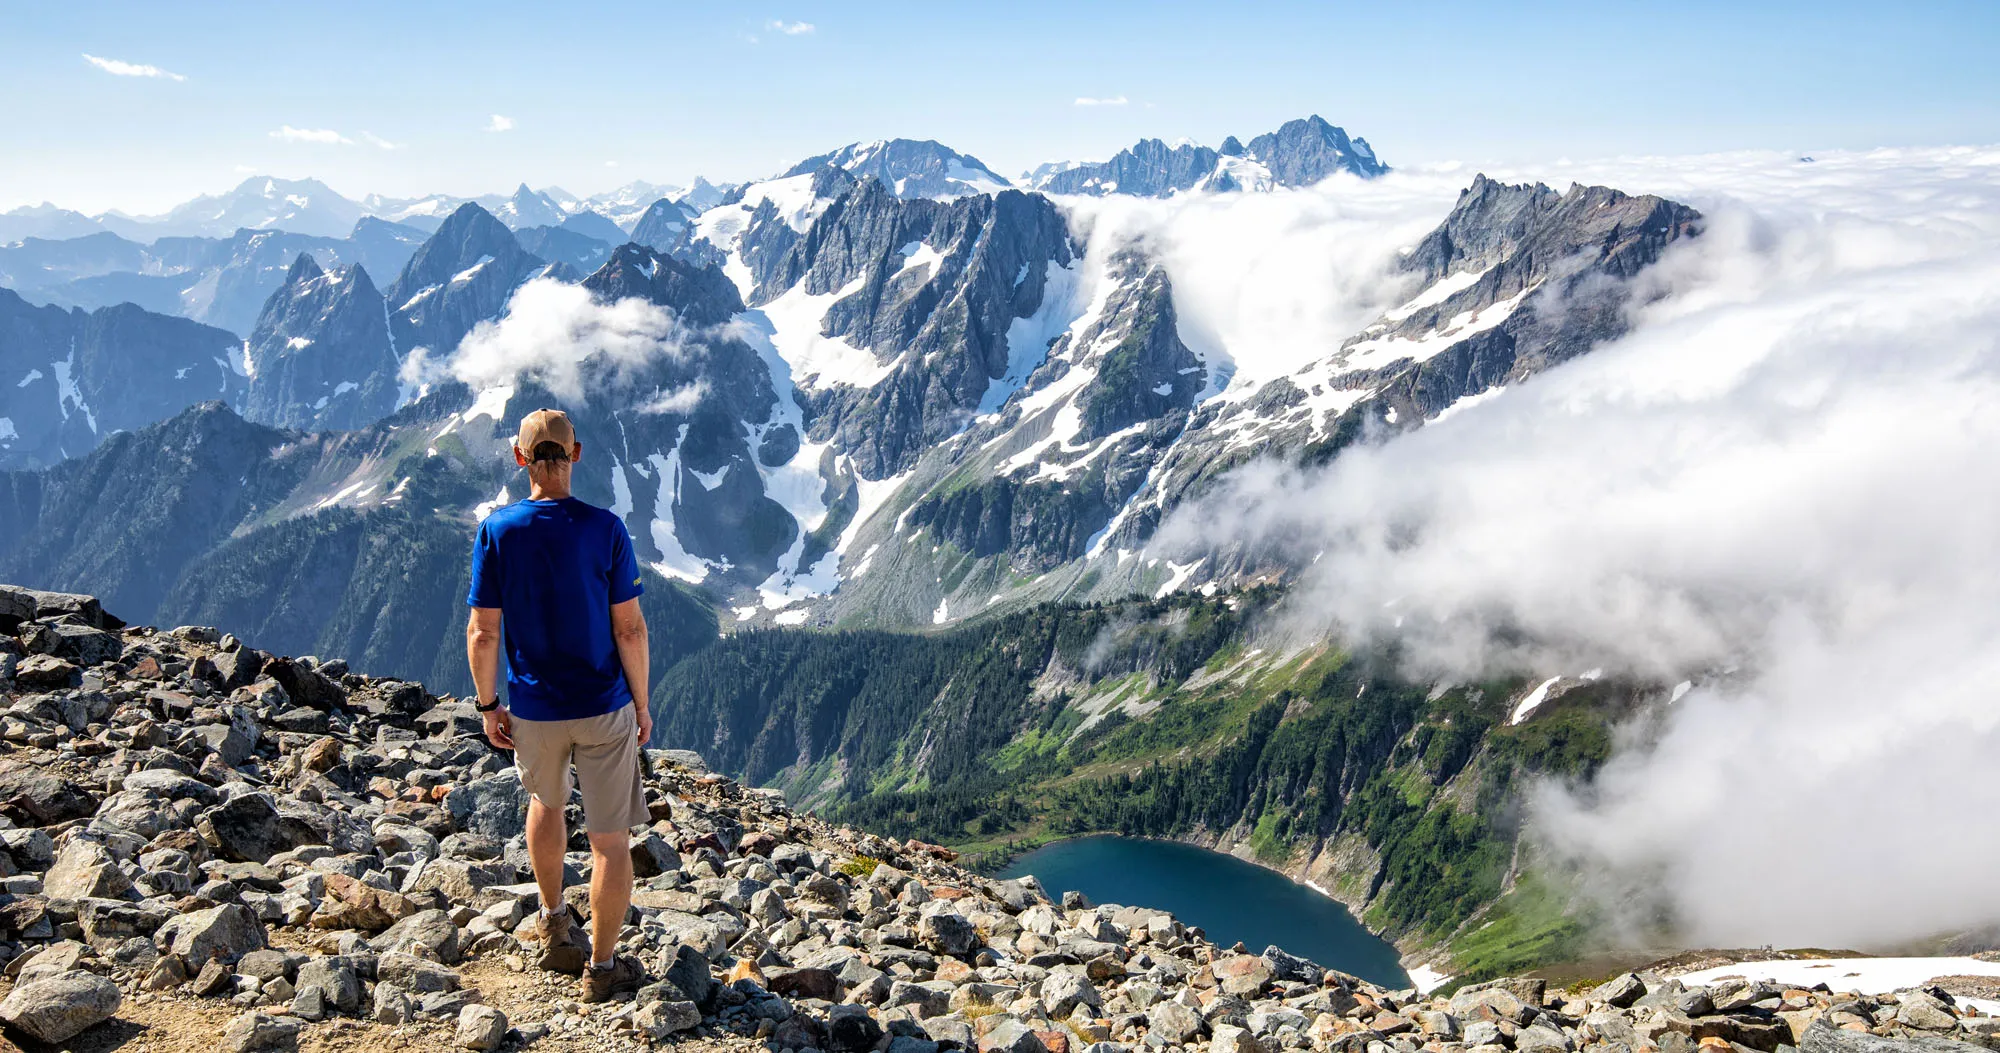
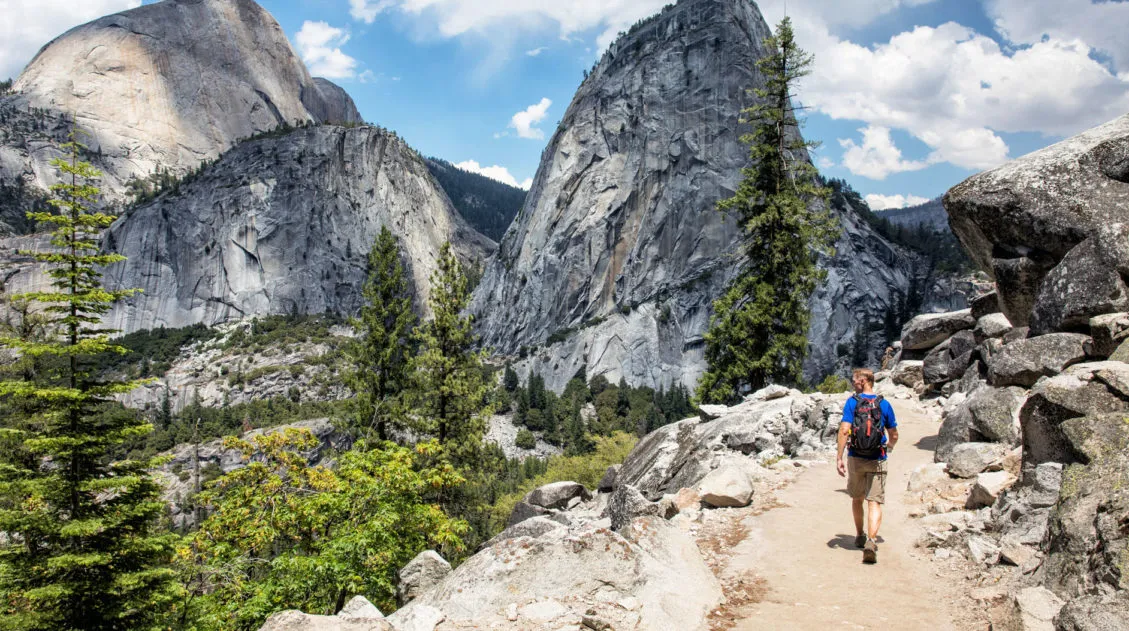
We’ve hiked in more than 50 national parks across the United States, and the Cascade Pass and Sahale Arm hike is one that still stands out. We did this hike as part of a six-week road trip through the national parks of Colorado and Washington, and it was the perfect way to end the trip.
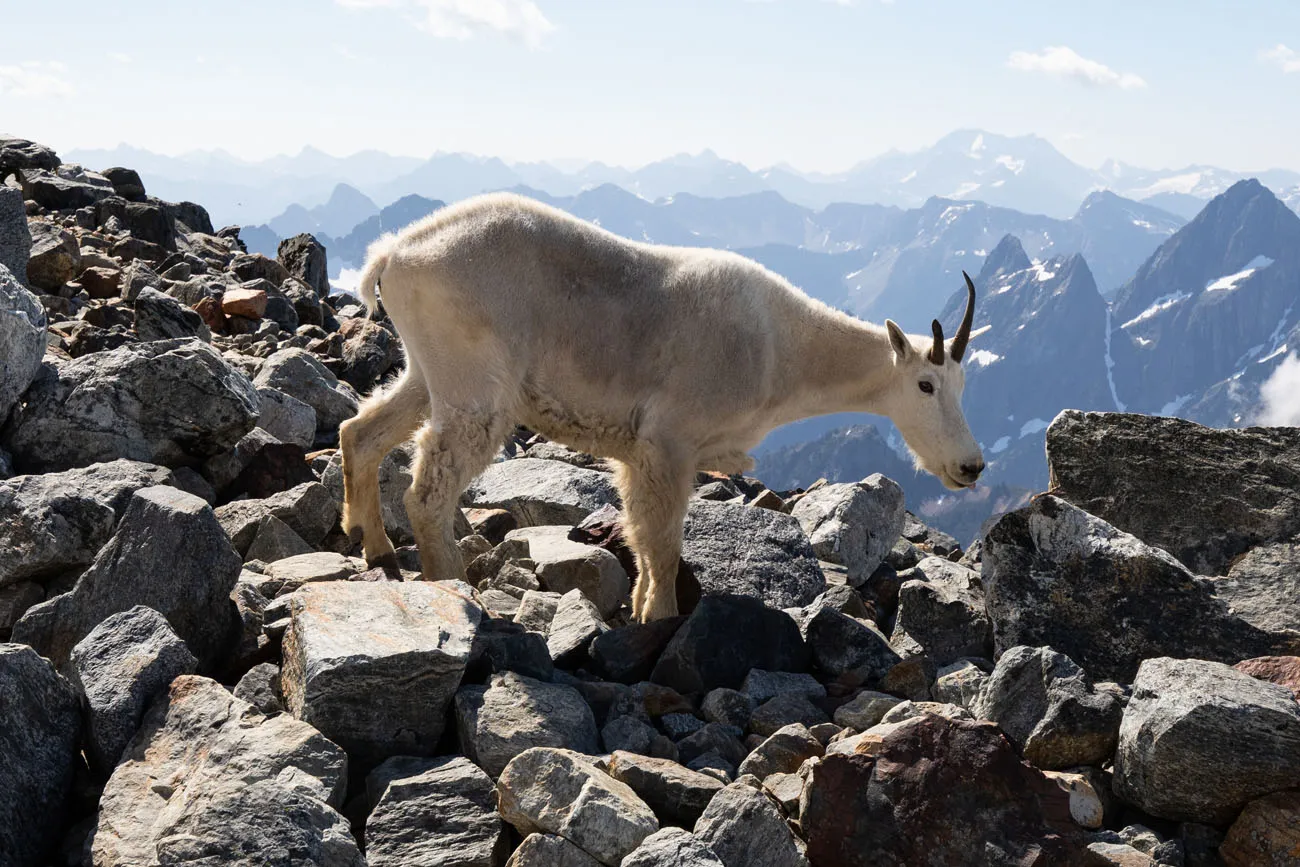
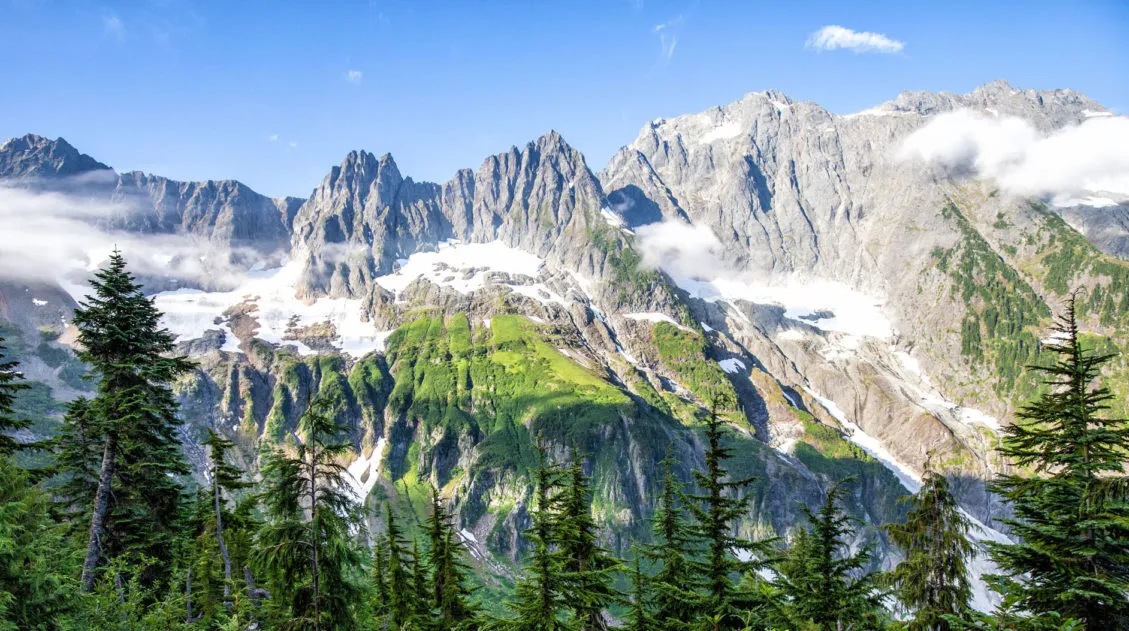
The views from Sahale Glacier Camp at 7,600 feet are simply spectacular, with jagged, snow-capped peaks stretching in every direction. Add in fields of wildflowers, curious marmots, and, if you’re lucky, mountain goats picking their way across the rocky slopes, and this hike delivers on every level.
It’s not an easy day. At 11.7 miles round trip with over 4,000 feet of elevation gain, the Cascade Pass and Sahale Arm hike will test your legs. But the payoff is absolutely worth the effort, which is why it’s widely considered the best day hike in North Cascades National Park.
In this guide, we cover everything you need to know to plan your visit, from navigating Cascade River Road to how far you should hike based on your fitness level.
Cascade Pass and Sahale Arm Hiking Stats & Map
Distance: 11.7 miles (18.8 km) round trip (out-and-back)
Difficulty: Hard
Total Elevation Gain: 4,120 feet (1,255 m)
Starting Elevation: 4,000 feet (1,200 m)
Elevation at Sahale Glacier Camp: 7,600 feet (2,300 m)
Length of Time: 5.5 to 7.5 hours
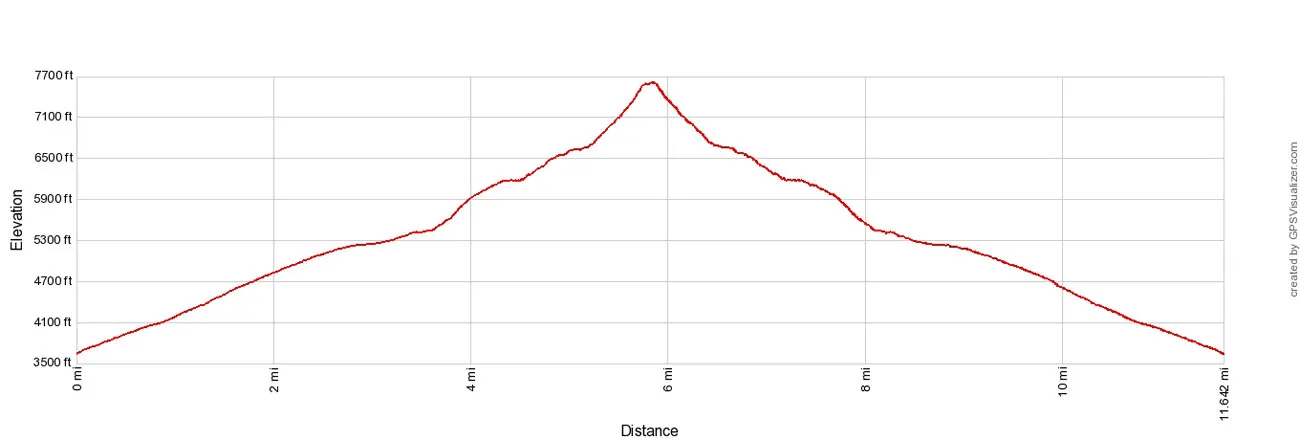
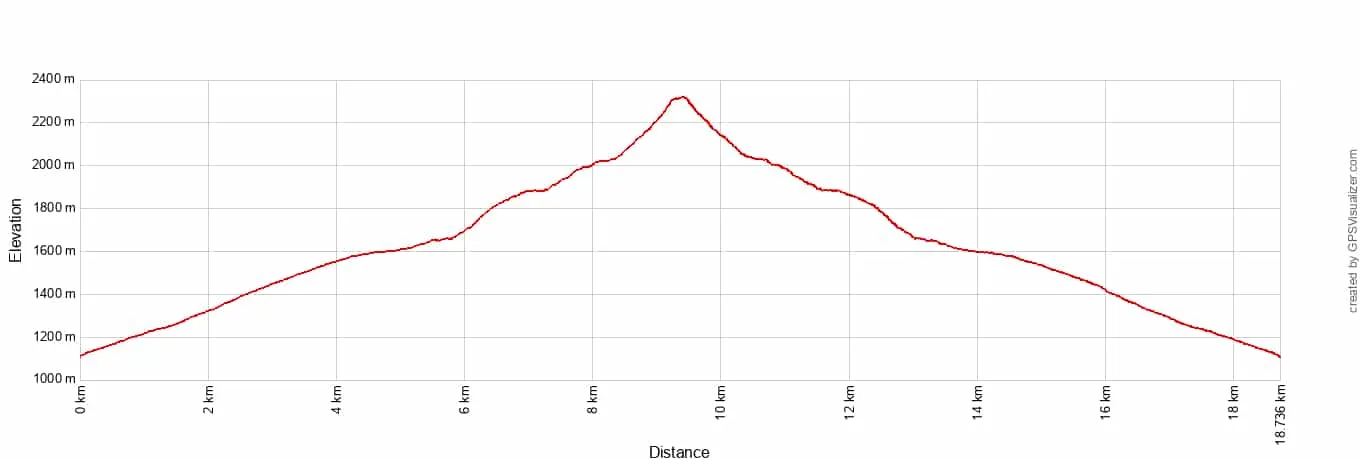
Cascade Pass and Sahale Arm elevation profile
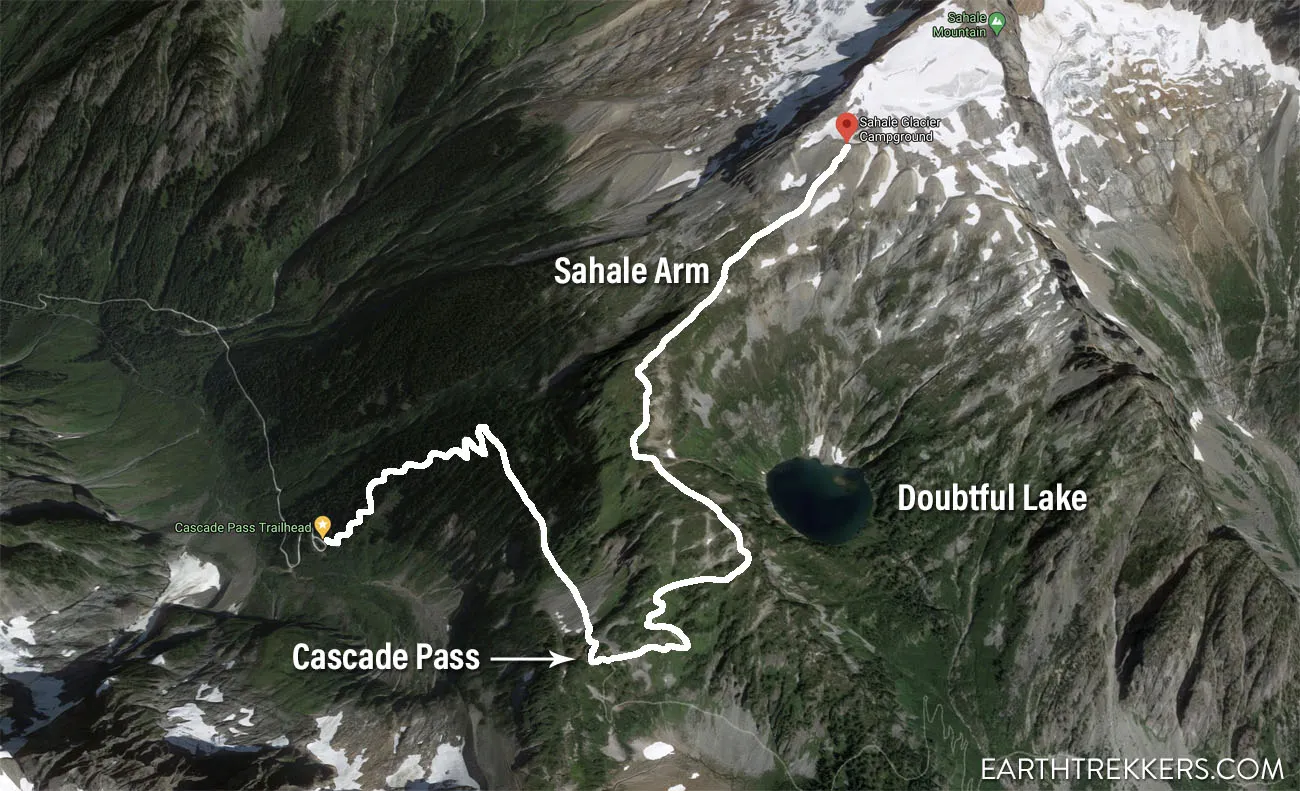
Map of the trail from the trailhead through Cascade Pass and Sahale Arm
Please practice the seven principles of Leave No Trace: plan ahead, stay on the trail, pack out what you bring to the hiking trail, leave areas as you found them, minimize campfire impacts, be considerate of other hikers, and do not approach or feed wildlife.
Getting to the Trailhead & Parking
The trailhead is located at the end of Cascade River Road, 23 miles from Marblemount. The first 10 miles are paved, but the final 13 miles are a compacted dirt road with loose gravel on the surface. Plan on about an hour for the full drive from Marblemount because it can be slow going on the unpaved section.
Road conditions on Cascade River Road can vary significantly from year to year, depending on winter damage and how quickly the park service can make repairs. Always check current road conditions on the NPS website before you go, especially early in the season.
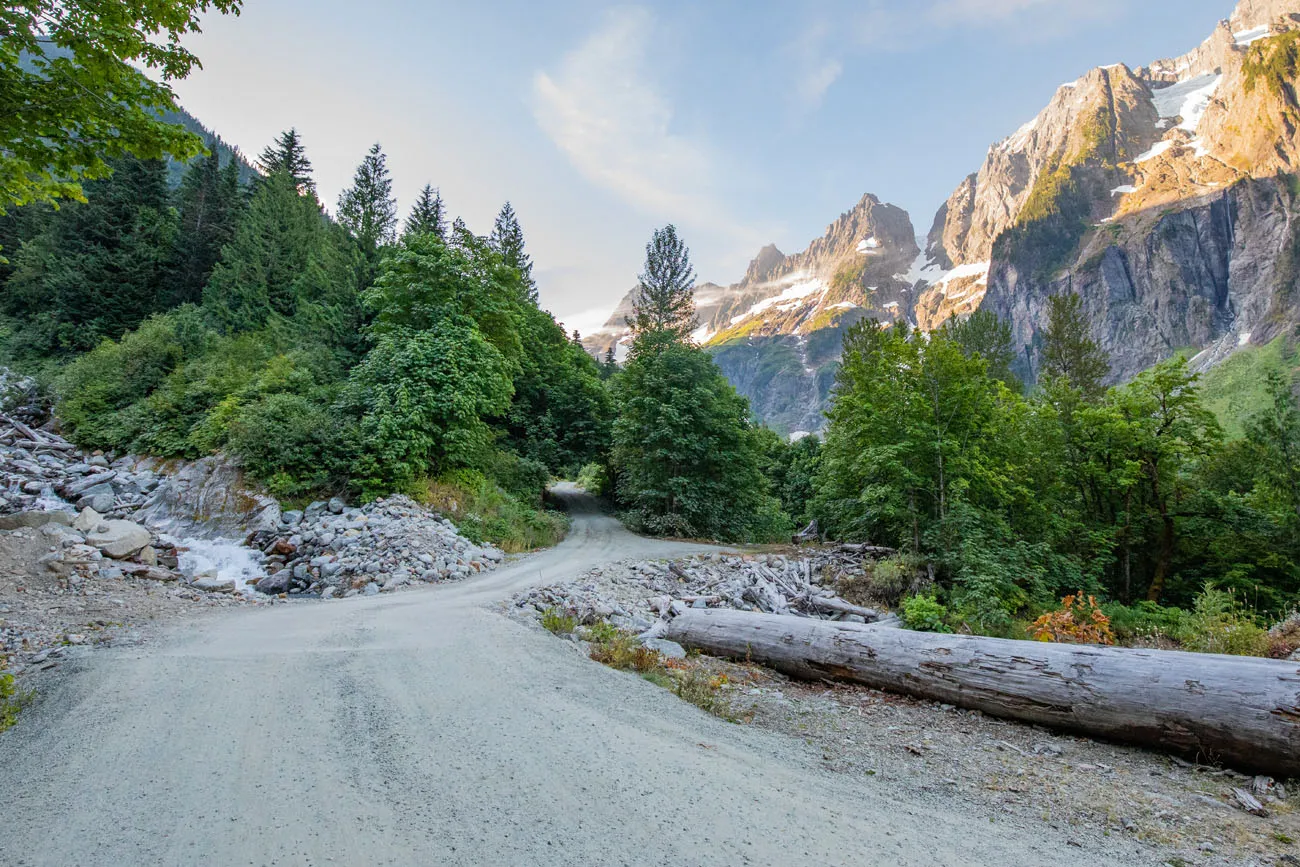
Cascade River Road
The parking lot fills fast. This is one of the most popular trails in North Cascades National Park and on summer weekends the lot can be full by 8 am. We recommend arriving by 7 am to secure a spot. Staying in Marblemount the night before, as we did, makes an early start easy and stress-free.
If the gate is closed: In late spring and early summer, the final 3 miles of Cascade River Road are sometimes closed due to snow or road damage. If the gate is closed, you can still hike, but you’ll be adding 6 miles and significant elevation to an already demanding day. Factor this in when planning, and again, check conditions before you leave.
A few other things to know before you drive out:
- Fill up on gas in Marblemount as there are no services beyond this point
- The road is suitable for standard cars when conditions are good, but high clearance helps on rougher years
- RVs and vehicles with trailers are not permitted due to narrow sections and tight switchbacks
- Cell service disappears quickly once you leave Marblemount and is essentially nonexistent on Cascade River Road and the trail itself
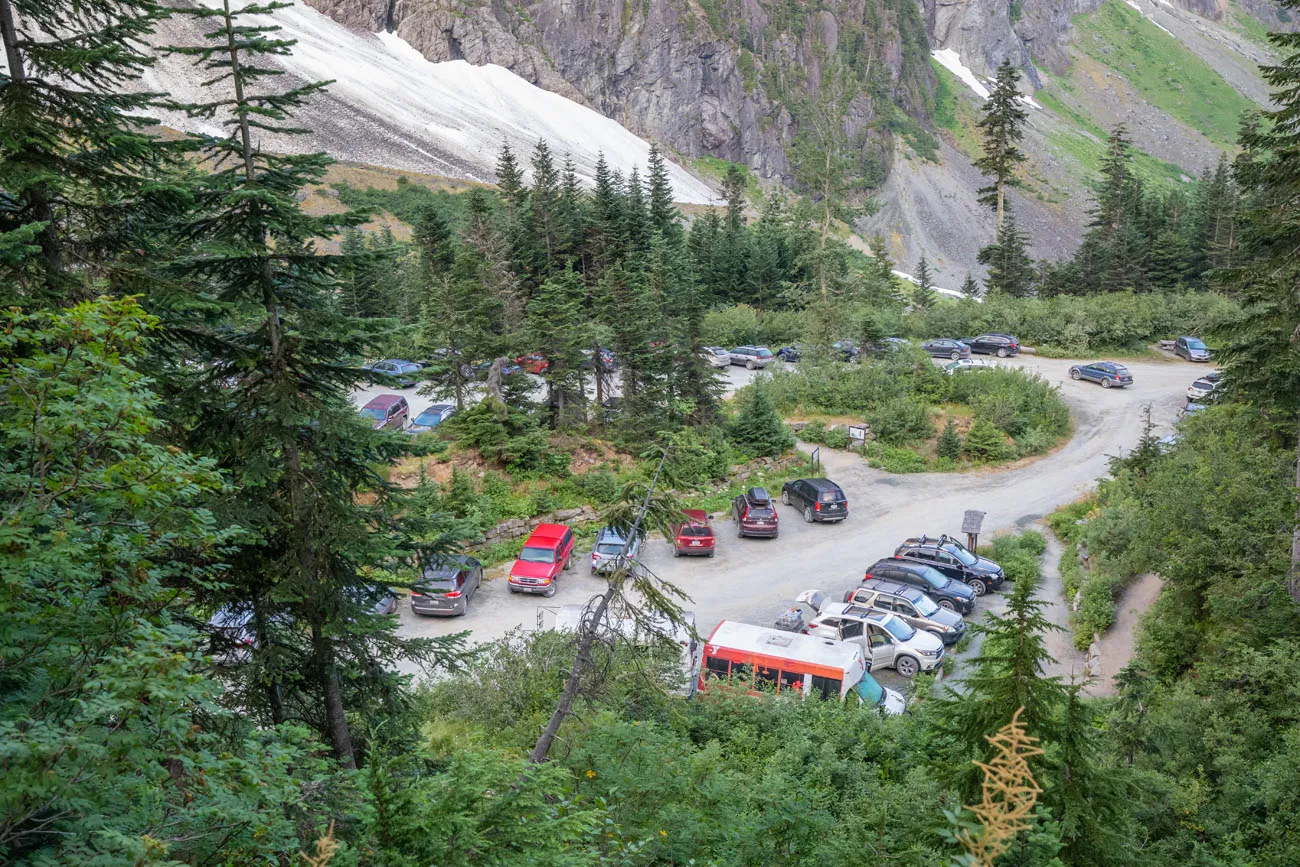
A view of the parking lot from one of the first switchbacks on the trail.
Cascade Pass and Sahale Arm Hike
Step-By-Step Trail Guide
Section 1: The Switchbacks
Distance: 2.6 miles
Elevation Gain: 1,500 feet
Time: 1.5 to 2 hours
This trail wastes no time in gaining elevation. From the parking area, the trail zig-zags up the side of the mountain.
If you want, you can count the switchbacks as you go…we counted 36.
The switchbacks start immediately, the first being just a few steps from the trailhead, and they will continue for 2.6 miles with 1,500 feet of total ascent.
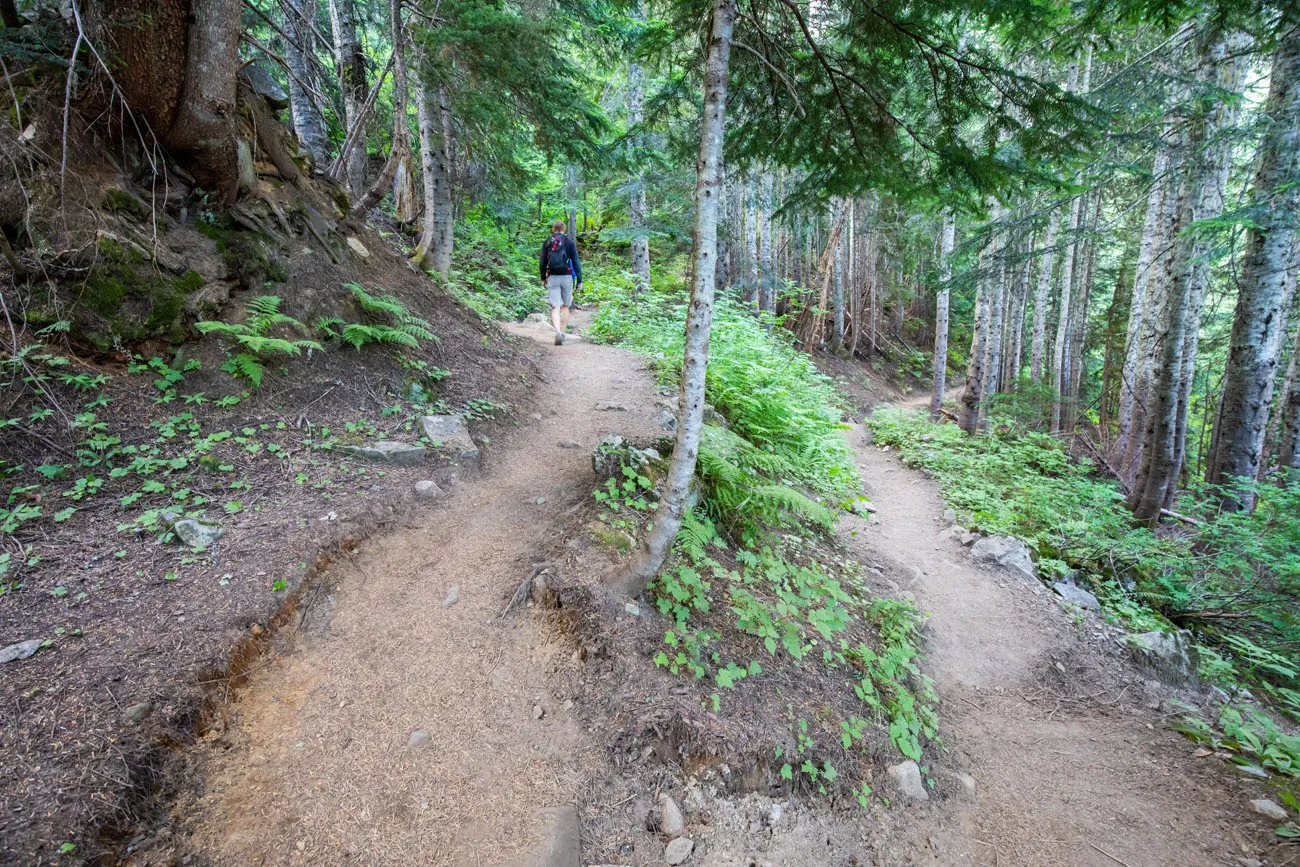
In terms of difficulty, it is a moderate hike up this section of the trail, but because the ascent is continuous for almost three miles, some may consider it a moderate-to-tough ascent. Once you reach the last switchback of this section, you will have completed a little more than a third of the total ascent up to the Sahale Glacier Camp.
This entire section is in a forest so there’s not a whole lot to look at here. It’s all about climbing up to Cascade Pass, although you do get brief glimpses of nearby mountains through the clearings in the trees.

Section 2: Cascade Pass
Distance: 0.9 miles
Elevation Gain: 300 feet
Time: 30 minutes
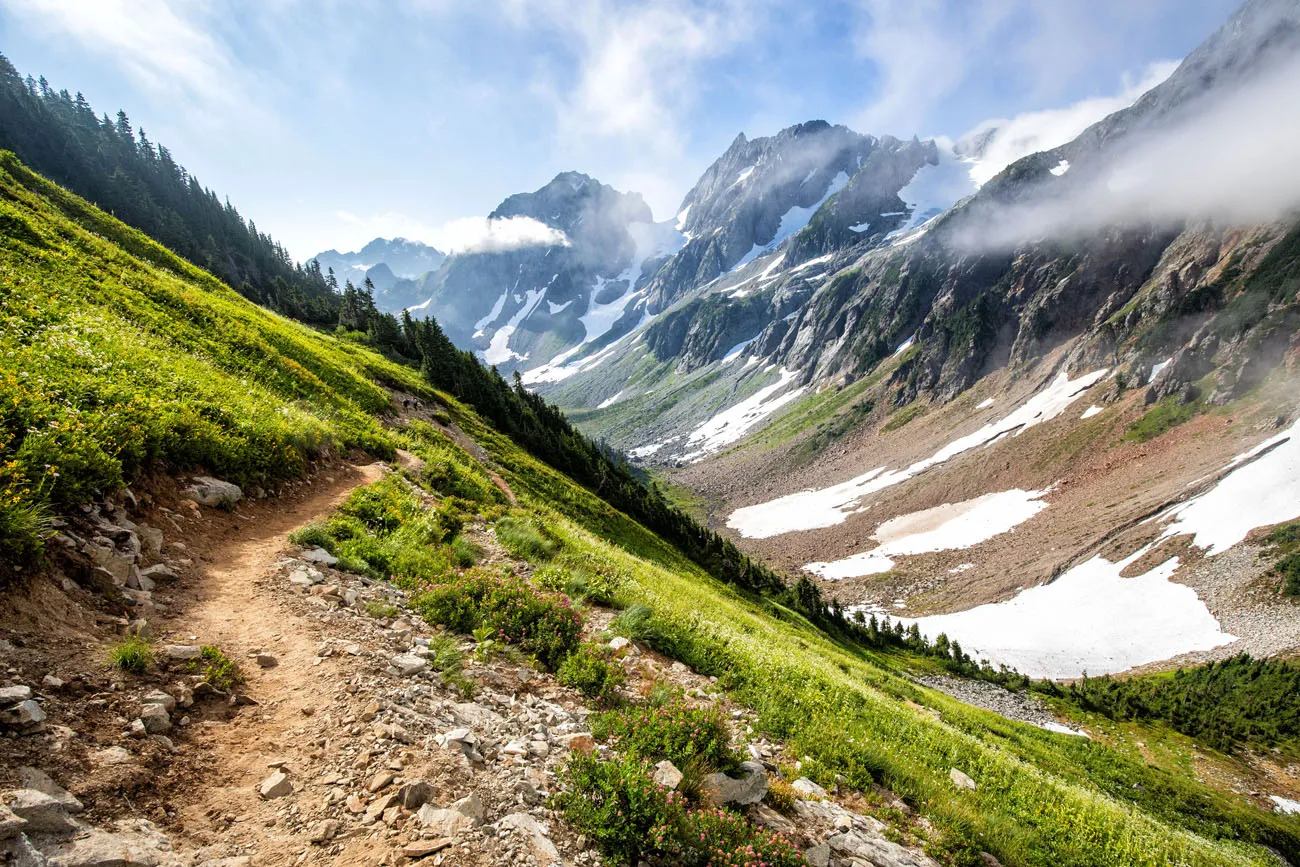
From the last switchback you have just under a mile to go until you reach Cascade Pass. This section of the trail levels out a bit and becomes easier with only 300 feet of total ascent over its 0.9-mile distance. It is a nice break, with very nice views of the towering mountains to your right.
Enjoy this brief respite from climbing because there is still a lot to go.
Once you reach Cascade Pass you will be standing at an elevation of 5,400 feet (1,650 m).

Cascade Pass
The view from Cascade Pass
Section 3: Up to the Sahale Arm
Distance: 0.8 miles
Elevation Gain: 650 feet
Time: 30 to 45 minutes
Just beyond Cascade Pass, look for the vertical sign post indicating a trail split. Take the split to the left (towards Sahale Arm).
This part of the trail lasts 0.8 miles and will add another 650 feet of total ascent. It starts off with a gradual incline but transitions into another set of switchbacks that feel steeper than those you did earlier.
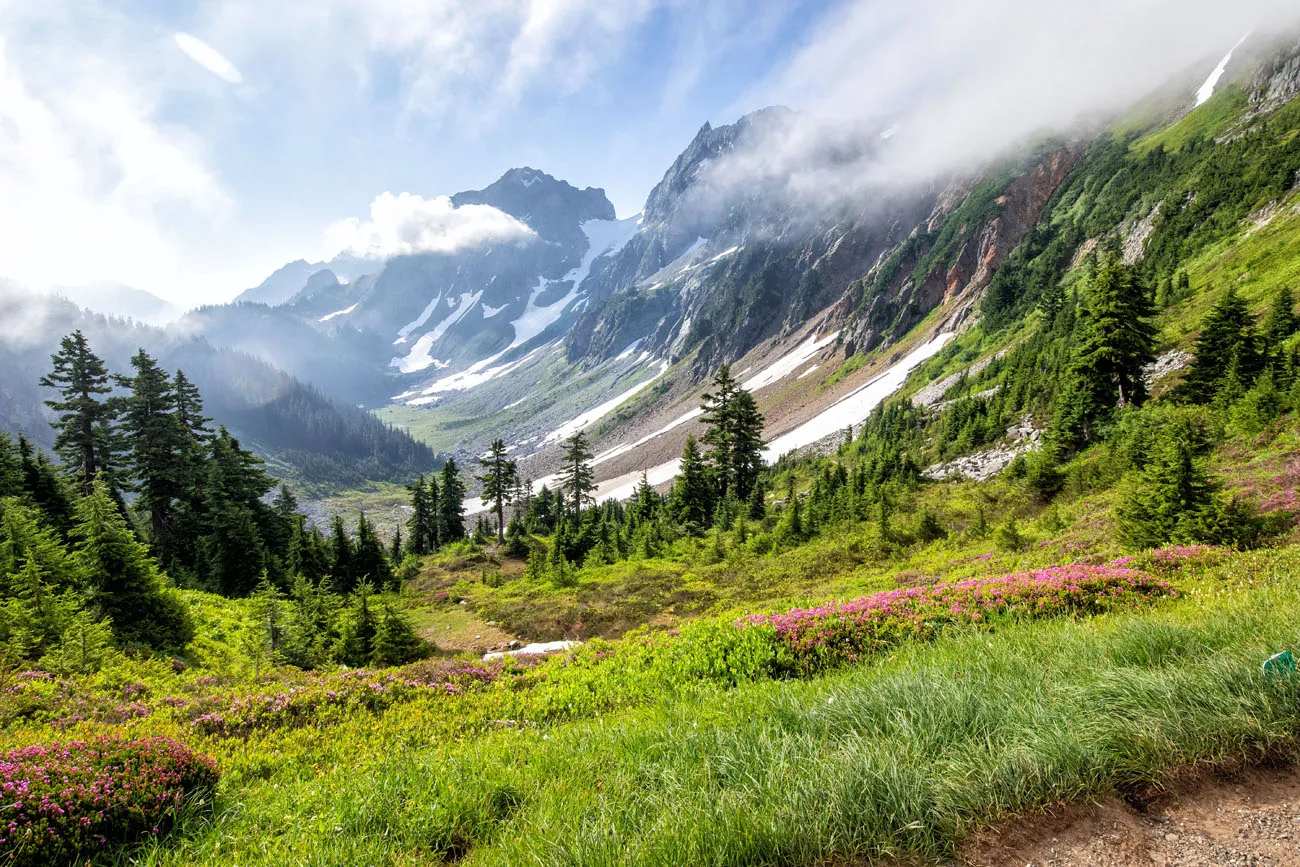
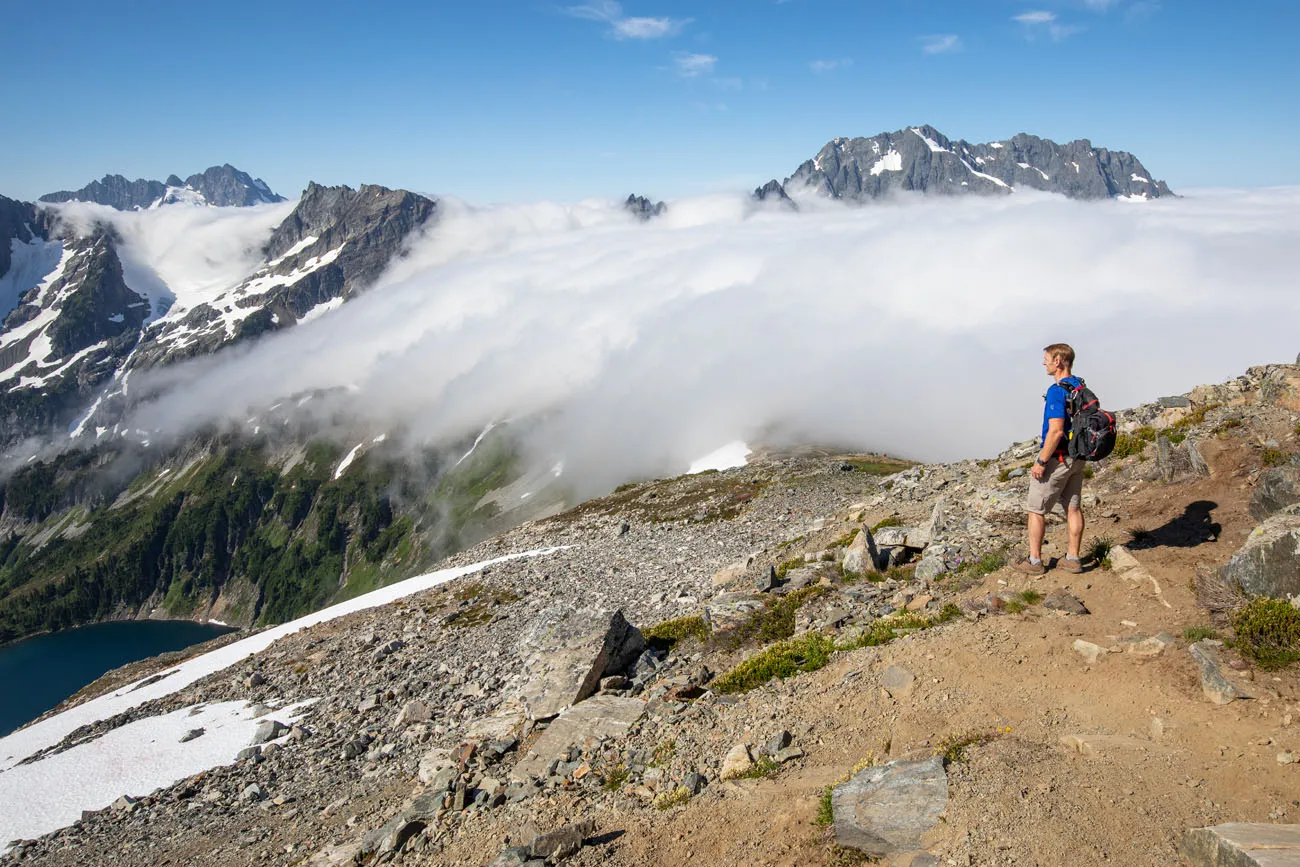
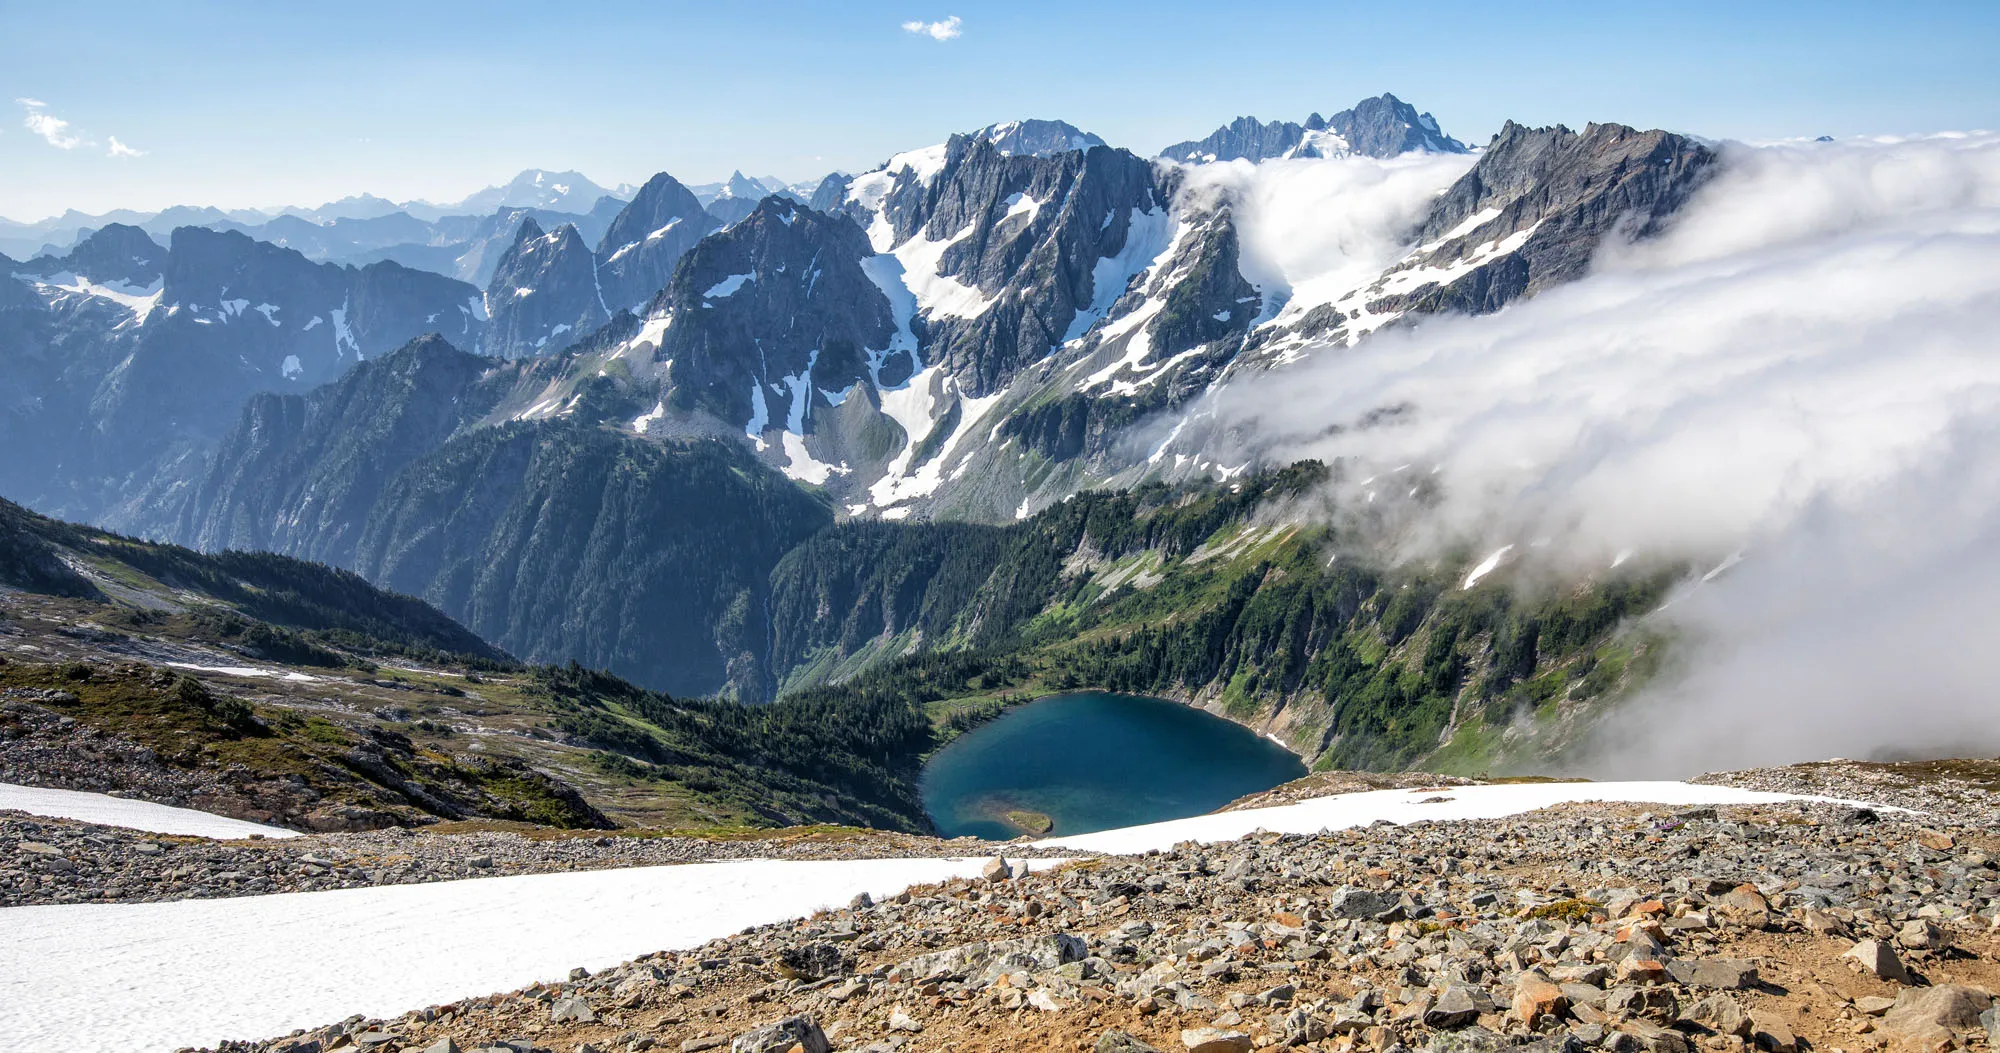
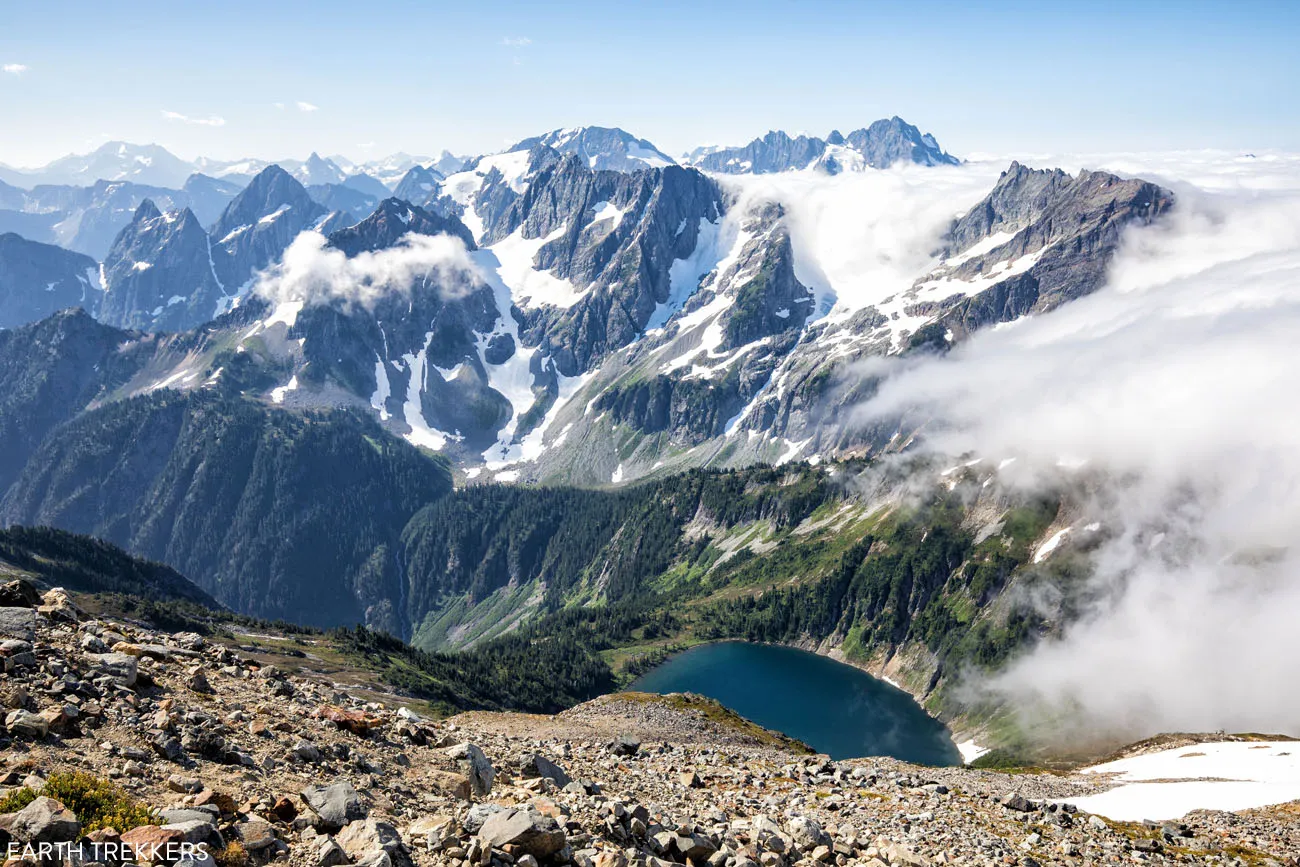
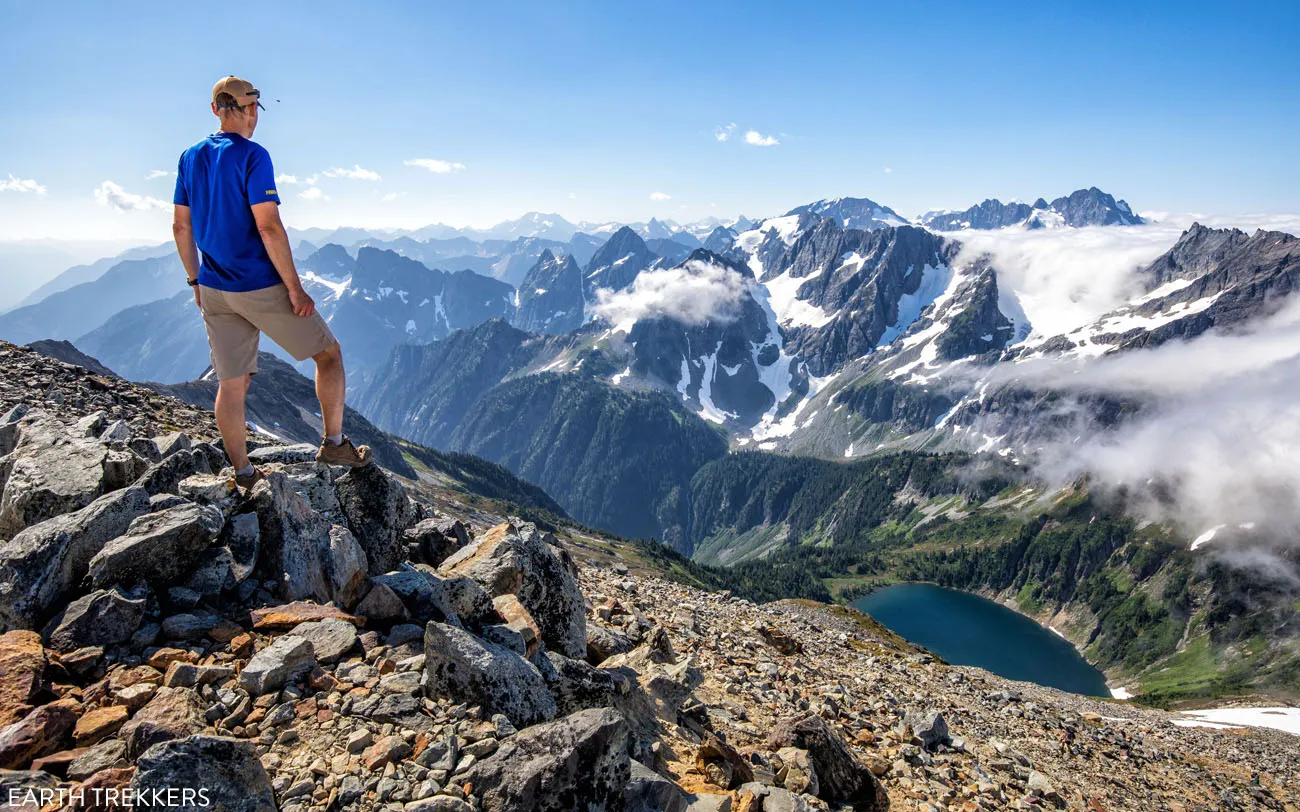
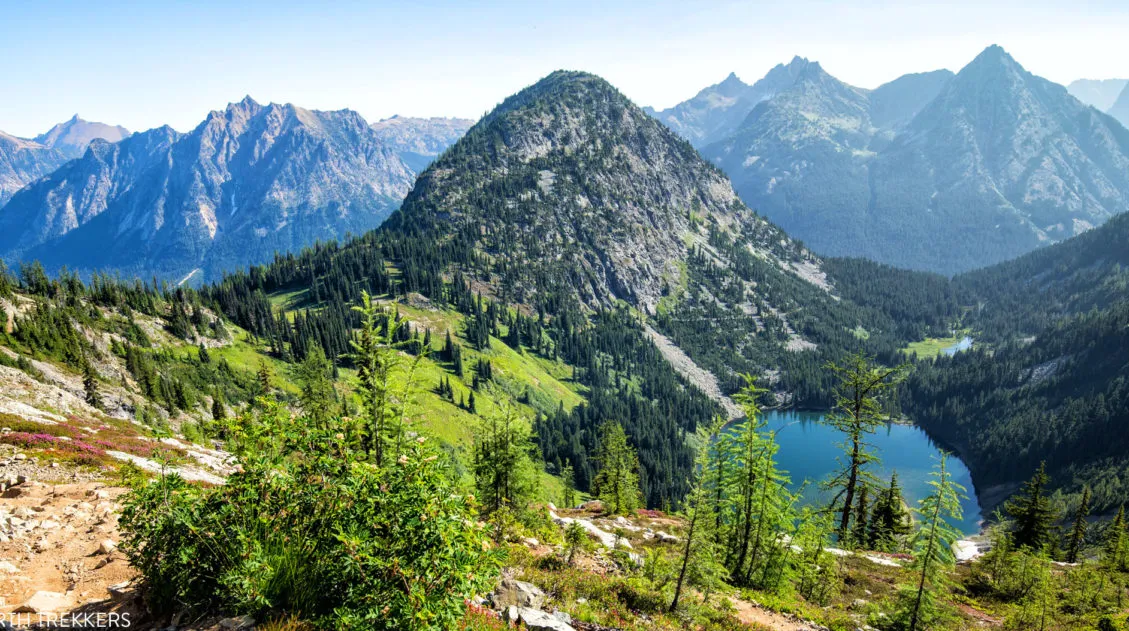
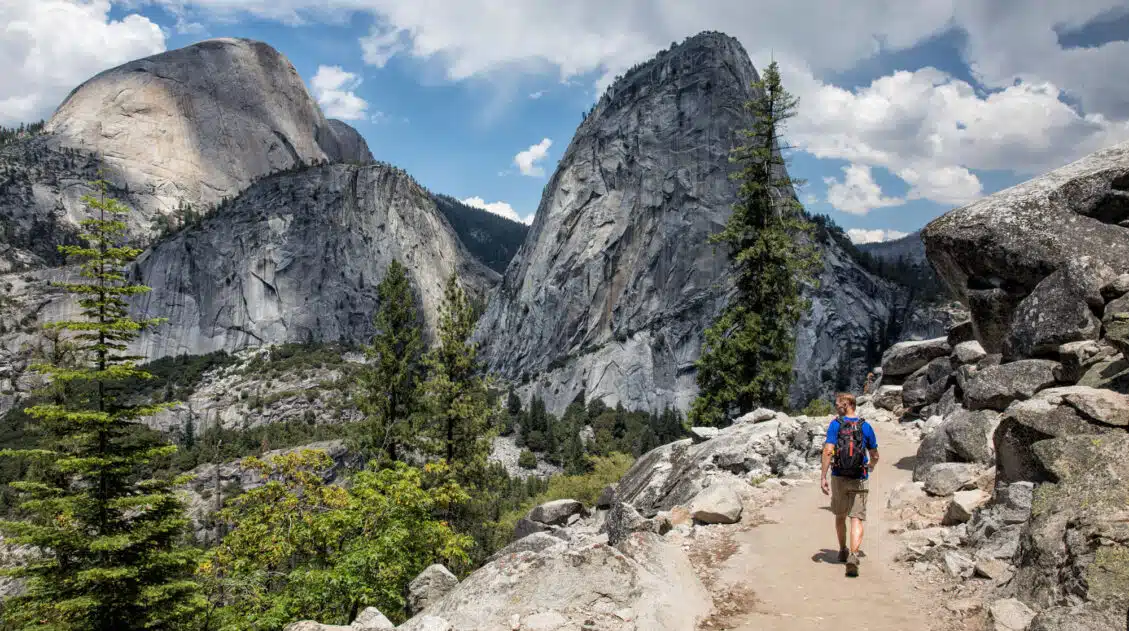
After the switchbacks you come out onto a ridgeline, the Sahale Arm, and the view in front of you is incredible. Sahale Mountain towers above you. And yes, you will be standing up there. Doubtful Lake sits in the valley below.
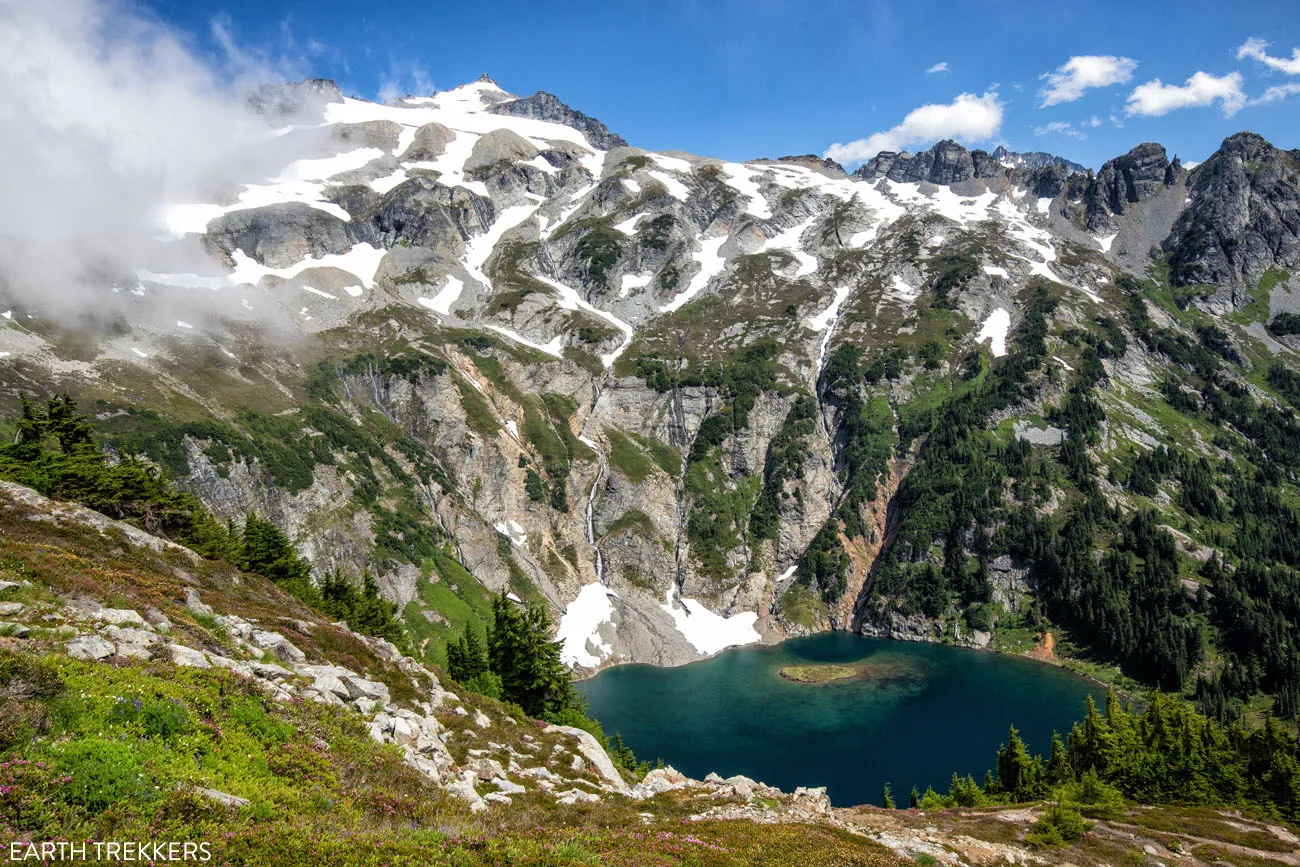
Continue following the trail until you reach the vertical sign post indicating a split in the trail. Take the split to the left to continue onwards toward Sahale, otherwise you’ll end up hiking down to Doubtful Lake.
Section 4: Sahale Arm
Distance: 0.9 miles
Elevation Gain: 600 feet
Time: 30 to 45 minutes
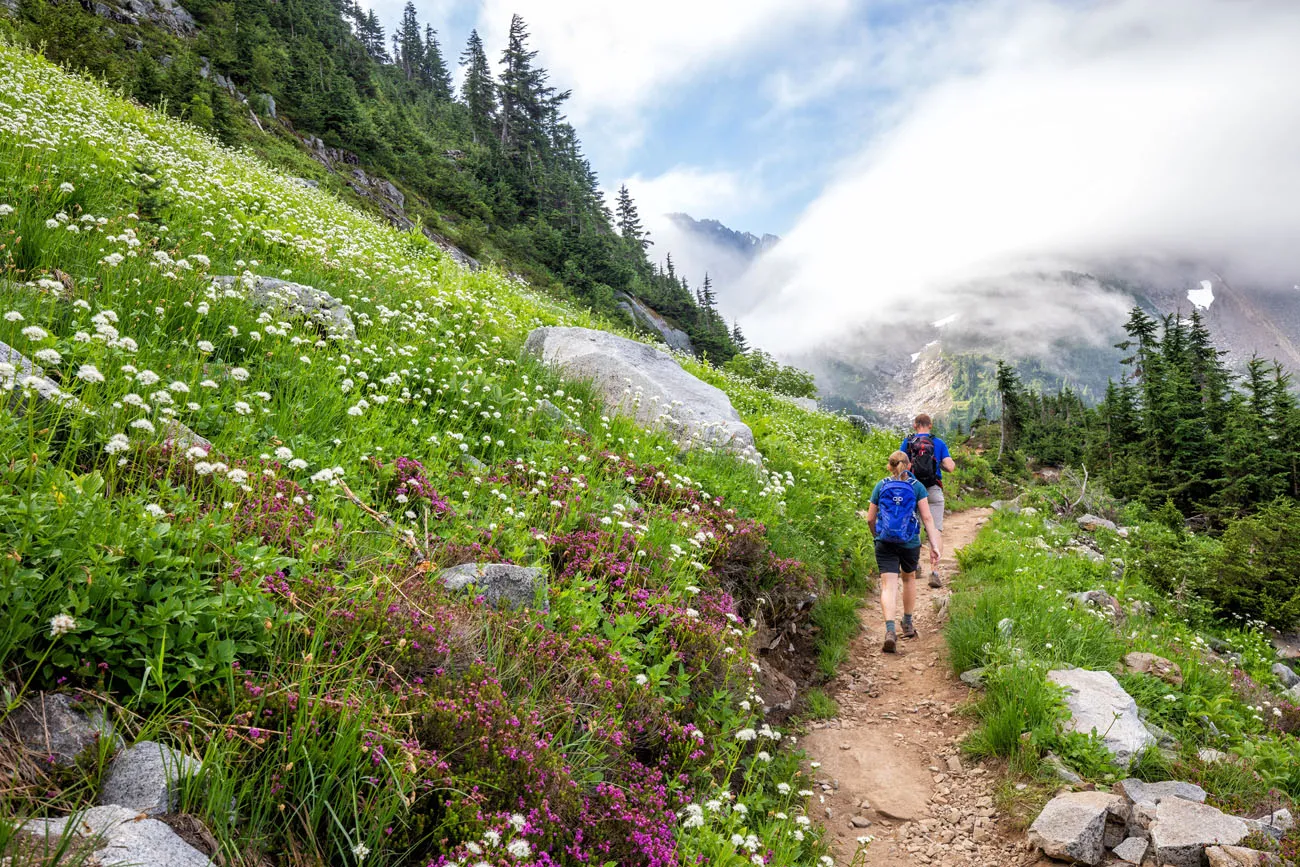
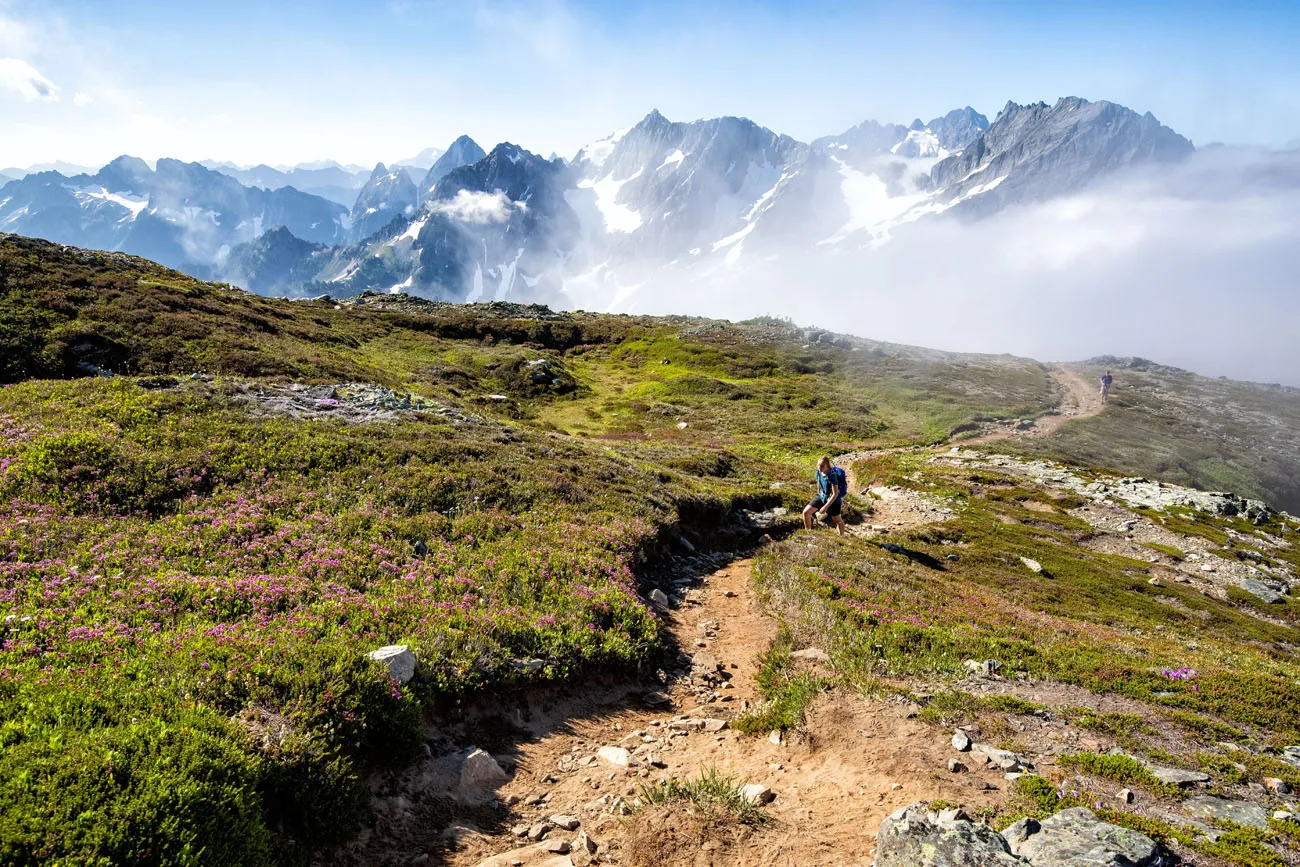
The Sahale Arm is the ridgeline that circles around Doubtful Lake. This portion of the trail winds its way through fields of wildflowers and is a good area for spotting marmots.
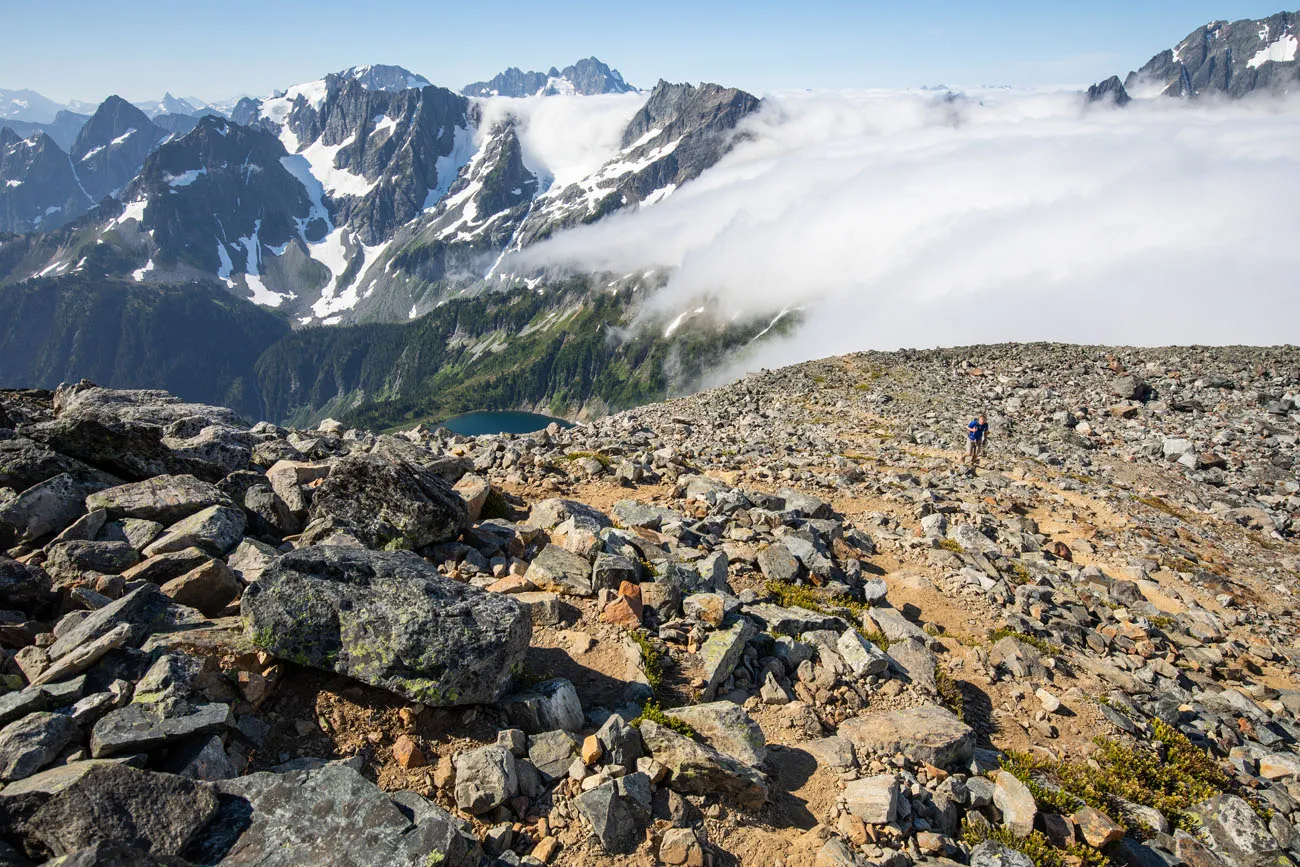
For one mile you hike along this ridge. You are still climbing, but it’s more gradual here. Enjoy it because the hike ends with one last challenging climb up to Sahale Glacier Camp.
On the day we did this, clouds were blowing in from the west. This entire section of trail, from Cascade Pass to the base of the final climb up to the glacier camp, was completely clouded in. We could not see Sahale Mountain or Doubtful Lake. In fact, we even considered turning around. I’m glad we didn’t because we eventually hiked high enough to get higher than those stubborn clouds. And later in the day, most of the clouds did burn off (which is when we took these photos).
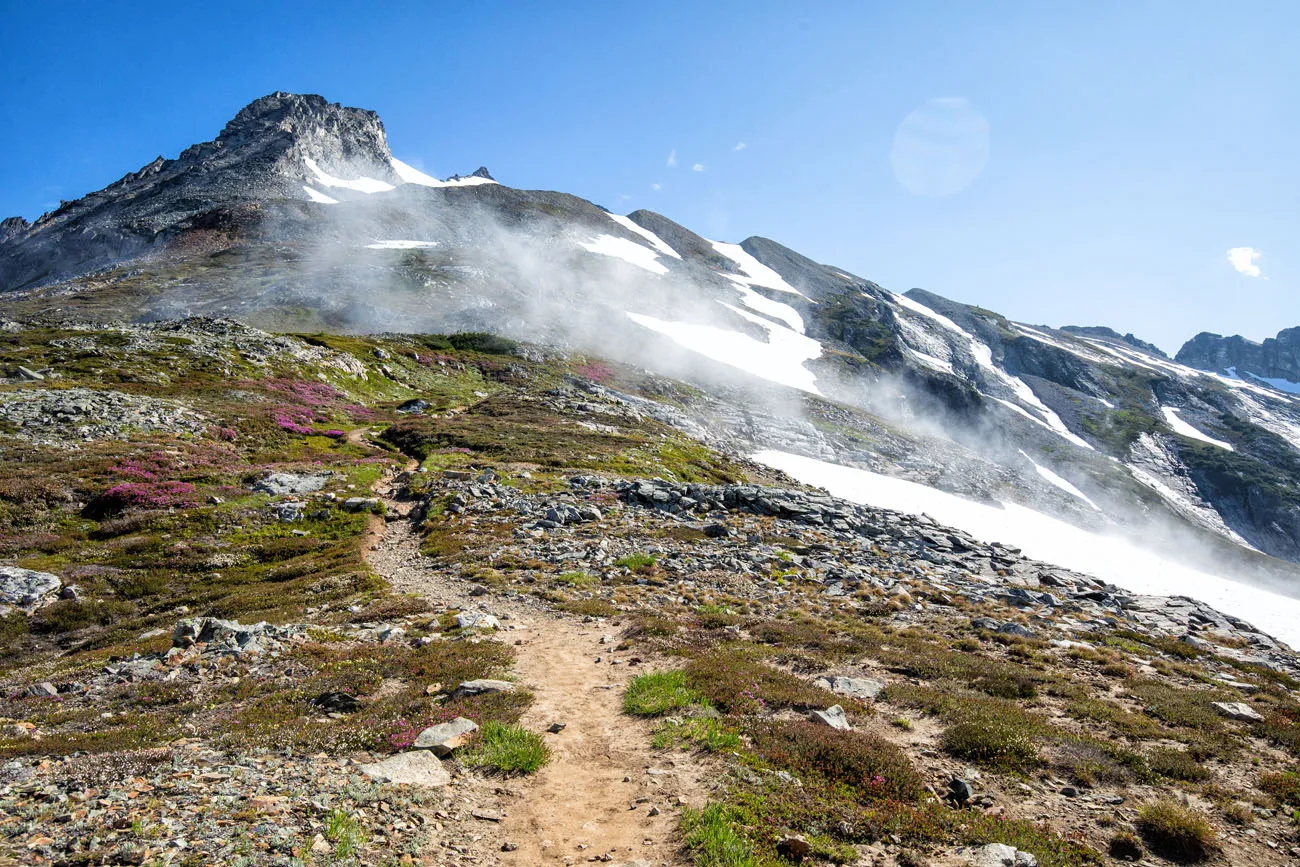
Looking up at the final climb.
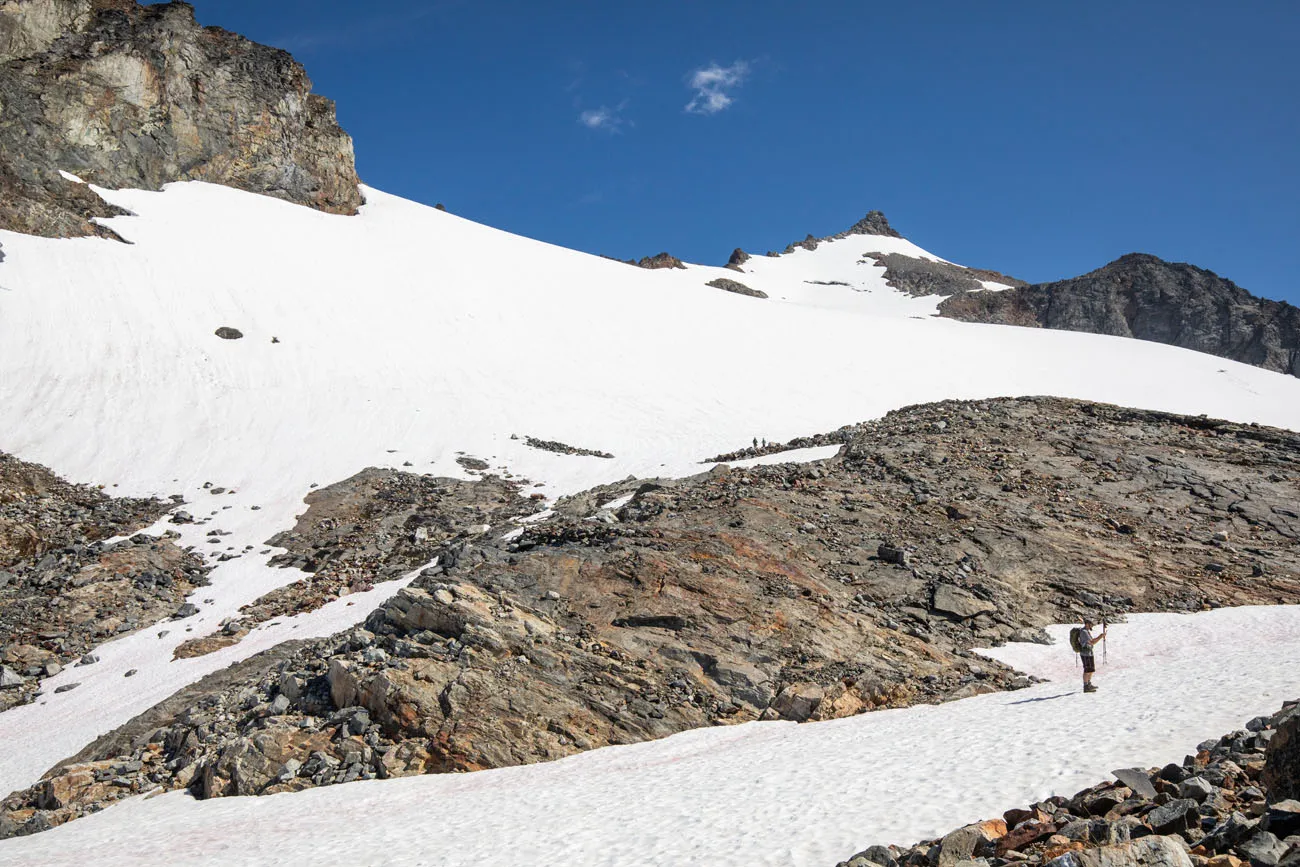
Section 5: The Final Ascent to Sahale Glacier Camp
Distance: 0.6 miles
Elevation Gain: 950 feet
Time: 30 to 45 minutes
The final ascent up to Sahale Glacier Camp is only 0.6 miles long but adds another 950 feet of elevation. This is the toughest part of the hike.
Parts of this trail can be slippery as a result of the steep incline combined with loose dirt and rocks. As you hike this section of the trail, look for cairns to help guide you up the mountain.
When you pause to catch your breath, enjoy the views of the mountain peaks in the distance. The views keep getting better the higher you go.
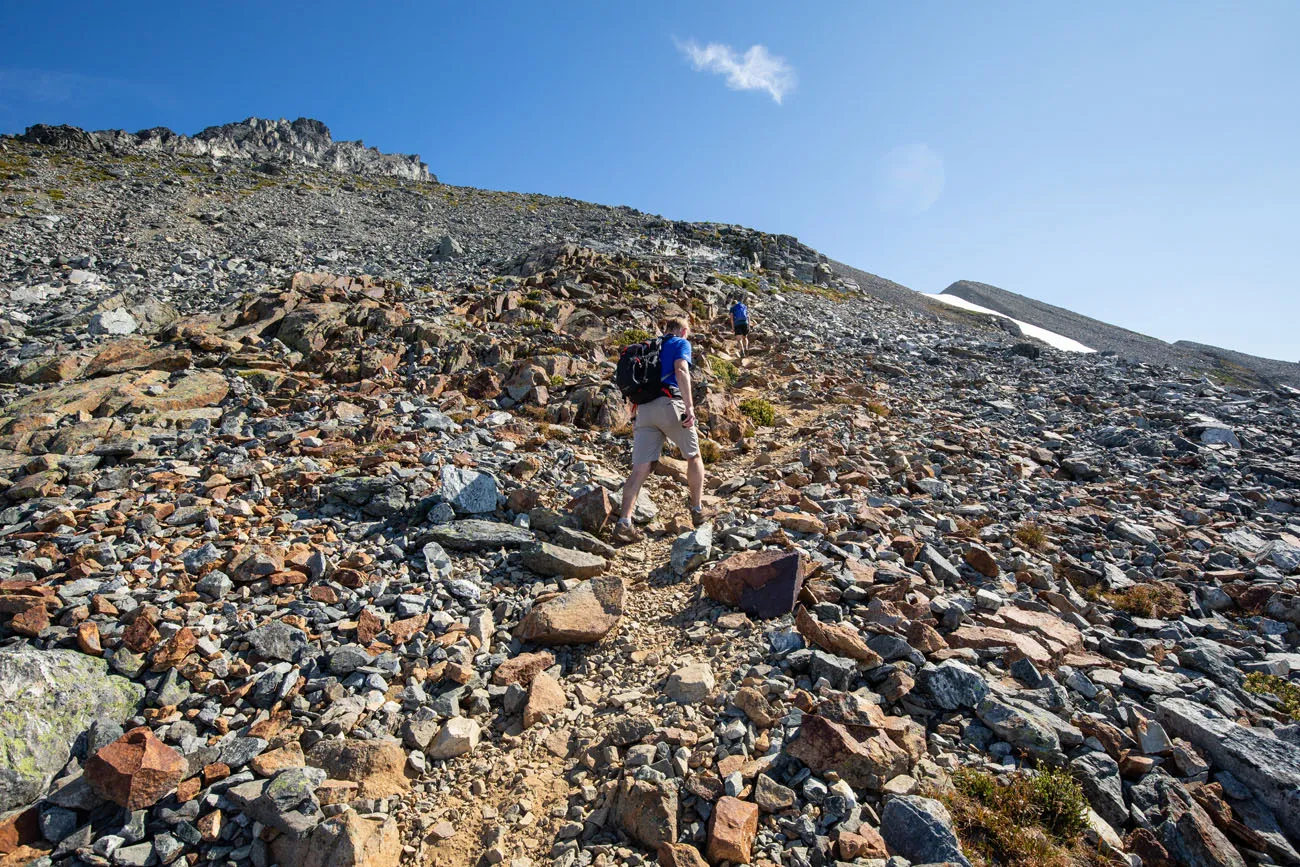
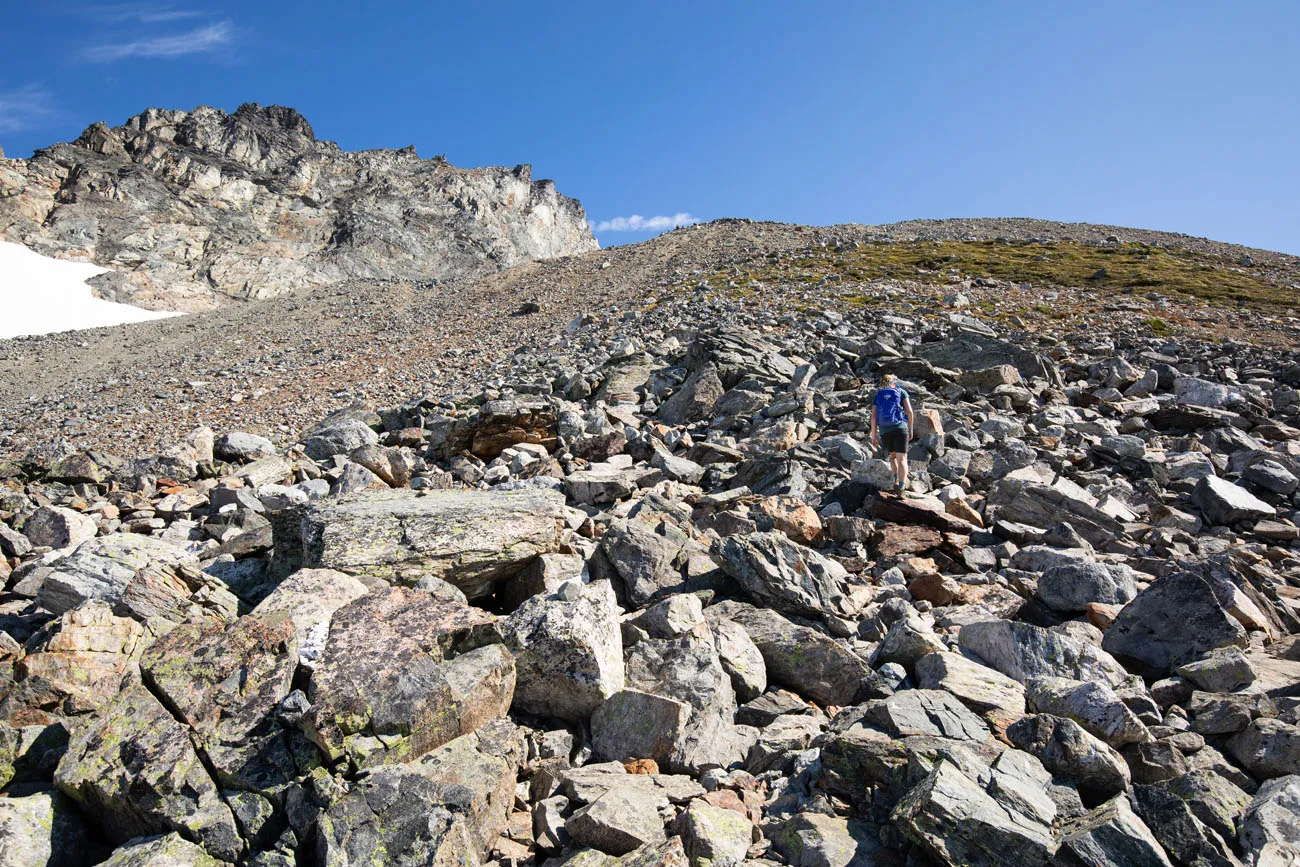
Final rocky climb to the Glacier Camp.
The trail tops out at Sahale Glacier Camp. You are now standing at 7,600 feet (2,300 m) and have panoramic views of the North Cascades.

iPhone panorama
With proper gear, it is possible to continue your hike up the glacier. But it is tough. Only those with proper equipment and experience glacier hiking should continue hiking from here.
Looking up at Sahale Glacier and the peak of Sahale Mountain.
The Return Hike
Distance: 5.8 miles
Elevation Loss: ~4,000 feet
Time: 2.5 to 3.5 hours
It’s all downhill from here. There will be a few, brief uphill climbs as you head back to your car, but for the most part, it’s downhill the entire way.
How Far Should You Hike?
One of the most common questions about this trail is how far to go. There are three logical stopping points, and the right choice depends on your fitness level and how much time you have.
Stop 1: Cascade Pass (3.5 miles one-way, 1,800 feet elevation gain)
Cascade Pass is where most casual hikers turn around, but honestly, we wouldn’t recommend making this your destination unless you have a specific reason to cut the day short.
The hike up to the pass is beautiful in its own way, but it’s mostly forest with limited views until you arrive at the pass itself. For the effort involved — nearly 4 miles and close to 2,000 feet of climbing — the payoff at Cascade Pass alone feels modest. The view is gorgeous, but it’s a tough hike to do just for that.
If you’re short on time, not feeling well, or hiking with young children, Cascade Pass is a perfectly reasonable place to turn around. Just go in knowing it’s the beginning of the best part of the trail, not the end.
Stop 2: Sahale Arm (4.5 miles one-way, 2,350 feet elevation gain)
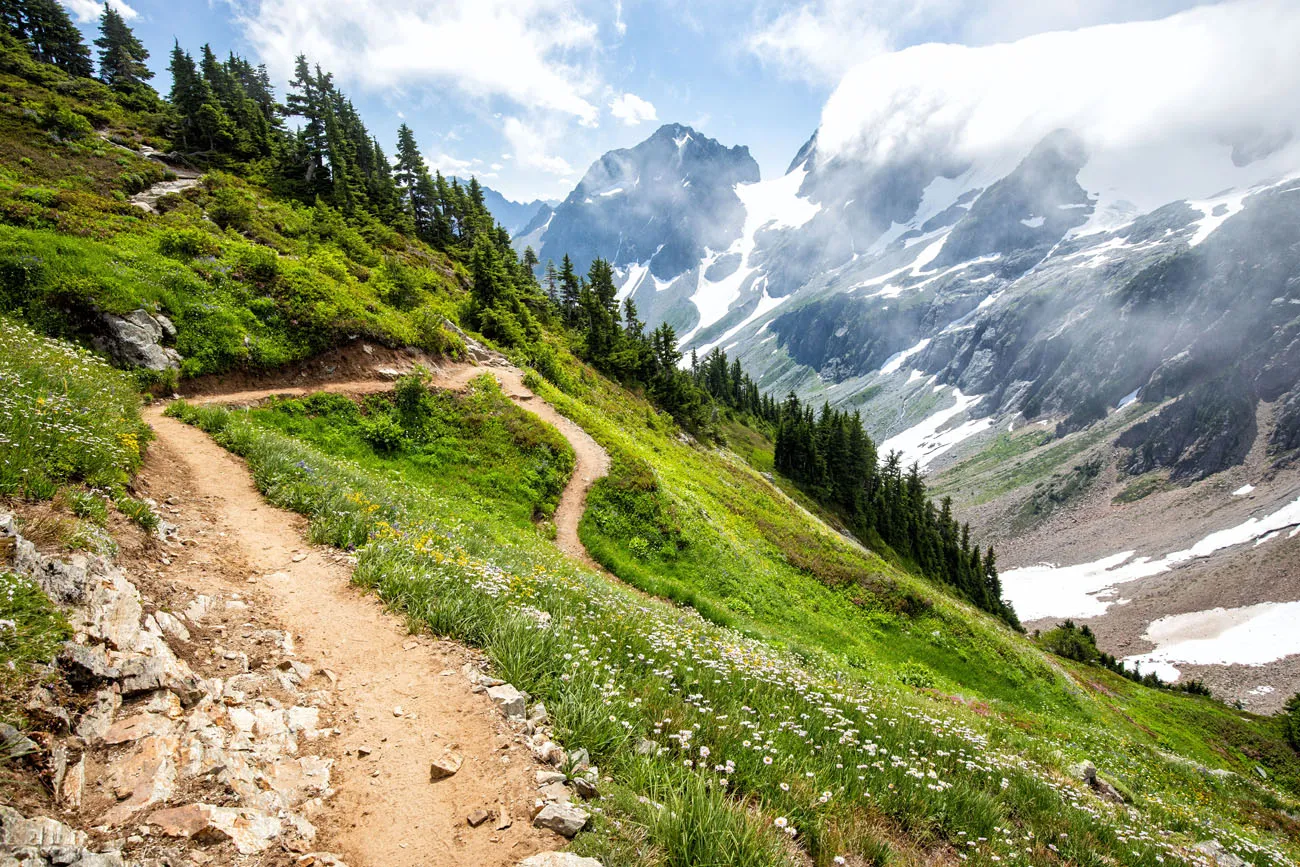
This is where the hike transforms. Once you crest onto the Sahale Arm ridgeline, the views open up completely, with Doubtful Lake in the valley below, Sahale Mountain towering above, and jagged North Cascades peaks in every direction. The wildflowers, marmots, and (if you’re lucky) mountain goats make this stretch of trail genuinely special.
If you can’t or don’t want to do the full hike to the glacier camp, stopping somewhere on the Sahale Arm is absolutely worth it. The views along this entire section are incredible.
Round trip stats to Sahale Arm: approximately 9 miles, 2,350 feet elevation gain
Stop 3: Sahale Glacier Camp (5.85 miles one-way, 4,120 feet elevation gain) — Recommended
This is the full hike and our recommendation if you have the fitness for it. The final push from the Sahale Arm up to the glacier camp is only 0.6 miles but gains nearly 1,000 feet. It’s the hardest section of the day. What awaits at the top is a 360-degree panorama of the North Cascades that is genuinely hard to put into words.
This is not a hike for beginners. With 4,120 feet of total elevation gain and 11.7 miles of round-trip distance, it demands a solid base of hiking fitness. Our teenage daughter completed it, but she had extensive hiking experience and was in peak shape after a summer of national park hiking. If you’re newer to hiking or haven’t done much elevation gain, build up to this one. The descent is also harder than people expect — steep, rocky, and tough on the knees, so hiking poles are strongly recommended.
Round trip stats to Sahale Glacier Camp: 11.7 miles, 4,120 feet elevation gain, 5.5 to 7.5 hours
Best Time to Hike Cascade Pass & Sahale Arm
The hiking season for Cascade Pass and Sahale Arm runs from approximately mid-July through mid-October, when Cascade River Road is open and the higher elevation trails are generally snow-free. Within that window, different months offer very different experiences.
July: The road typically reopens in late June or early July, but snow can linger on the upper sections of the trail, particularly on the final climb to Sahale Glacier Camp, well into July. If you’re hiking early in the season, check trail conditions carefully and be prepared for snow crossings. Early July hikers are rewarded with glacier lilies blooming on the lower slopes of the Sahale Arm.
August: This is when we did the hike, and it’s an excellent time to visit. Trails are generally snow-free, wildflowers are in full bloom across the Sahale Arm, temperatures are comfortable on the trail despite sometimes being very hot in Marblemount, and days are long. The tradeoff is that this is peak season. The parking lot fills early and the trail is at its most crowded. One thing to be aware of: afternoon clouds and thunderstorms can roll in quickly. Start early and plan to be descending by early afternoon.
September: Many experienced hikers consider September the sweet spot. Crowds thin compared to August, the weather is often still stable, and the wildflowers give way to the beginning of fall color. Late September is when the meadows on the Sahale Arm begin their stunning transformation. The blueberries and ground cover turn brilliant shades of rust-red, orange, and yellow, making this already spectacular trail even more dramatic.
Early October: If you can catch it at the right time, early October can be magical. The fall colors are at their peak and backcountry permits are slightly easier to secure than in summer. Snow can arrive as early as mid-October, and once it does, the upper sections become significantly more challenging. Microspikes are strongly recommended for any fall hike above Cascade Pass. Highway 20 typically closes for the season in early November, which also affects access.
A note on wildfire smoke: In recent years, smoke from wildfires has become an increasingly common issue in the North Cascades during August and September. On a smoky day the views from the top are significantly diminished. Check air quality forecasts alongside weather forecasts before your visit, particularly later in the season.
About Our Experience
We did the Cascade Pass and Sahale Arm hike in early August. The weather report predicted clear skies but instead, clouds blew in from the west during our hike.
The sky was perfectly clear during our drive along Cascade River Road. Once the clouds moved in, it was amazing how quickly they clouded in the Sahale Arm. Fortunately, once up at the glacier camp, we were high enough to look out over the clouds. The clouds began to break up midday.
We did this hike in five and a half hours, which includes time at the glacier camp for photos and lunch. It’s a fairly fast time but we had just spent the past six weeks hiking the national parks.
Camping Overnight at Sahale Glacier Camp
We did this as a day hike, but Sahale Glacier Camp is widely considered one of the most spectacular backcountry campsites in the entire national park system. If you have the time and experience for an overnight, it’s worth serious consideration.
A backcountry permit is required for all overnight stays. This is not a walk-up situation for peak season — Sahale Glacier Camp is one of the most in-demand backcountry sites in North Cascades National Park, and you’ll need to plan well ahead.
Here’s how the permit system works:
Early-Access Lottery (the best path to a permit): Each year in early March, the park opens a two-week lottery application window for high-demand areas including Sahale. Applying to the lottery doesn’t guarantee you a permit — if selected, you’re awarded a priority booking time that gives you early access to make a reservation before the general public. Sahale spots fill quickly once booking opens, so winning the lottery significantly improves your odds. Check Recreation.gov for current lottery dates.
General Reservations: If you miss the lottery or aren’t selected, reservations for remaining spots open to the public in late April. About 60% of backcountry sites are available for advance reservation; the other 40% are held for walk-up visitors.
Walk-up Permits: A limited number of permits are available on a first-come, first-served basis the day of or day before your trip at the Wilderness Information Center in Marblemount. For Sahale in peak summer, these go fast.
A few important logistics:
- Permits cost $26 per trip and must be picked up in person at the Wilderness Information Center in Marblemount by 11am on your trip start date or they will be cancelled
- Bear canisters are required — you can borrow one for free at the Wilderness Information Center
- Dogs are not permitted on this trail, day hike or overnight
- Always check current permit availability and procedures at the NPS website as details can change year to year
Tips for Hiking Cascade Pass and Sahale Arm
Start as early as possible. We can’t stress this enough. The parking lot fills by 8 am on summer weekends, and an early start also gives you the best chance of clear skies before afternoon clouds roll in. We stayed in Marblemount the night before and were on the road to the trailhead by 6 am.
Weather can change quickly. The North Cascades sit close enough to the Pacific coast that low-lying clouds and moisture can blow in from the west with little warning, even on days with a clear forecast. We experienced this firsthand. Clouds settled into the Sahale Arm during our hike and we nearly turned around before they eventually lifted.
Dress in layers. Temperatures at the trailhead and at Sahale Glacier Camp can differ by 20–30 degrees. It can be genuinely hot on the exposed sections above Cascade Pass, and genuinely cold and windy at the glacier camp. Bring a warm layer and a wind shell regardless of how warm it is when you start. In fall, add a hat and gloves.
Bring microspikes if hiking outside of peak summer. In early July and again from late September onward, snow can cover the upper sections of the trail, particularly the final push to Sahale Glacier Camp.
Carry all the water you need. There are a few small streams on the trail but these can be unreliable depending on the season. We carried all of our own water and recommend you do the same. If you do plan to filter water on trail, bring a filter as a backup rather than counting on it as your primary source. For the full hike to Sahale Glacier Camp, plan on at least 3 liters per person in summer.
Hiking poles are strongly recommended. The descent is steep, long, and hard on the knees. The switchbacks that felt manageable on the way up seem to multiply on the way down. We were surprised by just how many there were heading back to the car. Poles take real pressure off your legs and knees and will make a significant difference in how you feel the next day.
No dogs allowed. Dogs are not permitted anywhere on this trail. Leave them at home.
There are two composting toilets on the trail. One is at Cascade Pass and one is at Sahale Glacier Camp. Bring your own toilet paper.
No cell service. Cell service disappears shortly after leaving Marblemount and is essentially nonexistent on Cascade River Road and the entire trail. Download offline maps before you go and let someone know your plans.
Stay on the trail. The alpine vegetation above Cascade Pass is fragile and slow to recover from foot traffic. Follow cairns on the upper rocky sections and resist the urge to cut switchbacks on the descent.
Check conditions before you go. Road conditions, trail closures, and wildfire smoke can all affect this hike. Check the NPS website and AllTrails for recent trip reports before your visit.
What to Bring on the Hike
Hiking shoes. We recommend hiking shoes. This is a long, tough hike and early in the season it is possible that you will have to hike through some snow. When we did this in August 2020 there was no snow on the trail.
Hiking poles. There is a lot of elevation gain and descent on this hike and hiking poles can help ease the stress on your legs and knees.
Water and snacks. At least 2 liters of water in the summer.
Sunscreen, hat, and sunglasses. For most of the hike there is very little shade.
Camera. Even a smartphone will do.
Essential Hiking Gear: What Should You Bring on a Day Hike?
If you are new to hiking or are curious about what you should bring on a hike, check out our Hiking Gear Guide. Find out what we carry in our day packs and what we wear on the trails.Where to Stay
For this hike, Marblemount is the ideal base. It’s the last town before Cascade River Road, which means you can get an early start without a long morning drive, exactly what you need for a hike where parking fills by 8 am. We stayed in Marblemount the night before and it made the early start completely stress-free.
We stayed at the Buffalo Run Inn. It’s nothing fancy, but it’s clean, the rooms are large, and the Wi-Fi works well. There are also a few restaurants within walking distance.
The North Cascades Inn in Marblemount is the most convenient option and gets decent reviews. It’s nothing luxurious, but it’s clean, well-located, and has everything you need for a one-night hiking basecamp stop.
If Marblemount is booked up, Concrete is the next closest town, about 20 minutes further west on Highway 20. The Mount Baker Inn in Concrete gets good review scores and is a solid backup option.
Camping is a popular choice for hikers doing this trail. The closest campgrounds to the trailhead are Mineral Park Campground (about 20 minutes from the trailhead) and Marble Creek Campground (about 40 minutes away). Both are located along Cascade River Road. Reservations can be made through Recreation.gov during peak season.
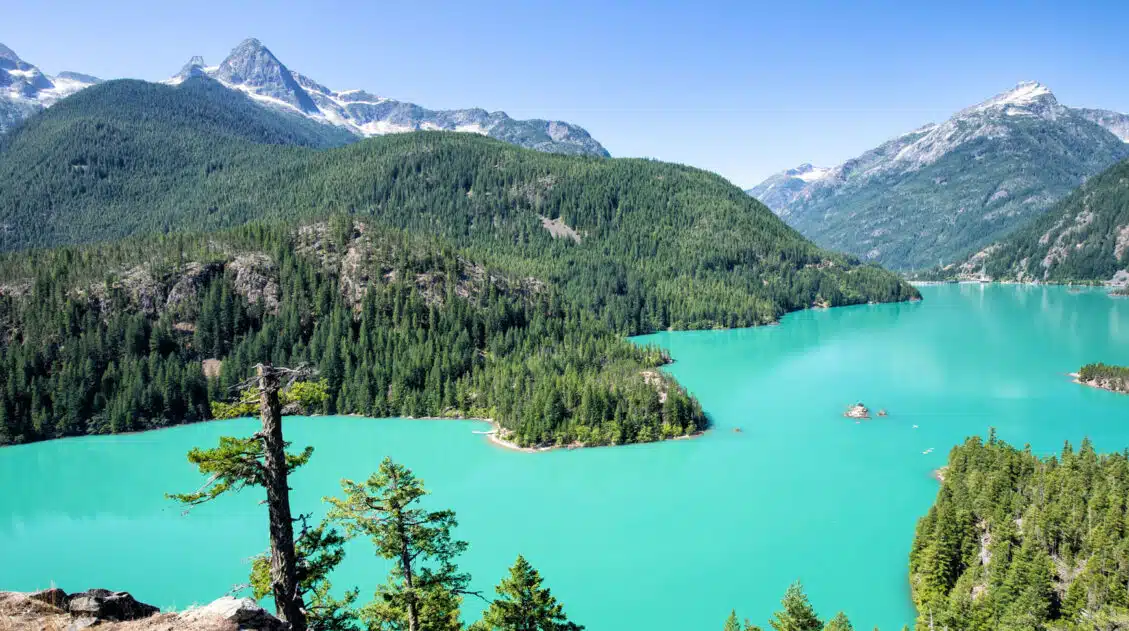
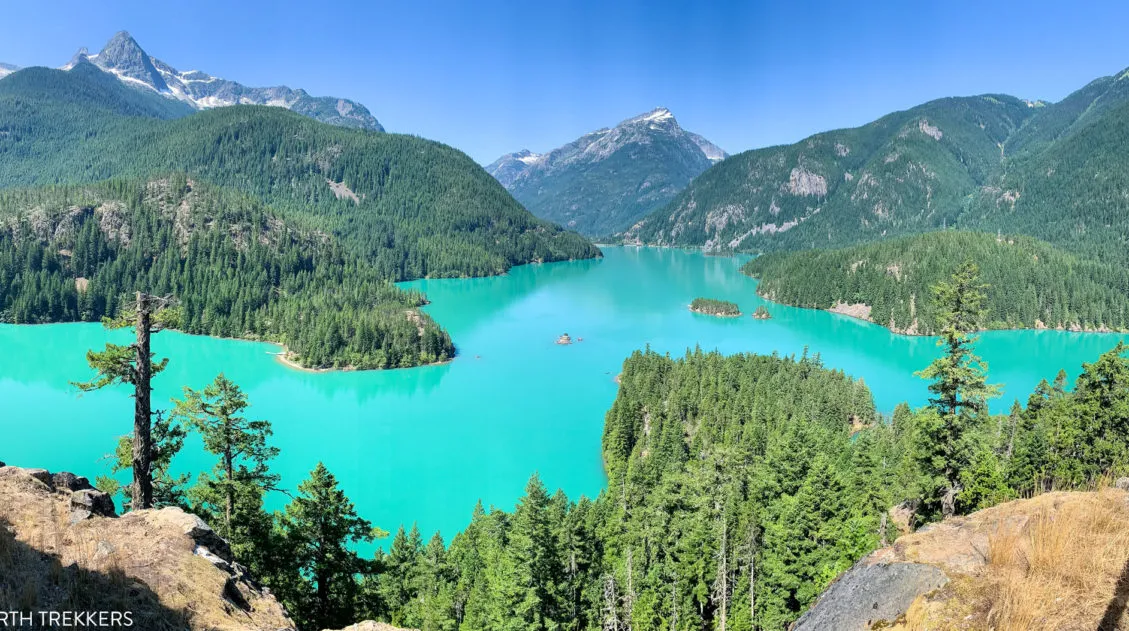
For those staying inside North Cascades National Park itself, Colonial Creek Campground on Diablo Lake is a beautiful option, though it puts you about an hour from the trailhead. Newhalem Campground is another park campground roughly the same distance away. Both are reservable in advance on Recreation.gov.
If you have any questions about the Cascade Pass to Sahale Arm hike, let us know in the comment section below.
Continue Exploring Washington State
If this is part of a bigger road trip through the USA, visit our United States Travel Guide and Washington Travel Guide for more inspiration and travel planning tips.
North Cascades National Park: How to Plan Your Visit
Plan your visit to North Cascades National Park. Learn about the best things to do, the best hikes and viewpoints, and get sample itineraries and travel tips.
12 Best Hikes in North Cascades National Park (Ranked by Difficulty & Area)
Pinterest Facebook Flipboard North Cascades National Park is not a place that easily reveals itself. Sure, the drive along Highway 20 is lovely. And the viewpoints over the lakes and mountain passes are gorgeous. But to really see this park, you are going to have to invest some time on the hiking trails. We spent […]
Maple Pass Loop Hiking Guide 2026 | North Cascades, WA
The Maple Pass Loop, also known as the Heather-Maple Pass Loop, is one of the best day hikes in the North Cascades, and one that’s surprisingly accessible for the views it delivers. In early August, Tim, Kara, and I completed this hike and came away genuinely impressed. It’s not our favorite hike in the area […]
9 Amazing Things to Do in North Cascades National Park
Discover the best things to do in North Cascades National Park, from the stunning drive along Highway 20 to Diablo Lake, Washington Pass Overlook, and world-class hiking trails. North Cascades National Park gets a fraction of the visitors that flock to Olympic and Mount Rainier, and that’s exactly what makes it so good. We visited […]
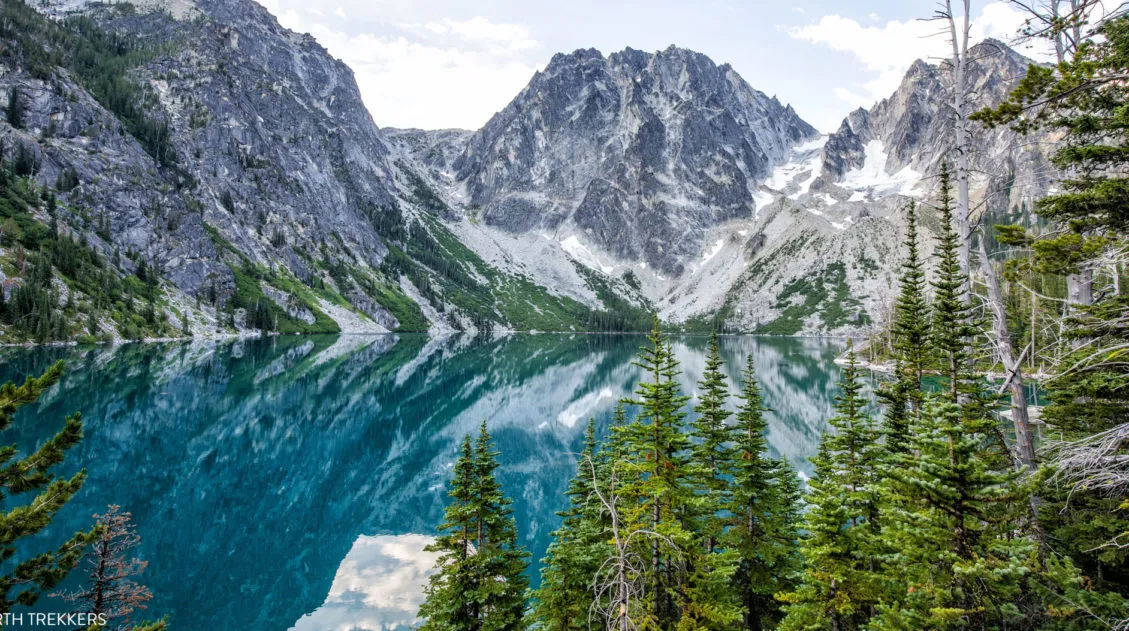
The Enchantments Thru Hike: Complete Planning Guide
The Enchantments are a slice of hiking paradise. Located in the Alpine Lakes Wilderness of Washington state, this is a wonderland of alpine lakes, jagged mountains, and waterfalls. If you’ve done any research on the Enchantments, you already know it’s one of the best day hikes in the United States. What you might not know yet is […]
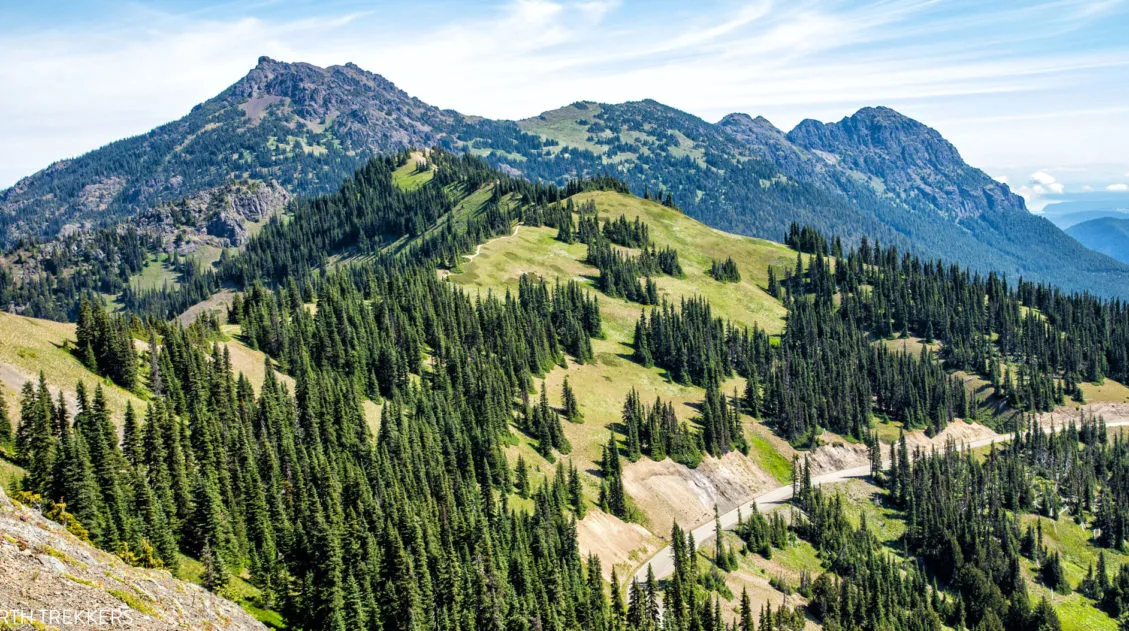
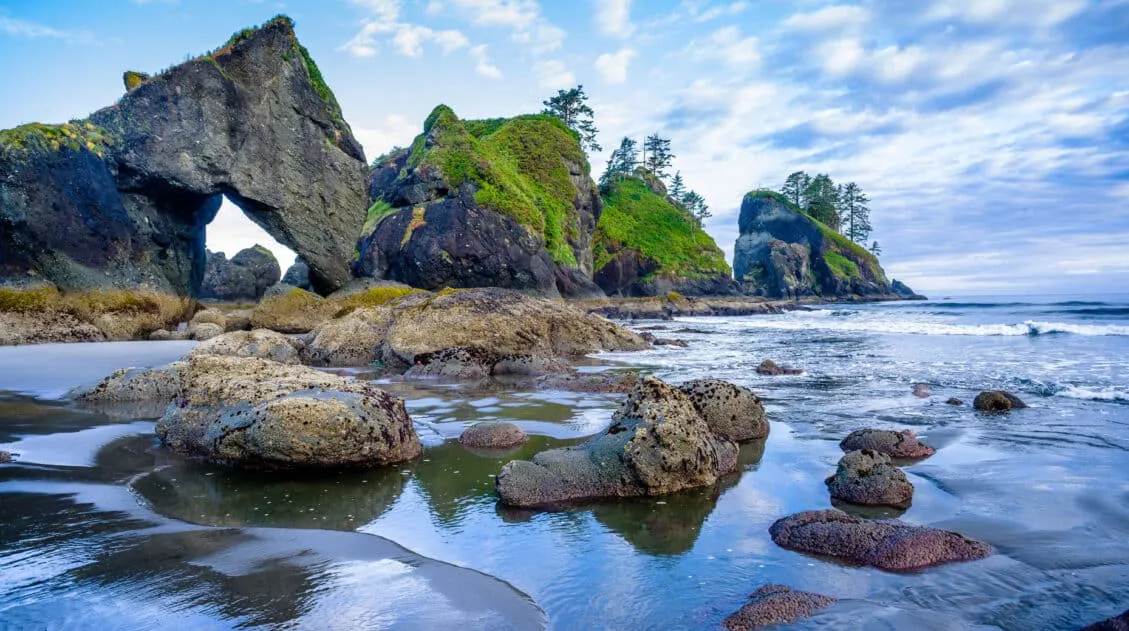
Best Hikes in Olympic National Park: Ranked by Area and Difficulty
Olympic National Park offers some of the most diverse hiking in the United States. Where else can you hike through a moss-covered temperate rainforest in the morning, walk along a wild Pacific coastline in the afternoon, and look out over glacier-capped mountain peaks from an alpine ridge? We spent four days in Olympic National Park, […]
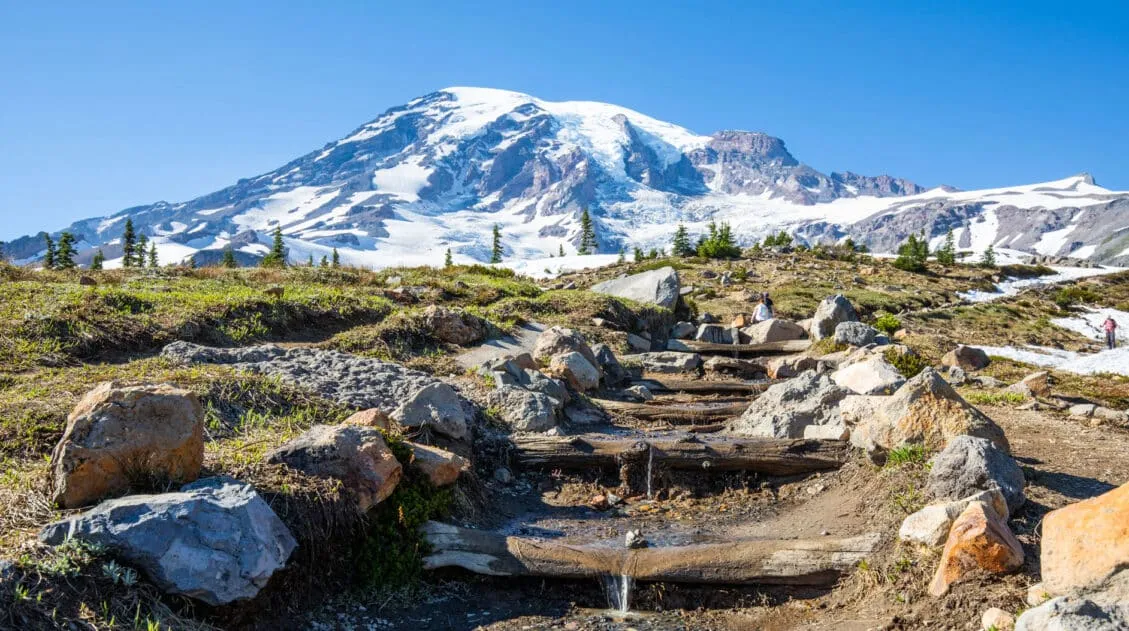
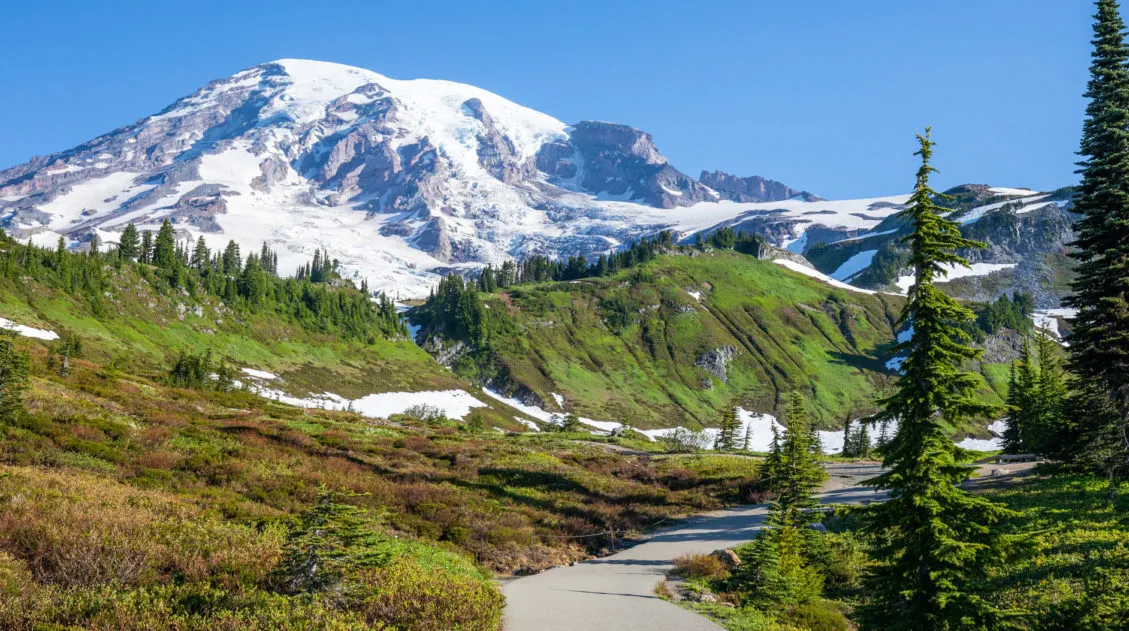
15 Best Hikes in Mount Rainier (Ranked by Difficulty & Area)
Mount Rainier is one of the most spectacular hiking destinations in the United States. From wildflower-covered alpine meadows to glacier viewpoints and fire lookout summits, the variety here is incredible. We’ve hiked in more than 50 U.S. national parks and on trails around the world, from Everest Base Camp in Nepal to the Dolomites, and […]
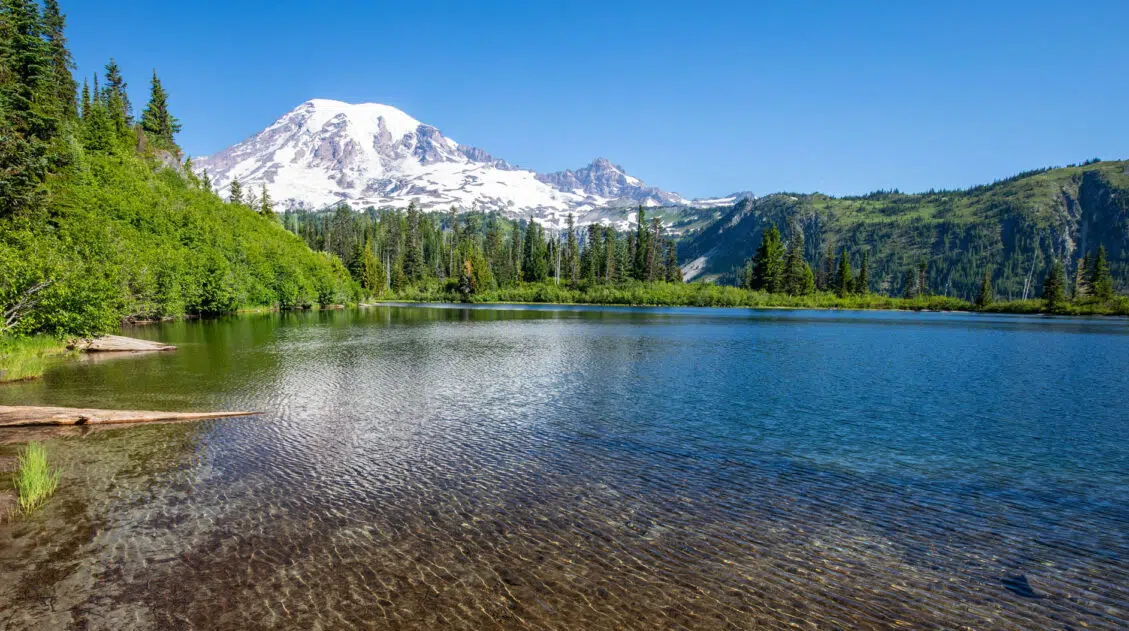
Skyline Trail Loop: A Step-by-Step Guide to Rainier’s Most Iconic Views
The Skyline Trail Loop is the most iconic hike in Mount Rainier National Park, and we’ve hiked it twice in both directions to figure out exactly which way is better. Here’s everything you need to know, from snow crossings and trail conditions to the best direction for views of Mount Rainier. For jaw-dropping alpine scenery, […]
US National Parks List: All 63 Parks, Map & Free Printable Checklist
There are 63 national parks in the United States, and we’ve visited 56 of them, from the remote wilderness of Denali to the coral reefs of the Virgin Islands. We’re a family of avid hikers who have spent over a decade exploring these parks, from multi-day backcountry trips to scenic drives with kids in tow. […]
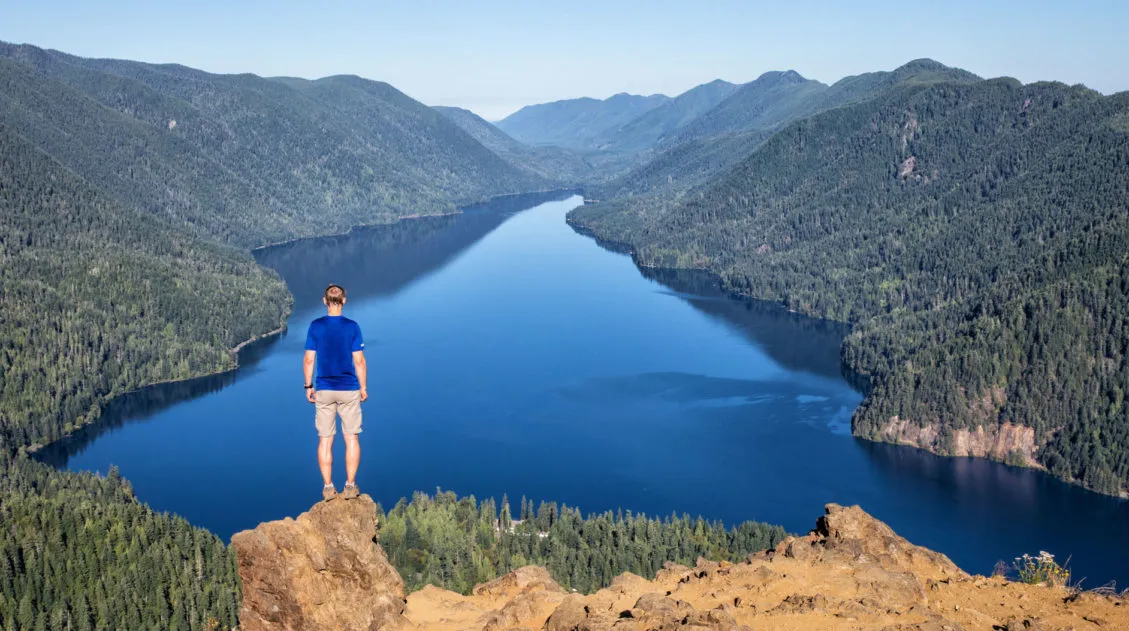
Mount Storm King Hike: Is It Worth the Brutal Climb?
Mount Storm King earns its dramatic name. This short but relentlessly steep trail in Olympic National Park climbs over 2,000 feet in just over two miles, ending with a rope-assisted scramble to a rocky outcropping with sweeping views over the impossibly blue waters of Lake Crescent. We hiked this in July on a clear summer […]
Olympic National Park Travel Guide: How to Plan Your Visit
Plan your visit to Olympic National Park. Learn about the best things to do, how to plan your time, where to stay, and more.
The Ultimate Guide to the 63 US National Parks
Stretching from the South Pacific, across the United States to the Caribbean, are 63 national parks. These national treasures preserve iconic landscapes, majestic mountains, primordial forests, arid deserts, misty coastlines, immense canyons, wildlife, and historic landmarks. We have visited 56 of the 63 US national parks, from the towering granite walls of Yosemite and the […]
Ultimate Hiking Guide: Europe, Asia, Africa, Americas & Oceania
Are you looking for the perfect hike? With hikes on six continents ranging from a few miles to multi-day adventures, explore some of the best hikes from around the world.

Comments 26