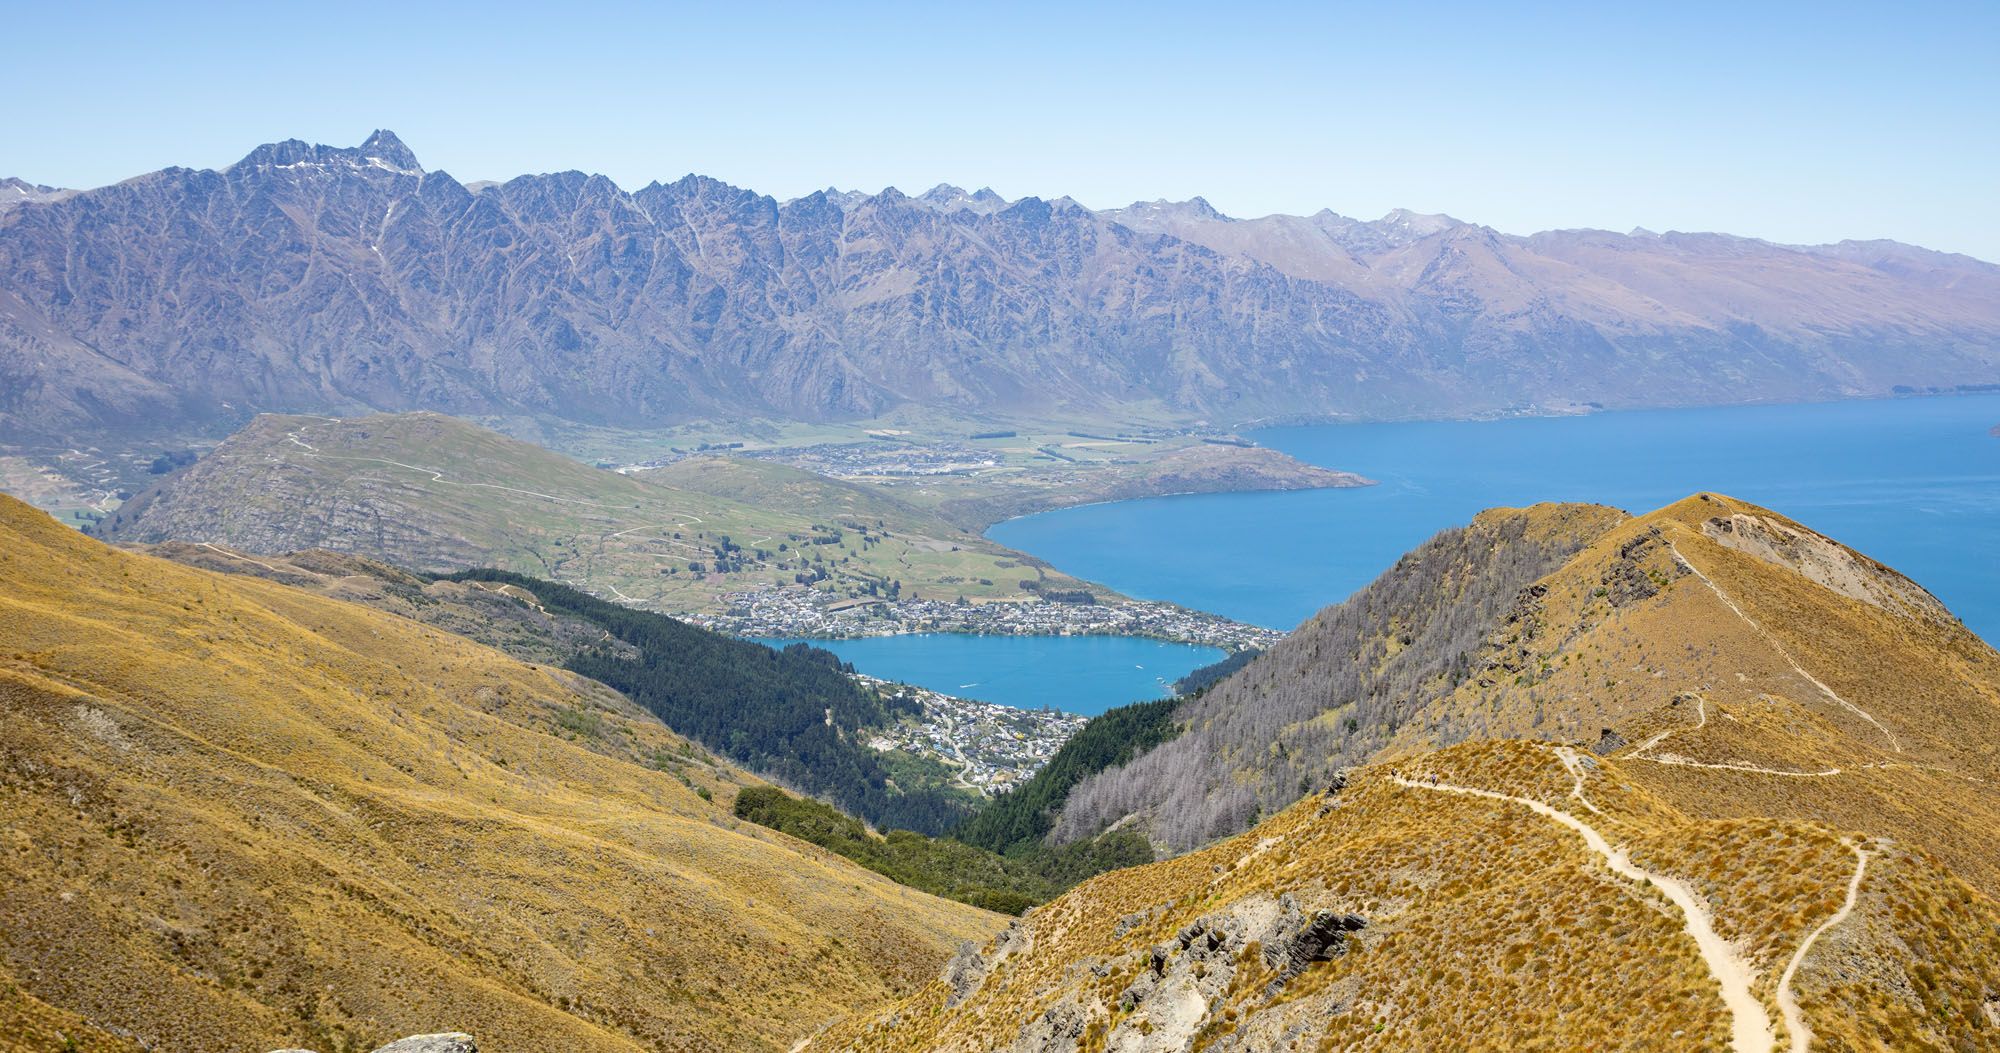
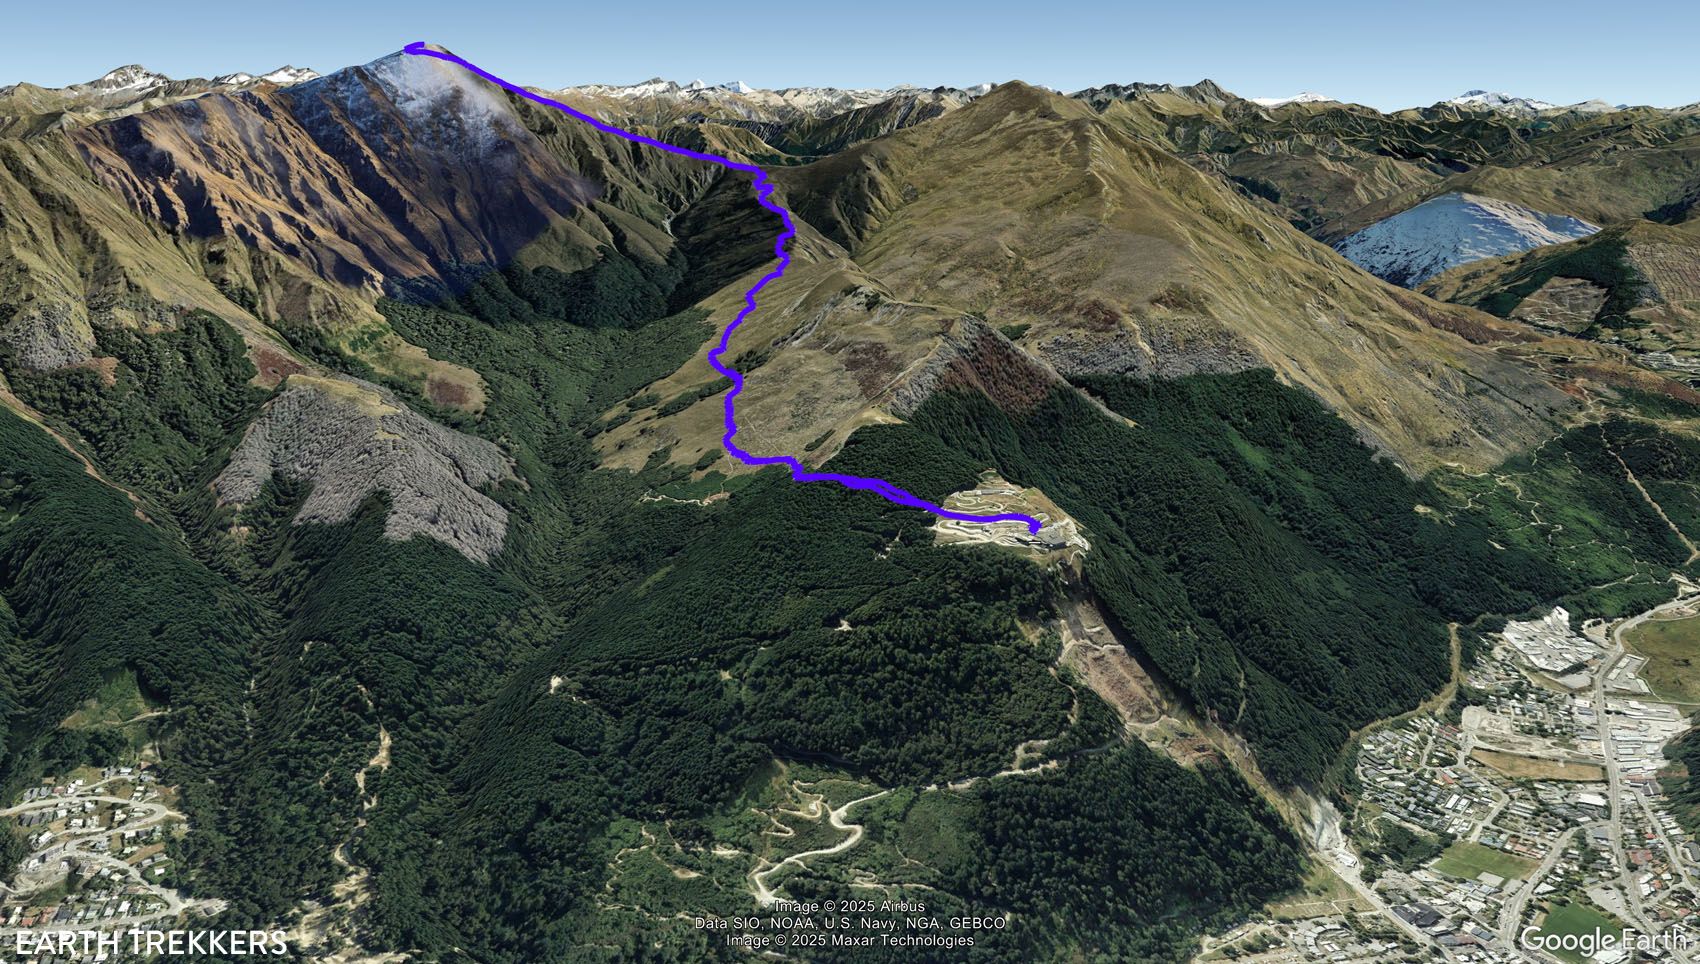
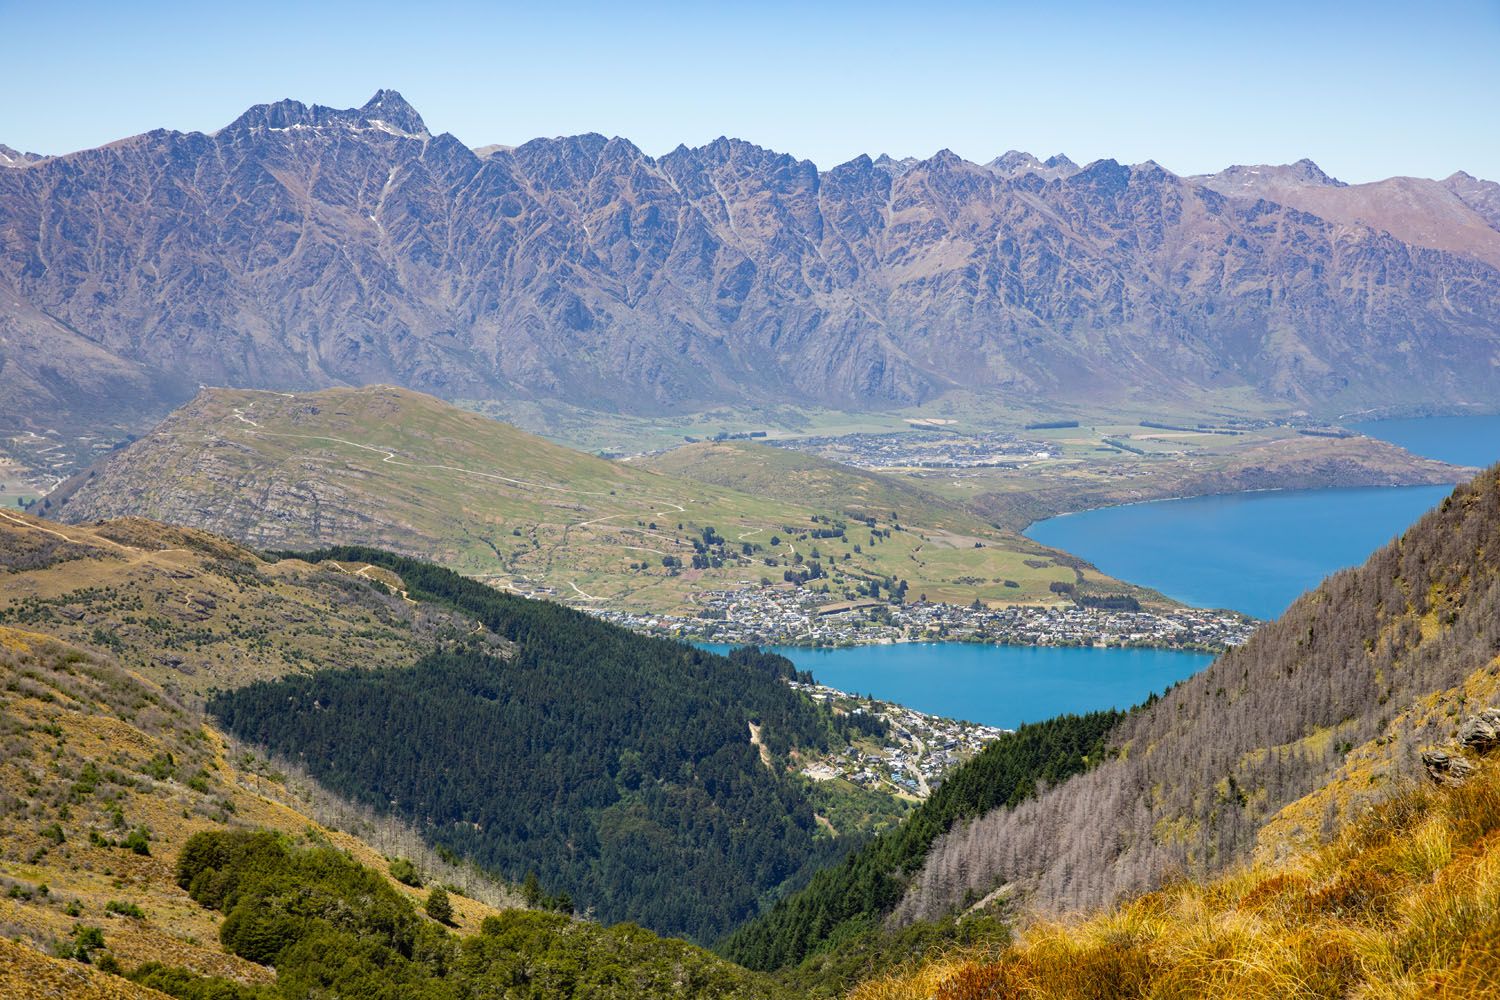
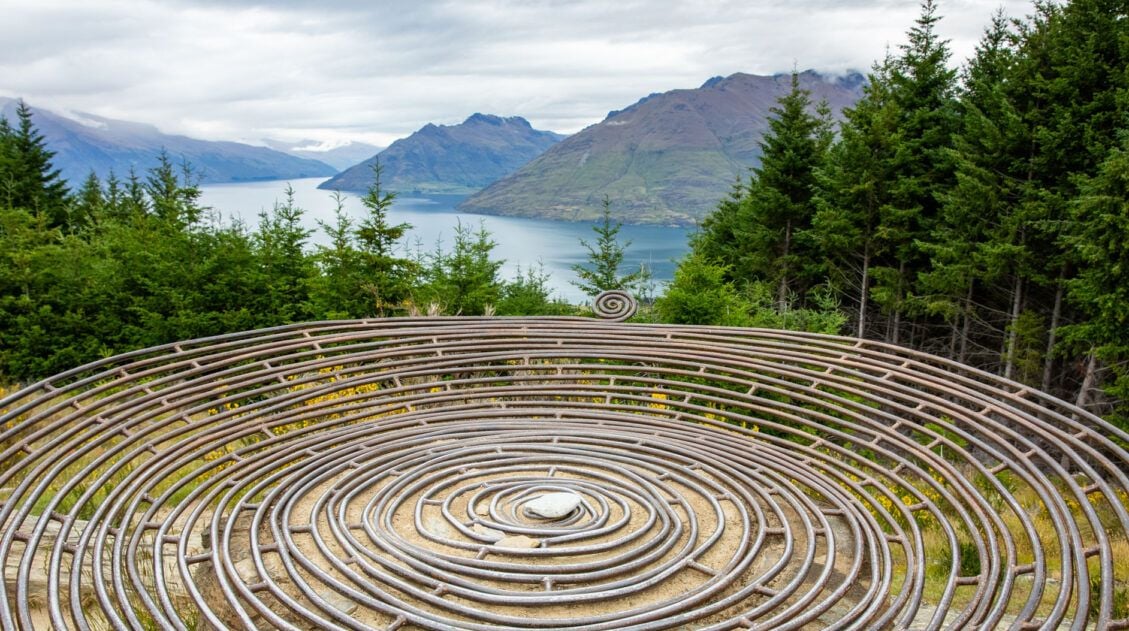
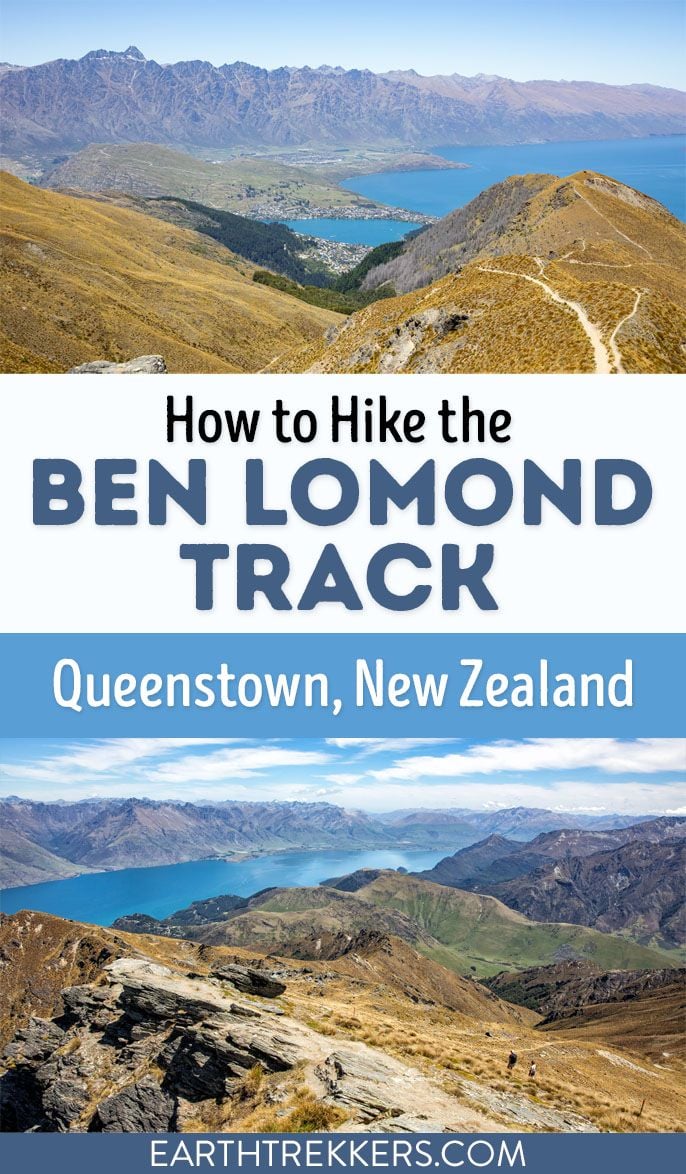
Looking for the best day hike in Queenstown? The Ben Lomond Track provides the perfect mix of challenge and reward. Along this 11 km (6.8 mile) round trip hike, you’ll be treated to incredible views of the Remarkables, Lake Wakatipu, Queenstown, and mountain peaks as far as the eye can see.
You can either hike to the Saddle, which has a fantastic view, or continue your climb up to the Summit for an even better view. You’ll definitely be breathing heavy as you hike from the Saddle to the Summit, but don’t worry, you’ll be able to enjoy the spectacular views as you stop to catch your breath. And the view from the top makes your hard work worth it as you’ll be treated to an incredible 360-degree panorama.
The Ben Lomond Track
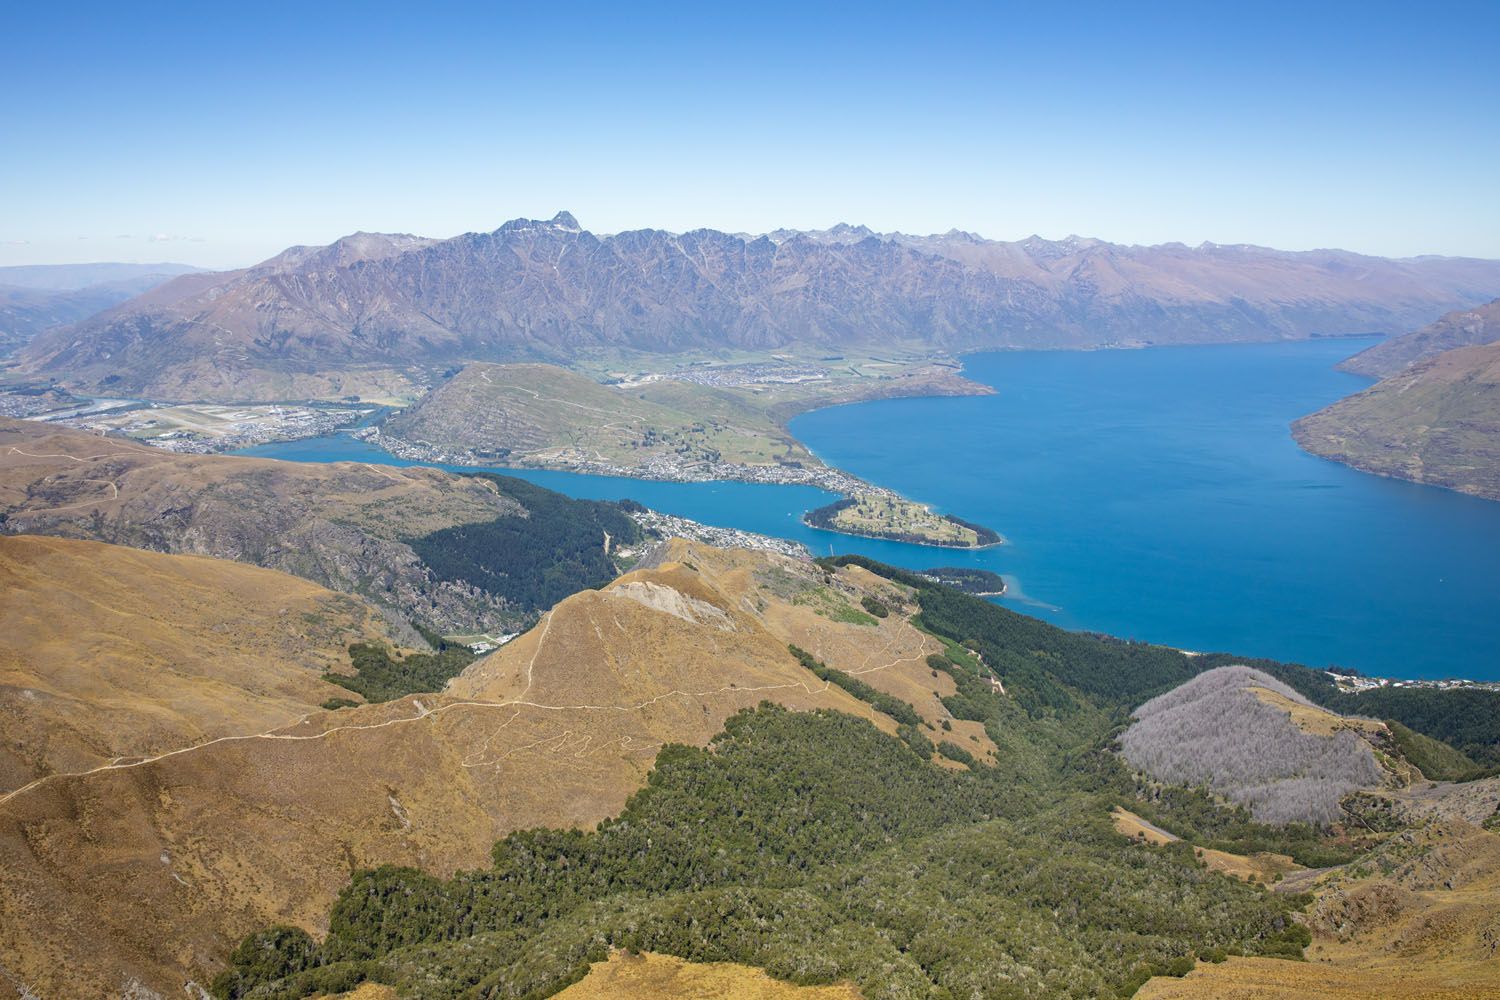
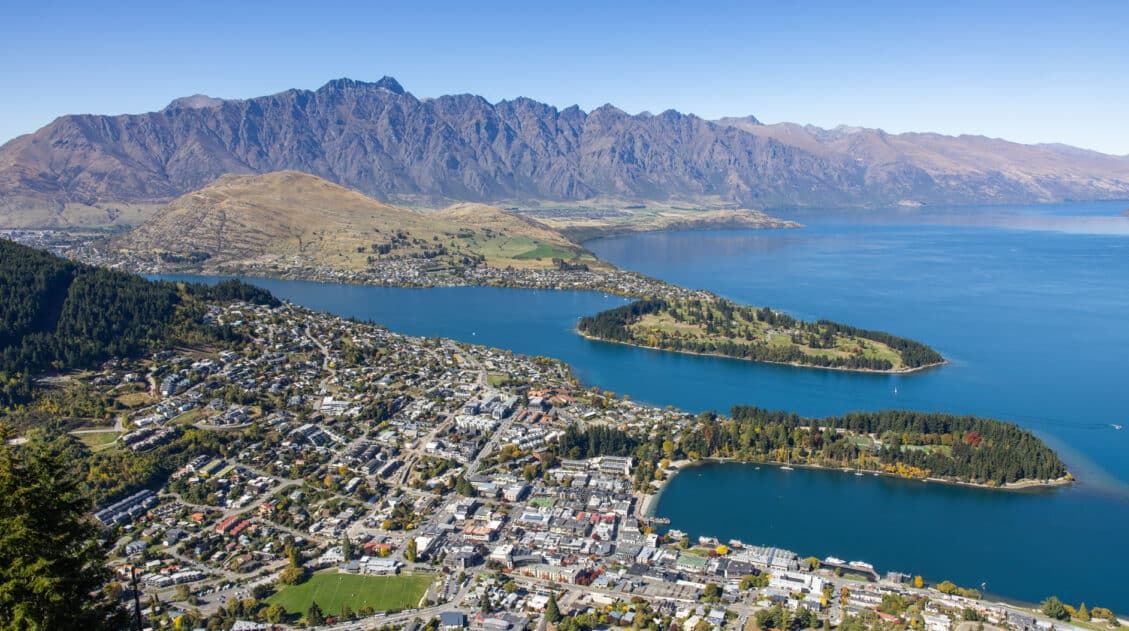
Ben Lomond is a mountain that sits only a few kilometers northwest of Queenstown. The summit sits at an elevation of 1,748 meters (5,735 feet), where hikers will be treated to a sweeping, 360-degree view of the surrounding mountains, Lake Wakatipu, and Queenstown. This is a moderately challenging day hike, with plenty of elevation gain on an easy to follow, well-defined dirt trail.
This guide covers the Ben Lomond Track starting and ending at the top of the Queenstown Gondola. The bottom gondola station is walking distance from the main Queenstown tourist area. The gondola is operated by Skyline, check their website for operating hours and prices.
Hikers may also choose to begin the hike from Queenstown to avoid paying the gondola fee. There are a couple of different routes up to the top gondola station. Just be aware that this would add considerable elevation gain and time to the hike.
Ben Lomond Track Hiking Stats
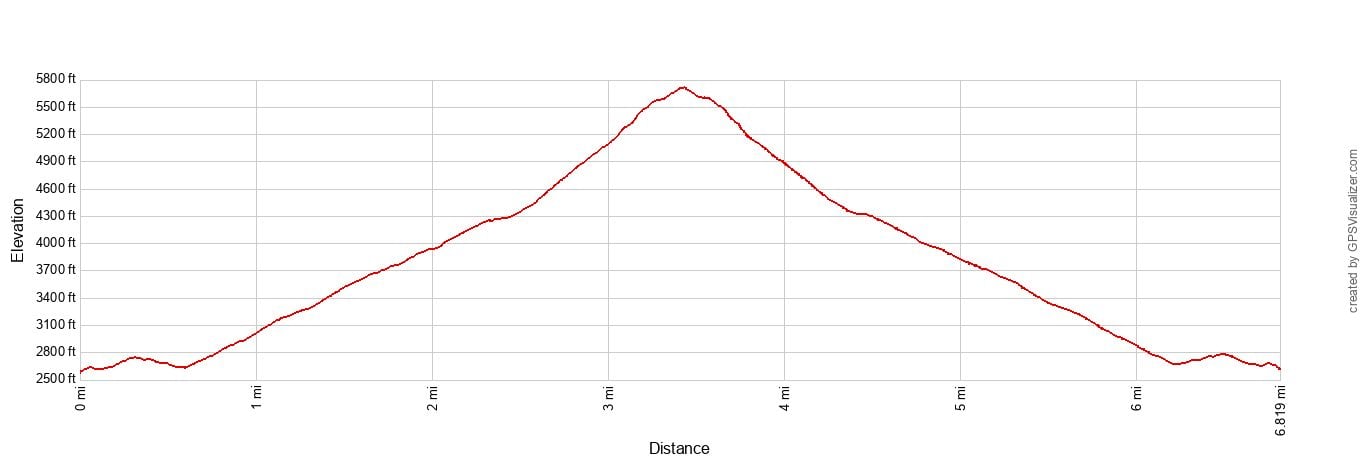
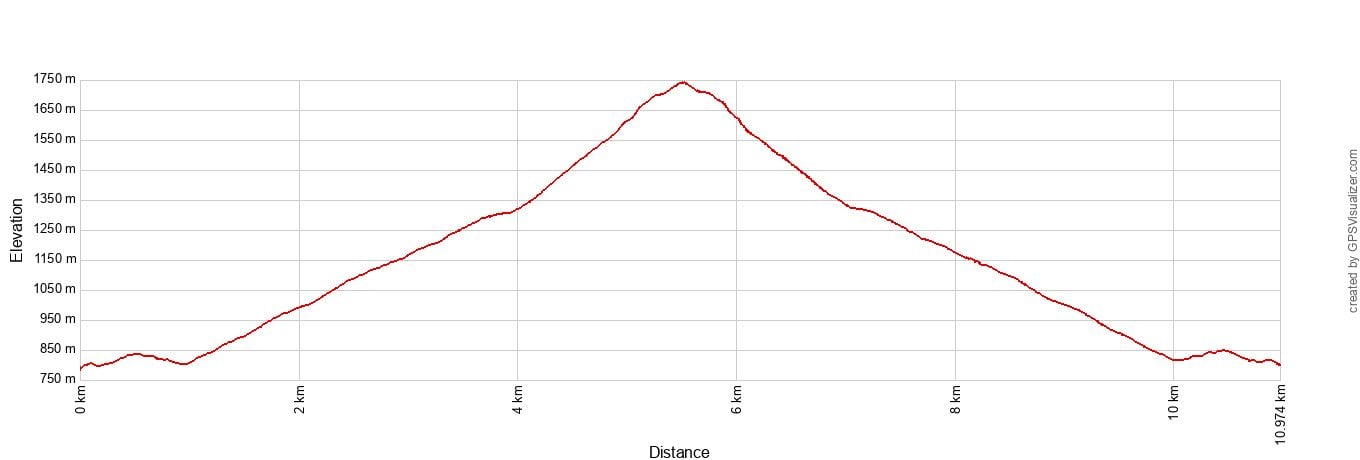
Roundtrip from the top gondola station to the Saddle:
Distance: 7.7 km (4.8 miles)
Total Ascent: 610 meters (2,000 feet)
Lowest Elevation: 783 meters (2,570 feet)
Highest Elevation: 1,300 meters (4,280 feet)
Difficulty: Moderate
Time: 2 to 4 hours
Roundtrip from the top gondola station to the Summit:
Distance: 11 km (6.8 miles)
Total Ascent: 1,045 meters (3,430 feet)
Lowest Elevation: 783 meters (2,570 feet)
Highest Elevation: 1,748 meters (5,735 feet)
Difficulty: Moderate to Strenuous
Time: 3.5 to 5 hours
Please practice the seven principles of Leave No Trace: plan ahead, stay on the trail, pack out what you bring to the hiking trail, leave areas as you found them, minimize campfire impacts, be considerate of other hikers, and do not approach or feed wildlife.
Things to Know Before You Go
There is very little shade on this hike. Apart from a brief forest walk at the beginning/end of this track, you will be exposed to the sun the entire time. We recommend bringing sun protection and plenty of water, especially in the summer months.
The trail is well-kept and has plenty of signage, so it was always easy to stay on the main trail.
We started this hike midday so we would have better lighting for photos. You will, however, face hotter midday temperatures by doing the same. So, it is generally recommended to start this hike during the cooler morning hours.

Ben Lomond Track: Step-By-Step Trail Guide
Starting the Hike
As you step off the gondola at the top station, ignore the signs pointing to the Ben Lomond Reserve and instead walk through the gondola station towards the bathrooms, gift shop, and cafe. Once in this area of the station look for signs to exit the station for the Skyline Luge.
Pro Travel Tip: The top gondola station is your last chance to get water and snacks before starting the hike. They also have toilets here, as well as lockers.
Once out of the building, follow the path behind the cafe up a small hill as if you are walking towards the luge. There will be several places where the trail splits, just keep following the signs to the Ben Lomond Track.
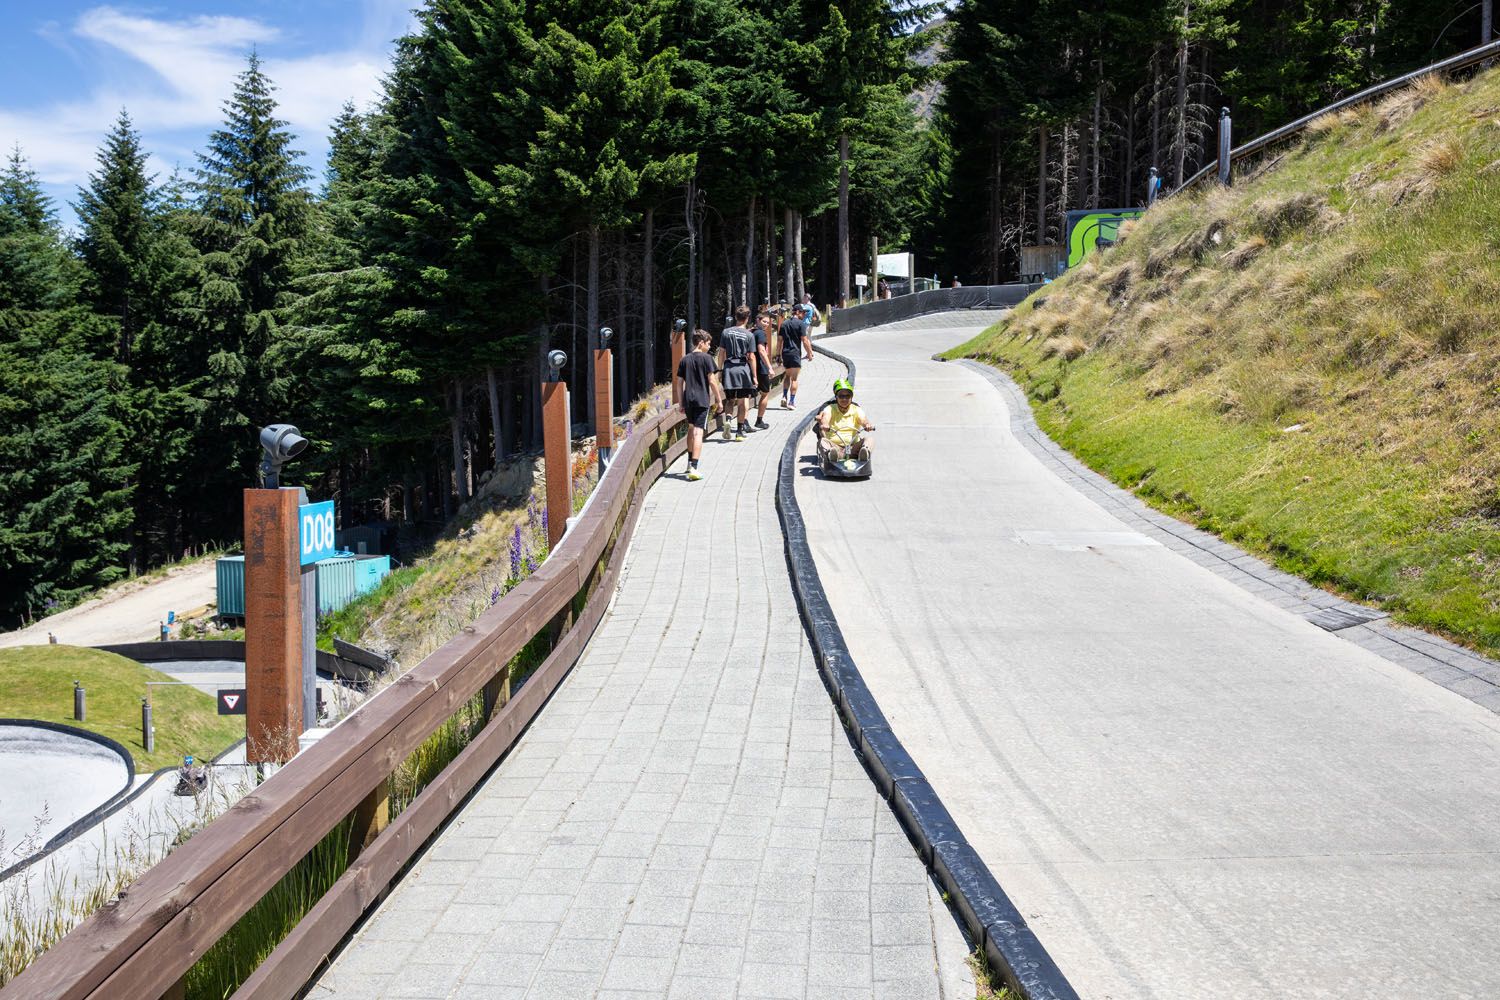
You will now be walking alongside the luge track with the karts zooming past you, which is always fun to see. After you pass the luge track you will come to a gravel area with signage for the Ben Lomond Track. Go straight across the gravel area to the opening in the trees. There will be another Ben Lomond Track sign directing to follow a dirt path through the trees.
Hiking to the Saddle
In the trees you will ascend a small hill and then see a trail split off to the right for the Skyline Loop Track (which you do not want). There is a sign here directing you to go straight to stay on the Ben Lomond Track. So, keep going straight.
A little further ahead you come out of the trees and the trail splits again. This is a split for a mountain biking trail. Go left at this split (there is a small sign close to the ground).
If you have a warm sunny day like we did, then enjoy this moment in the trees. There will not be any shade until you return back to this point.
Good to Know: As you continue hiking you may see mountain bike trails branch off from the main hiking trail. It should be obvious which way to go (follow the wider hiking trail), but there are usually small signs close to the ground indicating which trail to take.
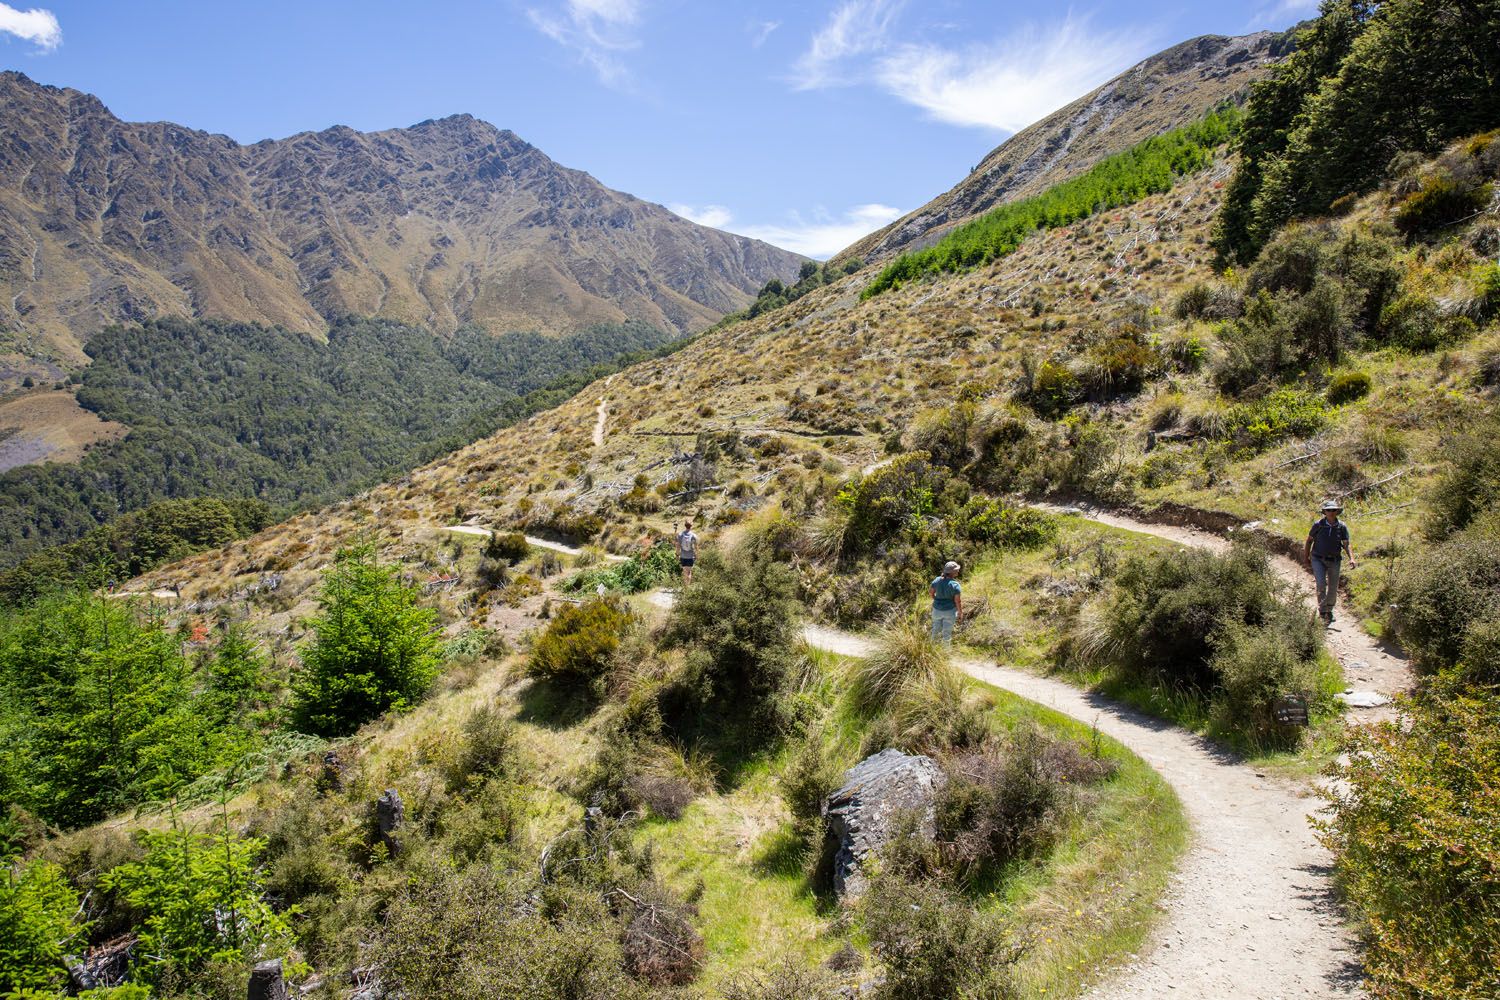
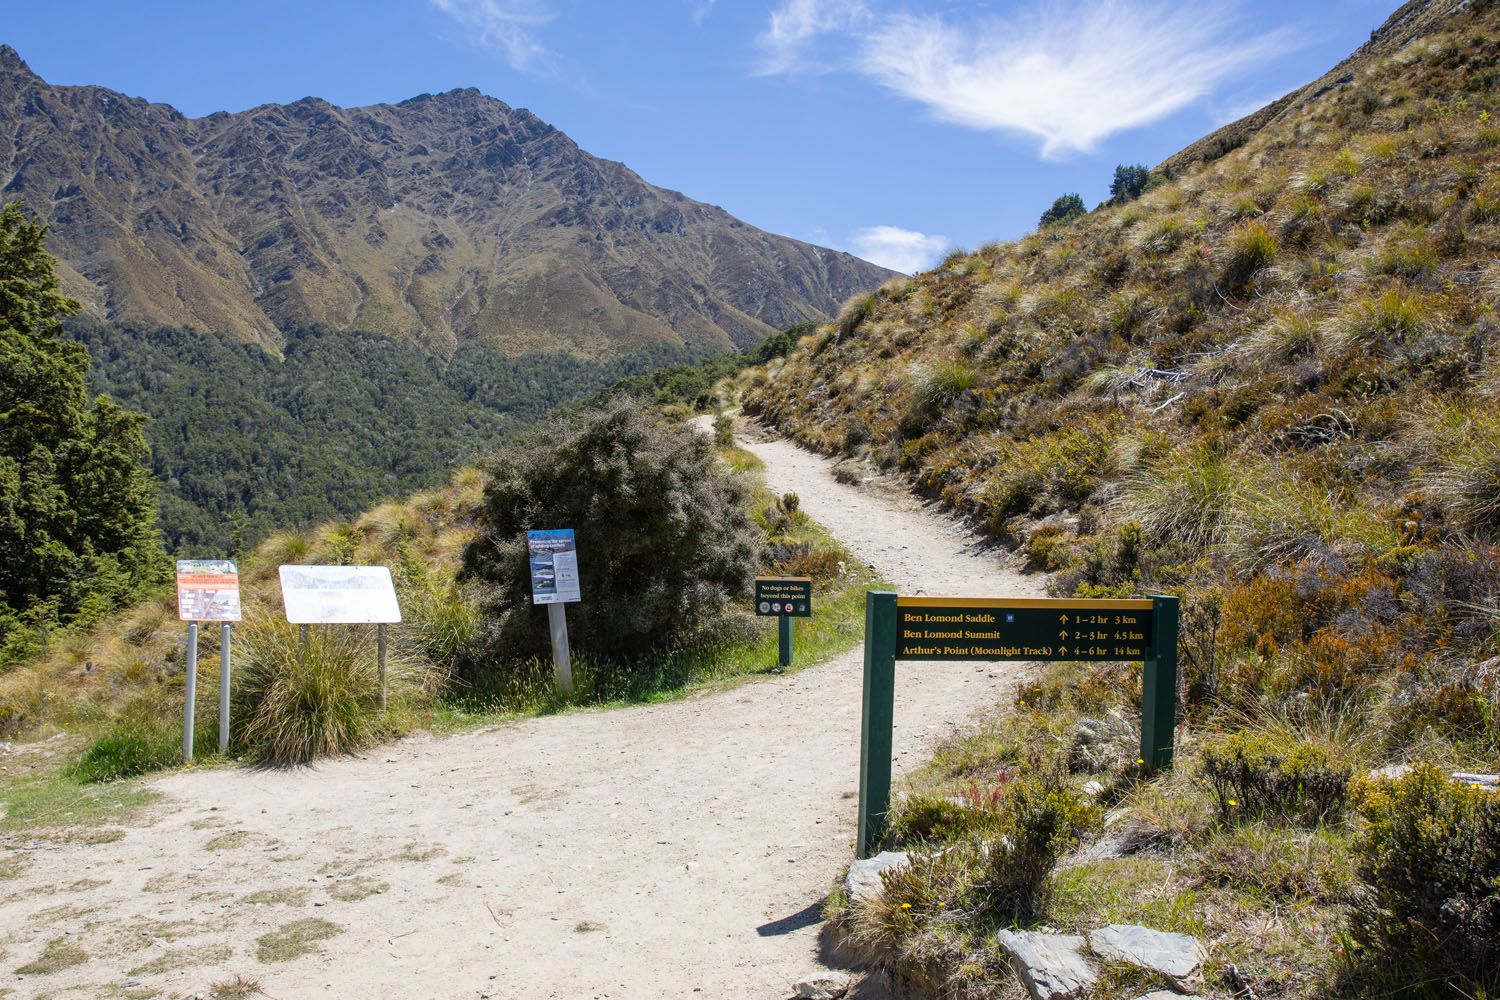
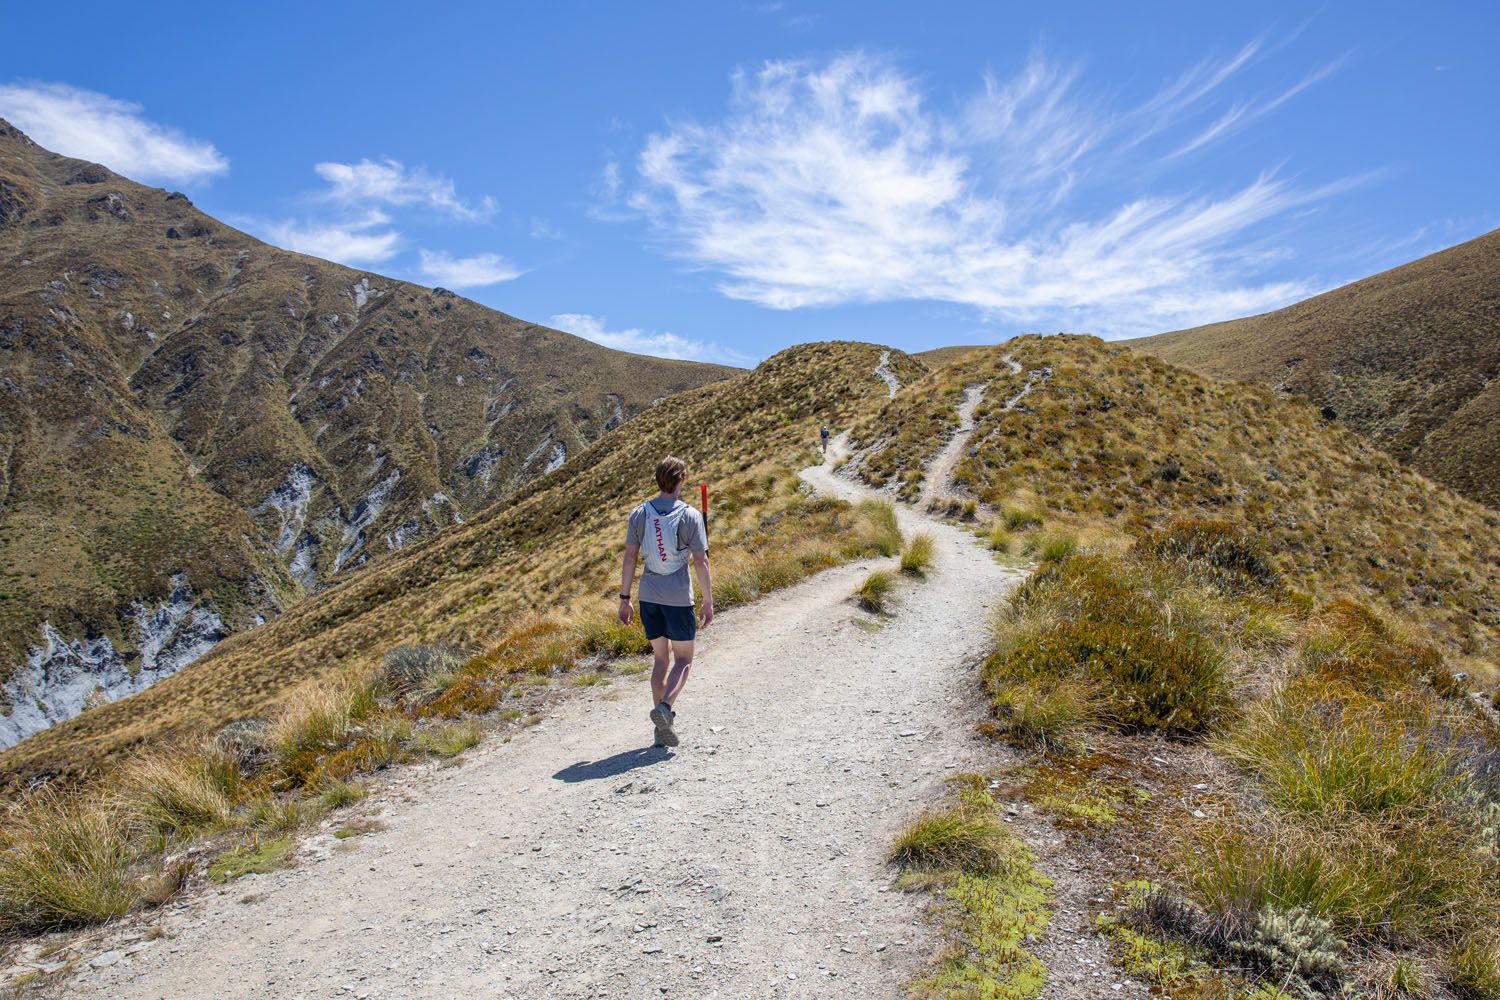
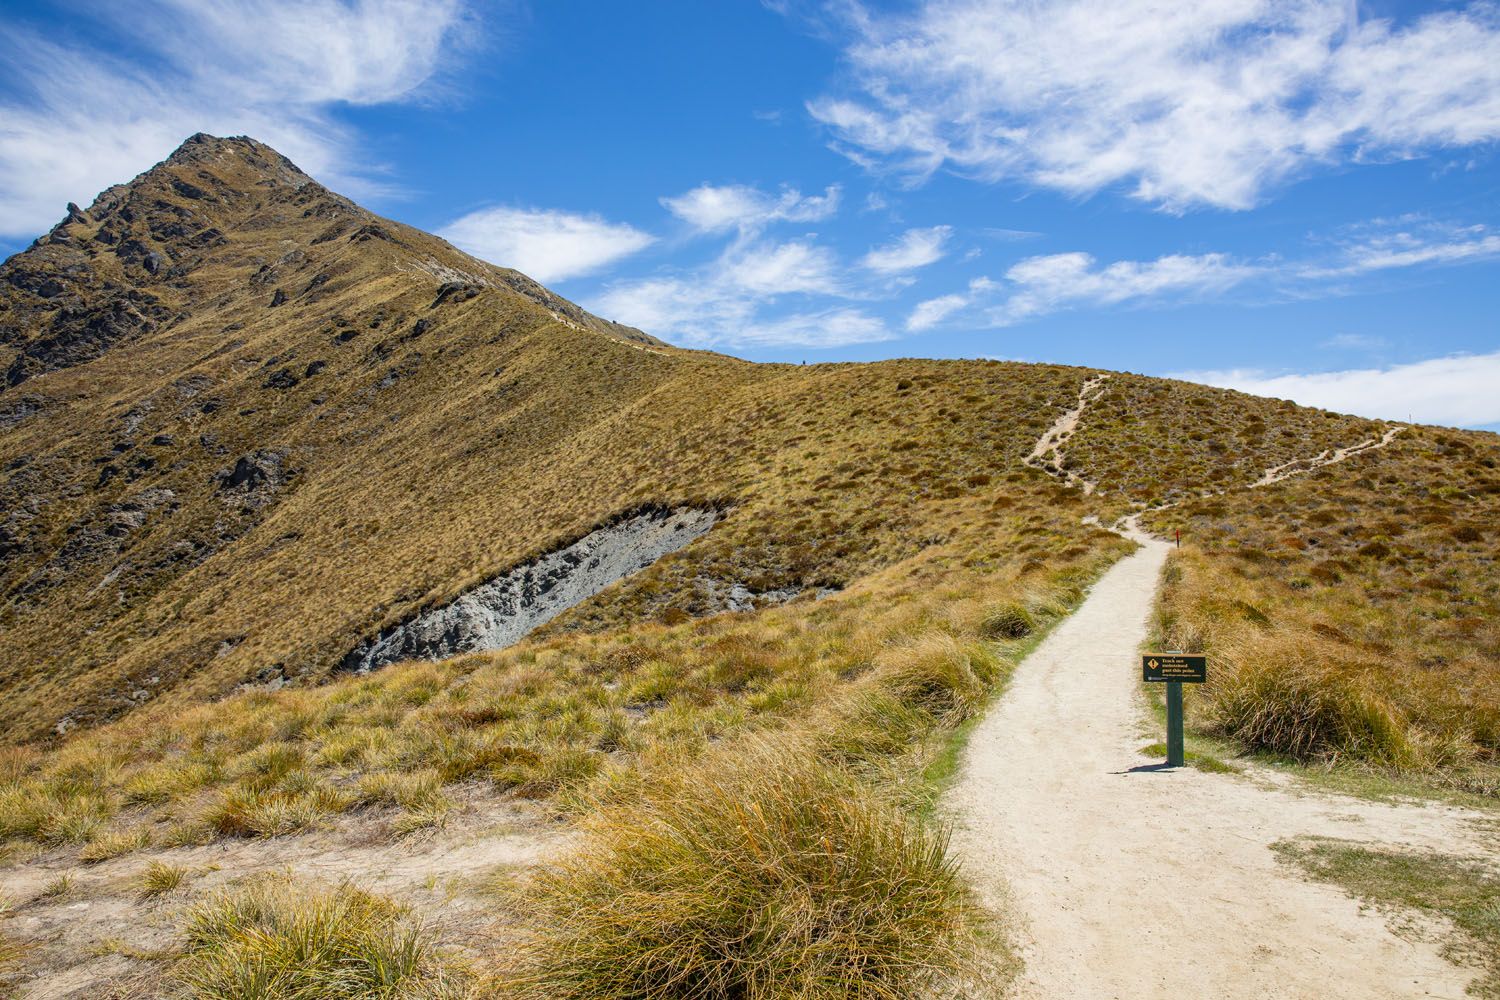
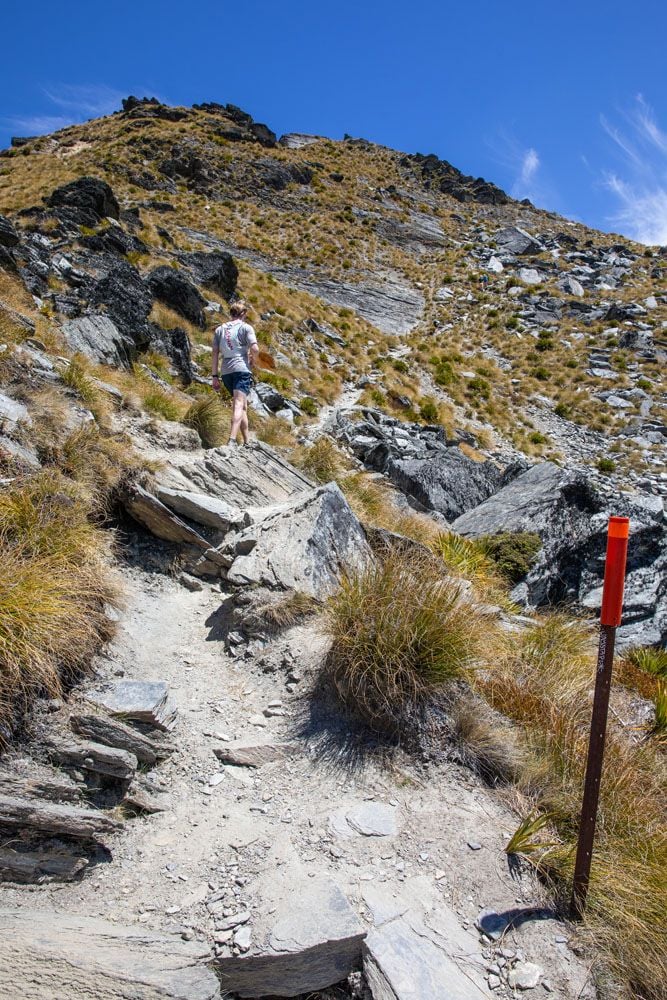
The trail will follow a well-defined dirt/rocky path that cuts along the grassy mountainside. You will then come to a small open area with signage. Follow the signage which will direct you up the hill to the Saddle and Summit.
All of the directions so far may seem like a lot to follow, but it is all well marked with signs. And it gets even easier from here.
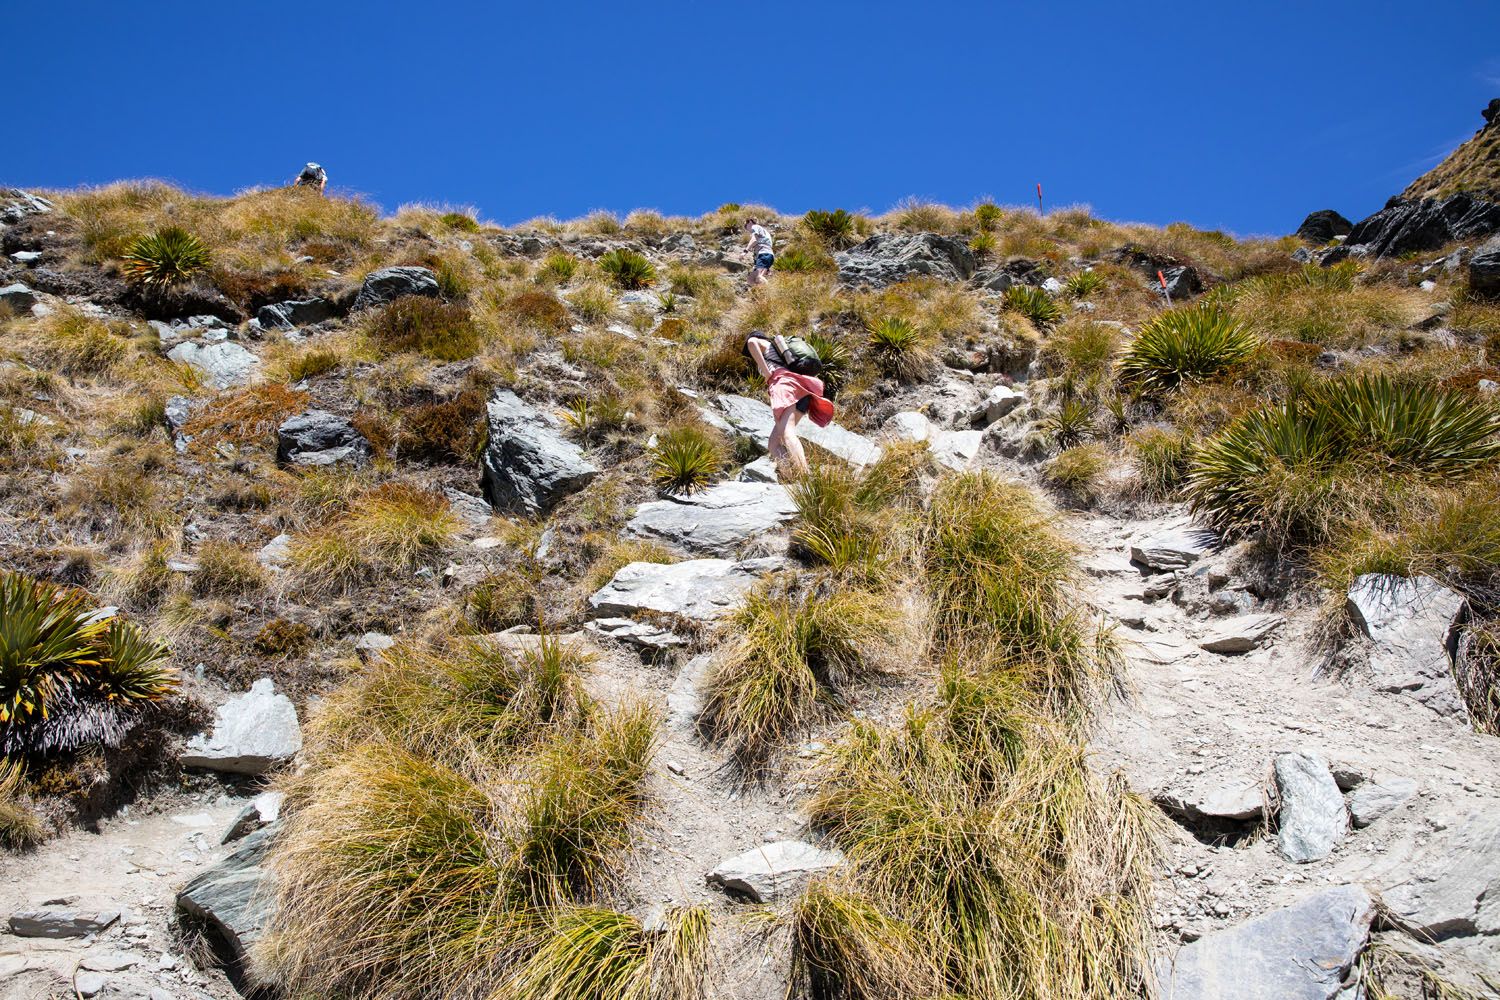
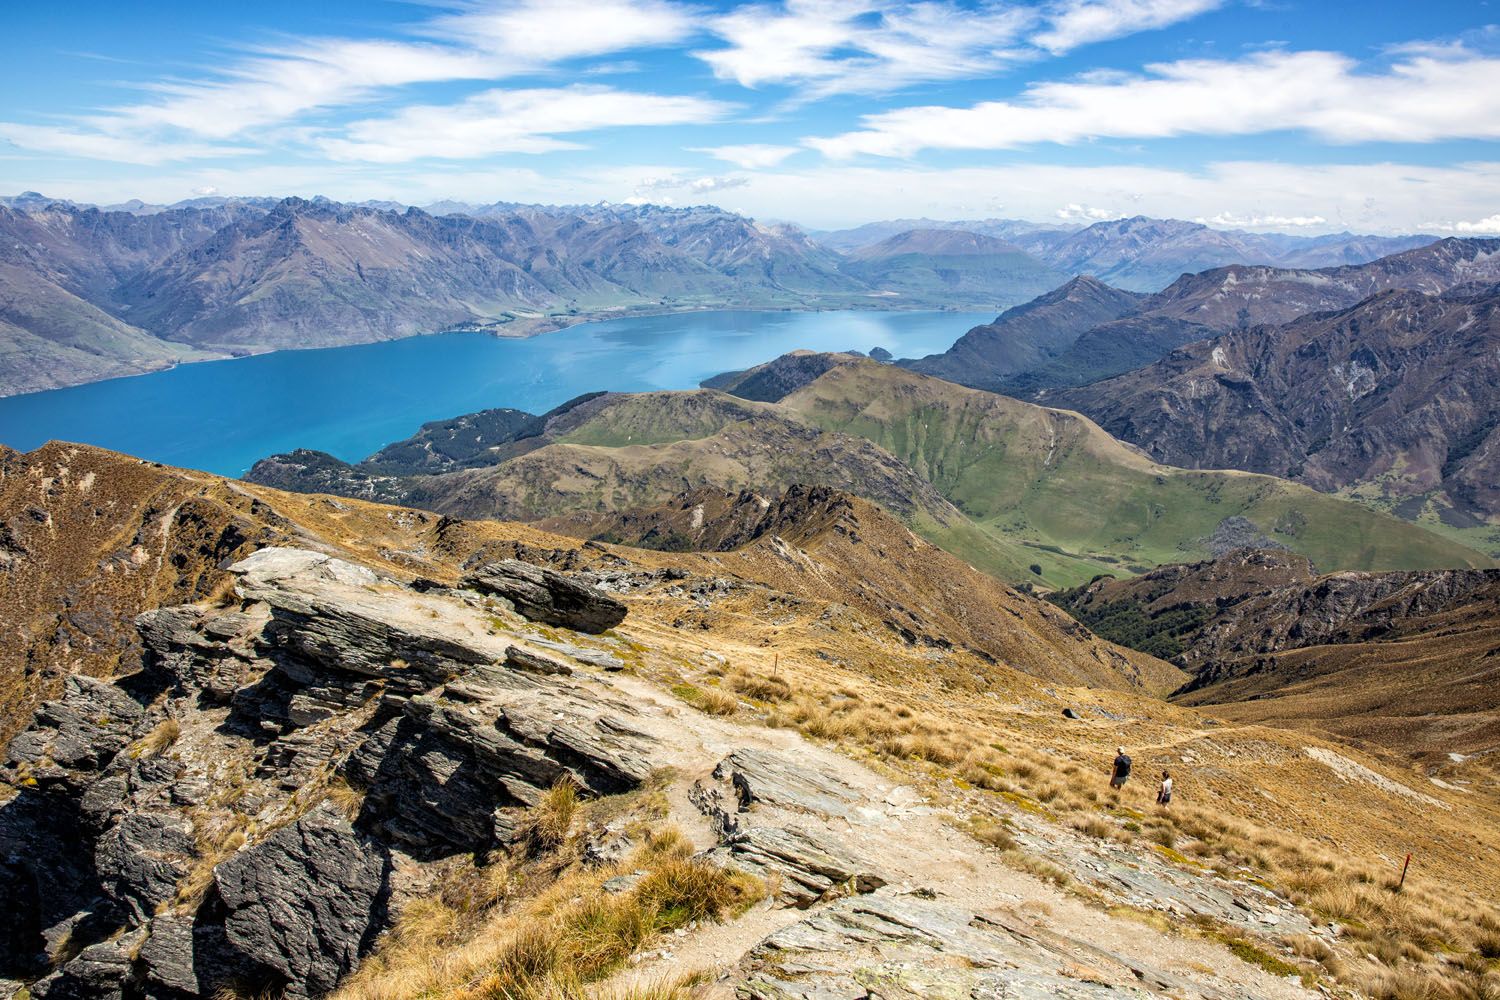
The ascent to the Saddle is a steady gradual ascent. And you should now be able to see both the Ben Lomond Summit off to the left and the Saddle in the distance in front of you.
I remember looking up at the summit and thinking we have such a long way to go, but it was nice having a visual indicator of our destination for most of the hike. As we progressed along the trail, that summit would get closer and closer, giving us extra motivation along our way.
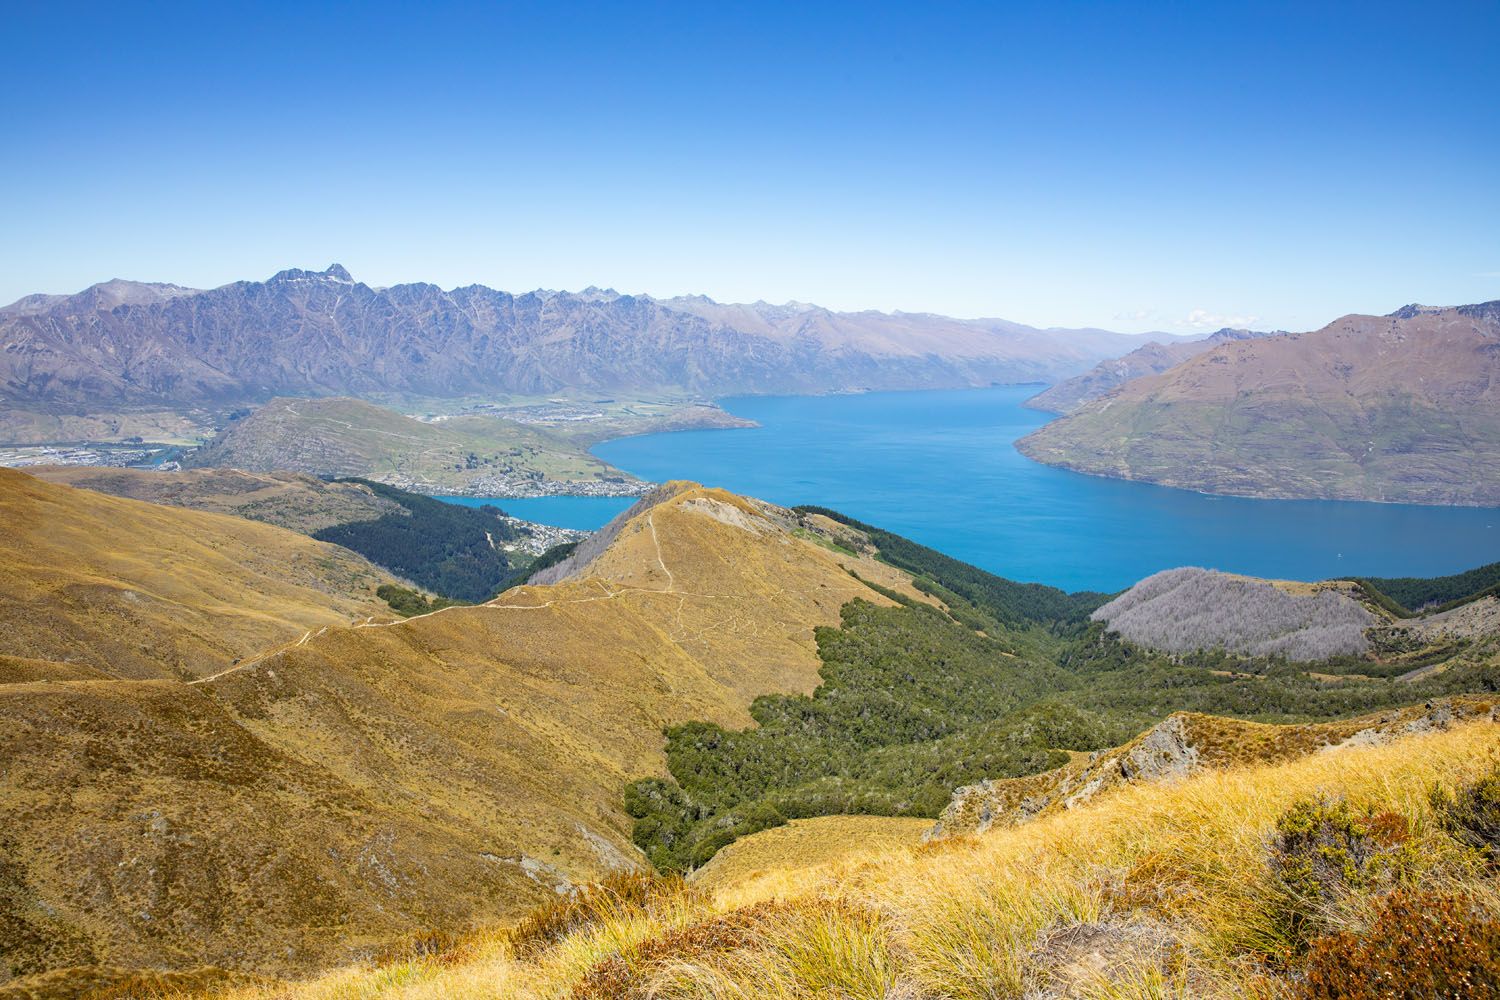
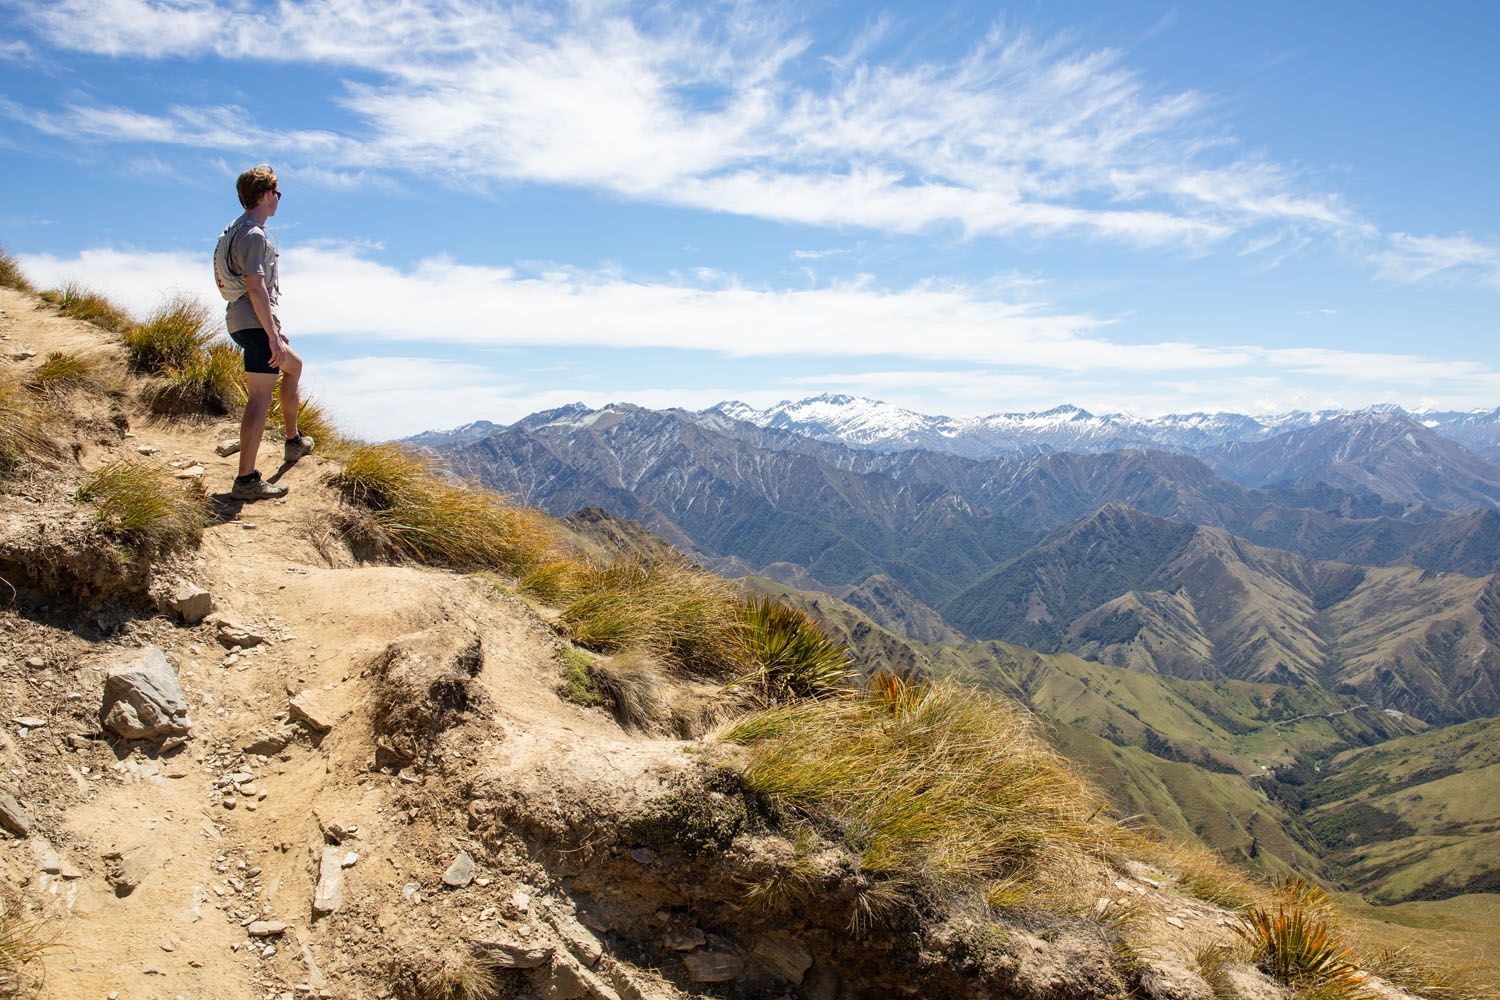
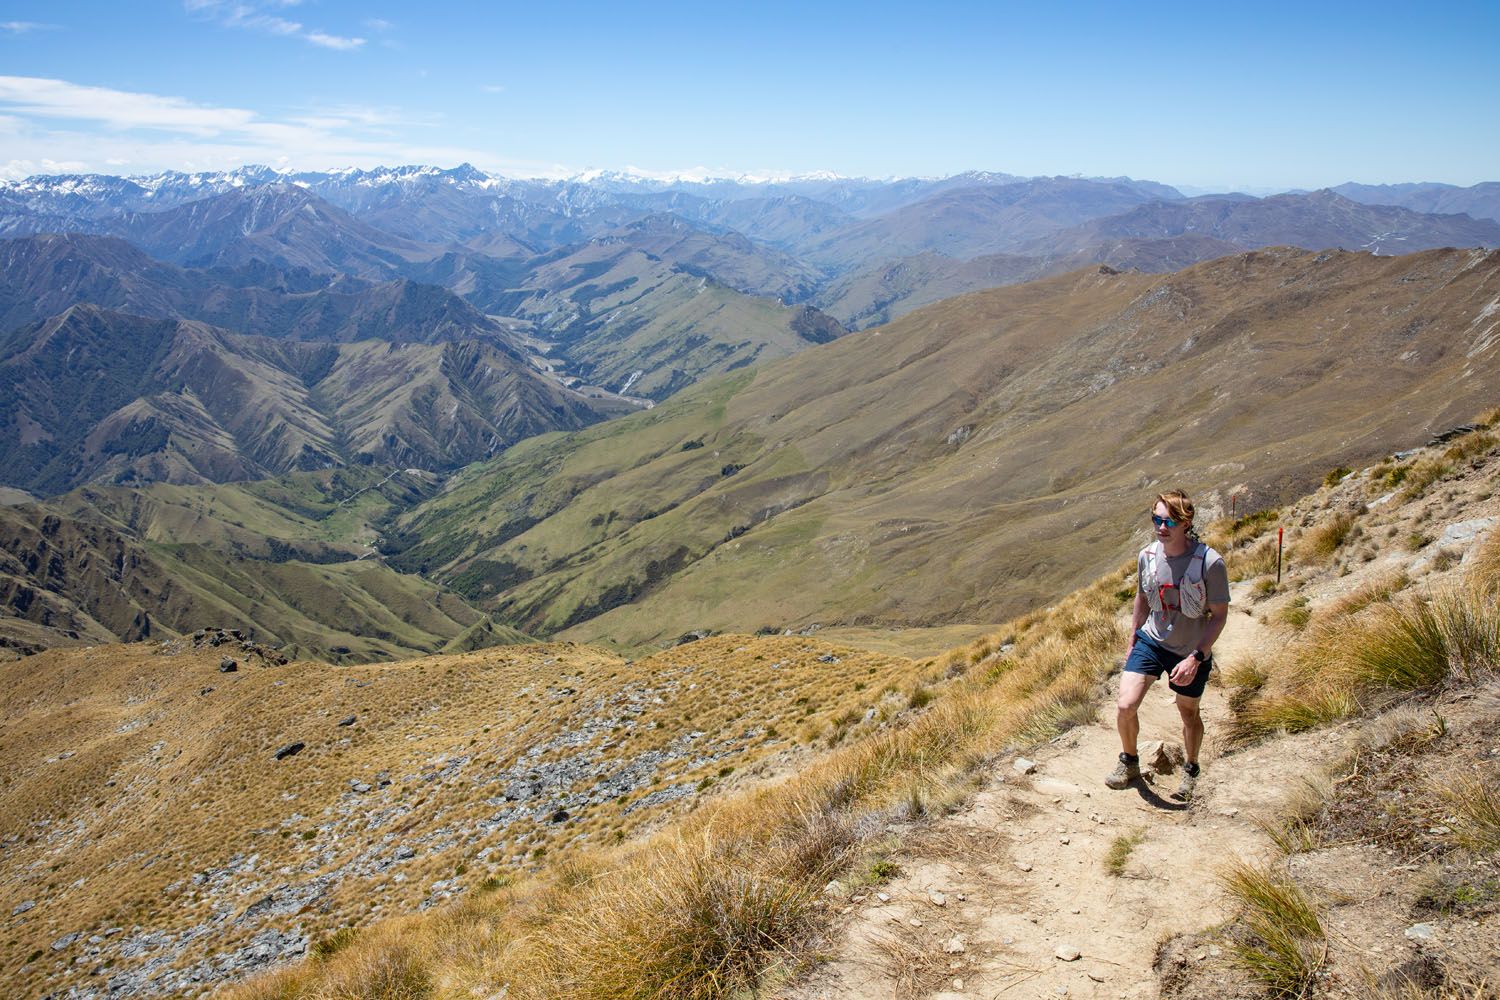
As you continue your ascent, make sure to turn around and enjoy the views behind you too. The view will continue to open up the higher you go, with great views out over Queenstown, the Remarkables, and Lake Wakatipu.
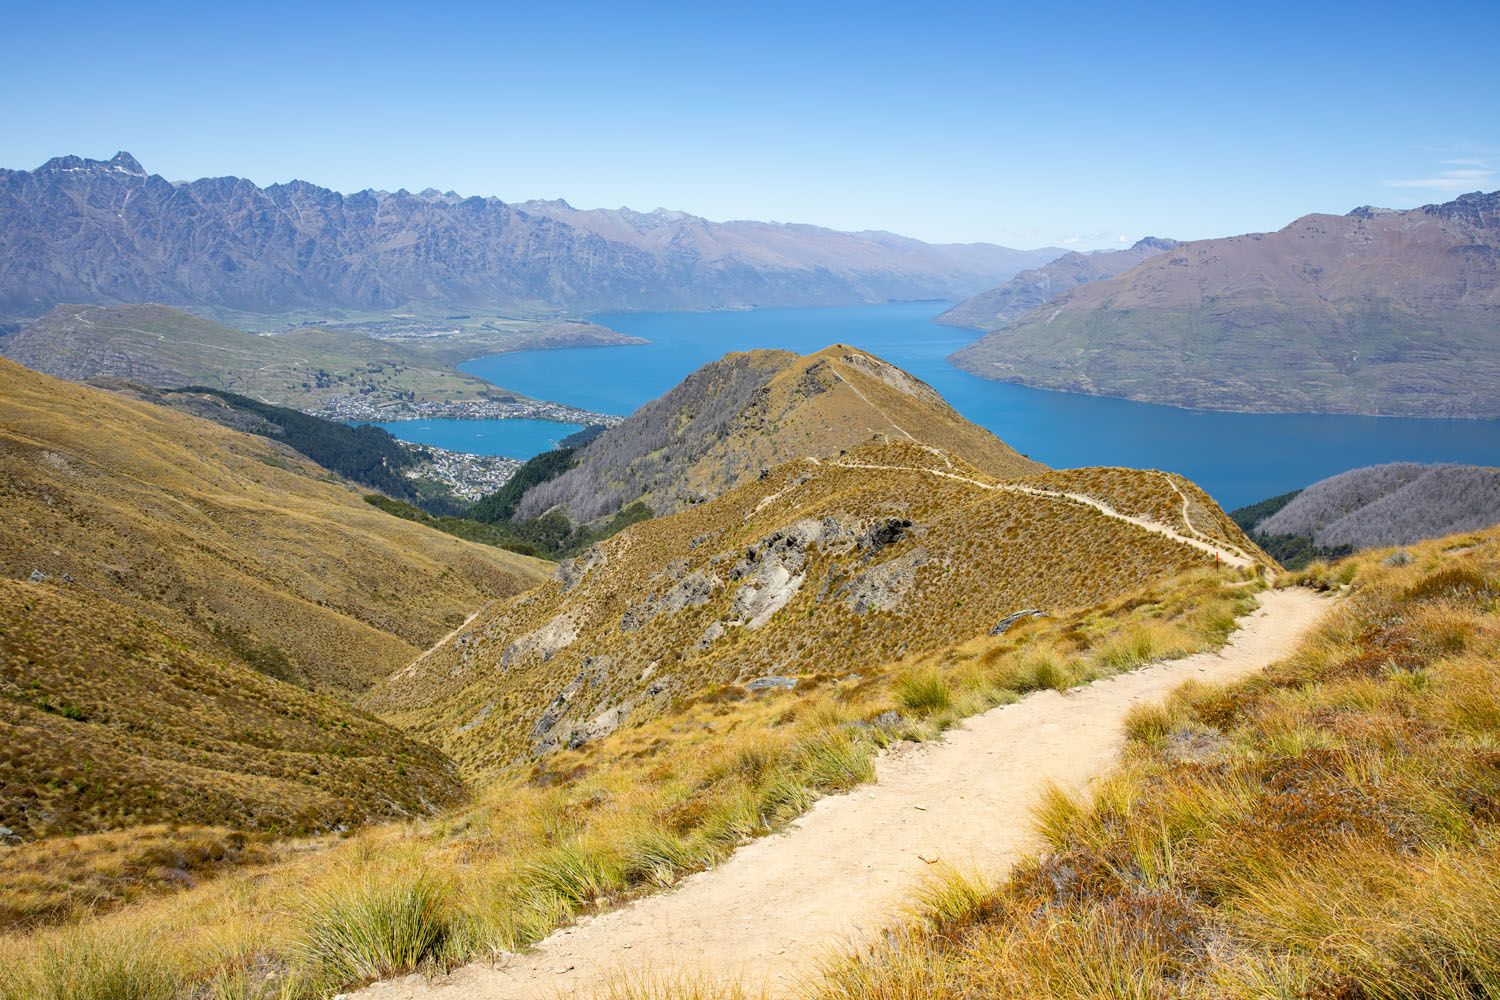
Soon enough, the trail levels off and you arrive at the saddle. Here you will be treated to your first view of the numerous mountain peaks on the other side of the saddle.
If this is your turnaround point then make sure to take in the view before heading back. If you are continuing onto the summit, then the views only continue to get better!
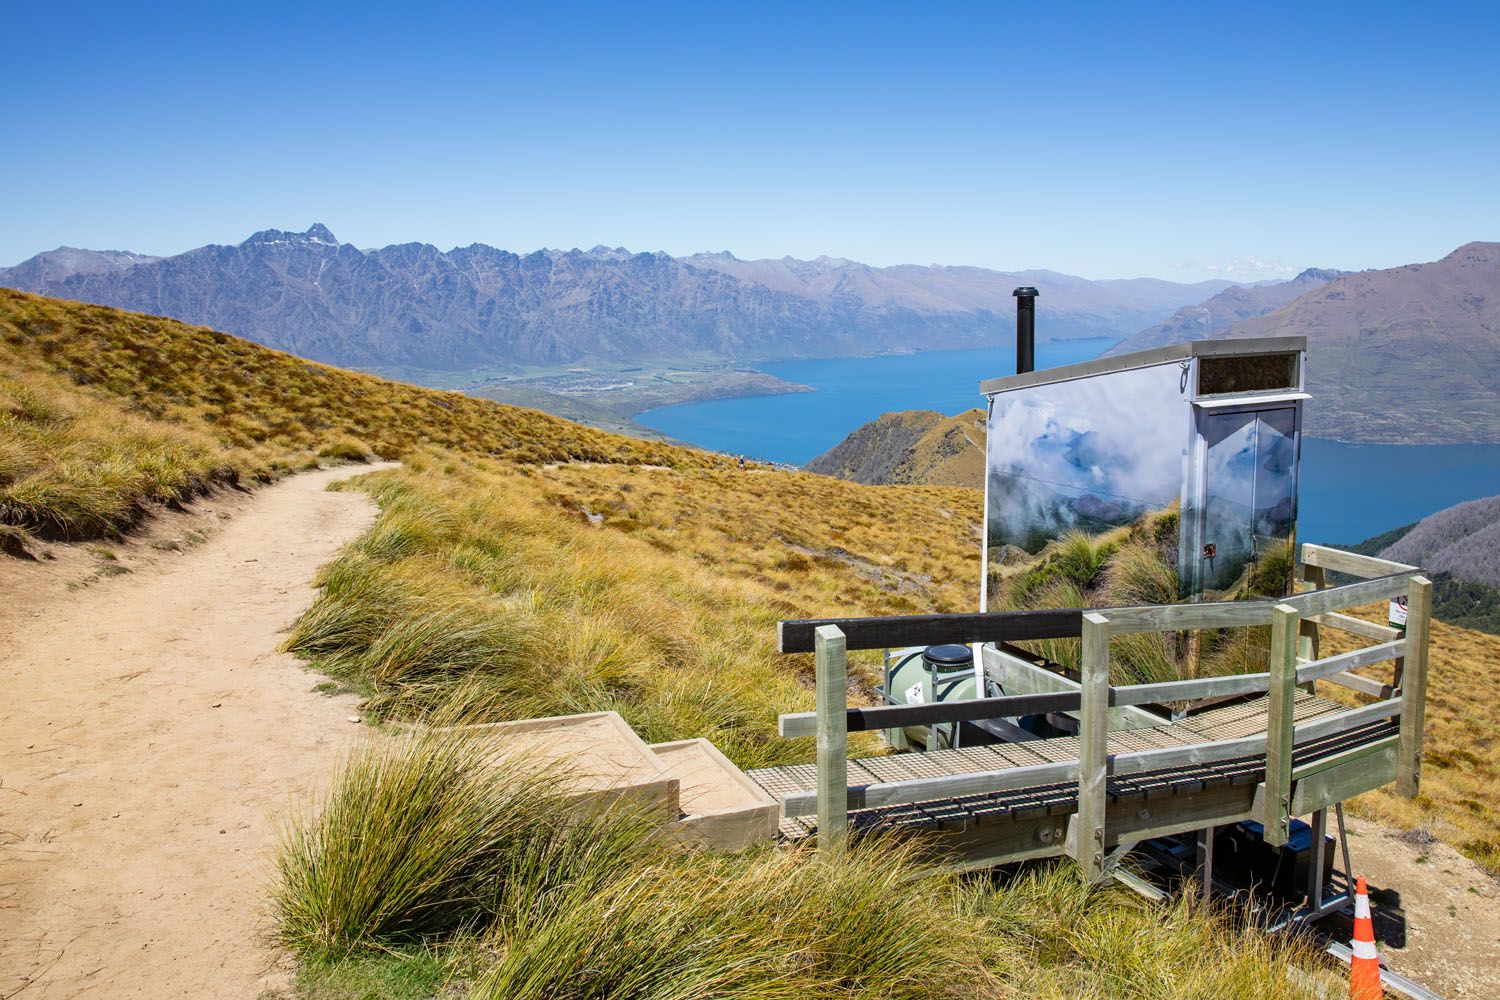
Good to Know: There is a small bathroom just before reaching the saddle. This is the only toilet along this trail, other than the bathrooms at the top gondola station.
Hiking to the Summit
As you start your climb up from the saddle to the summit, be ready for the trail to get more difficult. Not only will the ascent get steeper, but the trail will become narrower too. You’ll be hiking along a mix of rock and loose gravel, so watch your footing here, as you can easily slip.
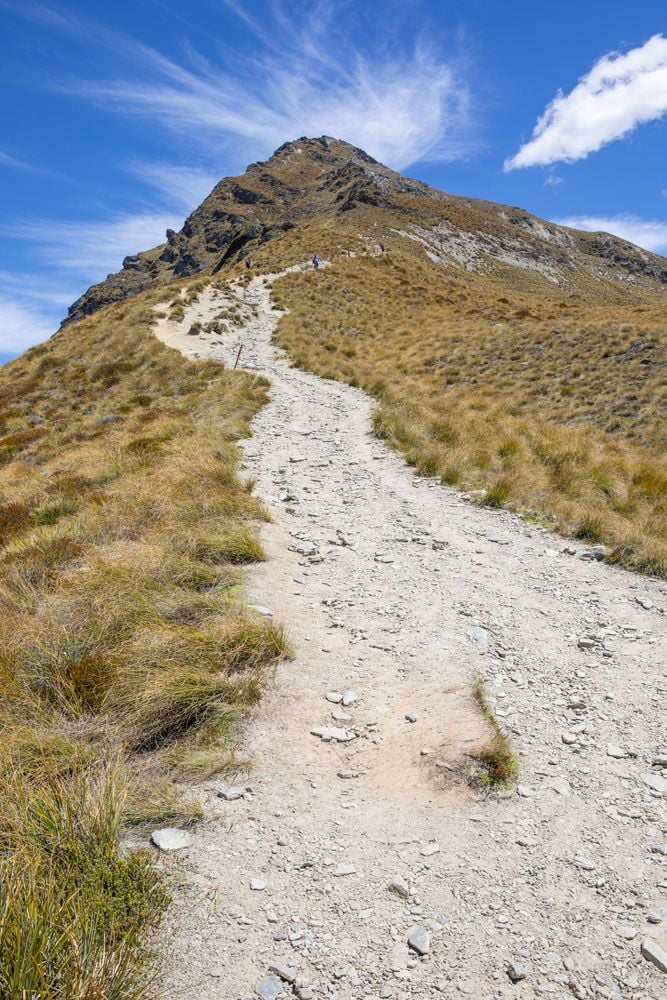
As you continue up, you will hit a section of short zigzags where the trail gets even steeper. This is a tough climb that’ll have you pausing to catch your breath, but the scenery is so beautiful that you won’t mind taking a quick break to look around. As you climb higher, the views will continue to open up. Make sure to snap some photos!
Just before the summit, the trail will level off. The hard part of the climb is over, and you are only a few minutes away from the top. More of the surrounding mountain range will continue to come into view.
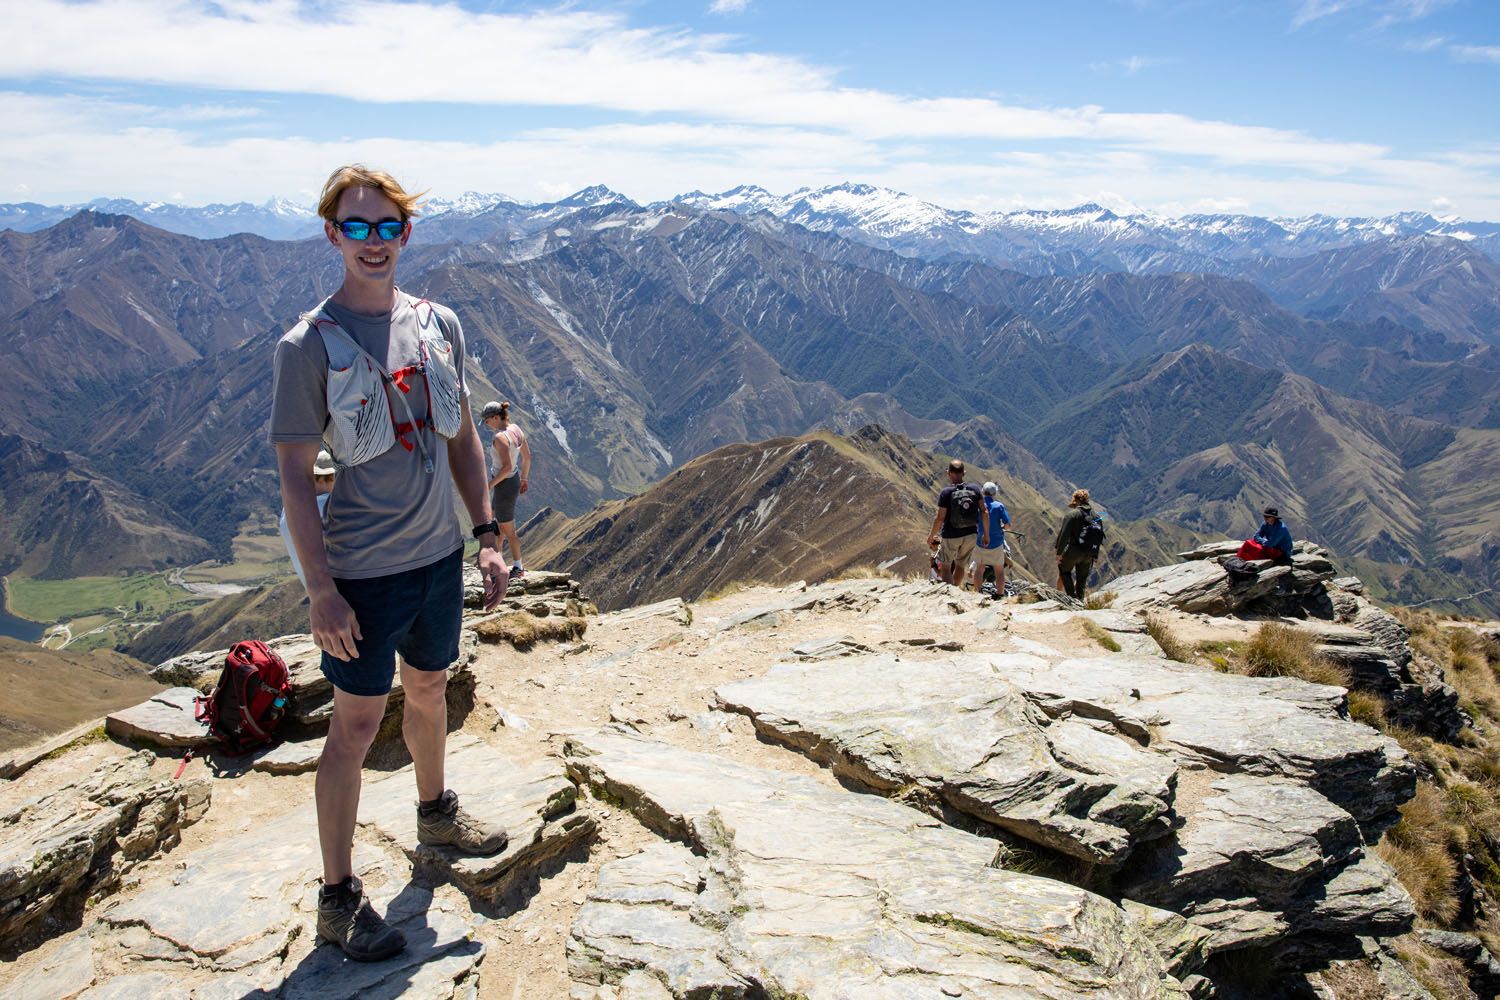
Once you reach the summit, enjoy the rewards of all your hard work. The 360° view from here is gorgeous and certainly the best view of the entire hike.
The Return Hike
This is an out and back hike, so whether you hiked to the Saddle or the Summit, just retrace your steps back down to the Queenstown Gondola. Once you reach the top gondola station be sure to walk out onto the outdoor viewing platform located next to the restaurant for a great view over Queenstown. You might also enjoy getting something to eat at the café or riding the luge.
And once you reach the bottom gondola station you might consider cooling off at the one of Queenstown’s ice bars. Take a look at our Best Things to Do in Queenstown article for more ideas ↓
What to Bring
We recommend packing water, nutrition, sunscreen, sunglasses, and a hat. It can be windy as you approach the saddle and as you continue to the summit, so a windbreaker is also a good idea. We also recommend wearing shoes with a good grip that can get dirty, such as hiking shoes.
Make sure to check the weather beforehand. Most people were wearing shorts and a t-shirt when we hiked in December (New Zealand’s summer). We were wearing hiking pants and wished we had a pair of shorts instead.
Essential Hiking Gear: What Should You Bring on a Day Hike?
If you are new to hiking or are curious about what you should bring on a hike, check out our Hiking Gear Guide. Find out what we carry in our day packs and what we wear on the trails.If you have any questions about how to hike the Ben Lomond Track, let us know in the comment section below.
More Information for Your Trip to New Zealand
Queenstown Bucket List: 25 Epic Things to Do in Queenstown
Pinterest Facebook Flipboard Discover the best things to do in Queenstown, from adrenaline-pumping activities like bungy jumping, jet boat rides, and paragliding, to top hiking trails, viewpoints, scenic drives, and more relaxed experiences such as hot springs and wine tastings. Queenstown is one of the best places in New Zealand to engage in heart-racing, thrilling […]
Queenstown Hill Walkway: A Step-By-Step Hiking Guide
The Queenstown Hill Walkway is the ideal hike for those looking to get great views over Queenstown without having to summit one of the looming nearby mountain peaks. Located in the heart of town, it’s an easy hike that is perfect for a morning or afternoon outing. Plus, with its popularity, you will see plenty […]
New Zealand Travel Guide | How to Plan a Trip to New Zealand
New Zealand Travel Guide New Zealand is one of our favorite countries in the world. Why? Because New Zealand has the perfect mix of breathtaking landscapes, adventure activities, beautiful cities, wine regions, stunning beaches, amazing drives, and gourmet food. This is the land of fiords, hiking trails, bungy jumping, sheep, glowworms, and glaciers. Lord of […]
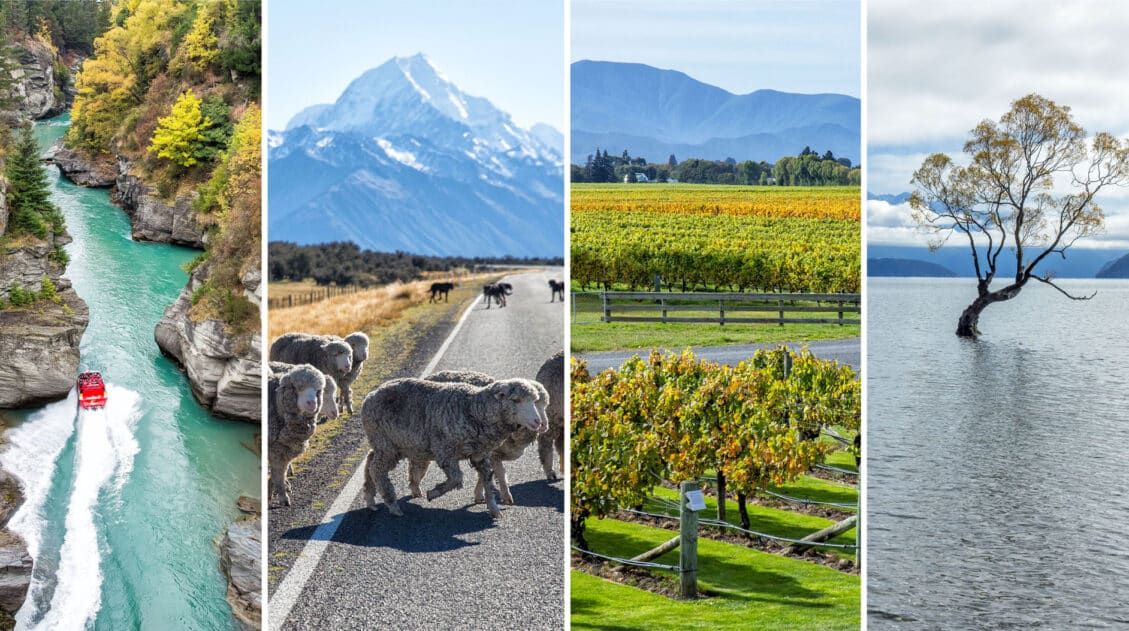
40 EPIC Things to Do on the South Island of New Zealand
Discover 40 amazing things to do on the South Island of New Zealand, from cruising Milford Sound to wine tasting and hiking the famous Roy’s Peak Track. Plan to spend at least one week on the South Island to see its highlights; three weeks is ideal for the full experience. The South Island of New […]

Diamond Lake & Rocky Mountain Track: Best Routes, Map & Trail Stats
The Diamond Lake and Rocky Mountain Track is a 7.3 km (4.5-mile) moderate trail with 520 meters of ascent, offering views of Diamond Lake and Lake Wanaka. There are several routes and in this guide, we cover which one is best, based on your time, interests, and hiking ability. A visit to New Zealand would be […]
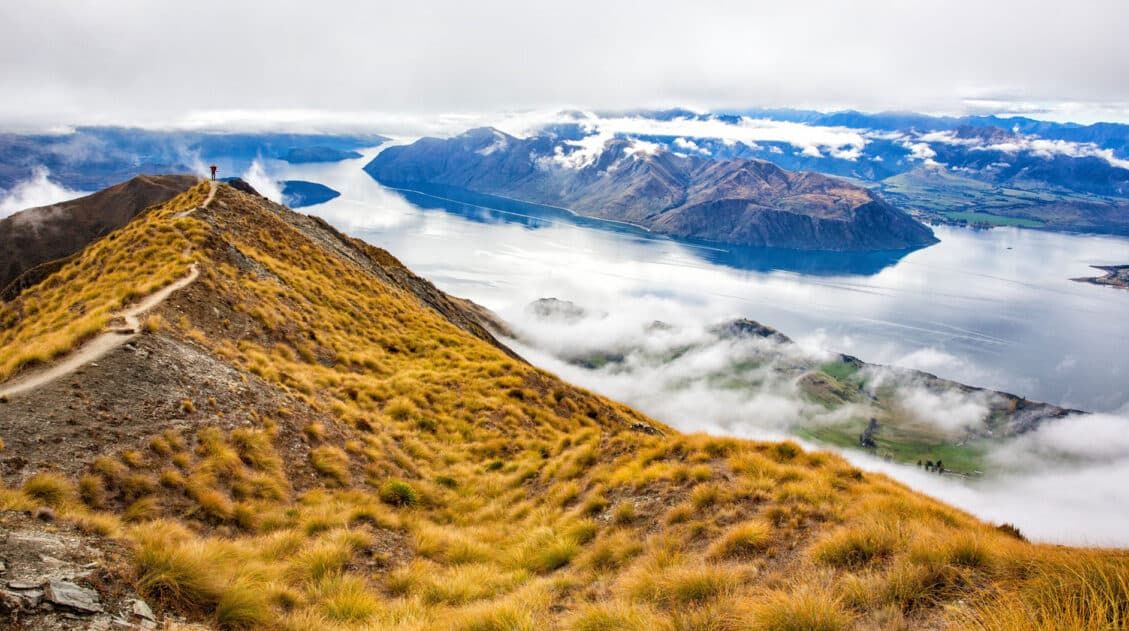
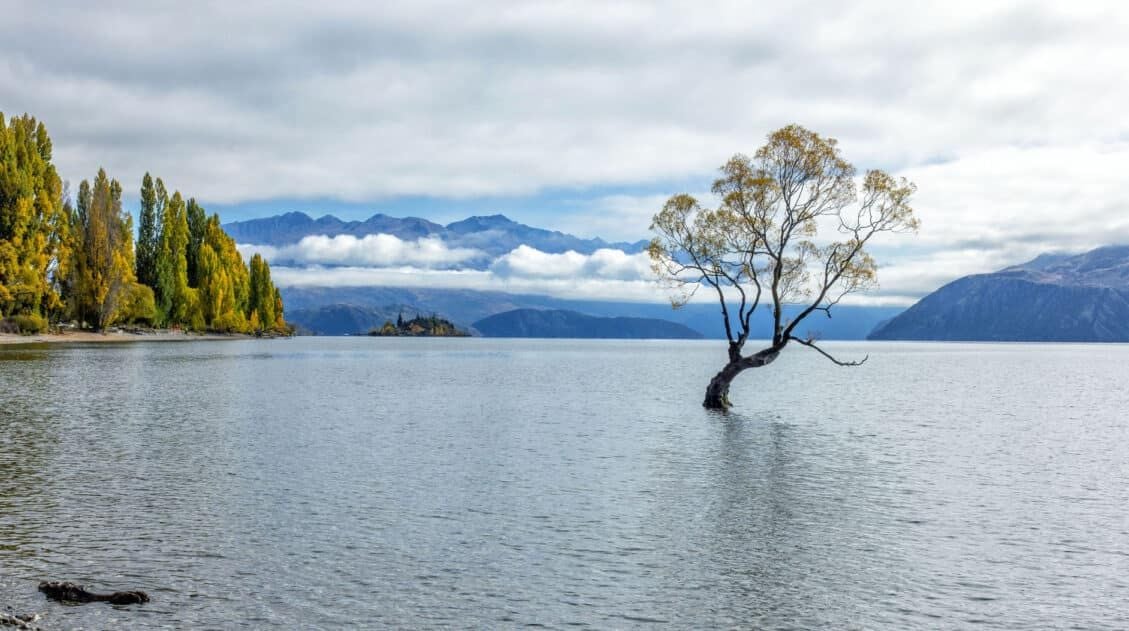
Roys Peak Track: Stats, Photos, Hiking with Kids
The Roys Peak Track is a 16 km (10 mile) strenuous, out-and-back hike to a stunning viewpoint over Wanaka and Lake Wanaka. Here’s how to do it. Roys Peak Track is one of the best hikes to do on the South Island of New Zealand. Located in Wanaka, this trail takes you high into the […]
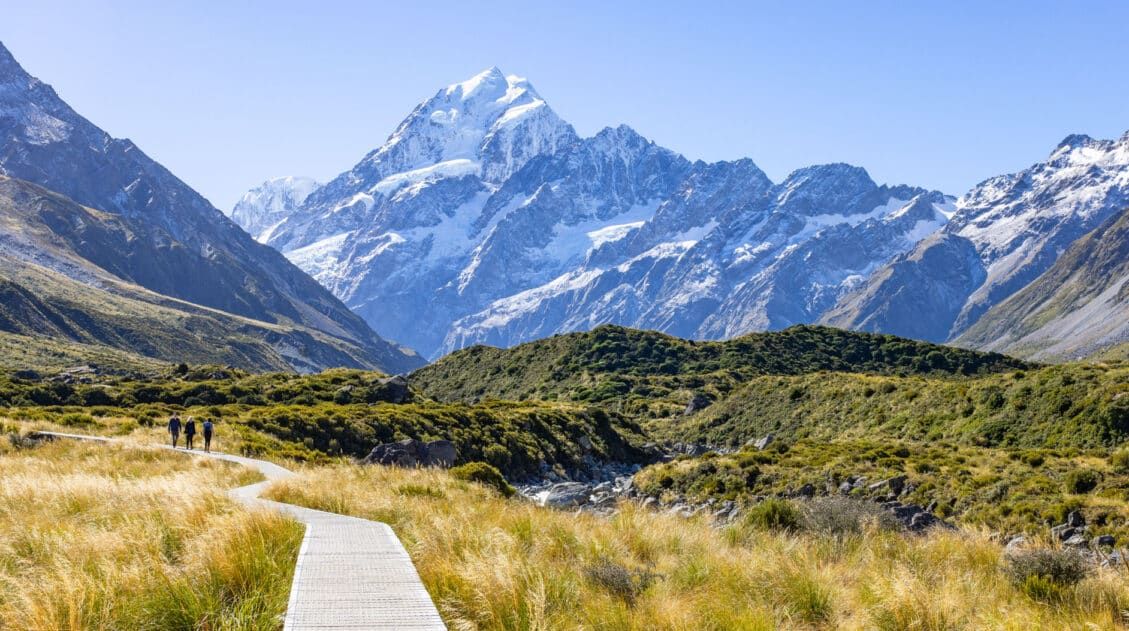
15 Amazing Things to Do in Aoraki / Mount Cook National Park
Discover the very best things to do in Aoraki/Mount Cook National Park, from its top hiking trails to its best viewpoints. We’ll also cover where to stay, the best time to visit, and how to plan your time. Aoraki / Mount Cook is the tallest mountain in New Zealand. Getting a glimpse of this mighty […]
20 Epic Things to Do in Wanaka, New Zealand
Discover the best things to do in Wanaka, from top hikes like Roy’s Peak and Diamond Lake to unique activities such as lavender farms, via ferratas, and enjoying freshly baked cookies at Cinema Paradiso. See the highlights in one busy day, but stay longer to experience all that Wanaka has to offer. Wanaka is one […]
Two Week South Island Itinerary: 3 Road Trip Routes
We have visited New Zealand three times, and in this guide, we provide three different ways to plan a two-week South Island itinerary. There’s a lot to see and do on the South Island, and this guide gives you the opportunity to pick the road trip that best fits your interests. Two of these itineraries […]
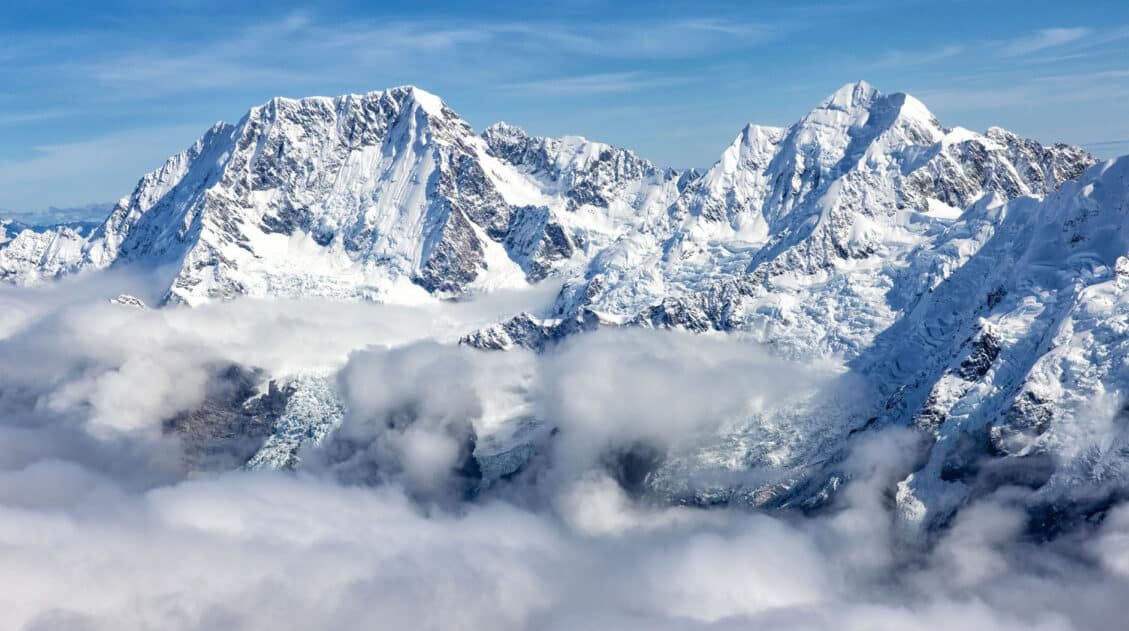
Fox Glacier & Franz Josef Helicopter Tours: Photos, Tips & What to Expect
A helicopter flight over the Franz Josef and Fox Glaciers is a thrilling experience. To see this land of glacier-capped mountains, rainforests, and rugged coastlines is one of the best experiences to have in Glacier Country, if not all of New Zealand. On a helicopter tour from Franz Josef or Fox Glacier, you will fly […]
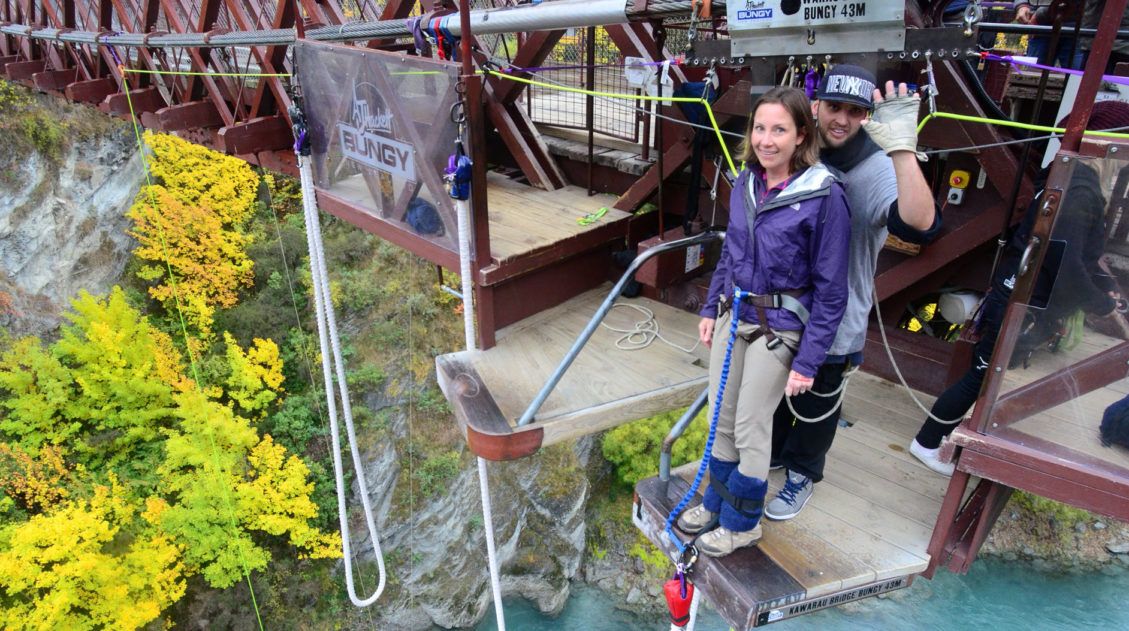
A Tale of Four Bungy Jumps
Prior to our trip around the world, we would never have gone bungy jumping. That’s just for crazy people, right?! But as we passed bungy jump locations around the world, the idea grew on us. Once in Queenstown, the birthplace of bungy jumping, the idea didn’t sound so crazy anymore. How could we circle this […]
Exactly How to Hike the Routeburn Track in One Day
The iconic Routeburn Track is a 33 km (20 mile) alpine track on New Zealand’s South Island runs from The Divide in Fiordland National Park to Routeburn Shelter in Mount Aspiring National Park. It is typically done as a 2 to 3 day trek, but if you’re fit and fast, you can do it in […]
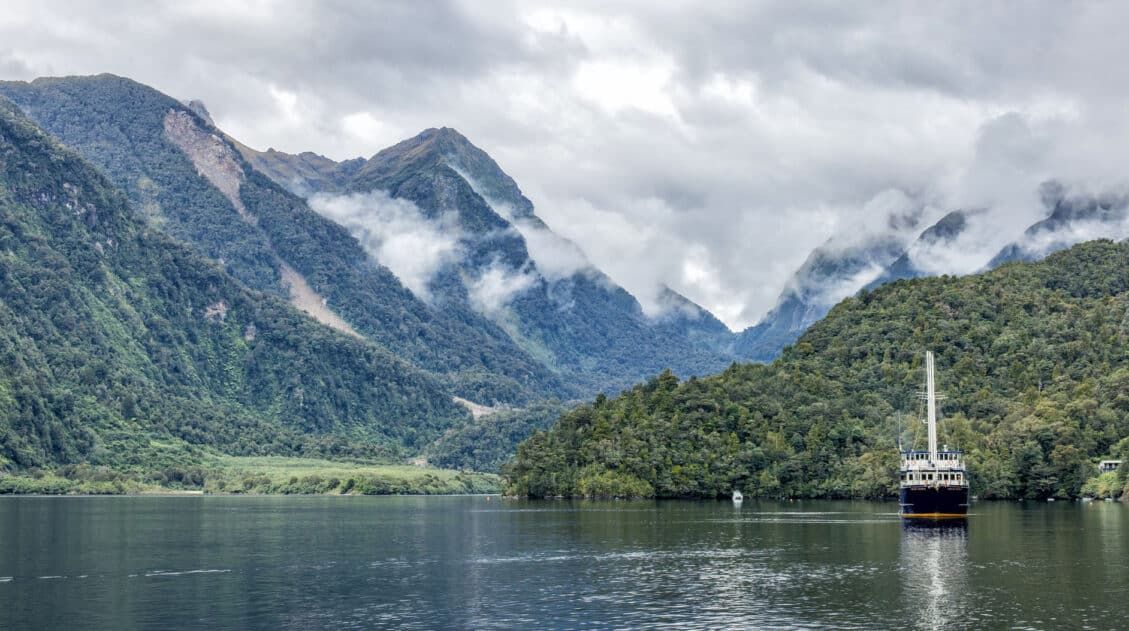
Doubtful Sound Day Trip Itinerary: What to Expect, Photos & Map
In this guide, we cover what to expect on a Doubtful Sound day trip, including photos, a map, tour options, tips to have the best experience, and whether or not it is worth it. Doubtful Sound is a fiord in southwest New Zealand. It’s a neighbor of the more popular Milford Sound. A visit to […]

Leave a Comment