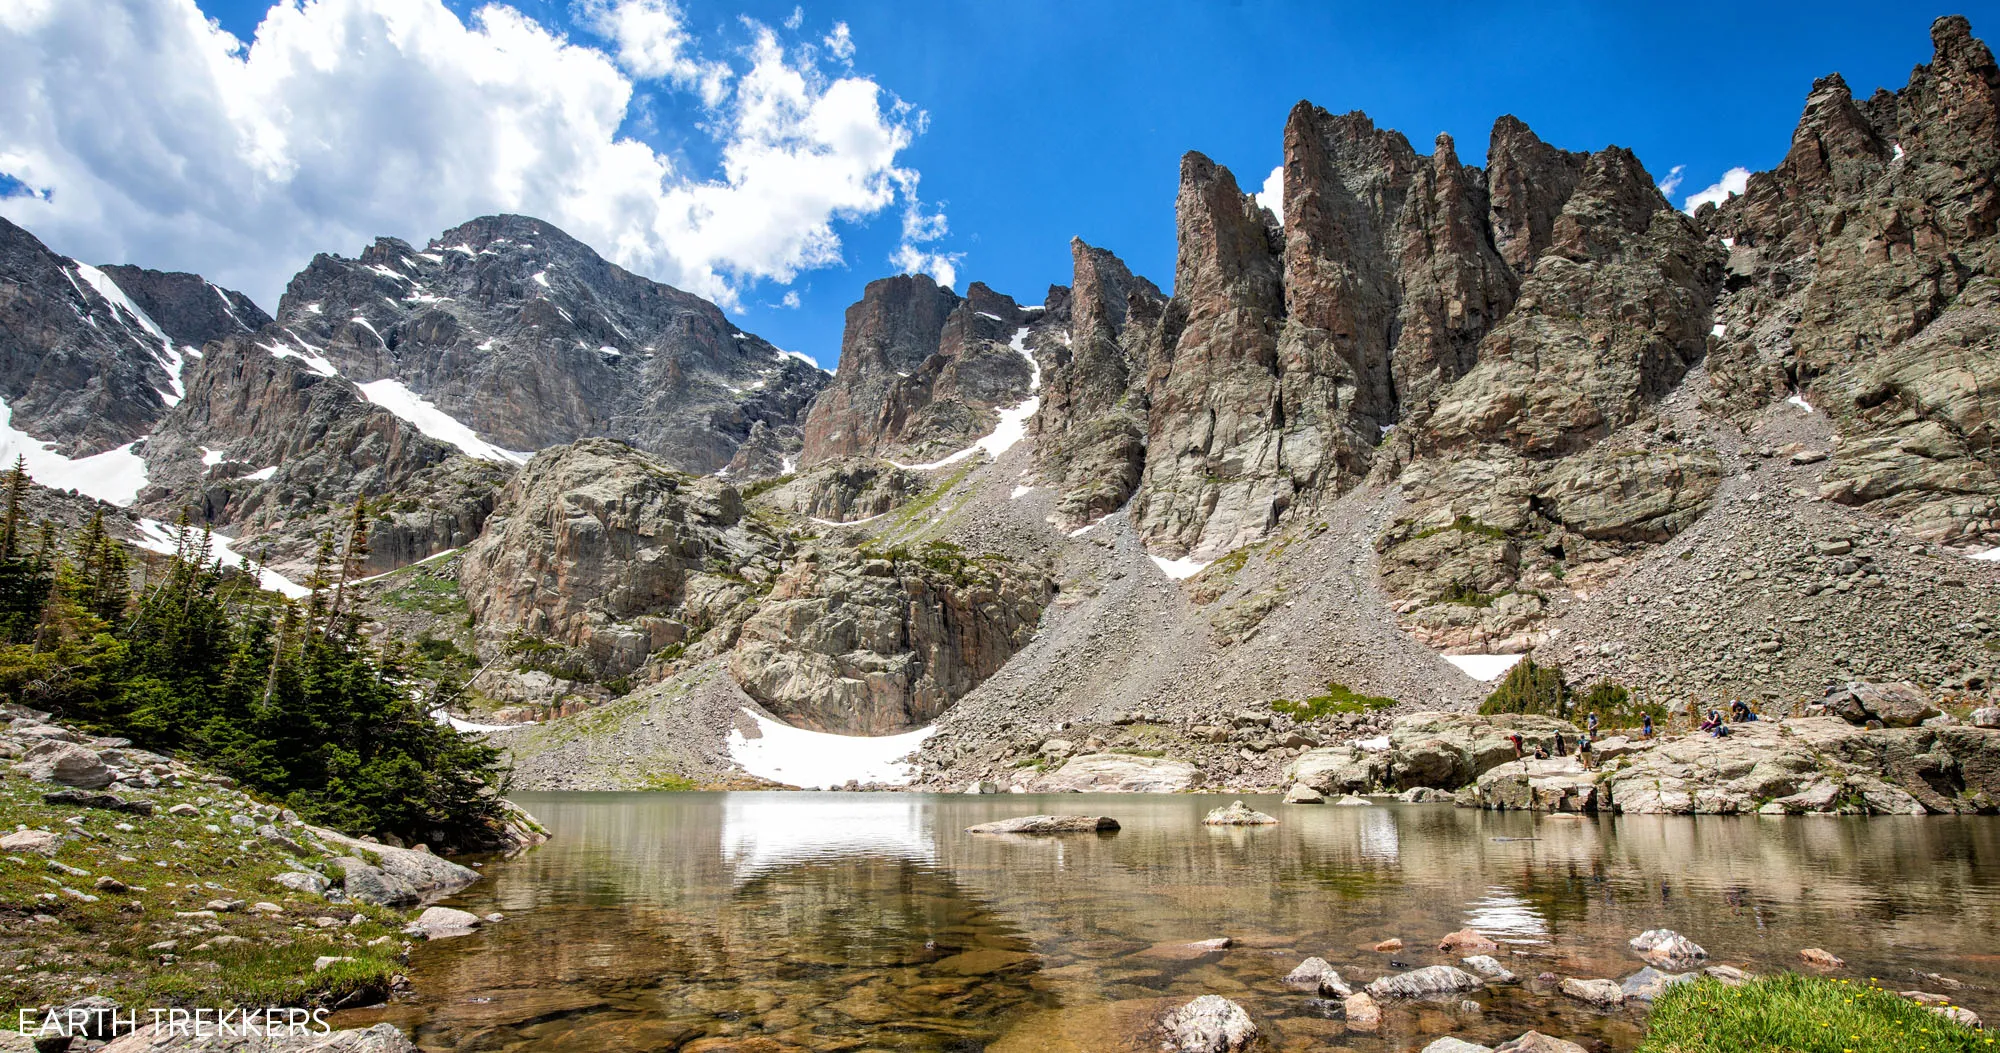
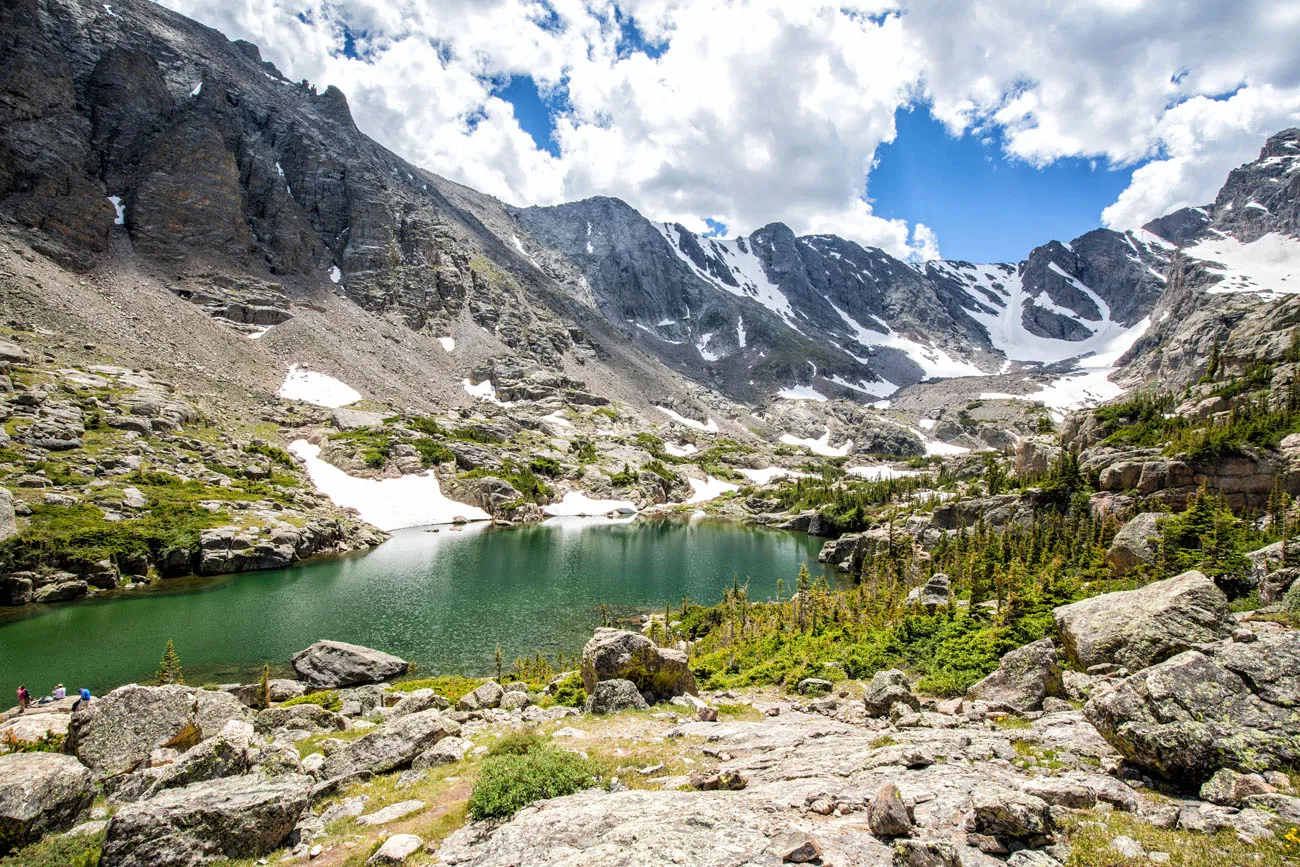
Sky Pond is one of the best hikes in Rocky Mountain National Park for good reason. This hike has a little bit of everything…waterfalls, alpine lakes, high mountain views, and fun river and stream crossings. To get to Sky Pond, you will rock scramble up a waterfall, which can be refreshing when the weather is warm and downright cold in chilly conditions. But the whole reason to do this hike is for the view of Sky Pond, one of the most spectacular lakes in the park.
There is never a boring moment on this trail. The everchanging views and trail conditions really keep this hike interesting. Yes, it is on the long side and it can be challenging, but you get a great pay-off at the end, with the view of Sky Pond.
If you are looking for a spectacular day hike in Rocky Mountain National Park, Sky Pond should go at or near the top of your list.
About Our Experience
We hiked this trail twice. Or, I should say, Tim hiked this trail twice.
We loved this hike, despite less than ideal conditions the first day we did it. The four of us hiked to Sky Pond on June 30. The weather forecast was for clear skies but chilly temperatures (a high of 65 degrees in Estes Park). What we got was a very cold morning (morning temps were in the 40’s in Estes Park) and snow showers once we got past Loch Lake.
Snow clouds hid the dramatic peaks that surround Sky Pond. Less than 30 minutes after our visit to the lake, the clouds descended farther, visibility plummeted, and snow began to fall. We half hiked, half jogged down to lower ground. The snow stopped by the time we got back to Loch Vale.
Tim hiked to Sky Pond solo a few days later. Weather conditions were much different. It reached 80°F in Estes Park with bright blue skies with a few puffy white clouds. The weather can be dramatically different day to day, even during the summer.
Sky Pond Hiking Stats
Distance: 9.5 miles out-and-back
Starting Elevation: 9,240 feet (at Glacier Gorge Trailhead)
Highest Elevation: 10,880 feet (at Sky Pond)
Elevation Gain (trailhead to Sky Pond): 1,640 feet
Total Elevation Gain: 2,125 feet
Difficulty: Strenuous
Length of Time: 4 to 6 hours
When to Go: The best time to do this hike is from June through September, when the trail is free of snow. Snow can linger on trail into July. Get updates on trail conditions on the National Park Service website.
Permit: You will need a Timed Entry + Bear Lake Road permit (a permit that includes Bear Lake Road) to do this hike between the end of May and early October.
These hiking stats are starting from Glacier Gorge Trailhead. Parking at the large lot at the end of Bear Lake Road adds approximately 0.4 miles to the hike (round trip).
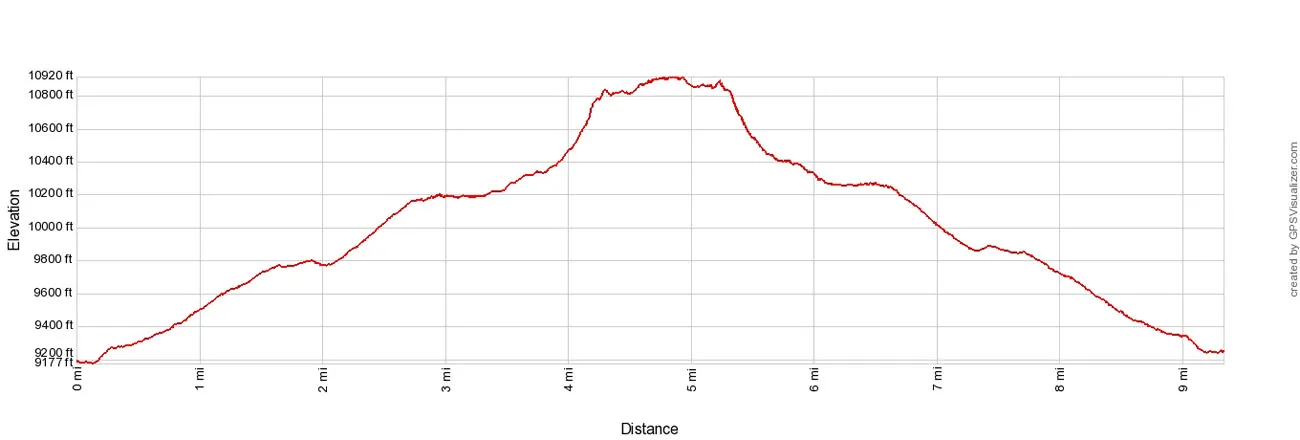
Sky Pond Elevation Profile
Please practice the seven principles of Leave No Trace: plan ahead, stay on the trail, pack out what you bring to the hiking trail, leave areas as you found them, minimize campfire impacts, be considerate of other hikers, and do not approach or feed wildlife.
How to Hike to Sky Pond
Step-By-Step Trail Guide
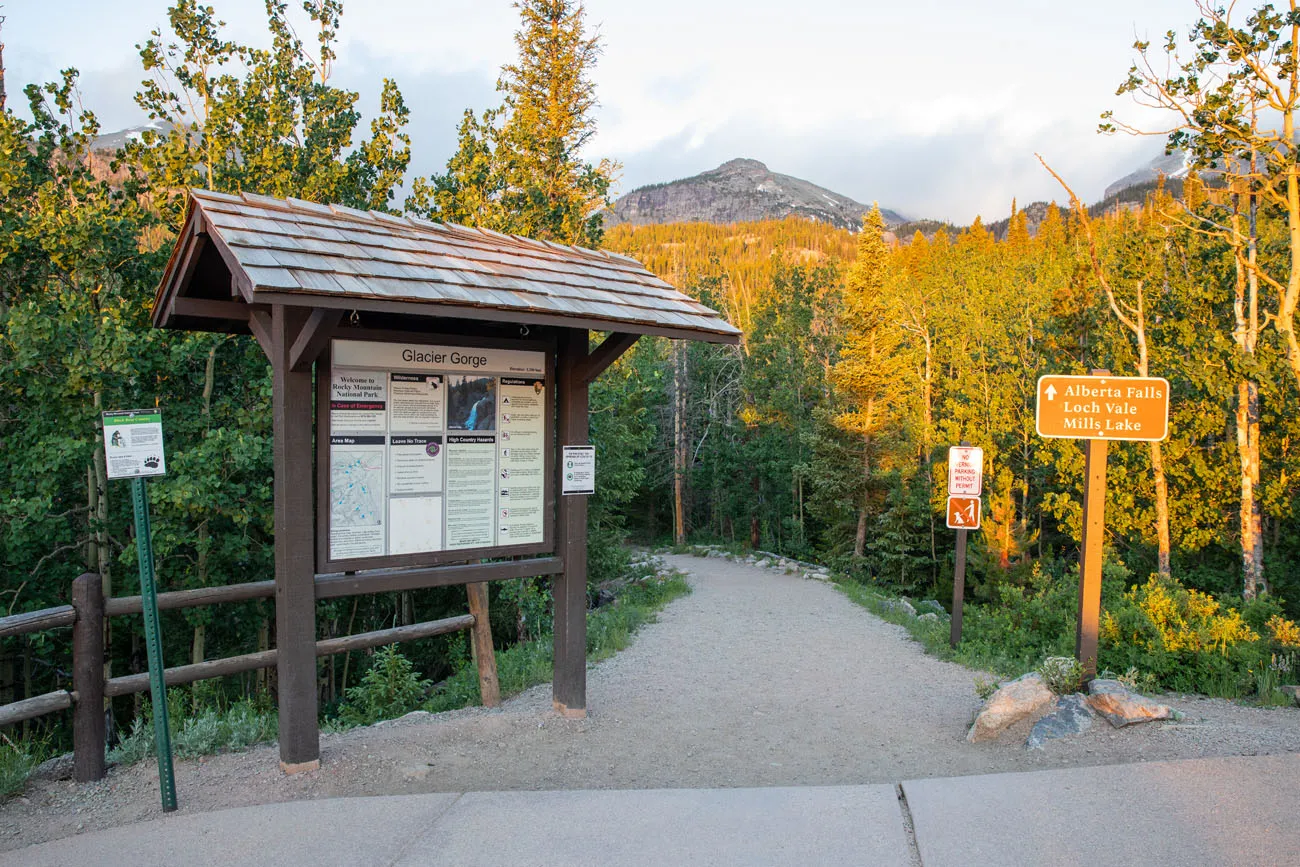
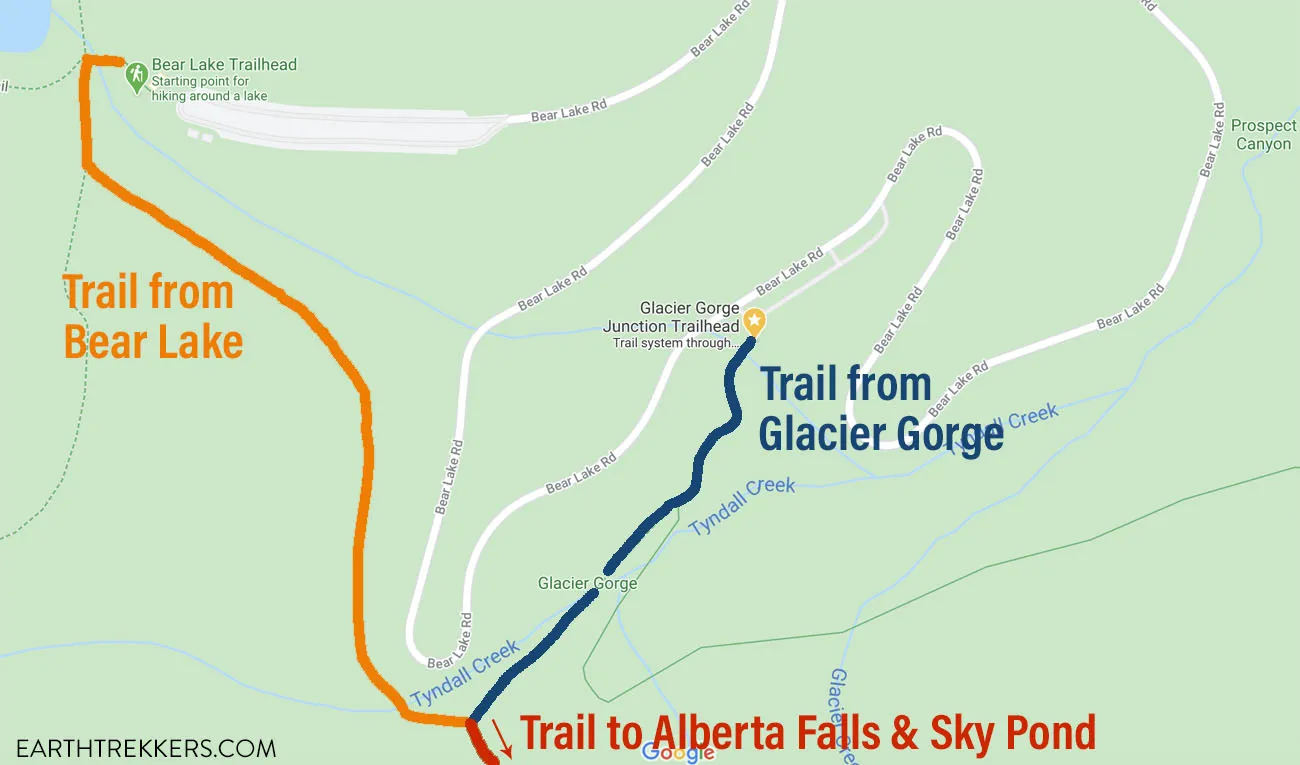
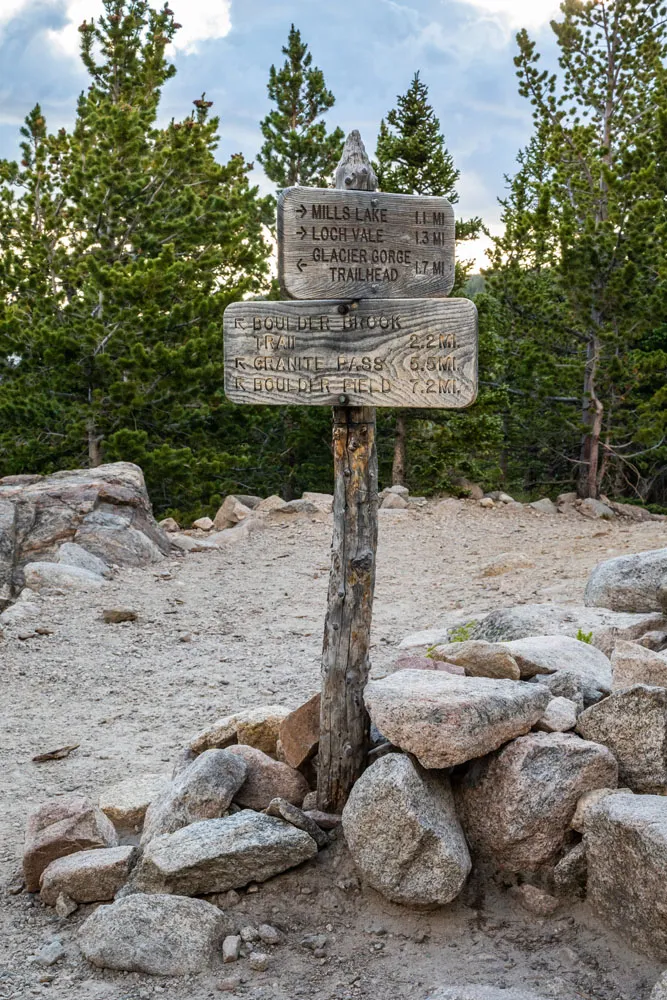
Parking/The Trailhead
The hike to Sky Pond starts near Bear Lake. To get to the trailhead, you will drive Bear Lake Road almost to the very end.
You can take one of two trailheads to reach Sky Pond.
The Glacier Gorge Junction Trailhead is the ideal place to start this hike, since the distance will be the shortest. However, the parking lot is small and you have to arrive very early in the morning to get a space. We arrived at 5:45 am and we were able to get a space, but the parking lot was filling fast. I wouldn’t be surprised if the parking lot was completely filled by 6 am. And this was at the end of June 2020, when RMNP was operating at 60% capacity for Covid-19.
Your second option is to park at the enormous parking lot at the very end of Bear Lake Road. Get here no later than 8:00 am if you want a space. Take Bear Lake Trailhead and follow signs for Alberta Falls.
To get to the trail to Alberta Falls and Sky Pond, it is a 0.3-mile walk from the Glacier Gorge Trailhead and a 0.5-mile walk from the Bear Lake Trailhead. If you can only get parking at the large lot at the end of Bear Lake Road, it only adds 0.4 miles round trip to the hike.
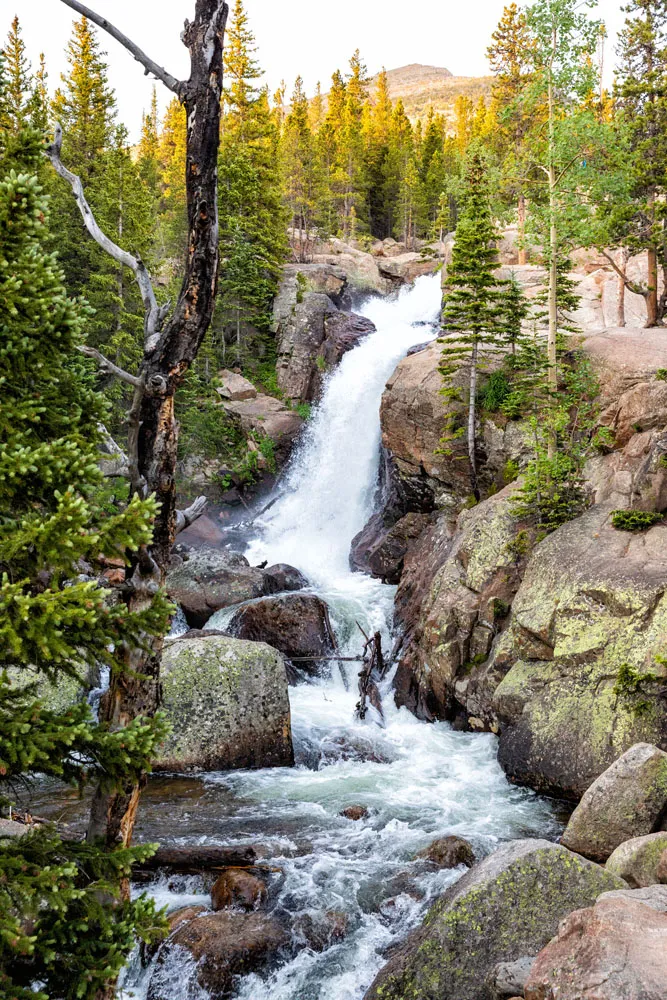
Alberta Falls
Once on the trail, follow the signs to Alberta Falls and Sky Pond.
About ¾ of a mile into the hike you will reach Alberta Falls, one of the most spectacular waterfalls in the park. You can either see the waterfall from the viewpoint or walk along the edge of the river on the giant boulders for a closer view.
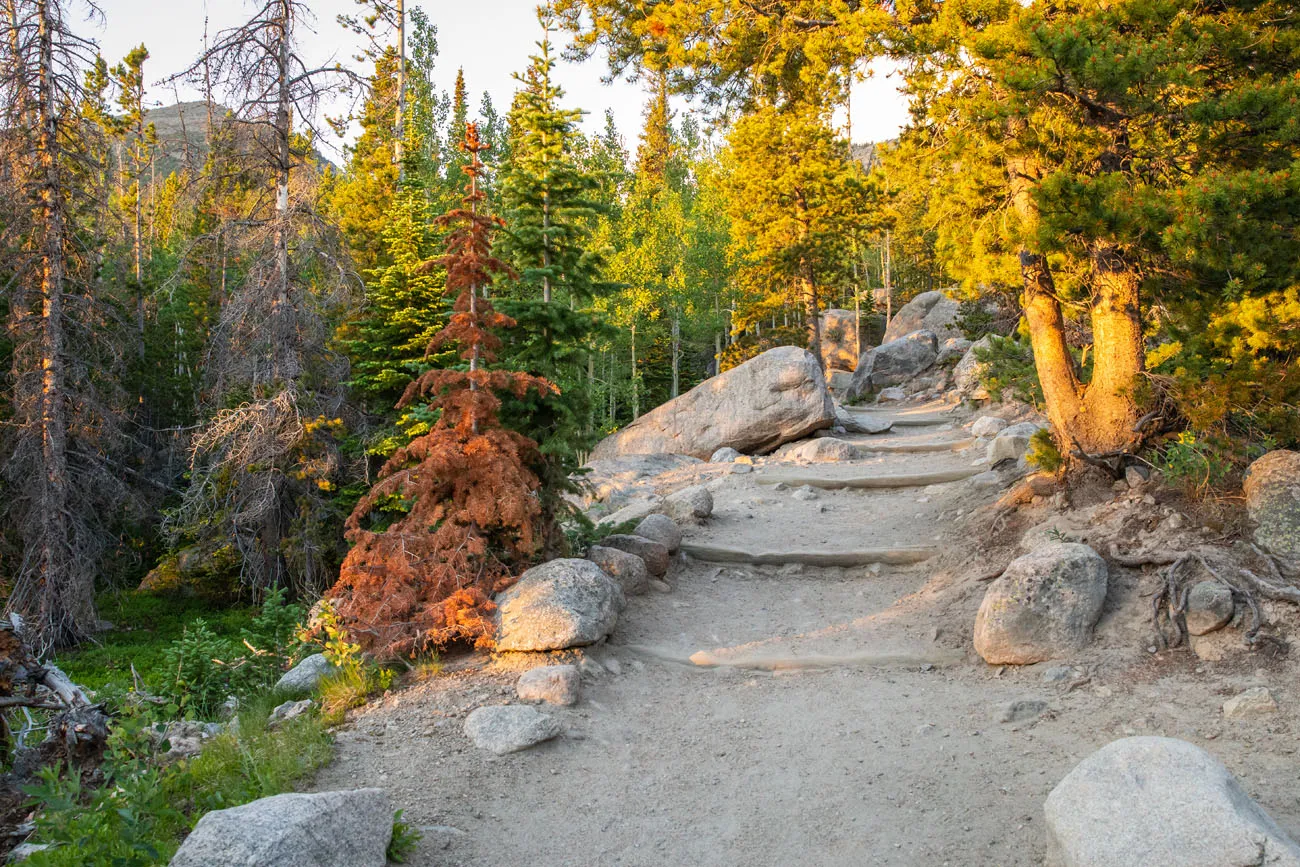
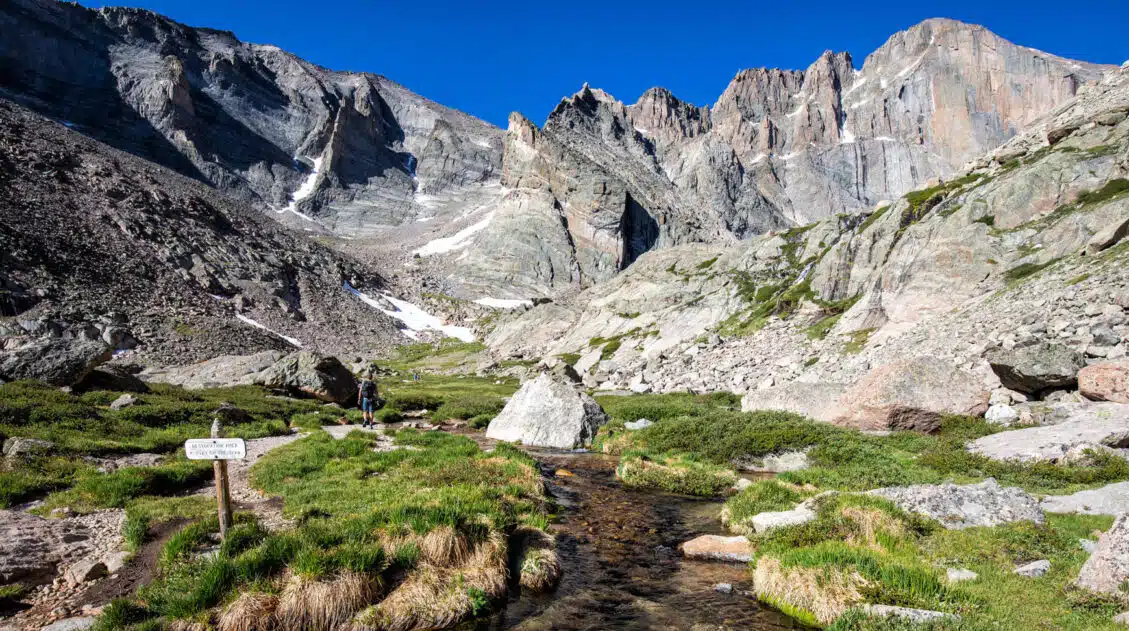
Loch Vale
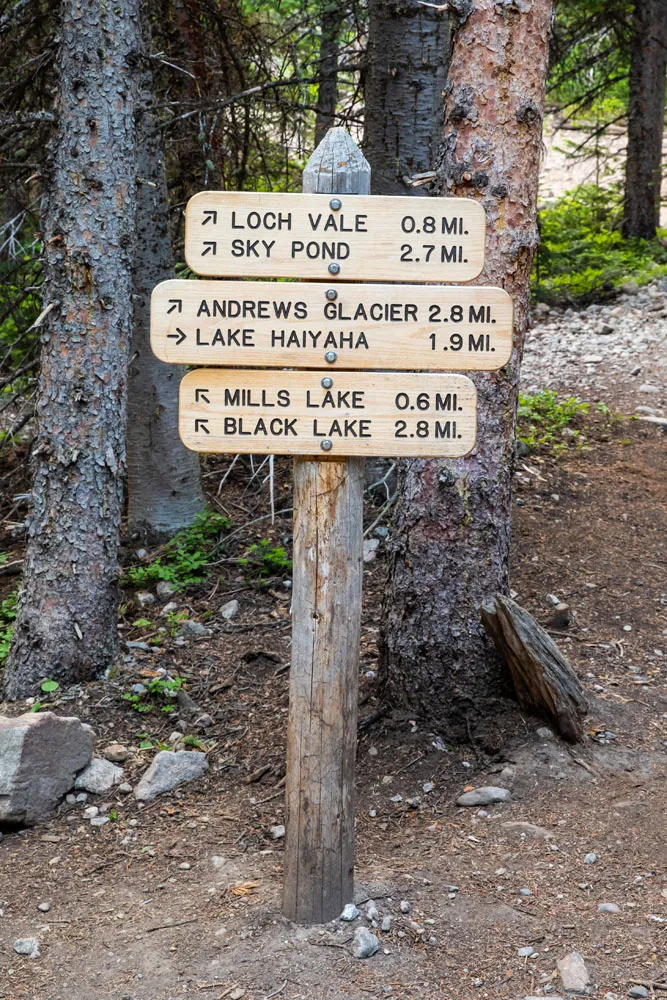
Past Alberta Falls, the trail slowly and steadily gains elevation. At 1.4 miles, you will come to a fork in the trail. Stay to the right to continue on to Loch Vale and Mills Lake (the trail to the left leads to Longs Peak, the highest point in the park).
About a half mile later, you will reach the Loch and Mills Lake Junction. Stay to the right to continue to Sky Pond.
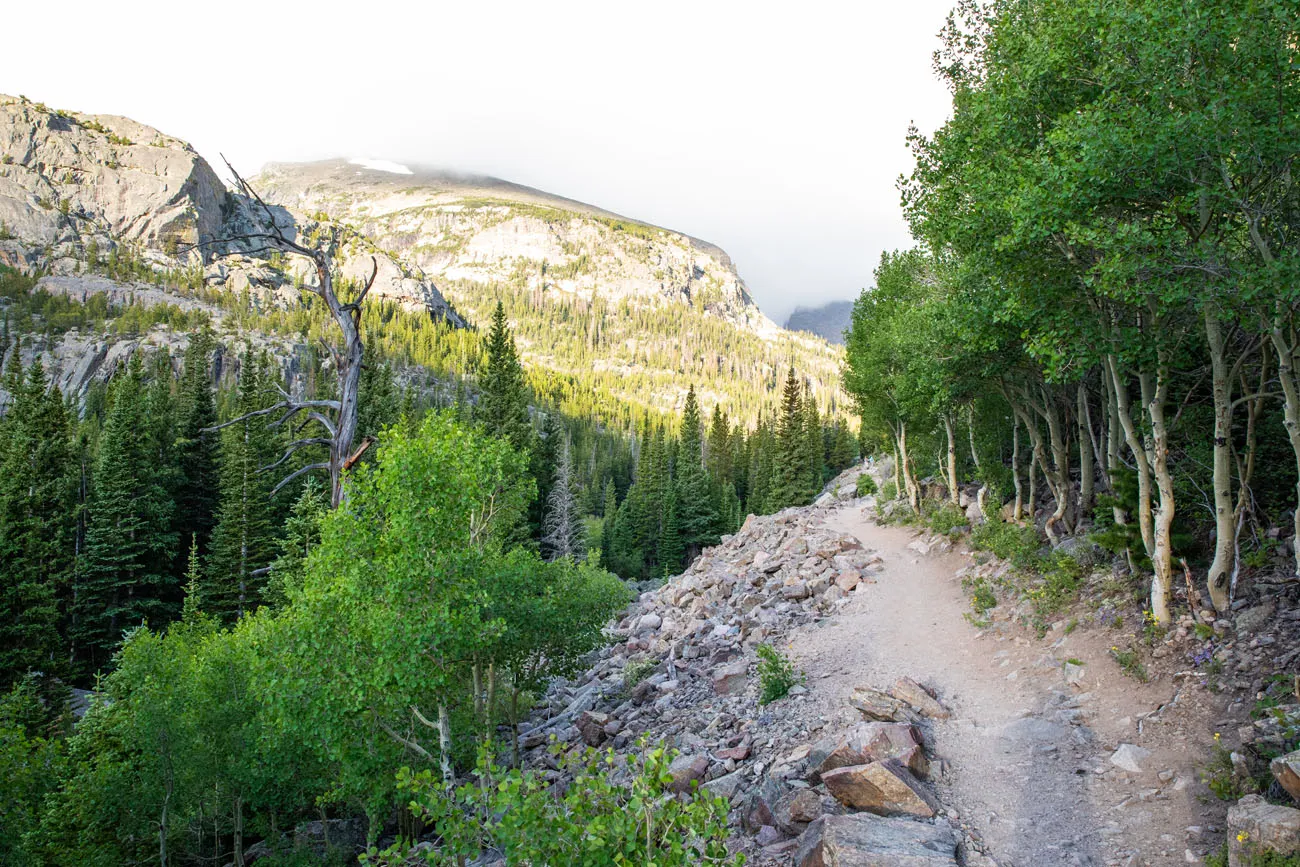
The trail runs alongside Icy Brook. You will reach a viewpoint of a waterfall and then the trail briefly but rapidly gains elevation as you hike a series of switchbacks.
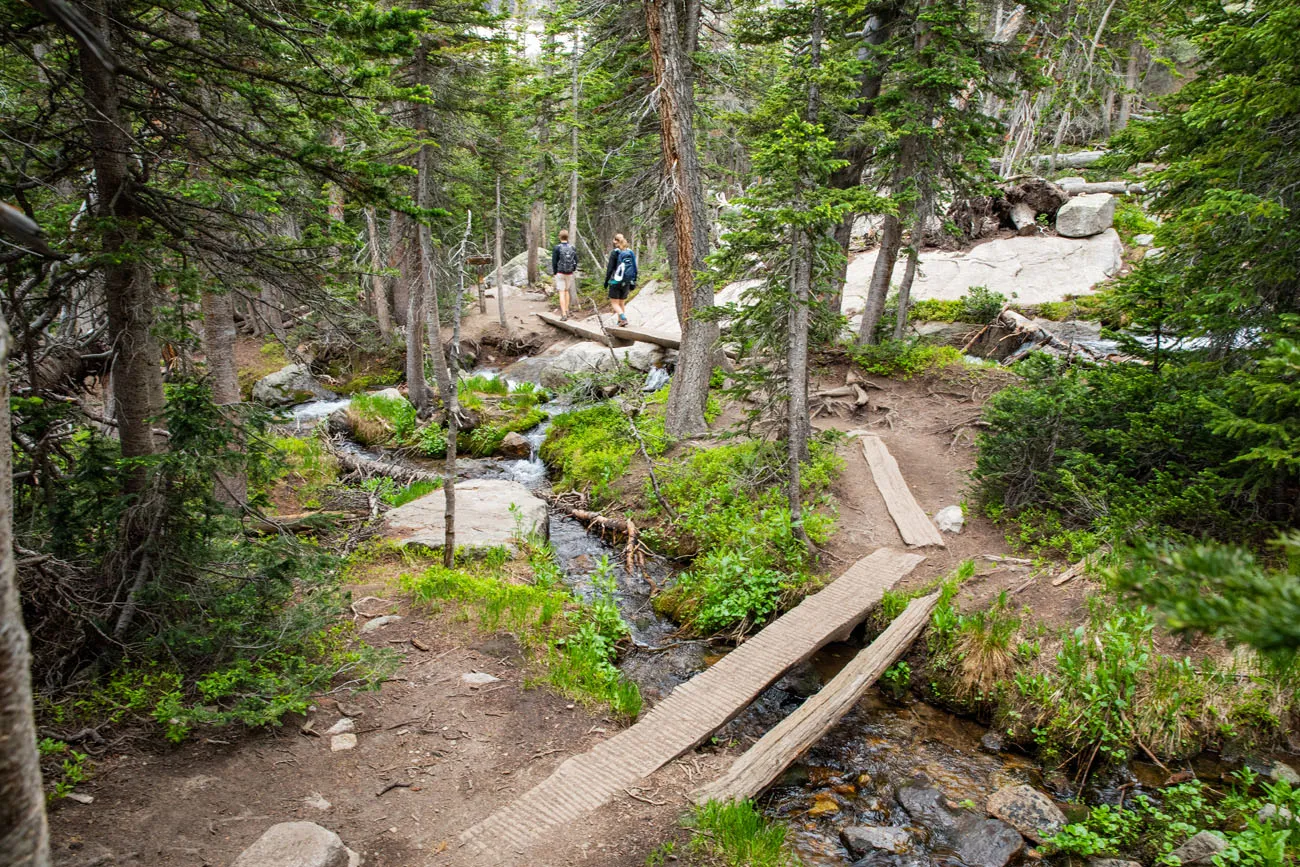
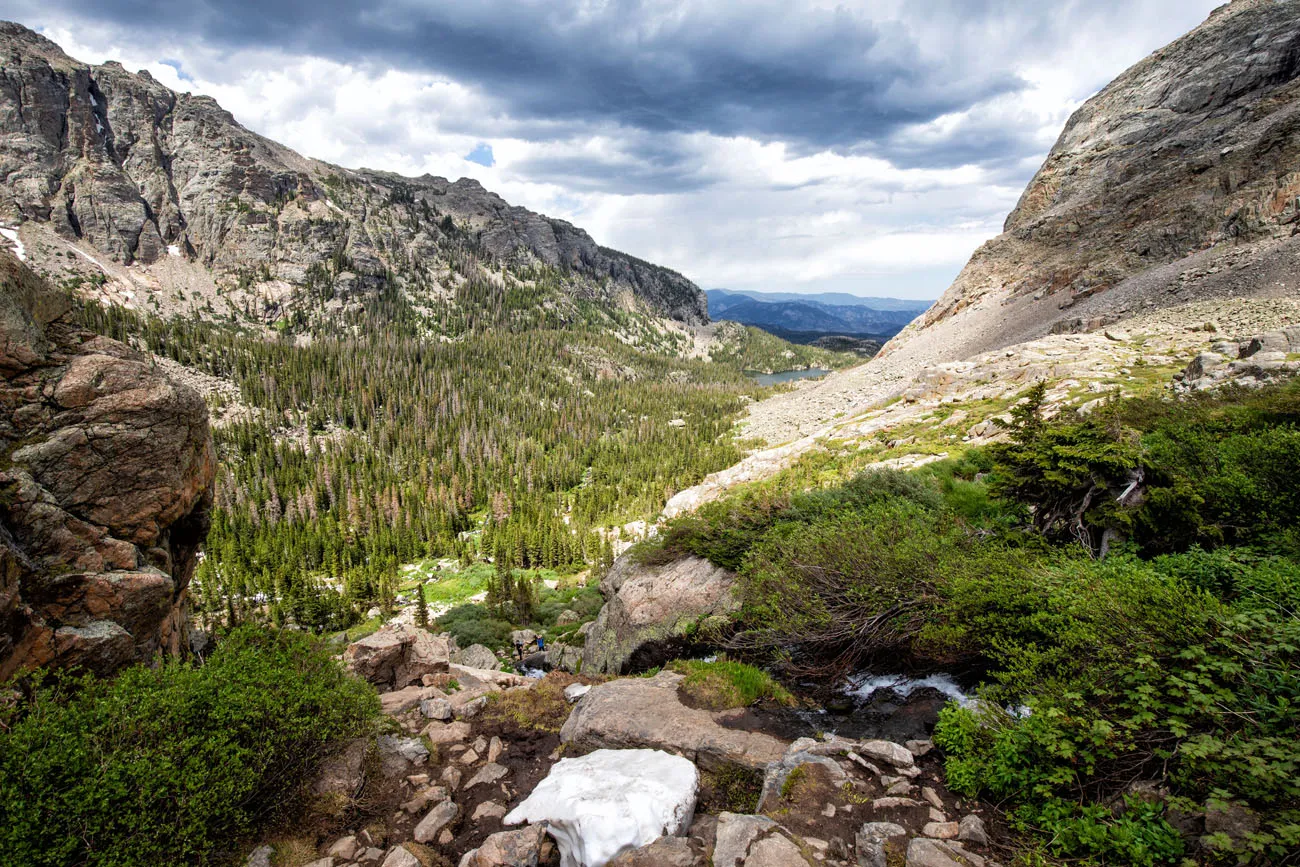
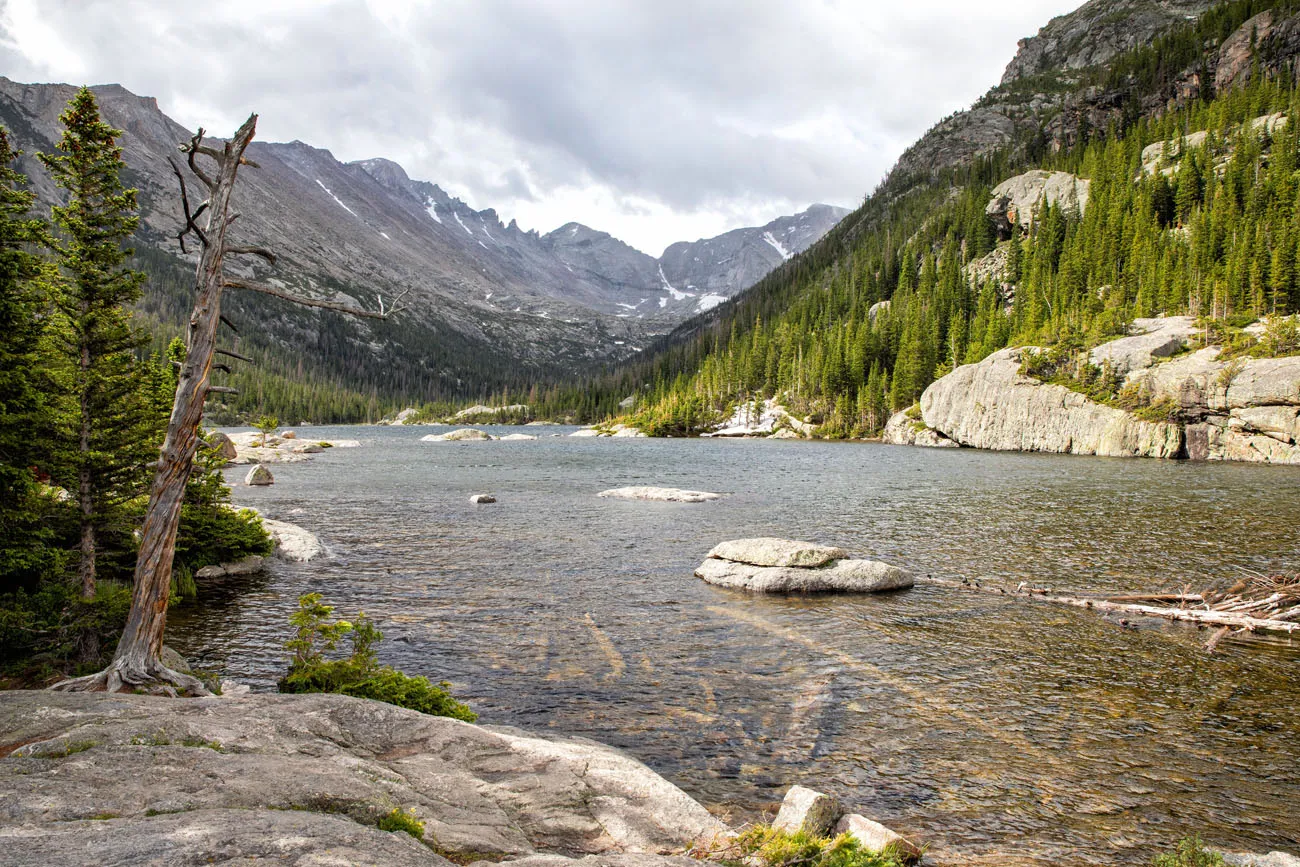
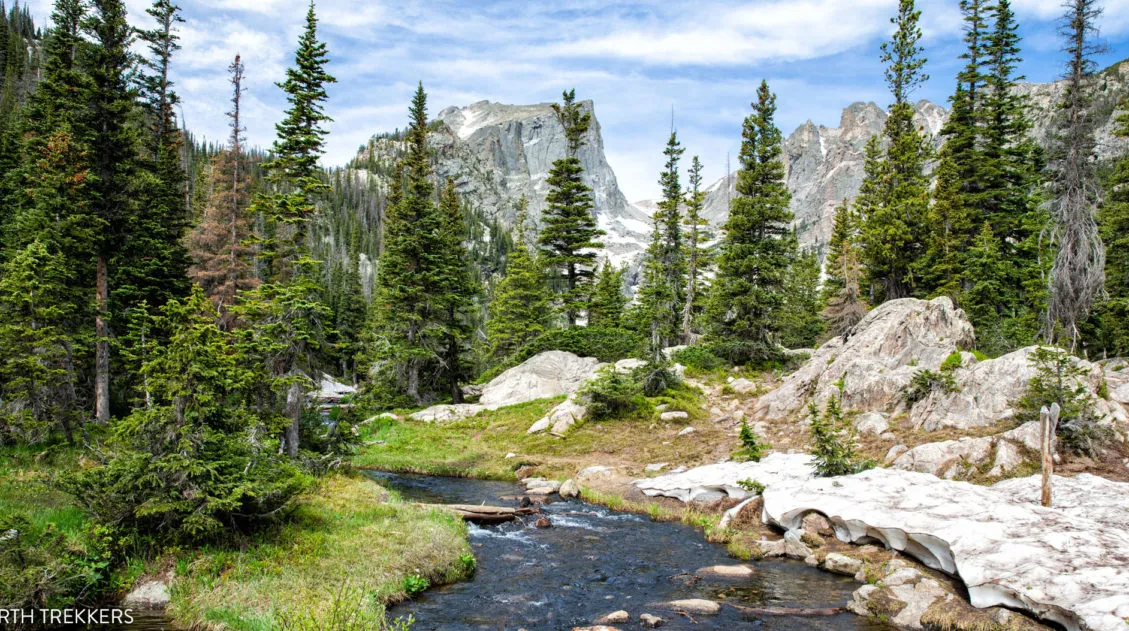
2.3 miles into the hike you reach The Loch, a very pretty lake. The trail follows around the right side of the lake, through Loch Vale, and levels out for a little bit. Enjoy it, because once you get past Loch Vale, the climbing begins again.
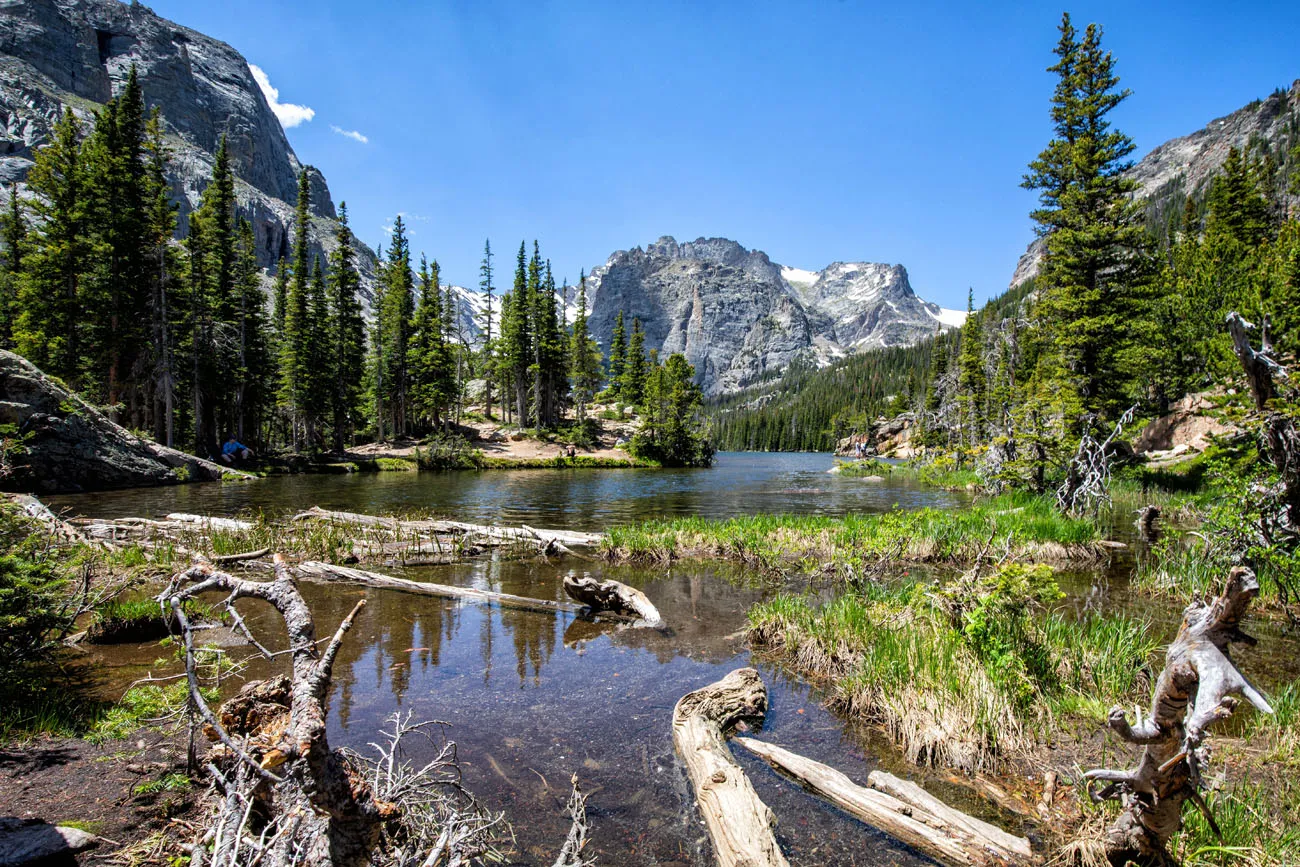
This section of the hike, from The Loch until you get to the trail junction for Andrews Glacier, was one of our favorite sections of the hike. It’s easy hiking here, you will cross several split log bridges over creeks, and the forest is beautiful and quiet.

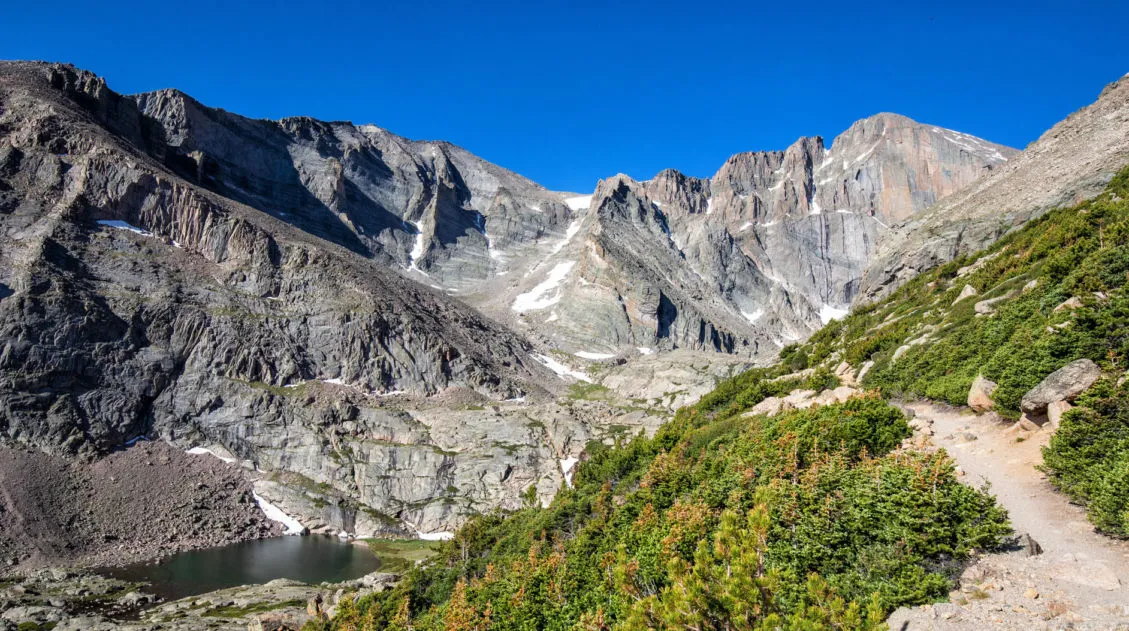
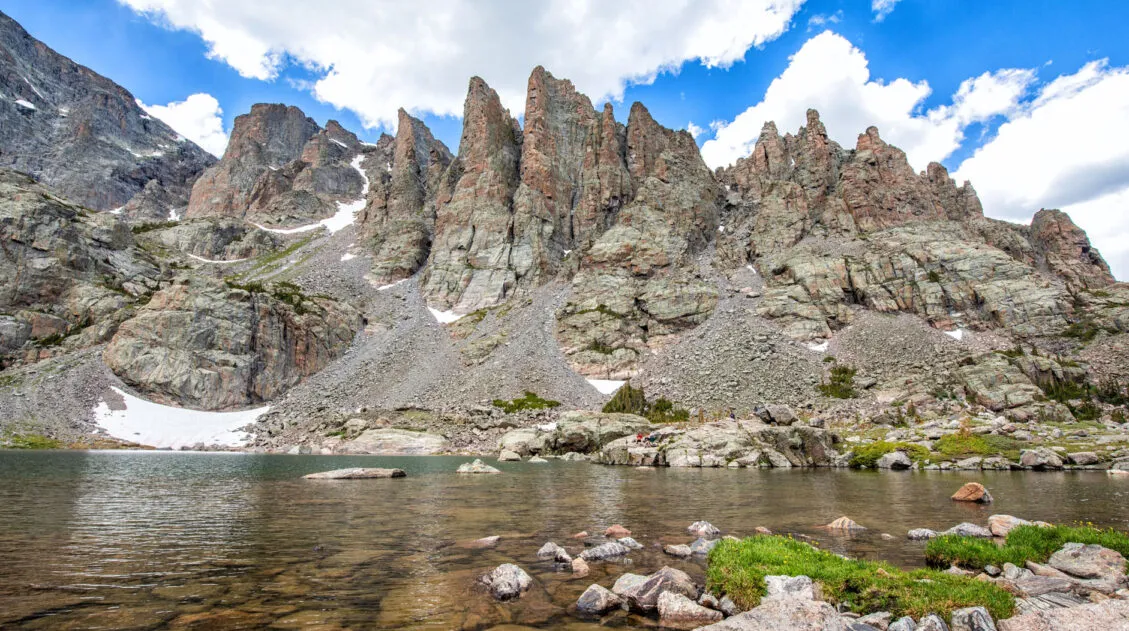
Lake of Glass
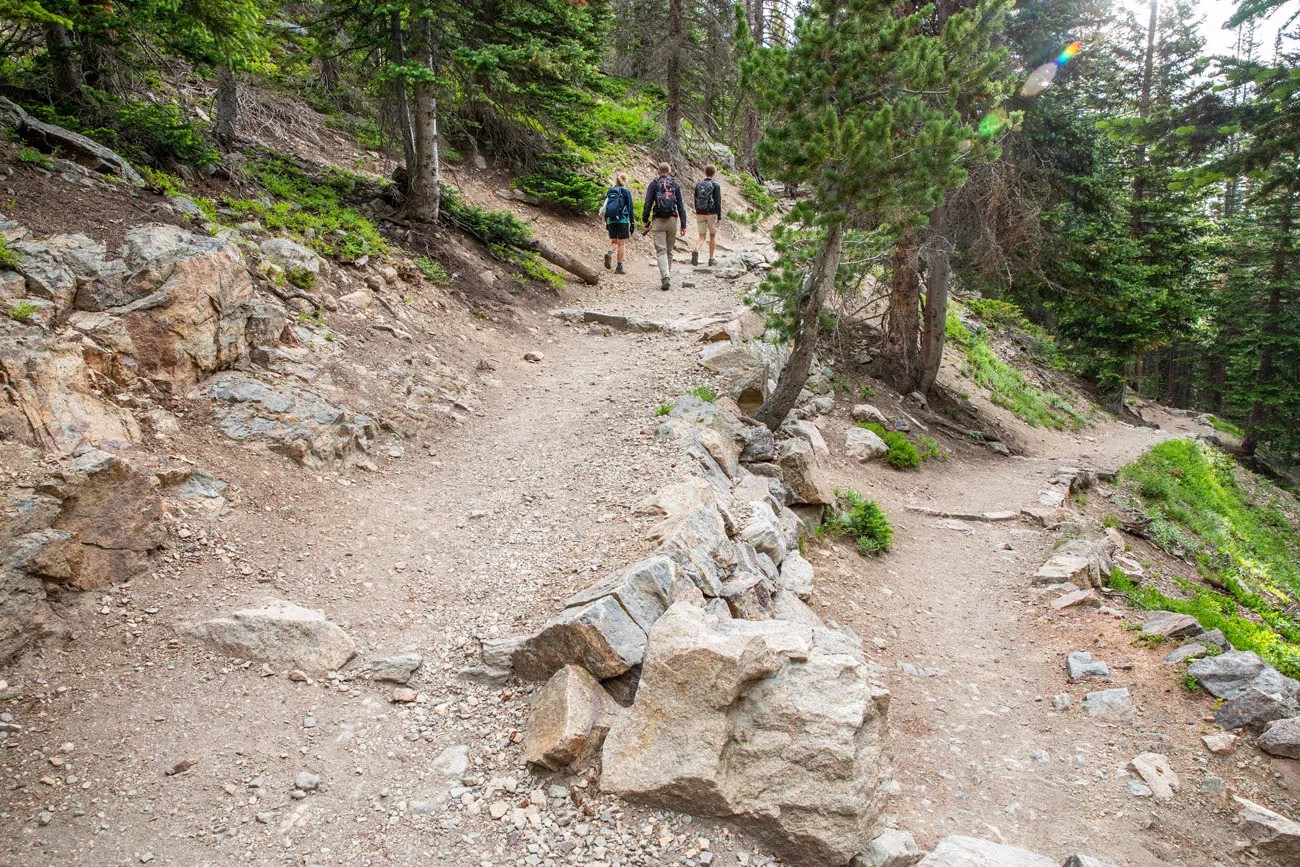
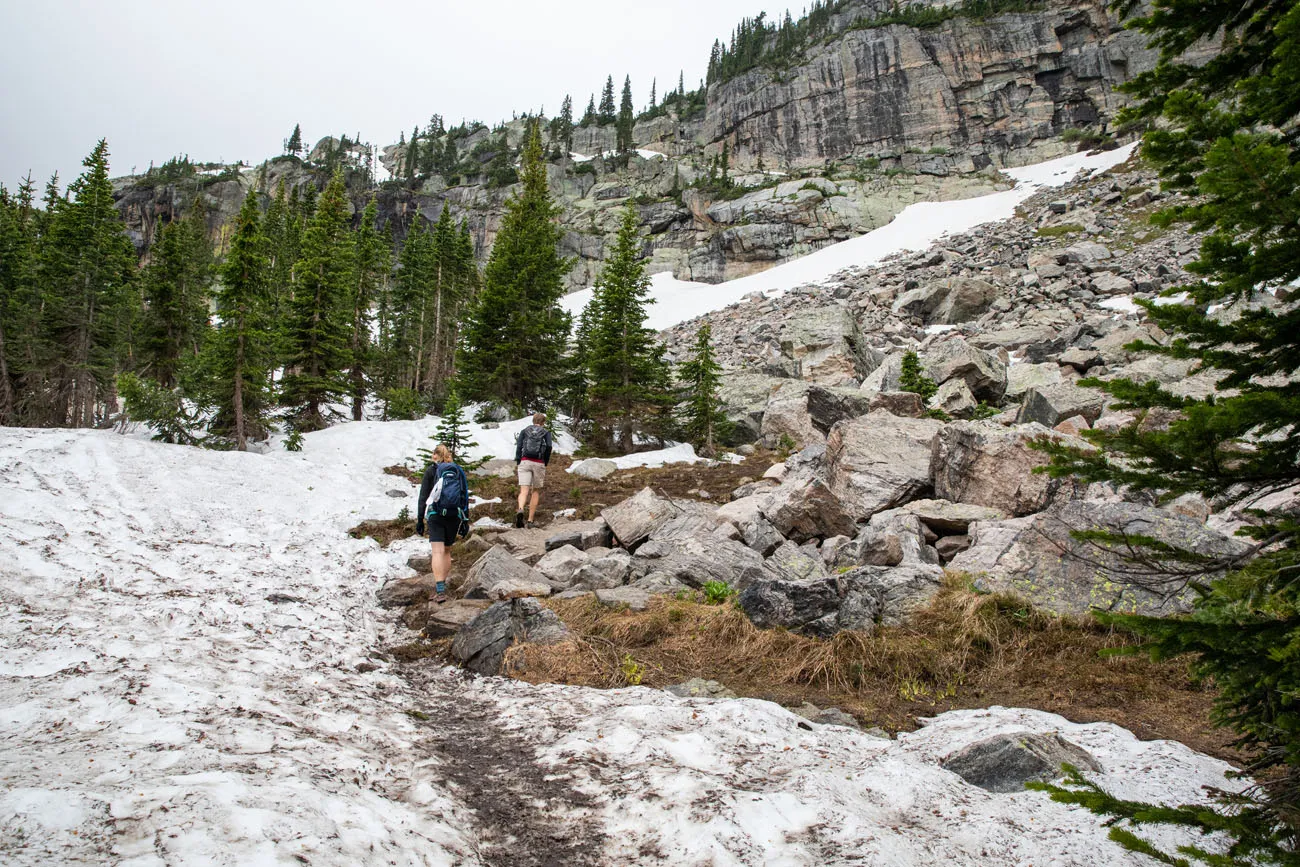
At the final trail junction, stay to the left continue to Sky Pond. Now the climbing really begins. The trail climbs up through a field of boulders until you reach Timberline Falls. When we did this at the very end of June, there were still giant patches of snow on the ground.
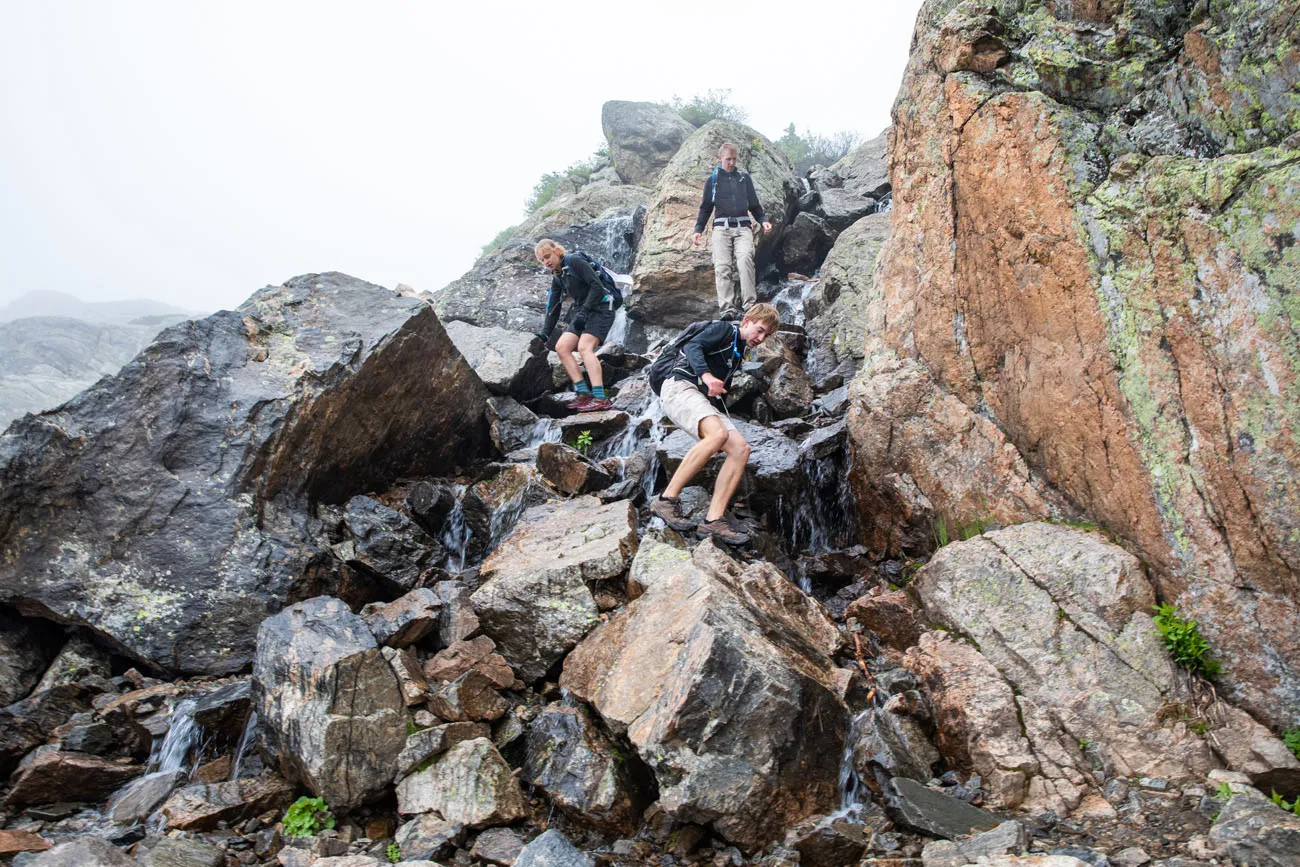
Next you reach Timberline Falls. The trail to Sky Pond continues up through a portion of this waterfall. For roughly 100 feet, you will rock scramble up the waterfall. Depending on the water flow, there is a chance that you will get wet. The water is very chilly, even in the summer months. Take your time here because the rocks are slippery.
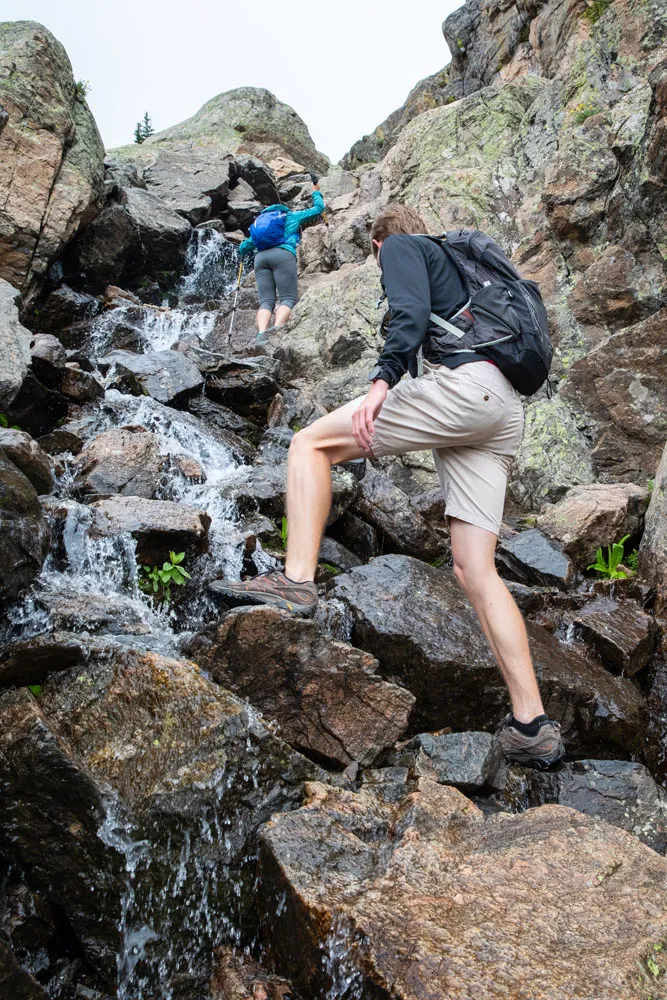
Tyler hiking up the waterfall
Another view of the waterfall (photo taken on the return hike).
View from the top of the waterfall, back to Loch Vale.
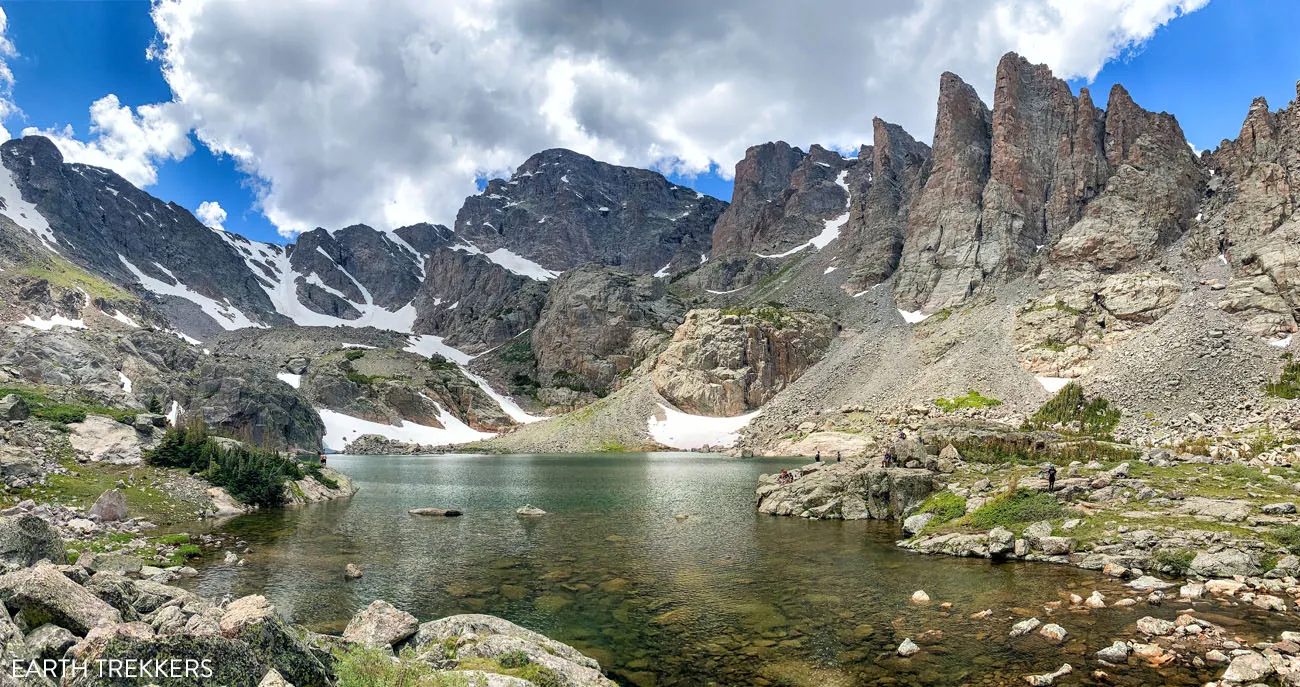
Once past the waterfall rock scramble, it’s just a few more steps to get to the Lake of Glass. Some people mistakenly turn around here, thinking that they reached Sky Pond, but that’s still a half mile away. Take your photos here and then get back on the trail to Sky Pond.
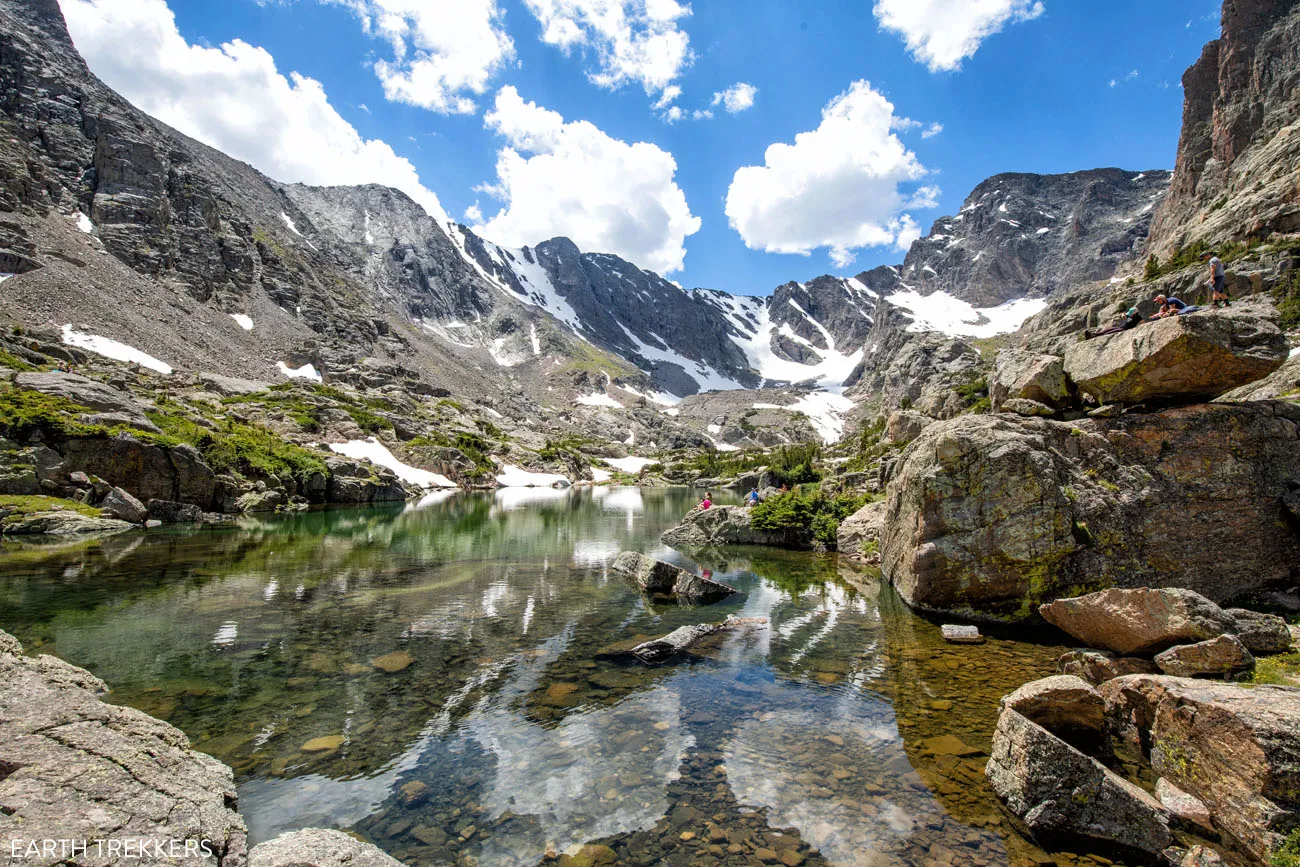
Lake of Glass
Trail along the Lake of Glass
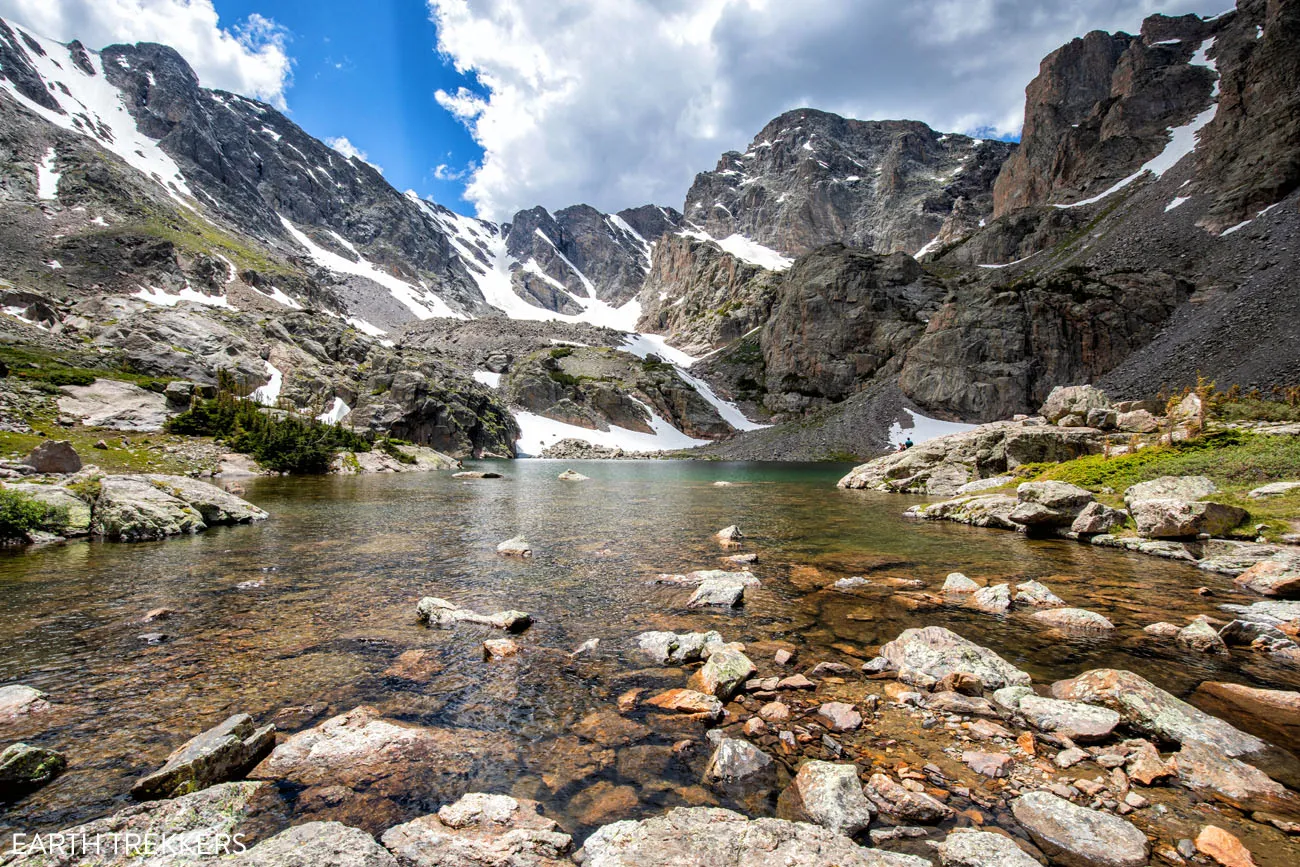
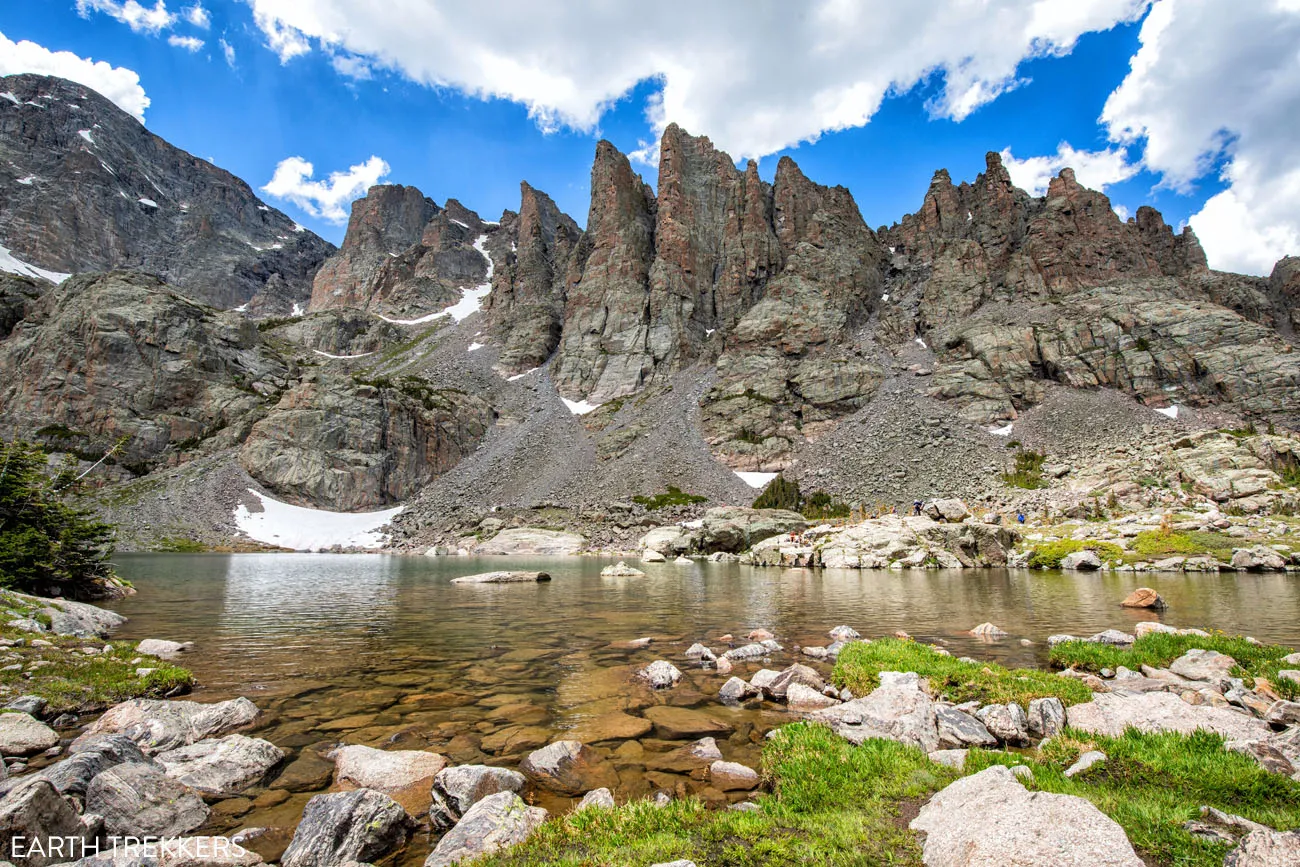
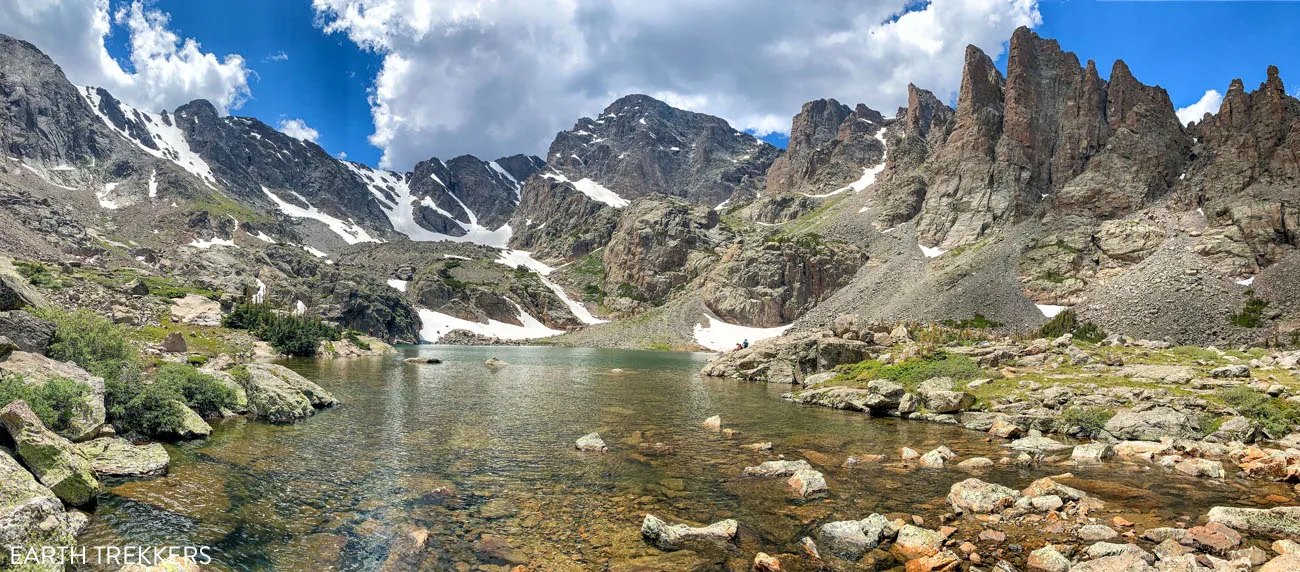
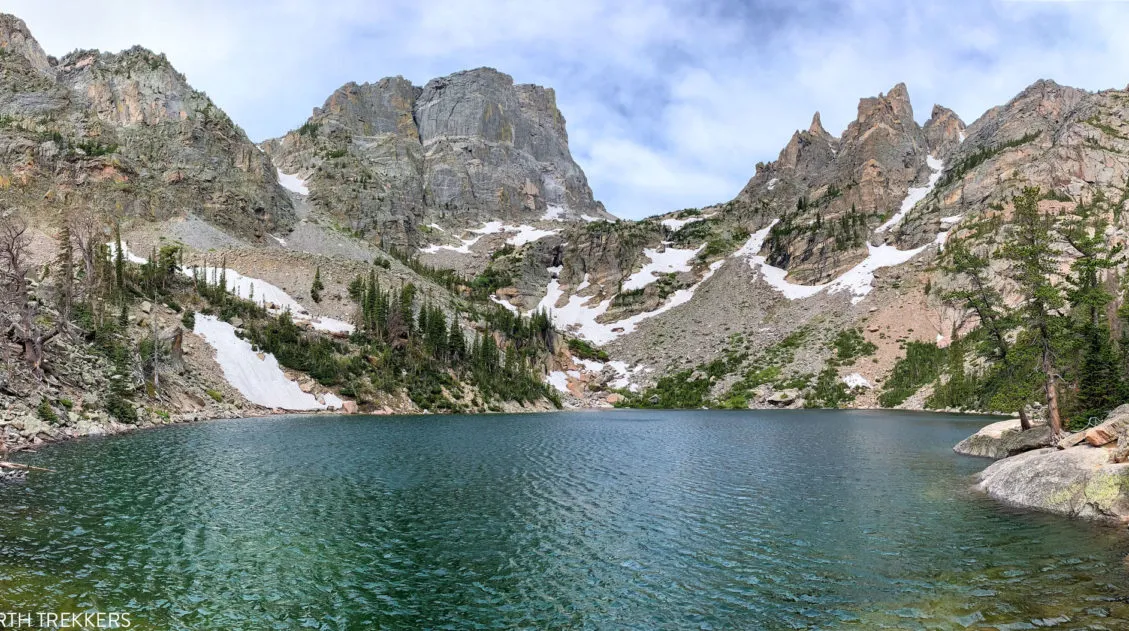
Sky Pond
The trail to Sky Pond starts on the right-hand side of the Lake of Glass. We had a hard time finding the trail. You will hike/rock scramble up some large boulders. Follow the rock cairns in this section. Once past this point, it is a fairly flat walk alongside the Lake of Glass until you reach Sky Pond.
Enjoy the amazing view. You earned it! You can hike around much of the lake, for different viewpoints or for solitude.
Retrace your steps back to Glacier Gorge Trailhead or Bear Lake Trailhead.
Optional: Mills Lake
If you still have a little energy left in your legs, you can make the detour to Mills Lake. The hike to this lovely lake adds 1.4 miles and 200 feet of elevation gain to the hike.
To do this, take the trail to Mills Lake and Black Lake at the Mills Lake Junction. Mills Lake will be the first lake you reach.
Mills Lake
Tips to Have the Best Experience
Start the hike early, ideally by 7 am. During the summer months, afternoon thunderstorms are common, typically occurring by 2 pm. You need to be back in the tree line by 2 pm.
If you plan to visit Rocky Mountain National Park from late spring through early fall, you will need a Timed Entry Permit. Learn more here.
Do not expect your cell phone to work. On 95% of the hike we had zero cellular service (this also goes for the entire drive down Bear Lake Road). There were a few spots in clearings or at higher elevations where we got a few bars of LTE or 3G, just enough to send a text message. But don’t depend on your phone to call for help, talk to friends, or send photos to friends and family.
Be prepared to turn around early. If weather conditions change and you see approaching thunderstorms, be prepared to end your hike before you reach Sky Pond. Your safety is more important than making it to the lake.
If you are not acclimated to the altitude, this is not a good first hike in Rocky Mountain National Park. The long distance, elevation gain, and altitude make this a tough hike. If you have not already spent time in Colorado adjusting to the altitude, I recommend that you spend a day or two acclimating to the higher elevation. Emerald Lake, Deer Mountain, and Gem Lake are good warm-up hikes.
Get updates on the National Park Service website before hiking to Sky Pond.
What to Bring on the Hike
Hiking shoes. Don’t do this hike in anything other than hiking shoes or hiking boots. There’s a good chance you will hike through snow, even in the summer. Plus, the waterfall scramble can be slippery, and the extra traction that hiking shoes provide will help you out a lot here.
Hiking poles. Hiking poles are optional but they take the stress off of your legs and help to ease leg pain and fatigue.
Water and snacks. At least 3 liters of water in the summer.
Sunscreen, hat, and sunglasses. For much of the hike you will be in the shade of the trees. However, the final mile to Sky Pond is exposed, so you will be in the sun for at least an hour of the hike.
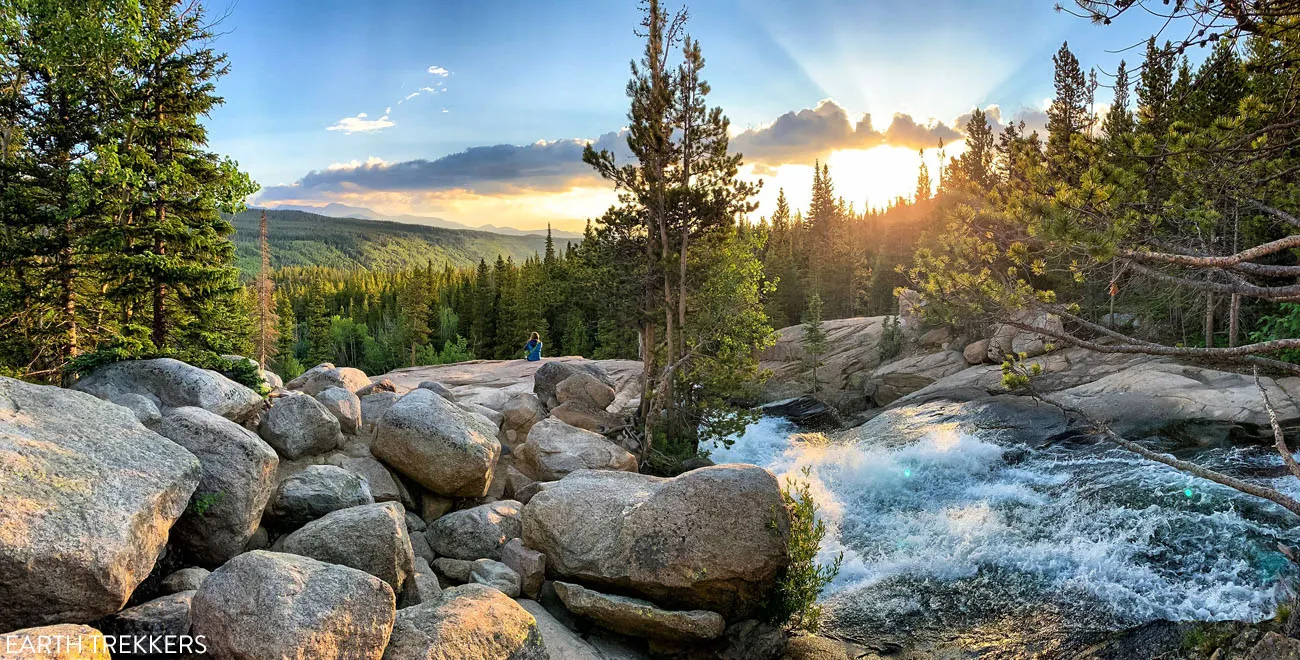
Camera. Even a smartphone will do. Sky Pond is a great place to use the panorama feature.
This panorama was taken by Tim with his iPhone.
Rain jacket or fleece. It’s chilly at Sky Pond. Be prepared for all weather conditions, even snow in the summer months. Pack a rain jacket and/or fleece and even another layer of clothing.
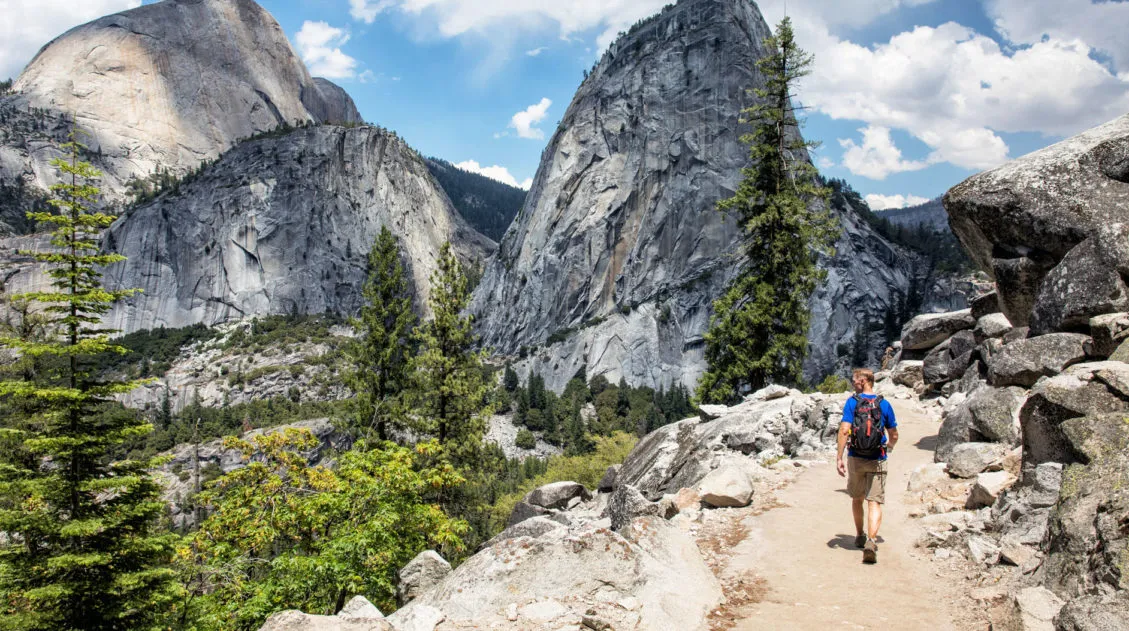
Essential Hiking Gear: What Should You Bring on a Day Hike?
If you are new to hiking or are curious about what you should bring on a hike, check out our Hiking Gear Guide. Find out what we carry in our day packs and what we wear on the trails.If you have any questions about hiking to Sky Pond, let us know in the comment section below. Happy hiking!!
More Information about Rocky Mountain National Park & Colorado
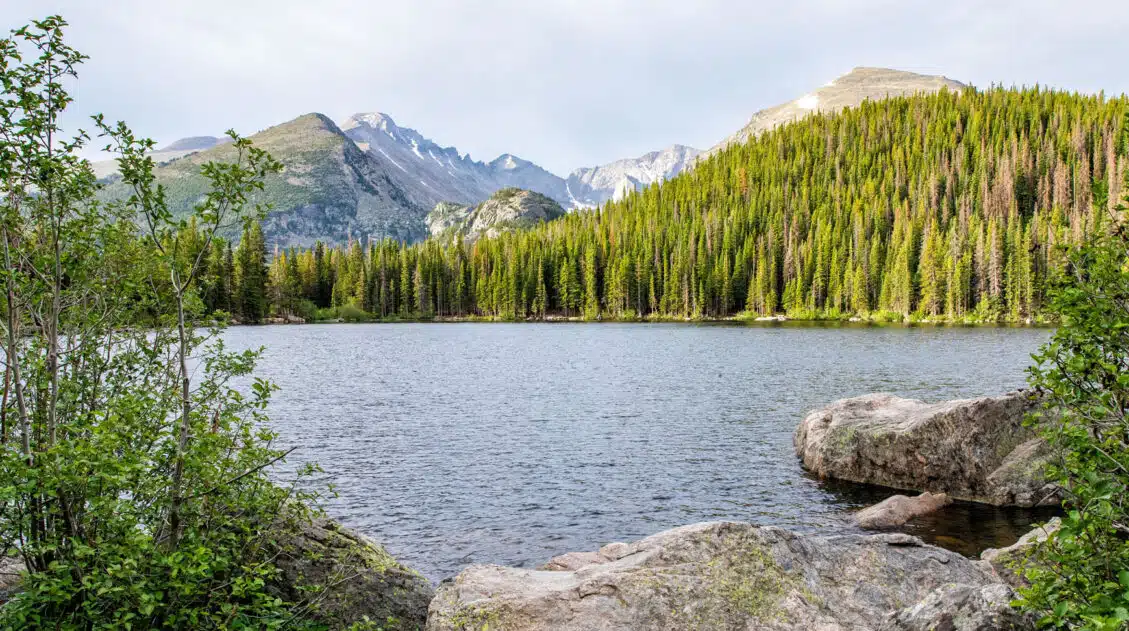
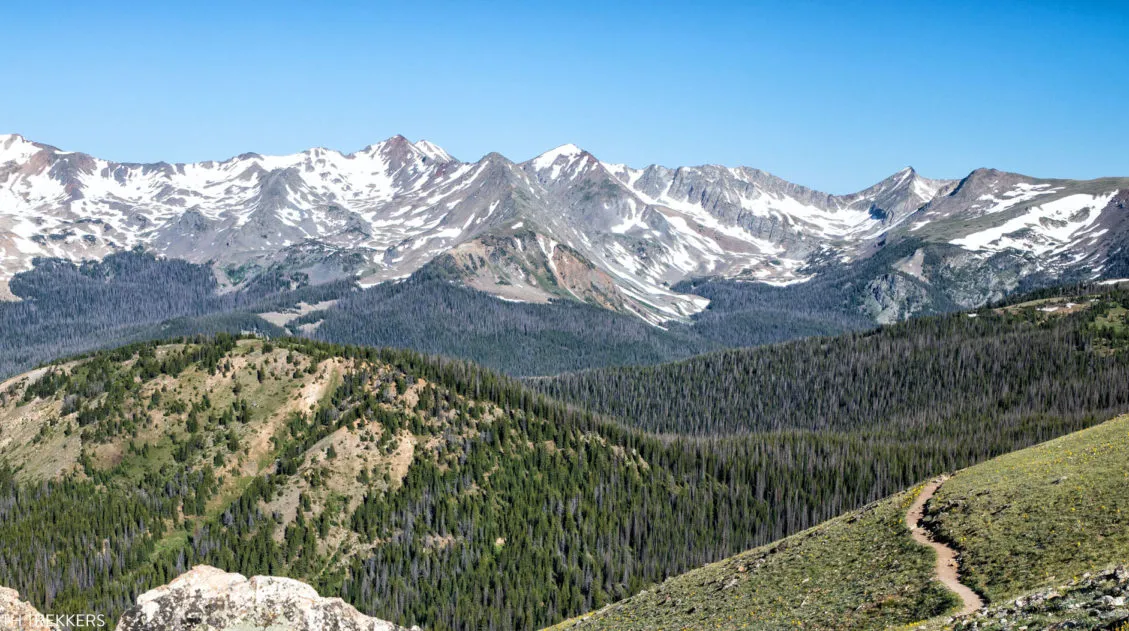
15 Epic Hikes in Rocky Mountain National Park
Rocky Mountain National Park is best seen from a hiking trail. Fortunately, there are hikes for all ages and ability levels. From short, easy strolls around lakes, to ridgeline trails with panoramic views, to challenging but epic climbs to the tallest mountain peaks, there truly is something here for everyone. Here are 15 of the […]

How to Hike Chasm Lake: Helpful Tips, Hiking Stats & Photos
Chasm Lake is one of the most spectacular lakes in Rocky Mountain National Park. For the first part of the hike, you will walk the same trail as hikers on their way to Longs Peak, the highest point in the park. Once the trail splits, the hike gets a little easier and you are treated […]
Nymph, Dream & Emerald Lake Hike (+ How to Add on Bear Lake & Lake Haiyaha)
The Emerald Lake hike is one of the most popular hikes in Rocky Mountain National Park. On this hike, you get to see three very pretty alpine lakes (Nymph Lake, Dream Lake, and Emerald Lake), with the option to add on Bear Lake and Lake Haiyaha. This is a great hike for almost all ages […]
10 Best Things to Do in Rocky Mountain National Park
With lofty mountain peaks, hiking trails that lead to alpine lakes and waterfalls, wildlife, and a scenic drive along one of the highest roads in the USA, Rocky Mountain National Park is a joy to explore. In this post, learn about the best things to do in Rocky Mountain National Park with tips on how […]
How to Hike Deer Mountain, RMNP | Helpful Tips, Trail Stats, Photos
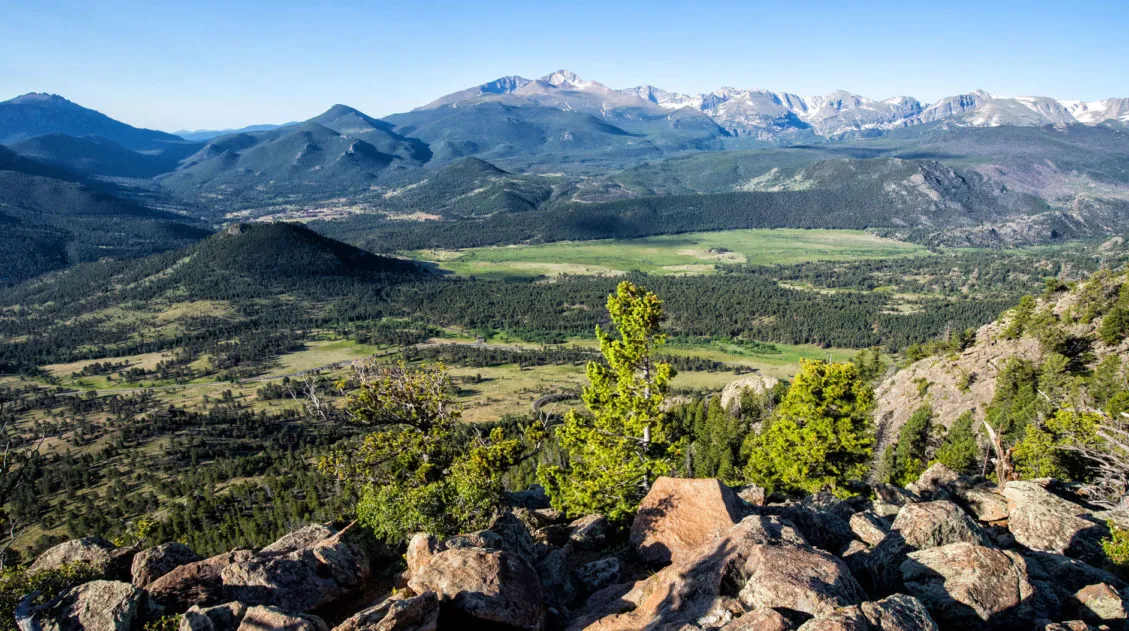
Deer Mountain is one of the easier hikes in Rocky Mountain National Park that offers high mountain views. To get to the peak, it’s an almost constant uphill walk through an evergreen forest. You will get occasional glimpses of Longs Peak early on during the hike, but for the most part, you will have to […]
The Perfect Rocky Mountain National Park Itinerary (2025)
If you are planning your Rocky Mountain National Park itinerary, this is a great place to start. Rocky Mountain National Park is one of the best US national parks to go hiking. With towering mountain peaks, alpine lakes and waterfalls, and the opportunity to hike along the Continental Divide, this park offers world-class hiking experiences. […]
The Ultimate Colorado Travel Guide
Colorado Travel Guide For travelers, Colorado is a year-round adventure destination. In the summer and fall, hike in the Rocky Mountains, explore the national parks, soak in the hot springs, and go on some of the best scenic drives in the USA. In the winter and early spring, when snow blankets the mountains, Colorado is […]
7 to 14 Day Colorado Itinerary: National Parks & Scenic Drives
With four national parks, numerous national forests and state parks, plus historic towns scattered throughout the Rocky Mountains, Colorado makes an awesome road trip destination. On this Colorado itinerary, you will visit all four national parks (Great Sand Dunes, Mesa Verde, Black Canyon of the Gunnison, and Rocky Mountain National Parks), linking them together with […]
The Ultimate Guide to the 63 US National Parks
Stretching from the South Pacific, across the United States to the Caribbean, are 63 national parks. These national treasures preserve iconic landscapes, majestic mountains, primordial forests, arid deserts, misty coastlines, immense canyons, wildlife, and historic landmarks. The opportunities for adventure are endless. Hiking, rock climbing, rafting, mountain biking, sand boarding, horseback riding, mountaineering, canyoneering, and […]
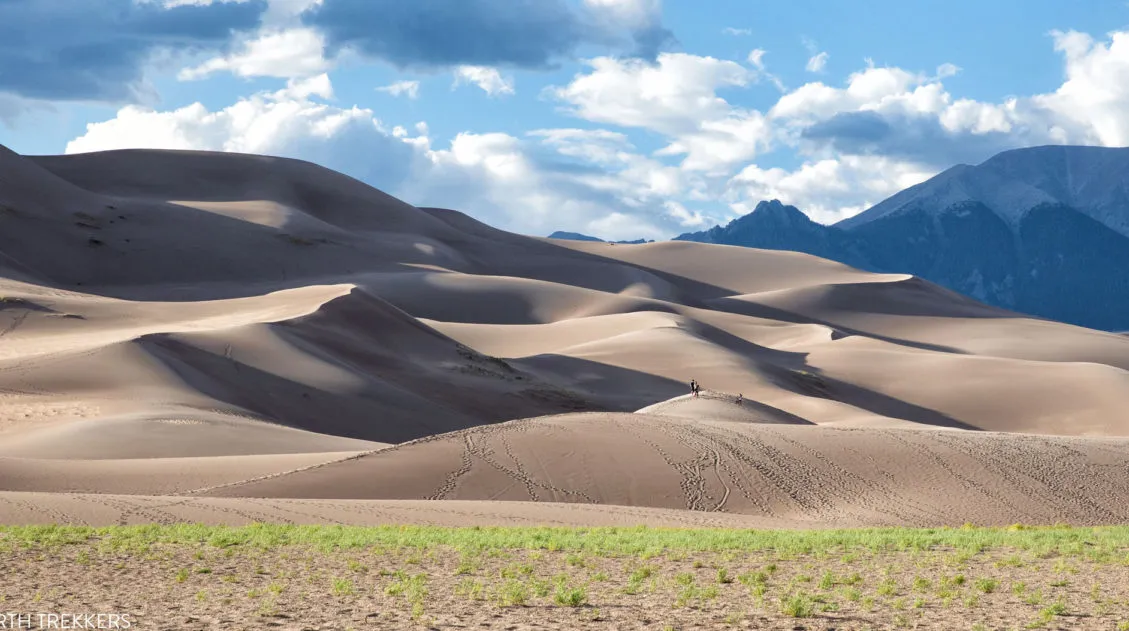
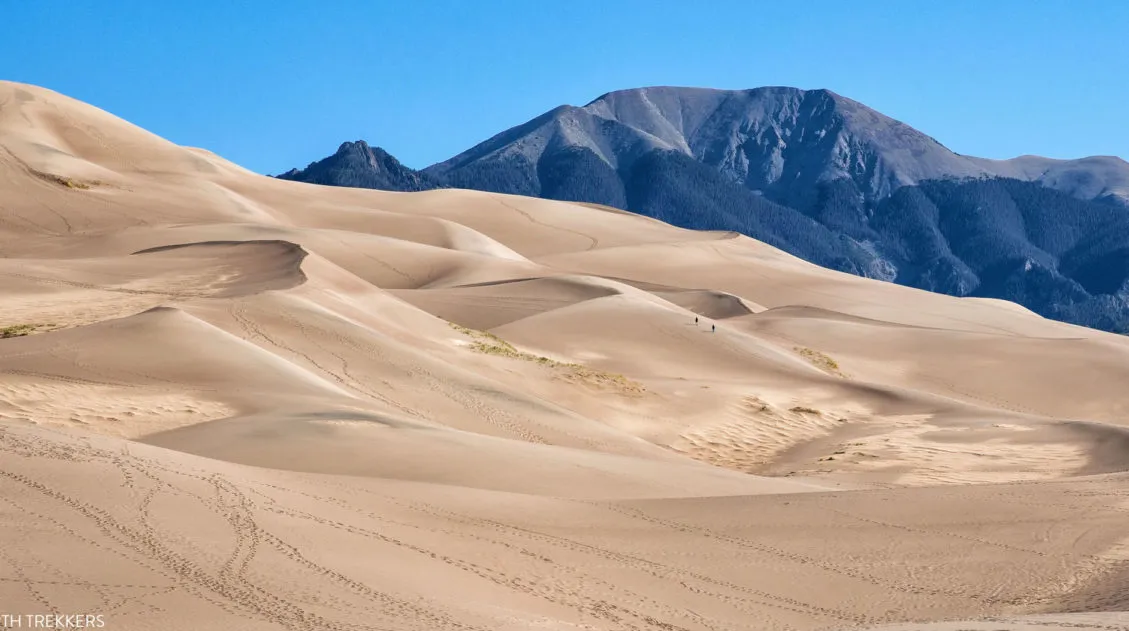
8 Amazing Things to Do at Great Sand Dunes National Park
Great Sand Dunes is a much different experience than many other national parks in the United States. Sure, there is hiking and amazing sunsets and ranger programs, but this park has a much different feel to it. It’s a small park and the list of things to do is very short. A few hours are […]
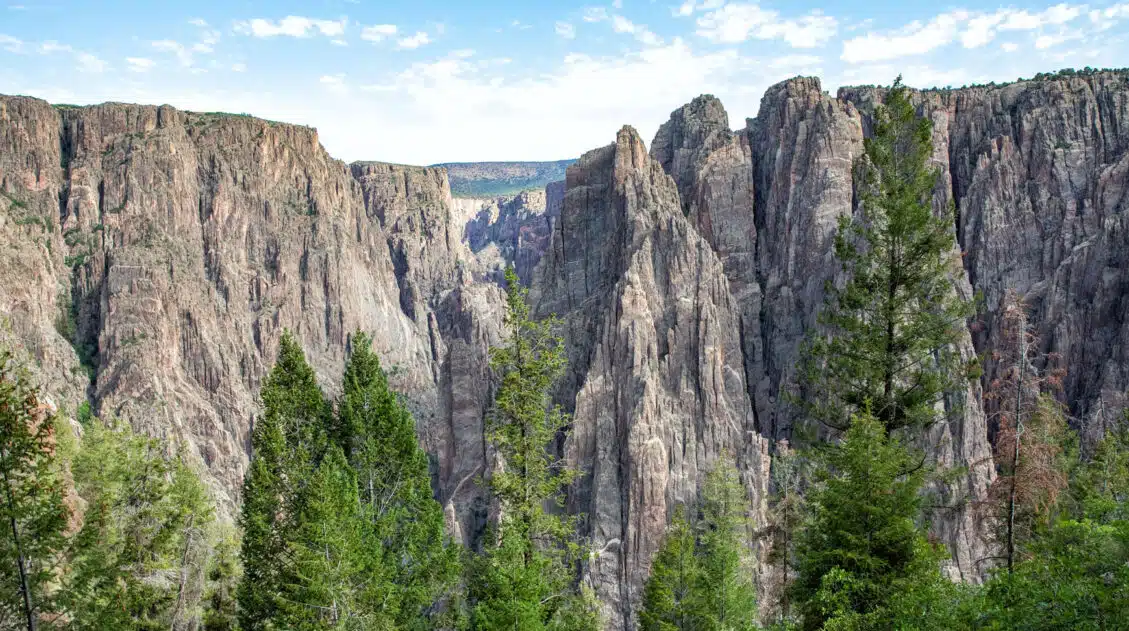
Black Canyon of the Gunnison National Park Travel Guide
Black Canyon of the Gunnison National Park Black Canyon of the Gunnison National Park is a smaller, less crowded version of the Grand Canyon. You can enjoy the views along both rims, hike the rim trails, or go on a real adventure by hiking below the rim. The park preserves the narrowest and deepest section […]
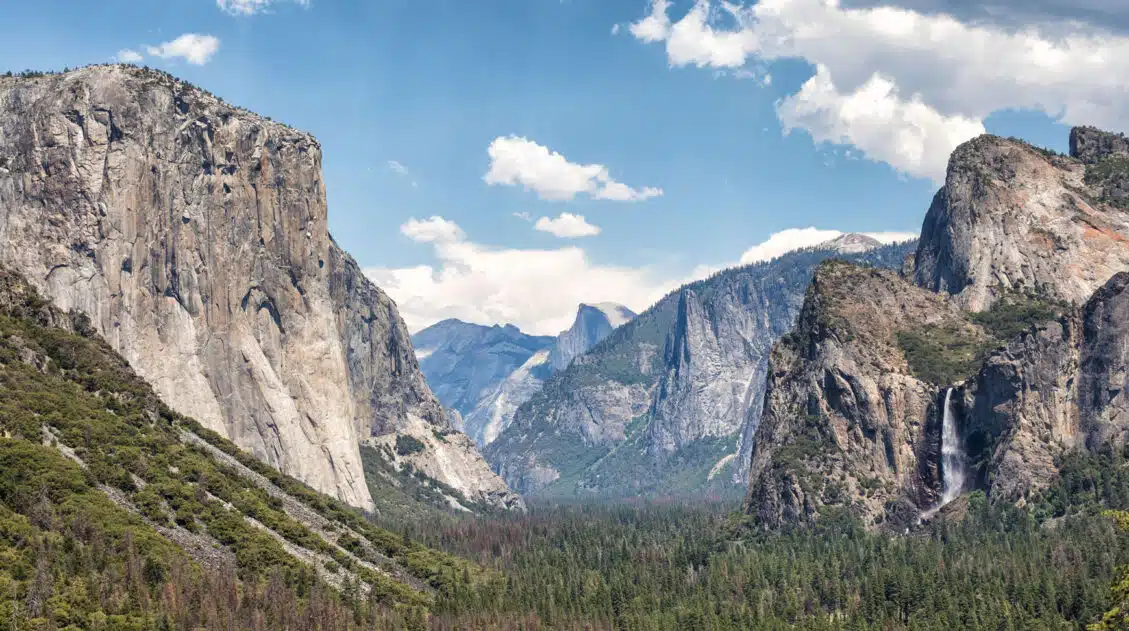
Ultimate Guide to the Colorado National Parks (+ 10 Day Itinerary)
There are four Colorado national parks: Rocky Mountain, Mesa Verde, Black Canyon of the Gunnison, and Great Sand Dunes. The landscapes that these national parks protect are dramatically different from one another. In Rocky Mountain National Park, journey high into the Rocky Mountains, cross the Continental Divide, and hike to gorgeous alpine lakes and waterfalls. […]
Comments 33