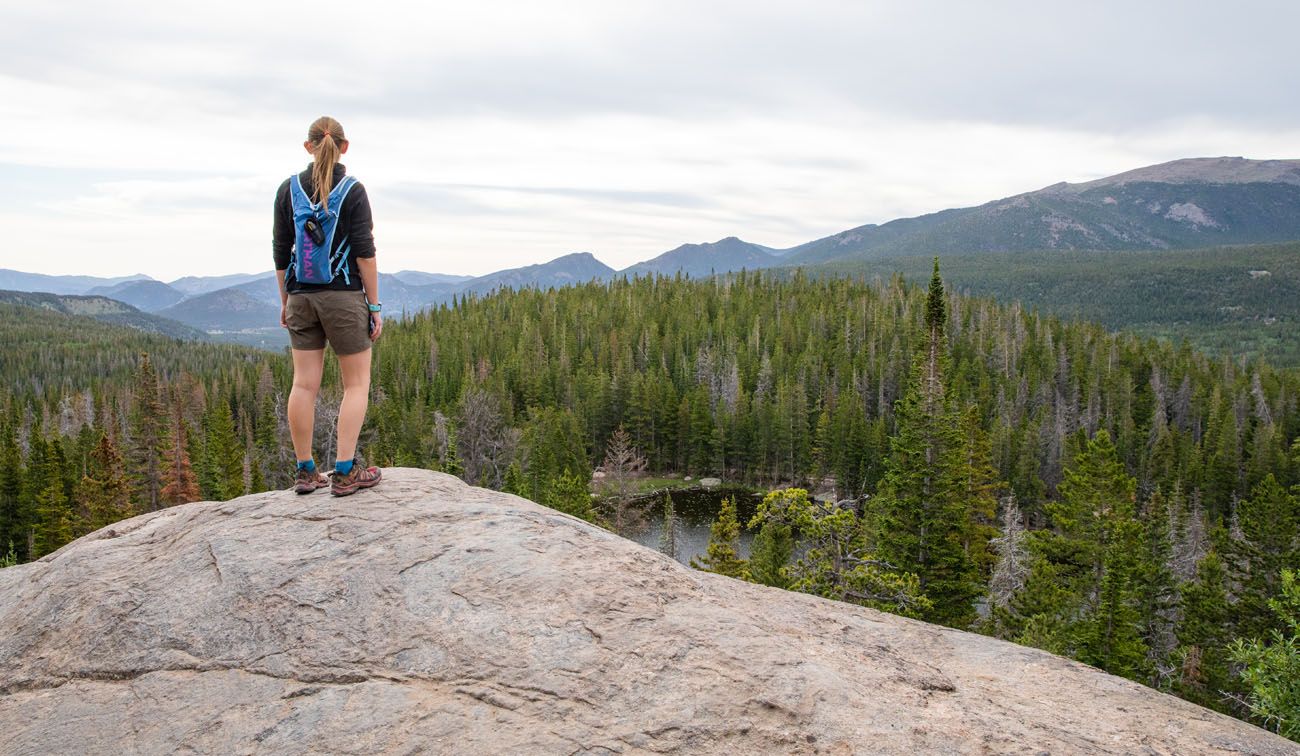
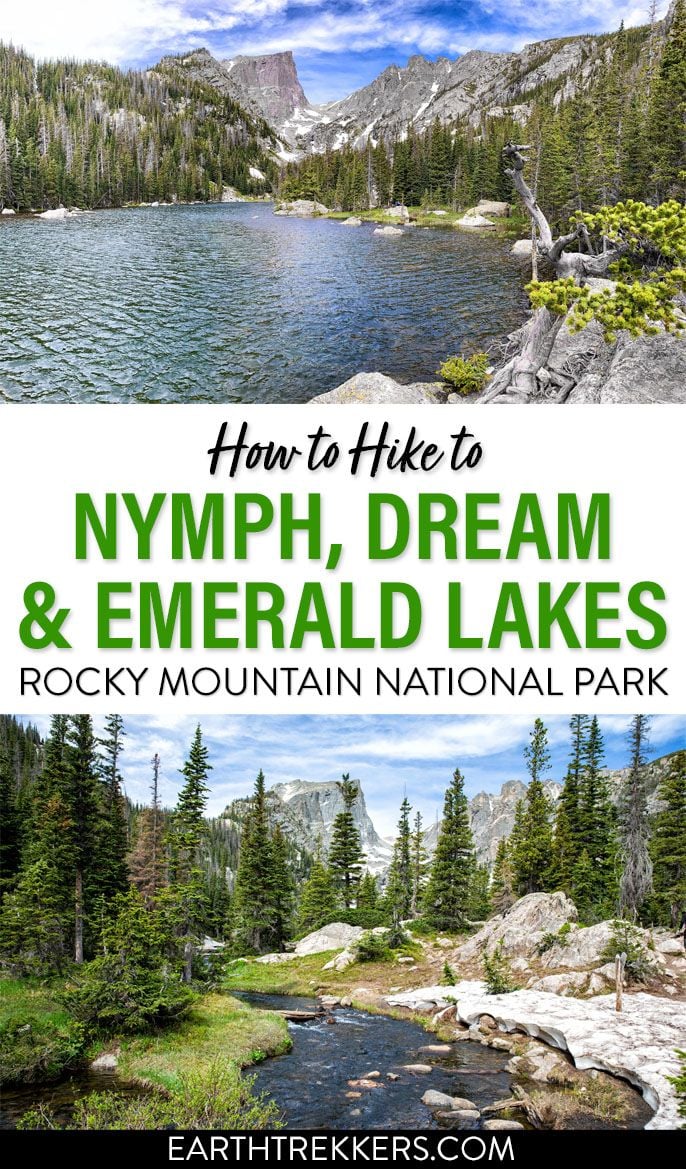
The Emerald Lake hike is one of the most popular hikes in Rocky Mountain National Park. On this hike, you get to see three very pretty alpine lakes (Nymph Lake, Dream Lake, and Emerald Lake), with the option to add on Bear Lake and Lake Haiyaha.
This is a great hike for almost all ages and ability levels. The Emerald Lake hike is a family friendly hike and it also makes a great intro to hiking in Rocky Mountain National Park. With its short distance and manageable elevation gain, it is a great first hike in the park, as you acclimate to the higher elevation (if you haven’t already spent some time in the Rocky Mountains).
Of course, you don’t have to hike all of the way to Emerald Lake. Nymph and Dream Lakes are beautiful, so you will have a wonderful hike if you choose to turn around at Dream Lake.
In this post, get all of the details on the Emerald Trail hike, with information on how to add on Bear Lake and Lake Haiyaha.
Nymph, Dream & Emerald Lake Hiking Stats
These are the stats for the round-trip hike starting at the Bear Lake Trailhead and hiking out-and-back to Emerald Lake.
Distance: 3.6 miles
Difficulty: Easy to moderate
Total Elevation Gain: 605 feet
Starting Elevation (Bear Lake Trailhead): 9,449 feet
Elevation at Emerald Lake: 10,110 feet
Length of Time: 2 to 3 hours
When to go: You can hike to Emerald Lake year-round. From October through May, snowshoes may be necessary depending on weather conditions. Get updates on trail conditions on the National Park Service website.
Permit: For this hike you will need a Timed Entry + Bear Lake Road Permit (the permit that includes Bear Lake Road) if you will be in Rocky Mountain National Park between the end of May and early October.
If you choose to turn around early, here are the hiking distances from the Bear Lake Trailhead:
Nymph Lake: 1.2 miles round trip, 236 feet of elevation gain
Dream Lake: 2.2 miles, 443 feet of elevation gain

Please practice the seven principles of Leave No Trace: plan ahead, stay on the trail, pack out what you bring to the hiking trail, leave areas as you found them, minimize campfire impacts, be considerate of other hikers, and do not approach or feed wildlife.
Nymph, Dream & Emerald Lake Hike
Step-By-Step Trail Guide
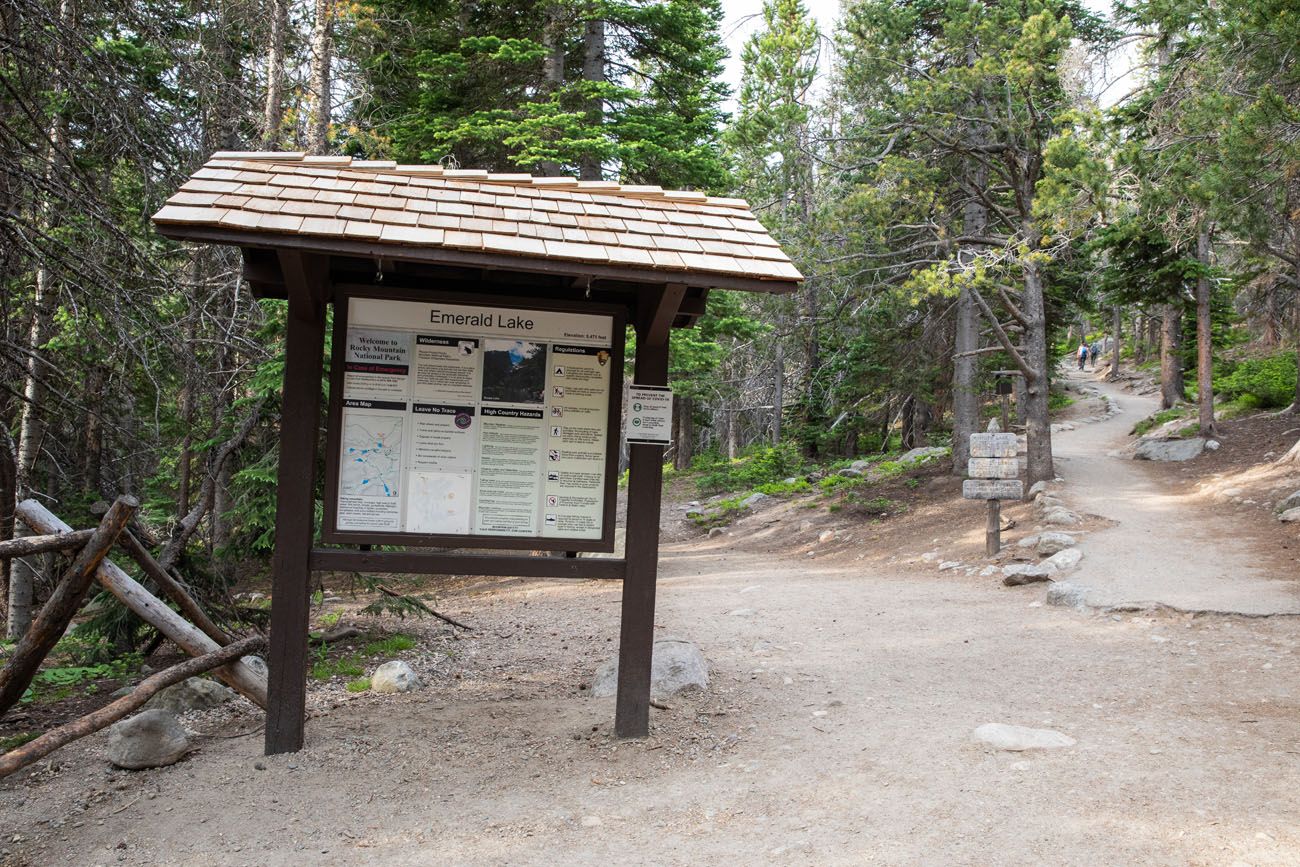
Getting to the Trailhead
The trail to Emerald Lake starts at the Bear Lake Trailhead. To get here, drive to the end of Bear Lake Road and park in the large parking lot. This parking lot is very large but you do need to get here early to get a parking space. Ideally, plan on arriving by 7:30 am to get a parking space.
If the Bear Lake parking lot is filled, you will have to park at the Park and Ride on Bear Lake Road and take the free shuttle to the trailhead. During peak season, this lot can also fill (usually midday) so park rangers turn away visitors from this section of the park once all of the spaces fill. So, get here early or late in the day.
The trailhead is located at the top of the parking lot. There are toilets and a ranger station here.
Take the trail into the woods and then follow the signs for Emerald Lake.
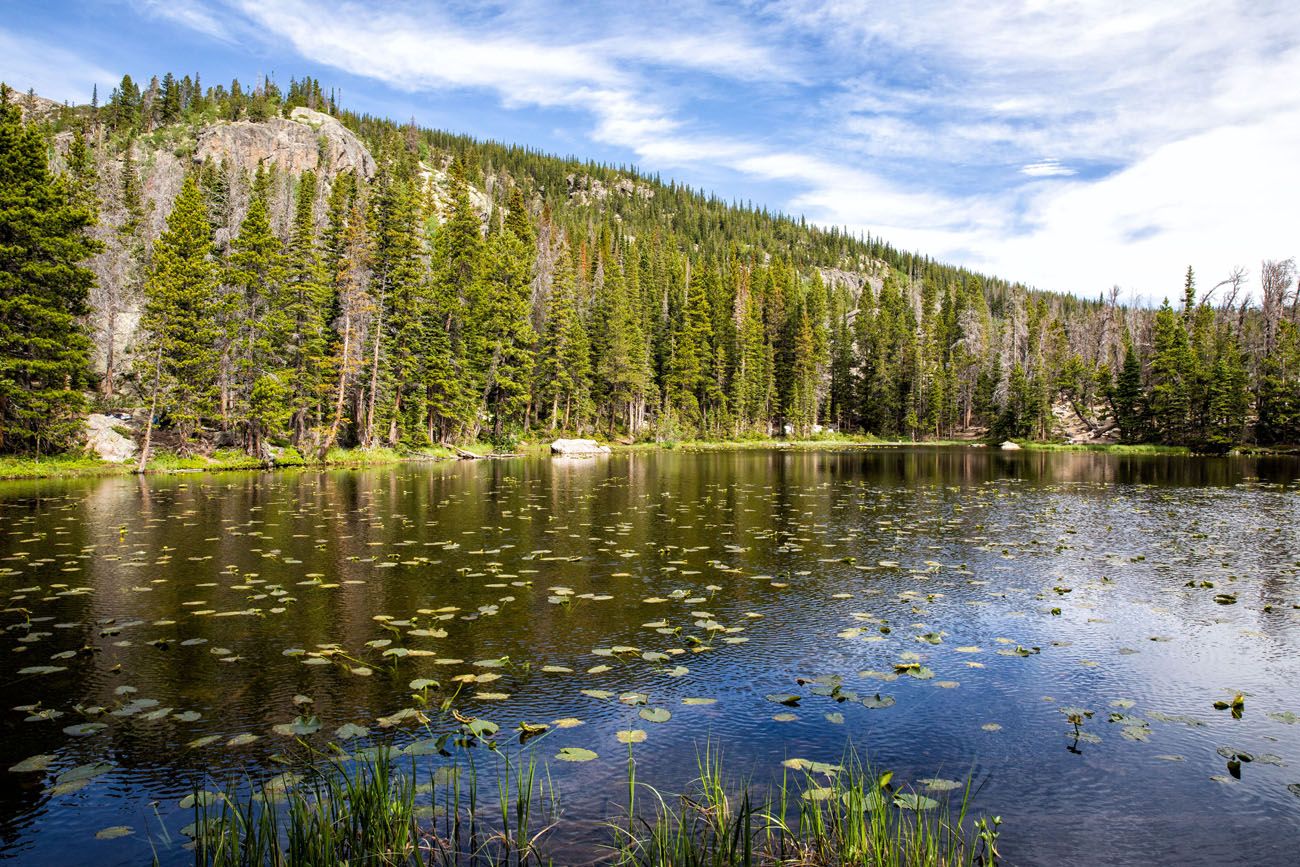
Nymph Lake
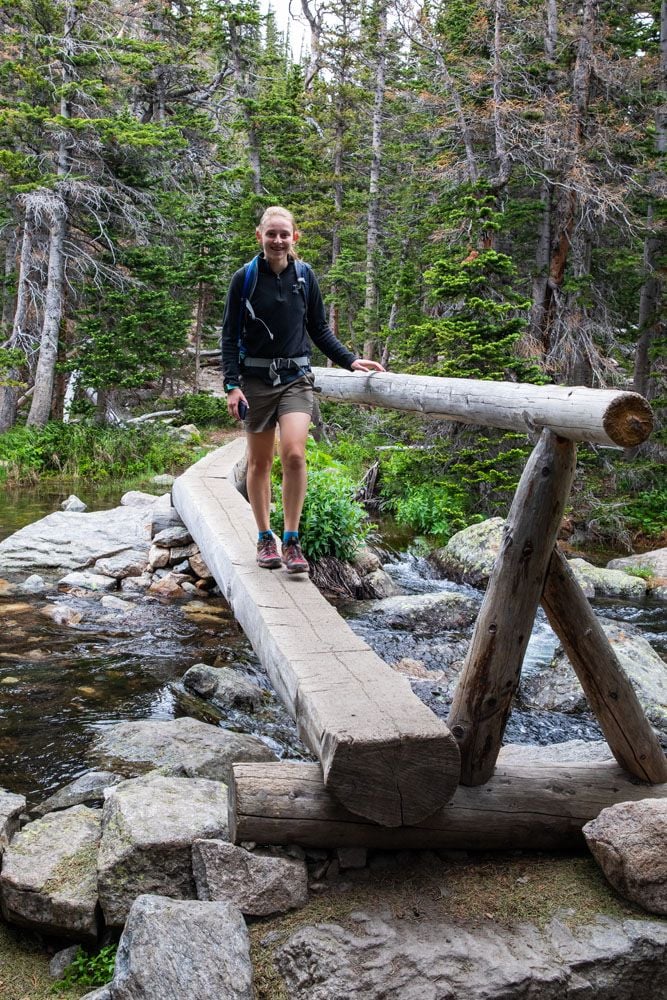
It’s an overall uphill walk to get to Nymph Lake. The very first part of the trail is paved, but that quickly switches over to a rocky, dirt trail. There are a few brief steep sections but nothing too difficult.
Once at Nymph Lake, enjoy the views. Lily pads cover the lake and we saw some ducks and ducklings paddling around among the lily pads. This is the smallest of the three lakes.
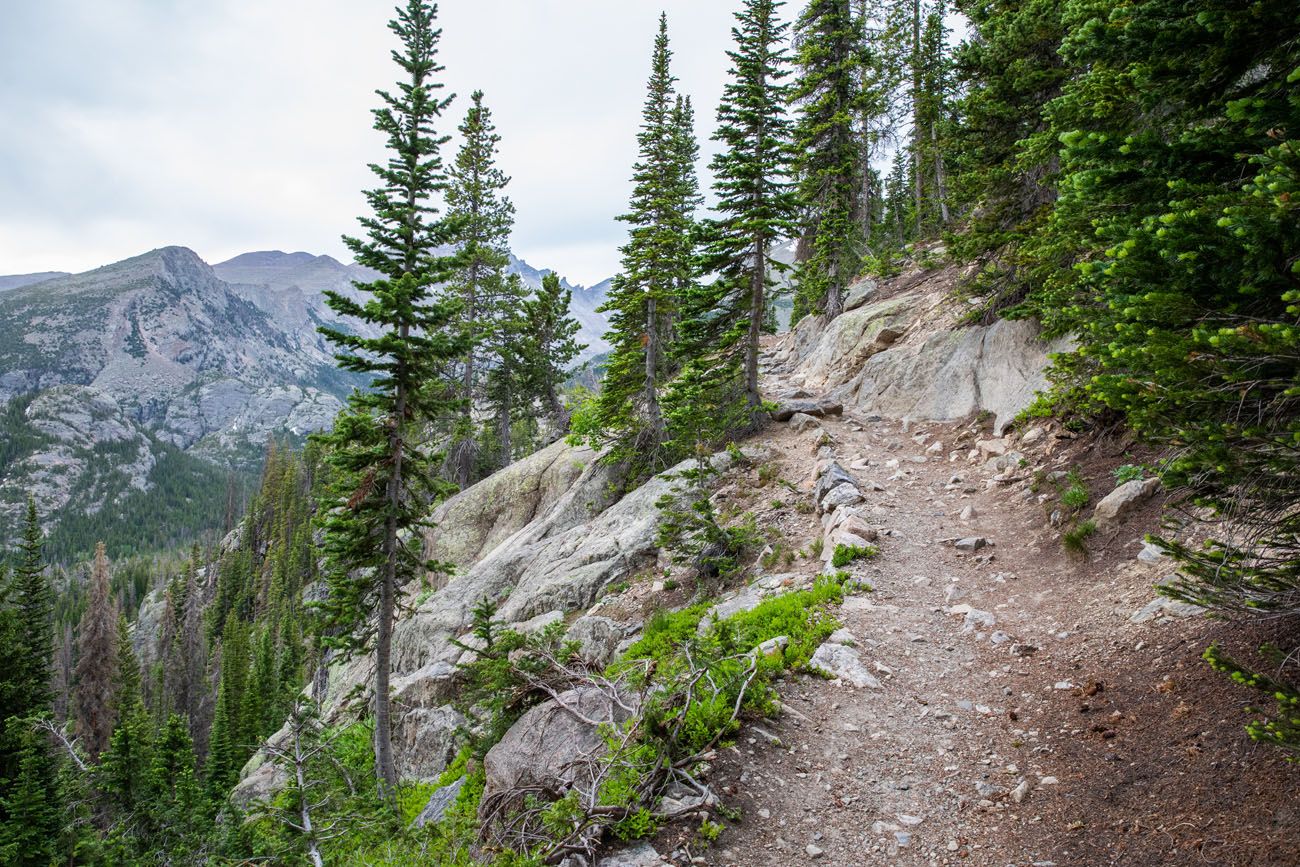
Dream Lake
From Nymph Lake, it is a half-mile walk to get to Dream Lake. This trail is a little bit steeper than what you hiked to get to Nymph Lake. There will be some steps and steeper uphill climbs, but it’s worth it. Dream Lake is one of the prettiest lakes in Rocky Mountain National Park.

As you hike to Dream Lake, keep a lookout for the view out over Nymph Lake and to Long’s Peak (it’s about 0.2 miles from Nymph Lake).
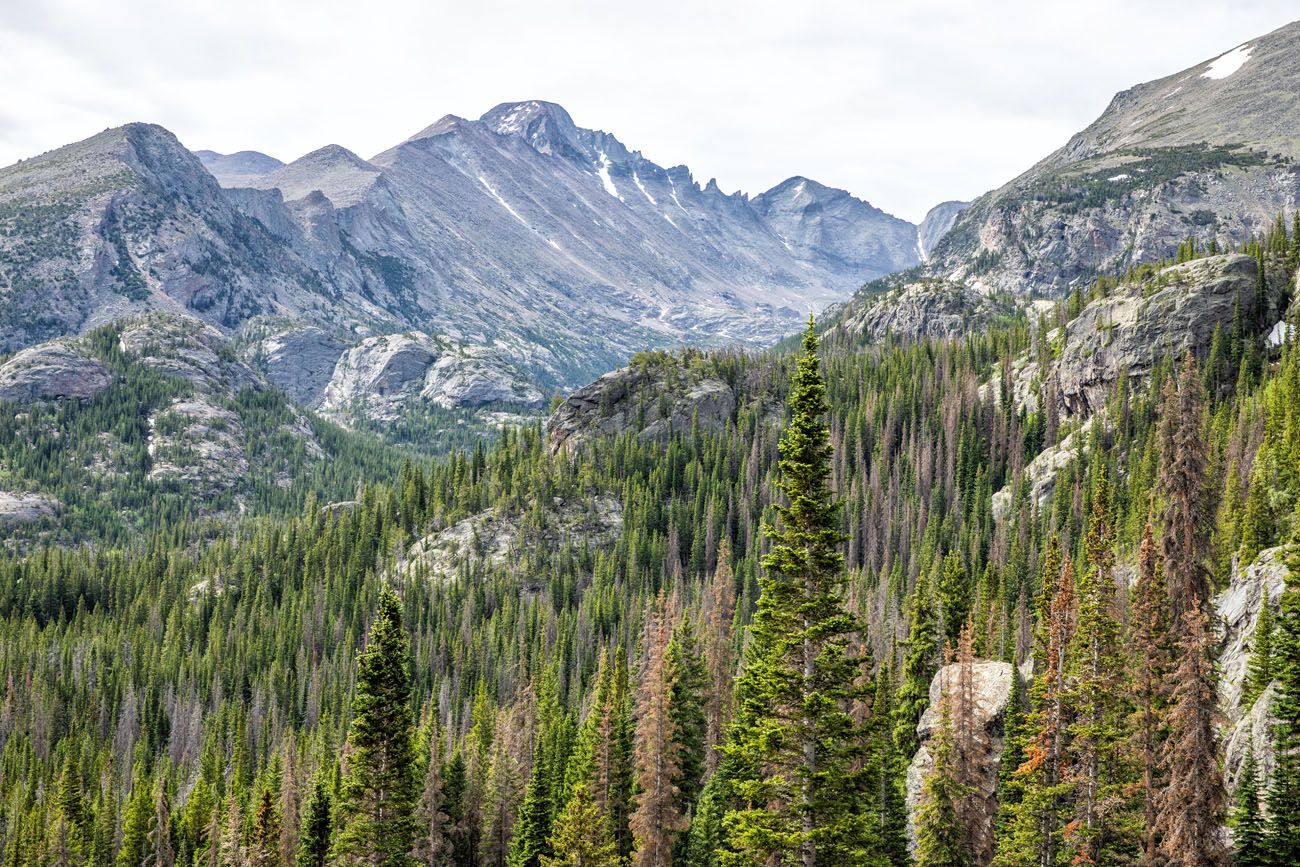
Long’s Peak
Once you make it to Dream Lake, there are several different viewpoints of the lake. The trail to Emerald Lake continues along the right side of Dream Lake, past these viewpoints. So, even if you don’t plan to hike all of the way to Emerald Lake, I recommend walking along Dream Lake for these views.

Approaching Dream Lake
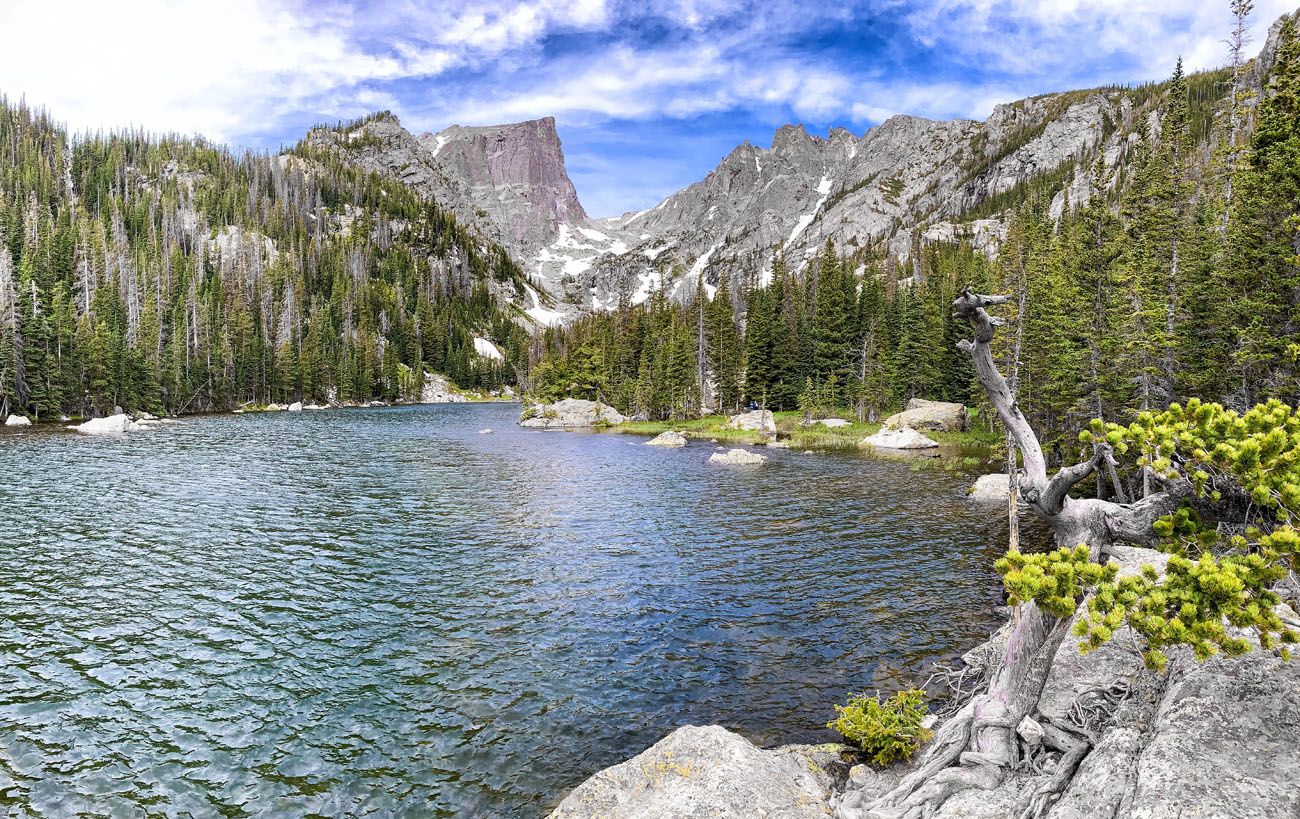
Dream Lake

Trail around Dream Lake
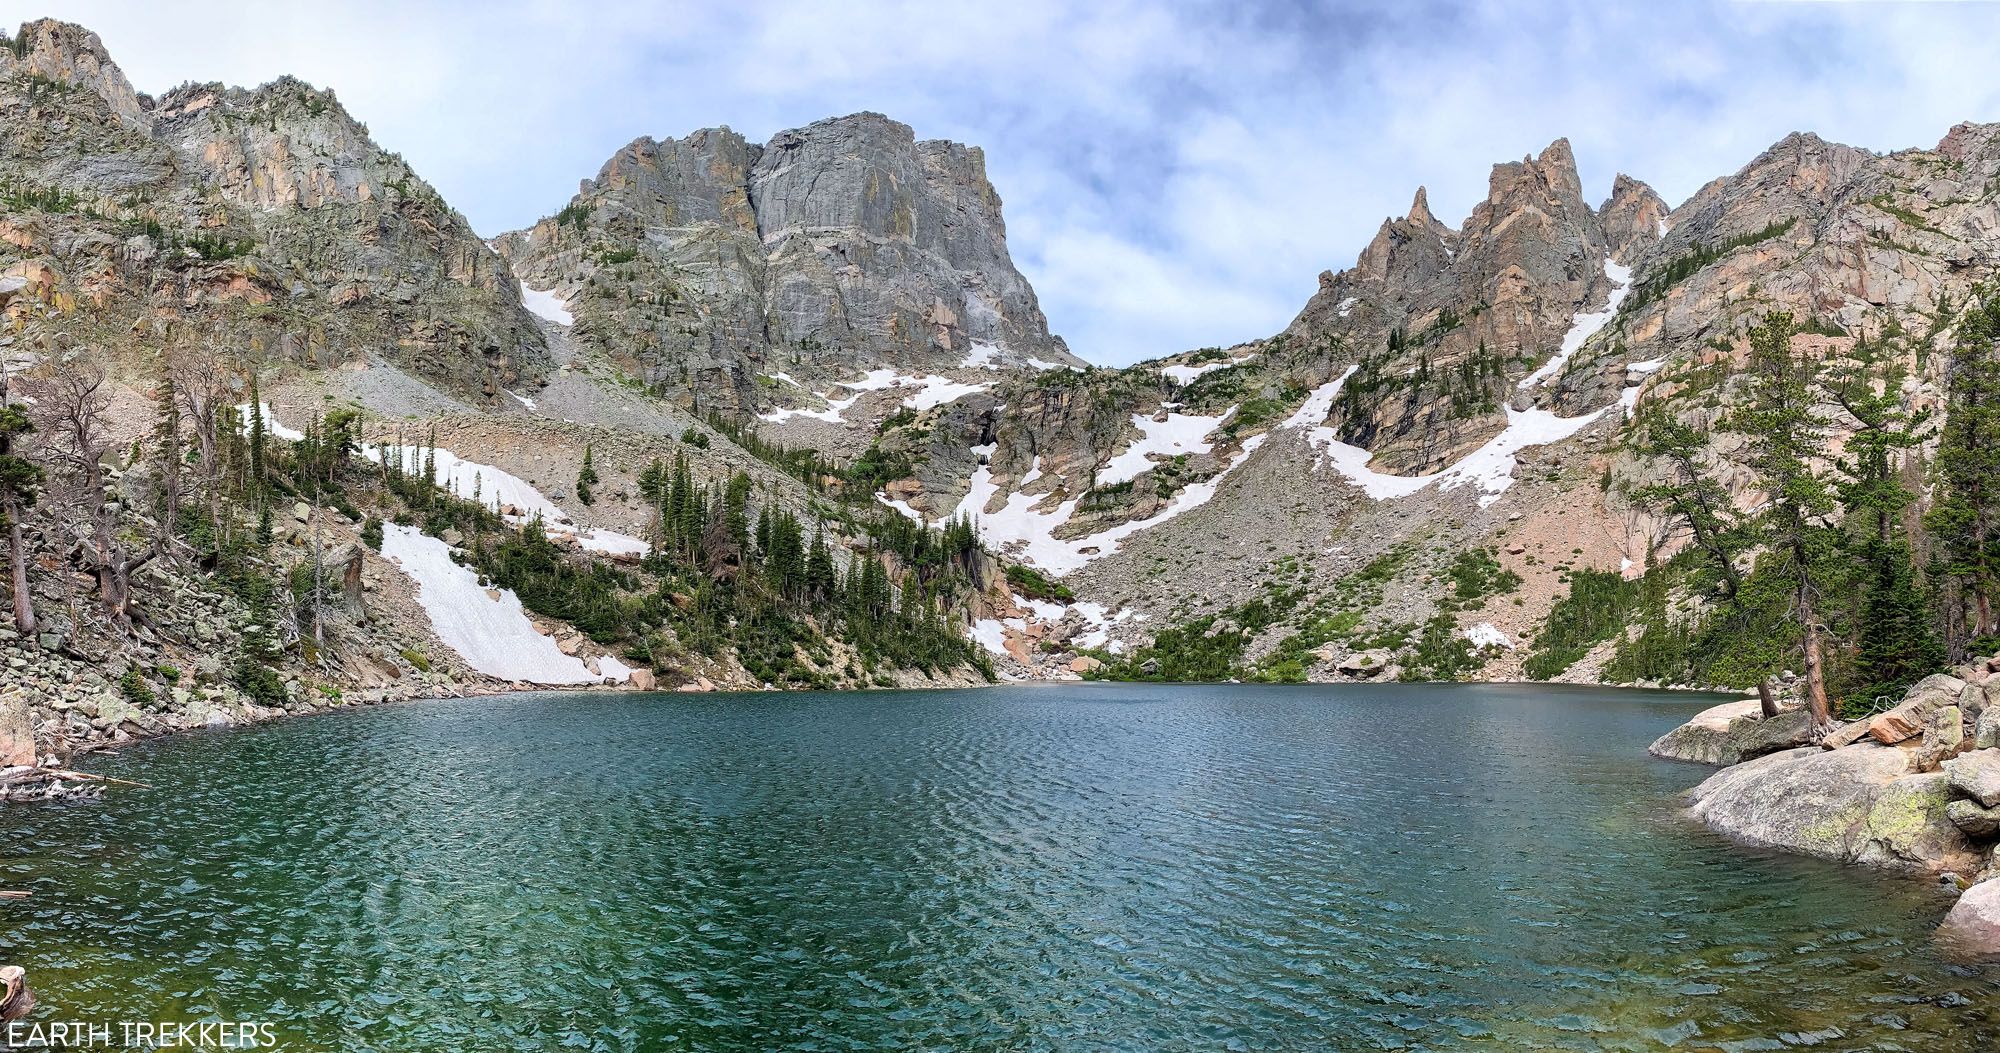
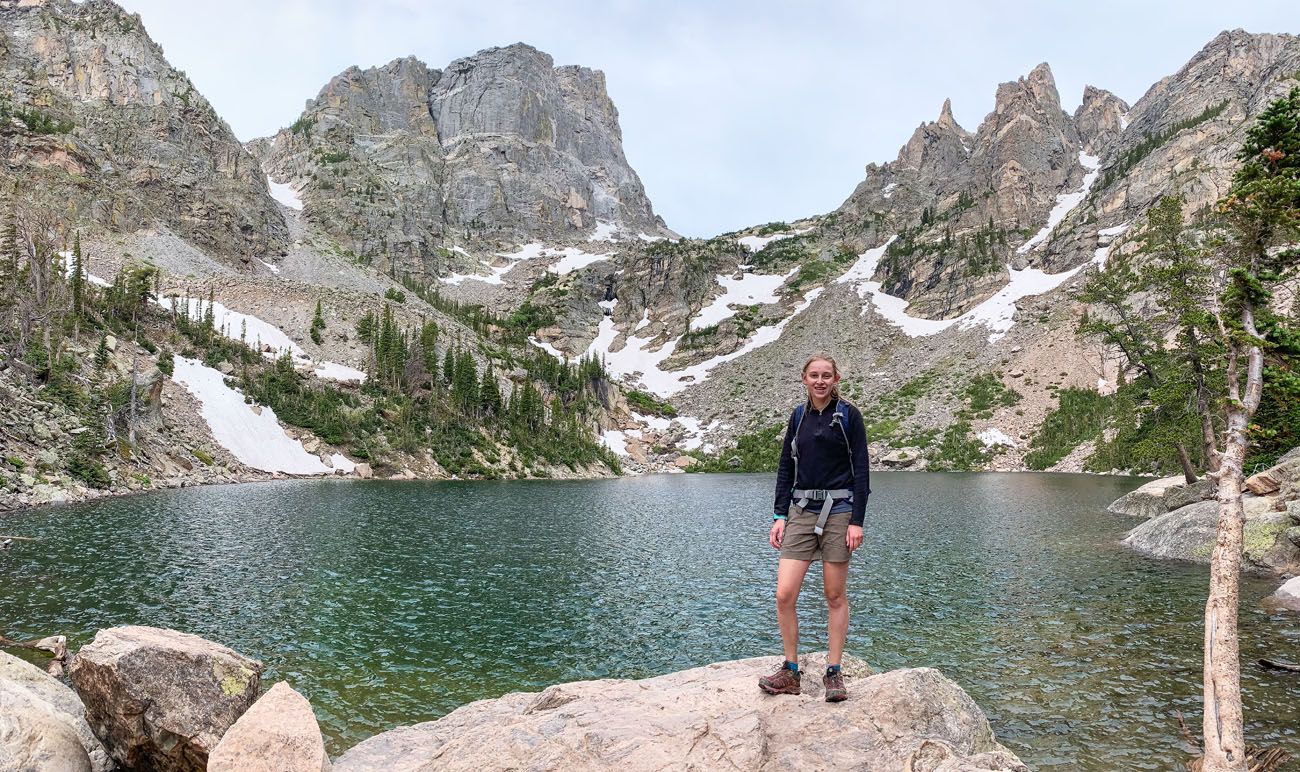
Emerald Lake
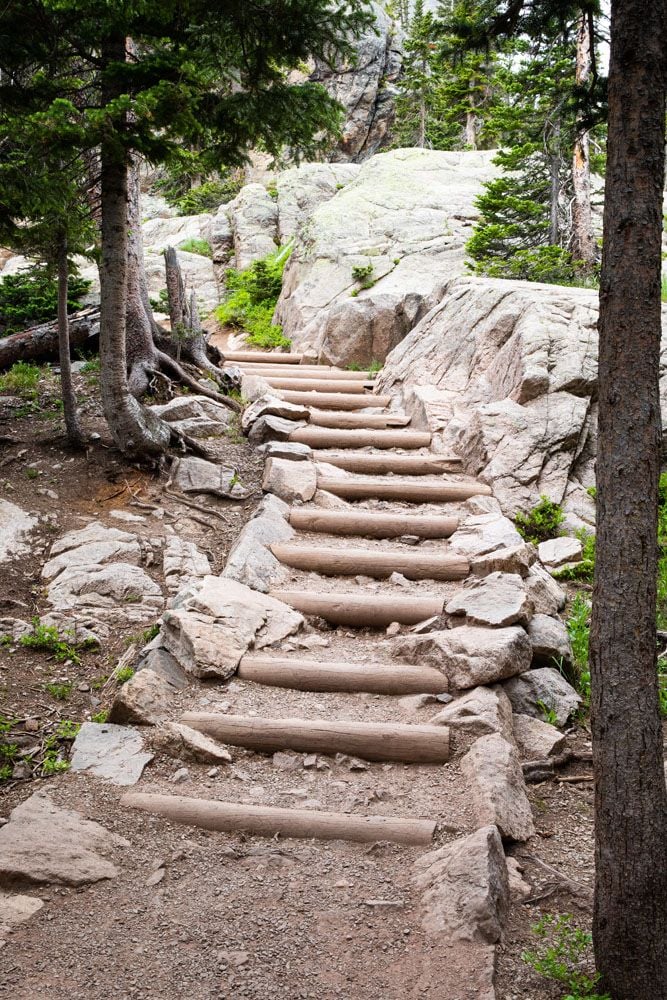
Once past Dream Lake, it’s a steeper uphill hike to get to Emerald Lake. This is the hardest section of the hike, with steep uphill climbs and stairs in some places. Plus, you will hike past 10,000 feet, which can really take your breath away, especially if this is one of your first days in the Rockies.
The trail ends at Emerald Lake. Hallett Peak and Flattop Mountain form the spectacular backdrop of Emerald Lake. The lake is fed by Tyndall Glacier, one of the last glaciers in Rocky Mountain National Park. The water flows from Emerald Lake to Dream Lake before heading into Glacier Gorge.
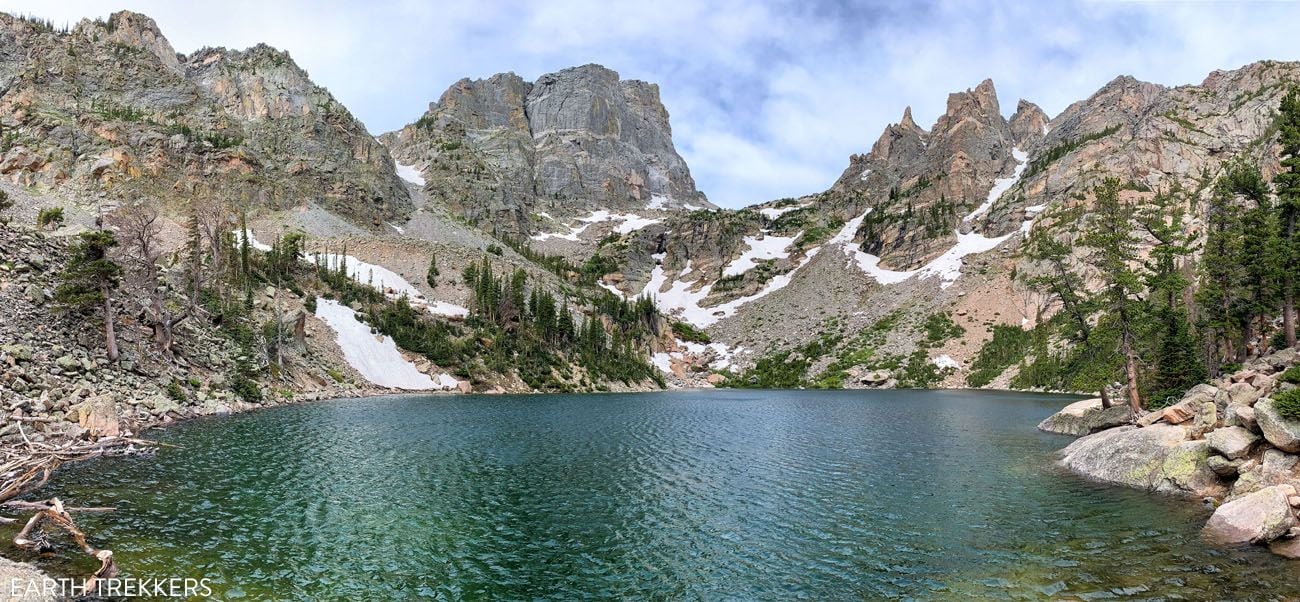
Emerald Lake
Bonus: Bear Lake and Lake Haiyaha
Turn this hike into a four or five-lake hike by adding on Bear Lake and/or Lake Haiyaha. Here’s how to do it.
Bear Lake
Bear Lake is a super easy addition to this hike. And a stroll around Bear Lake is a must-do while in Rocky Mountain National Park.
The trail around Bear Lake starts just a few steps from the Bear Lake Trailhead. You can add on Bear Lake to the beginning or the end of the Emerald Lake hike.
The trail around Bear Lake is 0.6 miles long, has a few short hills, and is wheelchair accessible. There are numerous split-log benches and viewpoints and this makes a wonderful, easy addition to the hike to Emerald Lake.
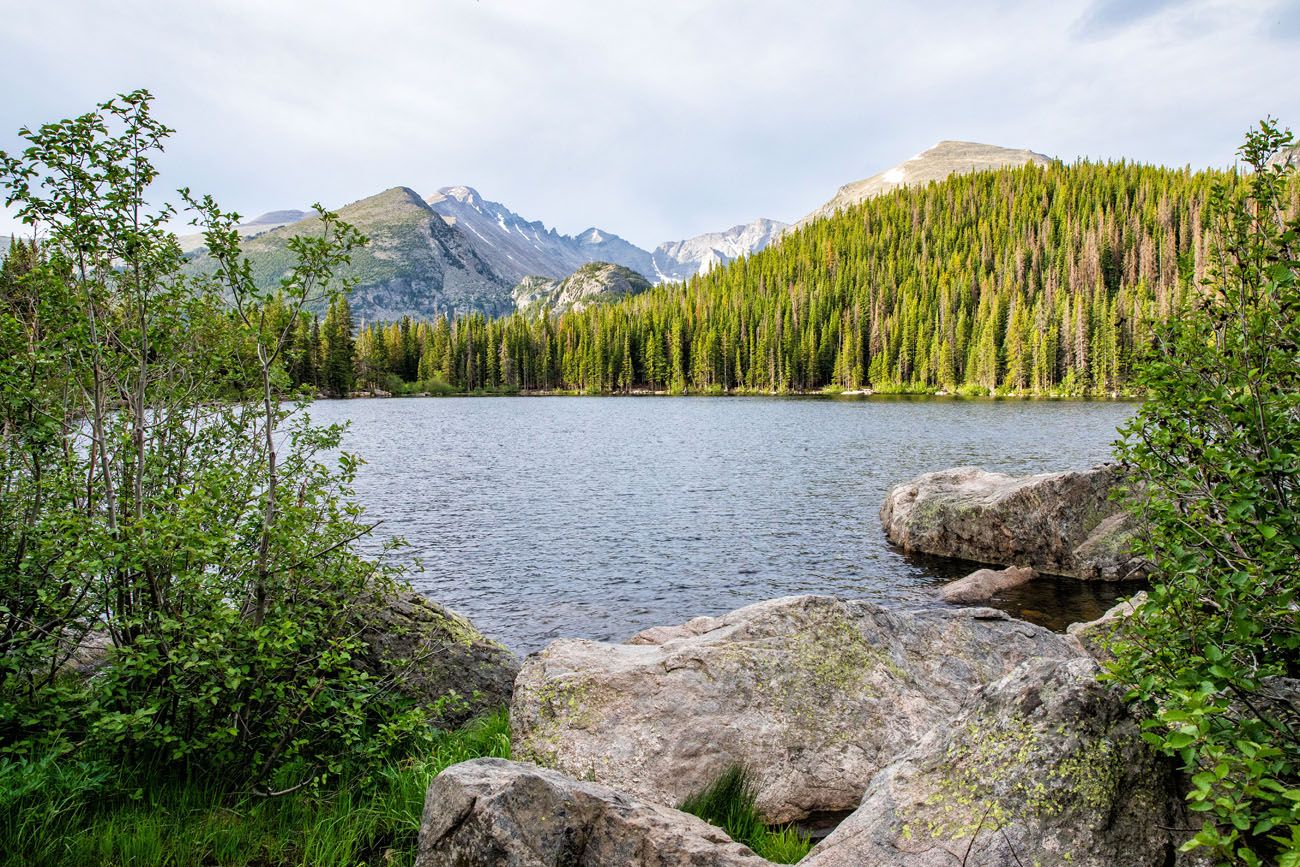
Bear Lake
Lake Haiyaha
Turn this into a five-lake hike by adding on Lake Haiyaha. The trail to Lake Haiyaha starts on the Emerald Lake Trail, between Nymph Lake and Dream Lake.
It is a mostly uphill walk to Lake Haiyaha, but what you get is another spectacular lake with fewer crowds, since many people skip this lake.
Adding Lake Haiyaha adds 2 miles round trip with another 350 feet of elevation gain.
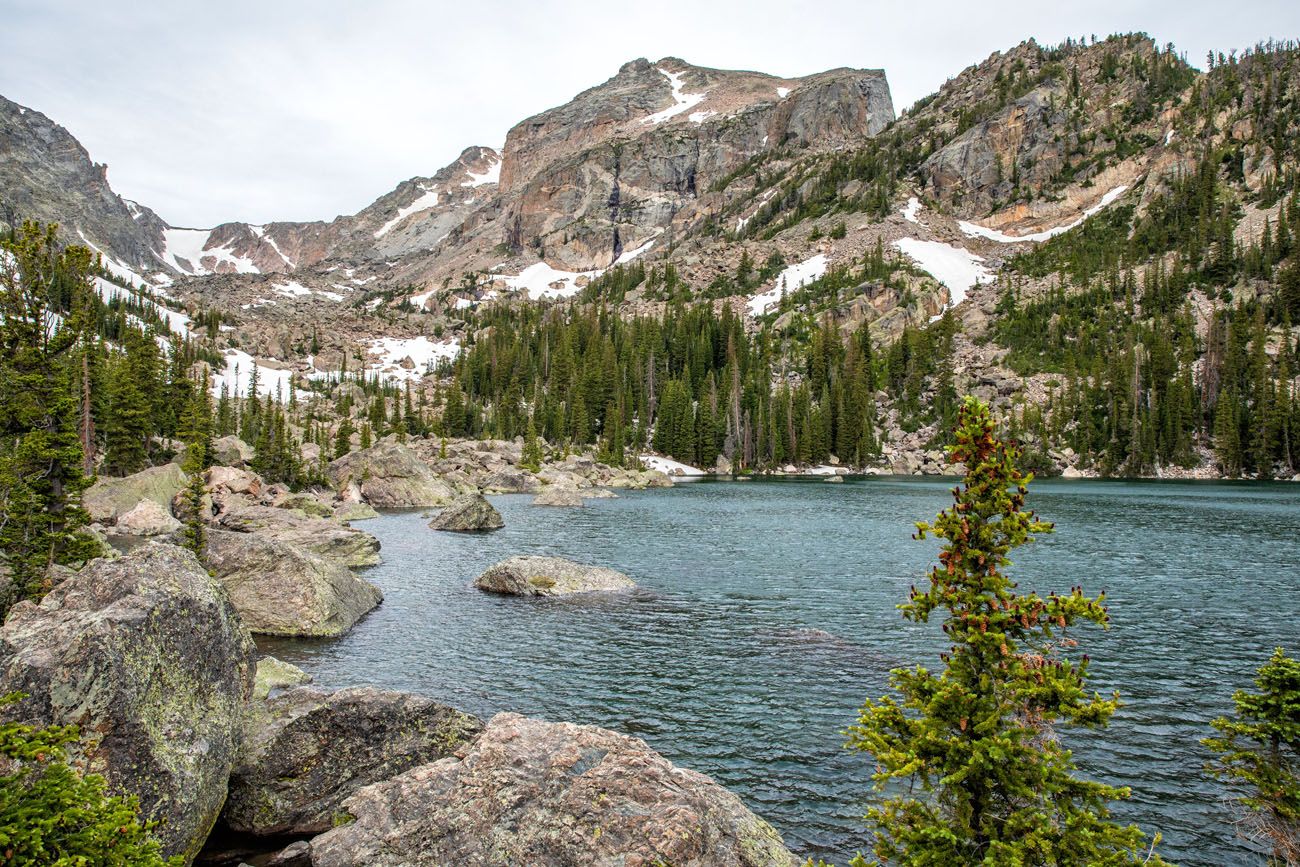
Lake Haiyaha
Hiking Stats for All 5 Lakes (Bear, Nymph, Dream, Emerald & Haiyaha)
Total Distance: 6.2 miles
Total Elevation Gain: 1000 feet
Length of Time: 4 to 5 hours
Tips to Have the Best Experience
Start the hike early, ideally by 8 am. During the summer months, afternoon thunderstorms are common, typically occurring by 2 pm. To avoid the storms, return to the parking lot by 2 pm.
If you plan to visit Rocky Mountain National Park during the summer and early fall, you will need a Timed Entry Permit. Learn more here.
Do not expect your cell phone to work. On 95% of the hike we had zero cellular service (this also goes for the entire drive down Bear Lake Road). There were a few spots in clearings or at higher elevations where we got a few bars of LTE or 3G, just enough to send a text message. But don’t depend on your phone to call for help, talk to friends, or send photos to friends and family.
Be prepared to turn around early. If weather conditions change and you see approaching thunderstorms, be prepared to end your hike before you reach Emerald Lake.
What to Bring on the Hike
Hiking shoes or a good pair of walking shoes. As long as there is not snow on the ground, a good pair of walking shoes or running shoes are sufficient. The trail is rocky and uneven but hiking shoes are not necessary for this hike.
Sunscreen, hat, and sunglasses. For portions of the hike you will be in and out of the shade of the trees.
Camera. Even a smartphone will do. For great photos of the lakes, use the panorama feature of your smartphone.
Essential Hiking Gear: What Should You Bring on a Day Hike?
If you are new to hiking or are curious about what you should bring on a hike, check out our Hiking Gear Guide. Find out what we carry in our day packs and what we wear on the trails.If you have any questions about hiking the Emerald Lake trail, let us know in the comment section below. Happy Hiking!!
More Information about Colorado
15 Epic Hikes in Rocky Mountain National Park (+ Our Top Picks)
Pinterest Facebook Flipboard Rocky Mountain National Park is best seen from a hiking trail. Fortunately, there are hikes for all ages and ability levels. From short, easy strolls around lakes, to ridgeline trails with panoramic views, to challenging but epic climbs to the tallest mountain peaks, there truly is something here for everyone. Here are […]

Ultimate Guide to Sky Pond: Trail Stats, Photos & Helpful Tips
Sky Pond is one of the best hikes in Rocky Mountain National Park for good reason. This hike has a little bit of everything…waterfalls, alpine lakes, high mountain views, and fun river and stream crossings. To get to Sky Pond, you will rock scramble up a waterfall, which can be refreshing when the weather is […]
How to Hike Bear Lake to Odessa Lake and Fern Lake, RMNP
The hike to Odessa Lake and onward to Fern Lake is a relatively low-traffic trail in Rocky Mountain National Park. Its nearby neighbors of Bear Lake, Emerald Lake, and Dream Lake get a lot more visitors, so if you are looking for a relatively uncrowded trail with the chance to visit multiple alpine lakes, this […]
Rocky Mountain National Park Travel Guide
Rocky Mountain National Park Located in the Rocky Mountains of Colorado sits one of the most popular parks in the national park service. With soaring mountains, alpine lakes, and scenic drives, Rocky Mountain National Park is a joy to explore. This is one of the best US national parks to go hiking. Towering mountain peaks, […]
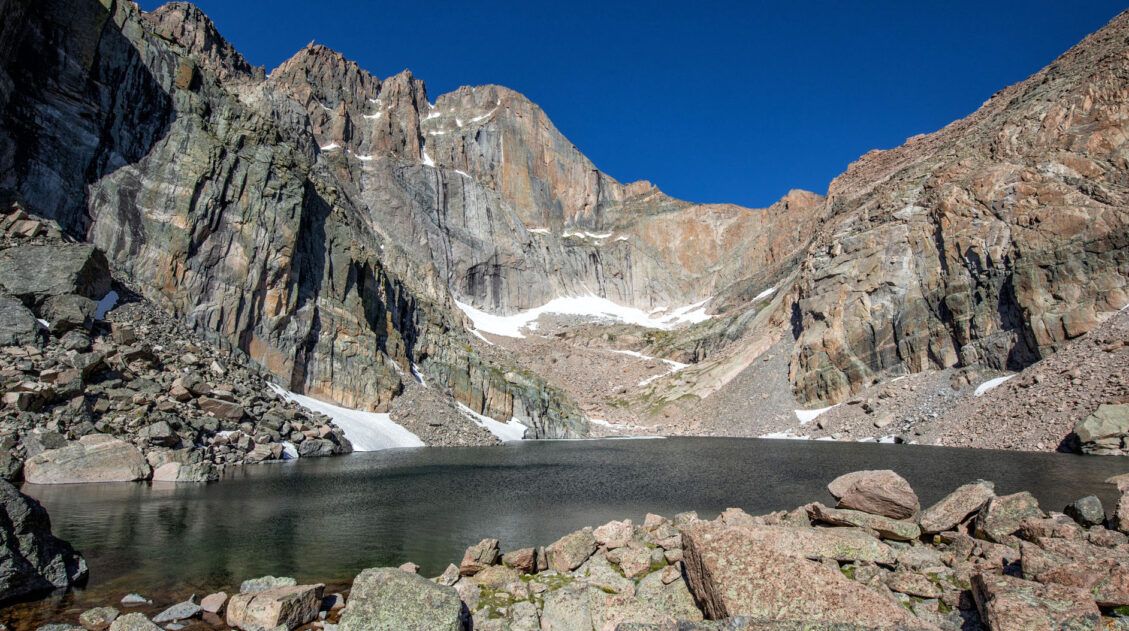
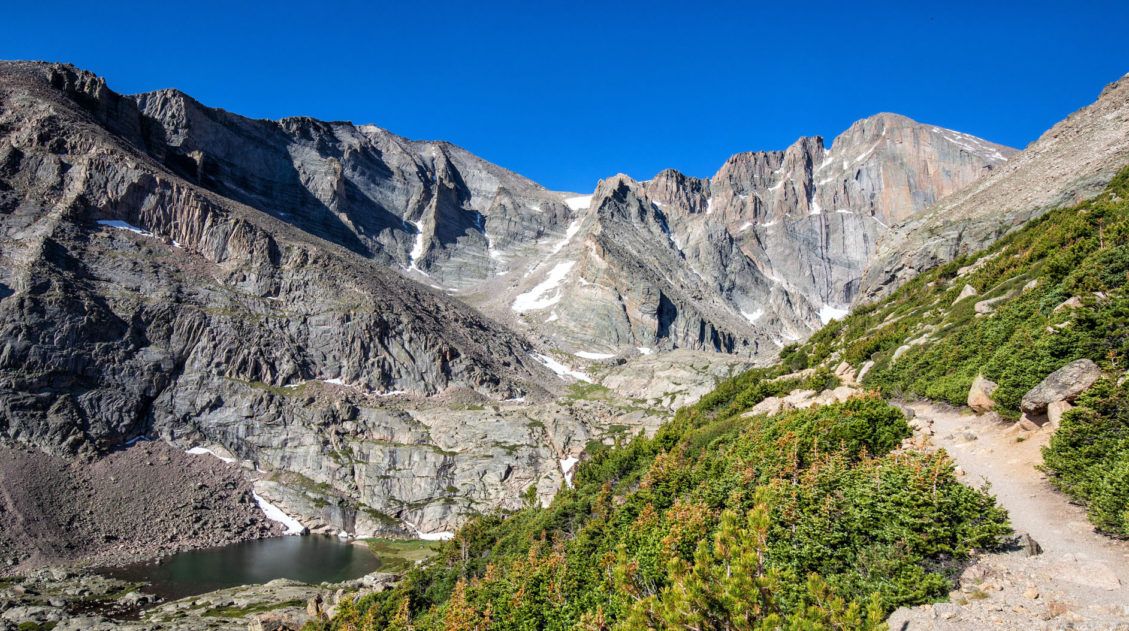
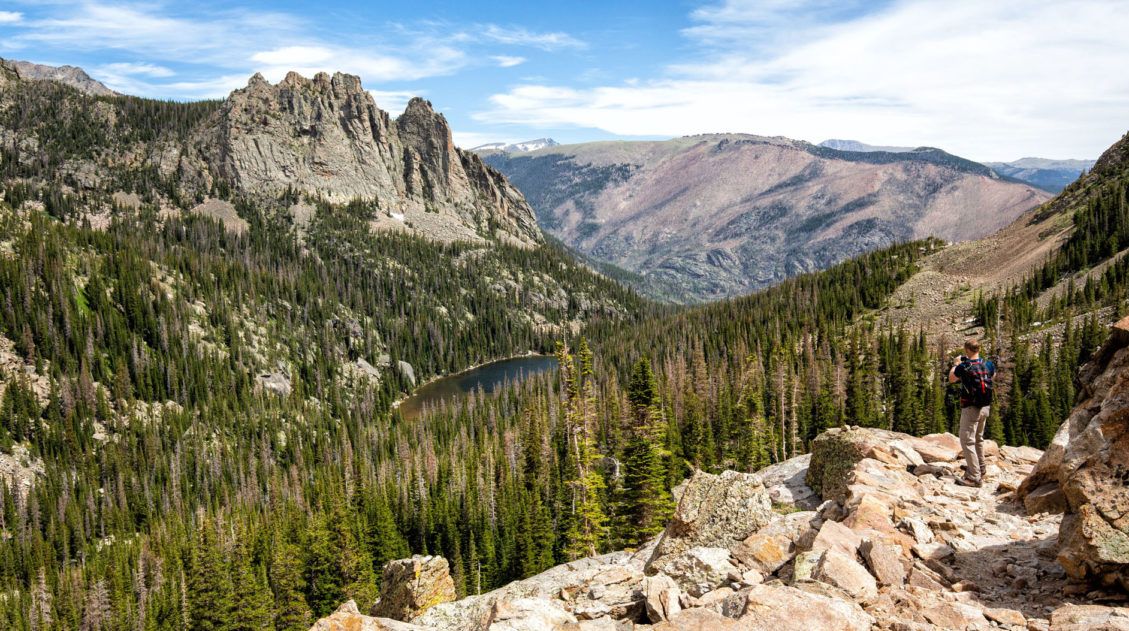
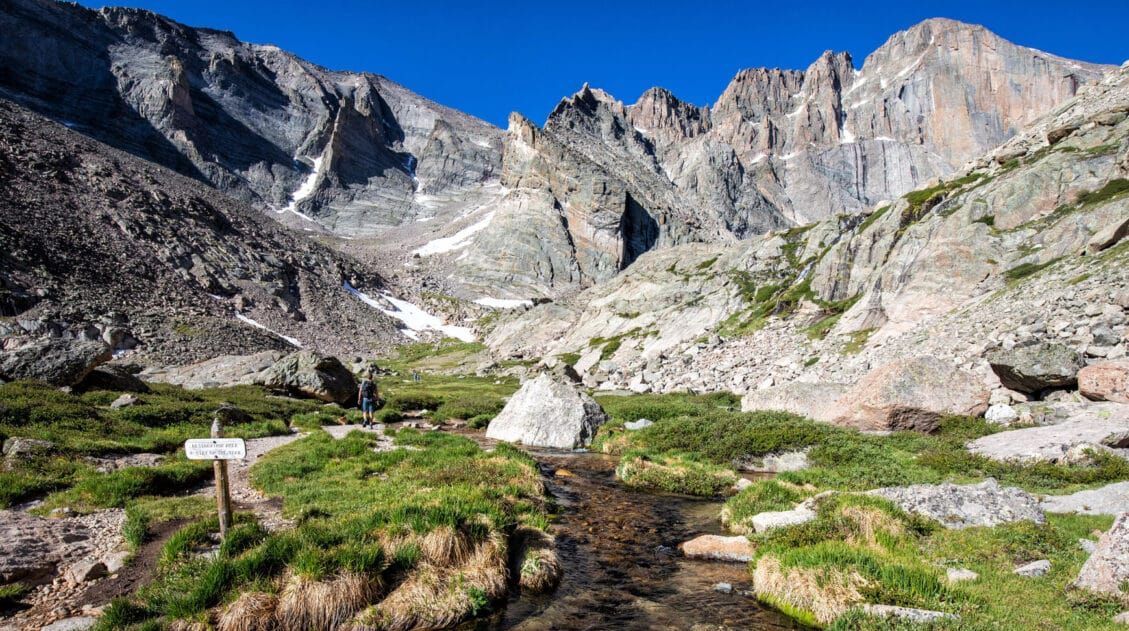
How to Hike Chasm Lake: Photos & Step-By-Step Guide
Chasm Lake is one of the most spectacular lakes in Rocky Mountain National Park. For the first part of the hike, you will walk the same trail as hikers on their way to Longs Peak, the highest point in the park. Once the trail splits, the hike gets a little easier and you are treated […]
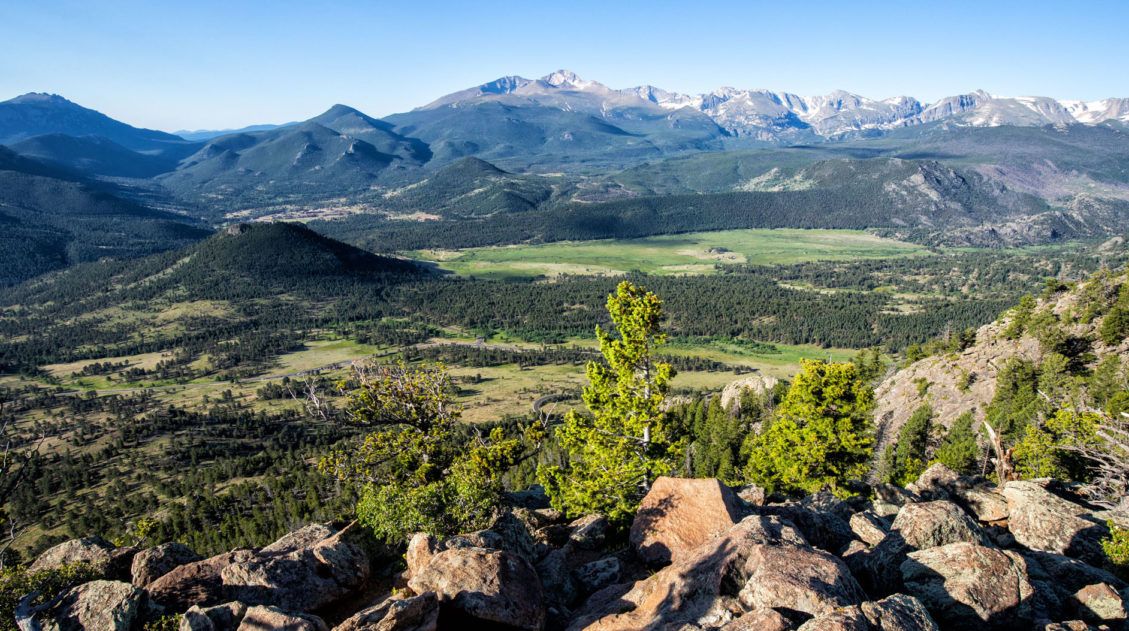
How to Hike Deer Mountain, RMNP (Photos & Trail Stats)
Deer Mountain is one of the easier hikes in Rocky Mountain National Park that offers high mountain views. To get to the peak, it’s an almost constant uphill walk through an evergreen forest. You will get occasional glimpses of Longs Peak early on during the hike, but for the most part, you will have to […]
The Perfect Rocky Mountain National Park Itinerary (2026)
If you are planning your Rocky Mountain National Park itinerary, this is a great place to start. Rocky Mountain National Park is one of the best US national parks to go hiking. With towering mountain peaks, alpine lakes and waterfalls, and the opportunity to hike aƒlong the Continental Divide, this park offers world-class hiking experiences. […]
Best of Estes Park: Things to Do, Where to Eat & Where to Stay
Estes Park is the gateway into Rocky Mountain National Park. This small town is home to numerous hotels and restaurants, making it the perfect home base for exploring the Rocky Mountains. But if you need a break from exploring the national park, there are a bunch of fun things to do in town. In this […]
Ultimate Guide to the Colorado National Parks (+ 10 Day Itinerary)
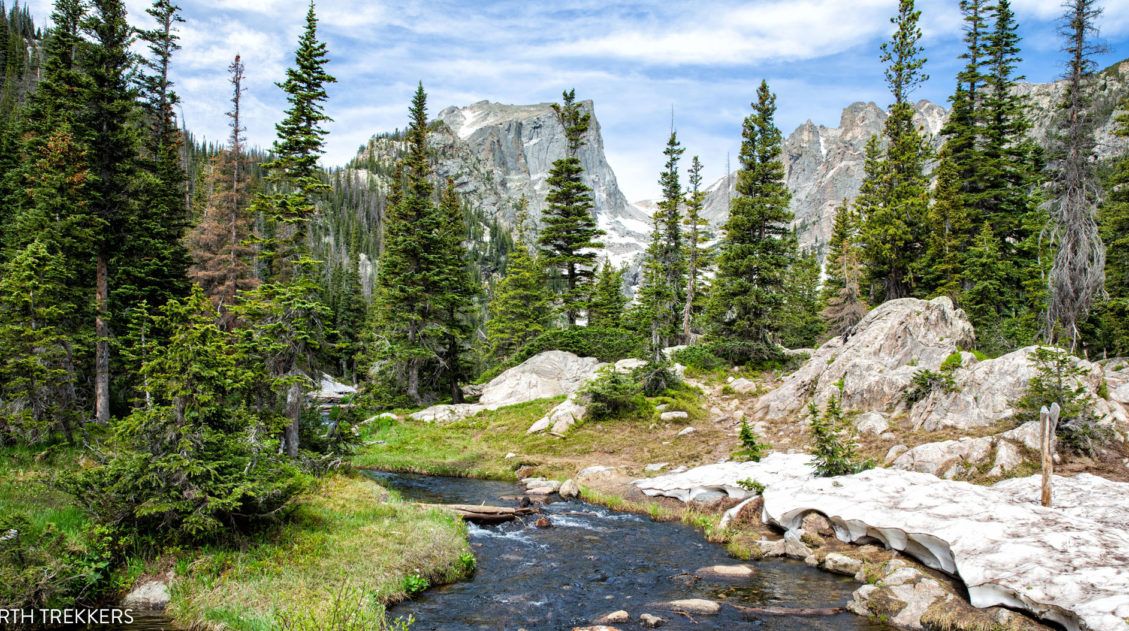
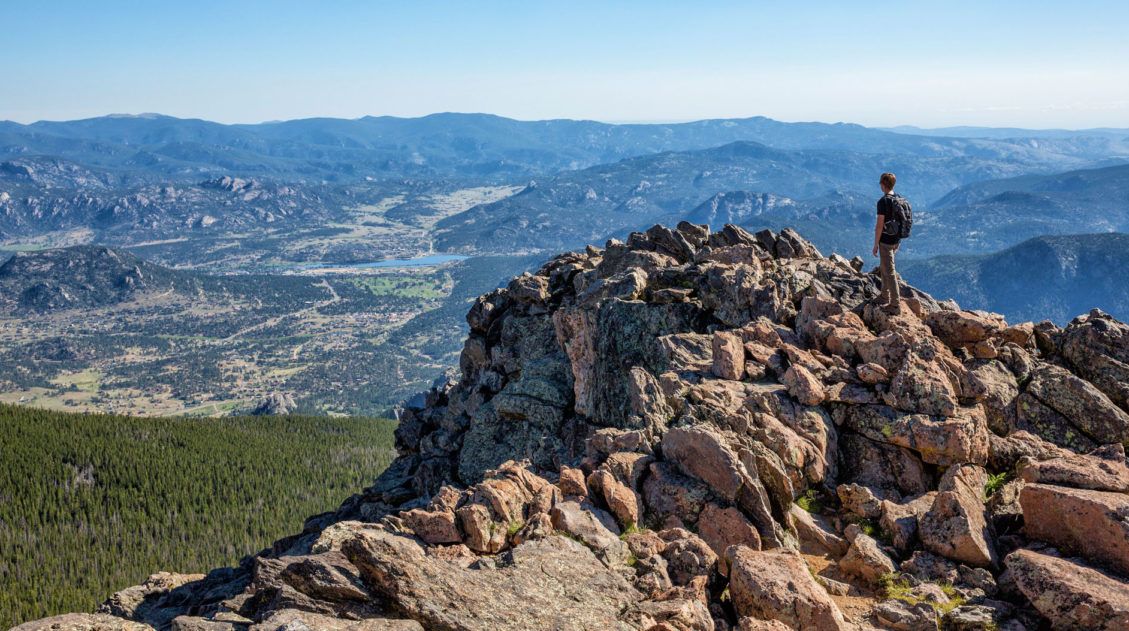
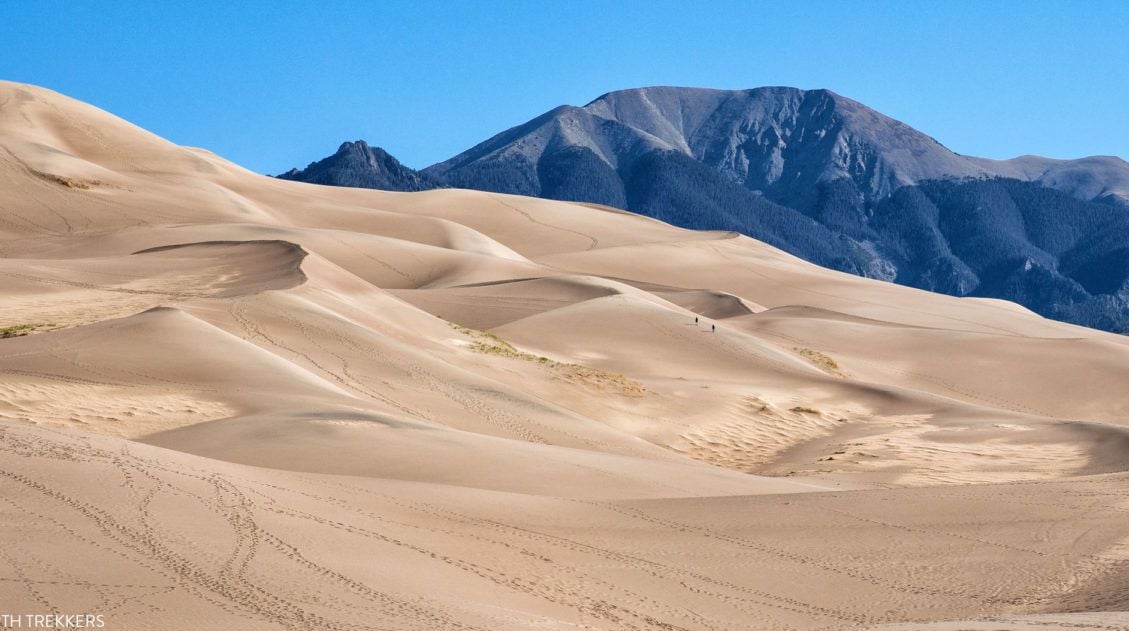
There are four Colorado national parks: Rocky Mountain, Mesa Verde, Black Canyon of the Gunnison, and Great Sand Dunes. The landscapes that these national parks protect are dramatically different from one another. In Rocky Mountain National Park, journey high into the Rocky Mountains, cross the Continental Divide, and hike to gorgeous alpine lakes and waterfalls. […]
How to Hike the Gunnison Route | Black Canyon of the Gunnison
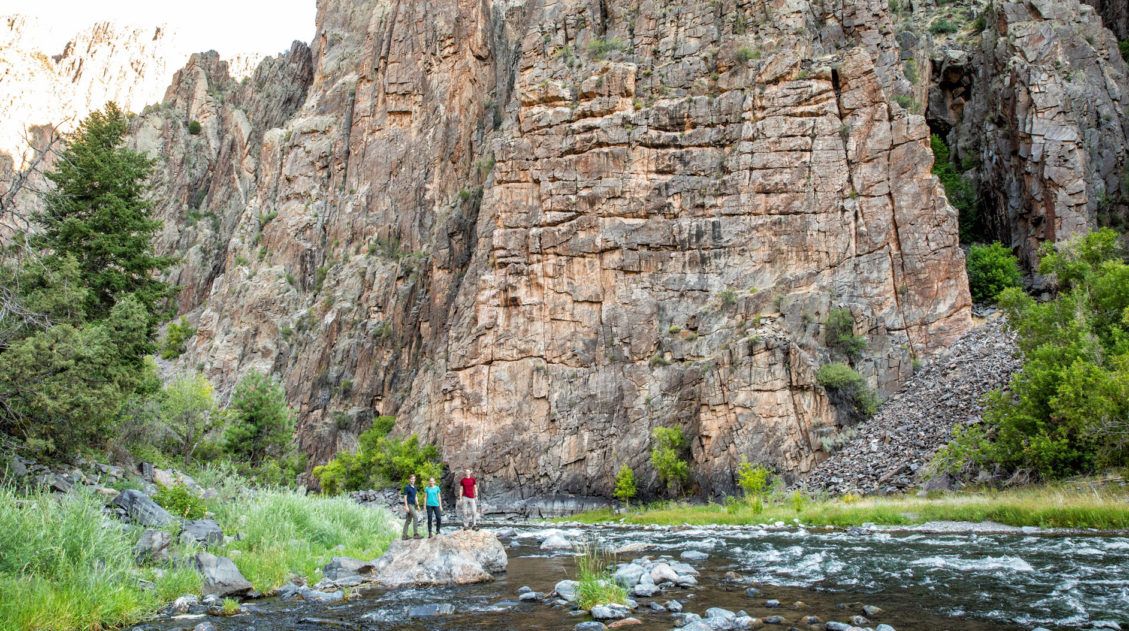
The Gunnison Route takes hikers from the south rim of the Black Canyon to the Gunnison River. It’s the most popular inner canyon experience on the south rim, but don’t let that fool you. This is a hard, strenuous hike where you will descend (and later hike back up) a massive amount of elevation in […]
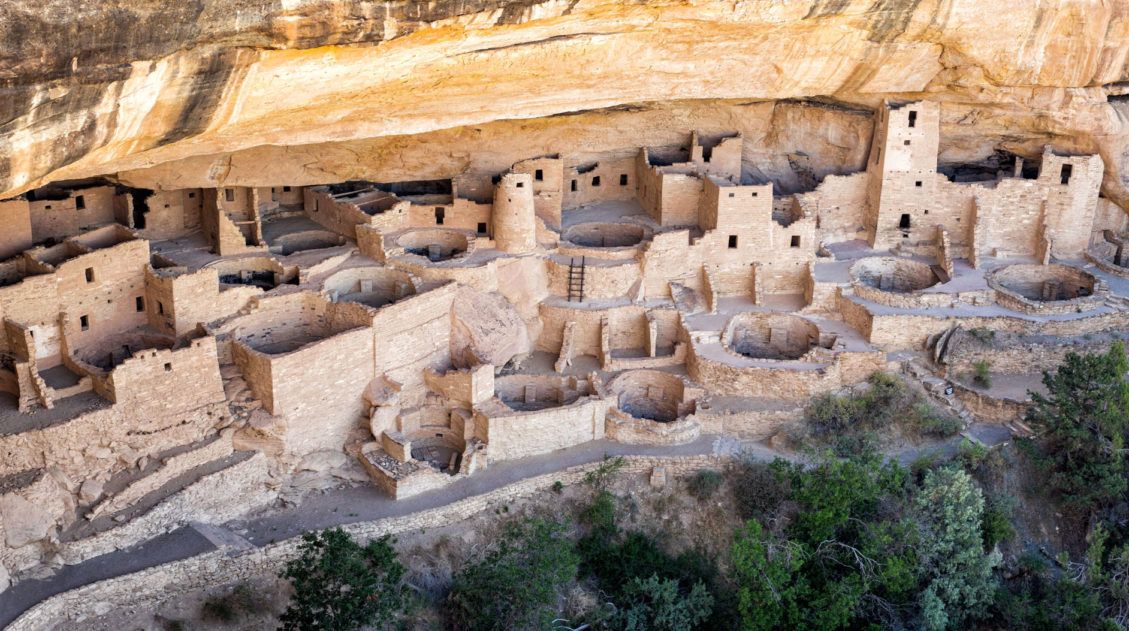
Top 10 Things to Do in Mesa Verde National Park
Located in southwestern Colorado, Mesa Verde National Park is one of the most unique national parks in the United States. This park preserves the ancient Puebloan cliff dwellings and archeological sites that are hundreds of years old. Short hikes, scenic drives, and viewpoints make the to-do list, but the best way to experience this park […]
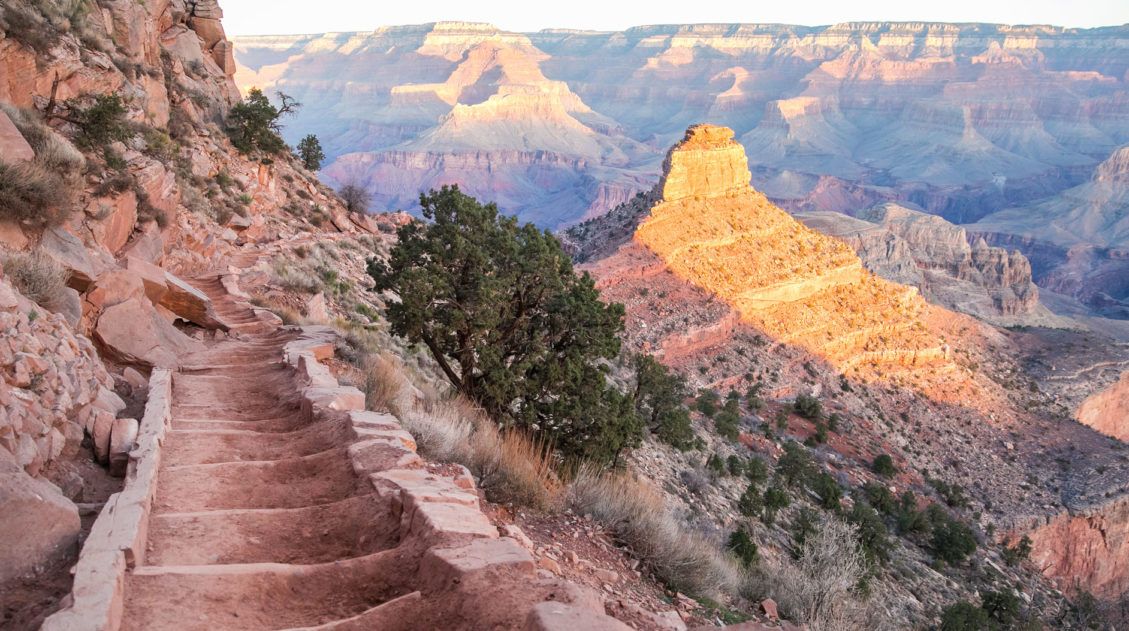
20 Fun, Short Hikes in the US National Parks
One of the best ways to experience the national parks is from a hiking trail. Hike to amazing viewpoints, deep into the forests, through scenic canyons, and to hidden lakes and waterfalls. Along the way, you have a better chance of spotting wildlife and potentially leaving the crowds behind. Here are 20 fun, short hikes […]
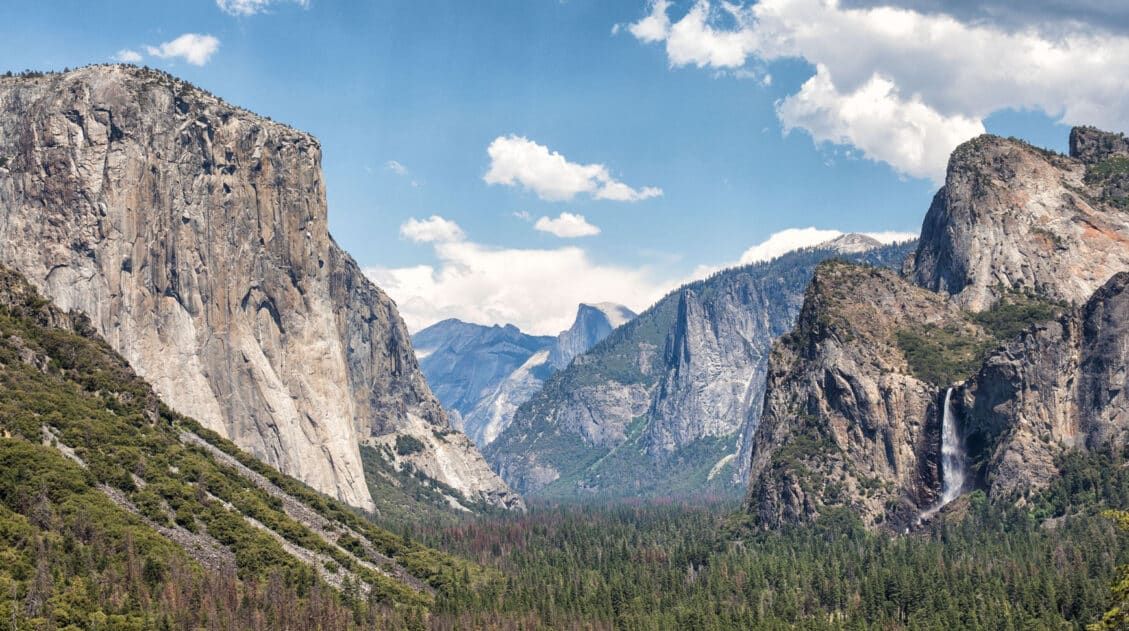
The Ultimate Guide to the 63 US National Parks
Stretching from the South Pacific, across the United States to the Caribbean, are 63 national parks. These national treasures preserve iconic landscapes, majestic mountains, primordial forests, arid deserts, misty coastlines, immense canyons, wildlife, and historic landmarks. We have visited 56 of the 63 US national parks, from the towering granite walls of Yosemite and the […]

Comments 15