

In Haleakala National Park, you can combine two very unique trails into one big day hike. The Sliding Sands Trail, which is one of the most popular trails in the park, starts on the rim of Haleakala and ends on the crater floor. To finish the hike, you can retrace your steps back up the Sliding Sands Trail, or, for a more interesting experience, cross the crater floor and hike back up to the rim on the Halemau’u Trail.
Called the Sliding Sands Loop, the combination of the Sliding Sands Trail with the Halemau’au Trail forms an 11-mile point-to-point hike that provides ever changing views of the Haleakala crater. It’s a long hike, and can be logistically challenging, but it’s worth it. We loved this hike and it was one of our favorite experiences in Hawaii (it’s also one of our favorite hikes in the US National Parks!).
On our recent visit to Haleakala National Park, we hiked this trail in both directions, so we have lots of great information to share with you.
In this guide to the Sliding Sands Loop, we cover what to expect on the trail, transportation logistics, tips to have the best experience, and alternatives to hiking point-to-point across the Haleakala crater.
Sliding Sands Trail Hiking Stats
Sliding Sands Trail to the Halemau’u Trail
Below are the stats for hiking the Sliding Sands Trail and then the Halemau’u Trail point-to-point.
Start: Sliding Sands Trailhead, next to the Visitor Center Parking Lot (elevation: 9,850 feet or 3,000 meters)
Finish: Halemau’u Trailhead (elevation: 8,000 feet or 2,438 meters)
Distance: 11.2 miles (18 km)
Total Ascent: 1,800 feet (550 m)
Total Descent: 3,600 feet (1,100 m)
Difficulty: Strenuous
Length of Time: 4.5 to 6.5 hours


Sliding Sands to the Halemau’u Trail elevation profile
Halemau’u Trail to the Sliding Sands Trail
Below are the stats for hiking the Halemau’u Trail first and ending with the Sliding Sands Trail.
Start: Halemau’u Trailhead (elevation: 8,000 feet or 2,438 meters)
Finish: Sliding Sands Trailhead, next to the Visitor Center Parking Lot (elevation: 9,850 feet or 3,000 meters)
Distance: 11.2 miles (18 km)
Total Ascent: 3,600 feet (1,100 m)
Difficulty: Strenuous
Length of Time: 5 to 7 hours
Which Way Should You Go?
The hiking distance and the views are identical on both routes. However, it’s MUCH easier to start on the Sliding Sands Trail and end with the Halemau’u Trail.
The Halemau’u Trailhead sits almost 2,000 feet lower than the Sliding Sands Trailhead, so if you start on the Sliding Sands Trail, you will have much less elevation to tackle. We’re talking a total of 1,800 feet (550 m) less to climb if you start on the Sliding Sands Trail.
Please practice the seven principles of Leave No Trace: plan ahead, stay on the trail, pack out what you bring to the hiking trail, leave areas as you found them, minimize campfire impacts, be considerate of other hikers, and do not approach or feed wildlife.
Hiking the Sliding Sands Loop
Step-By-Step Trail Guide
Here is the trail description and lots of photos, starting with the Sliding Sands Trail and ending with the Halemau’u Trail.
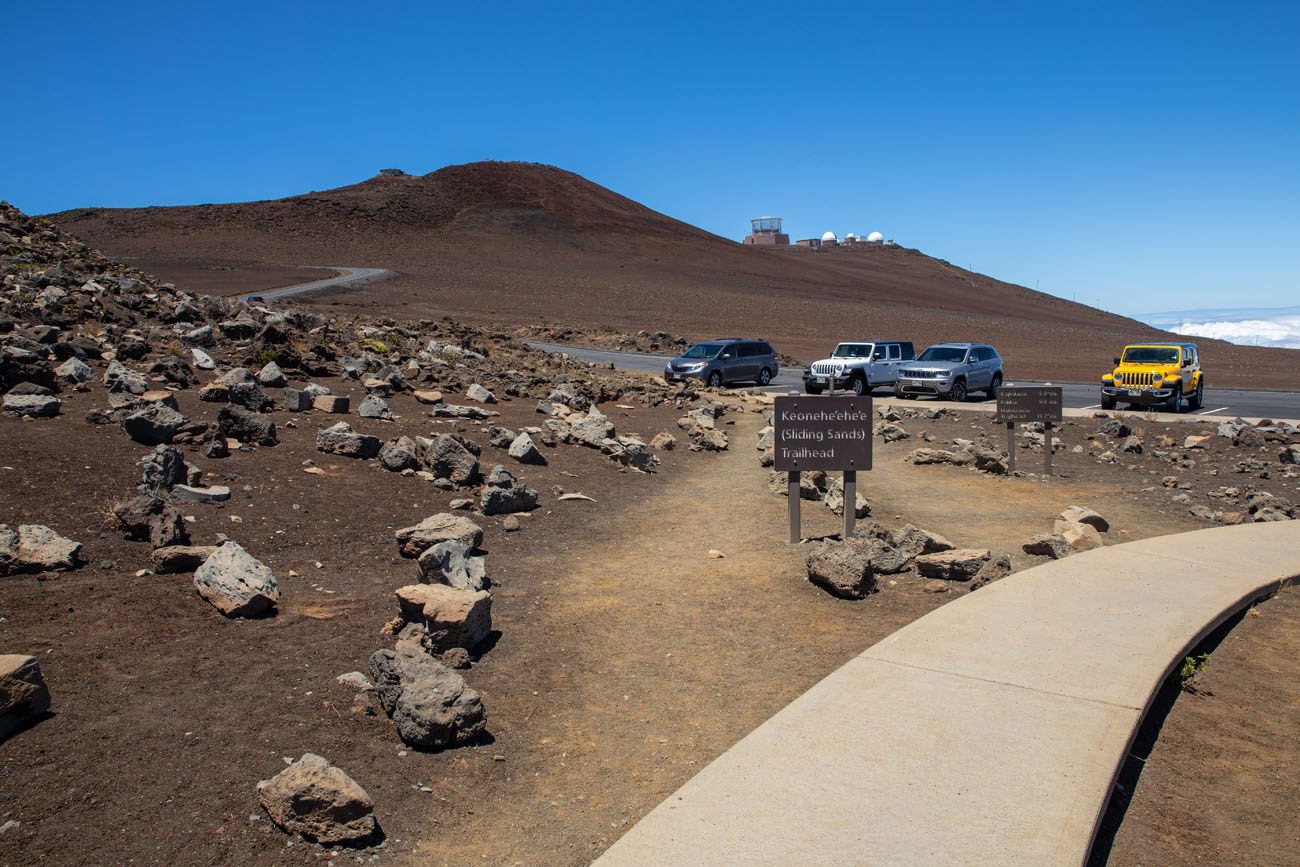
Sliding Sands Trailhead
Park in the visitor center parking lot. There are restrooms here and if you want to get trail updates, you can speak to one of the park rangers at the visitor center.
The trailhead is located on Haleakala Highway (Route 378), right next to the entrance into the parking lot. Just look for this sign (below). The Sliding Sands Trail is also called the Keonehe’ehe’e Trail.
On the Sliding Sands Trail
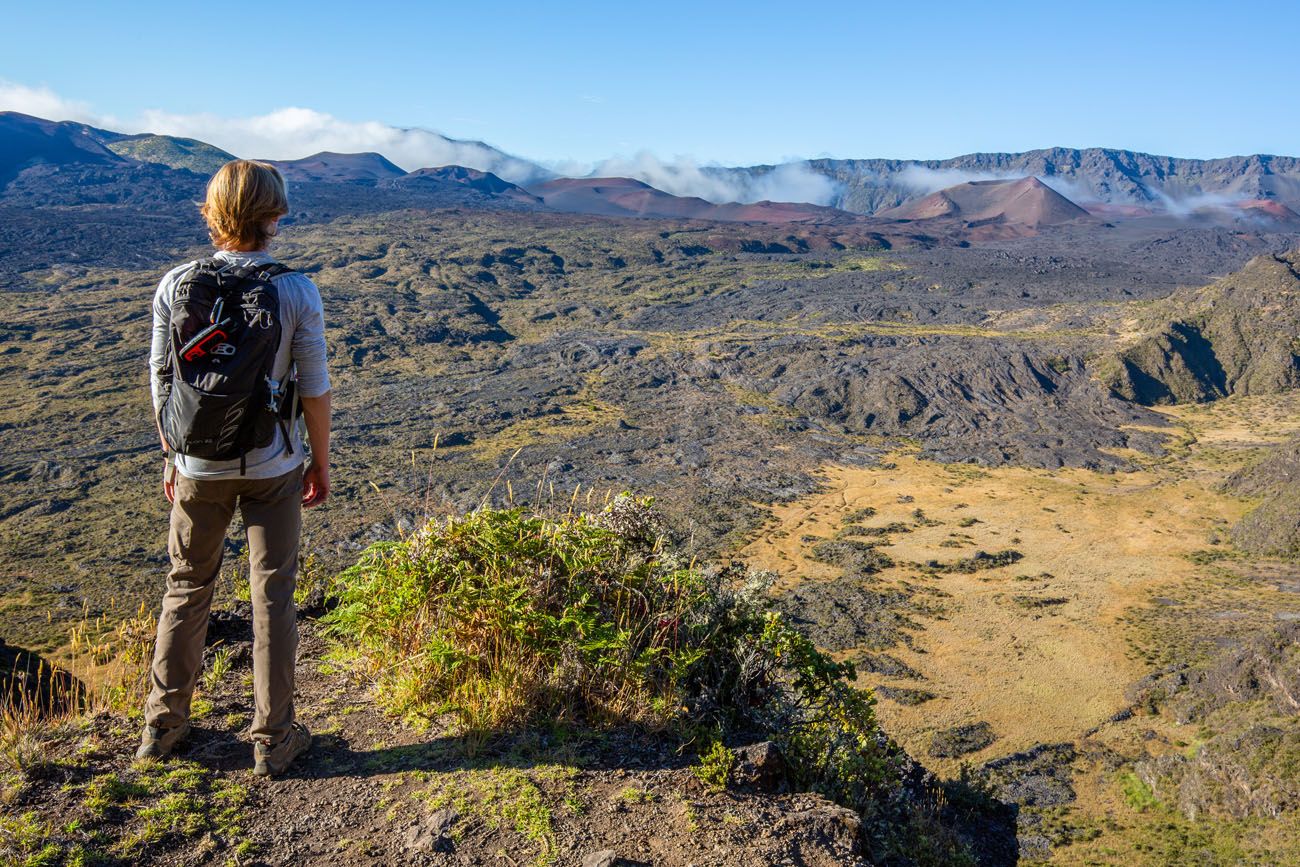
The first part of the trail heads parallel to Haleakala Highway for a short distance. Once you walk around the bend, you have your first view of the Haleakala crater.


The Sliding Sands Trail is mostly downhill, so you can make good time here, unless you are like us, stopping over and over again for photos.
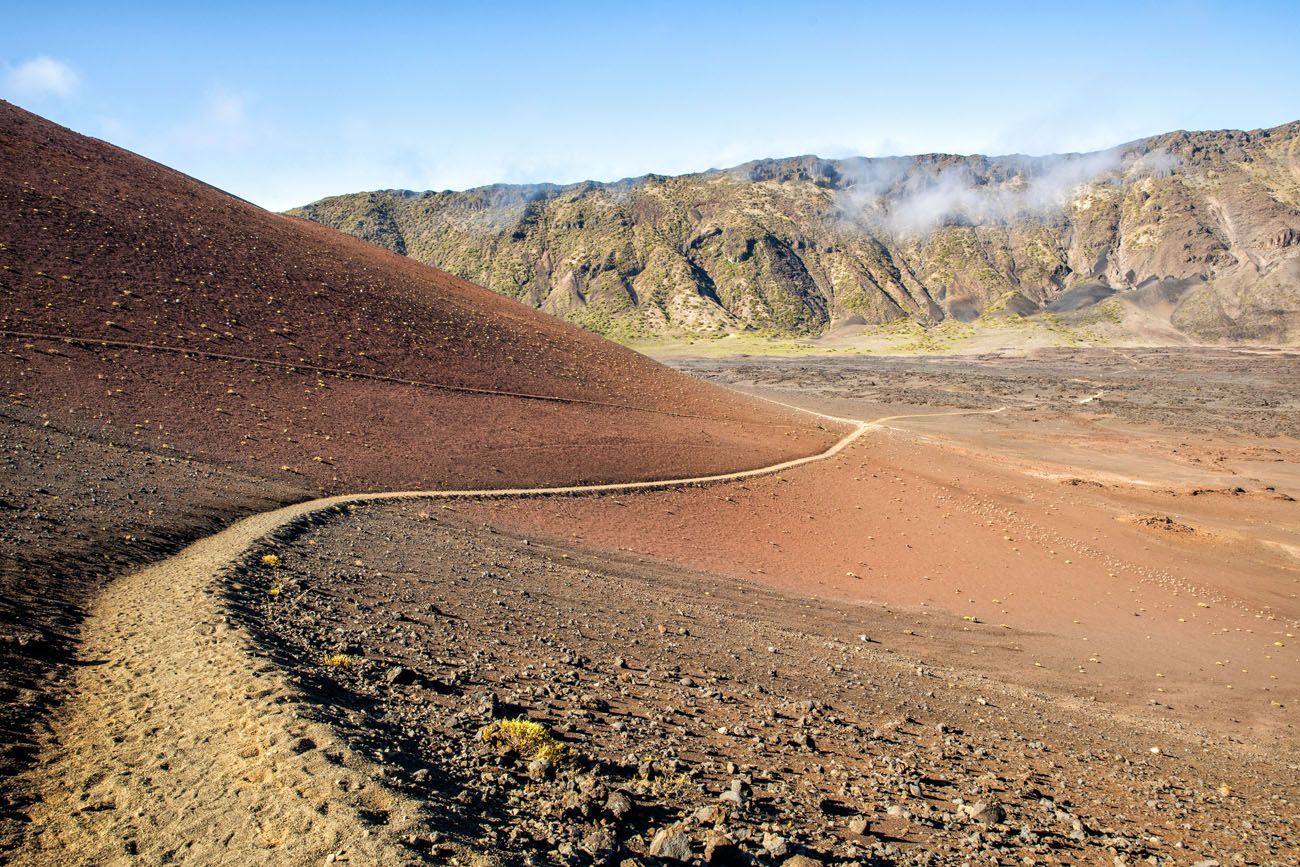
This is such a unique hike. As you hike into the crater, you slowly descend from the rim through a landscape that looks as if you are walking on Mars. Off in the distance are cinder cones and a dark, almost barren volcanic landscape.

The first part of the trail makes a few giant switchbacks as it descends into the crater. The trail is gravelly with a few rocks here and there, and it’s pretty quick moving at this point.
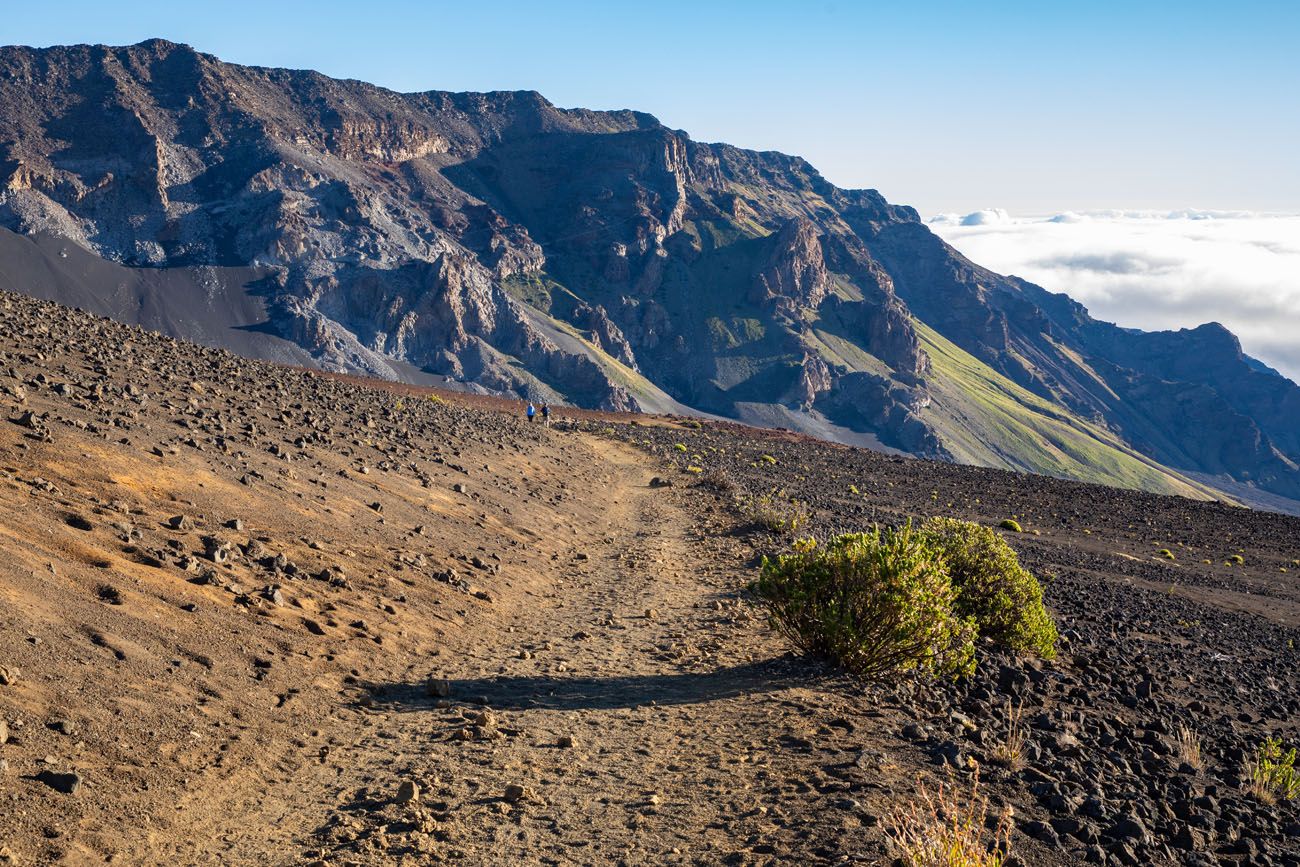

At roughly the 2 mile point, the trail levels out, just for a little bit, and gets a little rockier. There is also more plant life here.
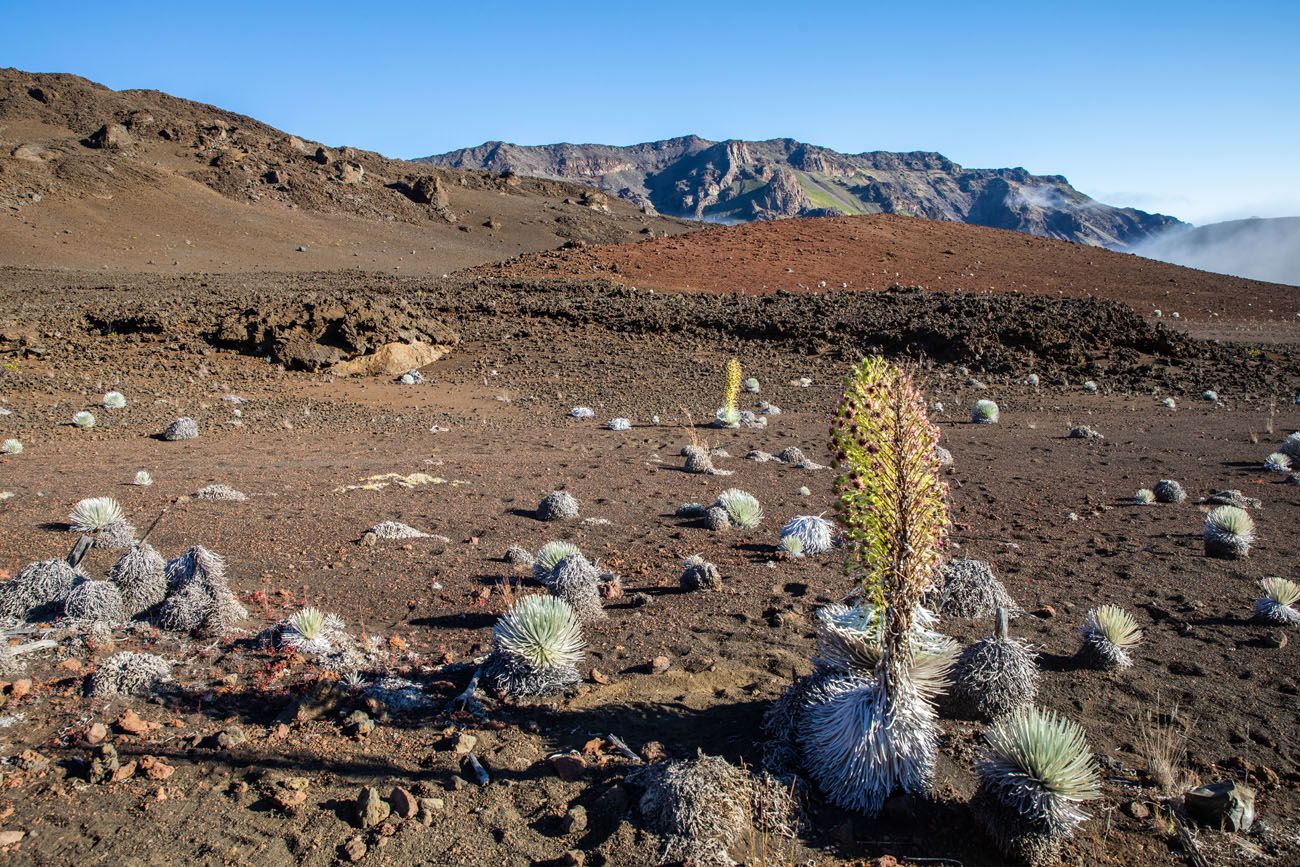
Keep an eye out for silverswords. These small, silvery spiky balls are endangered plants that are only found on Haleakala on Maui and Mauna Kea and Mauna Loa on Hawaii. Silverswords can live up to 90 years but they only bloom once. If you get to see one, you are extremely lucky!

Silversword
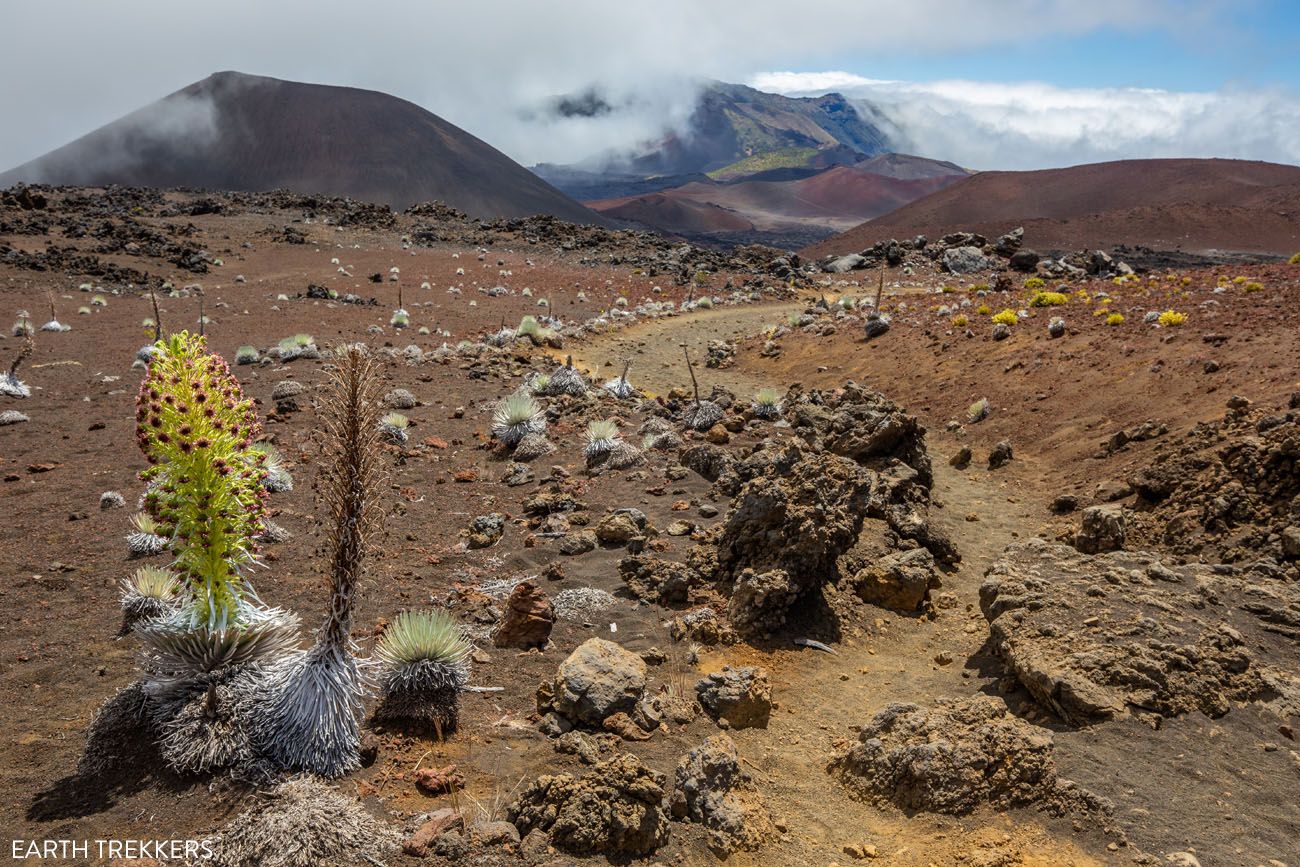
IMPORTANT! Stay on the hiking trail at all times. Even though the crater looks like a barren wasteland, it is a fragile ecosystem. Stay on the trail, limit hiking groups to 12 or less, and practice the principles of Leave No Trace.
Crossing the Haleakala Crater
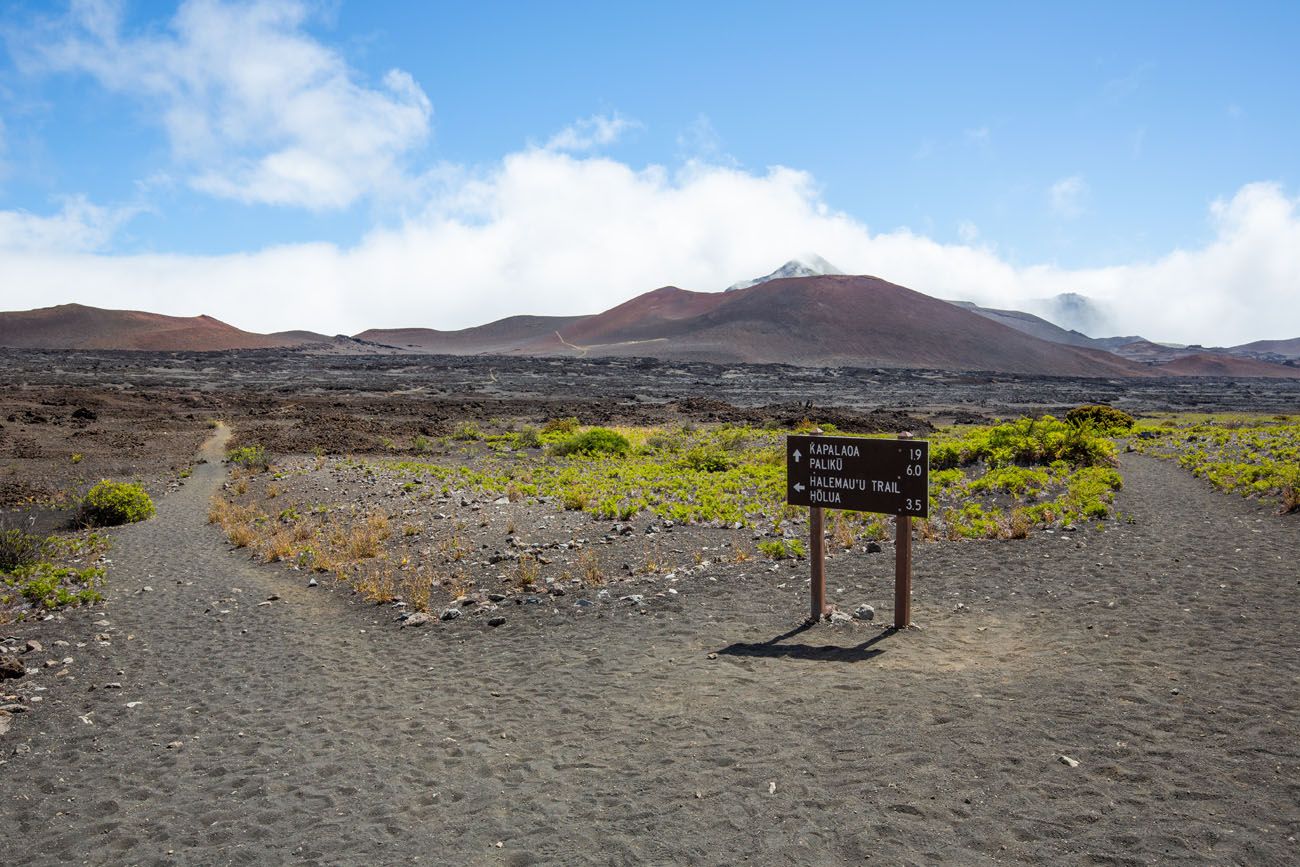
After one more stretch of switchbacks, and roughly 4 miles into the hike, you will arrive at the first trail junction. This is marked by a trail sign. Go left to continue to the Halemau’u Trail.
This spur trail travels through some the darkest, sandiest terrain. You are now crossing the Haleakala crater floor. It can be slow going for the next 2 miles, as hiking through this deep, black sand is slow and tiring.
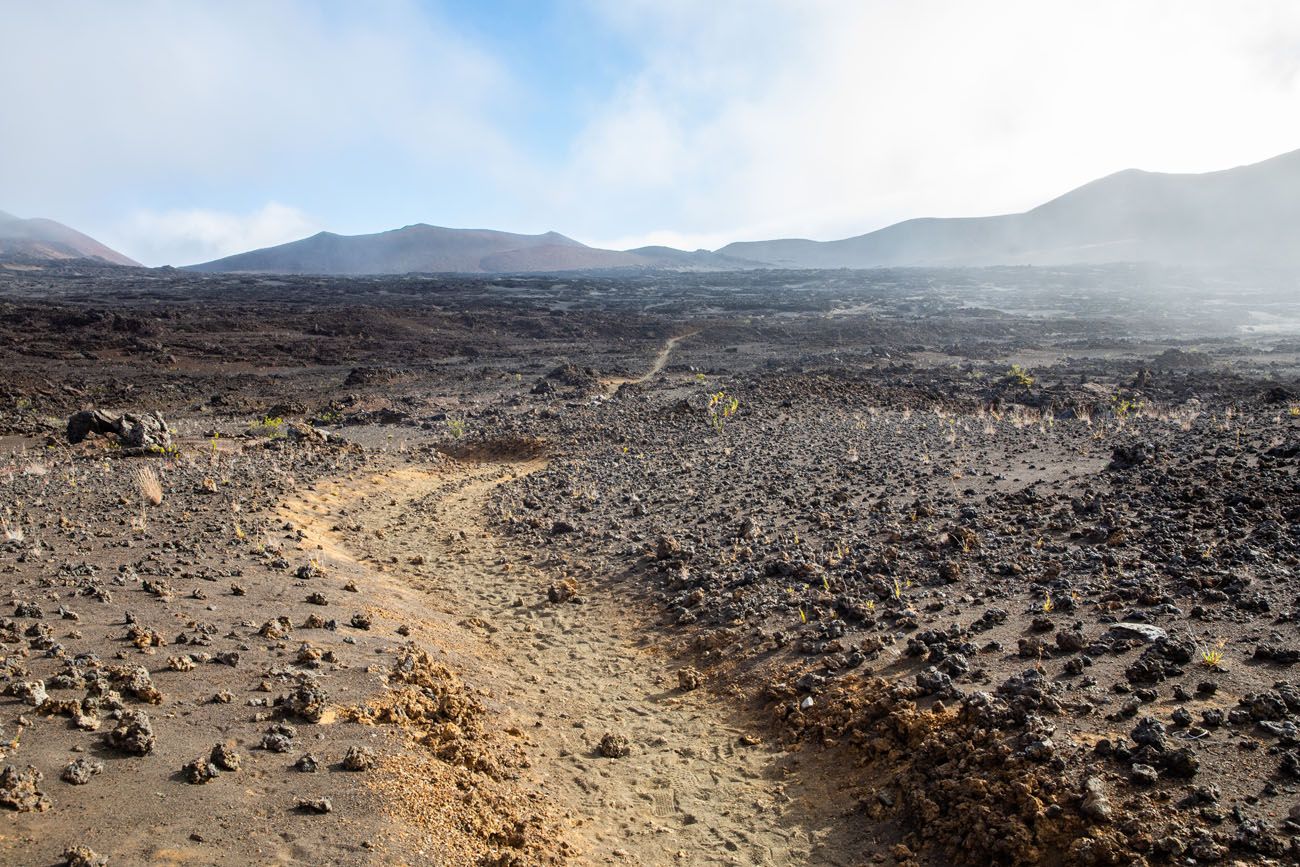
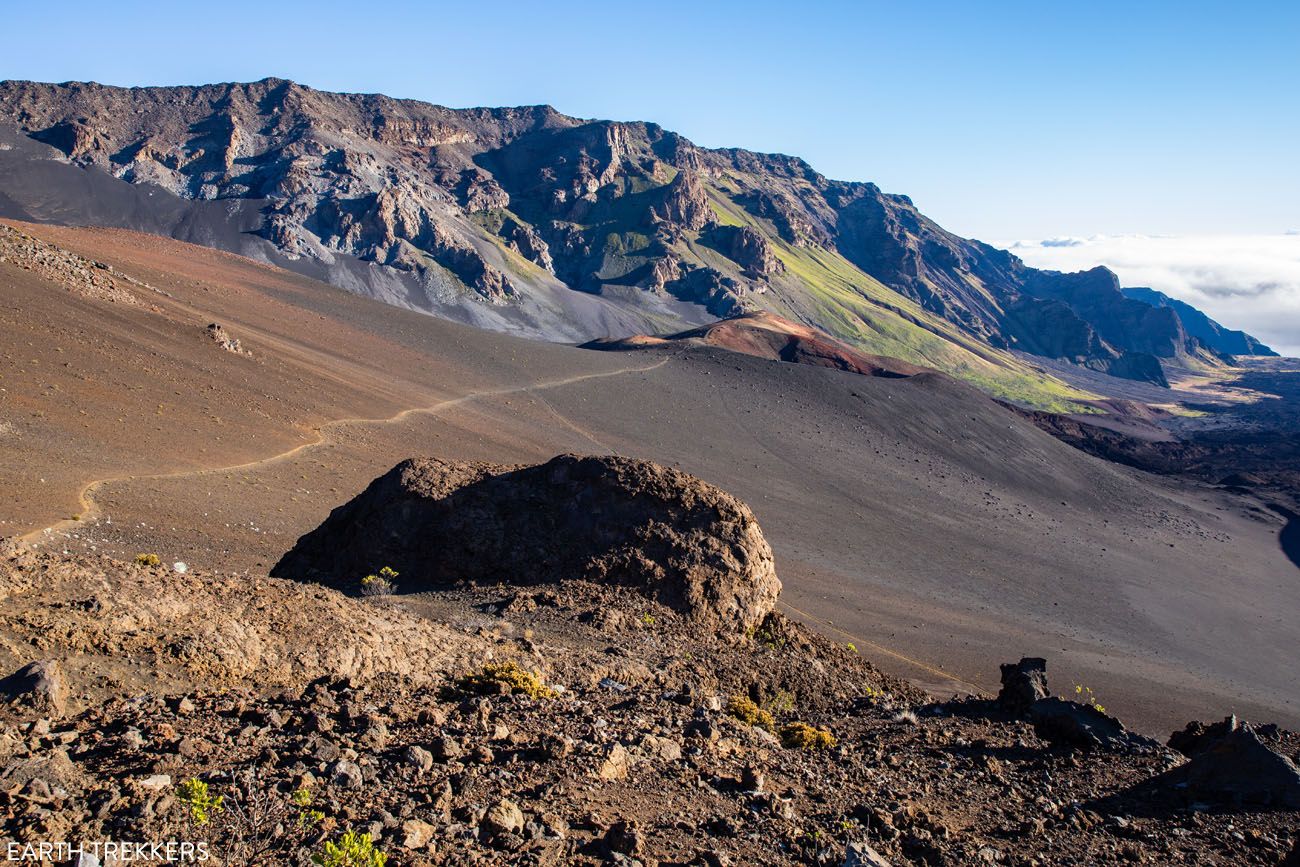
Next comes the hike up the side of the Halali’i cinder cone, which doesn’t look too bad in photos but is deceptively challenging since you are hiking up a sandy trail. But from the top the views are incredible. Turn around and look where you came from…you can see the Sliding Sands Trail as it switchbacks up the rim of the crater.
The view back down the trail on the Halali’i cinder cone.
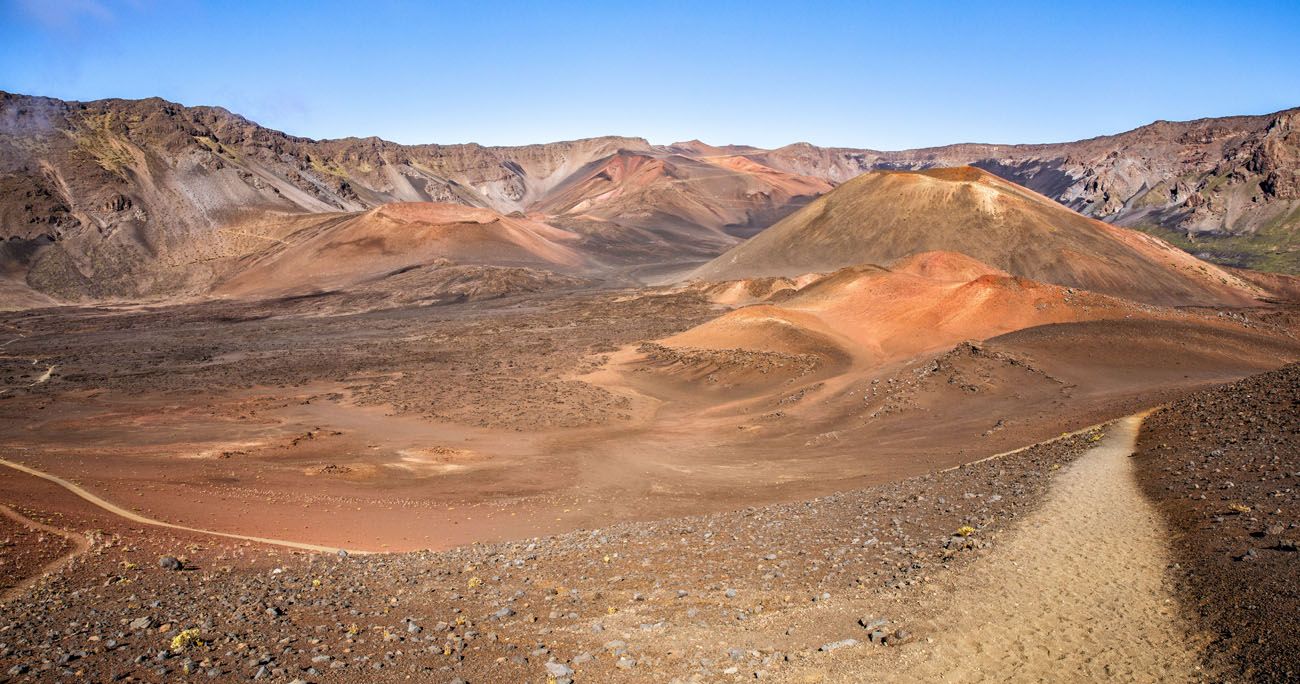
Looking back at the Sliding Sands Trail. If you look closely, you can see the trail as it switchbacks up the crater rim.
Halemau’mau Trail
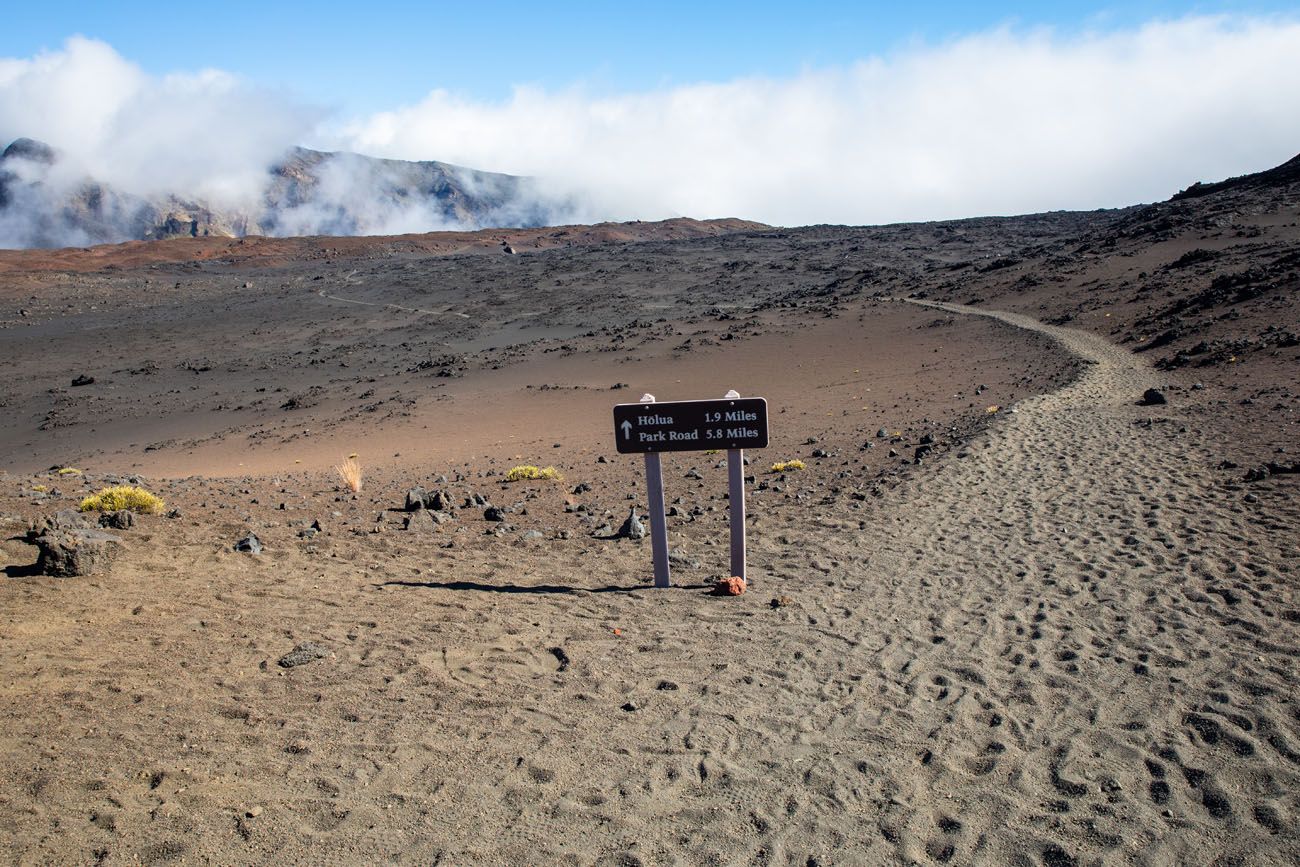
At the far side of the Halali’i cinder cone you will reach another trail junction. Turn left to continue to the Halemau’u Trail (follow the sign to Park Road, which is 6.1 miles from this point according to the National Park Service sign).
OPTIONAL DETOUR: Turn right here to hike to Kawilinau, the Bottomless Pit. It’s about 0.4 miles one-way and it will add about 20 to 30 minutes onto the hike.
From the Halali’i cinder cone, the trail is flat for a bit. The trail is still sandy here but that will be ending soon.
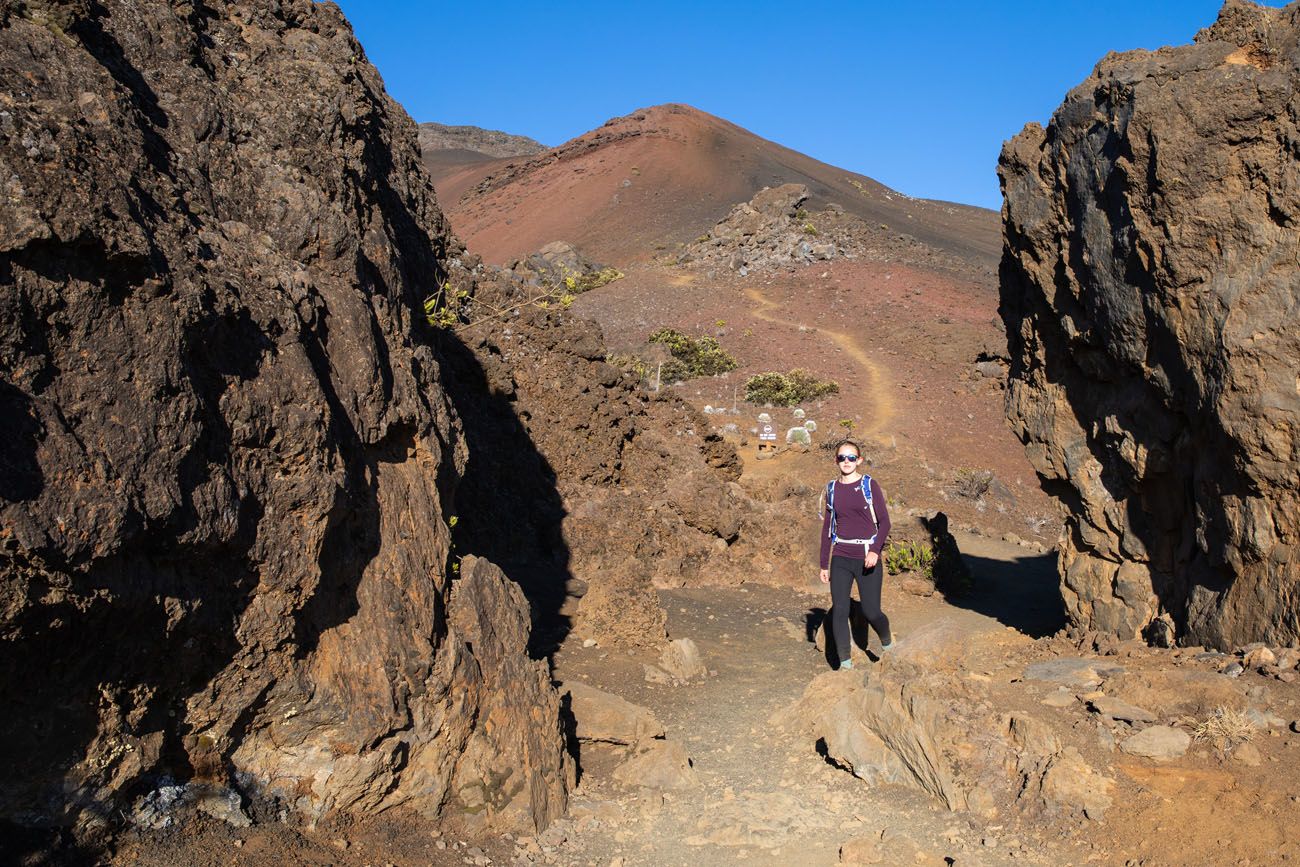
The next trail junction is for the Silversword Loop. You can go right or left here; both trails meet up again 0.3 miles later. Even though this is called the Silversword Loop, we saw very few silverswords here.
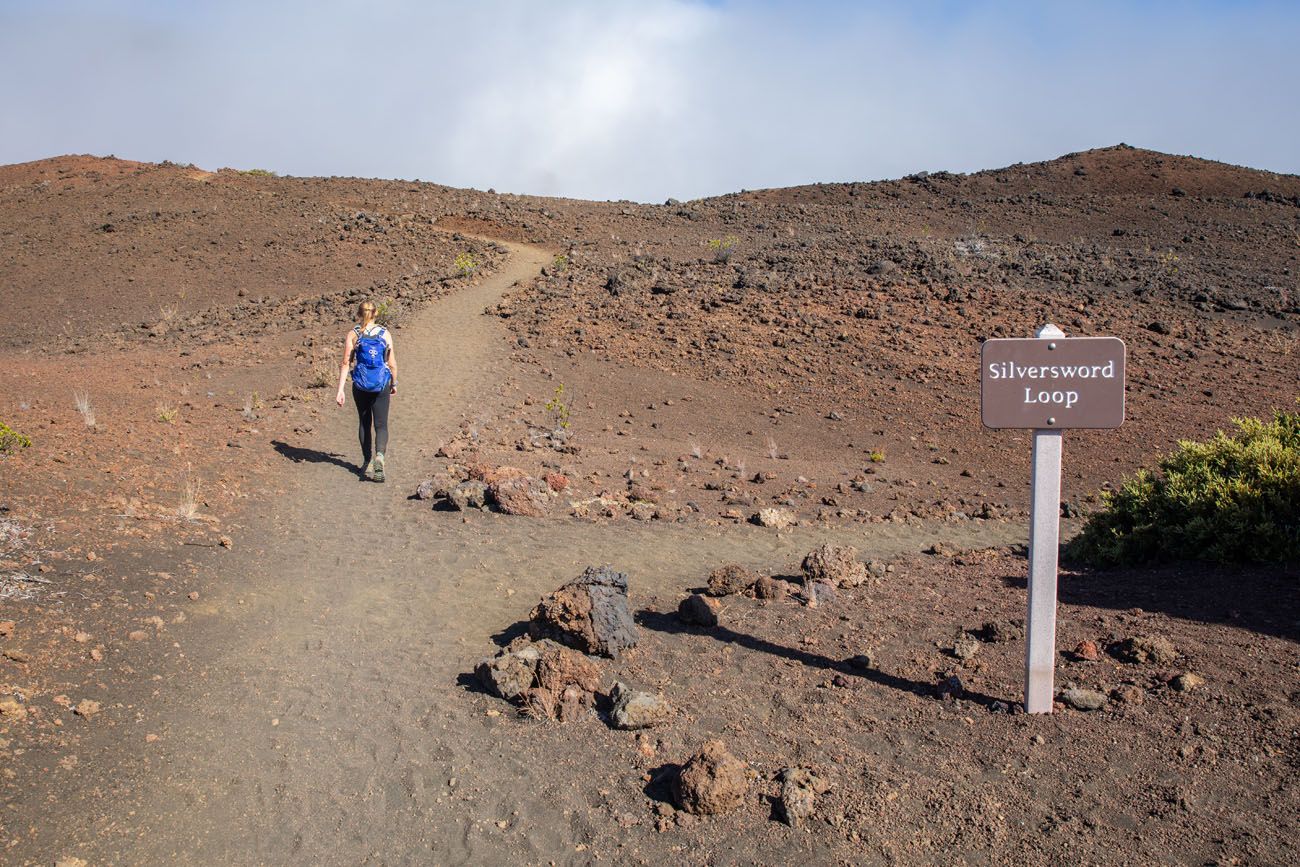
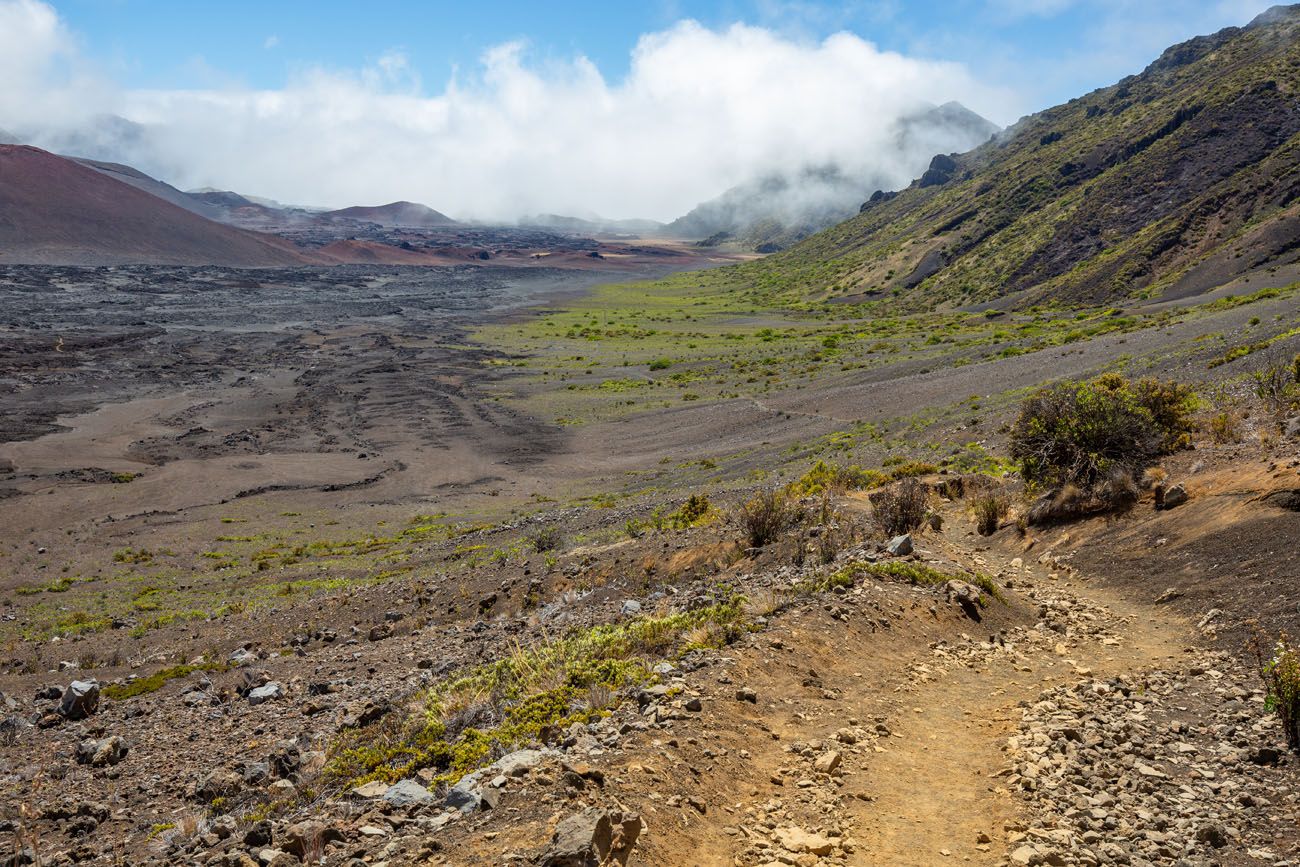
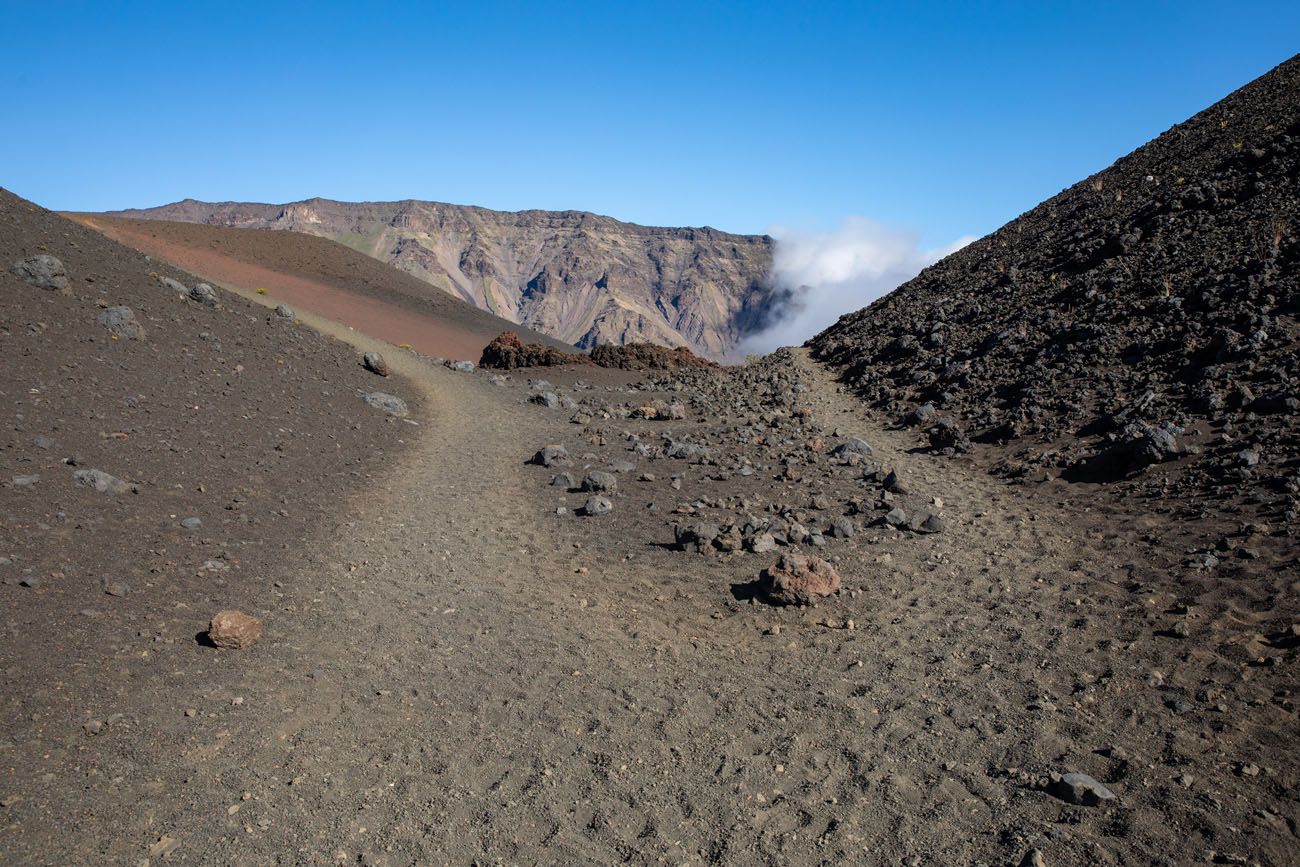
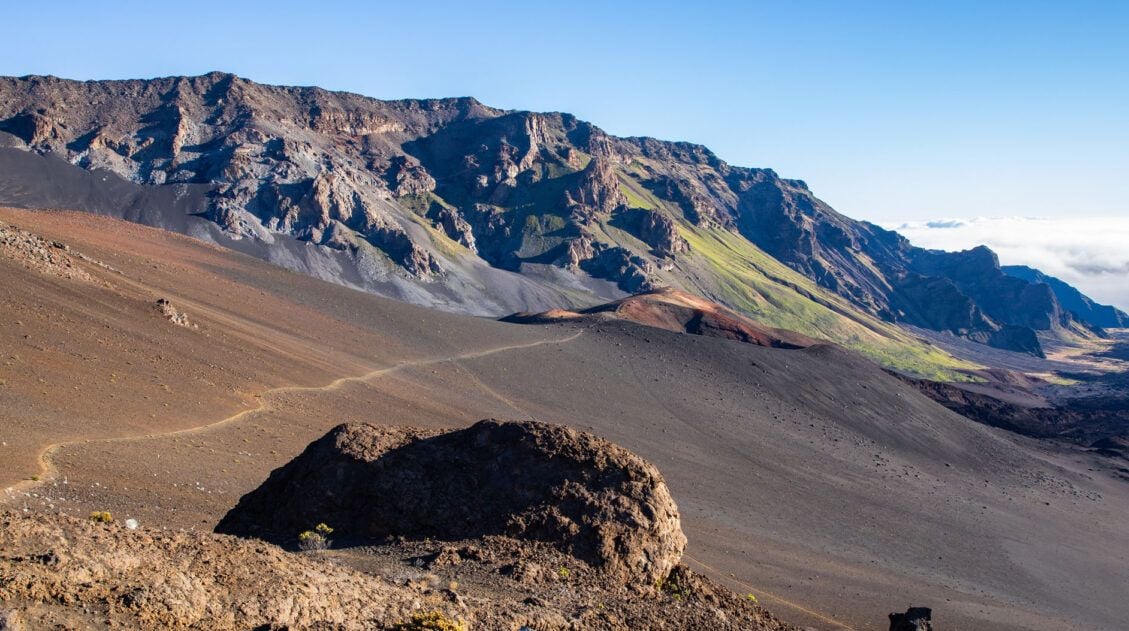
Beyond the Silversword Loop, the sandy trail is replaced with a rocky, compacted dirt trail. Now you will hike through a rocky volcanic landscape. Plant life reappears and that massive rock wall off in the distance…that’s the rim of the crater. Eventually, you will be making your way up that giant chunk of rock.

The rim, and the final climb, is hidden behind the clouds in this photo. But you get a better idea of what you will be hiking up in the photo below.
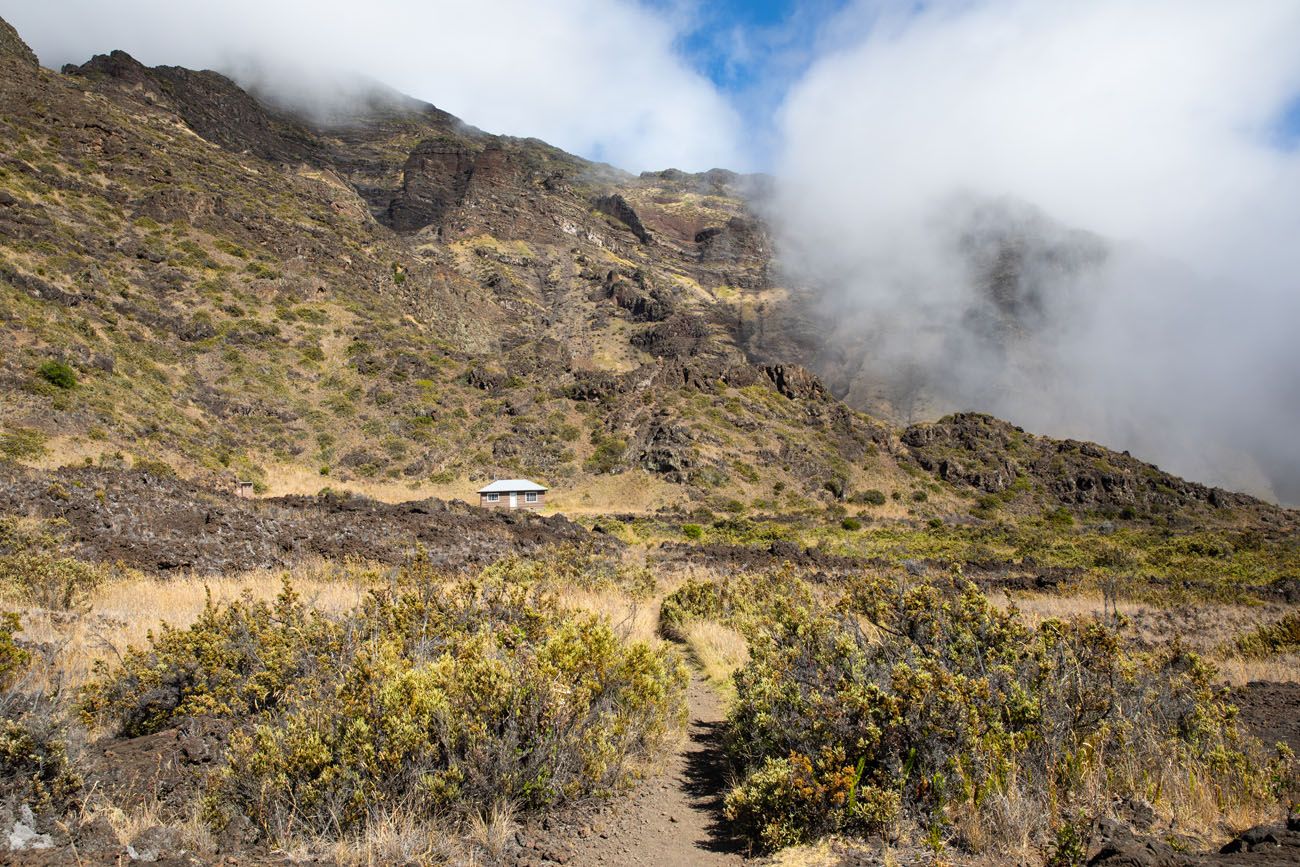
Holua Cabin
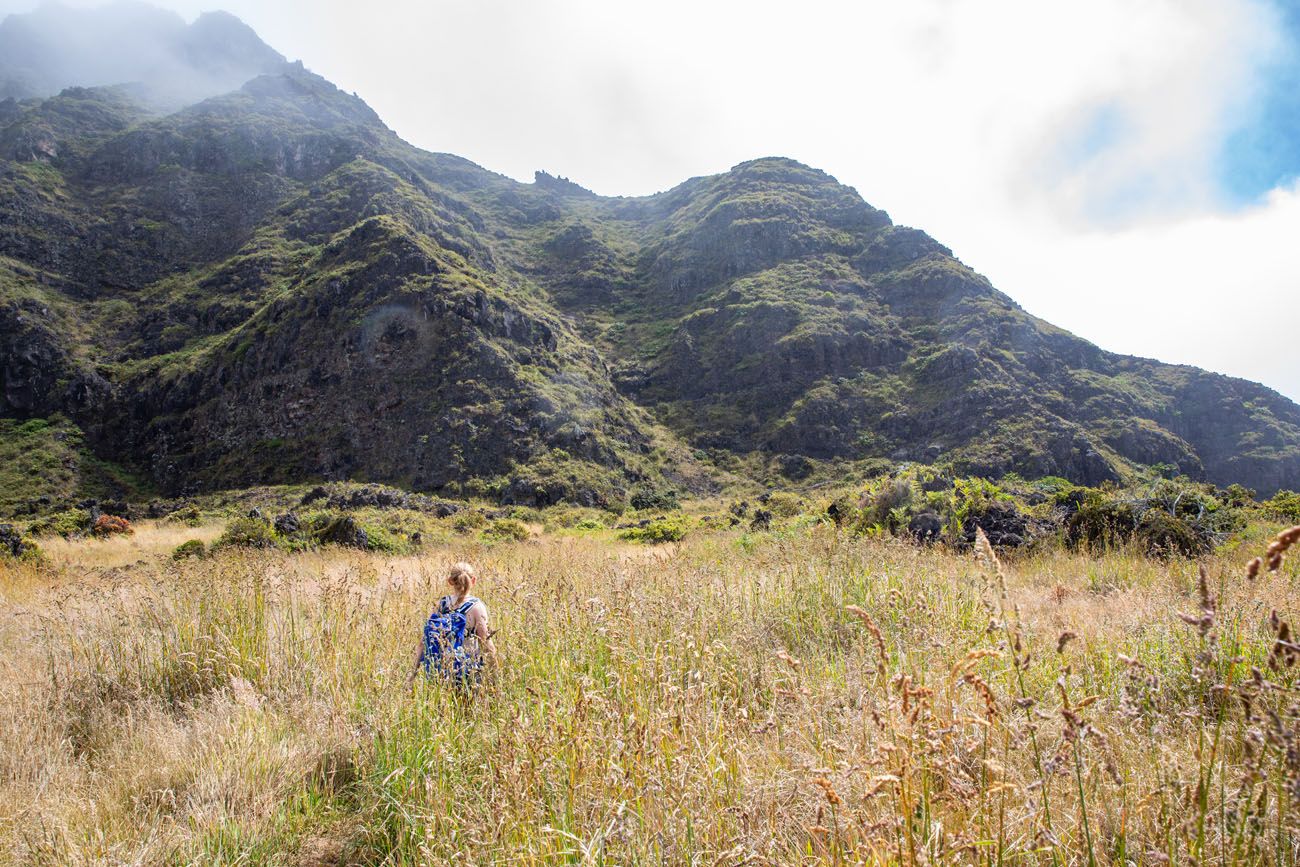
Once you reach the Holua Cabin, you have about 3.8 miles to go and 1,300 feet of climbing. It’s still flat for a bit, as you hike through more volcanic terrain and then a field of high grass.
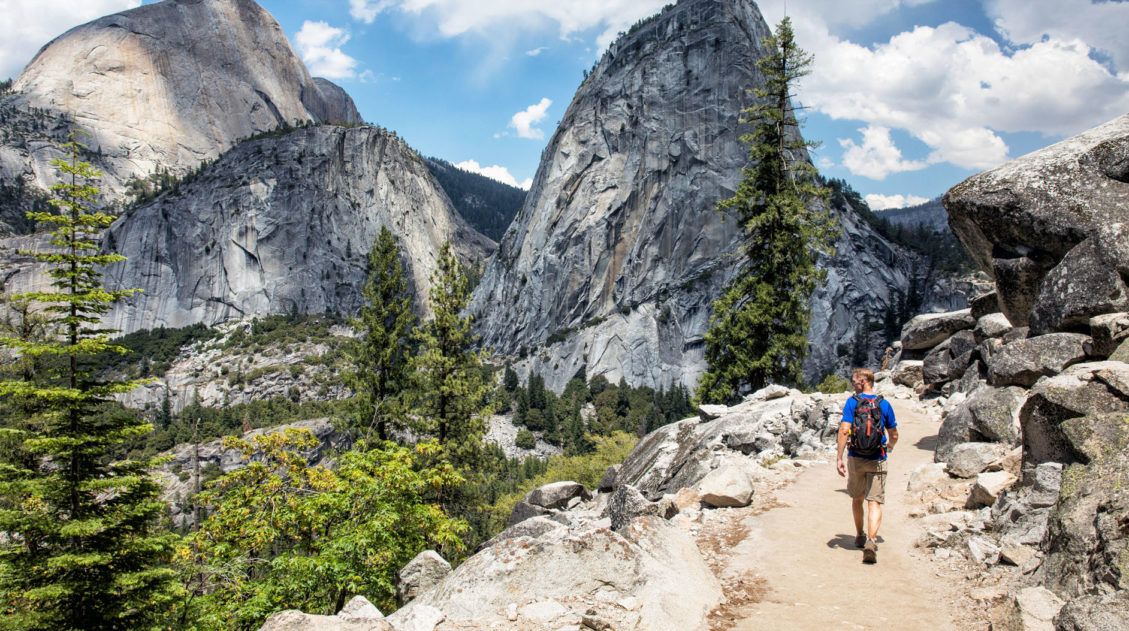
Just past the 8.5 mile point, you reach the rim of the crater. For the next 2 miles, the trail climbs out of the Haleakala crater. It’s a relatively short, intense, uphill hike. The trail is very rocky here, so a lot of the time you will be watching where to put your feet. Take your time, be careful, and when you need to, pause to enjoy the view.
Timing is everything. When Tim and Tyler did this early in the morning, the sky was clear and they had a great view of the crater. By the time Kara and I got here, in late morning, clouds moved in so we didn’t have much of a view. But the mist helped keep us cool.
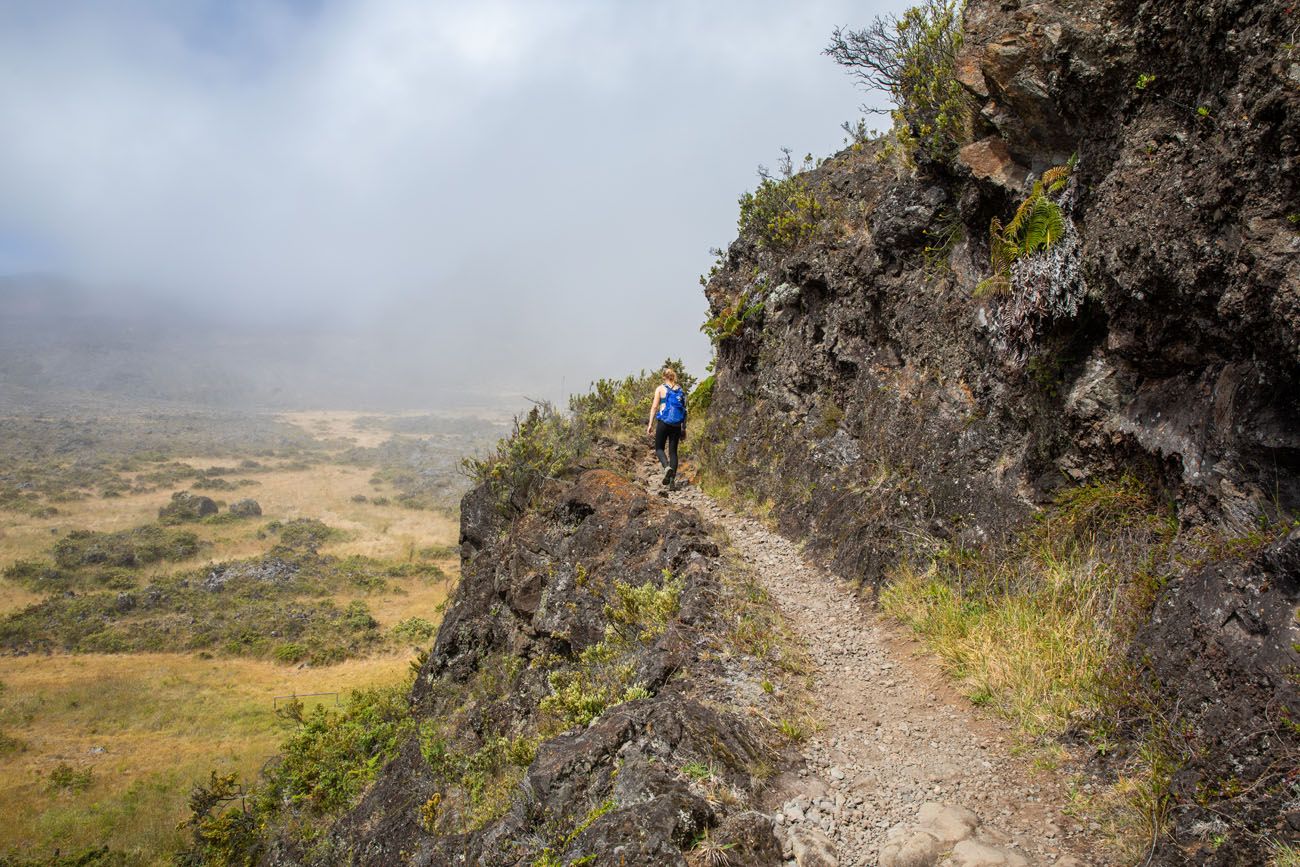
View of the Halemau’u Trail.
View from the Halemau’u Trail earlier in the day before it clouded in.
With 0.7 miles left to go, the switchbacks end. But the trail does not flatten out here. You are still traveling uphill and will ascend a bunch of steps before reaching the end of the trail.
The hike ends at the Halemau’u Trailhead. In this parking lot, there is a restroom if you need one.
Transportation Logistics
The Sliding Sands Loop is a point-to-point hike, so you will need some sort of transportation to get between the trailheads. There are no shuttles in Haleakala National Park.
If You Have Two Cars
If you are traveling as a group, you can drive two cars to the summit. Park one vehicle at the Halemau’u Trail parking lot, drive to the Visitor Center in the second vehicle. Park here, and, as a group, hike back to the Halemau’au Trail parking lot. Once finished the hike, drive back to the Visitor Center to retrieve your car.
Hitchhike
The National Park Service recommends hitchhiking. Park in the Halemau’u Trailhead parking lot and walk out to the hiker pick-up area on Haleakala Highway, just a short walk from the parking lot (GPS coordinates: 20°45’11.0″N 156°13’47.0″W). Hitch a ride with someone up to the Visitor Center and start your hike from here.
The National Park Service recommends parking in the Halemau’u Trail parking lot and hitchhiking from here. That way, you are hiking back to your car and no longer have to worry about transportation logistics.
This method does work, because we have talked to people who have done it. But you could end up waiting awhile for a someone to pick you up, based on the time of day.
Split Up
This is what we did. It works well if you have more than two people (preferably at least 4 people).
Tim dropped me and Kara off at the Sliding Sands trailhead. Kara and I hiked the Sliding Sands Trail to the Halemau’u Trail. Meanwhile, Tim and Tyler drove to the Halemau’u Trail, parked the car, and then hiked the Halemau’u Trail to the Sliding Sands Trail. We crossed on the trail, Tim gave me the car key, and we each finished the hike. I drove up to the Visitor Center to pick up Tim and Tyler.
To do this, you need 2 people in your group who can drive.
PRO HIKING TIP: There are a few spots on the trail where you could miss each other. The Silverswords Loop is one of these places. We both agreed to take the western side of the loop, and good thing we did, because this is where we crossed paths. Had one of us hiked the other side of the loop, we would have missed each other. Also, make sure you know the hiking route. In the crater, there are several trail junctions, and if you or the other group makes a wrong turn, you might miss each other. There is no cellular service in the crater so you will not be able to communicate by phone.
Sliding Sands Trail Out-and-Back
If you don’t want to hitchhike, or if you don’t have 4 people in your group to exchange keys, or if hiking 11 miles just sounds like torture, you can hike just a portion of the Sliding Sands Trail.
I highly recommend hiking a portion of the Sliding Sands Trail while you are in Haleakala National Park.
You really don’t have to go far for truly great views. From the Visitor Center, you could hike to one of the first overlooks along the Sliding Sands Trail, snap a few photos, and return to this Visitor Center. This would be less than a mile of walking and take 30 to 45 minutes.
For those feeling a bit more adventurous, hike 2.5 miles down the trail, take lots of photos of the crater, see the silverswords, and return to the rim.
The full Sliding Sands Trail hike is about 11 miles round trip. This hike takes you to the crater floor and then you retrace your steps back to the Visitor Center. In my opinion, it’s better to hike the Sliding Sands Trail Loop…you will get to see more of the crater and you will have less elevation gain than hiking back up the rim on the Sliding Sands Trail.
What to Bring on the Hike
We did this just after sunrise. We were all dressed in long pants or leggings and long-sleeved shirts. It is windy and cold at the start of the hike, but once you hike down into the crater, there is less wind and it feels a lot warmer. Kara and I regretted wearing black leggings on this hike. I recommend wearing shorts, a short-sleeved shirt, and bringing a few extra layers that you can remove as you get warmer.
Bring a rain jacket, just in case it rains. It’s usually dry in the crater, from what I have read, but a rain jacket also gives you some protection from the wind (which can be a lot).
Hiking shoes. You can get by with a good pair of walking shoes or running shoes but hiking shoes will give you more traction, particularly if you plan to hike the Halemau’u Trail.
Water and snacks. Bring at least 2 liters of water per person.
Sunscreen, hat, and sunglasses. There is no shade on this trail.
Camera. Even a smartphone will do.
Essential Hiking Gear: What Should You Bring on a Day Hike?
If you are new to hiking or are curious about what you should bring on a hike, check out our Hiking Gear Guide. Find out what we carry in our day packs and what we wear on the trails.Tips to Have the Best Experience
Leave No Trace. When you are in the park, practice the seven principles of Leave No Trace. This includes packing out what you bring into the park, be considerate of other hikers, stay on the trail, and do not remove anything from the park.
There is no cellular service here. Don’t expect to text, send photos, or be able to contact friends or family by phone while hiking this trail.
For more information on what to do in Haleakala National Park, read our Guide to Haleakala National Park.
Get updates on road conditions and trail closures, as you plan your trip and just before your visit, on the National Park Service website.
If you have any questions about how to hike the Sliding Sands Loop, or if you want to share your experience, let us know in the comment section below.
More Information about Hawaii
Read all of our articles about Hawaii in our Hawaii Travel Guide and the United States in our United States Travel Guide.
13 Amazing Things to Do in Haleakala National Park
Pinterest Facebook Flipboard Haleakala National Park is named for Haleakala, the massive volcano that forms the eastern part of Maui. Watching the sunrise above the clouds and hiking into the crater are two of the best things to do in Haleakala National Park, but there is more to this park than visiting the summit of […]

Maui Bucket List: 20 Best Things to Do in Maui, Hawaii
Maui, with its scenic drives, beautiful beaches, and water sports, is a top destination for tourists in Hawaii. In just one place, you can snorkel with sea turtles, learn to surf, visit a national park, watch the sunrise above the clouds, go wine tasting, attend a luau, rappel down a waterfall, and relax on the […]
Best Way to Drive the Road to Hana & is It Worth It?
The Road to Hana is often listed as one of the best things to do in Maui. This scenic drive attracts hundreds of visitors a day…but is the Road to Hana really worth it? As you plan your trip to Hawaii, you will read other posts and guides that rave about how wonderful the Road […]
How to Hike the Kīlauea Iki Trail in Hawai’i Volcanoes National Park
The Kīlauea Iki Trail is a great experience to add to your Hawai’i Volcanoes National Park to-do list. On this relatively short hike, walk through a rainforest, cross a solidified lava lake, and gaze out at the crater from the rim. You also have the option to add on the Thurston Lava Tube. This hike […]

20 Best Things to Do in Kauai, Hawaii
Kauai, also called the “Garden Isle,” is our favorite of the Hawaiian Islands. With its waterfalls, beautiful beaches, tropical resorts, and stunning coastlines, Kauai is pure paradise. In this guide, we cover the best things to do in Kauai with tips to have the best experience. Best Things to Do in Kauai Here are the […]

Hawaii Travel Guide: How to Plan a Trip to Hawaii
Travel advice and inspiration for travel to Hawaii, USA. How to visit Maui, Kauai, Oahu, the Big Island, with itineraries and photos.
Maha’ulepu Heritage Trail: Map, Photos, & Is It Worth It?
The Maha’ulepu Heritage Trail is a 2-mile coastal trail on south Kauai. It’s easy to get to, easy to walk, and offers beautiful views of the coastline along its entire distance. To make it even more worthwhile, there are a few places you can add on to the trail. I first learned of this walk […]
US National Parks List: All 63 Parks, Map & Free Printable Checklist
There are 63 national parks in the United States, and we’ve visited 56 of them, from the remote wilderness of Denali to the coral reefs of the Virgin Islands. We’re a family of avid hikers who have spent over a decade exploring these parks, from multi-day backcountry trips to scenic drives with kids in tow. […]
The Ultimate Guide to the 63 US National Parks
Stretching from the South Pacific, across the United States to the Caribbean, are 63 national parks. These national treasures preserve iconic landscapes, majestic mountains, primordial forests, arid deserts, misty coastlines, immense canyons, wildlife, and historic landmarks. We have visited 56 of the 63 US national parks, from the towering granite walls of Yosemite and the […]
20 Epic Hikes in the US National Parks
With 63 national parks and thousands of miles of hiking trails, your options are endless for exploring the American national parks. We narrowed down the list for you to 20 of the best hikes in the US national parks, 20 amazing ways to explore this beautiful country. Hike to the tallest peaks, through massive canyons, […]

Samoa and American Samoa Itineraries with Hawaii & Fiji
Samoa and American Samoa are two countries that sit side-by-side in the South Pacific. They are separated by the International Date Line but share a lot of similarities. If you are planning your Samoa and American Samoa itinerary, there are multiple ways to do it. The biggest factors are where you are coming from and […]


Comments 12