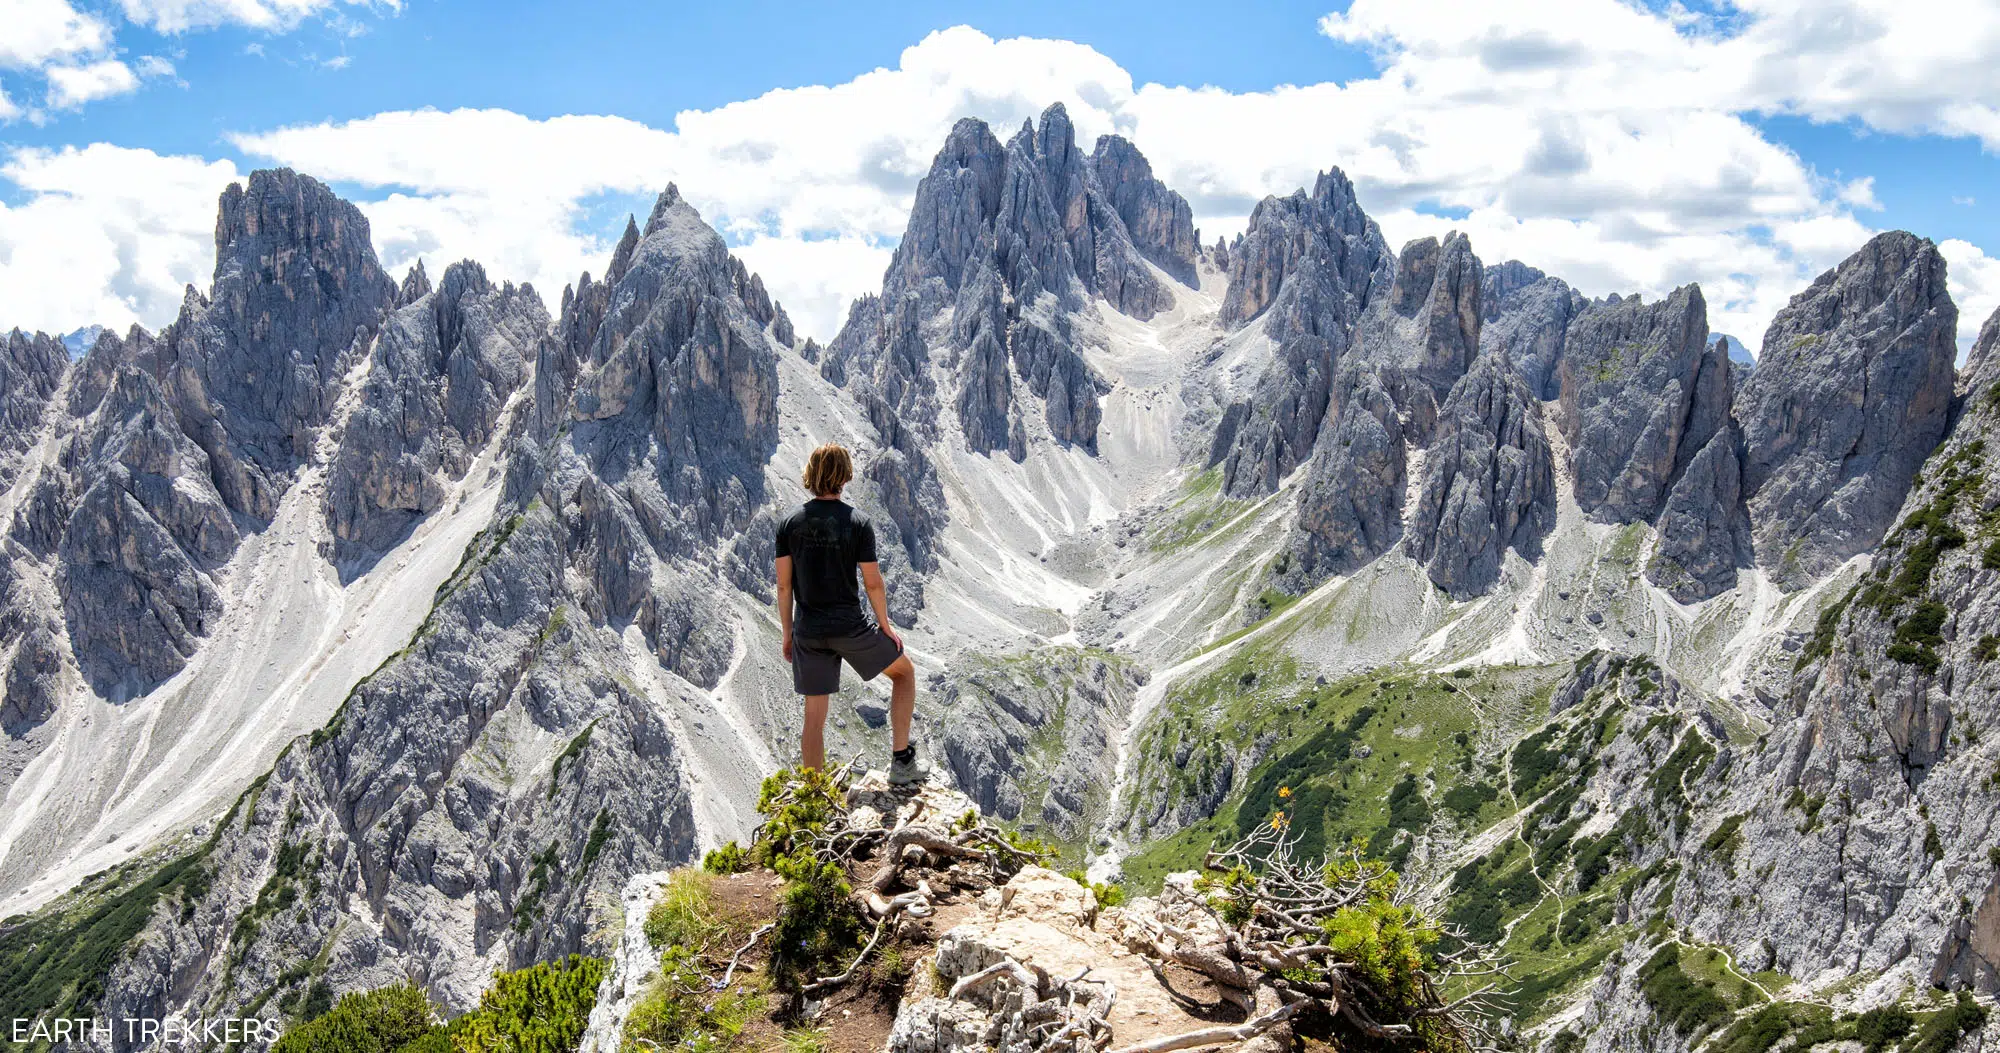

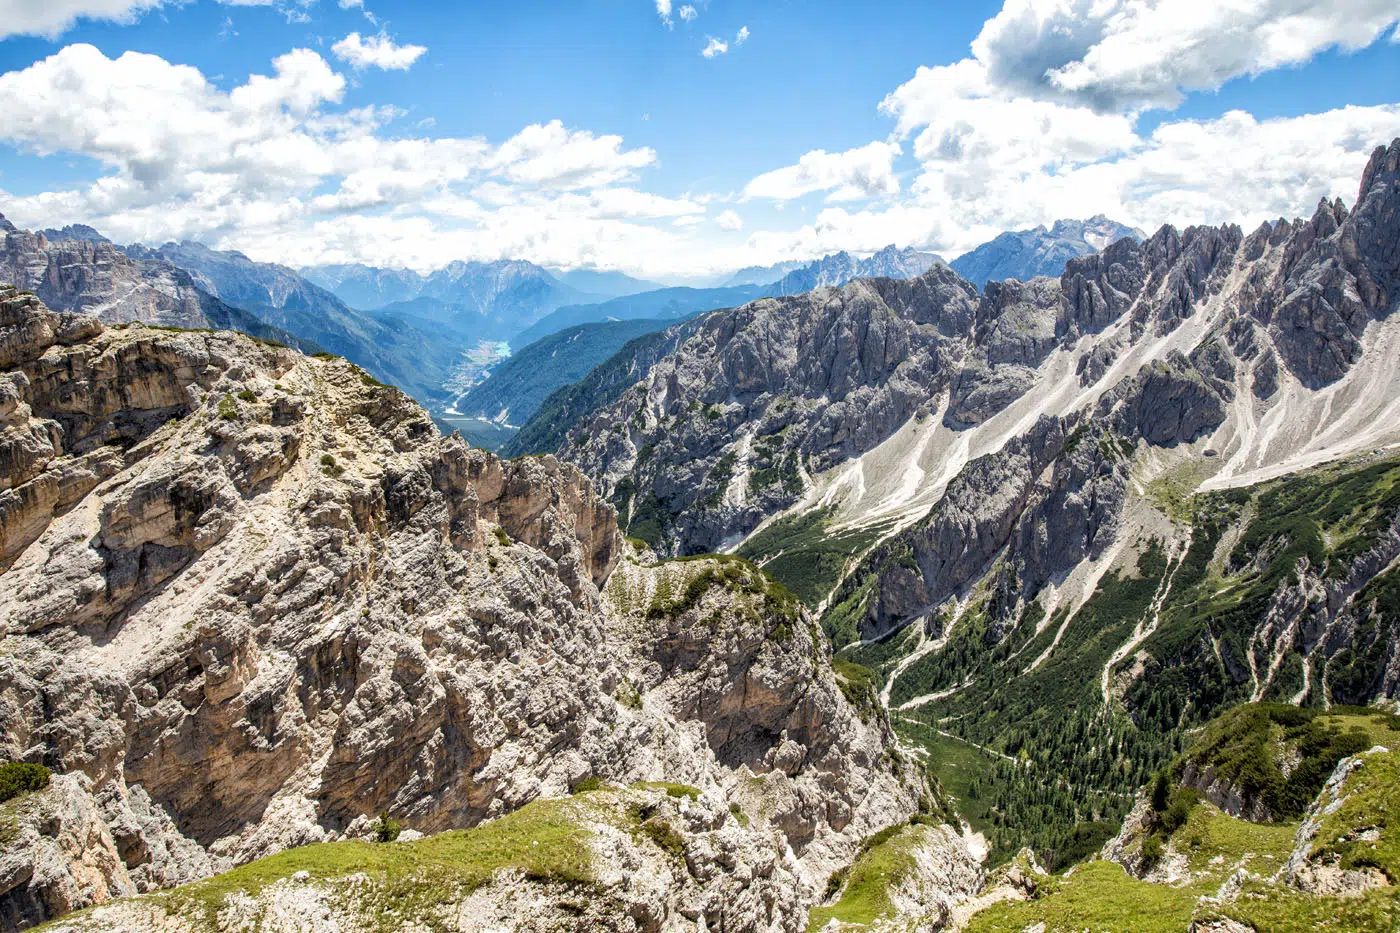
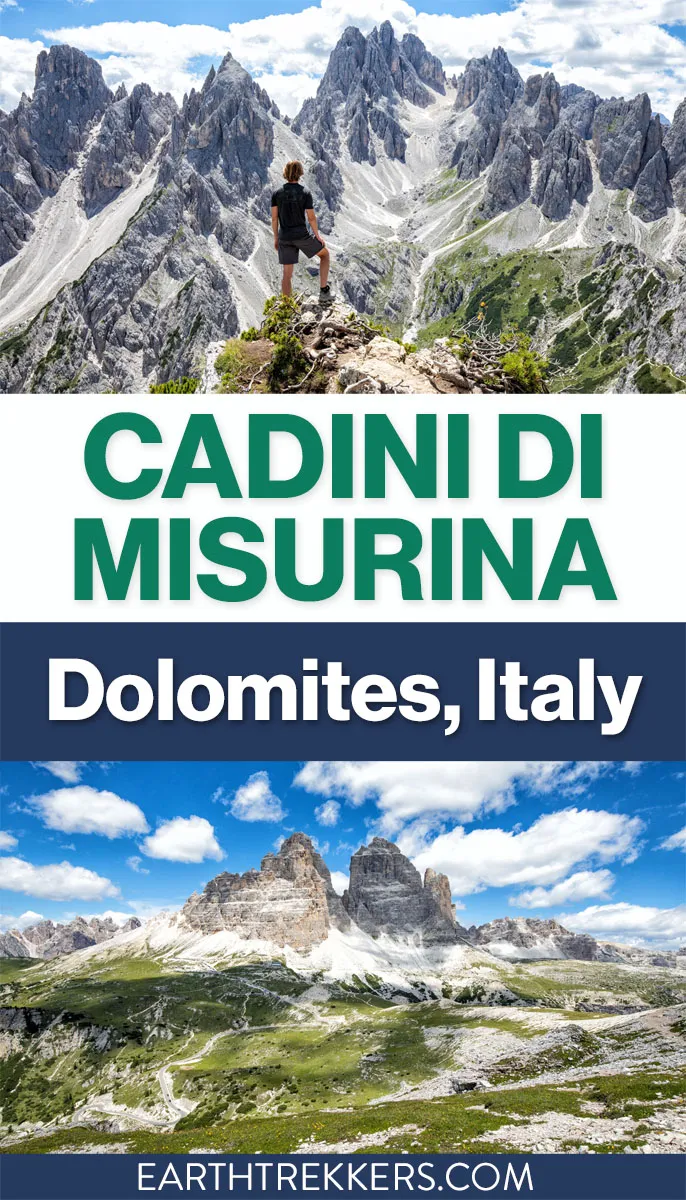
The hike to the Cadini di Misurina viewpoint is one of our favorite short hikes in the Dolomites. This is a gorgeous hike every step of the way, with panoramic views of the surrounding mountains, a unique view of the “backside” of Tre Cime di Lavaredo, and of course, an awesome view of the Cadini di Misurina.
We did this hike on our second visit to the Dolomites, on the same day that we hiked Tre Cime di Lavaredo.
If you are looking for a short, beautiful hike, the Cadini di Misurina hike belongs on top of your Dolomites to-do list.
In this guide, we cover how to hike Cadini di Misurina, including where to park, trail conditions, safety considerations, and whether this exposed ridge hike is worth it. For more options nearby, this hike is also featured in our guide to the best hikes in the Dolomites.
We’ve also helped many readers plan this hike, and the comment section at the end of this guide has become a helpful resource, with answered questions and firsthand trail updates shared by hikers each season.

The Essentials
WHAT IS IT | A short hike to a viewpoint of spiky mountains plus a unique perspective of the Tre Cime di Lavaredo
DISTANCE | 3.2 km (2 miles) round trip
TIME | 1 to 2 hours
DIFFICULTY | Easy, but requires a head for heights
PARKING | €40 per vehicle; the only way to park at the trailhead is by making an online reservation in advance.
WHEN | June through late October
February 2026 Update: Added updated pricing and links for the parking reservations, added new photos, added a map to the trailhead, and added information about how to get to the trailhead using public transportation.
Cadini di Misurina Hiking Stats
Distance: 3.2 km (2 miles) round trip
Total Ascent: 210 meters (690 feet)
Lowest Elevation: 2,260 meters (7,415 feet)
Highest Elevation: 2,355 meters (7,725 feet)
Difficulty: Easy
Length of Time: 1 to 2 hours
When to Go: Best in the summer months, when the trail is free of snow
Parking: Rifugio Auronzo parking lot (the same lot for Tre Cime di Lavaredo)
Best Time for Photography: Midday and early afternoon (our photos were taken between 12:30 and 1:30 pm)
Toilet: At Rifugio Auronzo
Exploring further: After the viewpoint you can follow the main trail further for additional views. You don’t have to go far, only another 0.25 km (0.15 miles) or 5 minutes each way, but extra caution is needed as you follow this narrow trail around a cliff edge.
Important safety note: The Cadini di Misurina trail follows a narrow, exposed ridge near the viewpoint. This hike is not recommended for individuals afraid of heights or during wet, icy, or windy weather.

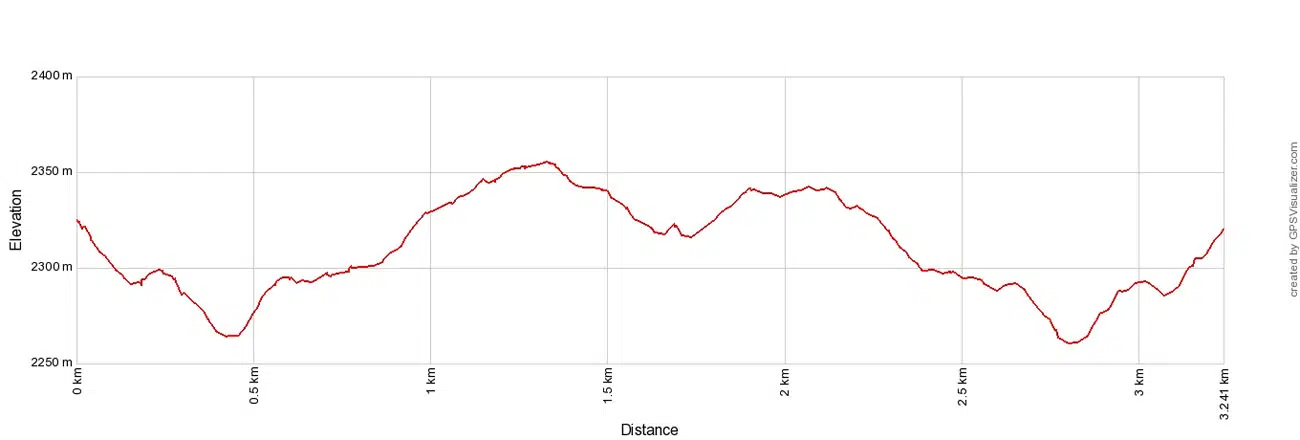
Cadini di Misurina viewpoint elevation profile.
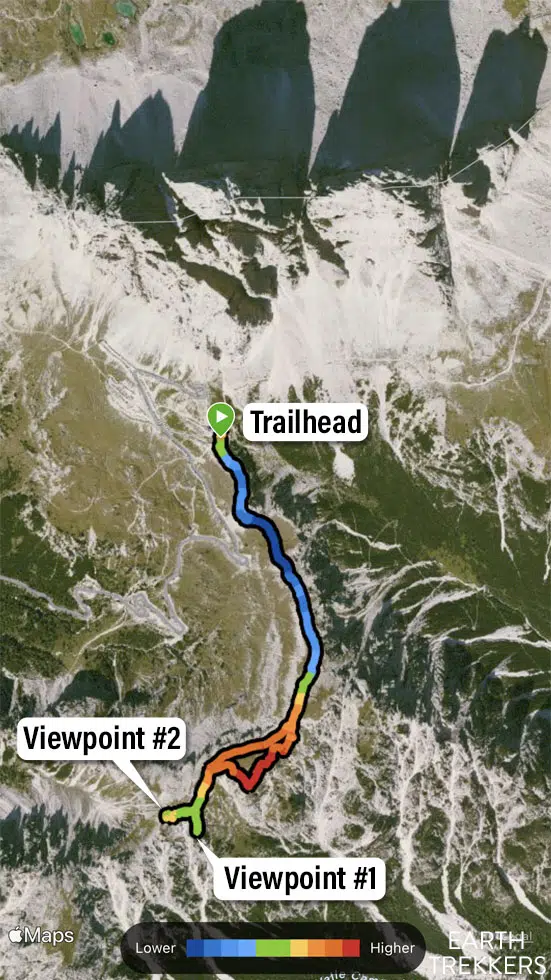
Cadini di Misurina trail map with both viewpoints (image generated from my Garmin Fenix watch). The blue color is the lowest elevation along the trail and the red color is the highest elevation along the trail.
Please practice the seven principles of Leave No Trace: plan ahead, stay on the trail, pack out what you bring to the hiking trail, leave areas as you found them, minimize campfire impacts, be considerate of other hikers, and do not approach or feed wildlife.
Parking for the Cadini di Misurina Viewpoint
How to Get to Rifugio Auronzo
For this hike, park in the lot for Rifugio Auronzo. This very large parking lot is the same parking lot for the Tre Cime di Lavaredo hike.
To get to the parking lot, it is a 7 km drive on a road that connects the Rifugio Auronzo parking lot and SP49. This road starts just north of Lago Misurina.
Below is a map of the driving route from Cortina d’Ampezzo and the location of the parking lot.
How to Use This Map: Click the icons on the map to get more information about each point of interest. To take this map with you, click the star next to the title of the map which adds it to your Google account. Next, within your Google Maps app, select ‘Saved’ and then select ‘Maps’. This map title will now appear in your list.
Parking Reservations & Cost
There is now a limit to the number of vehicles that can drive up this road. An online reservation is necessary to access this parking lot.
Reservations are made online and are released in limited quantities, often selling out weeks in advance for peak dates. Without a reservation, you will not be allowed to drive up, so planning ahead is essential.
The parking fee is €40 per vehicle (€60 per campervan).
The reservation fee covers both access to the toll road and parking at Rifugio Auronzo for up to 12 hours. If you plan to stay longer than 12 hours (for example, if you plan to spend the night at one of the rifugios along the Tre Cime di Lavaredo trail), you will need two parking reservations.
WHEN IS THE PARKING LOT OPEN? The road to the Rifugio Auronzo parking lot typically opens between late May and early June and closes mid to late October.
Once in the parking lot, the closer you can park to Rifugio Auronzo the better. The trailhead is located very close to the rifugio, so parking near it will save you some steps.
Getting Here By Public Transportation
If you don’t plan on renting a car, or if you were unable to get a parking reservation, you can still reach the trailhead (Rifugio Auronzo) by public transportation.
Buses run from Misurina (DolomitiBus), Cortina d’Ampezzo (DolomitiBus), and Dobbiaco (Shuttle 444 by SüdtirolMobil) during the summer months, roughly from early June through mid to late October, depending on snowfall.
For help choosing a home base, getting around, and building your itinerary, see our complete Dolomites Travel Guide.
How to Hike to the Cadini di Misurina Viewpoint
Step-By-Step Trail Guide
Cadini di Misurina Viewpoint Trailhead
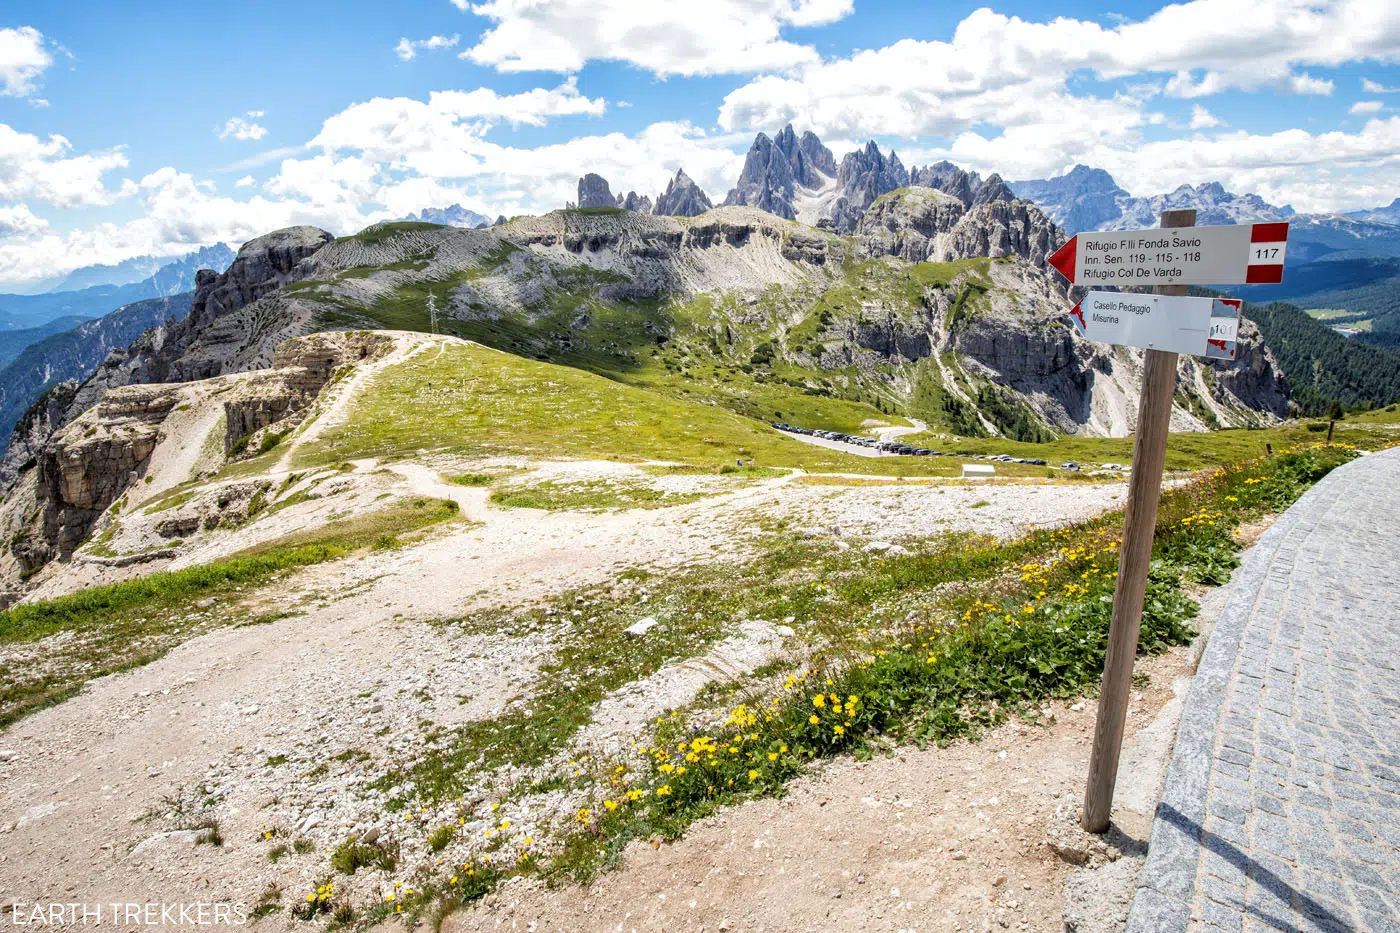
From Rifugio Auronzo, cross the street to the terrace viewpoint of the nearby valley. To the left is the trailhead for Tre Cime di Lavaredo. You DO NOT want to take this trail.
Instead, walk away from the Tre Cime trailhead, to the right side of the terrace. A few steps after the terrace ends, you will see a trail sign and a trail leading downhill through the grass. This is the trailhead for the Cadini di Misurina viewpoint.
Cadini di Misurina Trailhead
From Rifugio Auronzo, you will follow trail #117 and head in the direction of Rifugio Col De Varda.
Hiking to the Cadini di Misurina Viewpoint
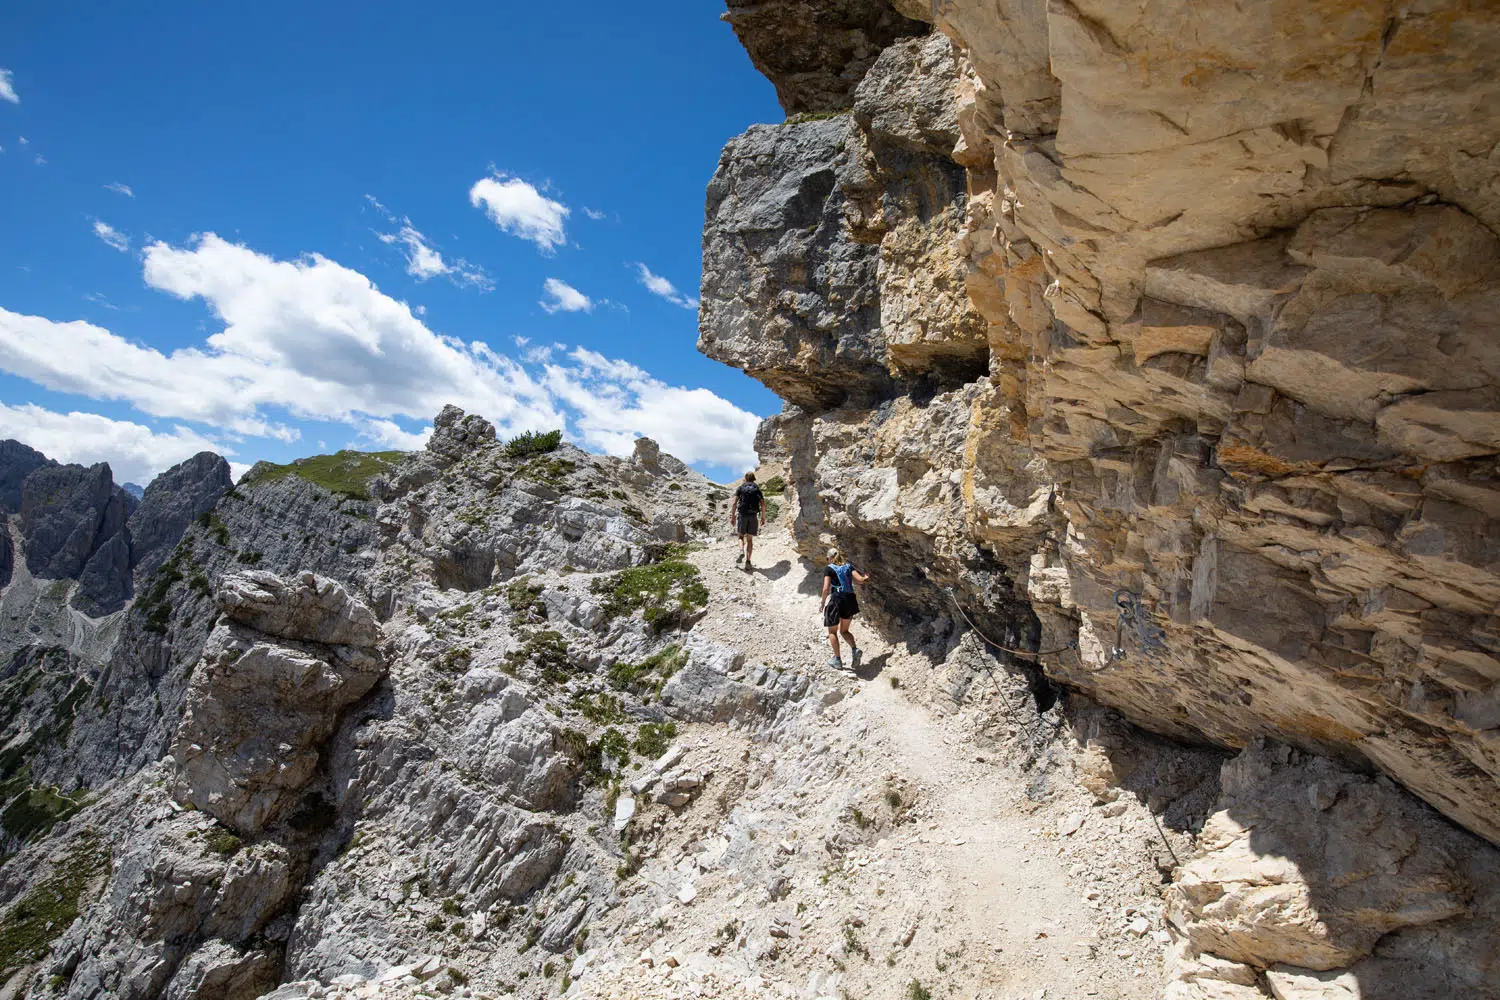
From Rifugio Auronzo, the trail briefly heads downhill and then climbs up the opposite ridgeline. The trail is a bit steep at times, and tiring, and when we did this it was very windy. Hold onto your hat if you’re wearing one!
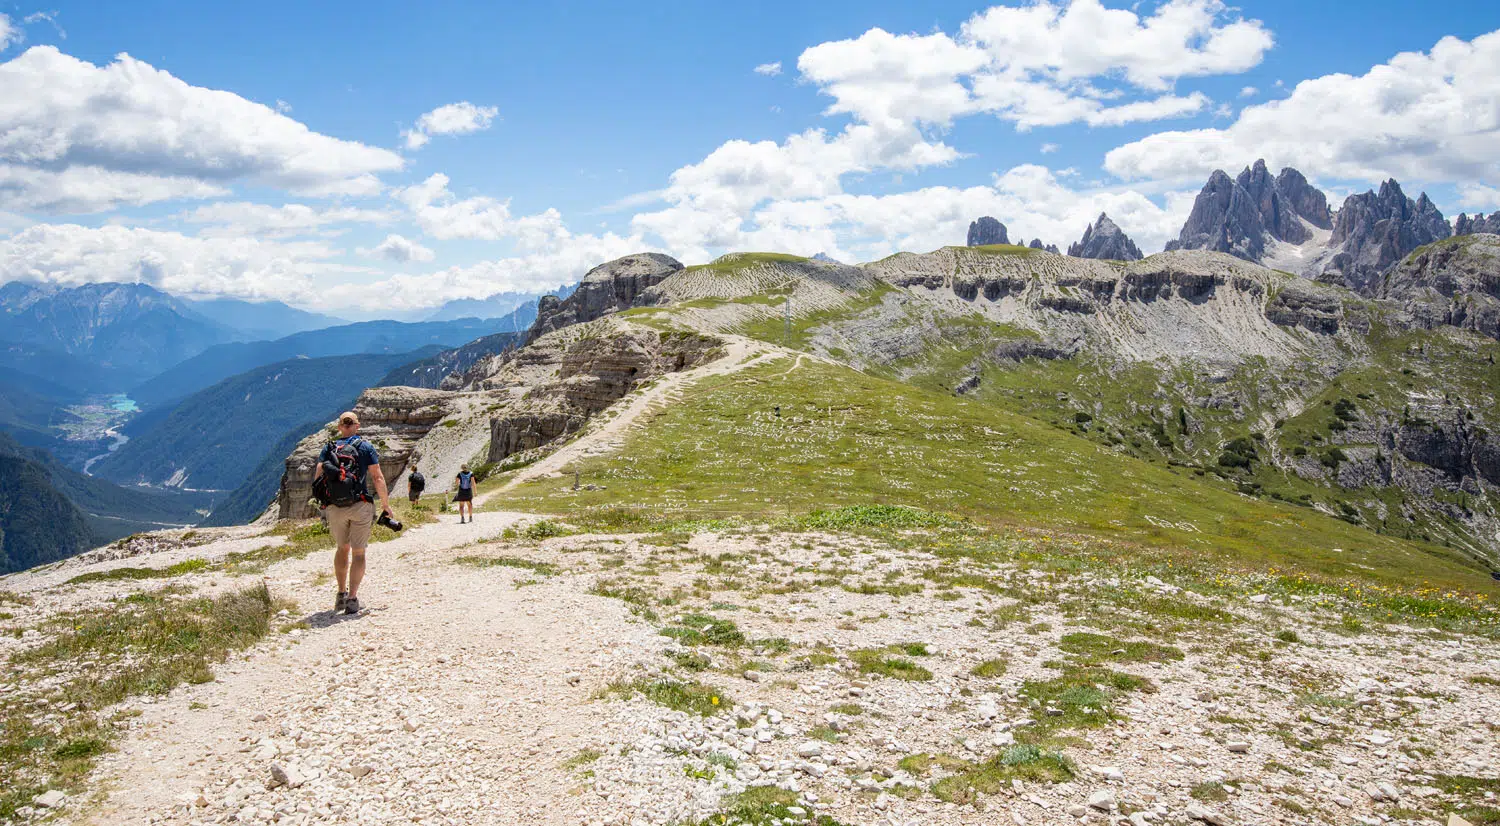
The trail to the Cadini di Misurina viewpoint.
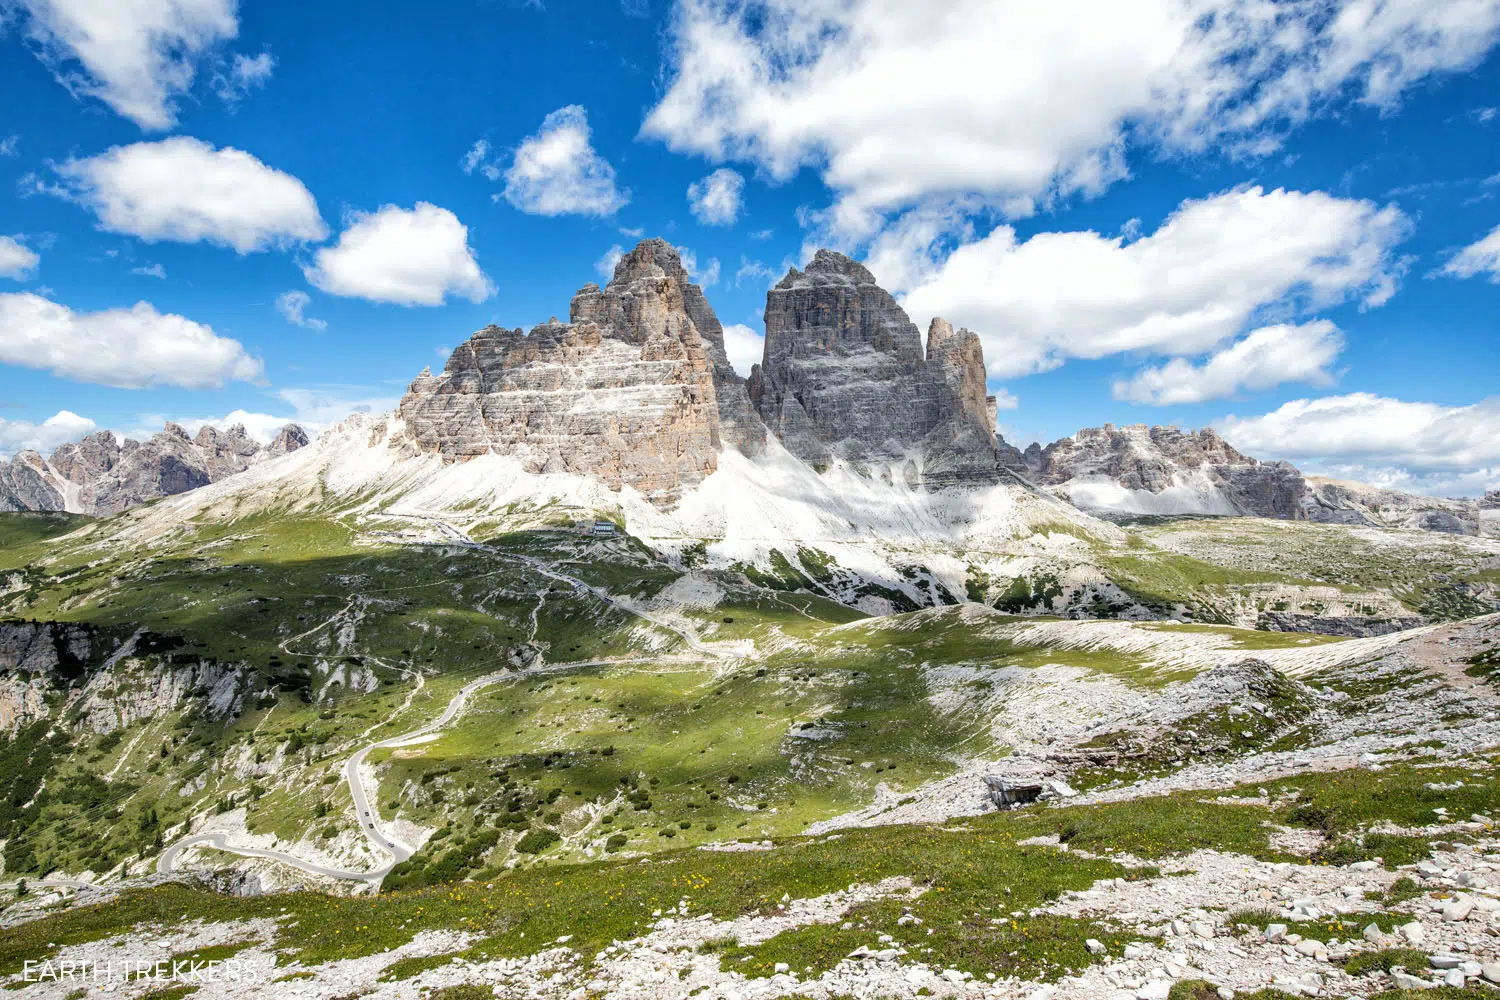
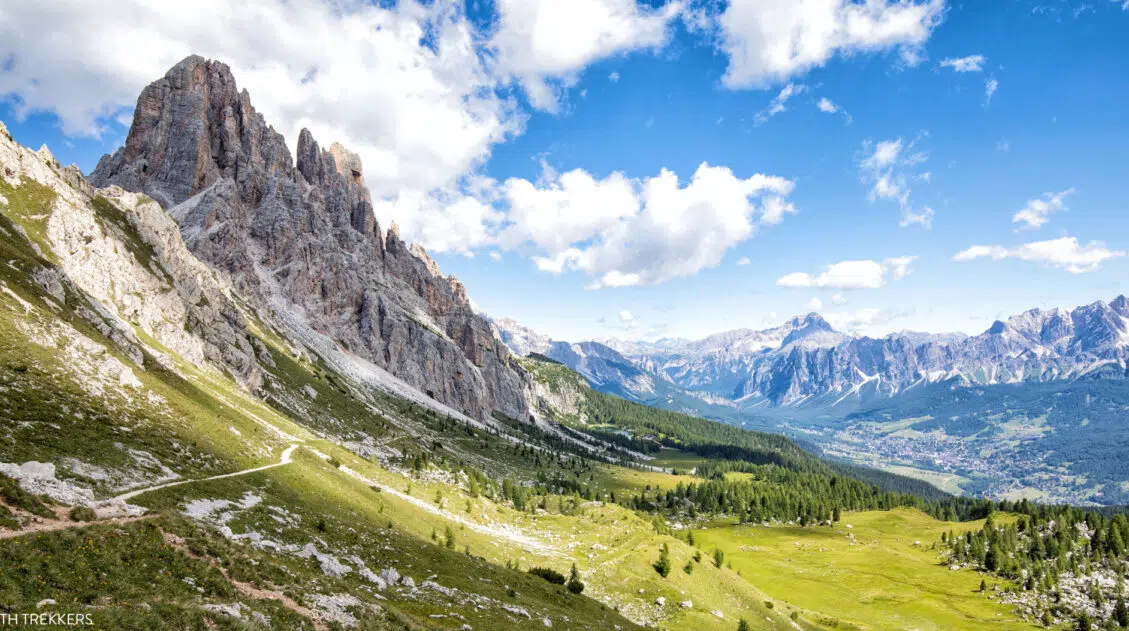
As the trail climbs up the hill, turn around and look back. From here, you have a great view of the “backside” of Tre Cime di Lavaredo and Rifugio Auronzo. I turned around so many times to take photos and the farther you go, the better the view.
Looking back to Tre Cime di Lavaredo and Rifugio Auronzo.
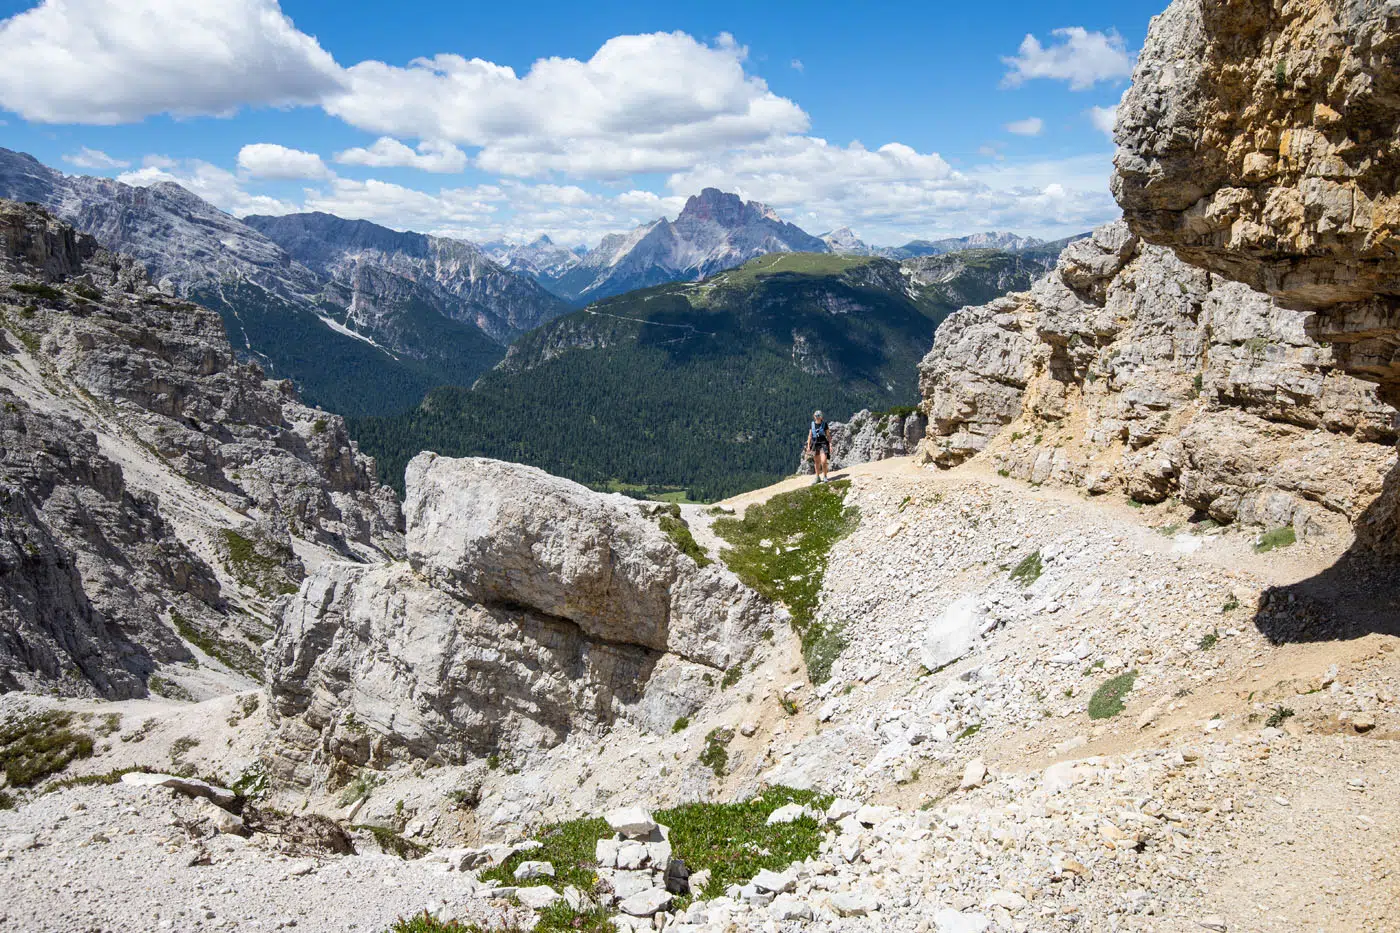
Trail Split: Which Way is Best?
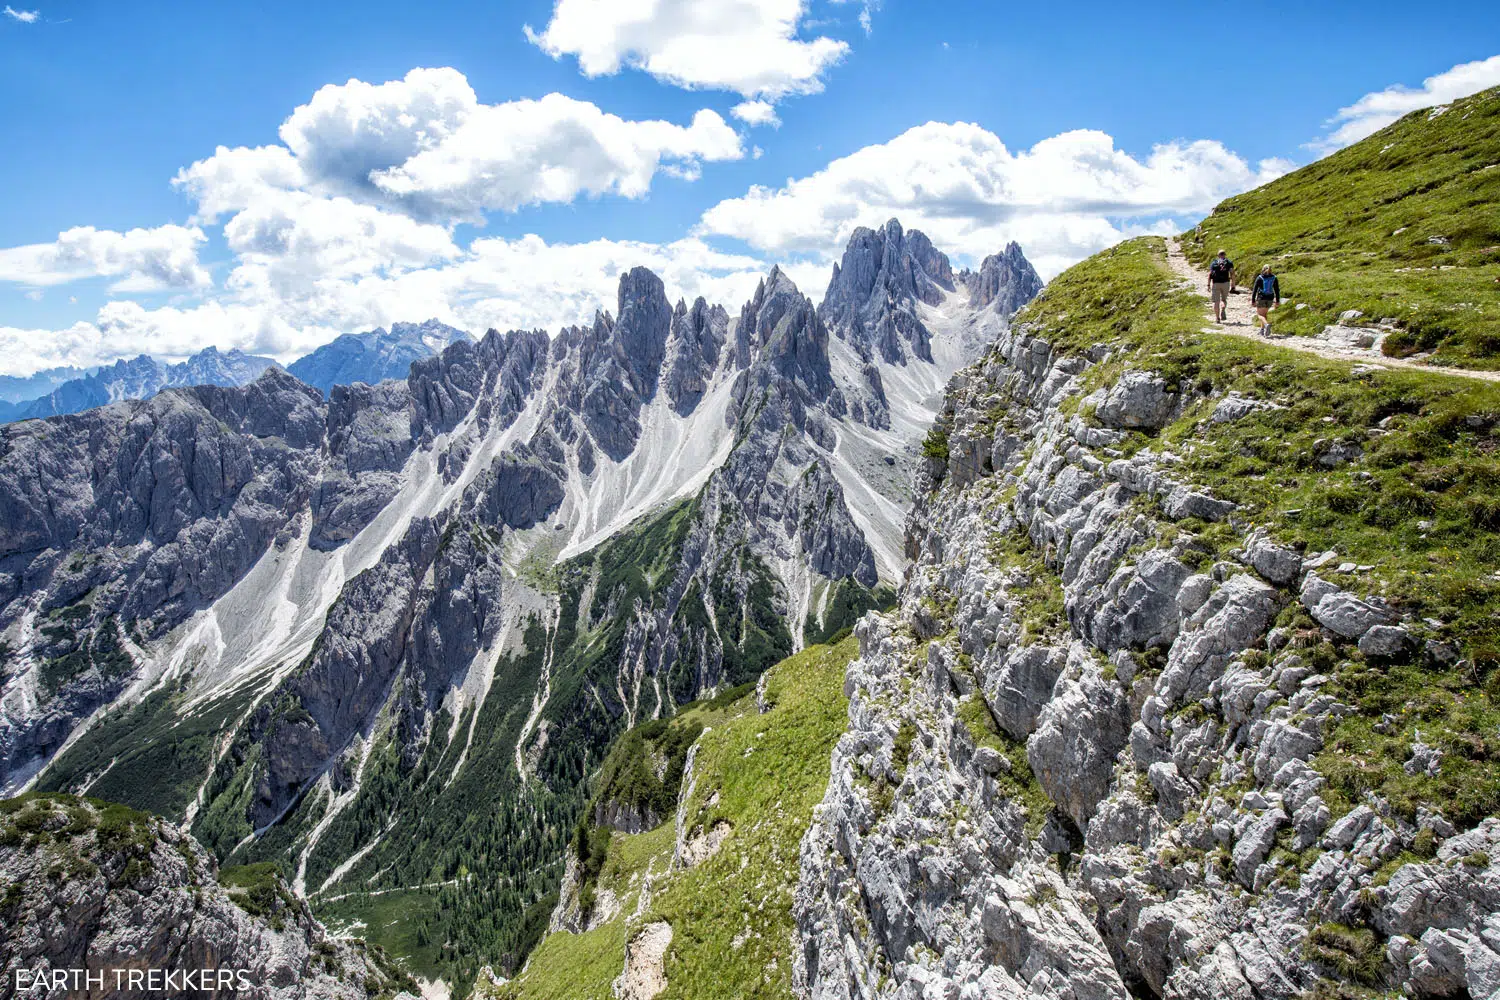
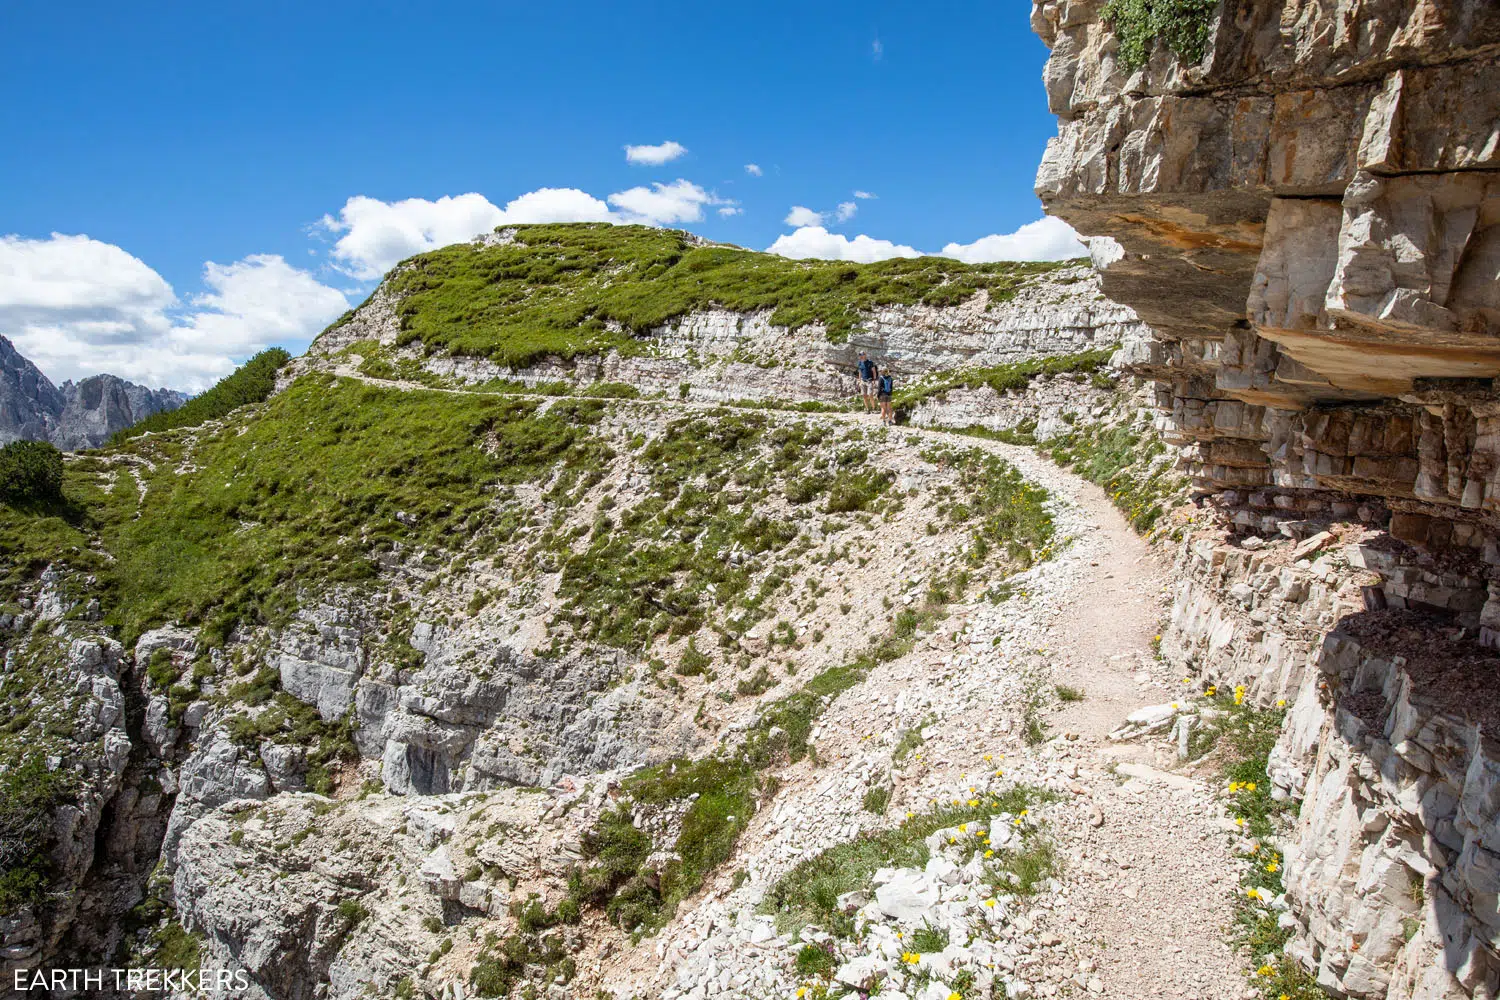
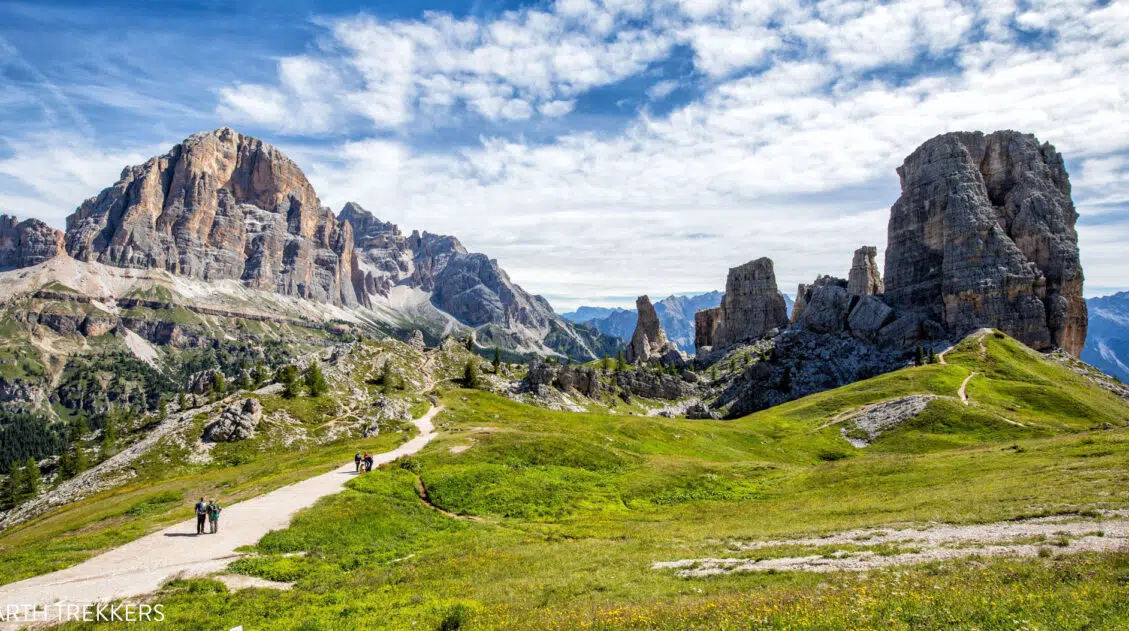
Near the top of the hill, the trail splits (at about 1 km/0.6 miles). Both trails get you to the viewpoint, but we recommend staying to the left, if you are not afraid of heights. This trail runs along the top of a cliff and from the trail, you have an amazing view looking east through the valley to the town of Auronzo.
Update for 2026: For the past two years, we have received mixed reports on the cliff trail conditions. Several people have reported that the trail is eroded in some spots while others report that the trail does not have any issues. I recommend reading the comment sections (at the end of this guide) for updates on trail conditions. If you have hiked this trail recently and want to add any updates to help future hikers, you can do so in the comment section below. Thanks in advance!
The cliff trail (the trail to the left) and the first good view of the Cadini di Misurina.
If you want to take the same photo of the cliff trail, look for this outcropping (on the left hand side of the photo above). You also have a great view out to the valley (photo below).
From the same viewpoint, this is the view of the valley.
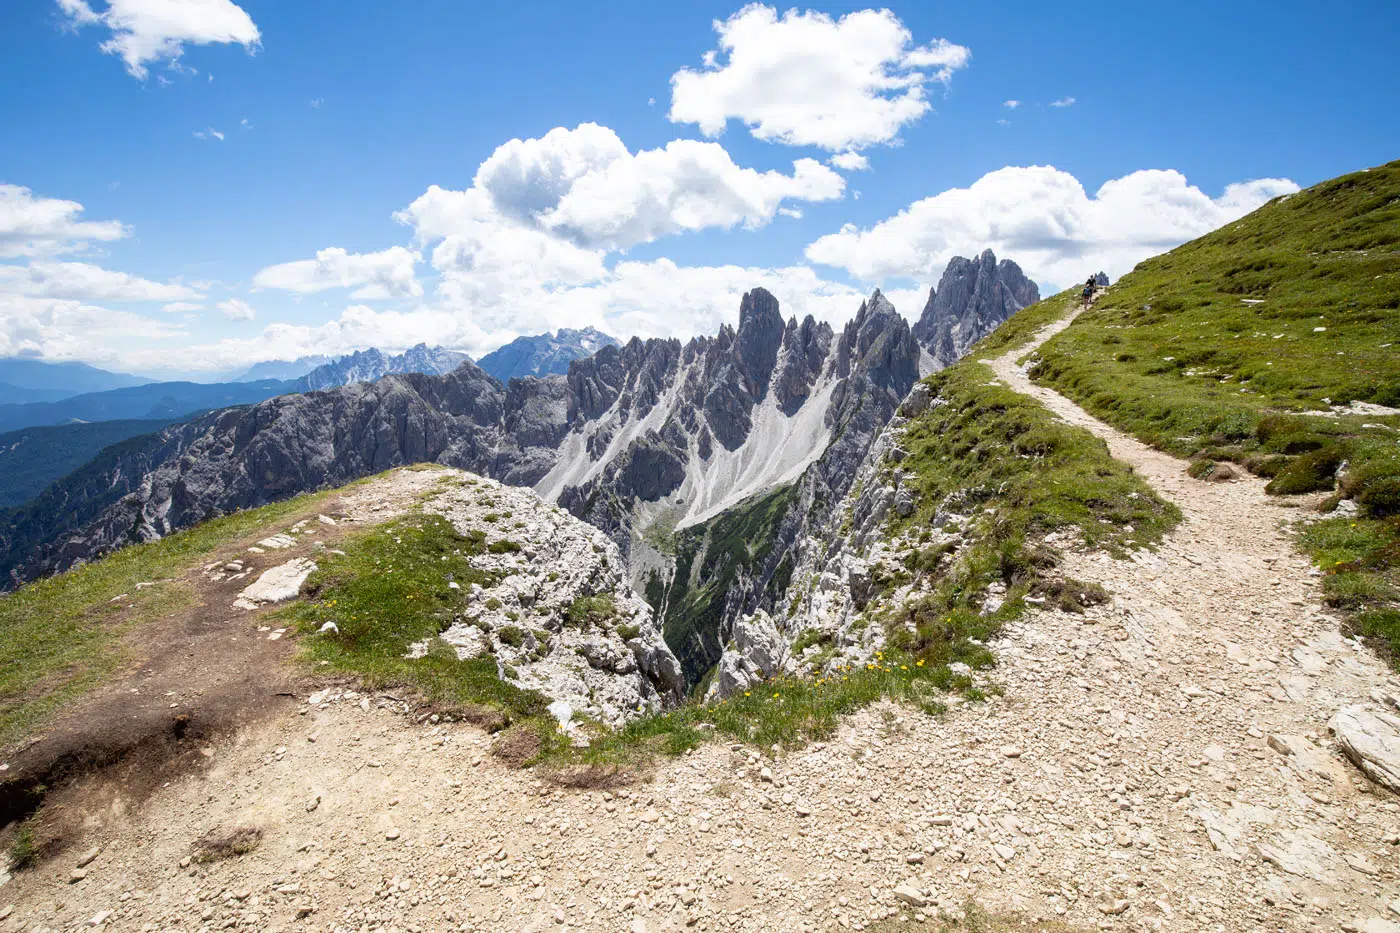
The trail twists and turns for a little bit, and you will pass under a few outcroppings of rock.
Looking back at the trail with Tre Cime in the background.
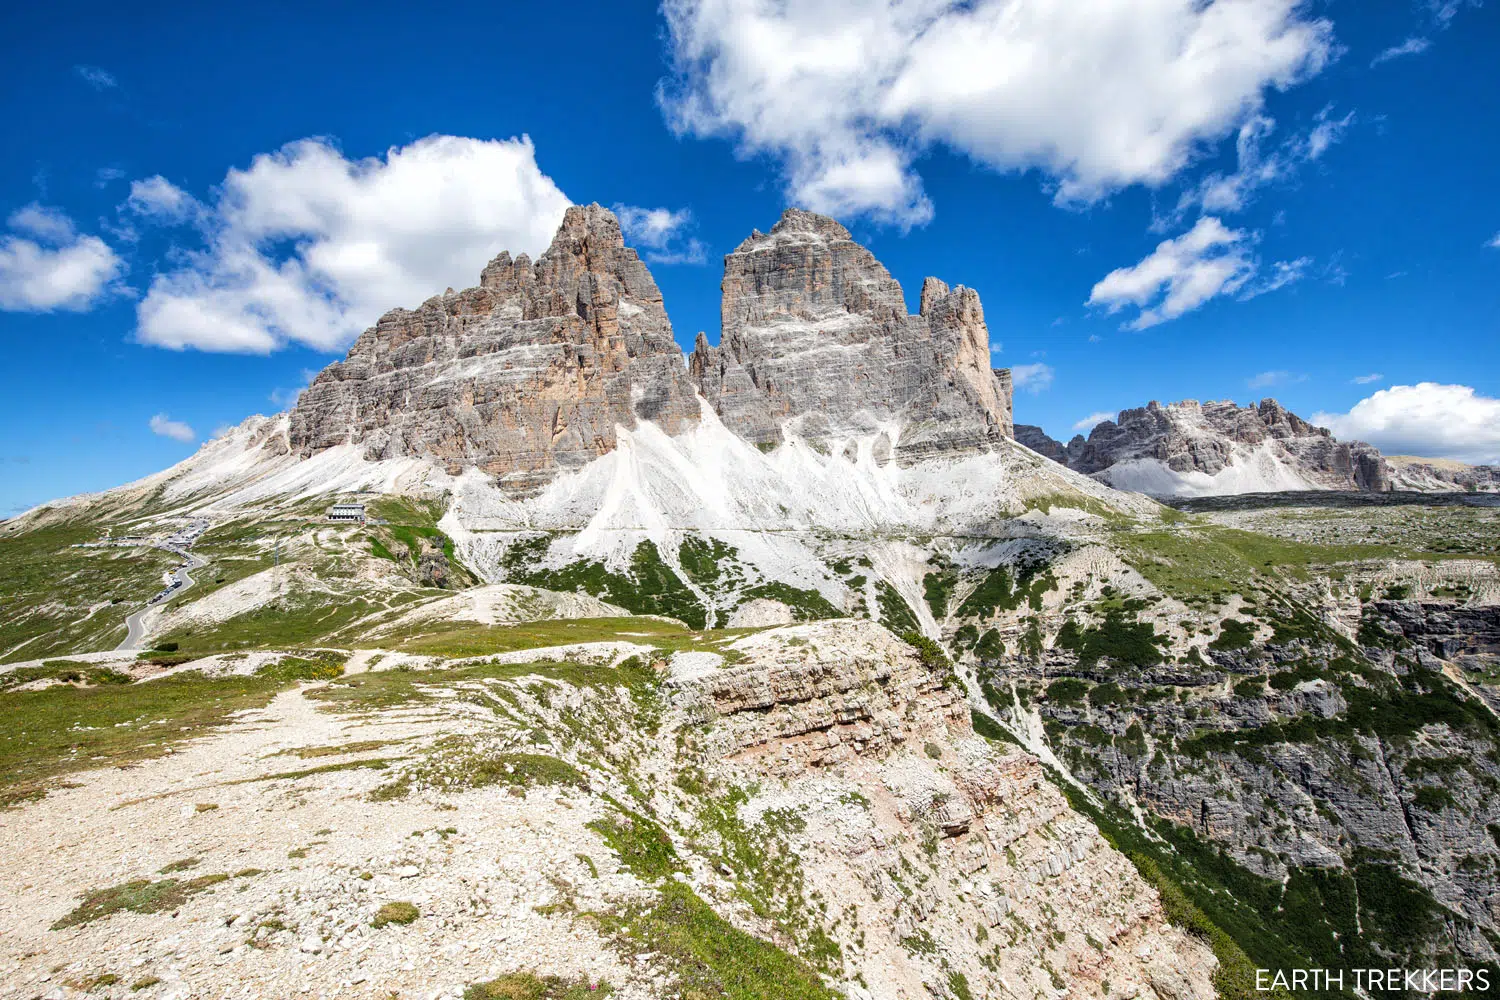
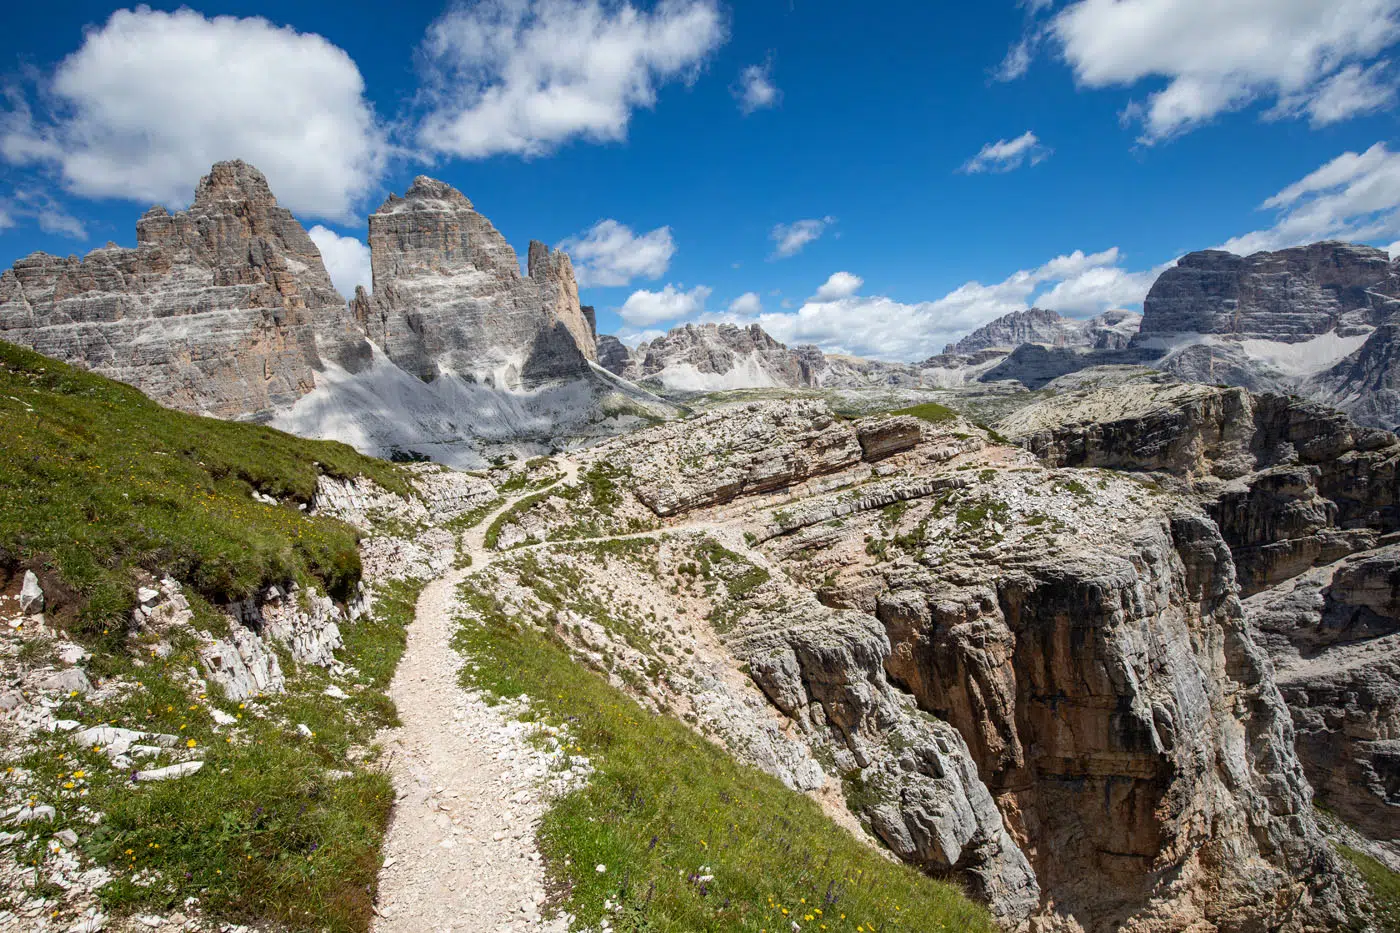
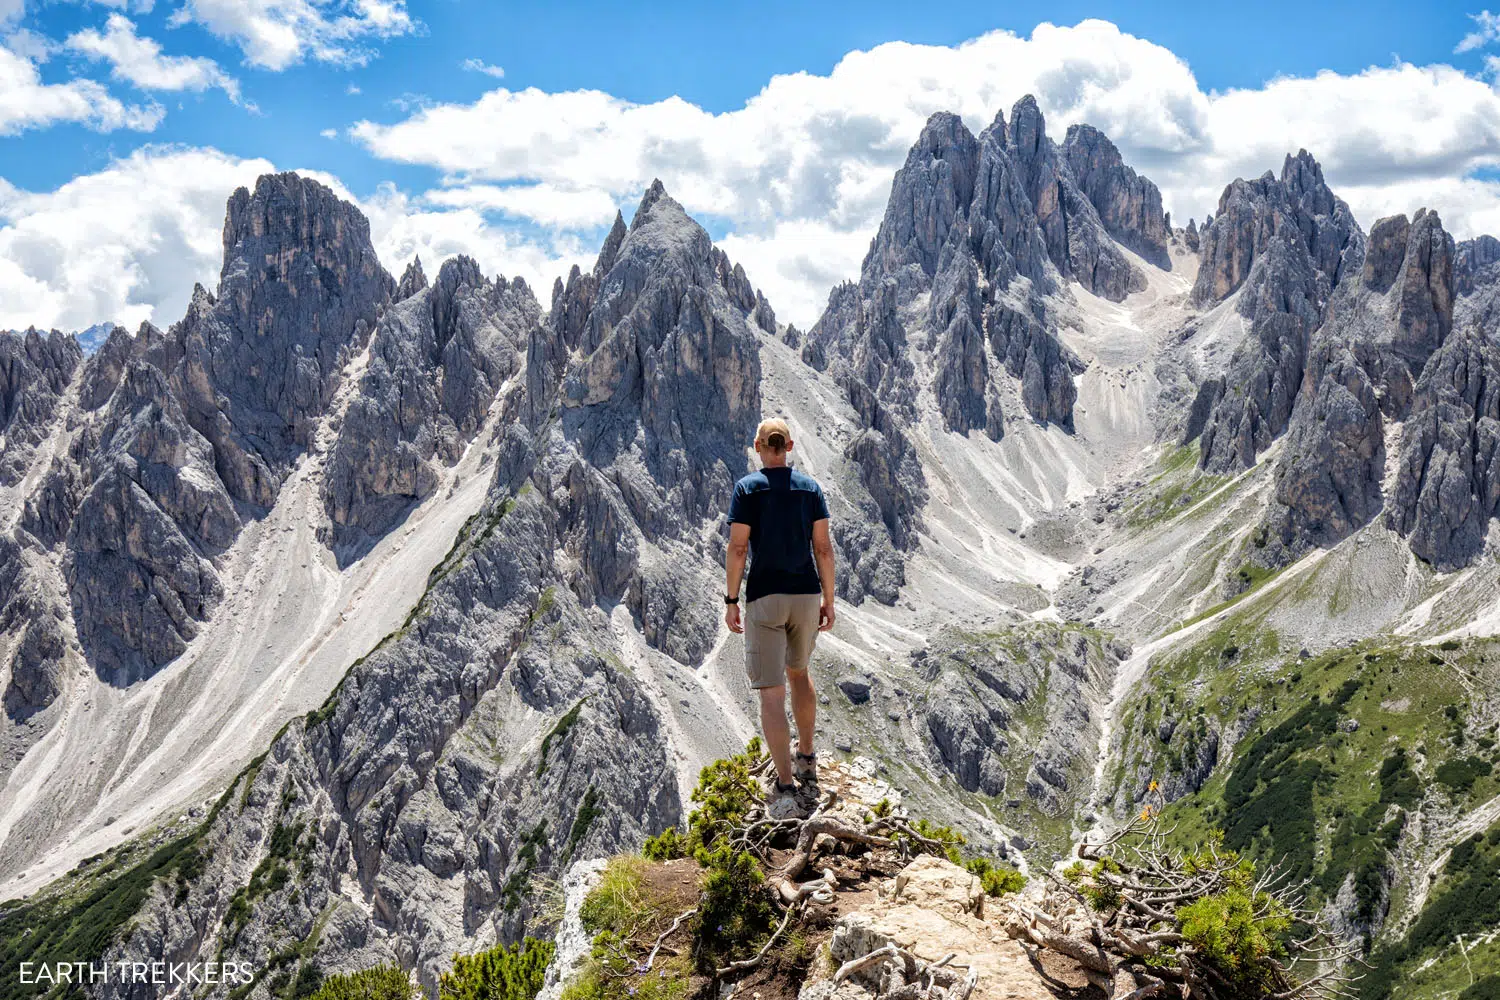
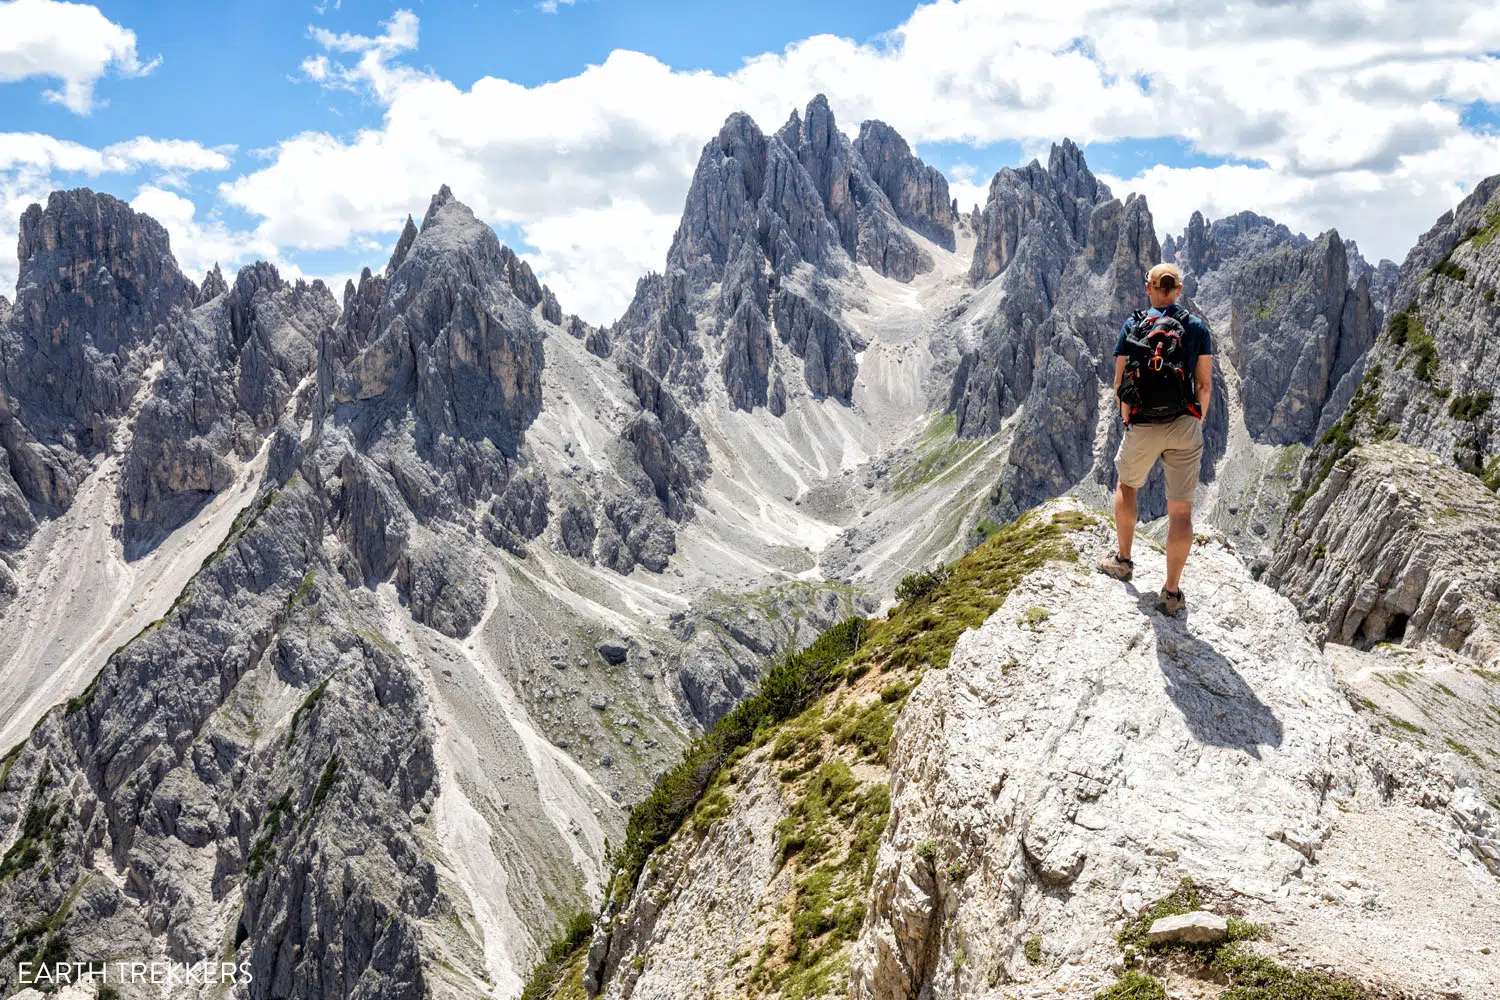
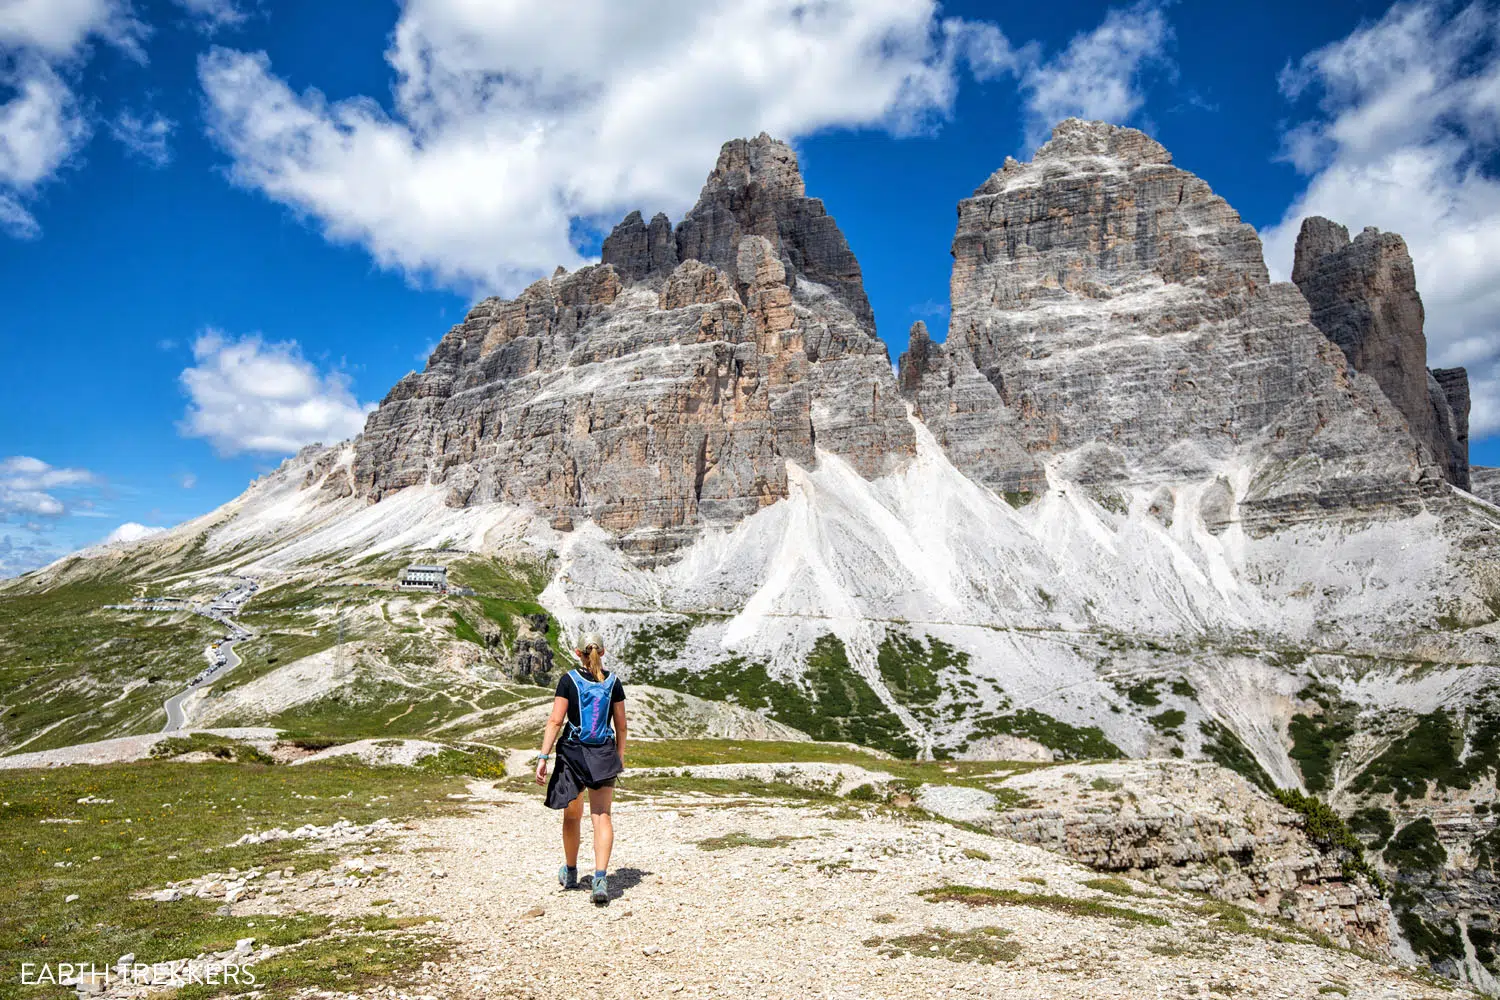
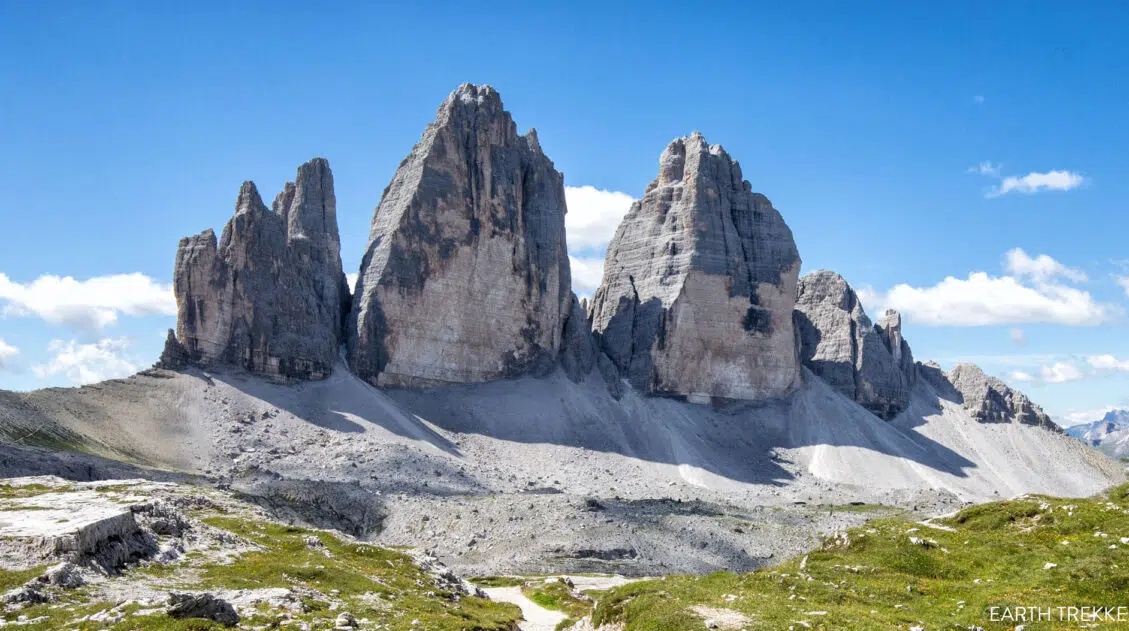
The Cadini di Misurina Viewpoint
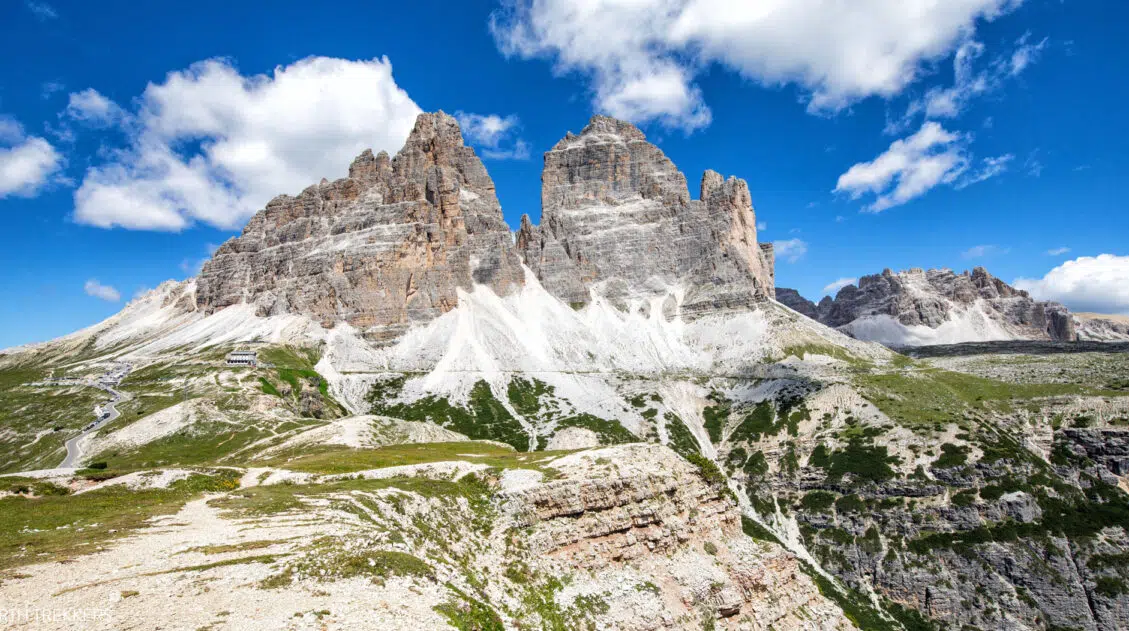
Then the Cadini di Misurina comes into view. These jagged peaks look a lot different from the rest of the Dolomites, which is one of the reasons we liked this hike so much.
Note: Since our visit, we have learned that crowd levels fluctuate quite a bit during the day. Friends of ours hiked this trail in the summer at three different times in two days, sometimes experiencing long lines to take a photo at the viewpoint (mid-morning) and no crowds at all (mid-afternoon).
At about the 1.5 km point (about 1 mile), keep a lookout out for a long outcropping of rock with a thin trail running along the top of it. This is the Cadini di Misurina viewpoint. Here is a photo of it:

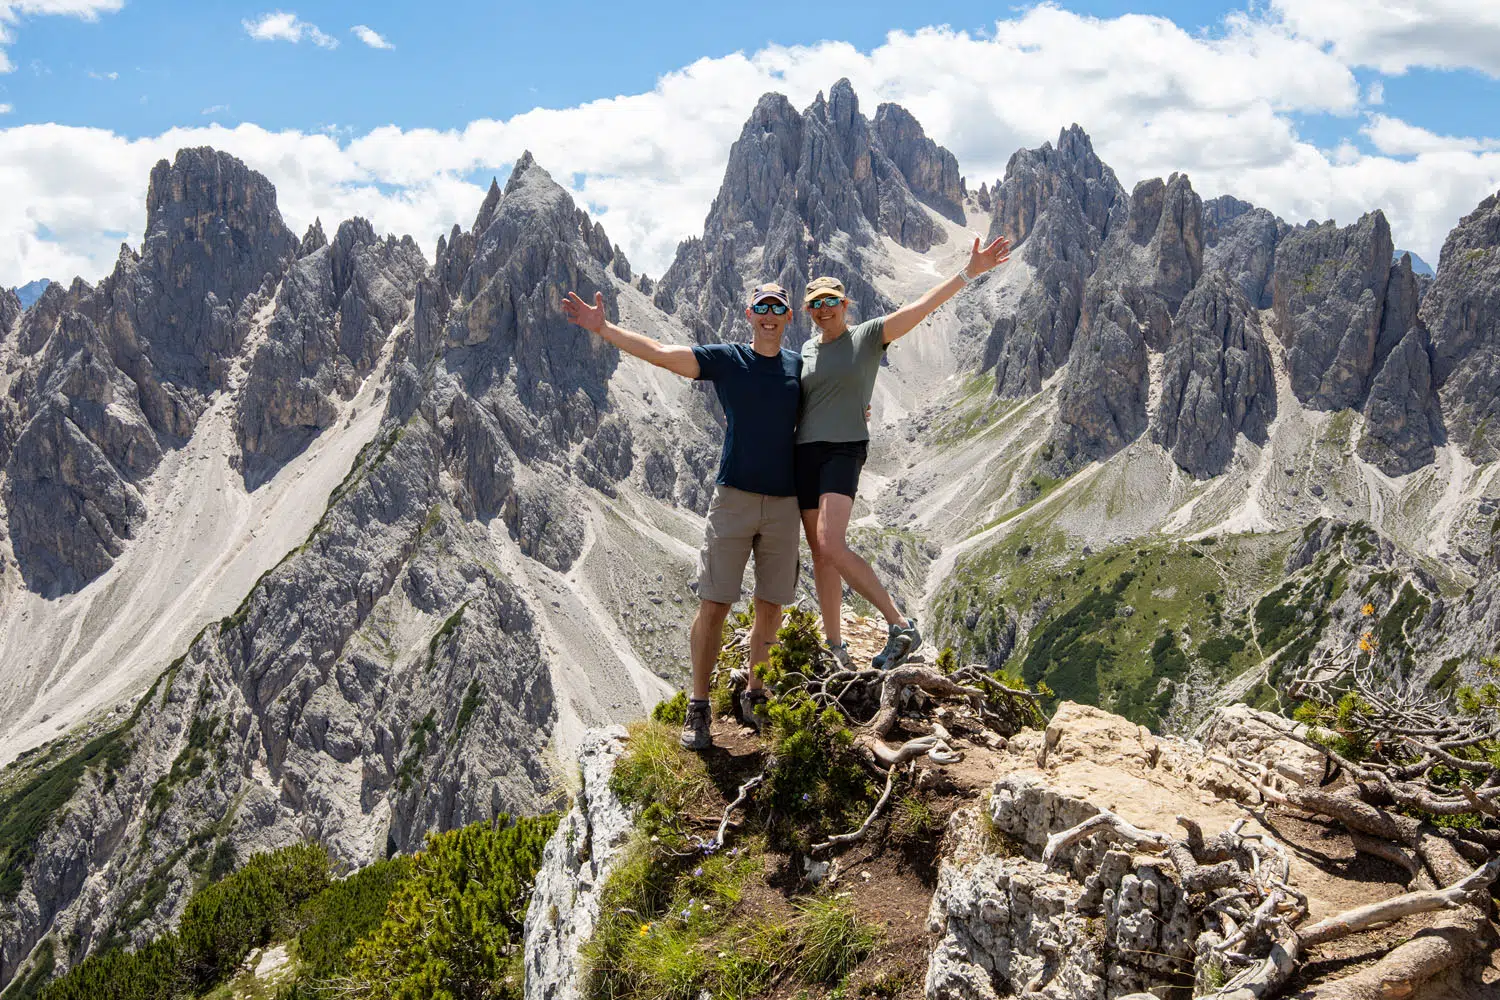
We took our photos right from the end of the viewpoint. Be careful here, because it is a narrow spot, with lots of big tree roots, and it is possible to fall.
For another photo idea, someone can stand here, at the viewpoint, and the photographer can walk back up to the main trail, and capture more of the mountains in the photo (I saw photos like these after we hiked this trail).
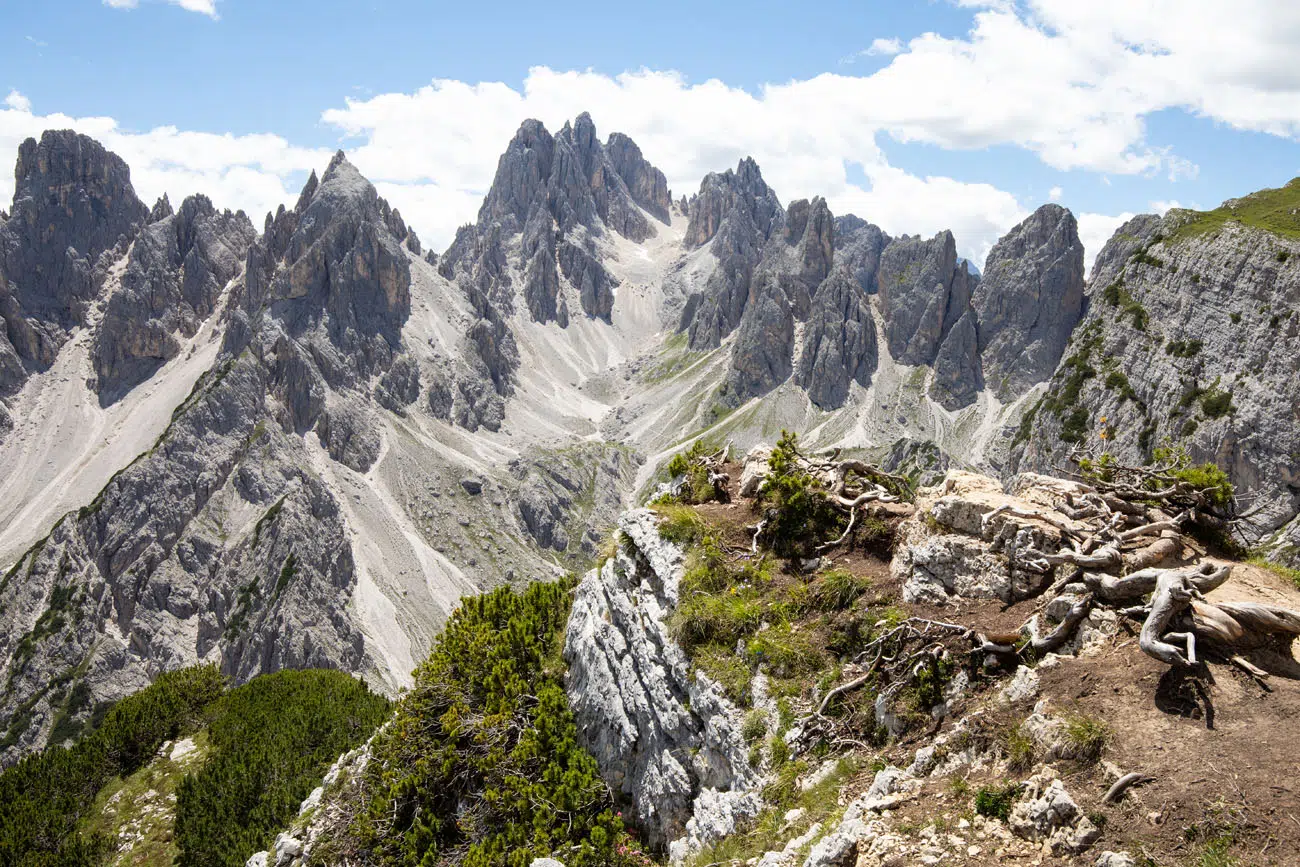
A view of the viewpoint, which is a rocky outcropping of rock covered with roots.
This is looking back at the main trail from the Cadini di Misurina viewpoint.
IMPORTANT! Do not hike out to this viewpoint if it is wet or it has been raining. The trail will be slippery and you risk falling from the trail. Save this hike for a day when the weather is clear and dry…not only is it safer but you will have a better view of spiky pinnacles.
Once you get your photos, you can retrace your steps or explore a little farther.
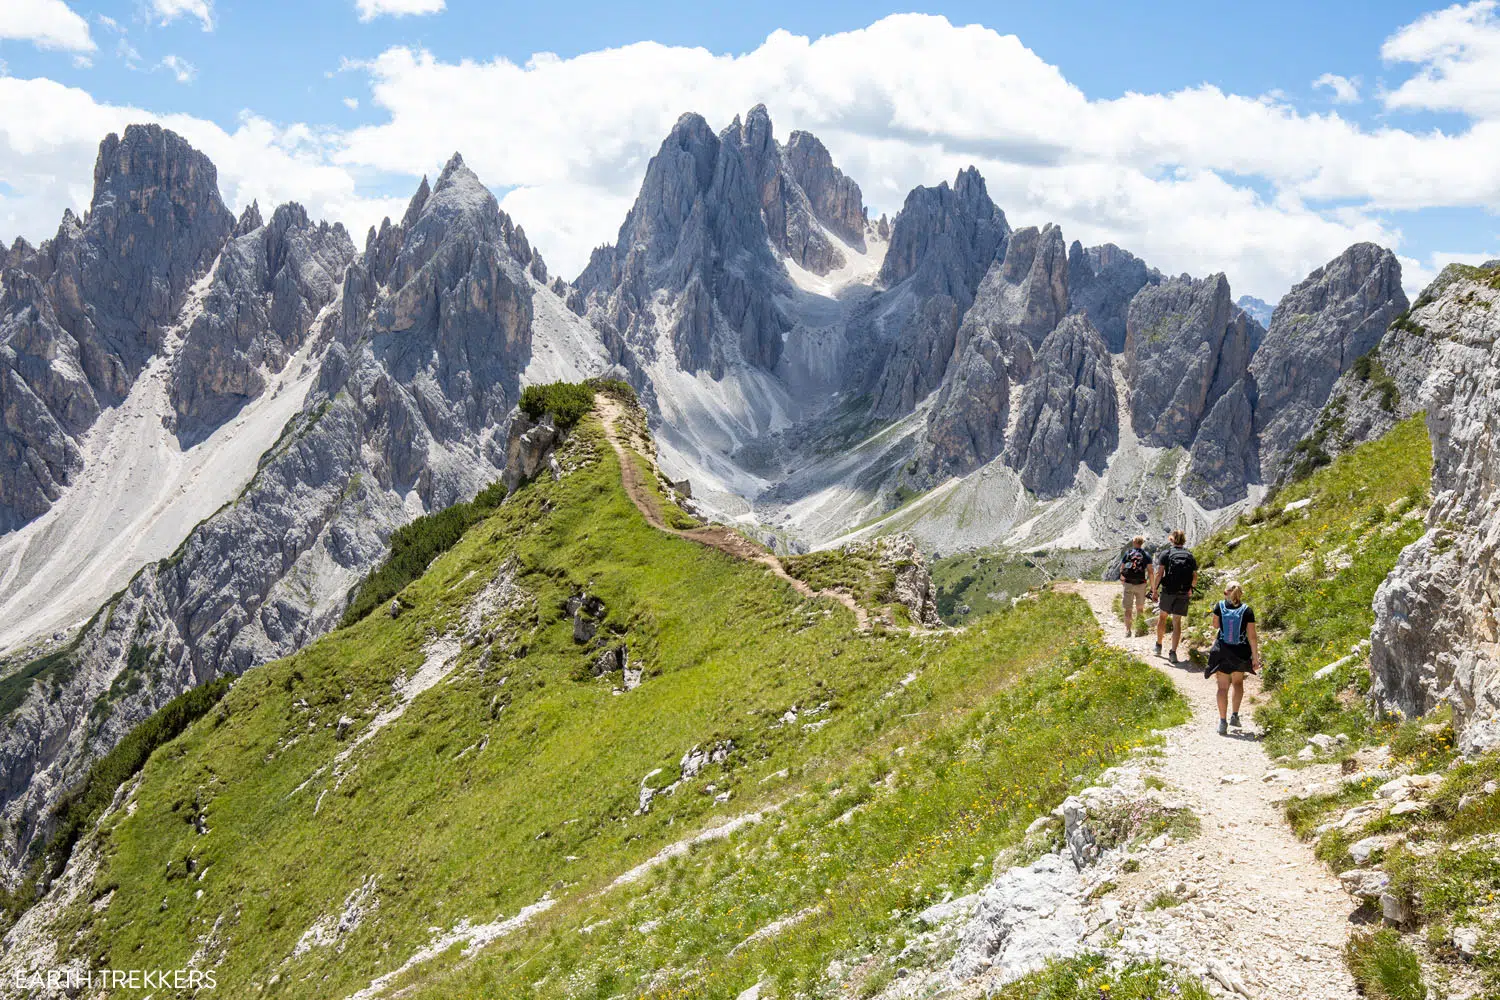
Going Farther Along the Trail
We hiked another 400 meters of the trail beyond the viewpoint. It’s a fun trail, as it winds along the cliffs here. Just be very careful! The trail is narrow and slippery, as it is covered with loose gravel. Like the viewpoint, it is possible to slip and fall here. If you don’t feel comfortable, turn around and hike back to the trailhead.
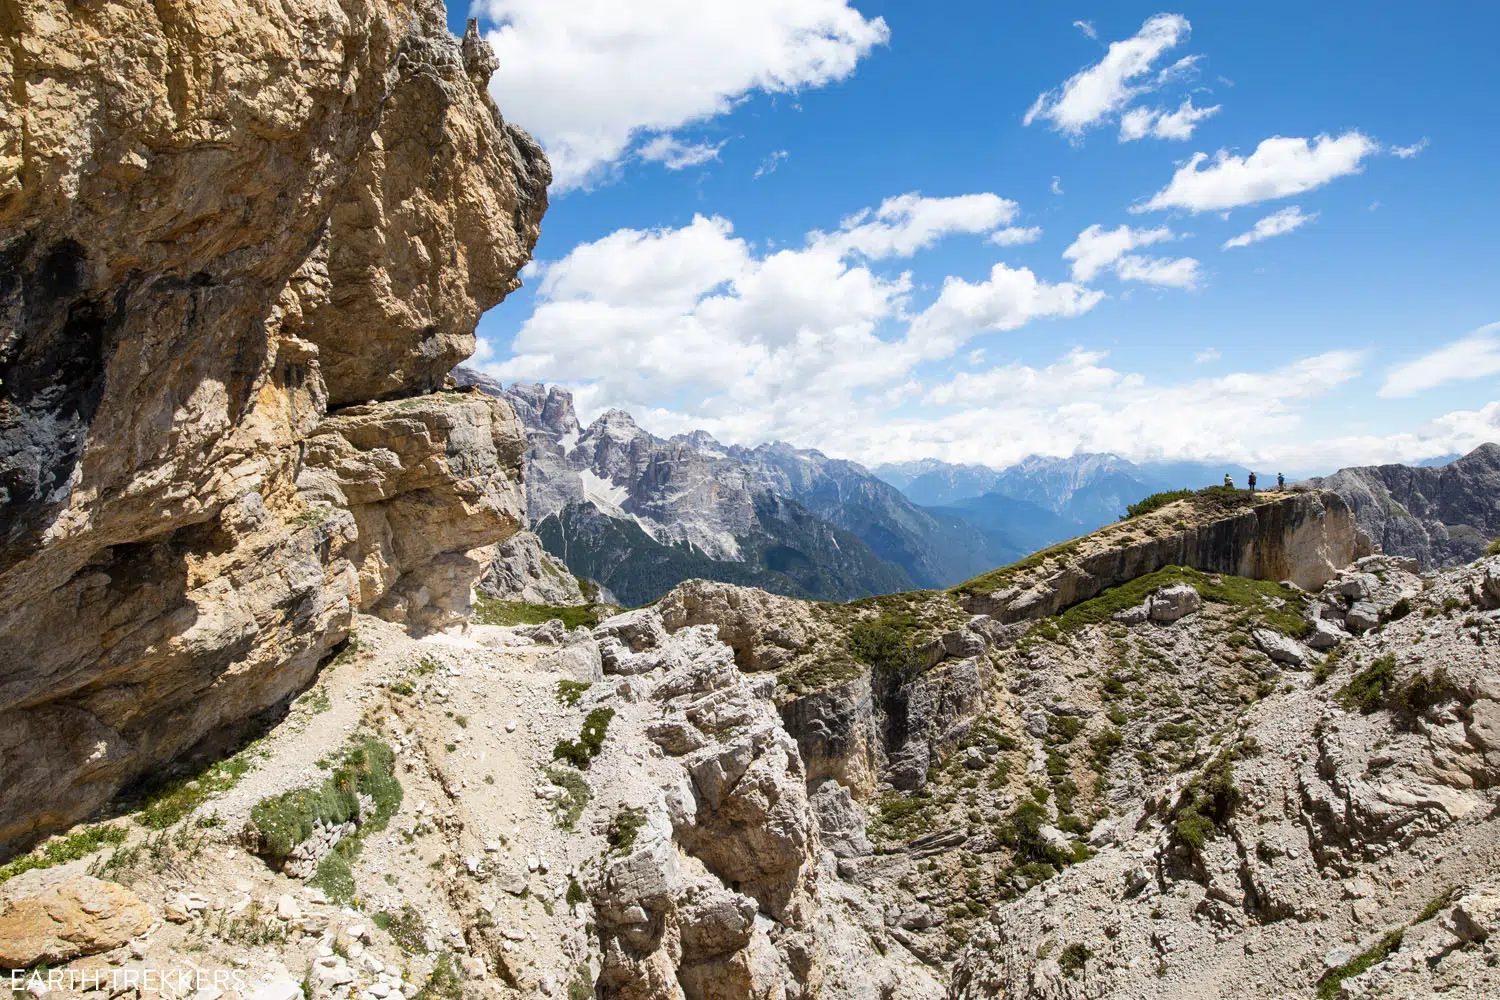
Looking back at the Cadini di Misurina viewpoint (look for the three hikers).
The second viewpoint of Cadini di Misurina is the big gray rock in the center of this photo.
About 400 meters beyond the Cadini di Misurina viewpoint, we found a second smaller outcropping of rock that also makes a great viewpoint (viewpoint #2 on our map).

From that same spot, here is the view into the valley.
We turned around here, but you can keep going farther. This trail runs all the way to Rifugio Col de Varda.
On the hike back, we passed the Cadini di Misurina viewpoint and at the trail split, took the trail to the left for different views on the return hike (if we stayed right, we would have hiked the same trail we took to get to the viewpoint). By going this way, we got to see more of Tre Cime, which is an awesome sight to see.
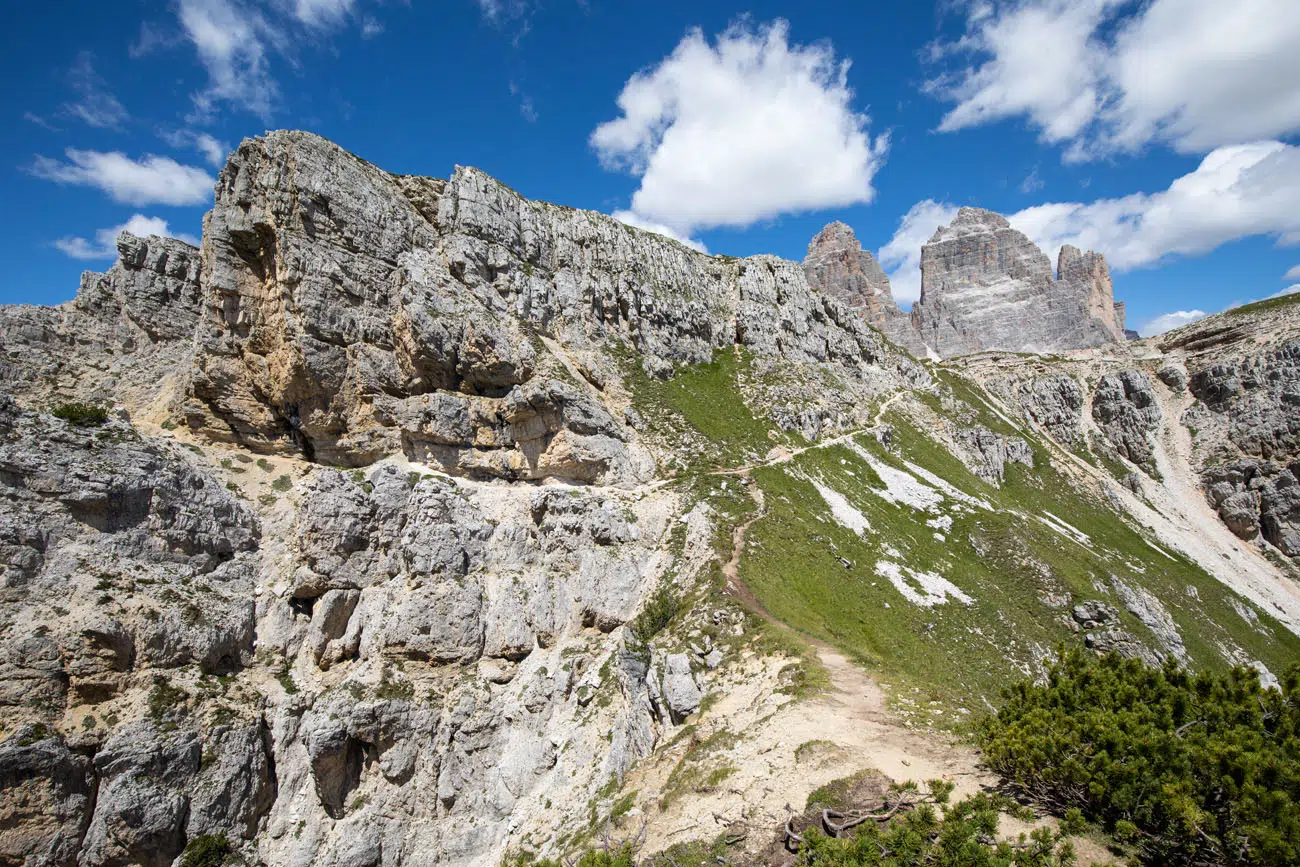
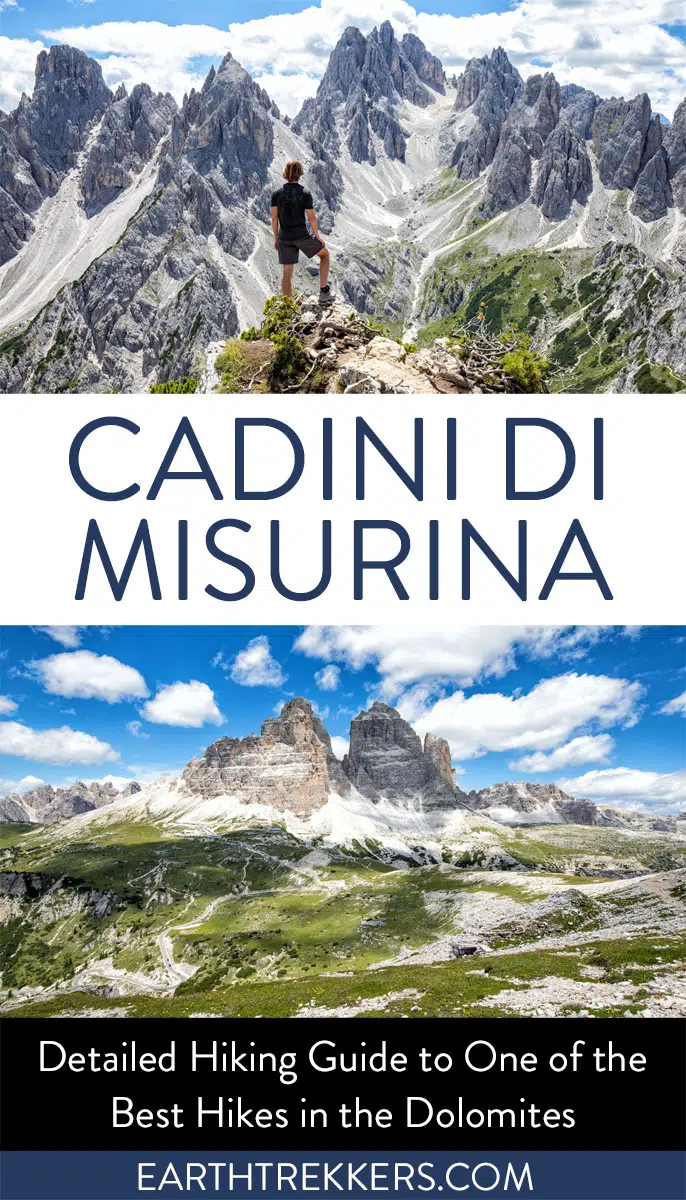
Tre Cime di Lavaredo on a picture perfect day.
Once back to Rifugio Auronzo, you can grab a bite to eat or hike the Tre Cime di Lavaredo Loop, if you did not do that yet.
What to Bring on the Hike
Hiking shoes. You need to wear a pair of hiking shoes or boots for this trail. Parts of the trail run near the edge of a cliff, and with the loose gravel, the trail can be slippery.
Water. I recommend bringing a liter of water per person. It’s not a long hike, but it can be warm in the summer, and it might be nice to have some cool water to drink during the hike.
Sunscreen, hat, and sunglasses. The trail is fully exposed to the sun.
Essential Hiking Gear: What Should You Bring on a Day Hike?
If you are new to hiking or are curious about what you should bring on a hike, check out our Hiking Gear Guide. Find out what we carry in our day packs and what we wear on the trails.Things to Do Near the Cadini di Misurina Viewpoint Hike
Hike the Tre Cime di Lavaredo Loop
The Tre Cime di Lavaredo hike is a very popular hike that starts at the same parking lot as the Cadini di Misurina viewpoint. Since you paid a hefty fee to park here, you might as well get two hikes out of it!
We did Tre Cime di Lavaredo first, since it is longer and more crowded. In the mid-afternoon, we hiked to the Cadini di Misurina viewpoint.
Tre Cime di Lavaredo Hike: Step-By-Step Trail Guide, Parking & Map
Everything you need to know to hike the Tre Cime di Lavaredo loop.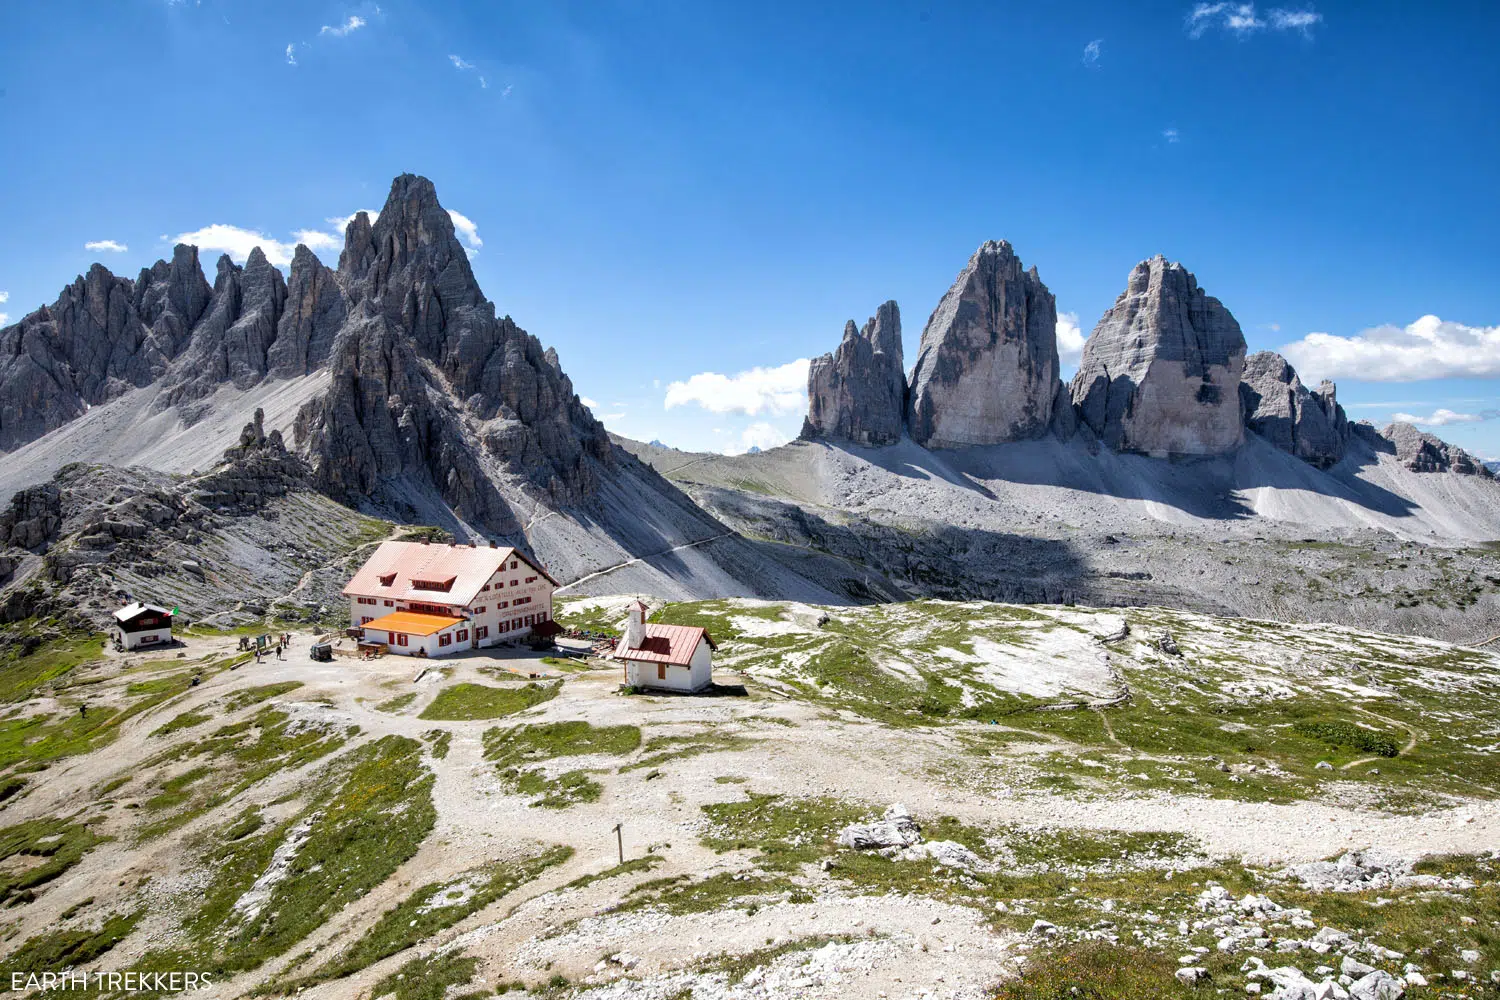
Tre Cime di Lavaredo
Spend Some Time at Lago di Misurina
Lago di Misurina is a beautiful lake that is located less than 10 km from Rifugio Auronzo. You can go ride paddle boats, ride the chairlift, relax in the sun, or have lunch or dinner. We ate at Pizzeria Edelweiss and it was just what we needed after hours of hiking.
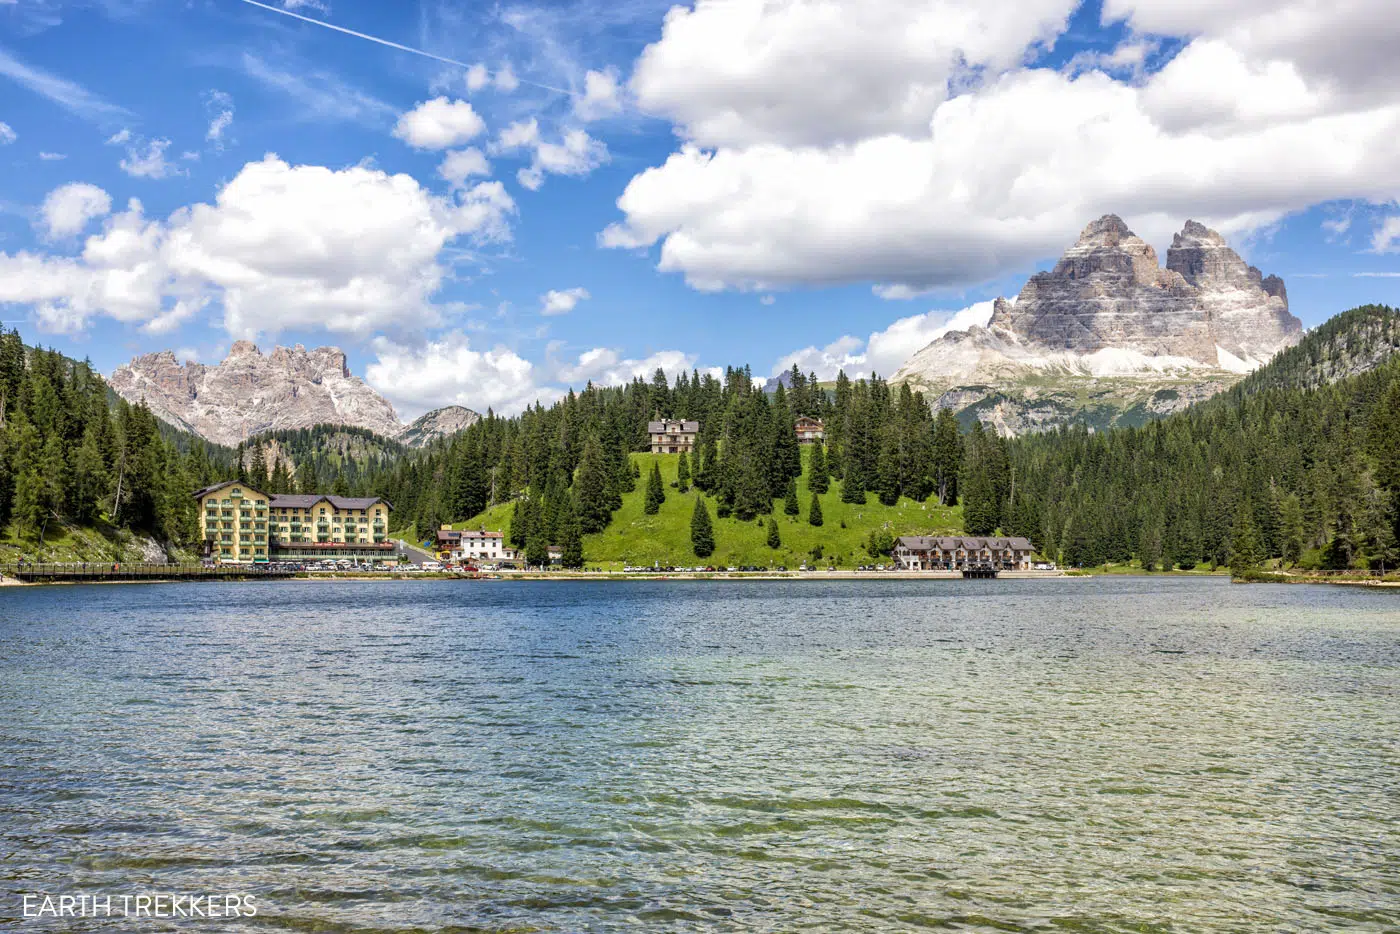
Lago di Misurina
Visit Lago di Dobbiaco
This is another beautiful lake to visit. From Rifugio Auronzo it is a 30-minute drive to get here. You can have lunch or dinner at one of the restaurants next to the lake or take a stroll along the lakeshore.
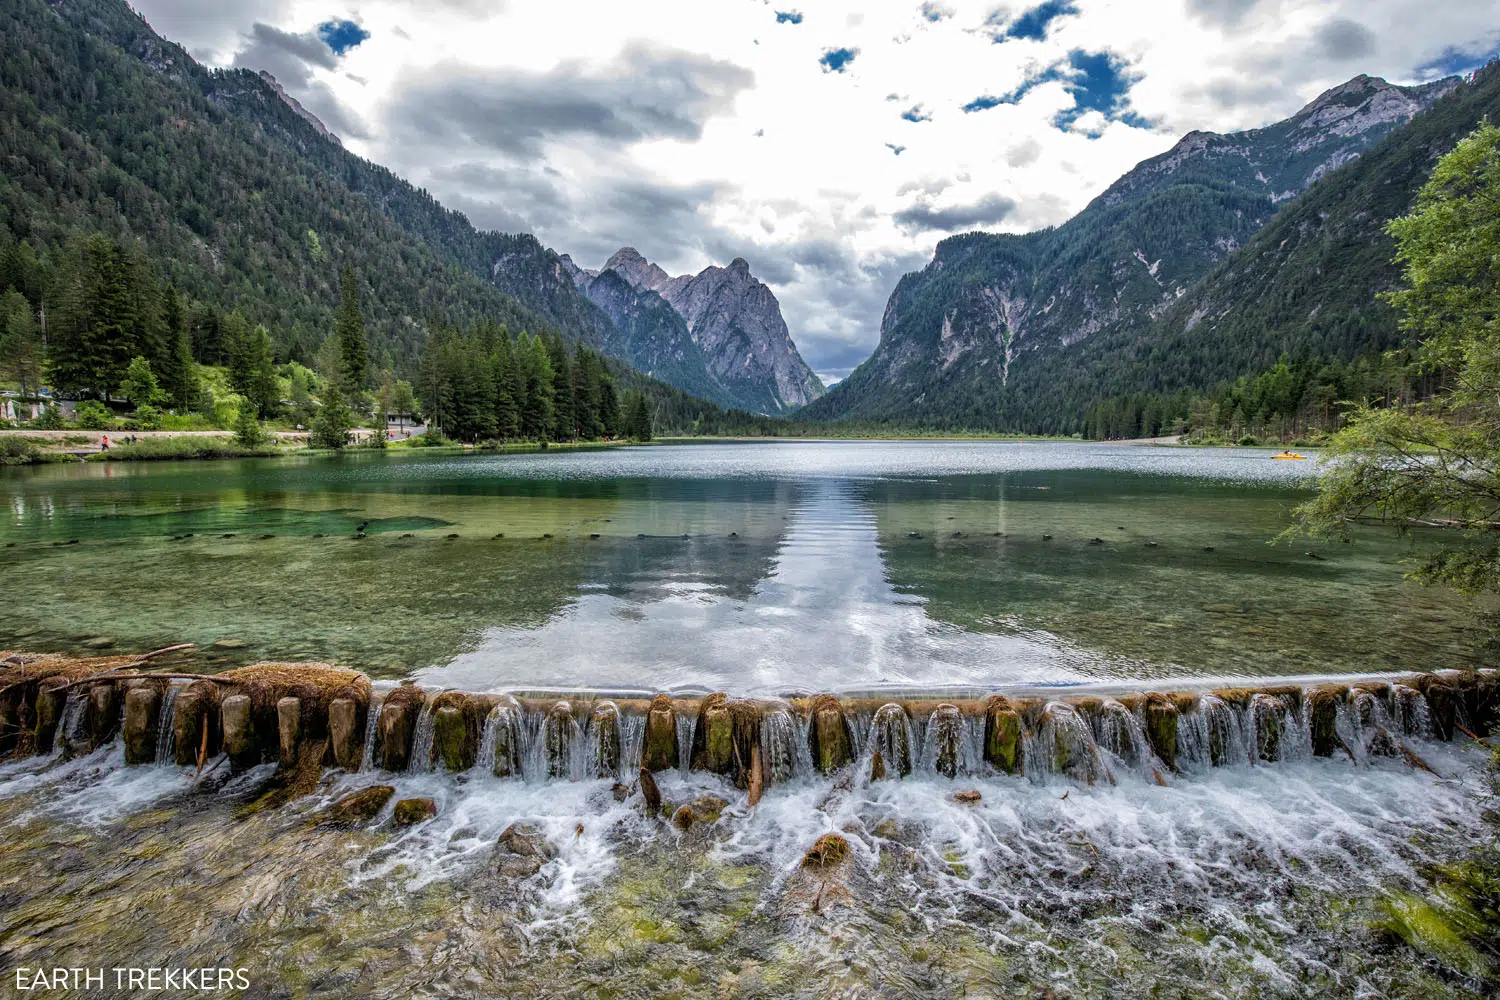
Lago di Dobbiaco
If you have any questions about how to hike to the Cadini di Misurina viewpoint, or if you want to share your experience, let us know in the comment section below.
More Information for Your Trip to Italy
We have TONS more information about Italy in our Italy Travel Guide, including Rome, Florence, Venice, Tuscany, the Dolomites, the Amalfi Coast, the Cinque Terre, and Puglia.
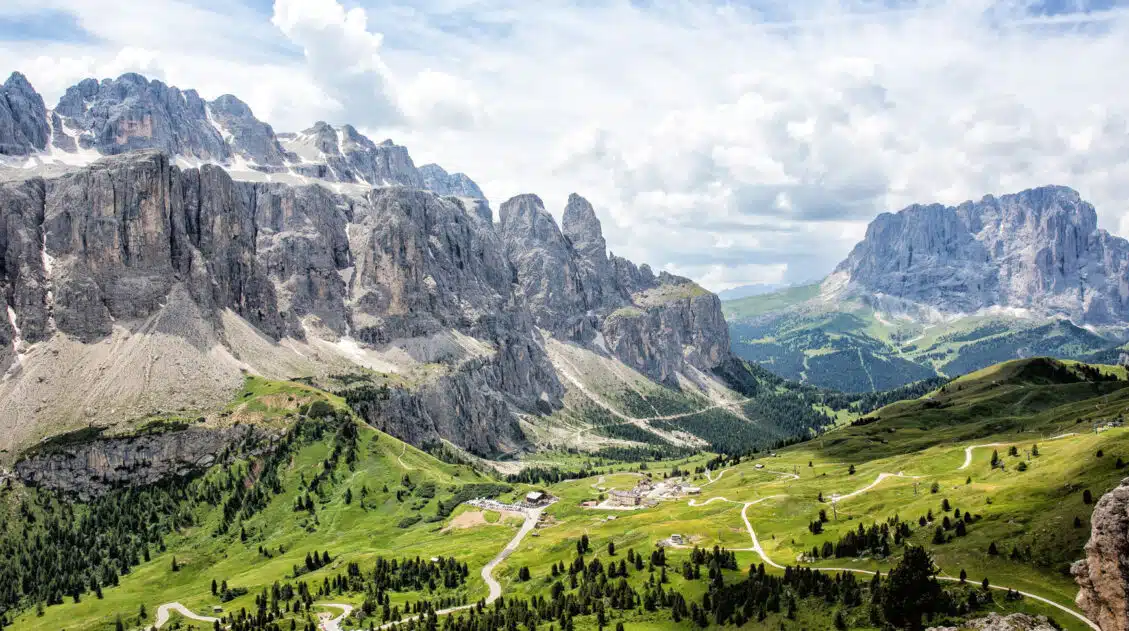
15 Best Hikes in the Dolomites (Easy to Challenging)
Pinterest Facebook Flipboard The Dolomites are one of the best hiking destinations in Europe. In this guide, we rank the 15 best hikes in the Dolomites, from easy scenic trails to challenging alpine adventures, based on views, difficulty, and our firsthand experience hiking the region. Jagged limestone peaks, knife-edge ridgelines, and turquoise alpine lakes make […]
Cinque Torri, Dolomites: Best Hike, How to Visit + Rifugios Averau & Nuvolau
We’ve explored the Dolomites across multiple trips, hiking Tre Cime, the Puez-Odle Altopiano, Lago di Sorapis, and more, and we have strong opinions about what’s worth your time. The Cinque Torri belongs near the top of any list. It’s one of the most recognizable rock formations in the Dolomites: five jagged towers rising above alpine […]
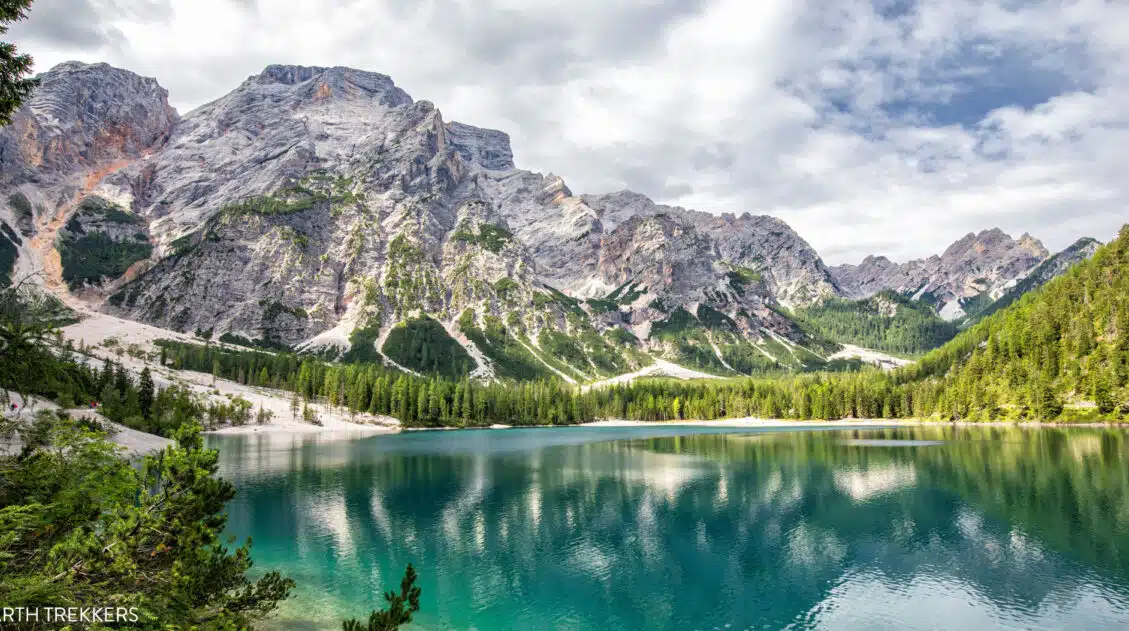
Lago di Sorapis Hike: Out-and-Back or As a Loop?
Lago di Sorapis (Lake Sorapis) is one of the most popular hikes in the Dolomites. Located just outside of Cortina d’Ampezzo, this aquamarine lake attracts hundreds of hikers every day during the summer months. The vast majority of people hike out-and-back to Lago di Sorapis on the main trail. What many people don’t know is […]
Is Marmolada Worth It? Visiting the Highest Peak in the Dolomites
We visited Marmolada while road tripping through the Dolomites, driving from Cortina d’Ampezzo to Val Gardena. Since it is the highest peak in the Dolomites, it had long been on our list of places to visit, and adding it as a stop along this scenic drive made perfect sense. After hiking many of the region’s […]
What We Wish We Knew Before Visiting the Dolomites
The Dolomites. This is where jagged pinnacles of rock soar into the sky, mountain huts and cabins dot the green, rolling hills, cable cars whisk hikers and skiers to the highest mountain peaks, and hiking trails connect small hamlets and towns. It’s easy to fall in love with the photos. Planning a smooth trip here, […]

Where to Stay in the Dolomites (2026 Guide to the Best Towns & Hotels)
Wondering where to stay in the Dolomites? It’s one of the most important decisions you’ll make when planning your trip. This region may look small on a map, but winding alpine roads and high mountain passes mean travel times are longer than expected. Stay in the wrong town and you could spend hours driving instead […]
Dolomites Travel Guide: How to Plan a Trip to the Dolomites
Dolomites Travel Guide The Dolomites are one of the most breathtaking mountain destinations in Europe. Jagged pinnacles of rock soar into the sky, mountain huts and cabins dot the green, rolling hills, cable cars whisk hikers and skiers to the highest mountain peaks, and hiking trails connect small hamlets and towns. We’ve spent 12 days […]
10 Day Northern Italy Itinerary (Dolomites, Venice & Lake Como)
This 10-day itinerary through Northern Italy features Venice, the Dolomites, Verona, Milan, and Lake Como, with hiking suggestions, hotel recommendations, and practical planning advice based on our numerous trips to Italy. We’ve visited Italy numerous times, exploring these destinations on separate trips over the years, hiking in the Dolomites, wandering the canals of Venice, strolling […]
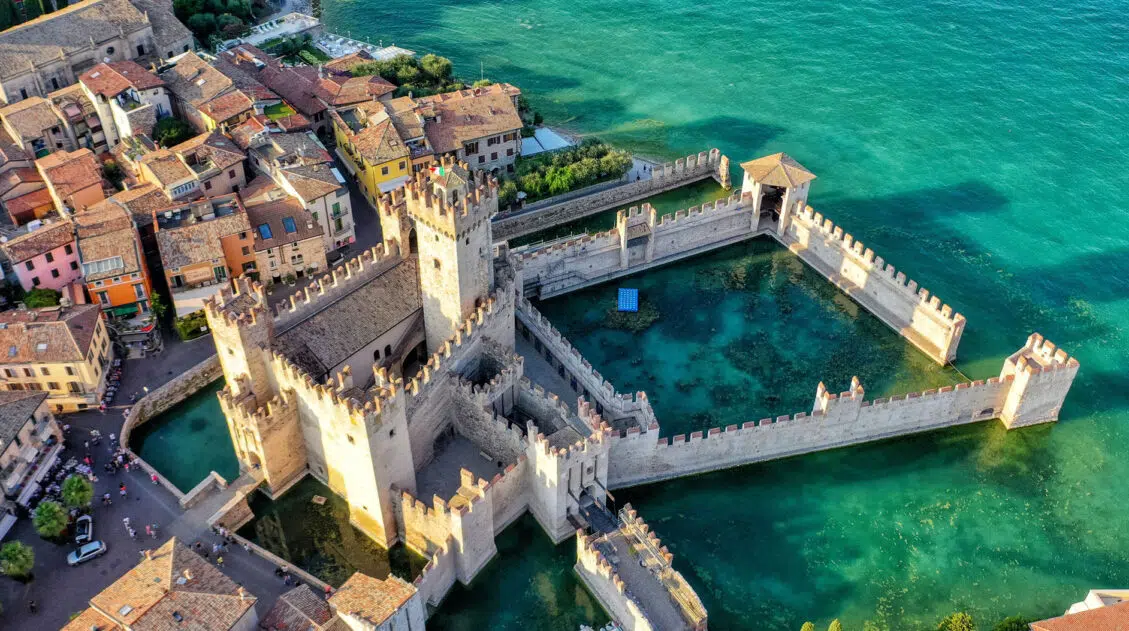
9 Wonderful Things to Do in Sirmione, Lake Garda, Italy
Perched on the tip of a long, narrow peninsula, Sirmione is a medieval town surrounded by gardens, thermal spas, beaches, and the aquamarine water of Lake Garda. Explore an ancient castle, wander the narrow city streets, tour historical sites, and go on a sunset cruise around the peninsula. Here are the best things to do […]
Best Hikes in Europe: 25 Incredible Hikes for Every Level
From the dramatic cliffs of Norway to the jagged peaks of the Dolomites and the volcanic landscapes of Iceland, Europe is packed with some of the most unforgettable hikes in the world. In this guide, we share our favorite hikes in Europe, trails that stand out for their scenery, uniqueness, and overall experience from start […]

10 Days in Italy: 5 Itineraries for Every Type of Traveler
With 10 days in Italy, you have enough time for an incredible trip, but not enough time to see everything. That’s the good news and the hard news at once. Italy is enormous, wildly varied, and deeply worth savoring. The biggest mistake most people make when planning a 10-day Italy itinerary is trying to fit […]

Italy Travel Guide: How to Plan a Trip to Italy
Italy Travel Guide From the ruins of ancient Rome to the hiking trails of the Dolomites, the trulli of Puglia to the hilltop villages of Tuscany, Italy is a country that rewards every kind of traveler, and keeps pulling you back. We’ve traveled to Italy six times, exploring the country from the lakes and mountains […]

Comments 99