
Over 19.25 miles, climb Aasgard Pass, wander through a surreal landscape of turquoise alpine lakes and jagged peaks, then descend nearly 7,000 feet to the Snow Lakes trailhead. Hiking the Enchantments in one day is a long, hard challenge, but one you’ll never forget.
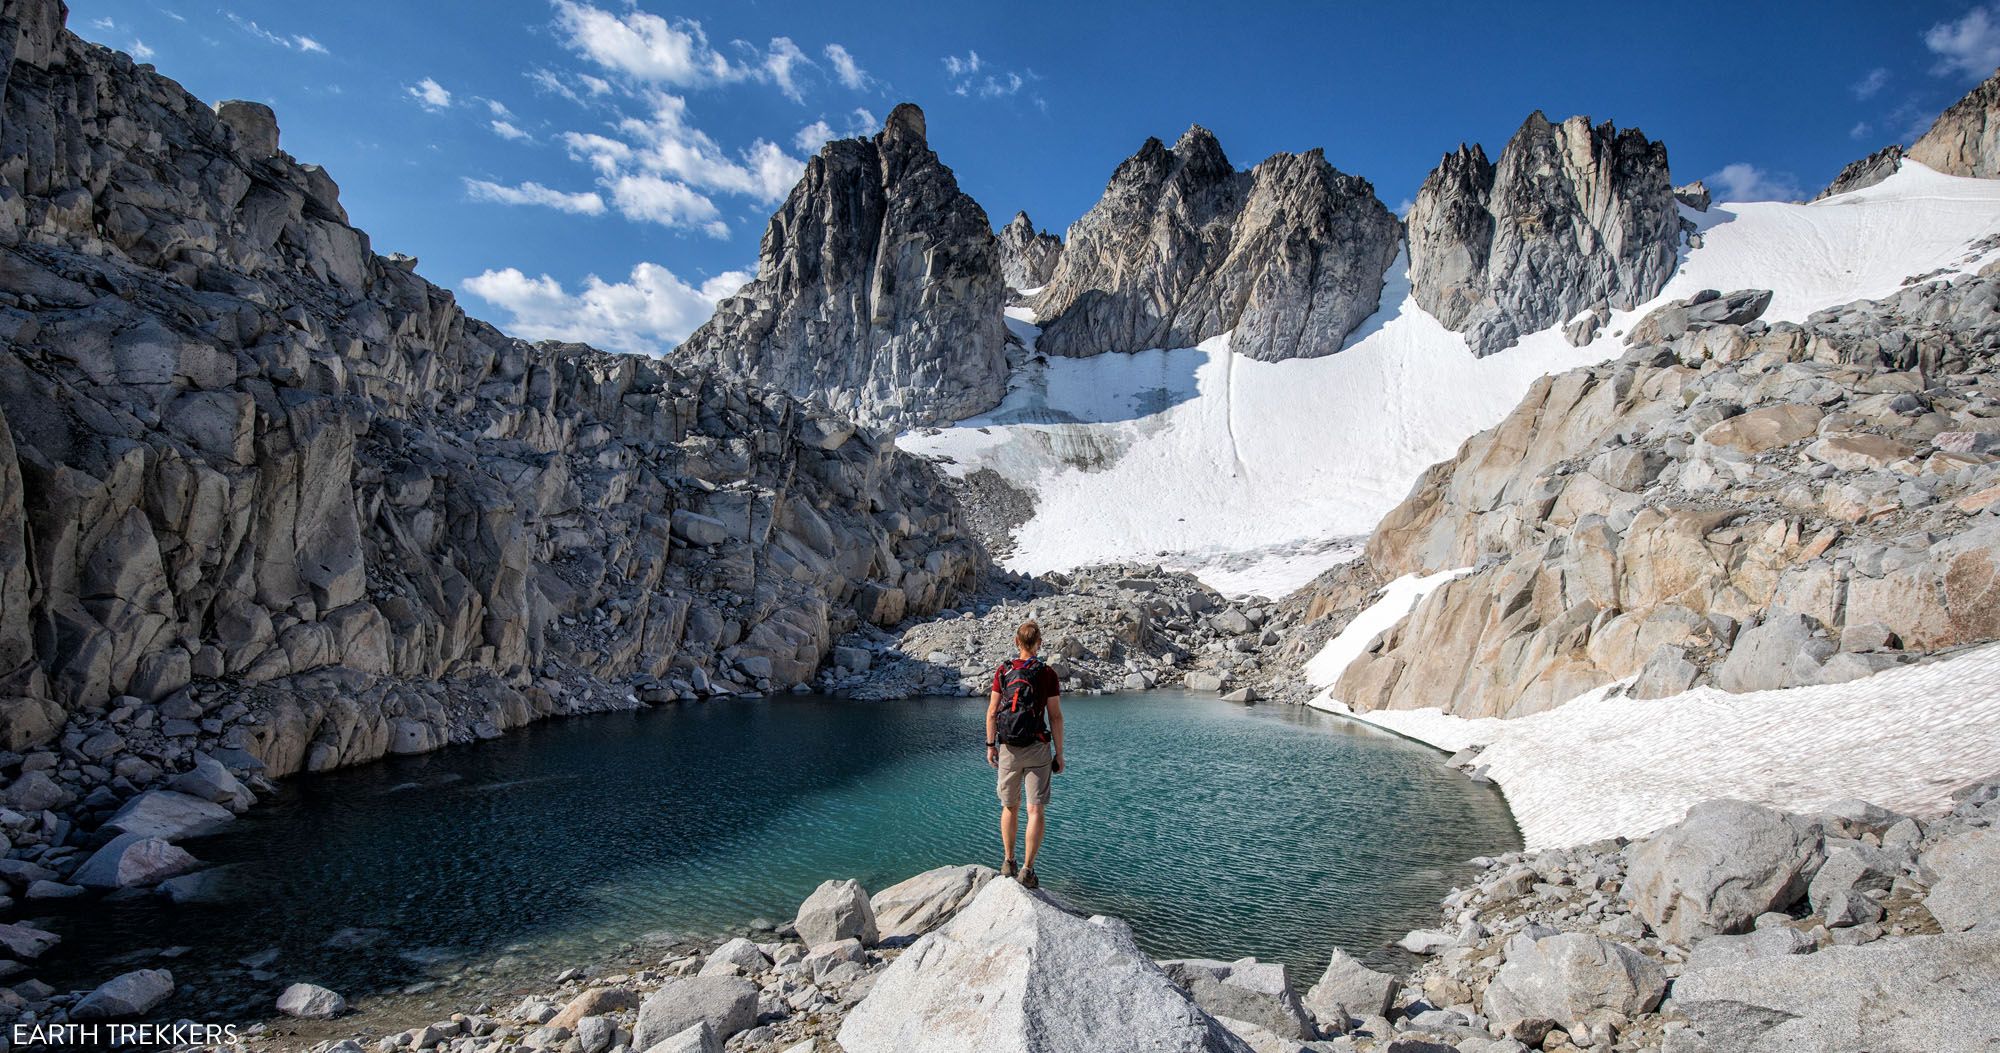
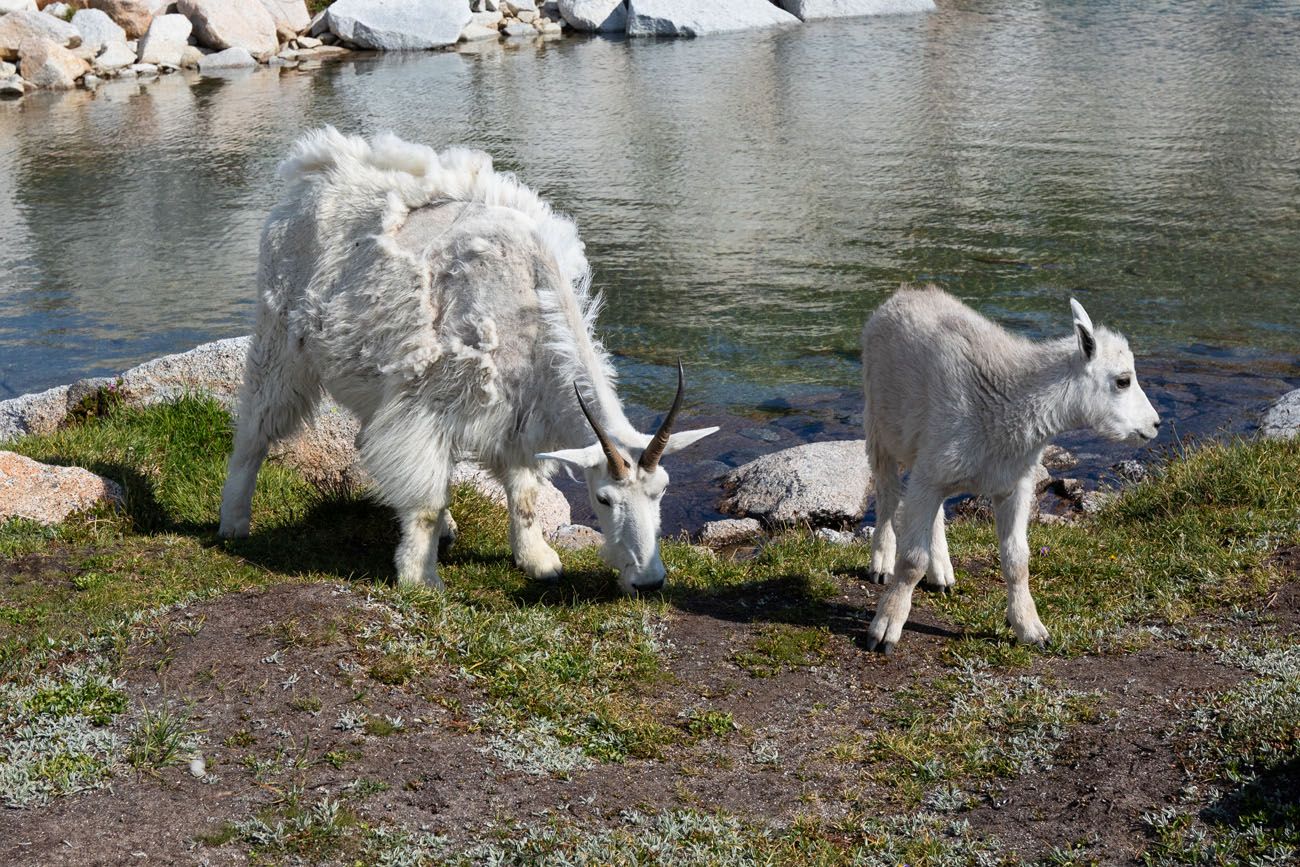
If you are a hiker, the Enchantments are a destination that belongs at the top of your list. Turquoise, emerald, and aquamarine alpine lakes are scattered through the jagged, snow-capped mountain peaks. Wildflowers bloom along the edges of the trail, mountain goats graze on the grasses, and the larches turn brilliantly yellow in the fall months.
On this hike, the landmarks make it sound like you are in a fairytale. It definitely looks like something from another world. You’ll climb over Aasgard Pass, gaze up at Dragontail Peak, and hike past Leprechaun Lake and Sprite Lake.
Tim, Kara, and I tackled the Enchantments on a scorching summer day and it immediately became our favorite hike of that trip. That’s saying something, because that summer we spent five weeks hiking Colorado’s and Washington’s national parks. This was the best hike we did all summer.
But we won’t sugarcoat it: this is a serious hike that should not be underestimated. Only hikers who are fit, experienced, and well-prepared should attempt the Enchantments as a day hike. If you’re planning to backpack the trail instead, this guide is equally useful.
In this guide, we walk you through the Enchantments trail step by step, from the climb to Colchuck Lake and the ascent of Aasgard Pass to the turquoise lakes of the Core Enchantments and the long descent past Snow Lakes.
If you’re looking for information about permits, transportation between trailheads, training, and what to pack, read our Complete Guide to the Enchantments Thru Hike, where we cover the logistics of planning this adventure.
Is Hiking the Enchantments in One Day Right for You?
Before you commit to this hike, be honest with yourself. The Enchantments is not a hike to wing. At nearly 20 miles with over 5,500 feet of elevation gain and a brutal descent, it pushes even strong, experienced hikers to their limits. We are fit, experienced hikers and it still took everything we had.
You’re a good candidate for this hike if:
- You regularly hike 15+ miles with elevation gain and finish feeling strong
- You’ve done big climbs and long descents before and know how your body responds
- You’re comfortable hiking 10 to 15 hours in a single day
- You have experience navigating trails with minimal signage
- You can start before sunrise and manage your pace over a very long day
This is probably not the right hike for you if:
- Your longest hike to date is under 10 miles
- You’re new to hiking or haven’t done significant elevation gain before
- You have knee or joint issues that flare up on long descents; the final miles are relentless downhill
- You’re hoping to do it casually and see what happens
What about backpackers? If you have an overnight permit, everything in this trail guide applies to you. The difference is you get to actually linger at the lakes instead of watching the clock. We’re a little jealous.
One final note: if you’re on the fence about your fitness level, read our Enchantments Complete Planning Guide before deciding. It covers exactly how to train and what level of fitness we recommend before attempting this hike.
Enchantments Hike: Trail Stats
These statistics are for the thru-hike from Stuart/Colchuck Lake Trailhead to the Snow Lakes Trailhead.
Distance: 19.25 miles (31 km)
Difficulty: Extremely strenuous
Total Elevation Gain: 5,500 feet (1,675 meters)
Total Elevation Loss: 7,000 feet (2,133 meters)
Starting Elevation (Stuart/Colchuck TH): 3,225 feet (980 meters)
Ending Elevation (Snow Lakes TH): 1,400 feet (425 meters)
Highest Elevation (Aasgard Pass): 7,841 feet (2,390 meters)
Length of Time: 8 to 15 hours. Those on the shorter end trail run a portion of the trail. Those on the longer end tend to linger longer at the lakes. The median time is 10 to 12 hours.
Location: Alpine Lakes Wilderness, Washington
Permits: If you do this as a day hike, you will need a Day Use Permit. The Day Use Permit is available at the trailhead and it is free. To camp overnight, you need to be one of the lucky 2% who get a permit awarded by lottery. You will need a National Forest Recreation Pass which can be purchased at the trailhead or at local sporting goods shops for $5. If you have an America the Beautiful Pass, you can use this in place of a National Forest Recreation Pass. Learn how to display your America the Beautiful Pass here.
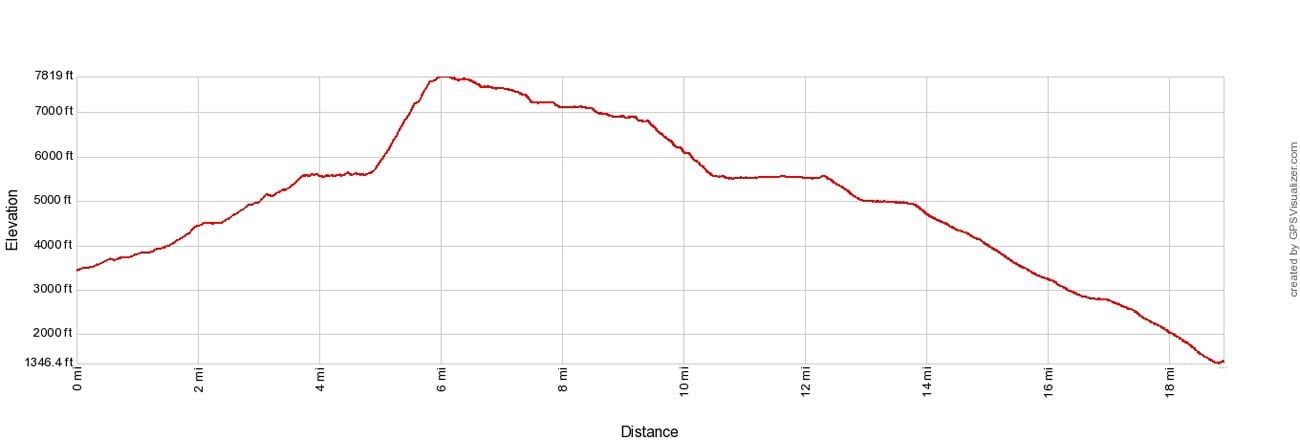
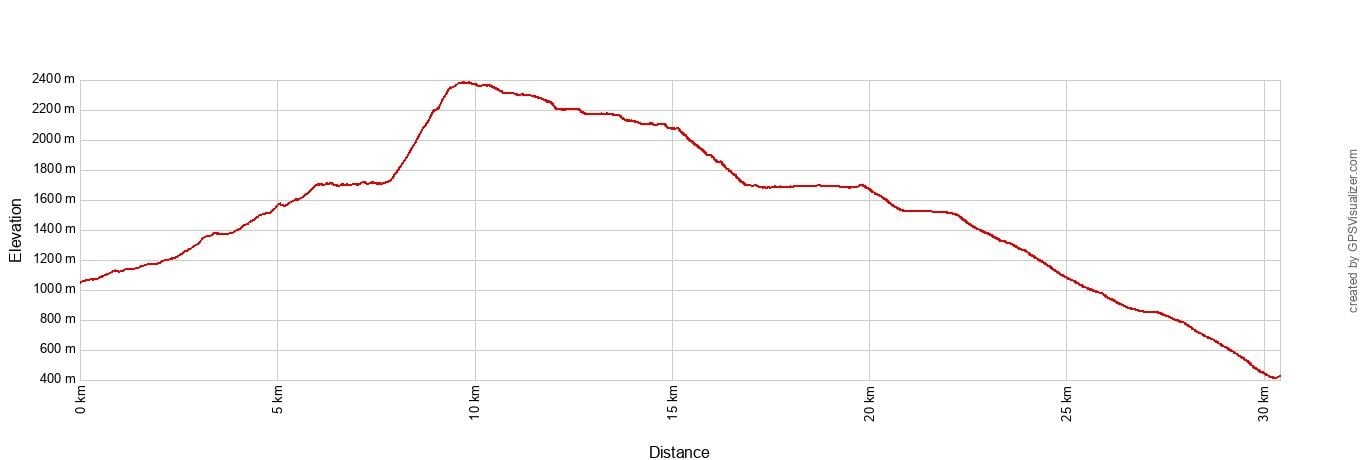
Enchantments Trail elevation profile
Map of the Enchantments Hike
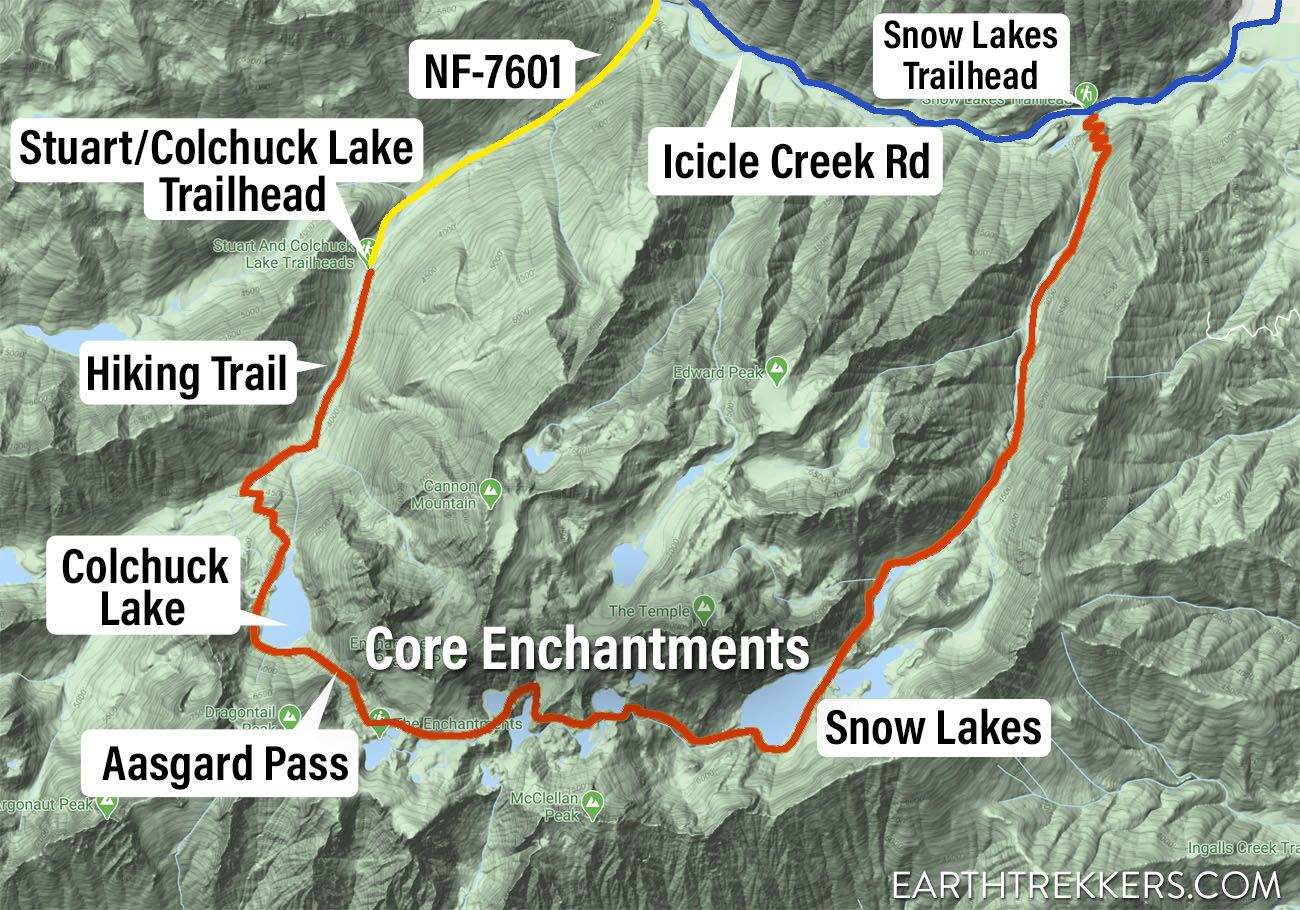
Map of the hiking trail. The red line is the hiking trail. The yellow line is NF-7601, the gravel road to the Stuart and Colchuck Lakes Trailhead. The blue line is Icicle Creek Road.
Please practice the seven principles of Leave No Trace: plan ahead, stay on the trail, pack out what you bring to the hiking trail, leave areas as you found them, minimize campfire impacts, be considerate of other hikers, and do not approach or feed wildlife.
The Enchantments: Step-By-Step Trail Guide
Since this is a point-to-point hike, you can do this hike in either direction. Most people chose to start at the Stuart/Colchuck Lakes trailhead for two reasons. For one thing, it sits almost 2,000 feet higher than the Snow Lakes trailhead, so you will have 2,000 less feet to climb on the hike. Also, you will hike up and over the Aasgard Pass early in the hike, when your legs are still fresh.
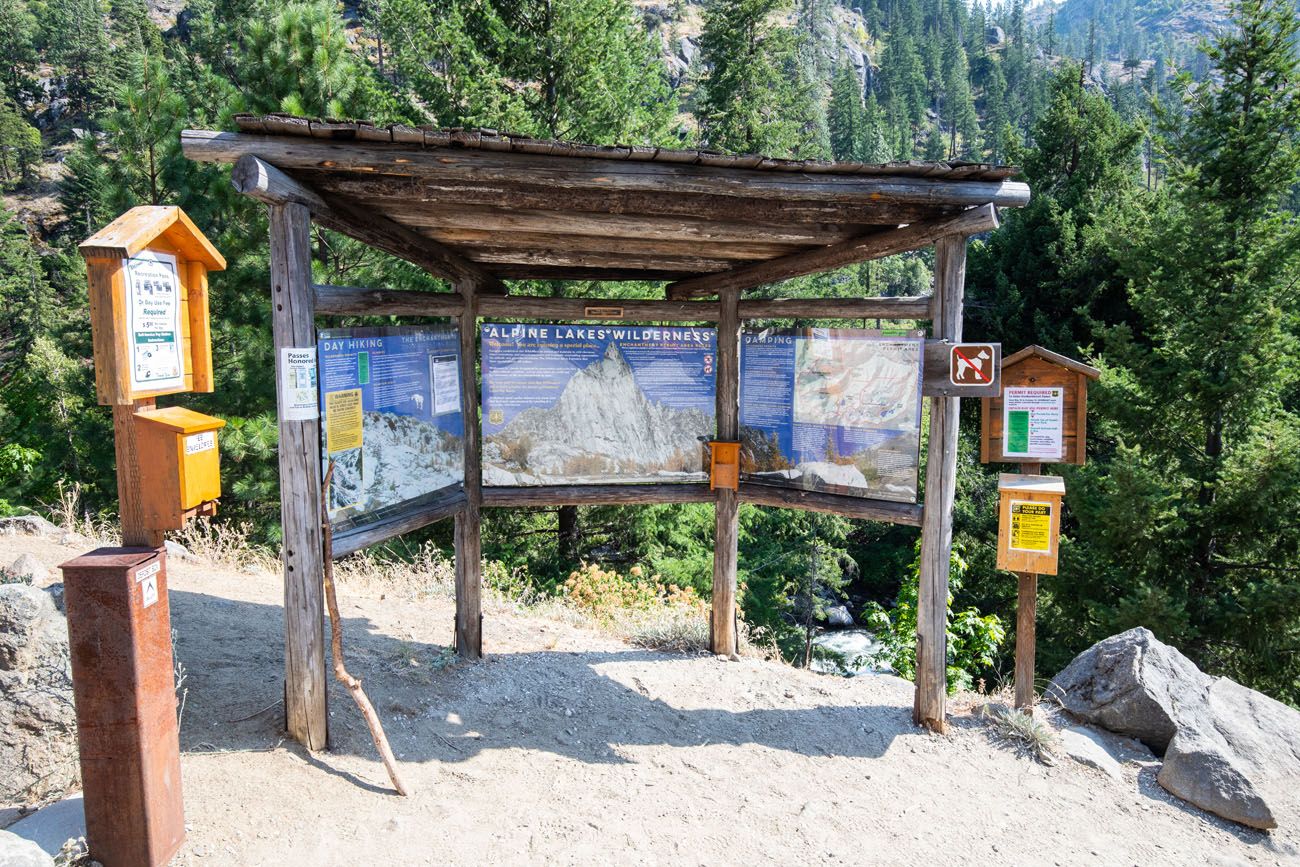
START: Stuart/Colchuck Lakes Trailhead
The Stuart/Colchuck Lakes trailhead is located at the very end of NF-7601. This is a compacted dirt and gravel road that is suitable for standard cars. However, an SUV will make this drive easier, since it is rutted in some places.
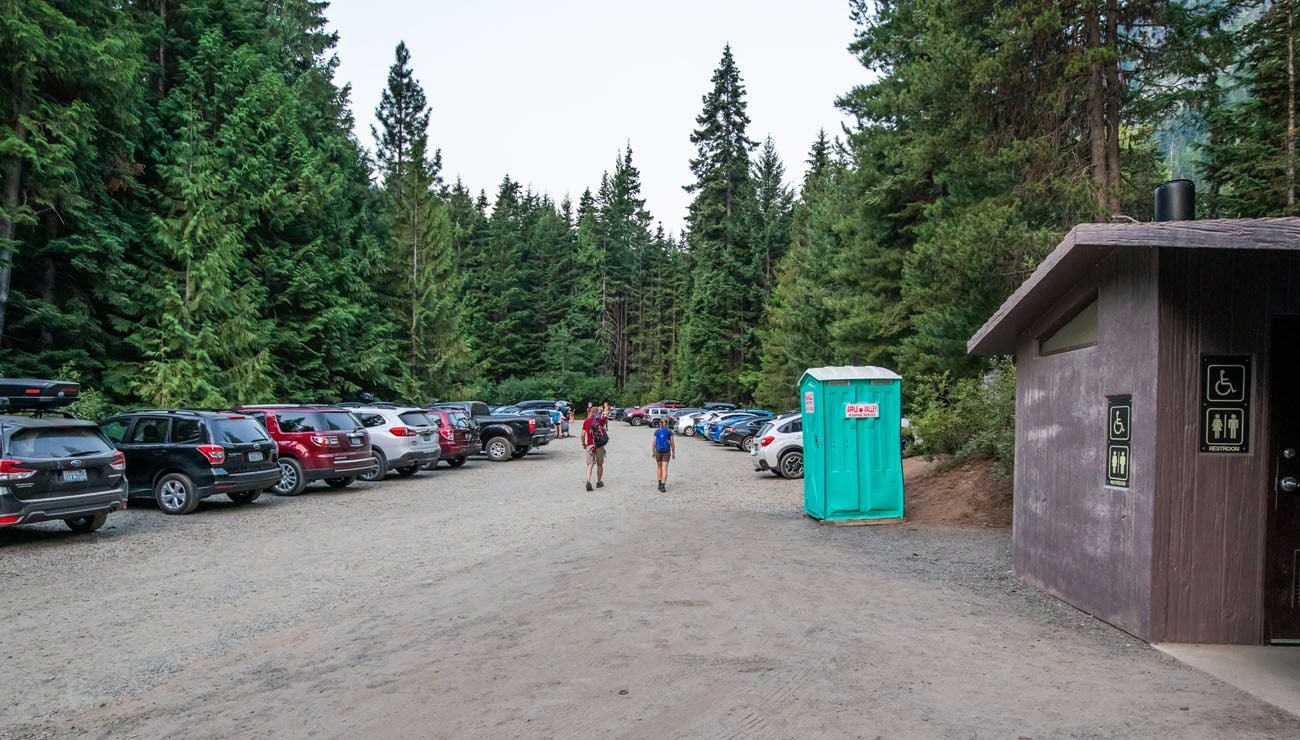
The parking lot is located at the very end of the gravel road. It is a relatively large parking lot and we had no problems finding a spot the morning we did this hike (it’s significantly larger than the Snow Lakes parking lot). We arrived at 5:30 am. You can see from the photo below that the lot was quite full, even that early. People start arriving at 4:30 am to do this hike. If no spaces are available, you can park on the right side of NF-7601.
There are toilets located near the trailhead.
Make sure you display your National Forest Recreation Pass or your America the Beautiful Pass in your car. If you do not have a National Forest Pass, you can purchase one at the trailhead. Look for the box of white envelopes. Fill one out and include your $5 fee.
Before setting foot on the trail, you must also fill out a wilderness permit. These are also located at the trailhead. Fill it out (bring a pen!), deposit the bottom section in the box, and take the top part of the permit with you. A ranger might check to see if you have this during your hike (ours was checked). You will deposit the top section in the box at the end of your hike.
Now that you got all of the paperwork out of the way, it’s time to start the hike.
Trailhead to Colchuck Lake
Distance: 4.25 miles
Elevation Gain: 2,200 feet
Average Time: 2 to 3 hours
Even though it is a steady uphill climb to Colchuck Lake, this felt like one of the easiest and fastest sections of the hike.
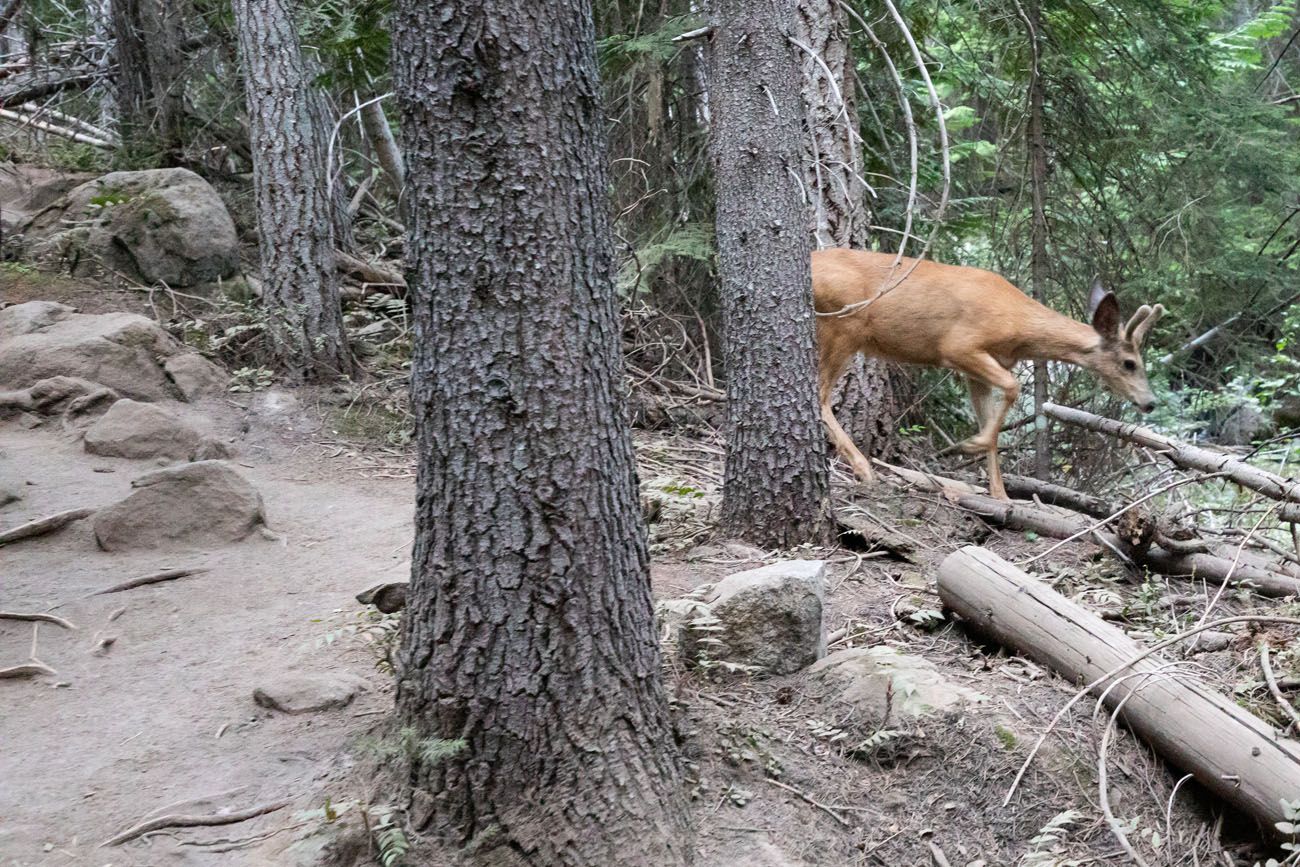
For the most part, you are hiking through a forest. There’s not a whole lot to look at, other than a few cool bridges along the way and maybe some wildlife. We were lucky to see two deer cross the trail right in front of us.
At about 2.4 miles into the hike (and roughly 1,000 feet of total ascent) you’ll reach a noticeable split in the trail. There is a sign on a tree directing you to turn left to go towards Colchuck Lake, which is what you want to do. Going straight at the split will take you to Stuart Lake which you don’t want to do today.
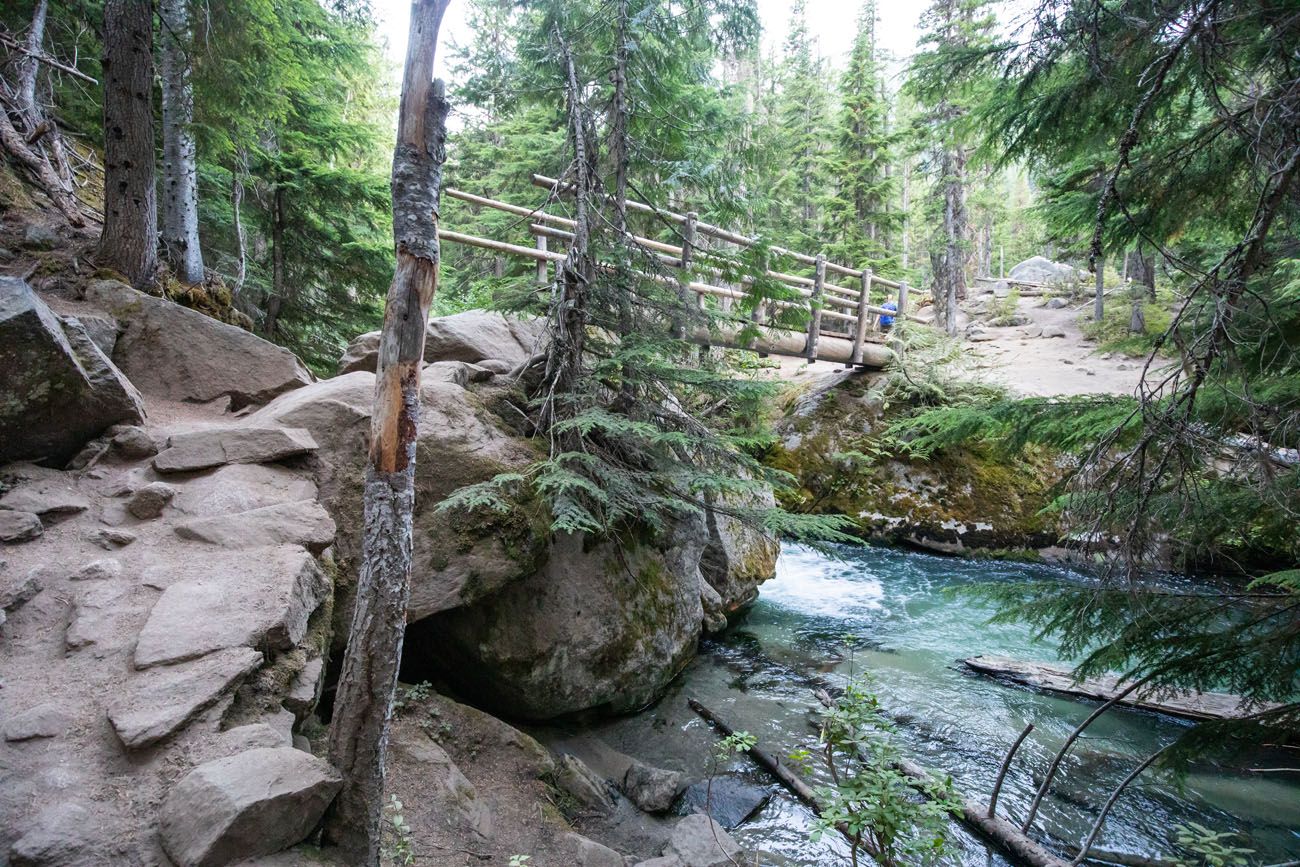
After turning left at the split you’ll reach a wooden bridge that ends at a boulder area. There is no need to climb the boulders here. Just turn right when you step off the bridge and keep following the dirt trail. Now you will alternate between easy and moderate ascents a few times until you reach Colchuck Lake.
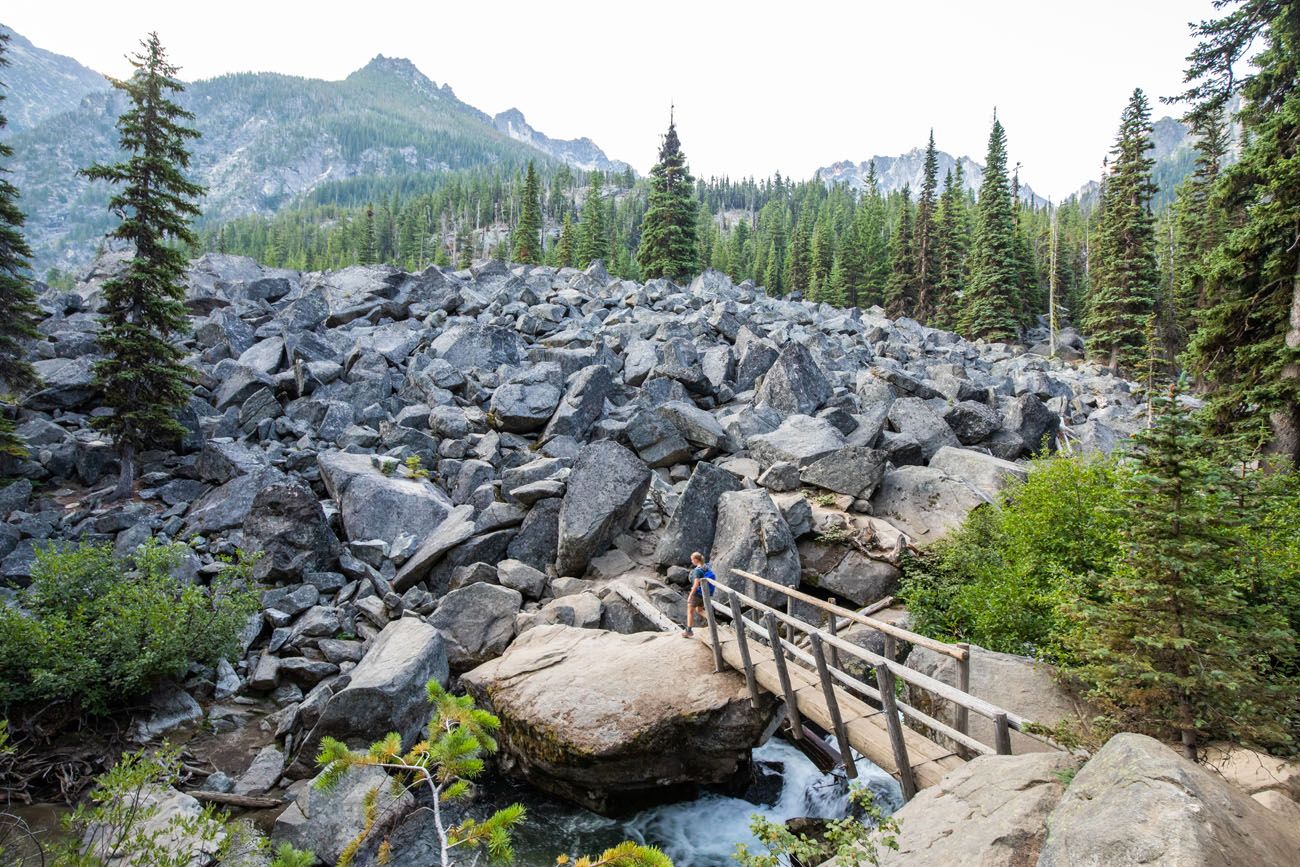
Turn right once you reach this boulder field. Once you get to this point, it’s not too much farther until you reach Colchuck Lake.
Around Colchuck Lake to the Start of the Aasgard Pass
Distance: 1.25 miles
Average Time: 45 minutes to one hour (this includes time for a quick break or snack)
Elevation Gain: Minimal. There are a few ups and downs here but for the most part, the trail is flat as you walk around the lake.
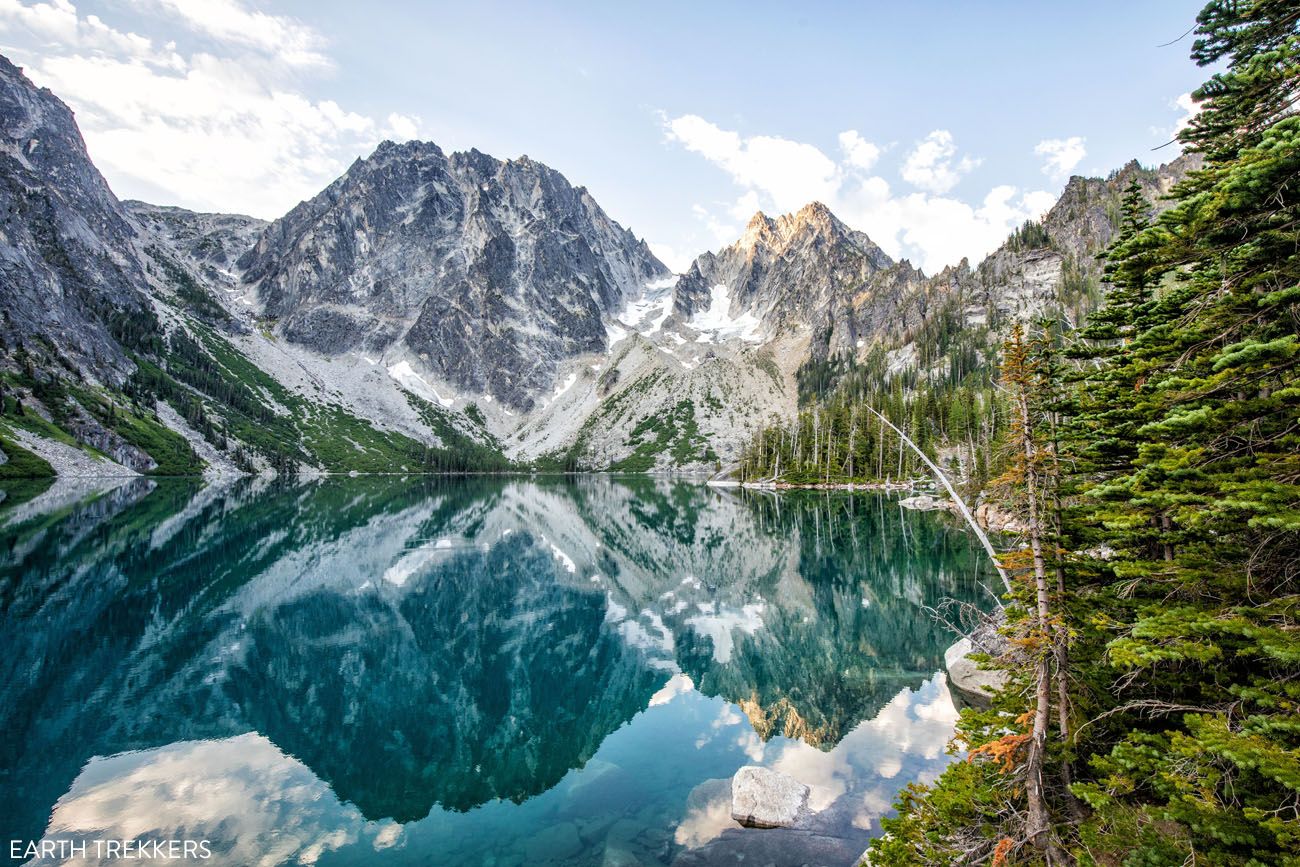
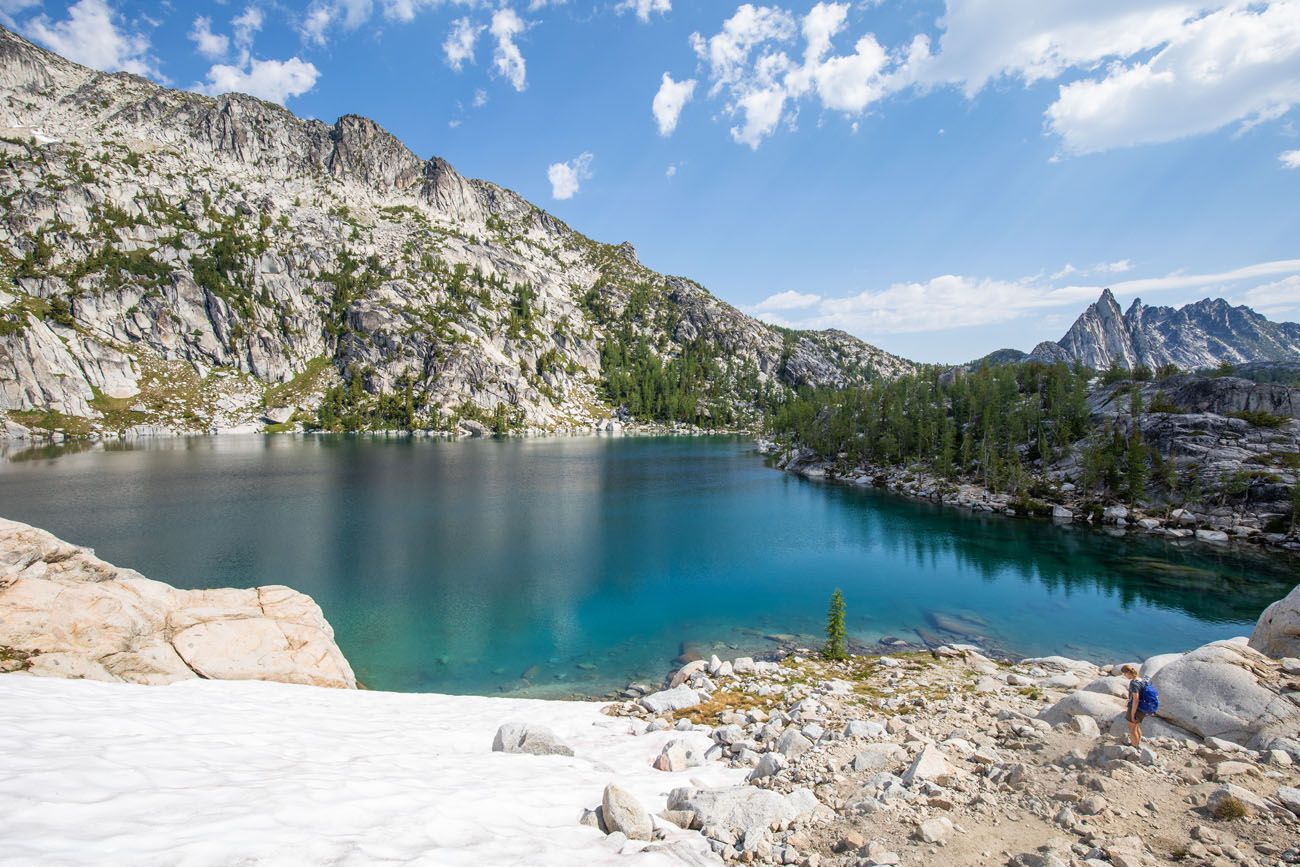
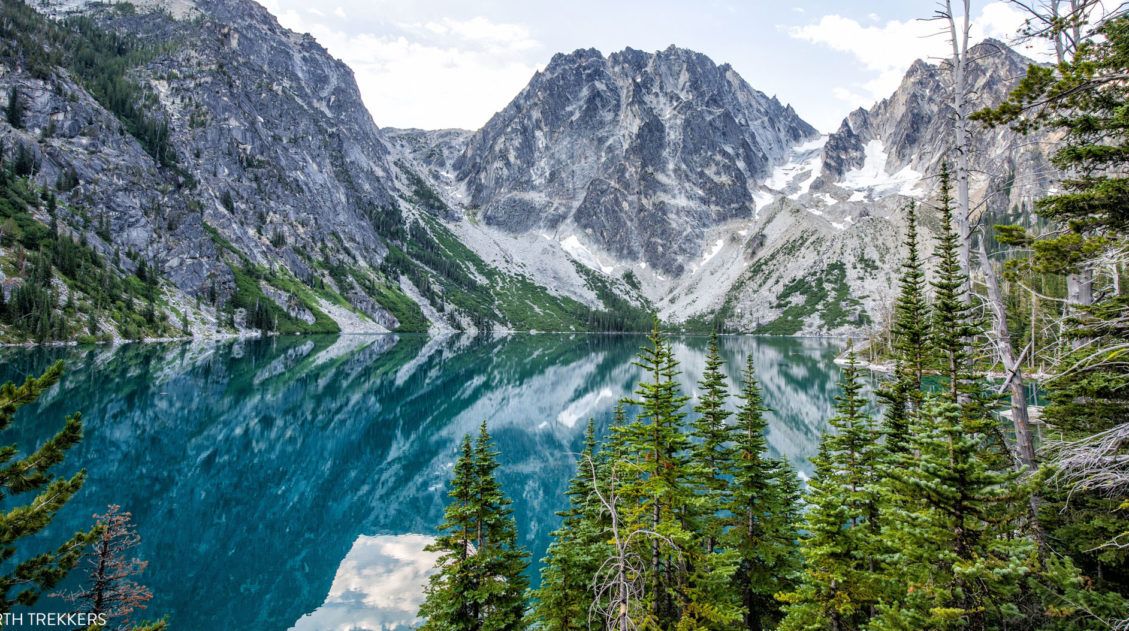
Colchuck Lake is a beautiful, aquamarine lake. It’s also the perfect place to take a short break and have a snack. If you look across the lake to the other side, you can see the Aasgard Pass and Dragontail Peak.
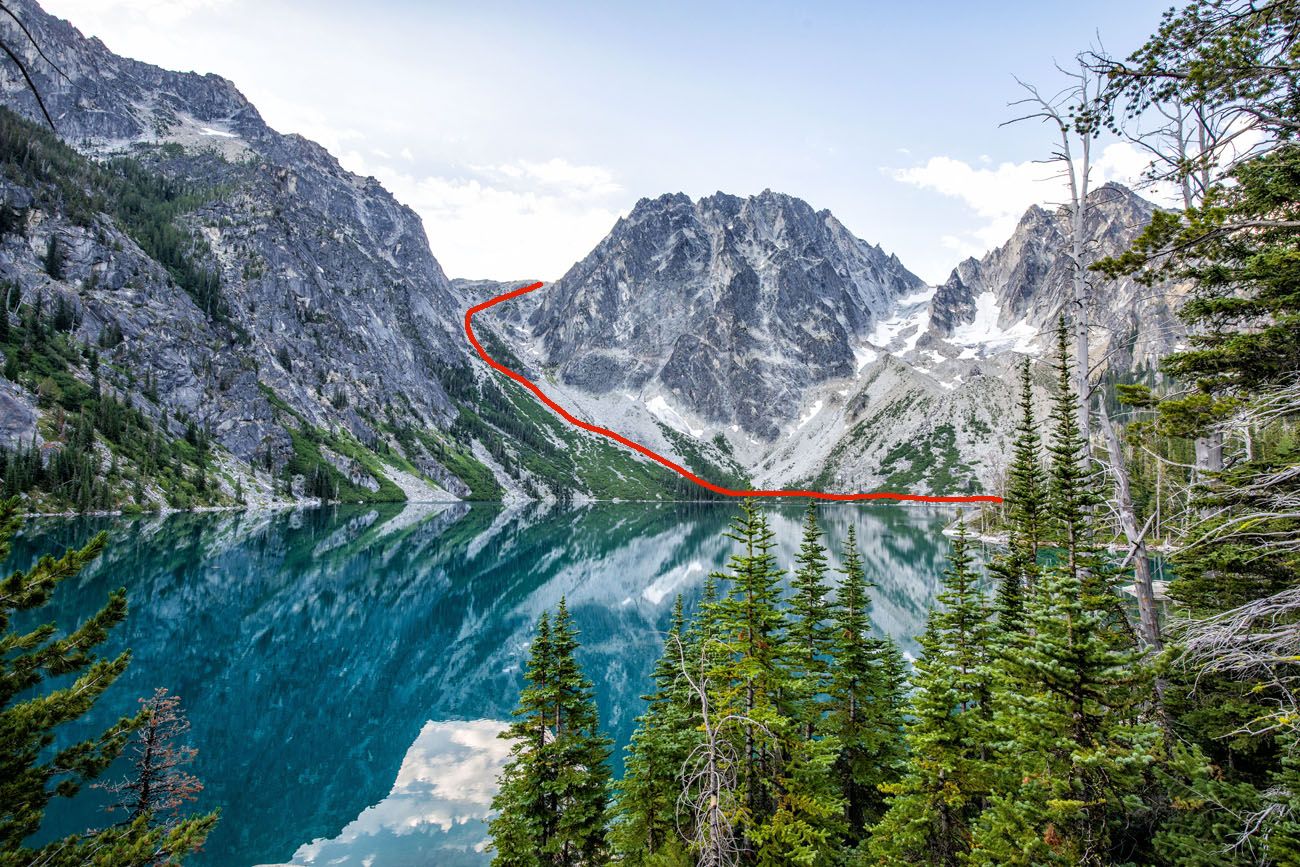
The red line indicates the hiking trail. You will hike counter-clockwise around Colchuck Lake. Once on the opposite side you start the hike up and over the Aasgard Pass.
It takes 45 minutes to one hour to walk around the lake to start of the climb up Aasgard Pass.
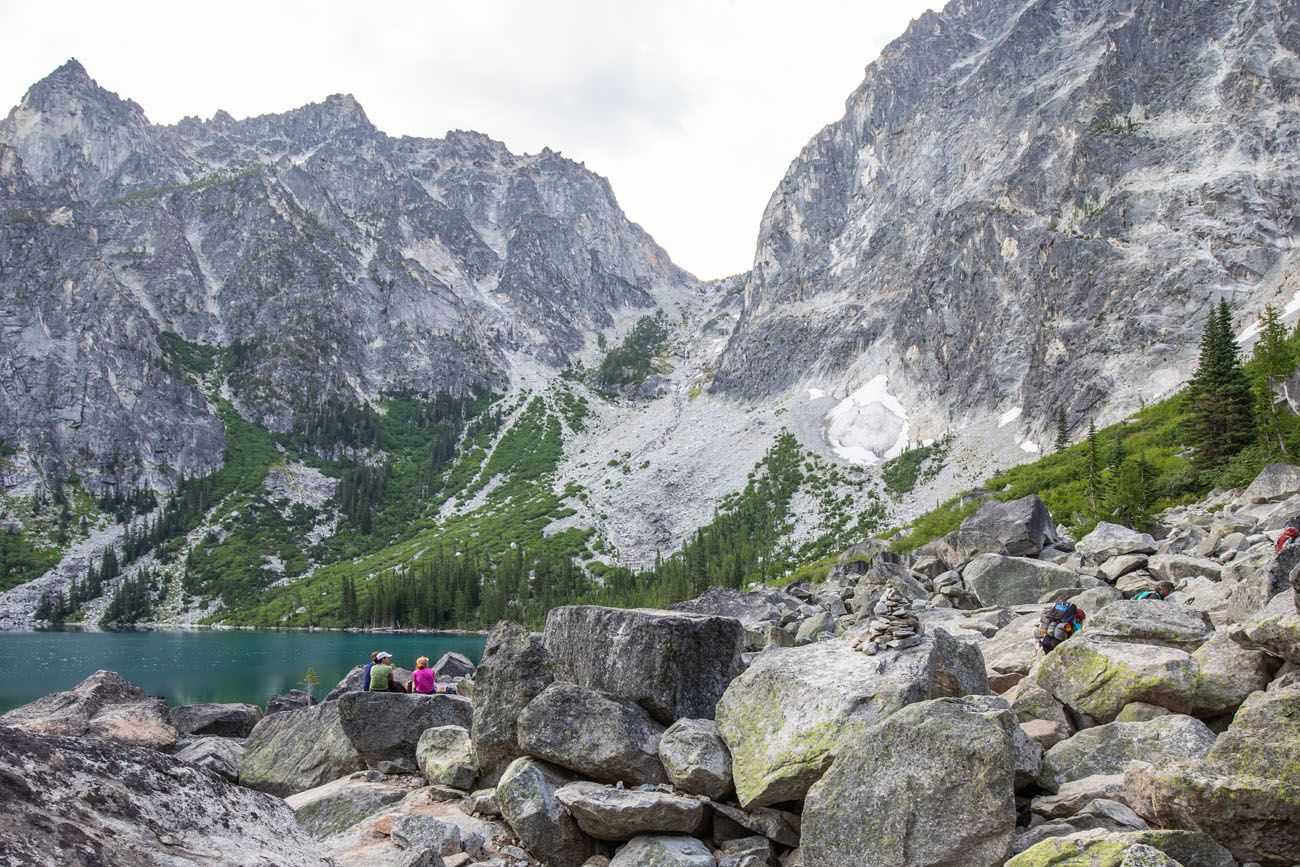
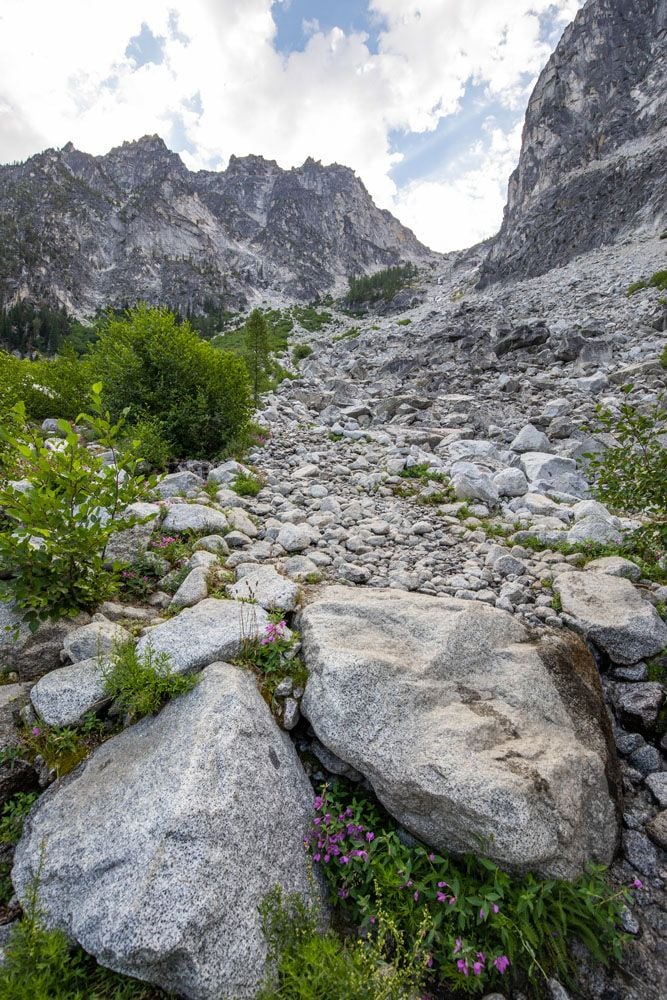
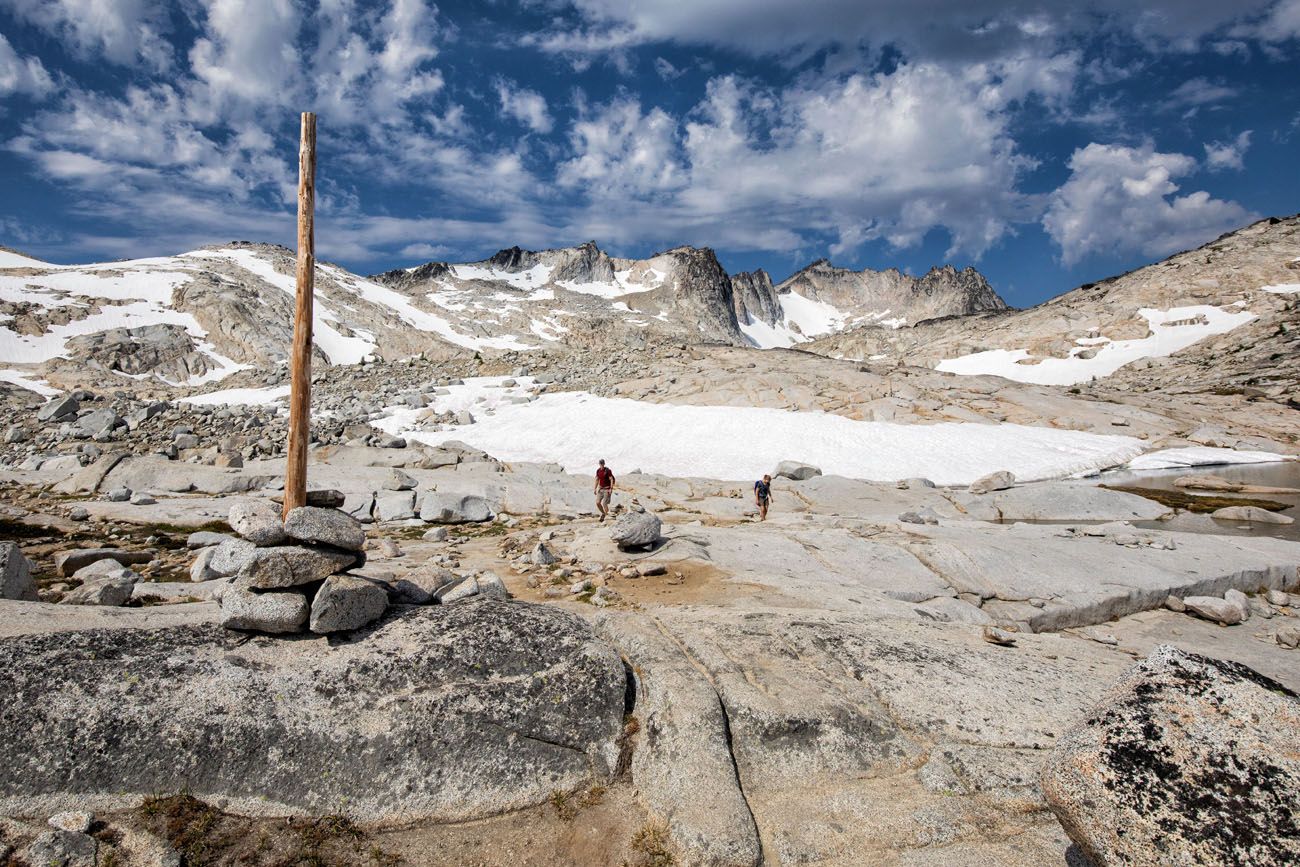
When you get to the far end of the lake, you’ll come out of the trees and enter a boulder area. Follow the cairns across this boulder area. Keep in mind that you are not looking to make any significant elevation gains here, you are just crossing the boulder area while keeping Colchuck Lake to your left.
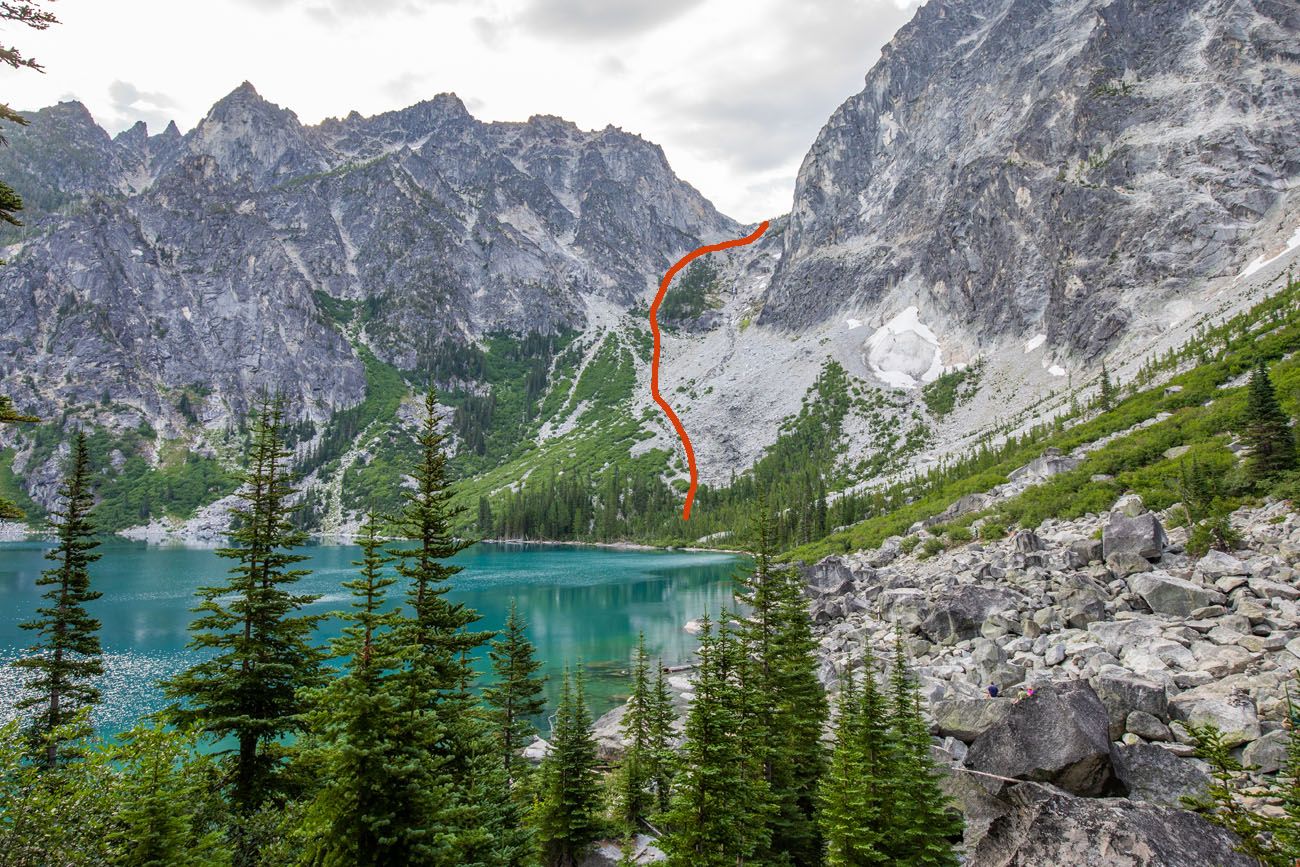
Another view of the hiking trail.
You will hike through this boulder field to reach the base of Aasgard Pass.
By the time you are standing at the base of the Aasgard Pass, you have hiked 5.5 miles with roughly 2,500 feet of ascent.
Aasgard Pass
Distance: 1.25 miles
Elevation Gain: 2,000 feet
Average Time: 1.5 to 2.5 hours
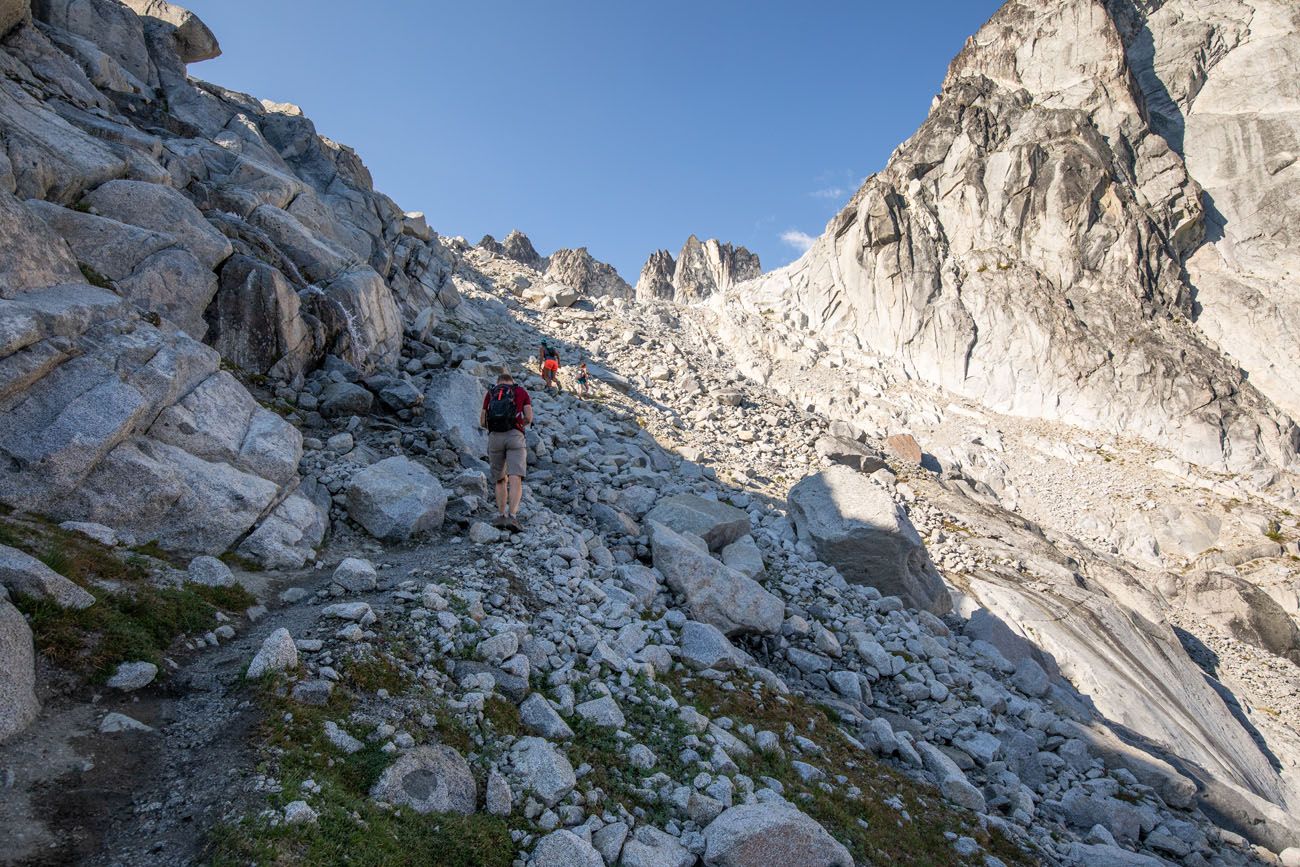
When you stare up at the Aasgard Pass, it looks hard. And let me tell you, it’s even harder than it looks. Not only is it steep, but loose dirt and scree make it slippery and even more exhausting.
At first, it’s not so bad. The trail is easy to walk up and we made good time here. But as you approach the grove of trees, the loose dirt and rock will have you slipping and sliding in some spots. Plus, you will step up and over large rocks and boulders.
We would hike up 50 feet, pause to catch our breath, then continue on. It’s a good thing that you have a nice view of Colchuck Lake as you tackle this beast of a climb.
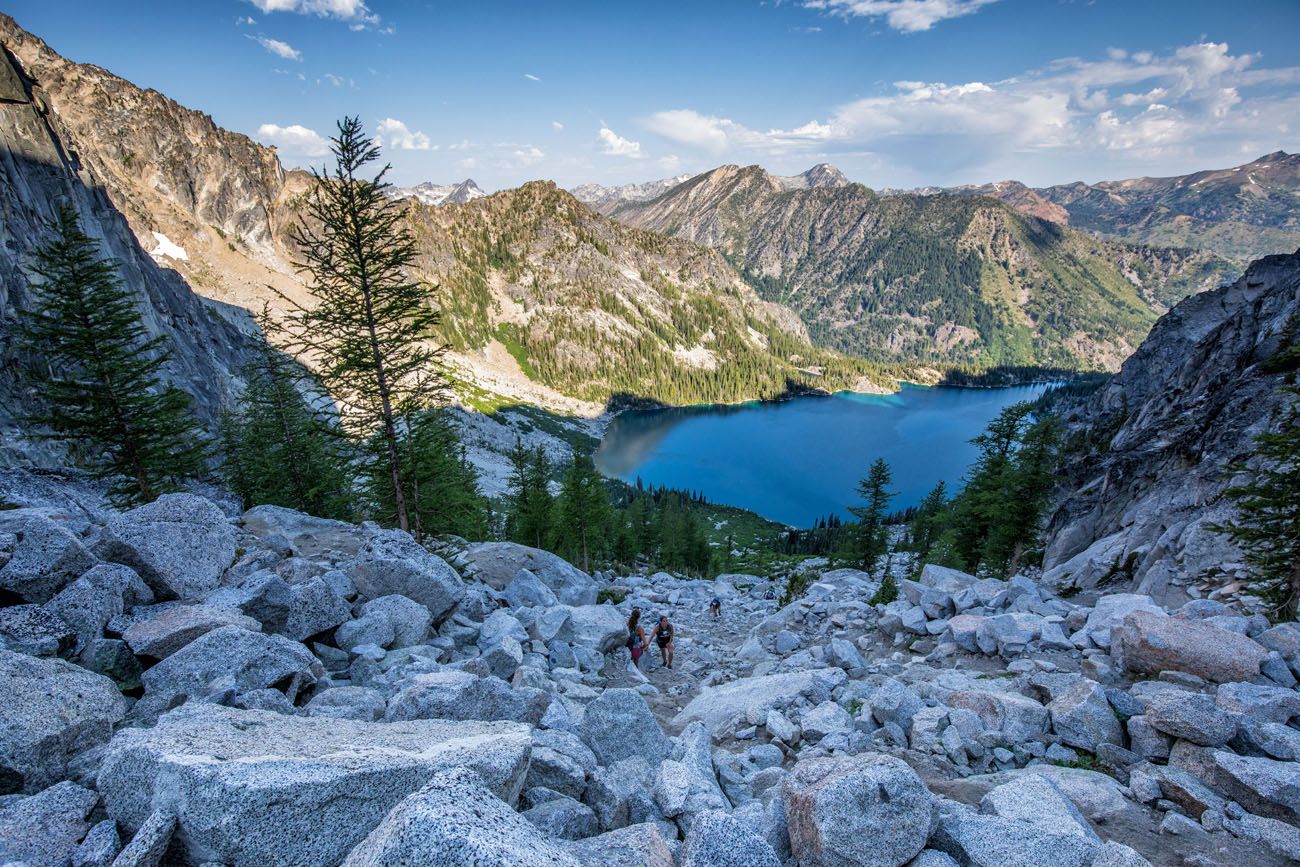
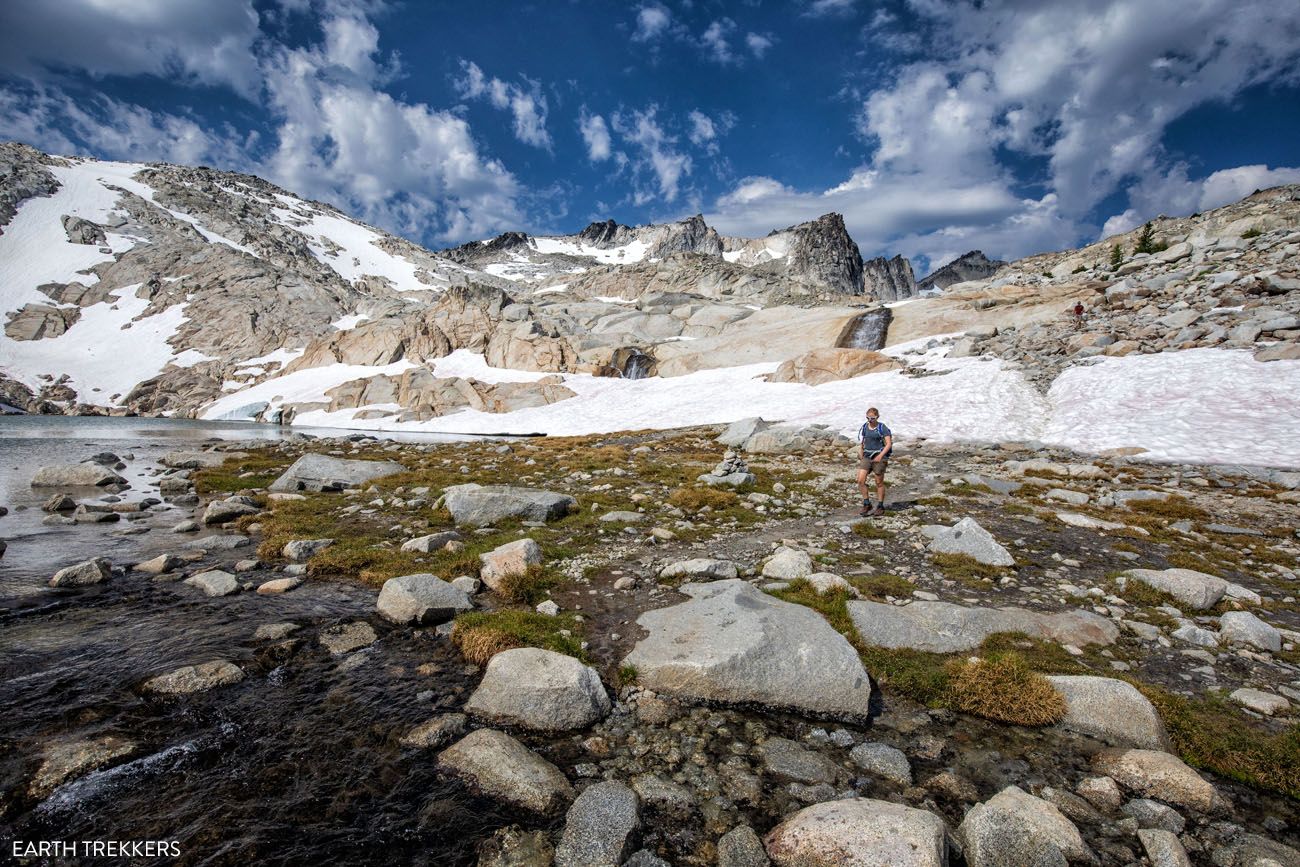
There are multiple trails up this mountain. Keep following the rock cairns, of which there are many. Just make sure that you pass to the left side of the grove of evergreen trees. If you go right, you head into dangerous territory, with a waterfall and steep terrain.
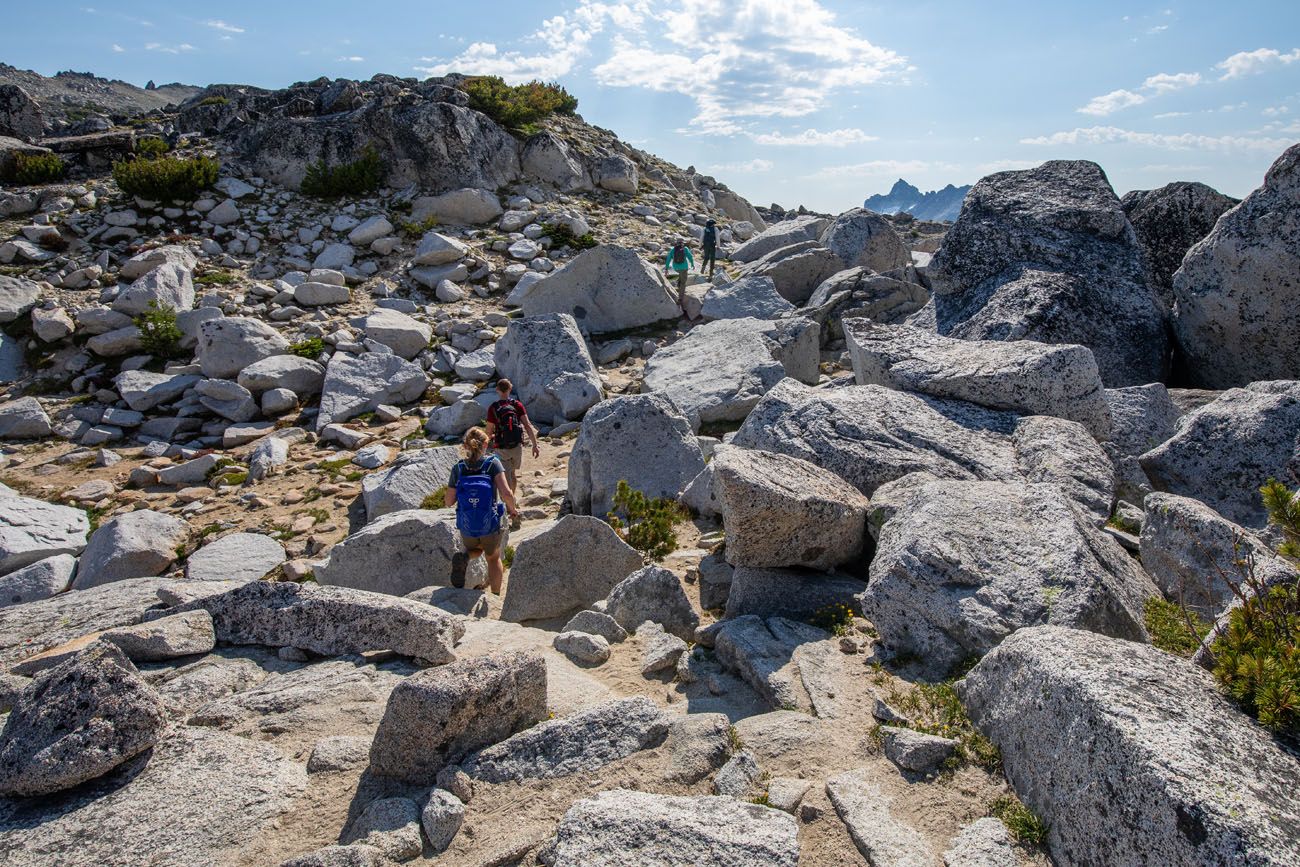
There are a lot of false summits on this climb. Just when you think you made it to the top, there’s still a little more to go. But let me tell you, it’s worth it. The pain and the fatigue will fade once you get to the Upper Enchantments.
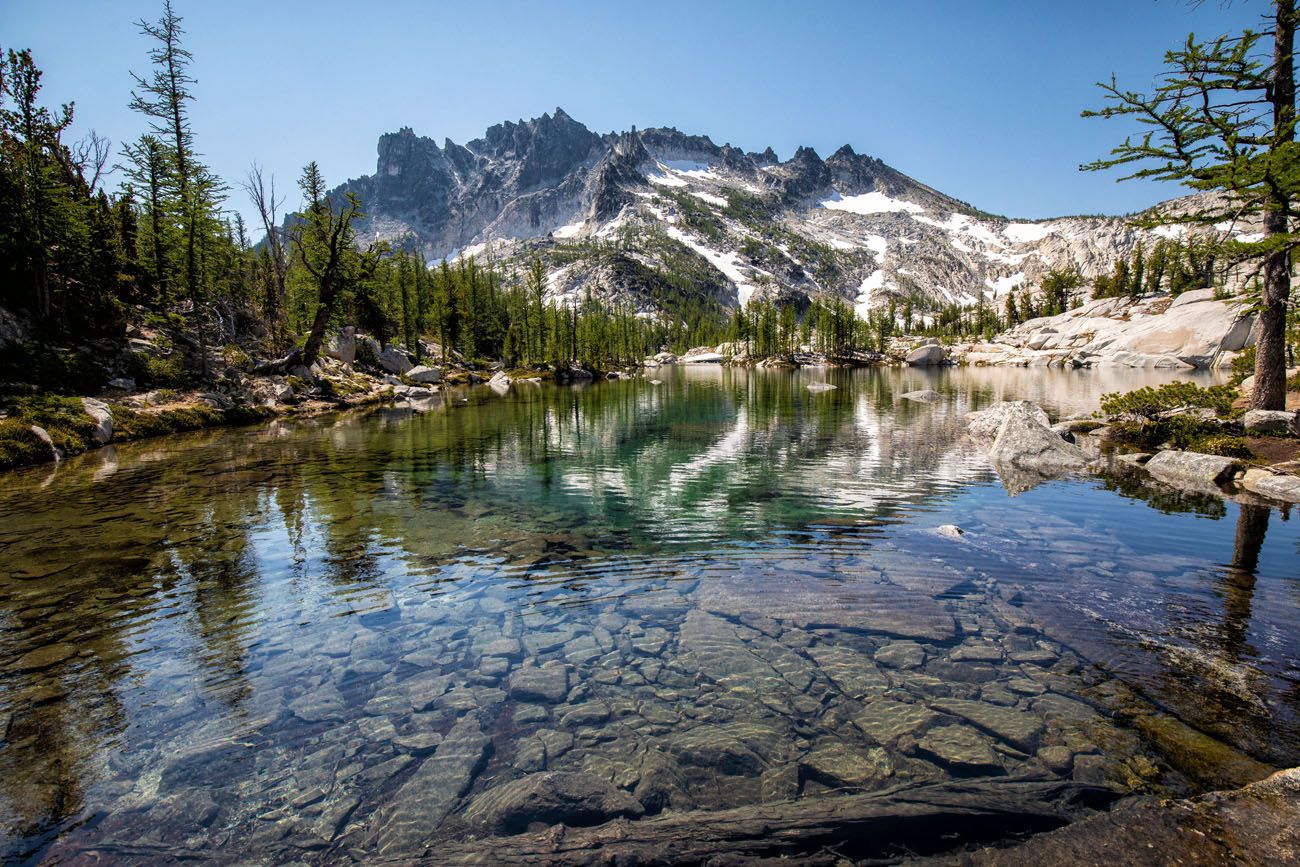
Once you see this small but gorgeous lake, it’s just a short uphill walk up and over the Aasgard Pass.
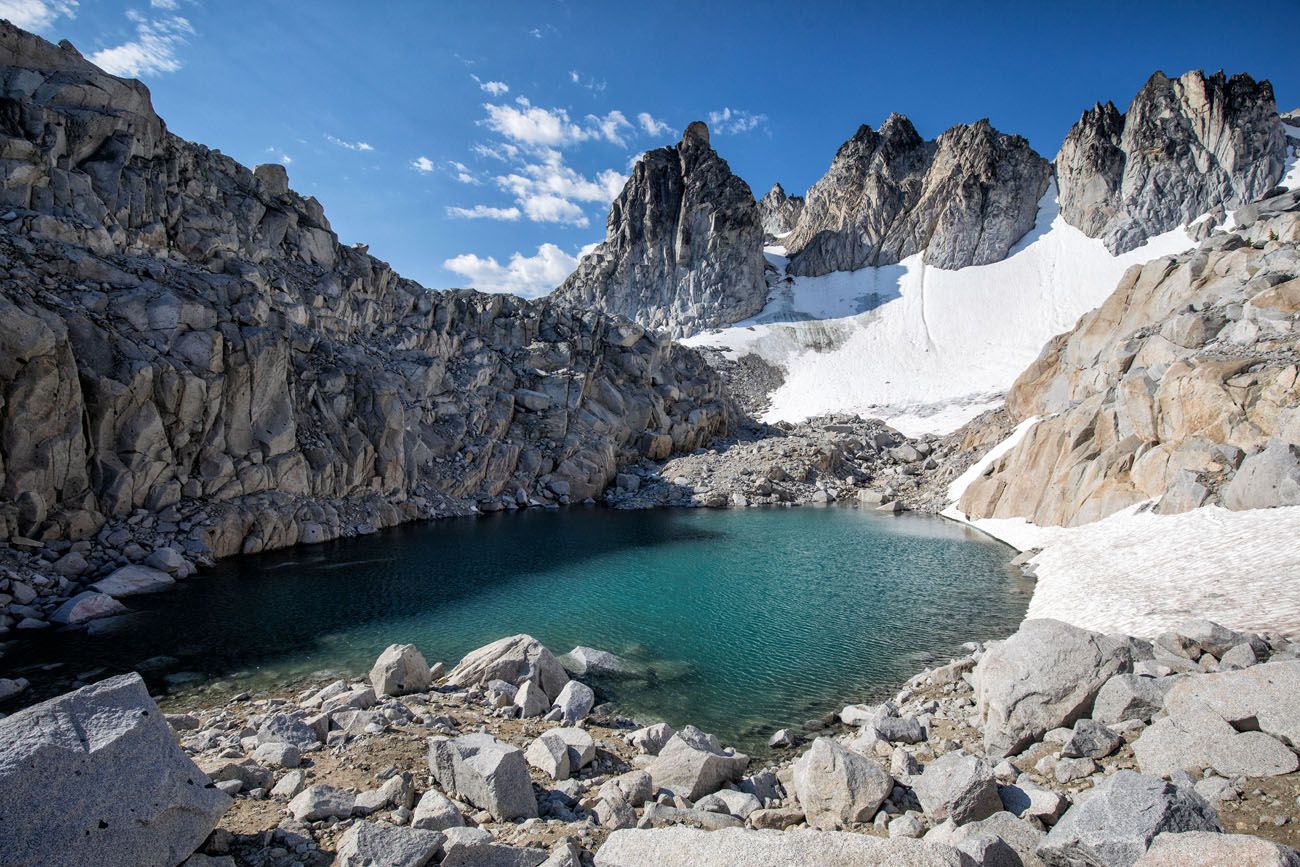
Follow the trail past the lake. Congrats! You have now gone about 6.75 miles with roughly 4,500 feet of total ascent. The giant climb is behind you and it is mostly downhill from here. It is an overall descent to Snow Lakes, but with a few ups and downs, you still have about 1,000 feet of elevation gain sprinkled into the remaining hike.
Just past the lake, it’s one last small climb to reach to the top of Aasgard Pass.
The Core Enchantments
Distance: 3 miles
Elevation Loss: 1,000 feet
Average Time: 1.5 to 3 hours
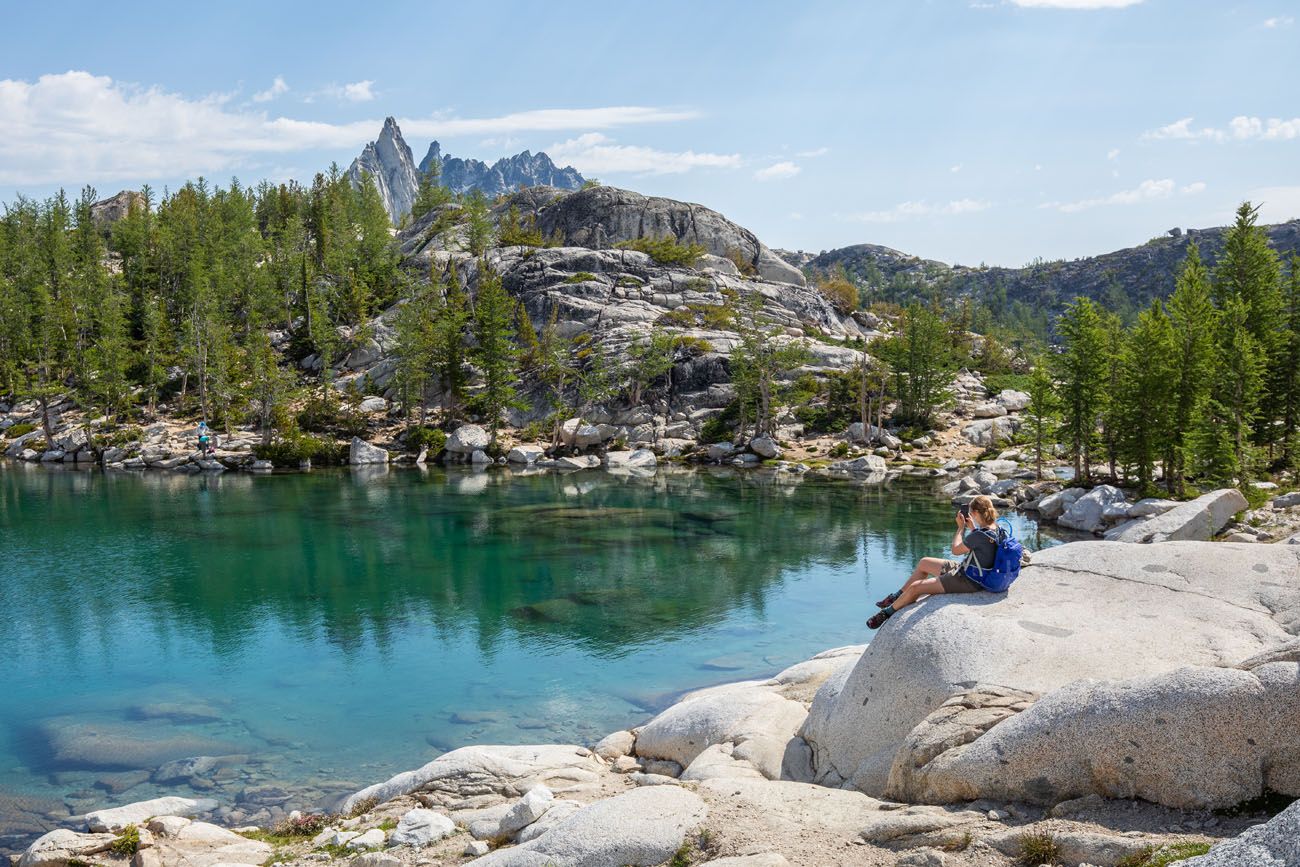
The Core Enchantments…this is the whole reason why you are here. This is an extraordinarily beautiful area. It might be hard to manage your time here, especially if you are a day hiker. It is so tempting to relax and linger at these lakes, but you still have very far to go before your day is over.
So enjoy it and take lots of photos, but be mindful of the time.
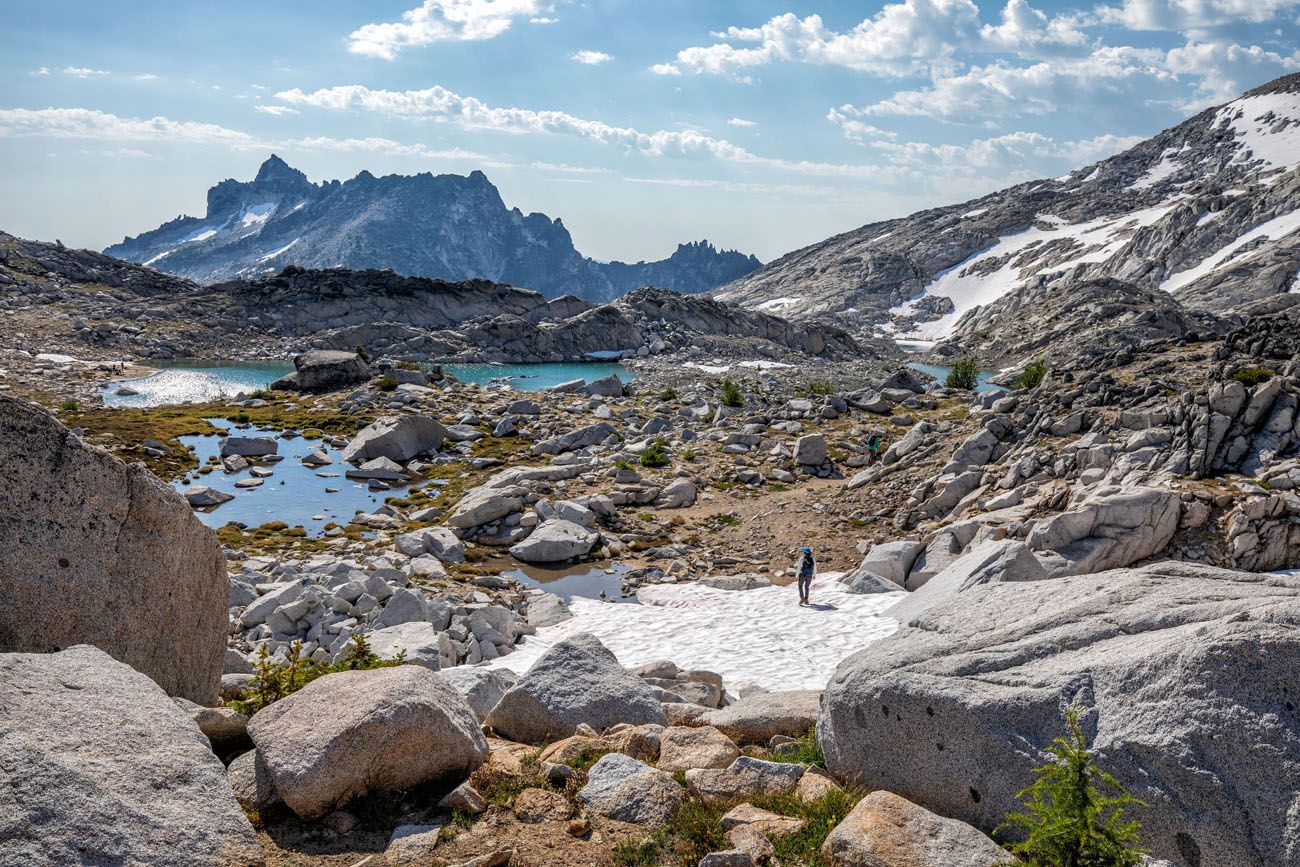
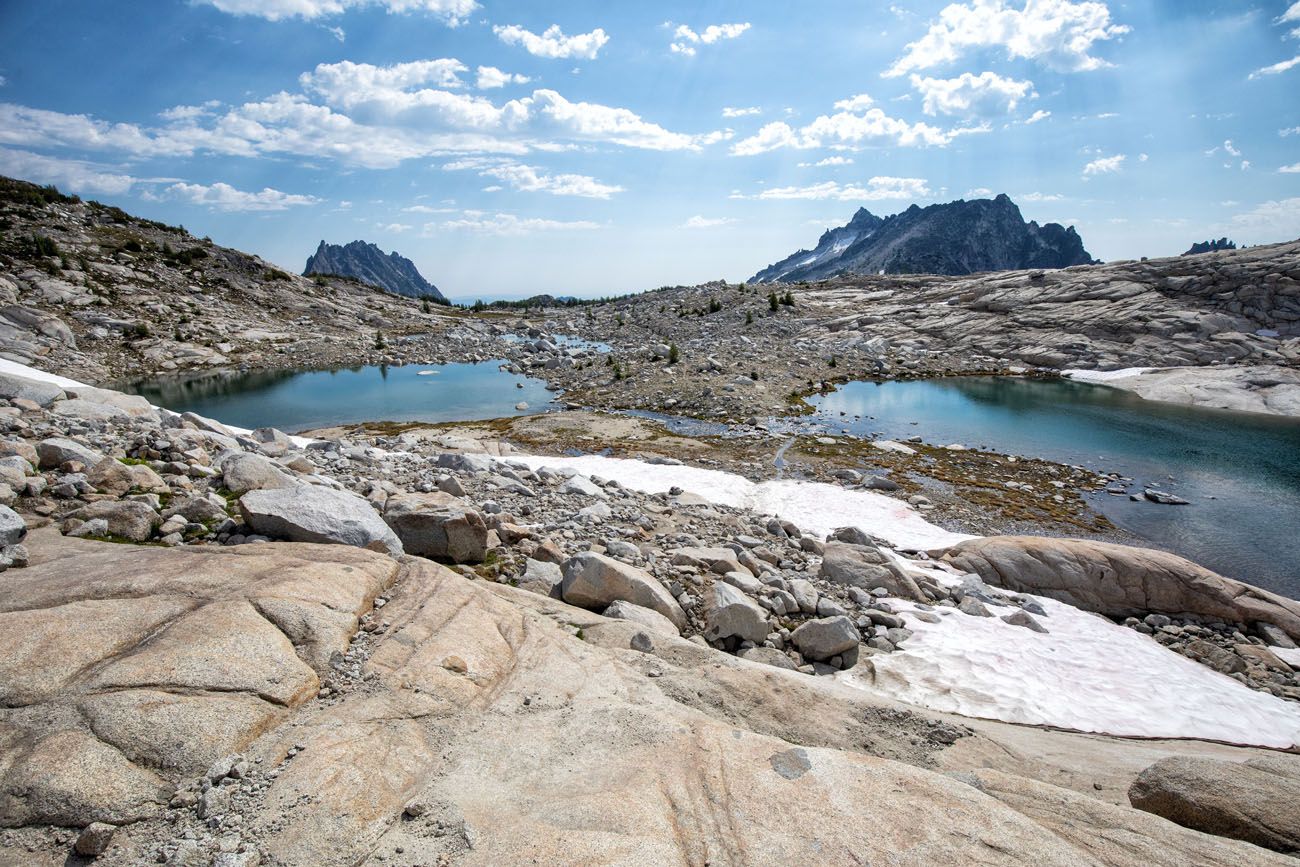
The Upper Enchantments almost look like something from another planet. This rocky, mountainous terrain is dotted with small, colorful lakes.
PRO TRAVEL TIP: There are very few trail signs along the trail. Instead, look for the rock cairns. They are spaced close together and are easy to follow.
Isolation Lake is one of the larger lakes that you will come to first. This makes another great spot to relax and have a bite to eat.
Isolation Lake
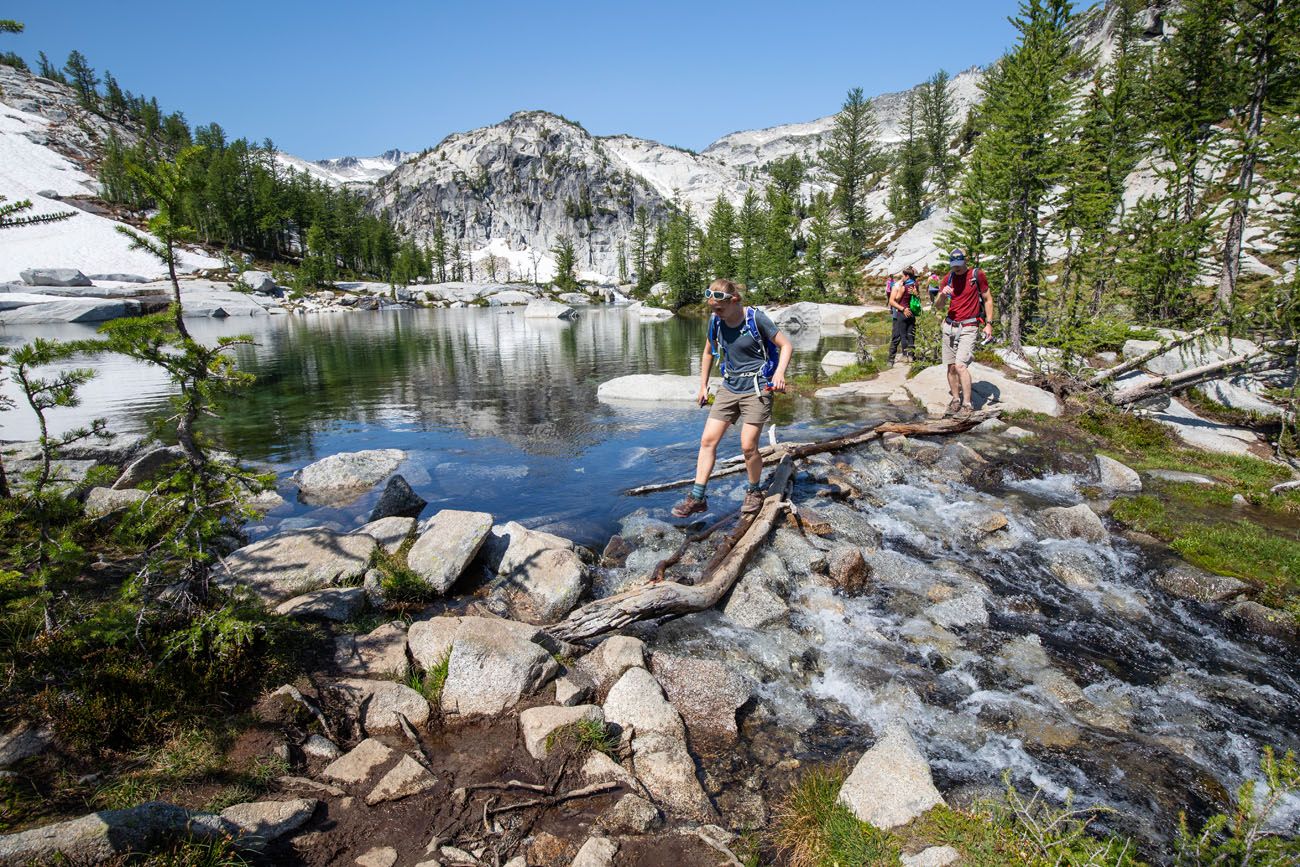
Continue across the barren but beautiful terrain, passing smaller ponds and hiking across small streams and creeks.
As you slowly descend through the Core Enchantments, more plant life makes an appearance. Wildflowers, small shrubs, and eventually larches and evergreen trees appear. Mosquitoes might also be a problem for the remainder of the hike.
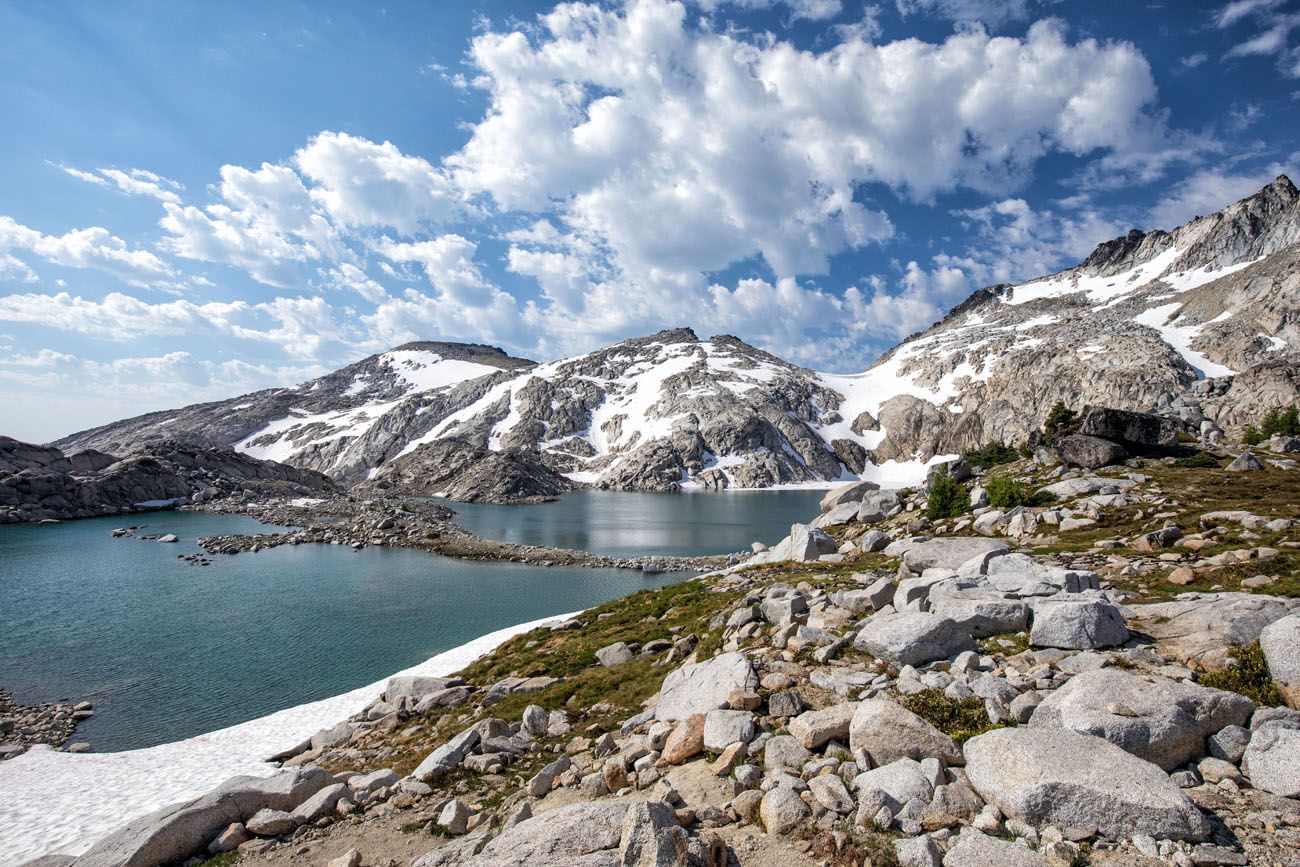
Further along the trail, you will pass Inspiration Lake, Perfection Lake, and Sprite Lake.
Inspiration Lake
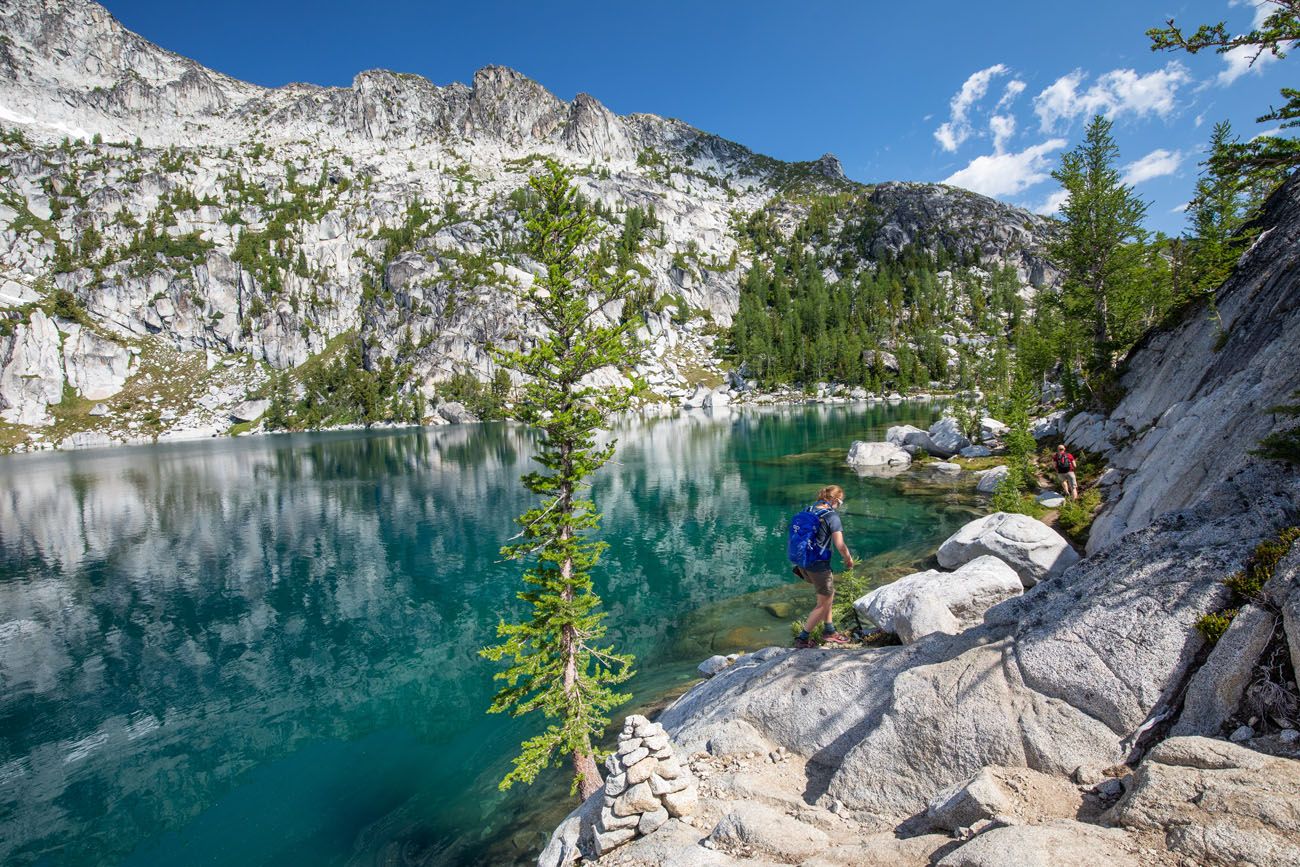
Perfection Lake
Leprechaun Lake
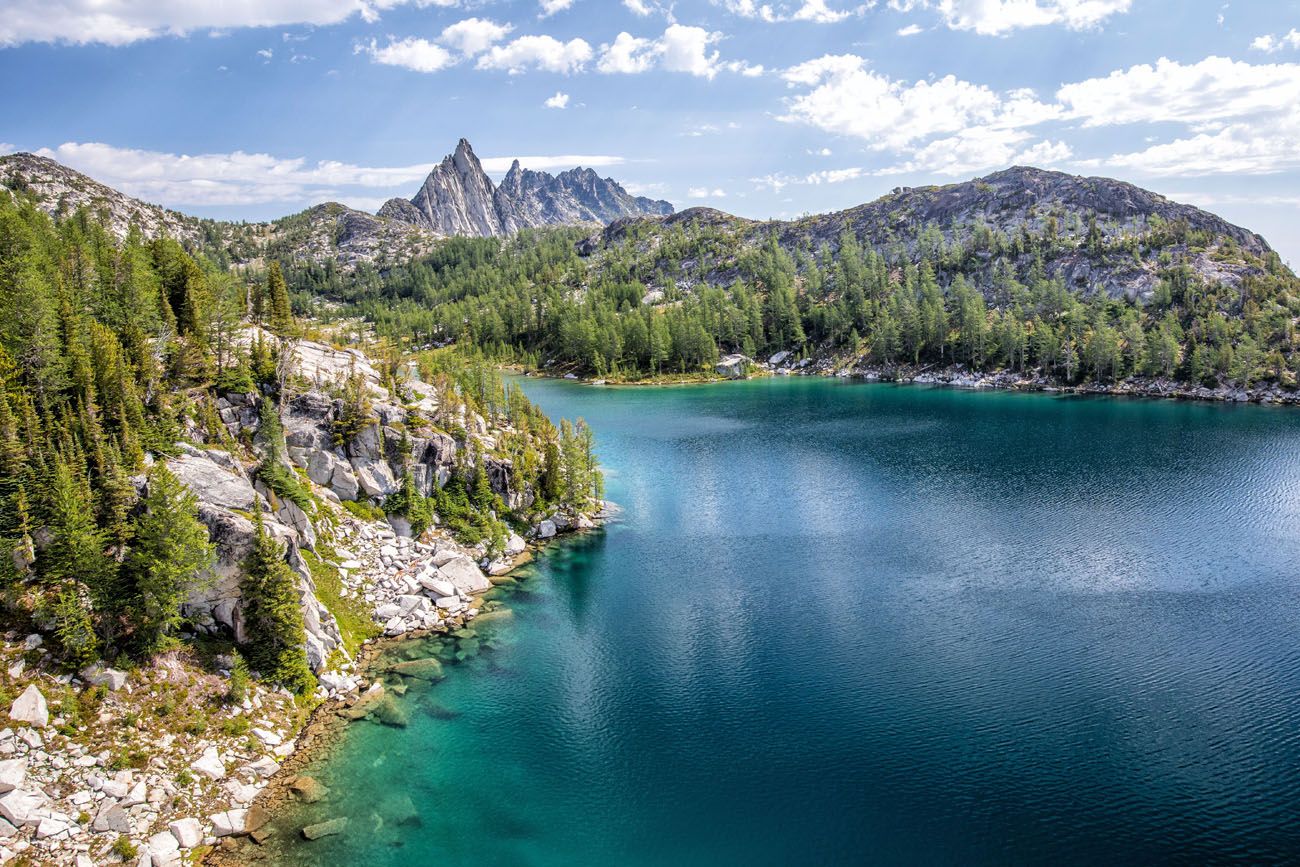
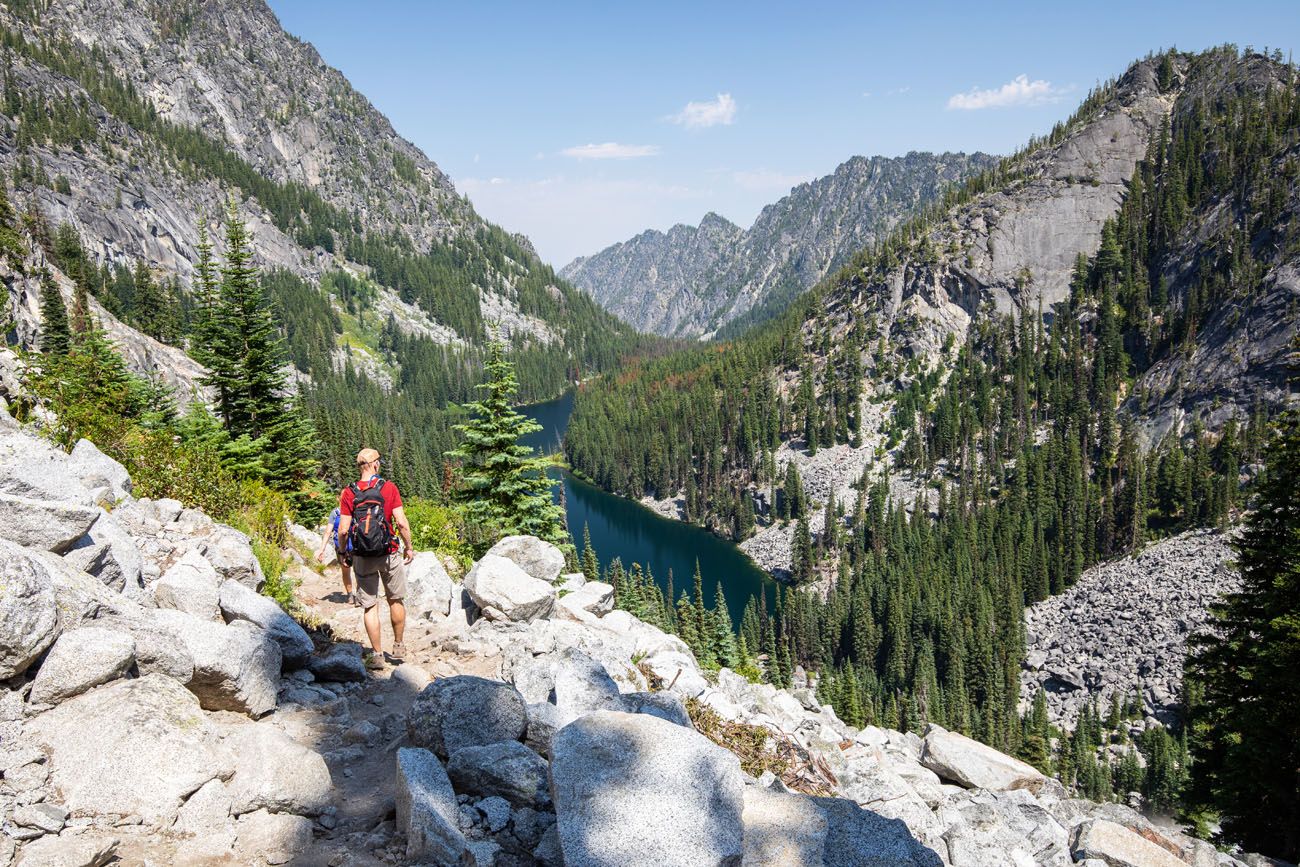
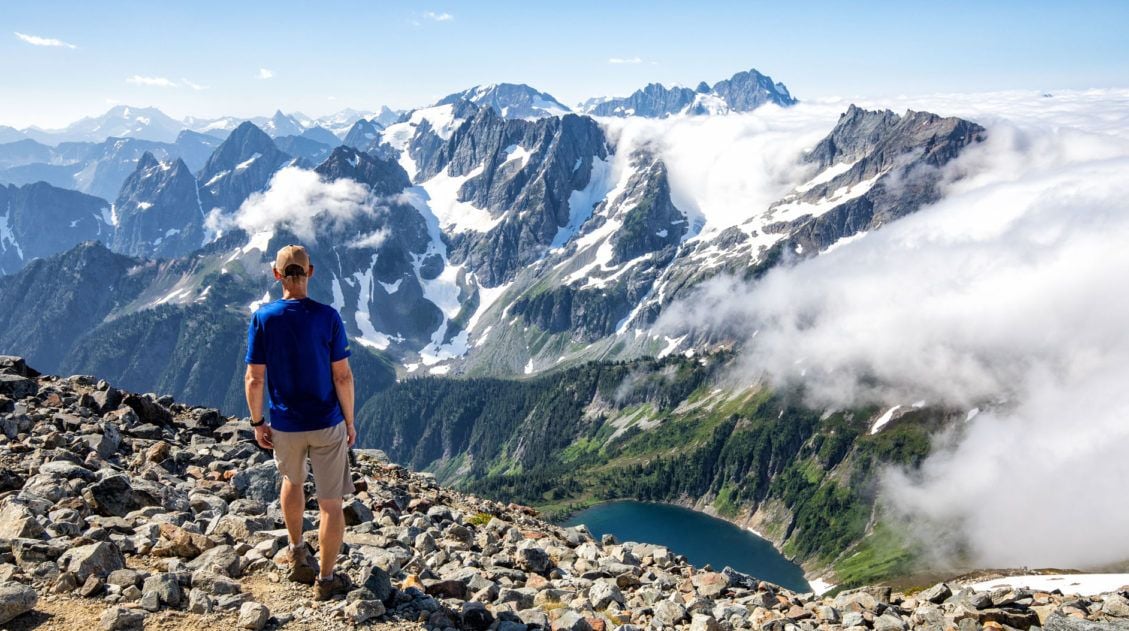
Once you pass Viviane Lake and reach this rocky cliff (photo below) with a view out over the Snow Lakes, you will say goodbye to the Core Enchantments and begin the long descent to the Snow Lakes parking lot.
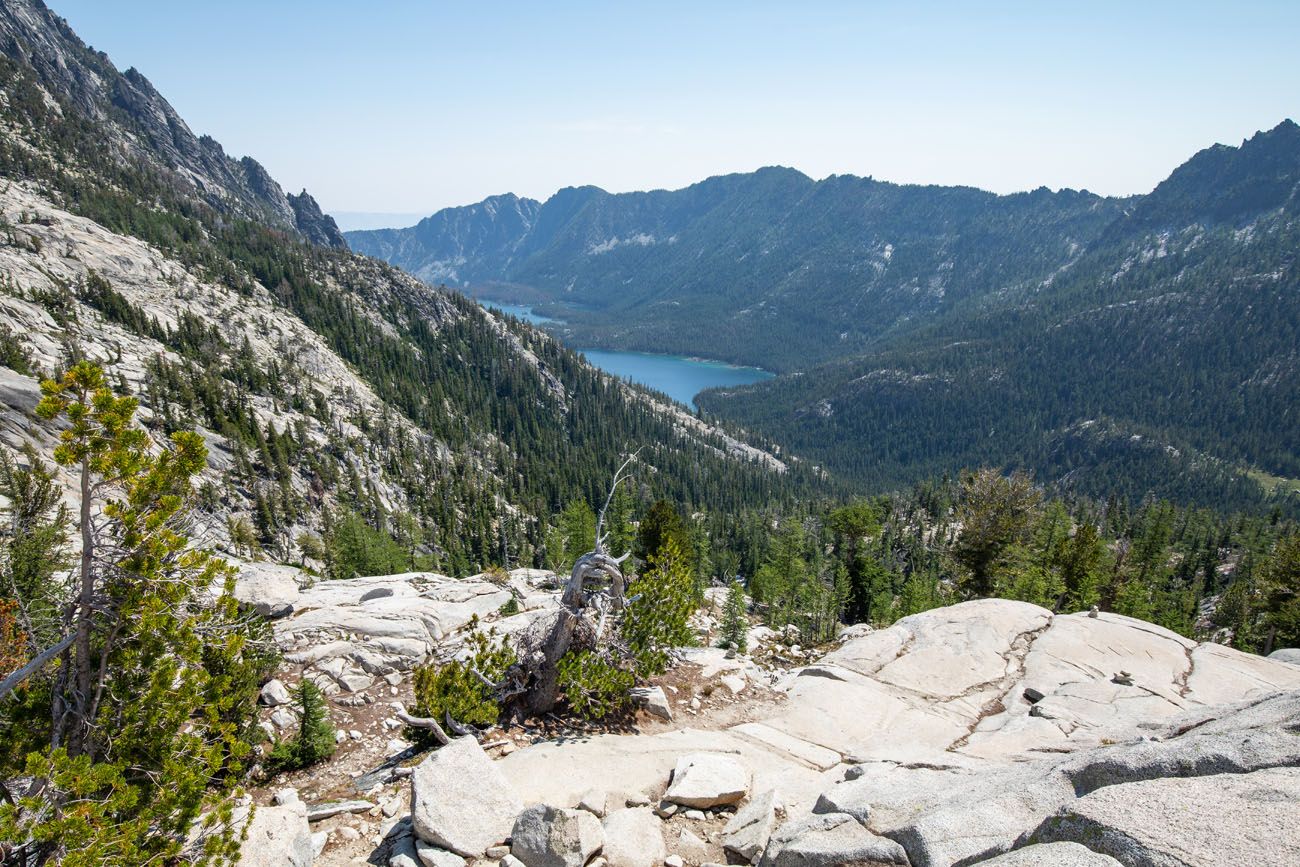
Descent to the Snow Lakes
Distance: 1.5 miles
Elevation Loss: 1,400 feet
Average Time: roughly 1 hour
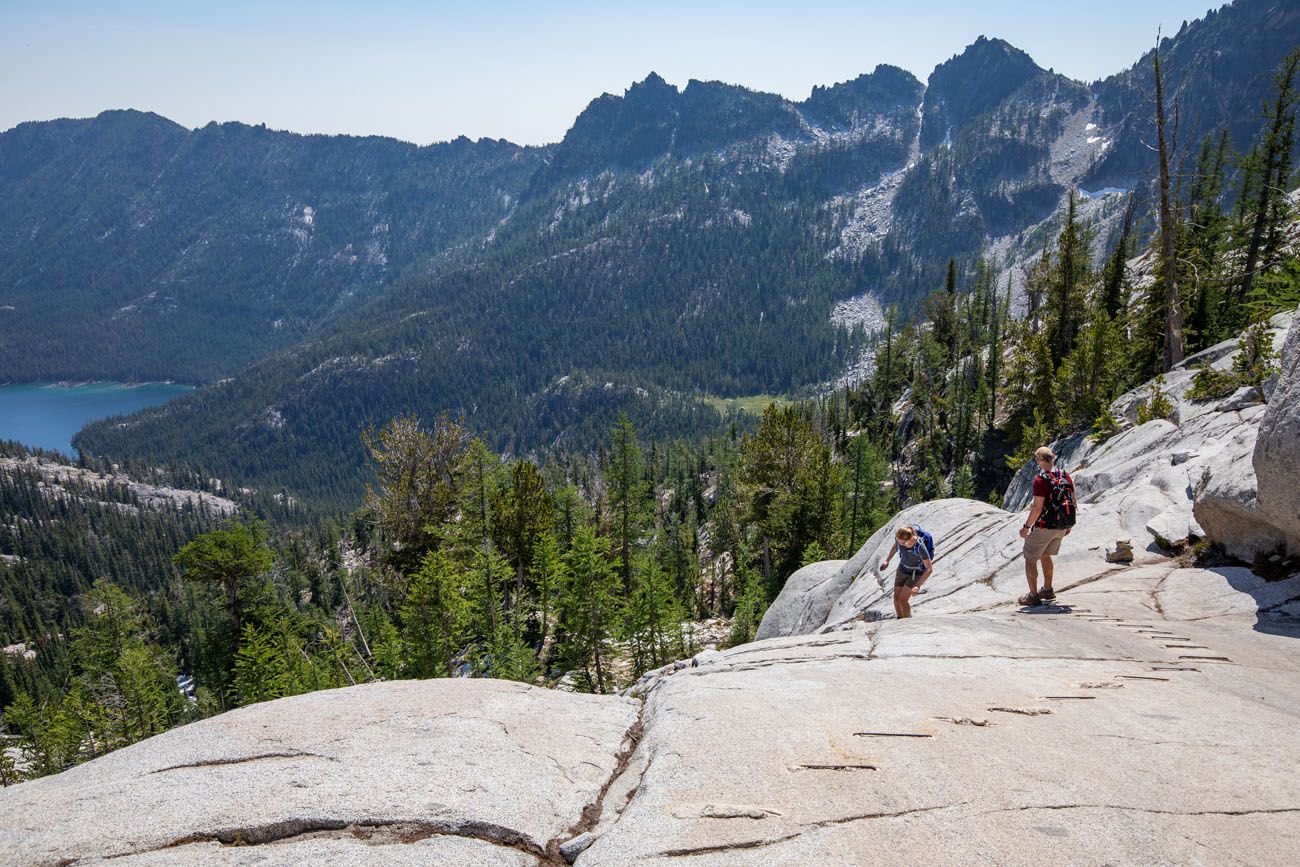
Even though it is an overall downhill, hiking from the the Core Enchantments to Snow Lake, this part of the trail is still challenging. And it’s very difficult to move quickly.
For 1.5 miles, you will descend down steep dirt trails, stepping and scrambling over large rocks and tangled tree roots. You will also hike down bald, granite rock. It’s slow going, simply because there are so many obstacles along the trail. We got frustrated here because we wanted to pick up the pace a little bit, but we also didn’t want to move too fast and get injured.
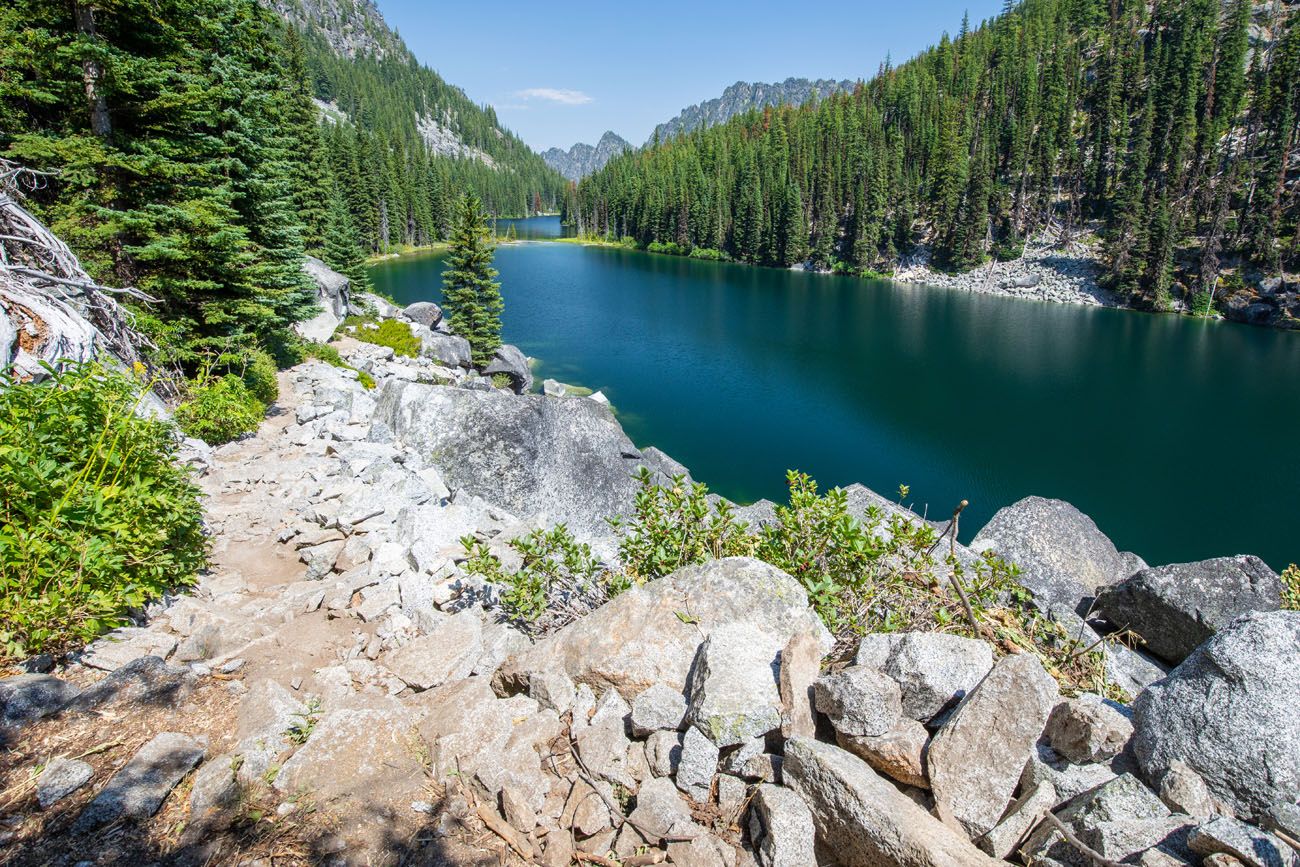
Snow Lakes and Nada Lake
Distance: 2.5 miles
Elevation Loss: 600 feet
Average Time: 1.5 to 2 hours
It’s a flat, easy walk around the southern side of Snow Lake.
You will cross a dam. When we did this, the water was just a few inches deep, so we left our shoes on. If you are concerned about getting wet feet, or you don’t have waterproof hiking shoes or boots, you can cross this barefoot.
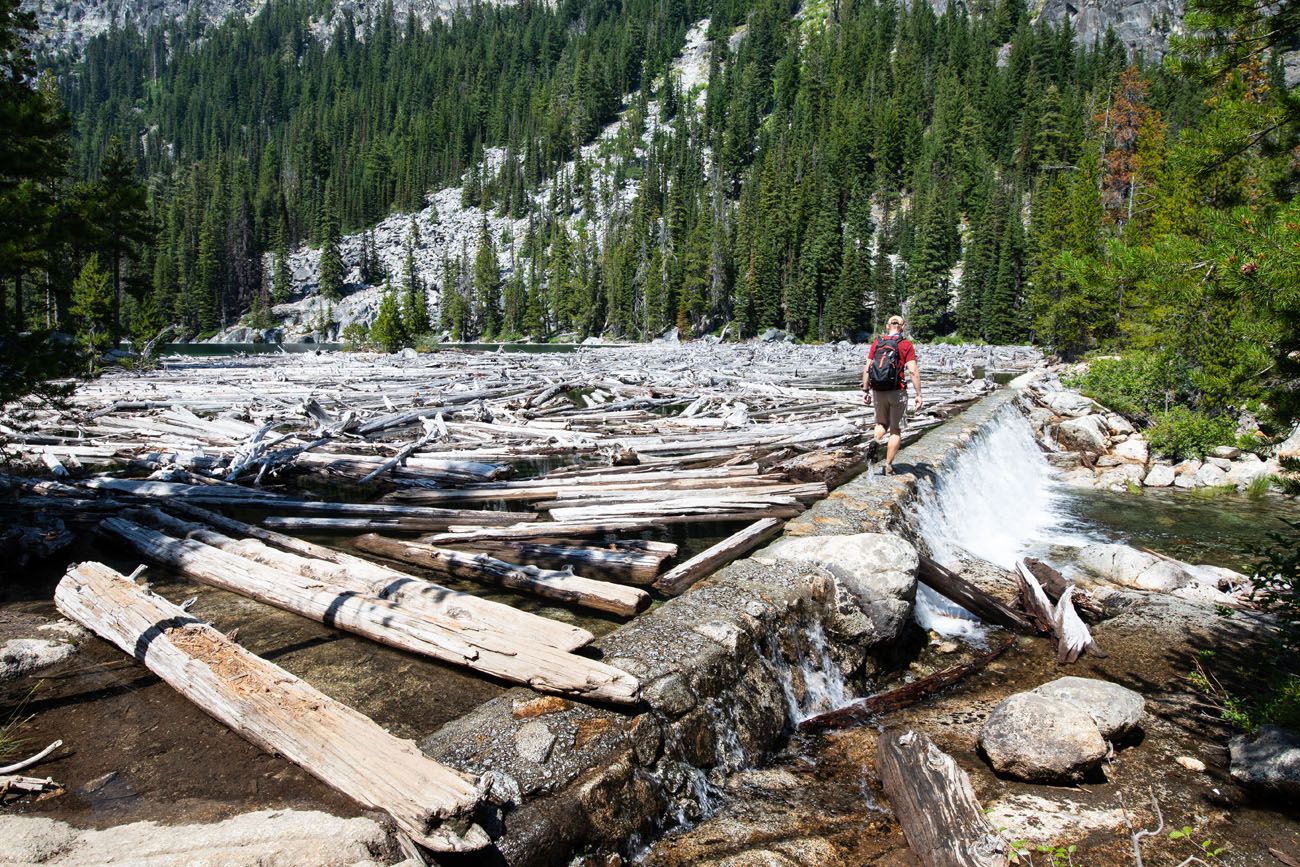
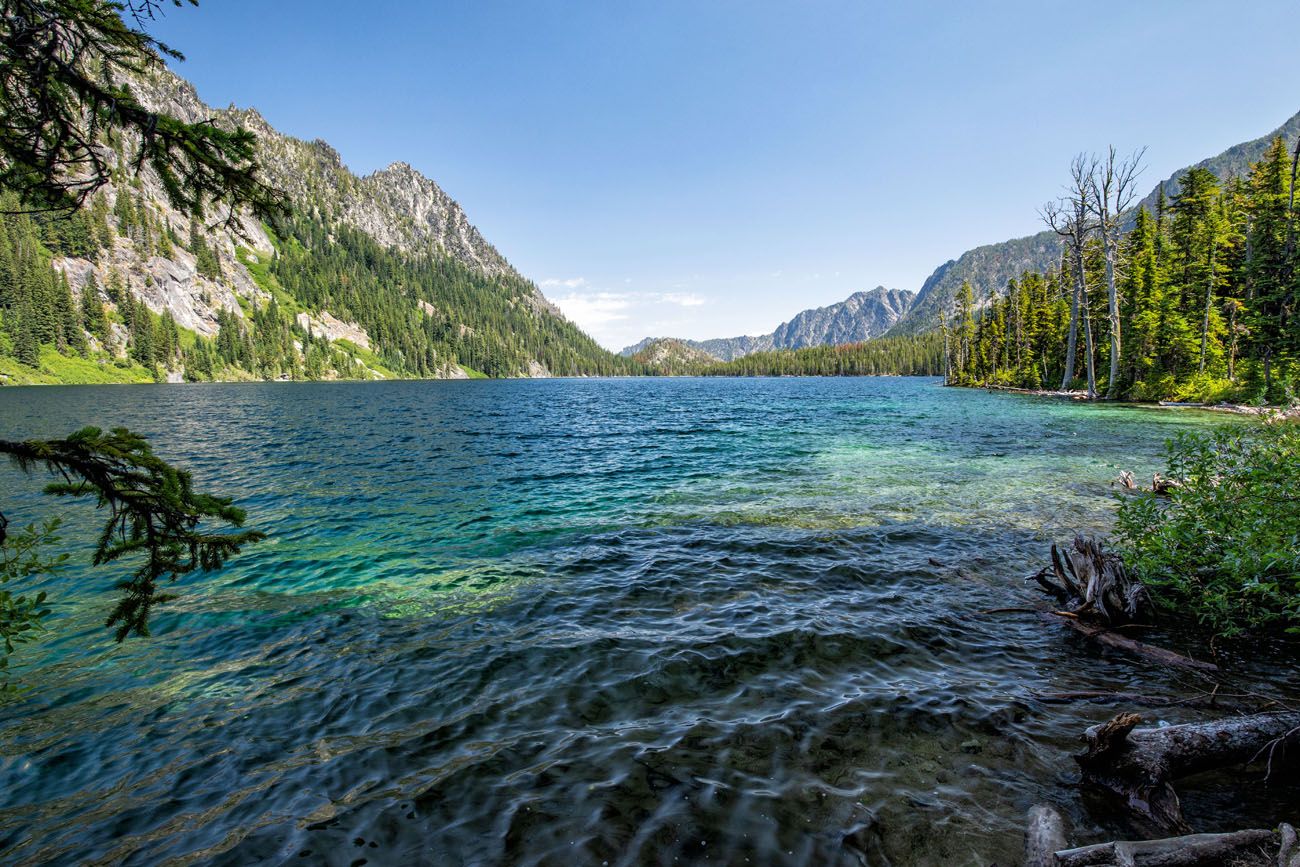
To get to Nada Lake, it’s a steep descent through a boulder field and a forest. If you are doing this on a hot day, you will really start to feel the heat here.
It’s a short, flat easy walk around Nada Lake.
Nada Lake
Nada Lake to the Snow Lakes Trailhead
Distance: 5.5 miles
Elevation Loss: 4,000 feet
Average Time: 2.5 to 3.5 hours
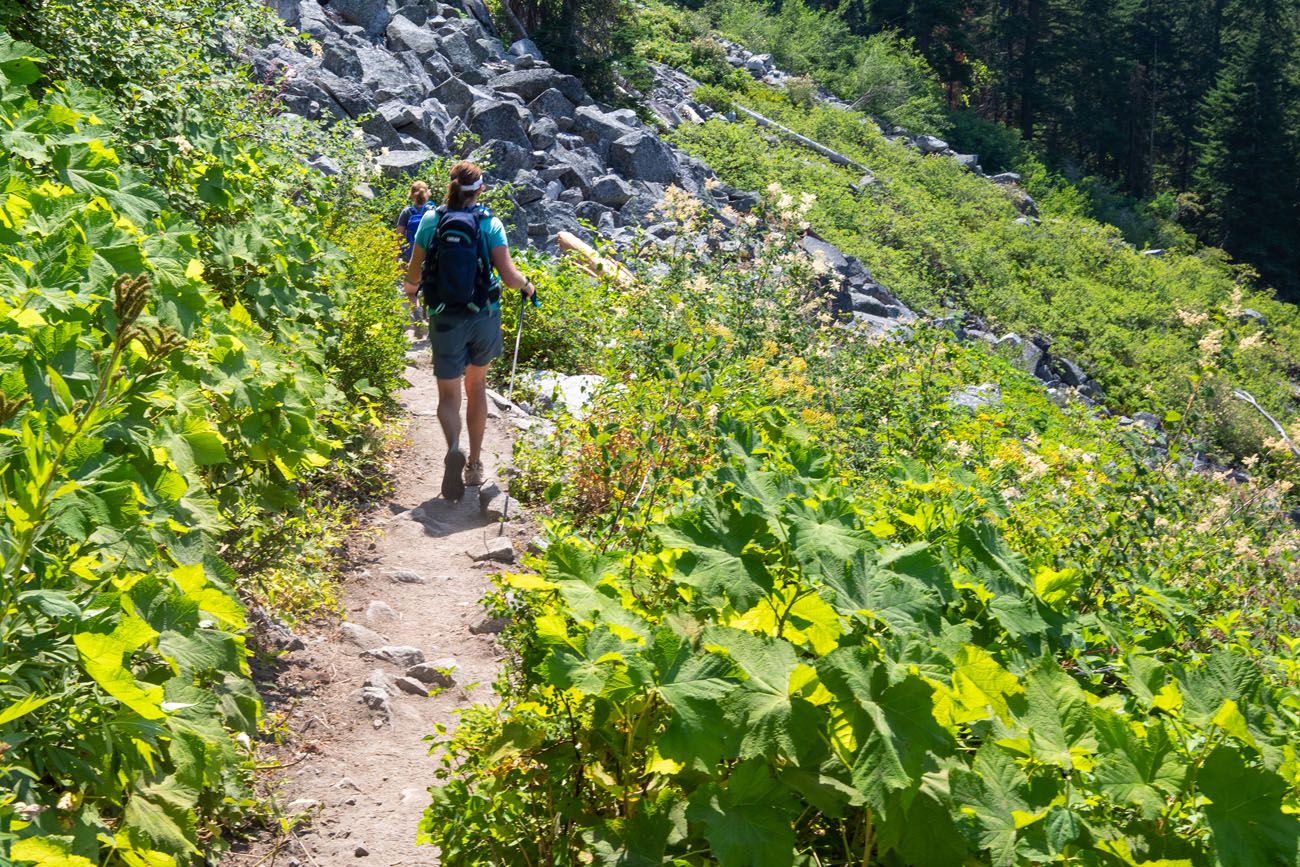
For us, it felt like a never-ending hike to get from Snow Lakes to the Snow Lakes parking lot. By now, we were exhausted, sore, and very hot (we did this on a day where the high temperature reached 101°F). And there is nothing fun or interesting about this last section of the hike. It feels like an endless walk through overgrown shrubbery with very little shade. And on a hot day, it feels like you are walking through a furnace.
There is very little shade, so make sure you reapply your sunscreen at Nada Lake.
Not to alarm you, but I’m going to say it again, this part of the hike feels like it takes forever.
At first the trail slowly descends through the forest, so it is easy to hike fast here. Then, the trees disappear, and you switch back many times through shrubs. The trail straightens out but keeps up with its rapid descent, briefly passing in and out of the trees, but most of this time you are exposed to the sun.
Once you get to the last section of switchbacks, you can look out and see the Snow Lakes parking lot. You’re so close, but this last bit of trail (a little over a mile to go at this point) still seems to take a long time.
Once you get down the river, cross the bridge and follow the trail up to the parking lot. Turn in your wilderness permit and give yourself and your group members a big high five! Congrats!!
Snow Lakes Trailhead
Sample One Day Enchantments Hiking Timeline
Every hiker moves at a different pace, but if you’re planning your day, this gives you a realistic framework. This timeline is based on a median pace of 12 hours on trail, with a 5:30 am start. If you’re dropping a car at the Snow Lakes trailhead first, plan to leave your accommodation by 4:30 am to get that done and still hit the Stuart/Colchuck trailhead by 5:30 am.
| Time | Milestone |
| 4:30 am | Leave Leavenworth. Drop car at Snow Lakes trailhead, then drive to Stuart/Colchuck Lakes trailhead. |
| 5:30 am | Start hiking from Stuart/Colchuck Lakes trailhead. |
| 7:30 – 8:00 am | Arrive at Colchuck Lake (4.25 miles). Take a short break, eat a snack, and take in the view of Aasgard Pass across the lake. |
| 8:45 – 9:00 am | Reach the base of Aasgard Pass (5.5 miles). |
| 10:30 – 11:00 am | Crest Aasgard Pass and enter the Upper Enchantments (6.75 miles). Stop to eat, catch your breath, and soak it in — the hard climbing is behind you. |
| 11:00 am – 1:00 pm | Hike through the Core Enchantments (6.75–9.75 miles). This is the highlight of the entire hike. |
| 1:00 – 2:00 pm | Descend from the Core Enchantments to Snow Lake (9.75–11.25 miles). |
| 2:00 – 3:30 pm | Snow Lakes and Nada Lake (11.25–13.75 miles). |
| 3:30 – 5:30 pm | Final descent to Snow Lakes trailhead (13.75–19.25 miles). This section feels long. Dig in and keep moving. |
| 5:30 pm | Finish at Snow Lakes trailhead. Turn in your permit and celebrate. |
A few things to keep in mind. The Core Enchantments section is where most hikers lose time, in the best possible way. It’s the whole reason you’re here, so don’t rush it. Just make sure you’re leaving the Core Enchantments no later than 1:00–1:30 pm to give yourself enough daylight for the long final stretch. The last five miles to the Snow Lakes trailhead is the section that catches people off guard — you’re exhausted, it’s exposed, and it takes longer than it looks on the map.
What to Expect: Our Experience on the Trail
Tim, Kara, and I did the Enchantments hike on a hot July day. It’s an awesome hike and we highly recommend it, but it is not to be underestimated. We are fast hikers, but the trail conditions (steep descents, obstacles on the trail, and hot conditions) slowed us down. Plus, the alpine lakes are so gorgeous that it is nearly impossible to not want to spend some time at each one of them. That’s the whole reason for doing this hike, right?
We did this hike in 10 hours and 30 minutes, including time for rest, snacks, and photos. Our fastest sections were at the very beginning and the very end of the trail, where the terrain was smooth enough that we could keep up a fast pace.
The hardest section is the Aasgard Pass. The trail down from the Core Enchantments to the Snow Lakes is difficult, simply because of the number of obstacles along the trail. And that final five mile stretch to the car is a beast. Yes, you are going downhill but it can be painful. Hopefully I am talking it up so much that it won’t seem so bad once you get there. 😉
We hiked the Enchantments on July 31, 2020. The trail experience and what you’ll see along the way hasn’t changed, and we review and update the logistics, permits, and practical details in this guide and our planning guide regularly to make sure everything is current.
Final Tips Before You Hit the Trail
A few things we wish someone had told us before we did this hike:
- Start early. Parking at both trailheads fills up fast. Earlier also means cooler temperatures for the Aasgard Pass climb.
- Don’t underestimate the final five miles. Everyone warns you about the Aasgard Pass. What catches people off guard is the long, exposed slog from Nada Lake to the Snow Lakes trailhead when you’re already exhausted. Mentally prepare for it.
- Bring more food than you think you need. Eat a snack every hour without fail, and load up on salty foods to keep your electrolytes in check.
- Carry a water filter. There are plenty of creeks to filter from, which means you don’t have to haul three liters up the Aasgard Pass.
- Bug spray is not optional. The mosquitoes around the alpine lakes are relentless.
- Leave the Core Enchantments by 1:30 PM. It’s tempting to linger — that’s the whole point of being there — but you still have a long way to go.
- Pack a headlamp. Just in case.
Now that you know what to expect on the trail, it’s time to get the logistics sorted. Our Enchantments Complete Planning Guide covers everything you need before you go: permits, transportation, how to arrange your shuttle, what to pack, fitness preparation, and where to stay in Leavenworth. Read that next and you’ll be ready to have the best possible day on this incredible trail.
How to Hike the Enchantments: Transportation, Permits, Nutrition & More
In case you missed it, here is the link to Part 2 of our guide to hiking the Enchantments. Part 2 covers transportation, permits, training advice, and the logistics to have a successful hike.If you’re planning a bigger trip around this hike, we have a Washington road trip itinerary to help you build out your trip. You can see all of our guides on Washington (Mount Rainier, Olympic, and North Cascades National Parks) in our Washington Travel Guide.
Did we miss anything? If you have any questions about hiking the Enchantments or if you want to share your experience, let us know in the comment section below. Happy hiking!
Continue Exploring Washington & Other Bucket List Hikes
Ultimate Hiking Guide: Europe, Asia, Africa, Americas & Oceania
Are you looking for the perfect hike? With hikes on six continents ranging from a few miles to multi-day adventures, explore some of the best hikes from around the world.
20 Epic Hikes in the US National Parks
Pinterest Facebook Flipboard With 63 national parks and thousands of miles of hiking trails, your options are endless for exploring the American national parks. We narrowed down the list for you to 20 of the best hikes in the US national parks, 20 amazing ways to explore this beautiful country. Hike to the tallest peaks, […]
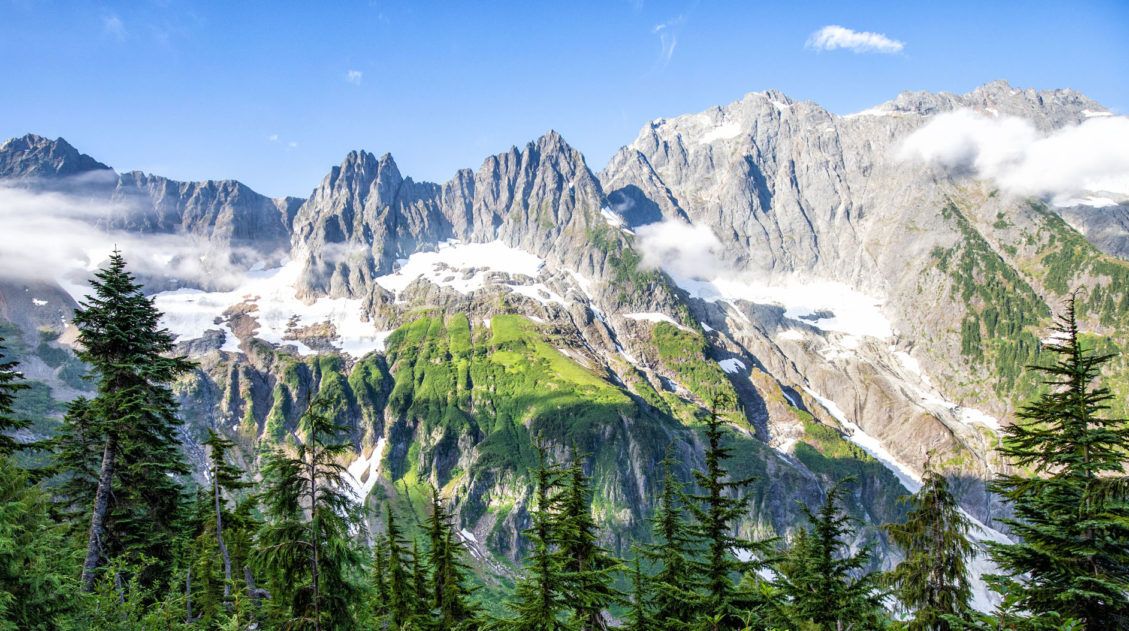
Cascade Pass and Sahale Arm: The Best Day Hike in North Cascades
We’ve hiked in more than 50 national parks across the United States, and the Cascade Pass and Sahale Arm hike is one that still stands out. We did this hike as part of a six-week road trip through the national parks of Colorado and Washington, and it was the perfect way to end the trip. […]
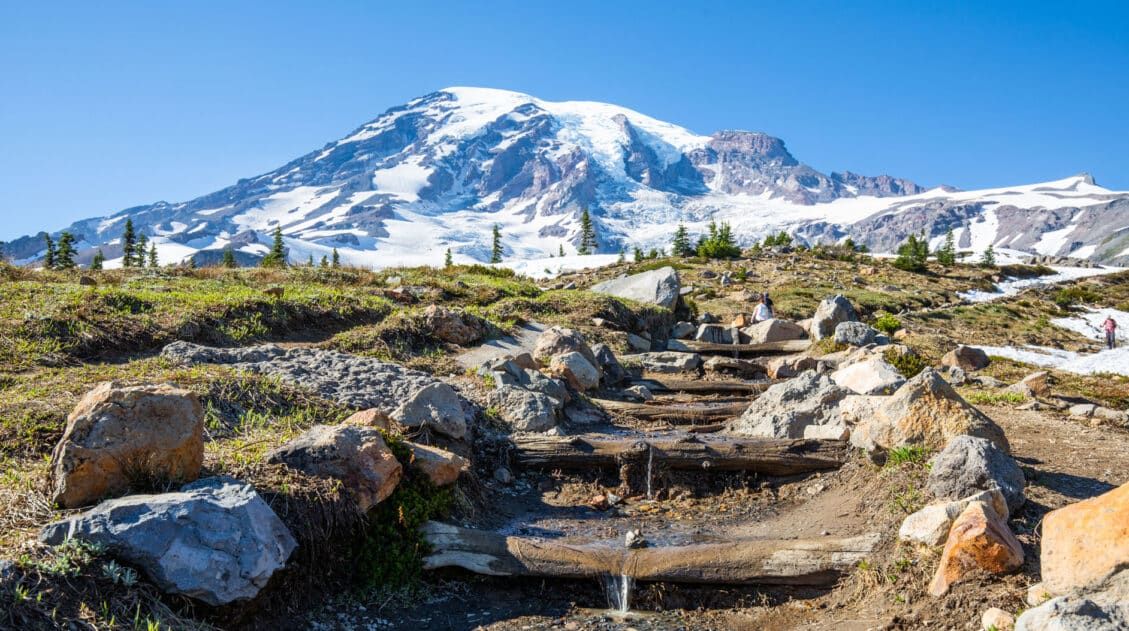
15 Best Hikes in Mount Rainier (Ranked by Difficulty & Area)
Mount Rainier is one of the most spectacular hiking destinations in the United States. From wildflower-covered alpine meadows to glacier viewpoints and fire lookout summits, the variety here is incredible. We’ve hiked in more than 50 U.S. national parks and on trails around the world, from Everest Base Camp in Nepal to the Dolomites, and […]
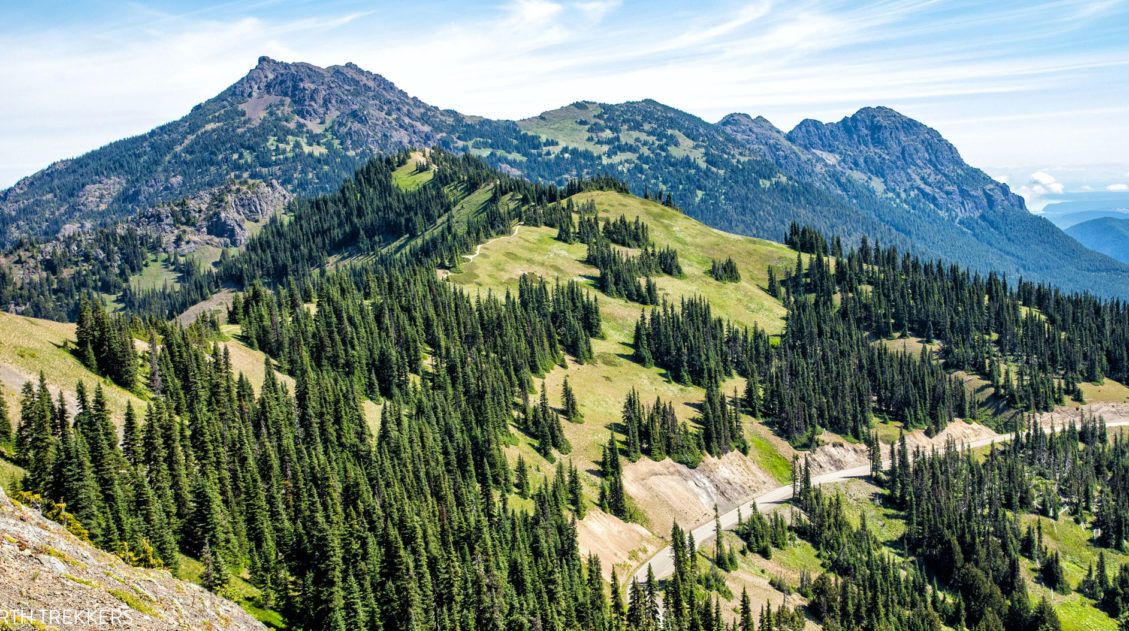
12 Best Hikes in North Cascades National Park (Ranked by Difficulty & Area)
North Cascades National Park is not a place that easily reveals itself. Sure, the drive along Highway 20 is lovely. And the viewpoints over the lakes and mountain passes are gorgeous. But to really see this park, you are going to have to invest some time on the hiking trails. We spent three weeks hiking […]

Mount Storm King Hike: Is It Worth the Brutal Climb?
Mount Storm King earns its dramatic name. This short but relentlessly steep trail in Olympic National Park climbs over 2,000 feet in just over two miles, ending with a rope-assisted scramble to a rocky outcropping with sweeping views over the impossibly blue waters of Lake Crescent. We hiked this in July on a clear summer […]
Best Hikes in Olympic National Park: Ranked by Area and Difficulty
Olympic National Park offers some of the most diverse hiking in the United States. Where else can you hike through a moss-covered temperate rainforest in the morning, walk along a wild Pacific coastline in the afternoon, and look out over glacier-capped mountain peaks from an alpine ridge? We spent four days in Olympic National Park, […]
20 Best Day Hikes in the World (+ Map & Photos)
Where can you go to find that perfect day hike? The hike that leaves you breathless as you climb the summit of the mountain. The hike with the awe-inspiring views. The hike that is so enjoyable because the terrain and its views are always changing. The hike that has you saying “Wow!” over and over […]
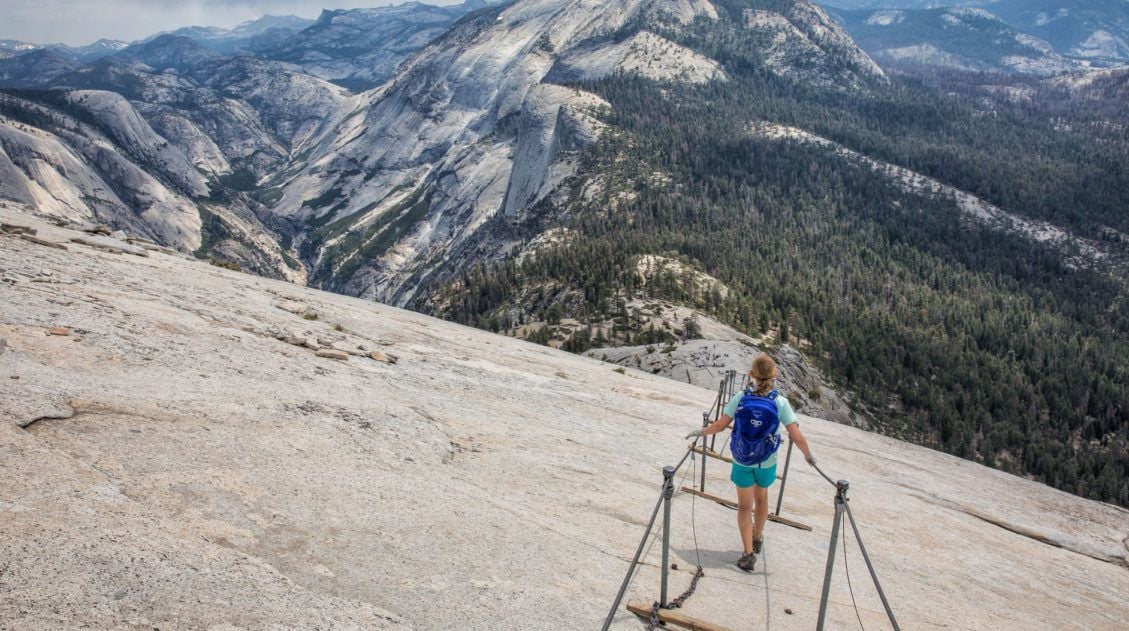
Climbing the Half Dome Cables: A Journey in 18 Photos
Have you ever wondered what it is like to climb the Half Dome cables? Did you even know that hiking Half Dome was something you could do? I will admit it, when I saw my first photos of people clinging to the steel cables on Half Dome, climbing one of Yosemite’s most famous icons, this […]
United States Travel Guide: Places to Visit in the USA
Plan your visit to the United States. Learn about the best things to do, how to plan your time, road trip ideas, and sample itineraries.
Best USA Road Trips: 18 Ideas for Your Next Big Adventure
One of the best ways to explore the USA is on a good old-fashioned road trip. Cruise along Route 66, road trip through the Florida Keys, explore the American Southwest, or even drive from coast to coast. In this guide, we share 18 of the best USA road trips…18 great ideas for your next big […]
10 Best Hikes in Glacier National Park (Easy Walks to Epic Day Hikes)
Looking for the best hikes in Glacier National Park? From the breathtaking Highline Trail and the scenic walk to Hidden Lake Overlook to the unforgettable hike to Grinnell Glacier, Glacier National Park is home to some of the most spectacular trails in the United States. We’ve visited Glacier National Park multiple times, hiking trails across […]

Washington Travel Guide: National Parks, Road Trips & Places to Visit
Washington Travel Guide Washington State packs an incredible range of landscapes into one destination, from glacier-covered volcanoes and alpine lakes to wild Pacific coastline and dense rainforests. If you love hiking, scenic drives, and national park adventures, Washington is one of the best outdoor destinations in the United States. We explored Washington on a three-week […]

Comments 48