
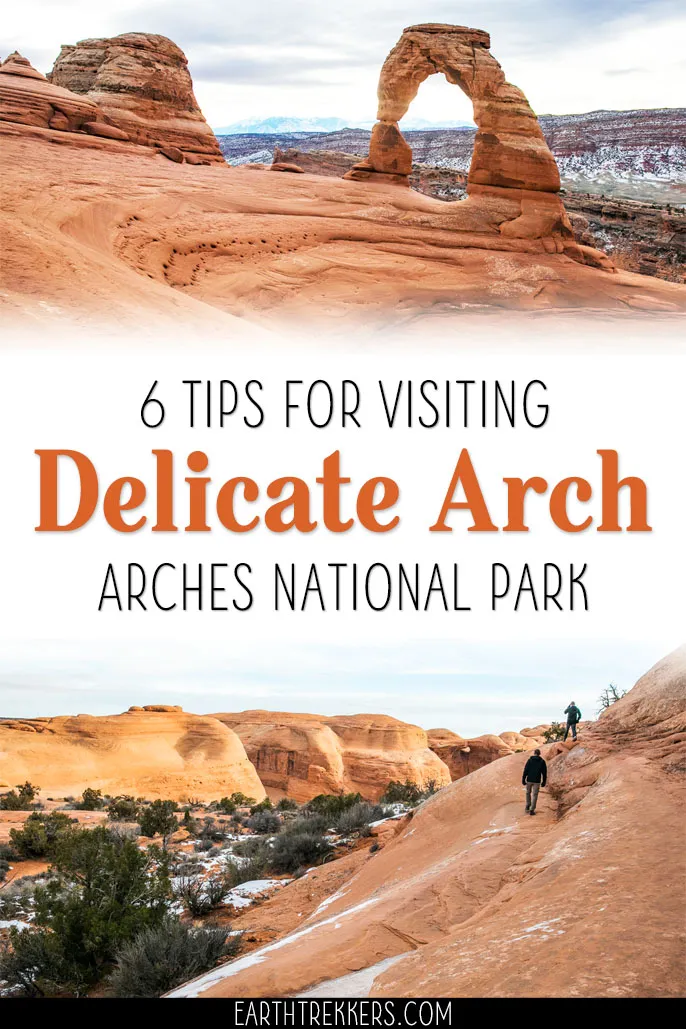
Delicate Arch is one of the main attractions in Arches National Park. Most likely, this arch is high on your list of places to visit in the park. In order to have the best experience, there are a few things to know before you go. Here are our tips for visiting Delicate Arch, including what to expect on the Devils Arch hike and several unique photo spots of the arch.
Note: We have visited Delicate Arch on multiple occasions. The photos in this post are from our two most recent visits. We were here at sunrise in December 2018 and on a late afternoon in November 2020. The photos of the arch are labeled with the times of our visit, because the time of day and lighting conditions dramatically change the appearance of Delicate Arch.
What Makes Delicate Arch Special?
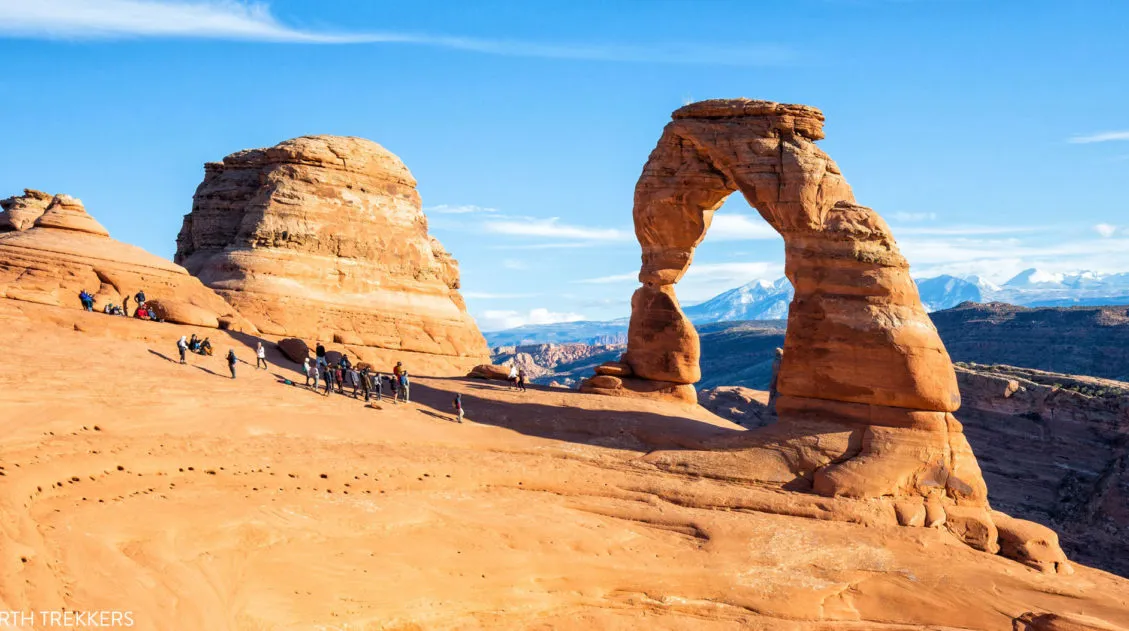
Delicate Arch is one of the most famous geologic structures in the world. It is so iconic that you will see it thousands of times as you road trip through Utah…on local license plates.
It may not look like it in photos, but Delicate Arch is massive. The opening below the arch is 46 feet high, making this the largest free-standing arch in Arches National Park. It’s not until you see a photo of someone standing under the arch (or you stand under it yourself) that you get an idea of just how big it is.
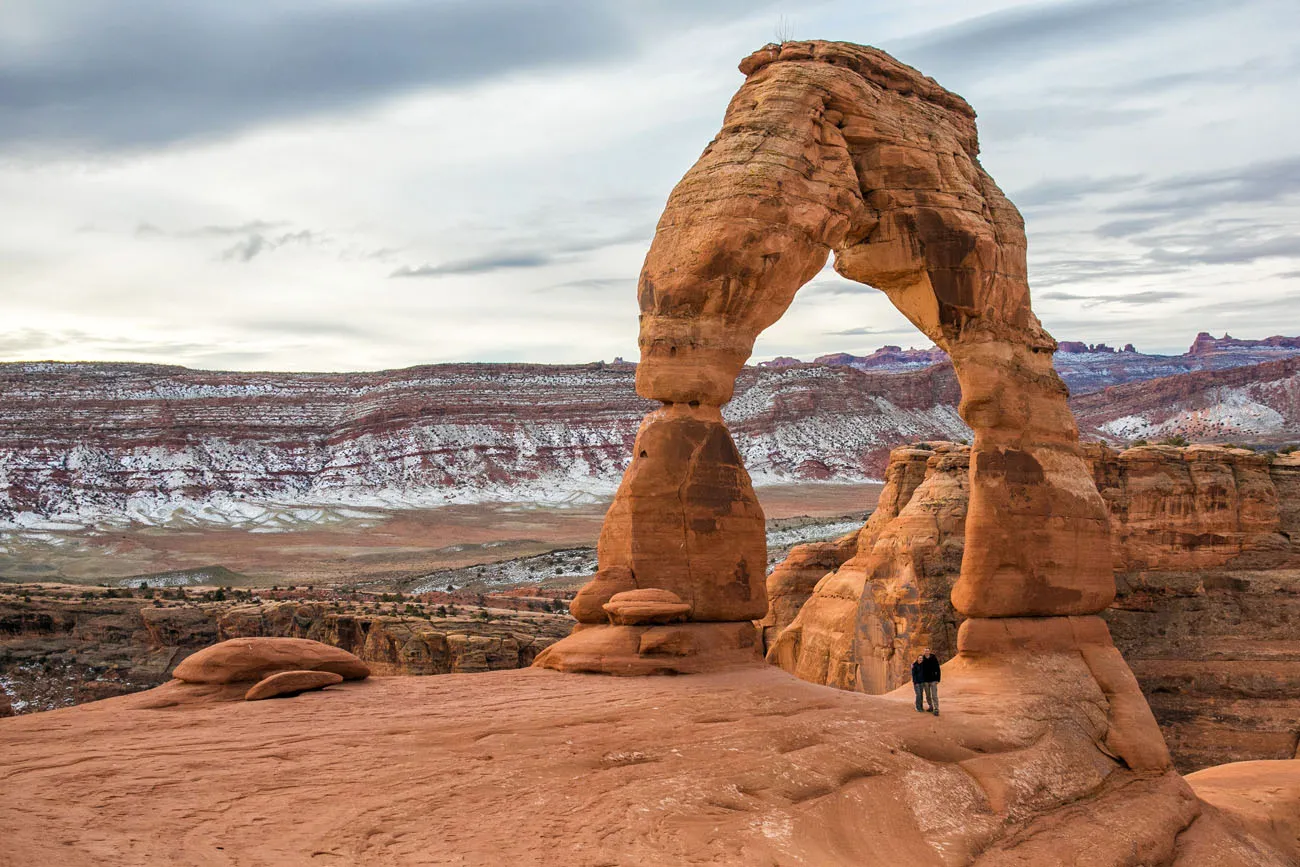
Tim and Kara, sunrise in December.
The Olympic torch was carried under Delicate Arch for the 2002 Winter Olympics.
Delicate Arch Trail
To get a close up view of Delicate Arch you need to do some hiking. Unlike Balanced Rock and several of the arches that you can see from the road, Delicate Arch is located in the “backcountry.”
To get to Delicate Arch, it is a 3-mile (5 km) round trip hike with 480 feet (150 m) of elevation gain. This hike, plus time to view the arch, takes most people 2 to 3 hours. But if you hike fast and don’t linger long for photos, it’s possible to hike the Delicate Arch Trail in an hour and a half.
How Hard is the Delicate Arch Hike? There is a short, steady climb up to the arch, making this hike moderate in difficulty. The National Park Service describes this hike as difficult. I think “difficult” is a bit of a stretch, unless you happen to be hiking midday during the summer months.


Delicate Arch Trail Elevation Profile
Please practice the seven principles of Leave No Trace: plan ahead, stay on the trail, pack out what you bring to the hiking trail, leave areas as you found them, minimize campfire impacts, be considerate of other hikers, and do not approach or feed wildlife.
Delicate Arch Trail Guide
TRAILHEAD: The hike starts at the Wolfe Ranch Cabin. Park in the large parking lot next to the cabin and look for the sign that marks the trailhead.
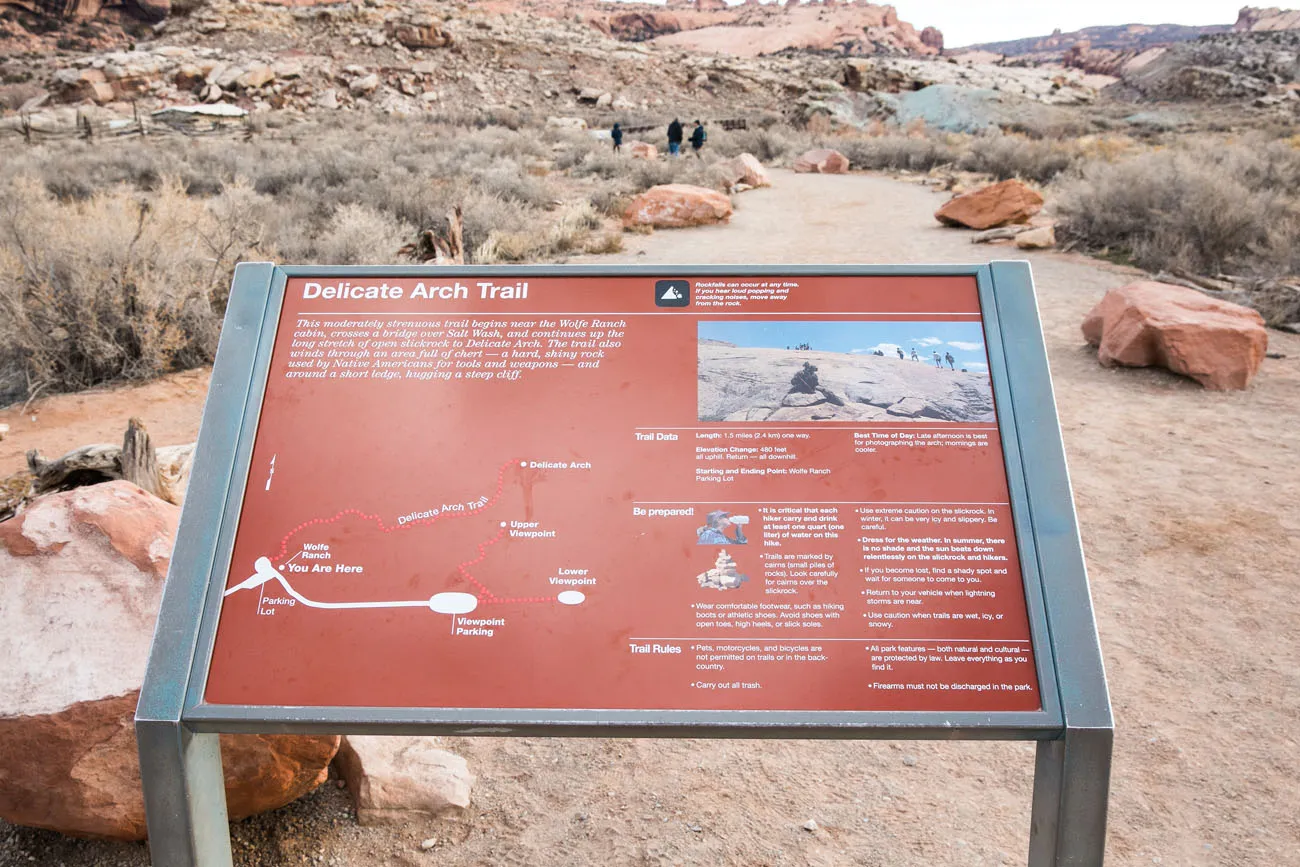
START OF THE HIKE: The first section of the trail is an easy walk on a graded gravel path. There are some short climbs here but nothing too strenuous.
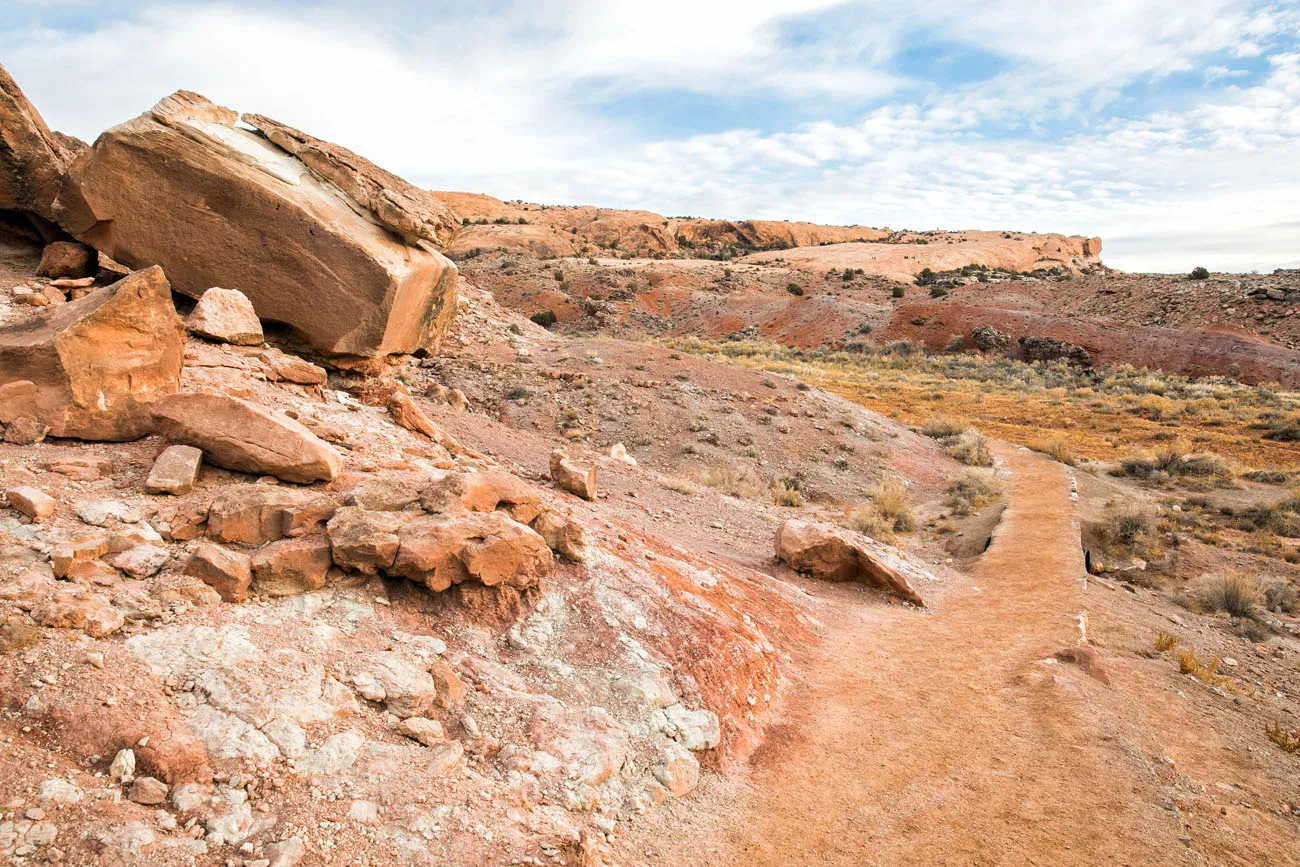
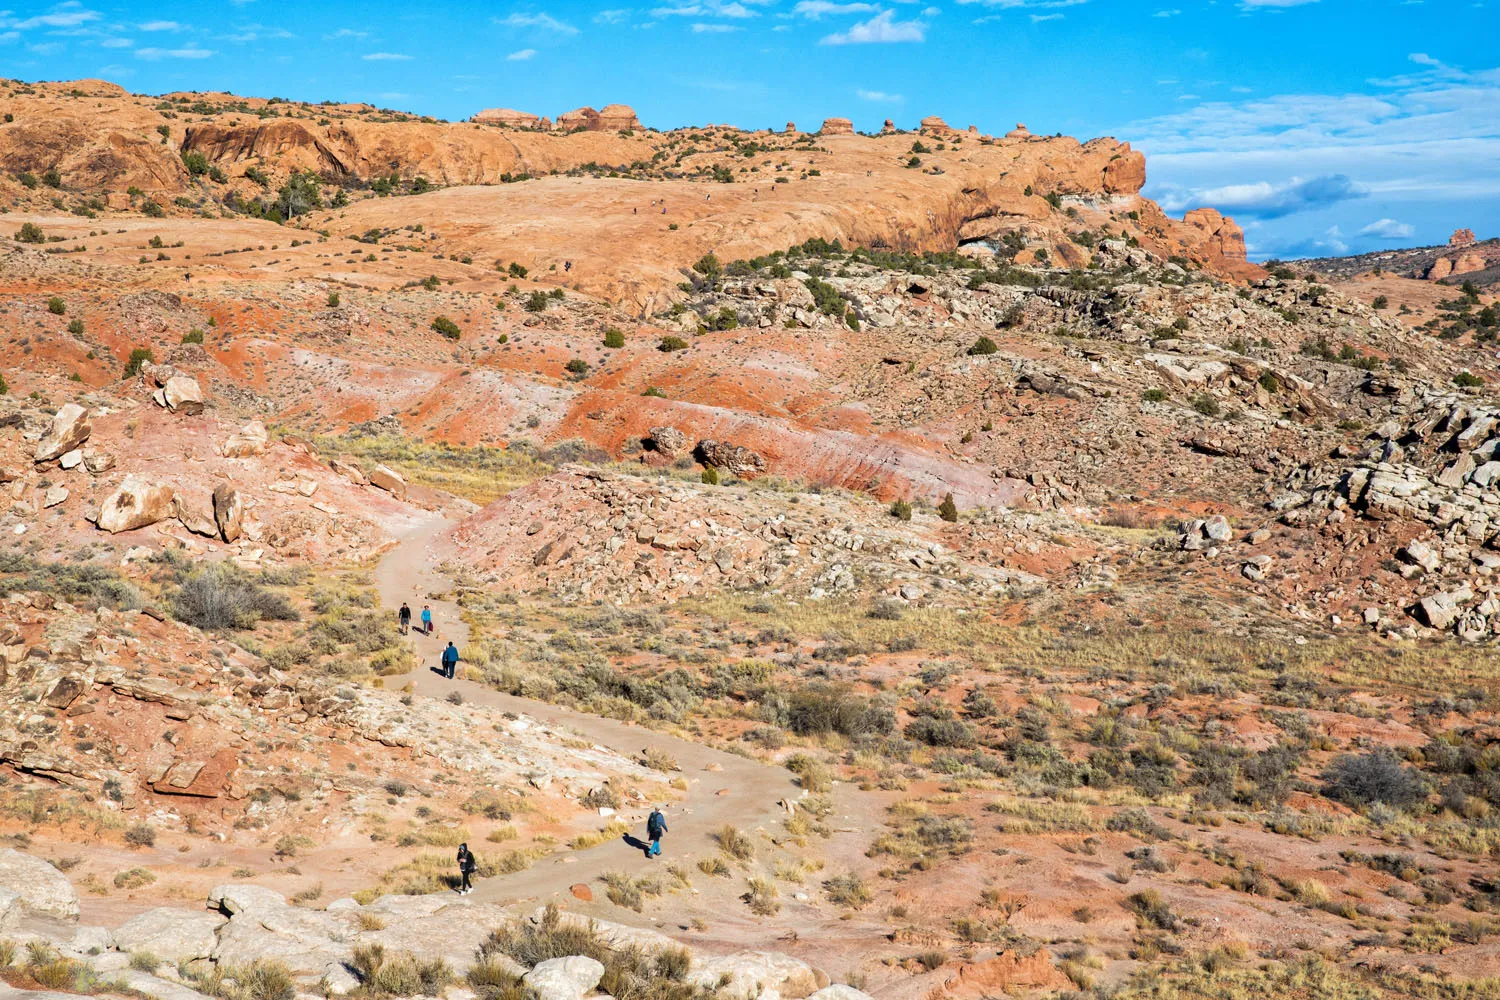
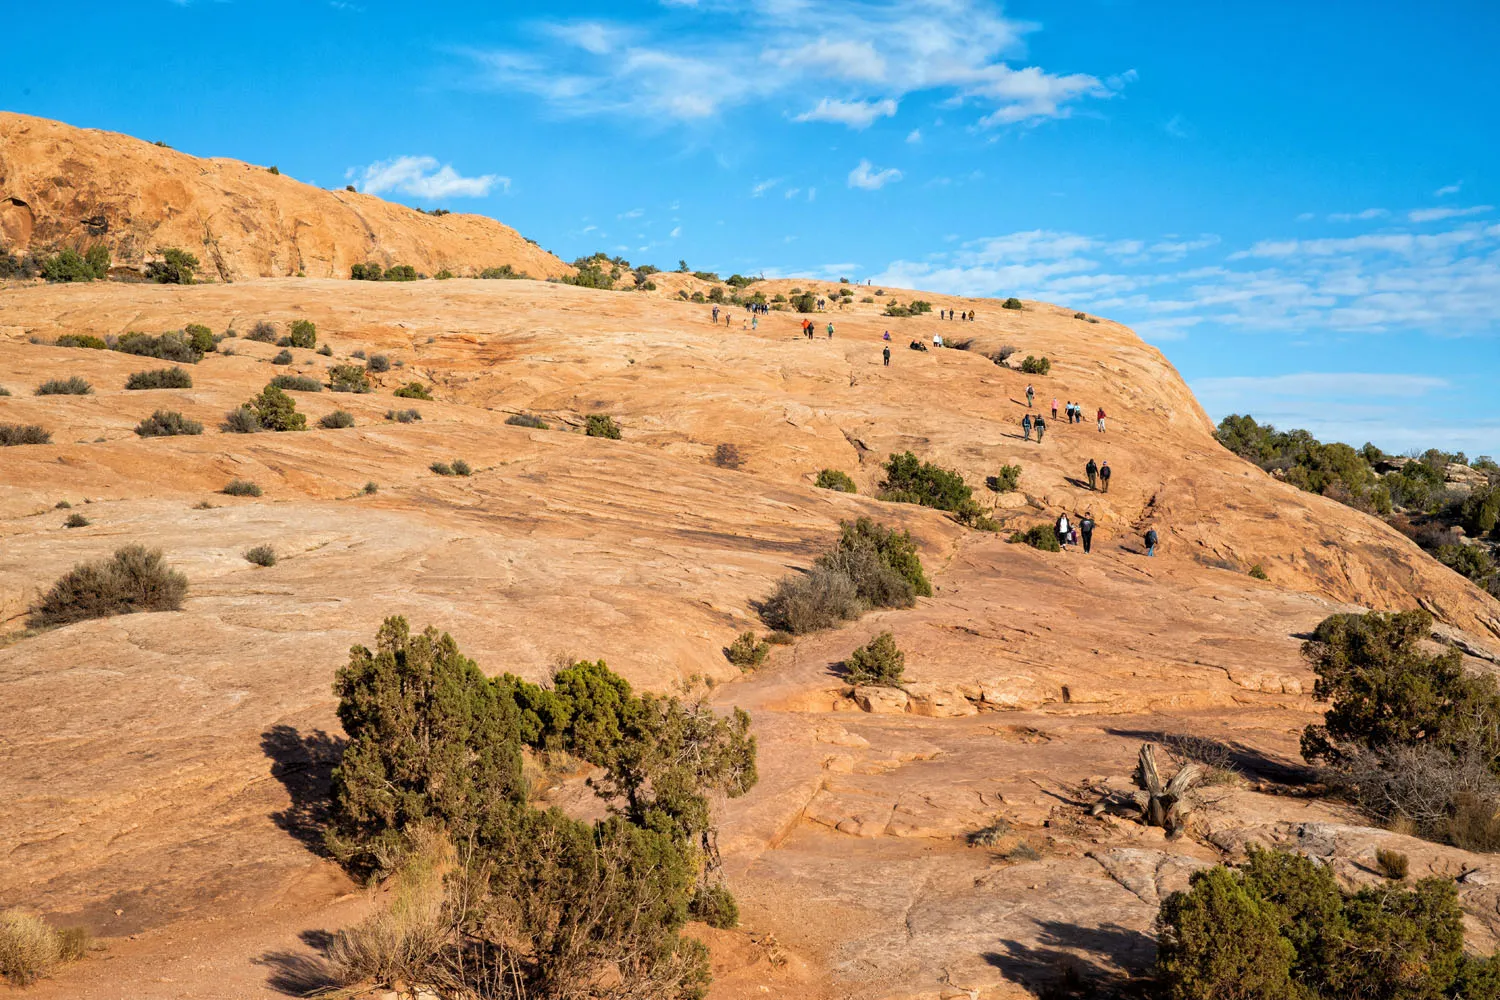
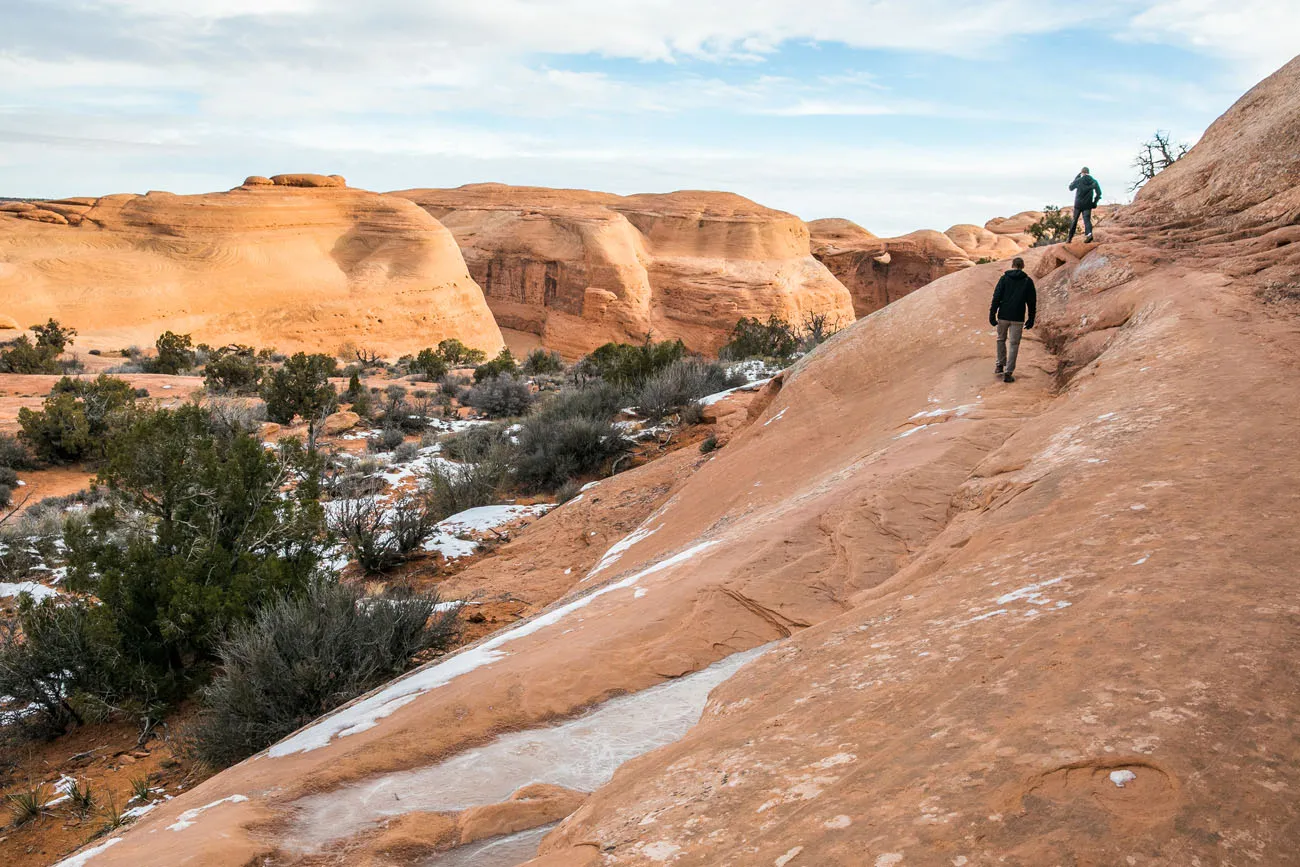
THE CLIMB: The hardest part of the hike is the middle third. This is where you will walk up a steep section of slickrock. Along the way, follow the rock cairns or the people in front of you. Hiking to Delicate Rock is a very popular thing to do so most likely you will share the trail with other hikers. The higher you climb, the better the view gets over the park.
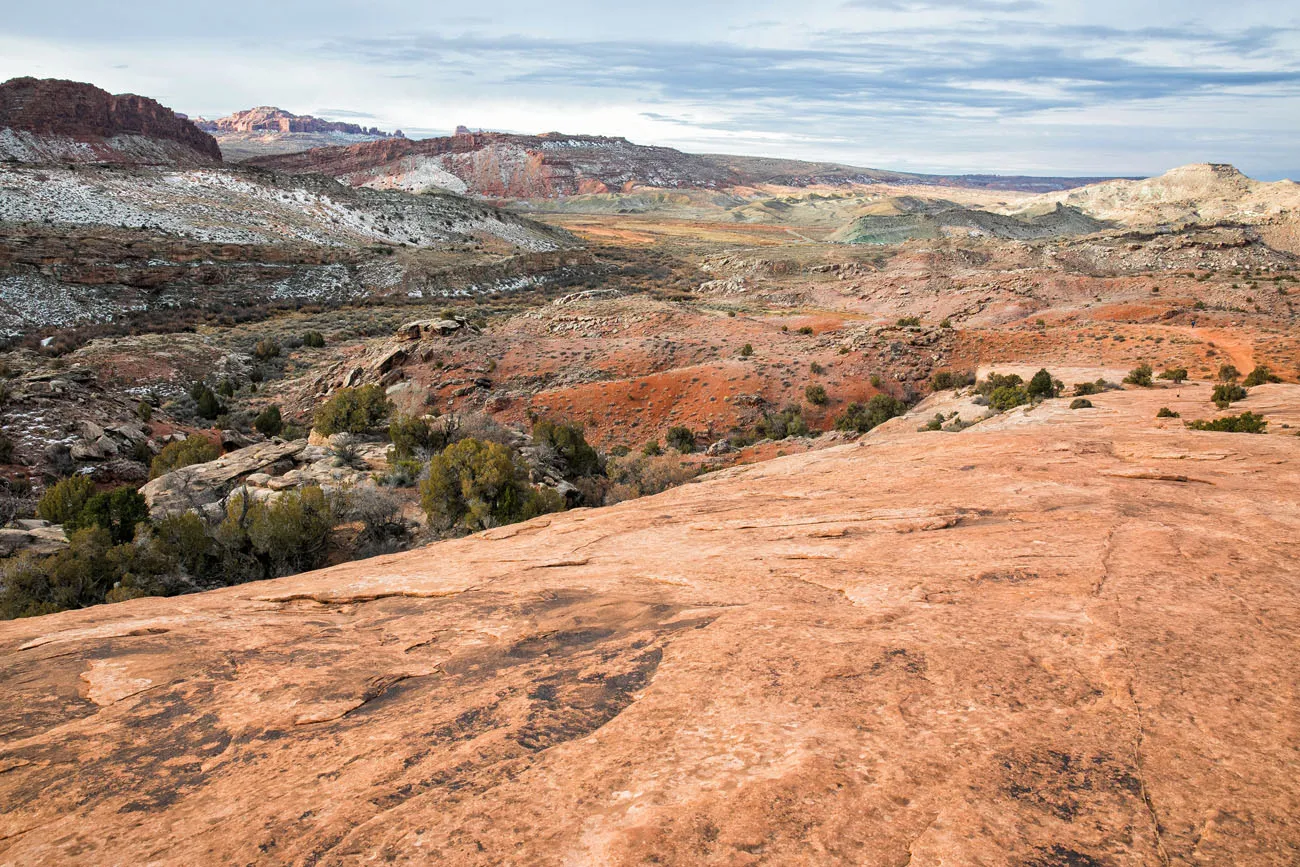
The view from the hiking trail, looking back towards the parking lot.
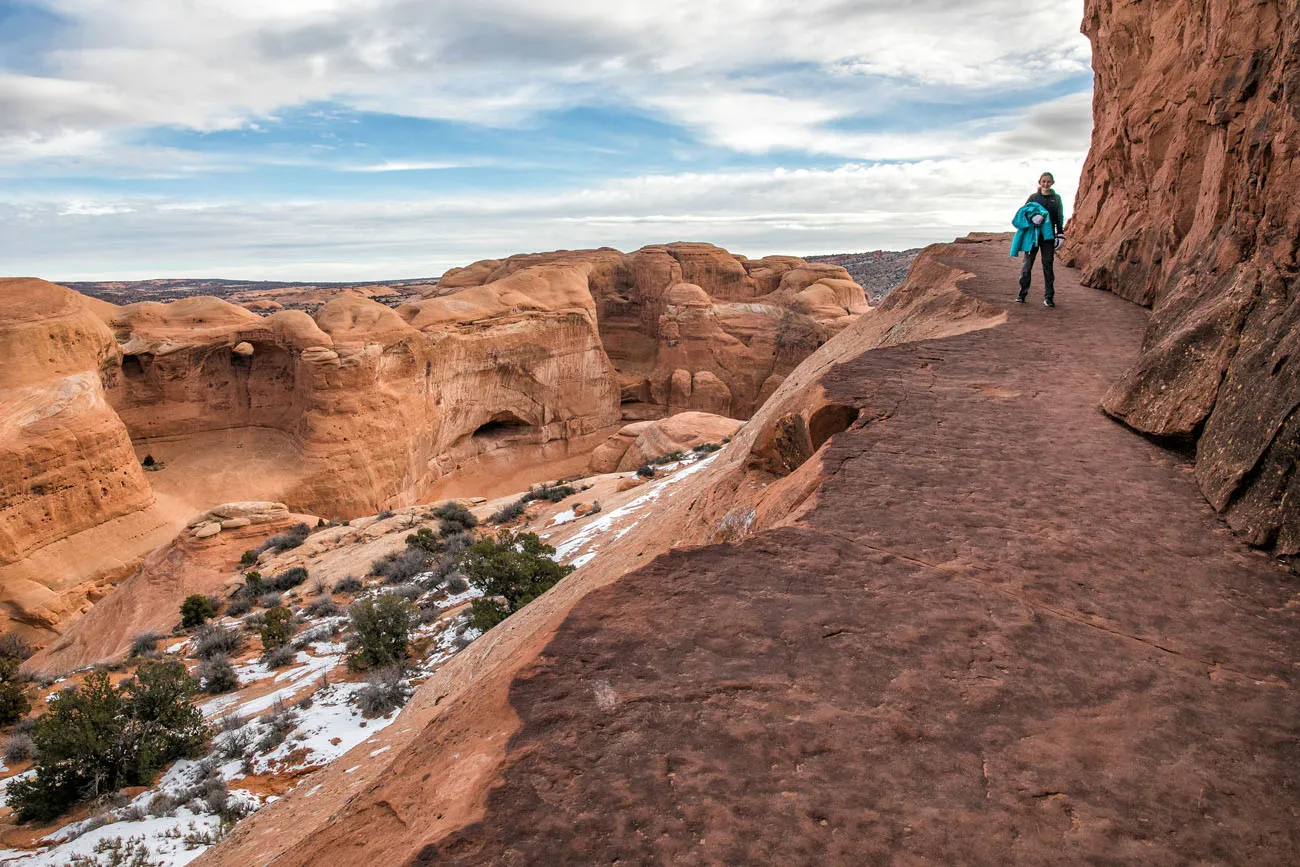
FINAL SECTION OF THE HIKE: Once past the slickrock, the trail levels out. Now you are hiking among giant domes of sandstone rock. Continue to follow the cairns. The last section of trail is along a ledge that hugs a rock wall. There is a drop-off here on one side, so be careful.
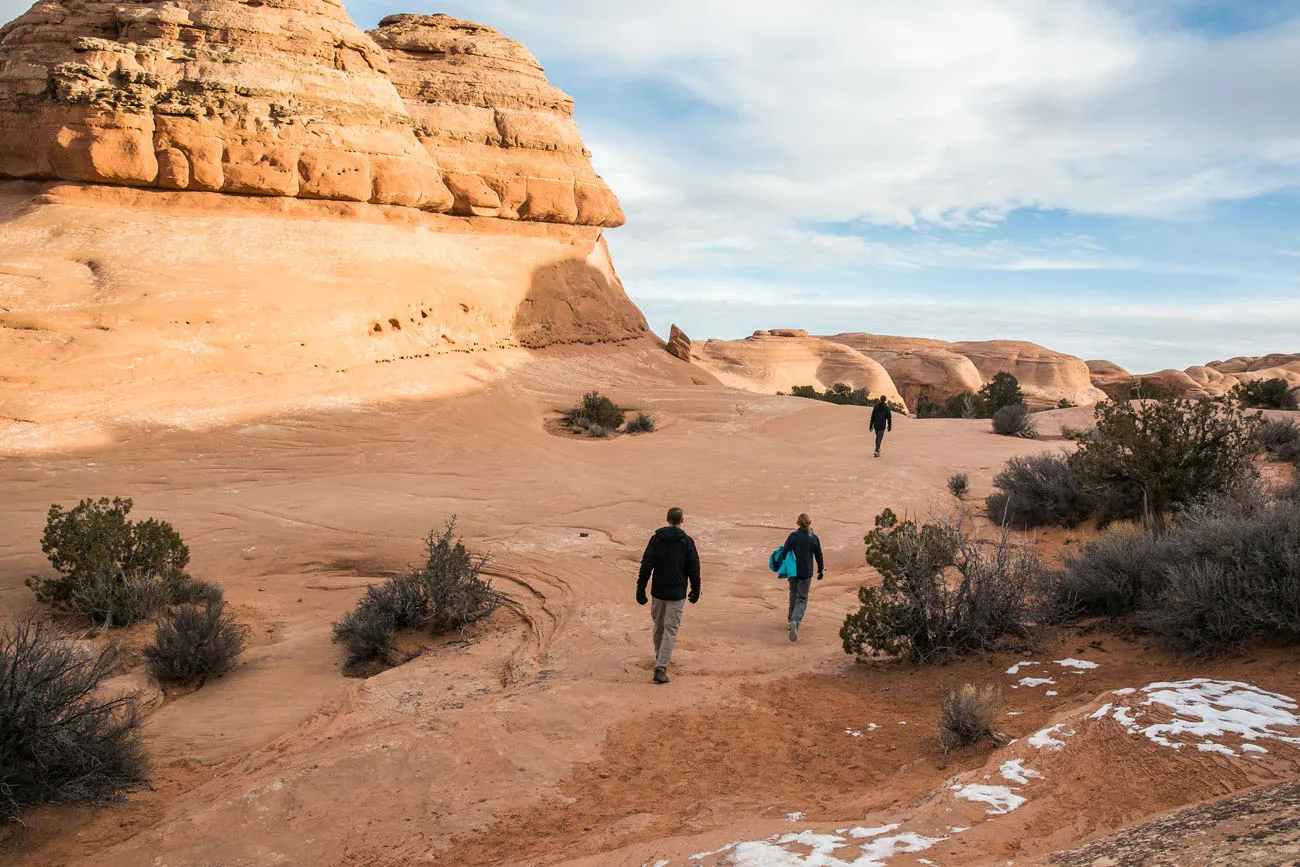
TWISTED DOUGHNUT: As you walk up this trail, keep an eye out for an opening in the rock wall to your right. There is an arch here, called the Twisted Doughnut, that offers a very unique view of Delicate Arch (keep reading to see photos, or skip ahead to see a photo from Twisted Doughnut Arch). If you get to the trail shown in the photo below (with Kara), you went too far.
The last short section of trail has a drop-off on one side, so be careful here. Kara is standing on one of the narrowest sections, to give you an idea of just how wide (or narrow 😊) this trail is.
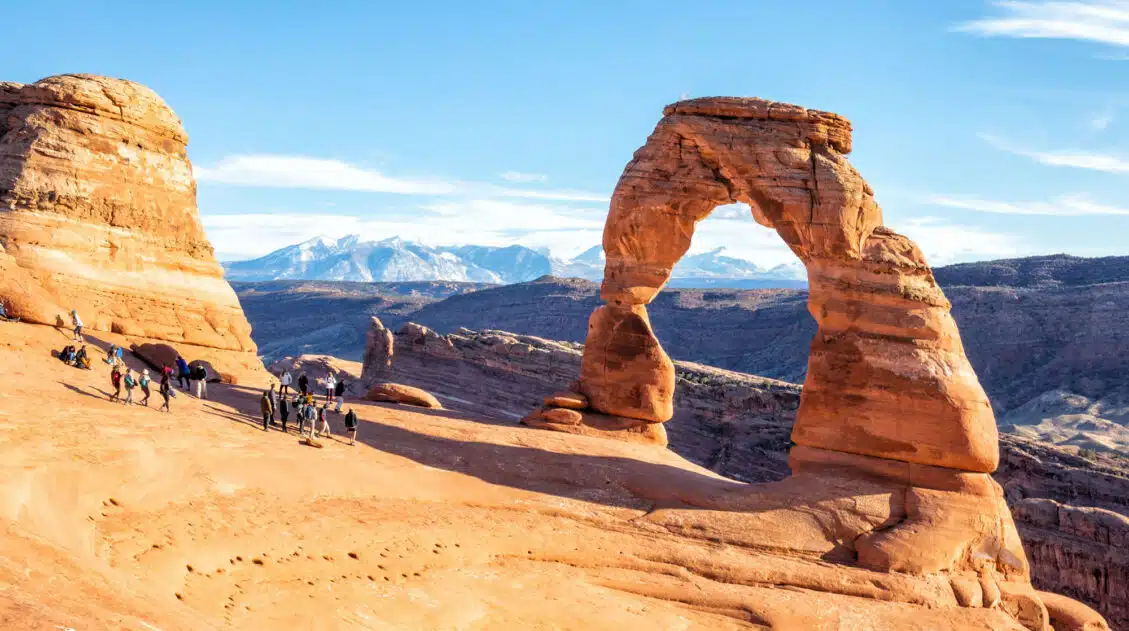
DELICATE ARCH: Once you round the final turn, you get your first up-close view of Delicate Arch.

First view of Delicate Arch (photo taken in the afternoon in November).
RETURN HIKE: To complete the hike, you will retrace the trail back to the parking lot.
When is the Best Time to Photograph Delicate Arch?
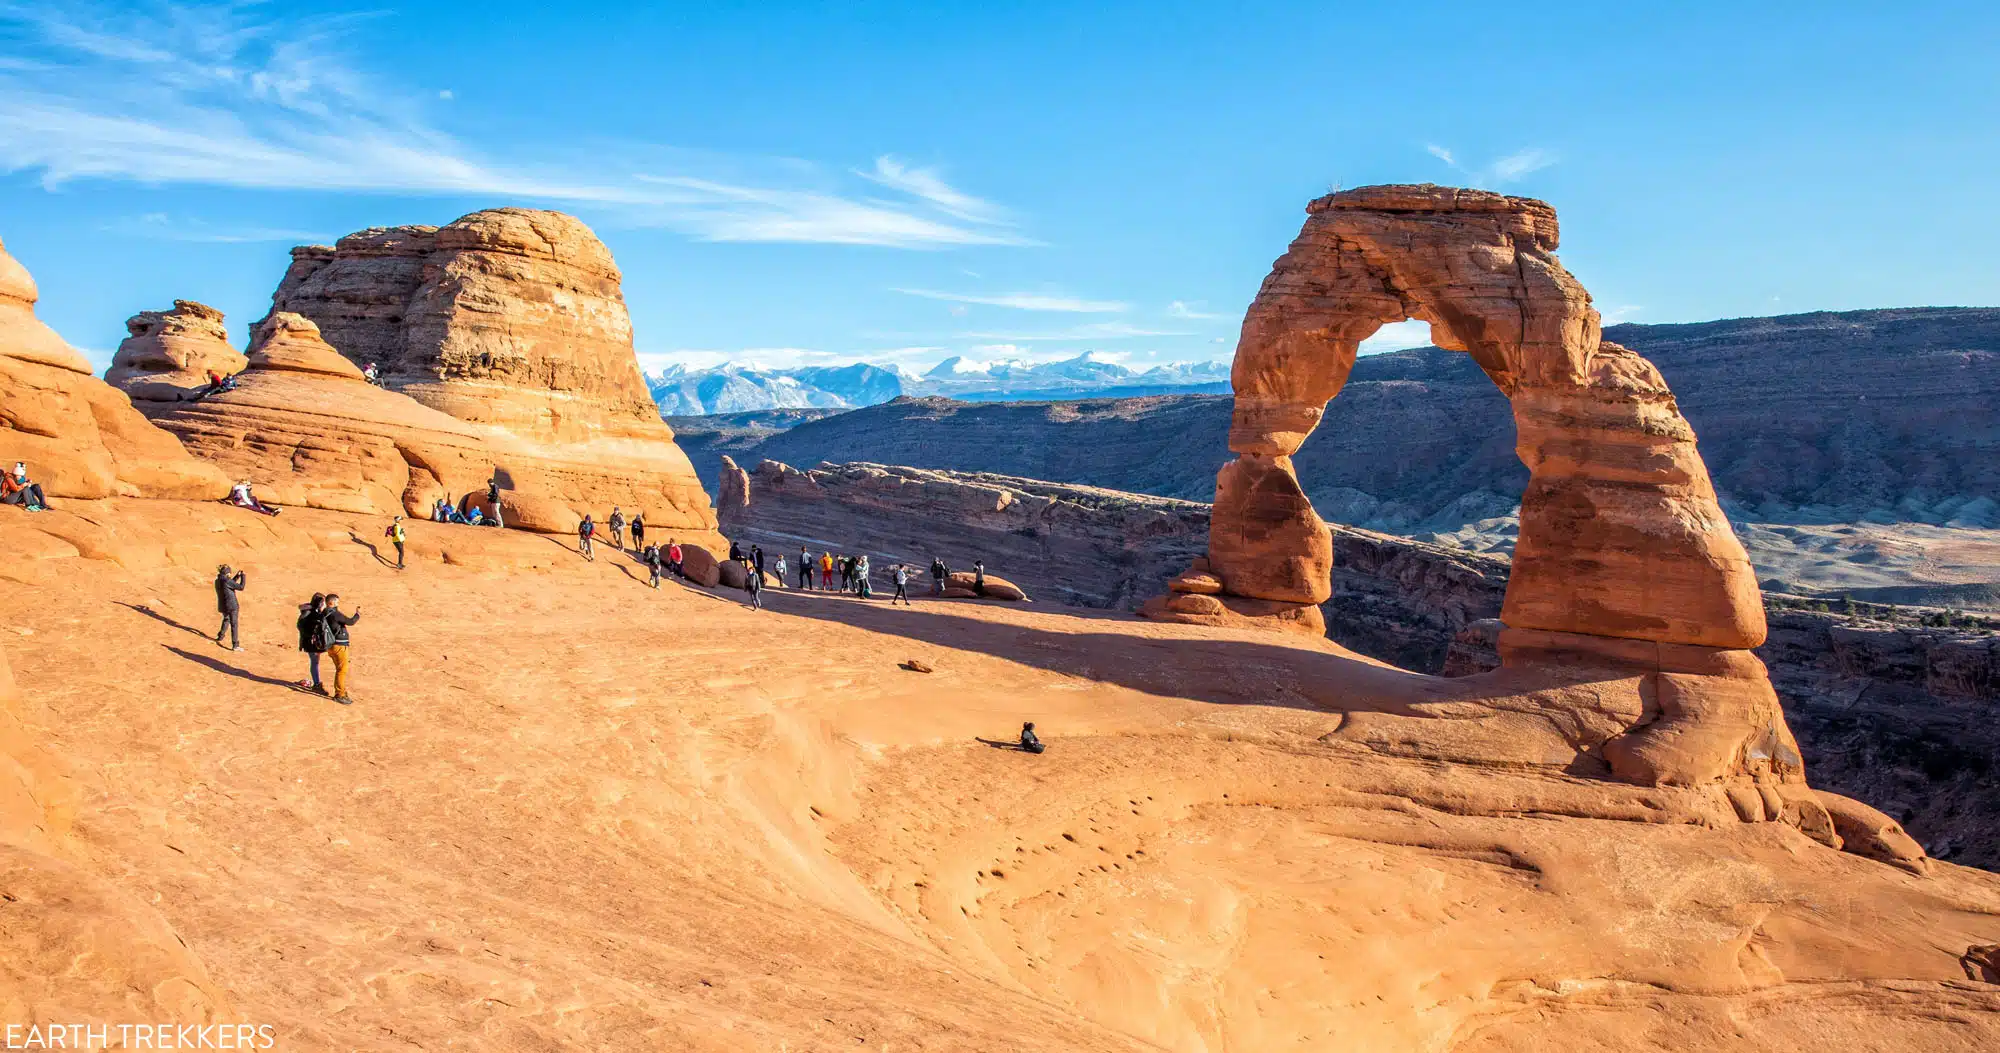
The best time to photograph the arch is at sunset. At the end of the day, the warm light from the setting sun illuminates Delicate Arch, casting it in a warm glow. This makes the arch look fiery red during sunset.
Sunset is a popular time to visit Delicate Arch so it can be crowded, especially during the summer months.
Sunrise is another popular time to photograph the arch. However, the sun rises behind the arch, creating a much different effect then seeing Delicate Arch at sunset.
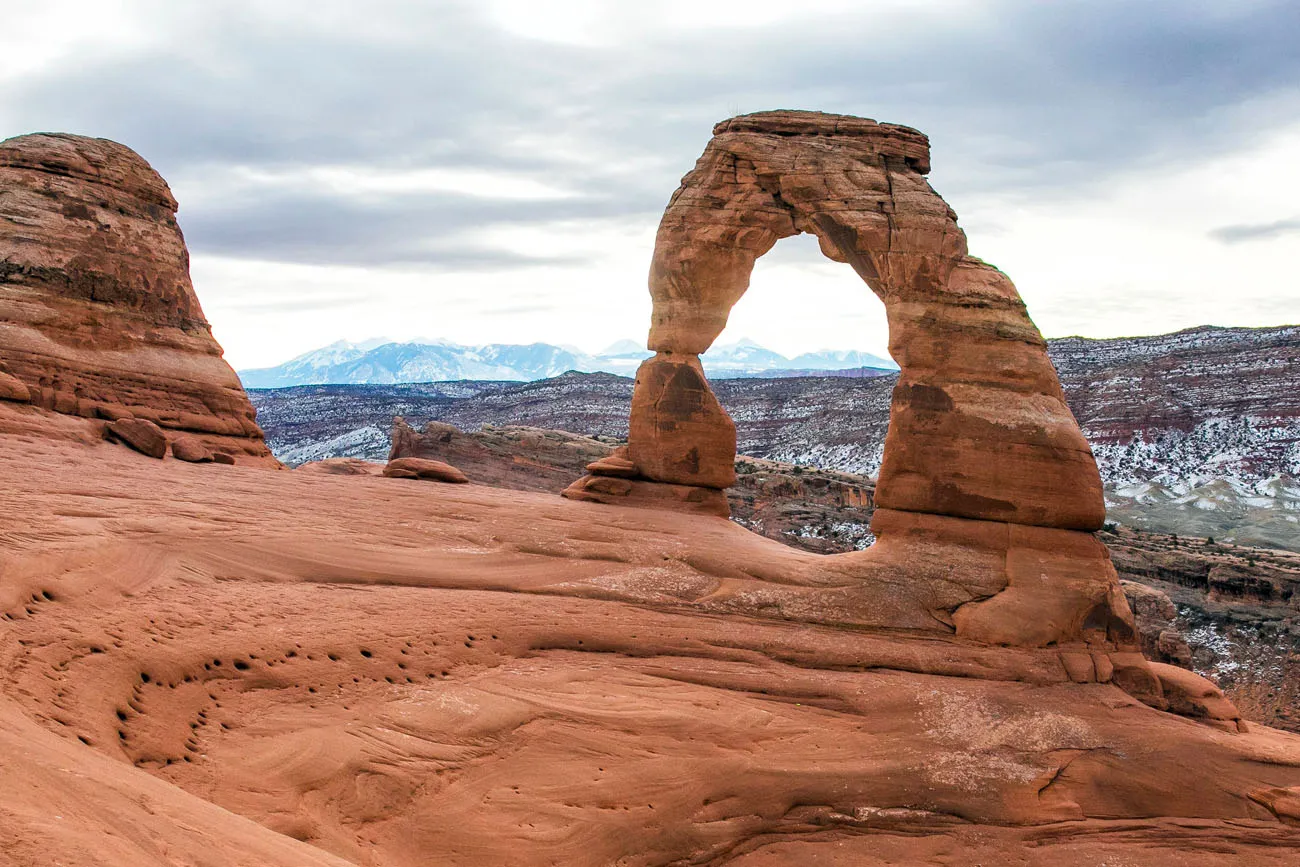
Delicate Arch just past sunrise (in December)
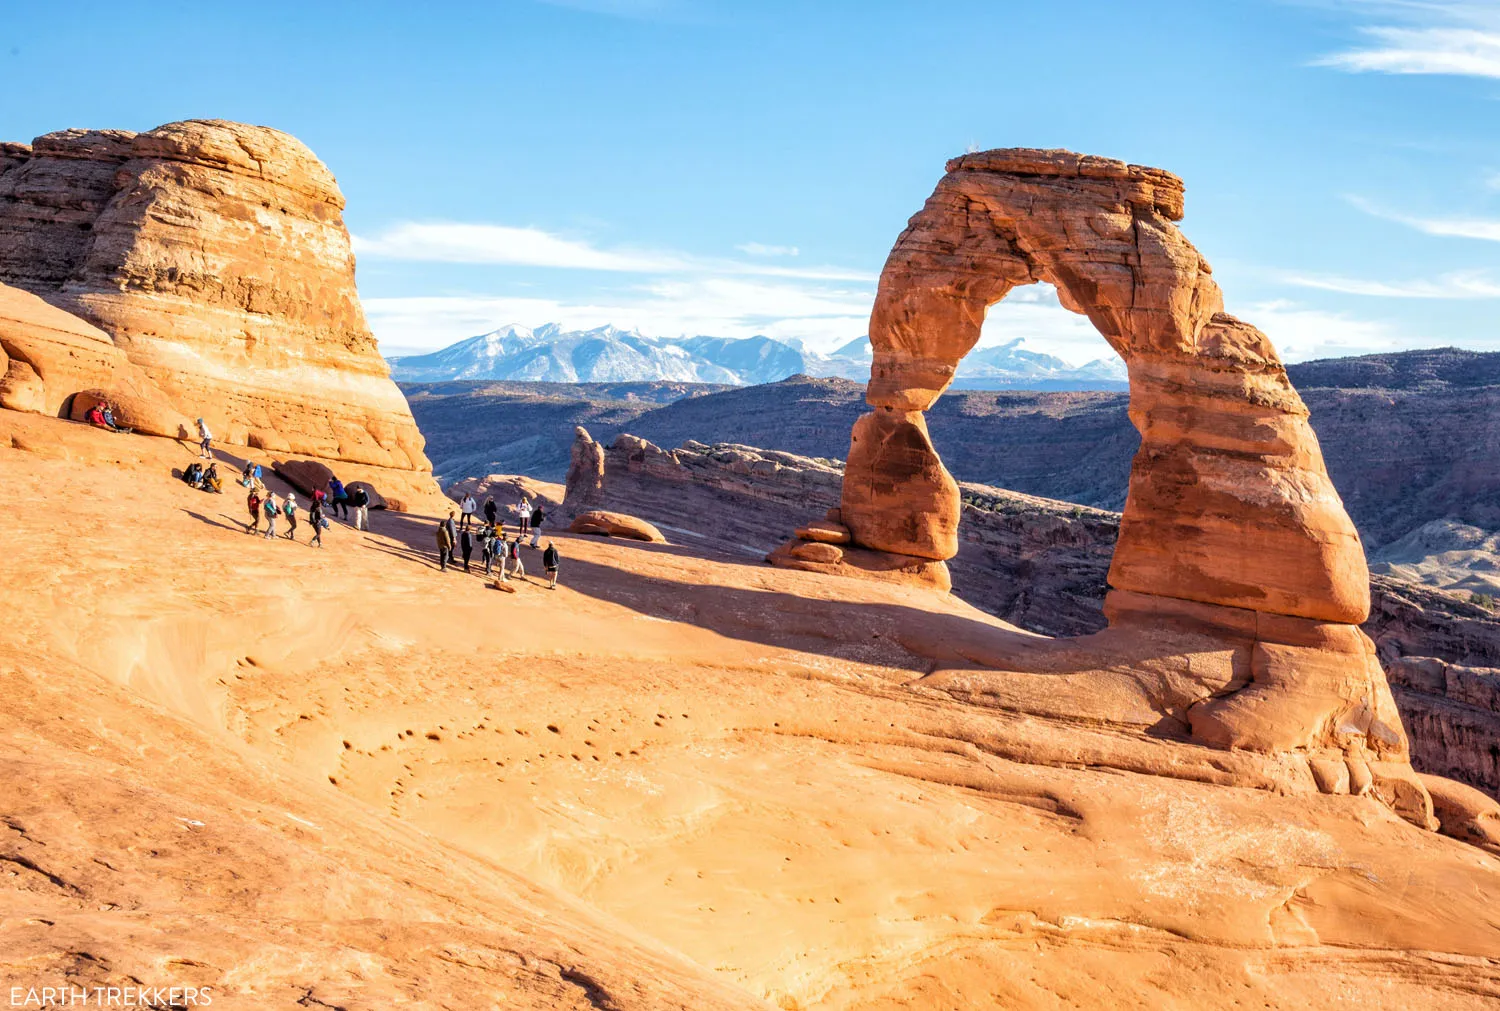
Delicate Arch in the late afternoon in November
If you plan to visit Delicate Arch at sunrise or sunset, make sure you pack a headlamp, warm clothing (it can get chilly once the sun sets), plenty of water, and snacks. If you have a wide-angle lens, pack that in your bag, too.
When is the Best Time to Avoid the Crowds?
The best time to see Delicate Arch without the crowds is early in the morning, just past sunrise. If you want the chance to have Delicate Arch to yourself (or just share the experience with a handful of people), it’s worth rolling out of bed early and heading right to Delicate Arch.
We visited Delicate Arch just past sunrise on a cloudy December morning. In this case, the clouds worked in our favor. They obstructed the harsh sunlight so I could take photos of the arch without it being too back lit. There were about 10 to 15 people here, which wasn’t too bad, considering it was a holiday week. By the time we started the hike back to the parking lot, more and more people began to roll in.
Delicate Arch was more crowded when we were here in the afternoon in November, but it really wasn’t too bad. There is a lot of room to spread out, but if you want a photo under the arch, you will have to wait in line for a little bit (it was about a five minute wait when we were here).
Don’t Miss the View from the Twisted Doughnut
Tyler gets the credit for “discovering” this spectacular viewpoint. Just before you round the bend to get your first view of Delicate Arch, there is a small opening in the giant rock wall to your right. This arch, called Twisted Doughnut Arch, is one of the most unique spots to take a photo of Delicate Arch.
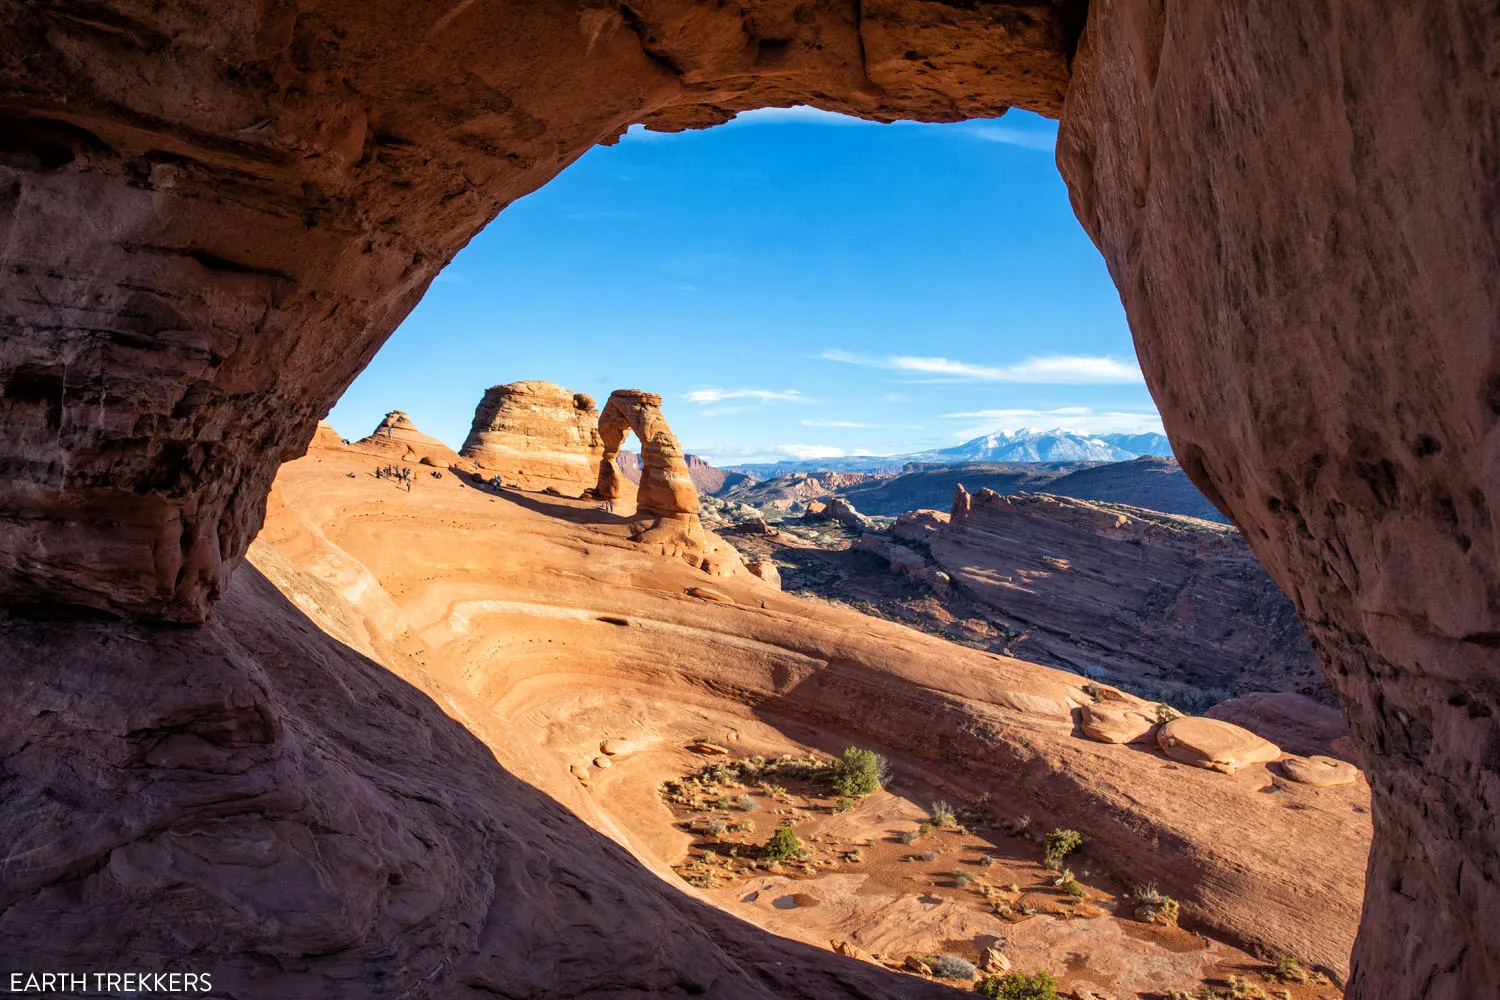
Twisted Doughnut Arch (photo taken in the afternoon in November)
The view from the opening (photo taken in the afternoon in November)
It wasn’t until after our visit that I learned that this little arch has a name (and maybe the best name of all the arches in the park). So no, we didn’t discover it, although I never read anything about Twisted Doughnut Arch before our visit to Arches. Tyler just happened to spot it during our hike.
There’s More than Just the “Iconic Shot”
Rather than just taking a few photos from the first viewpoint, take some extra time to view Delicate Arch from numerous other viewpoints.
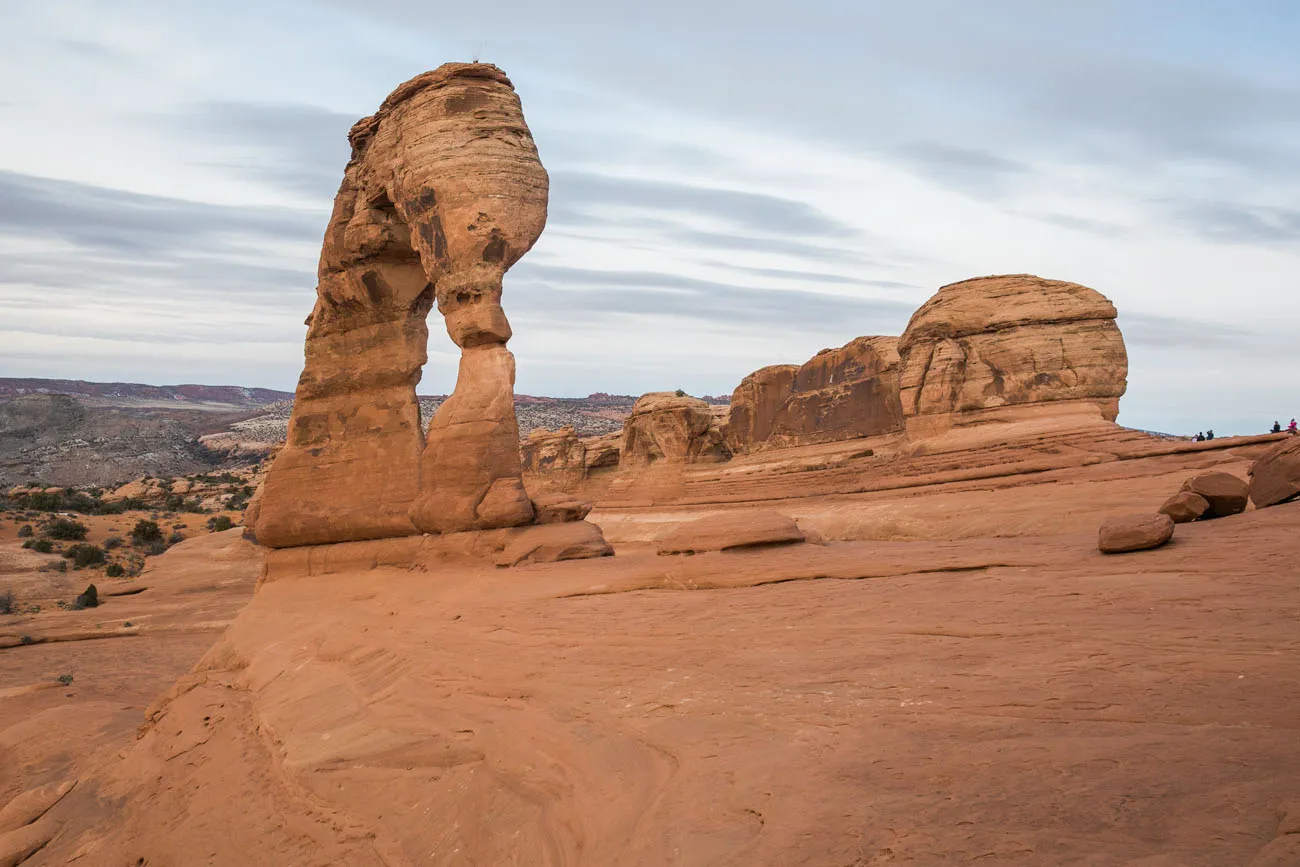
Photo taken at sunrise in December.
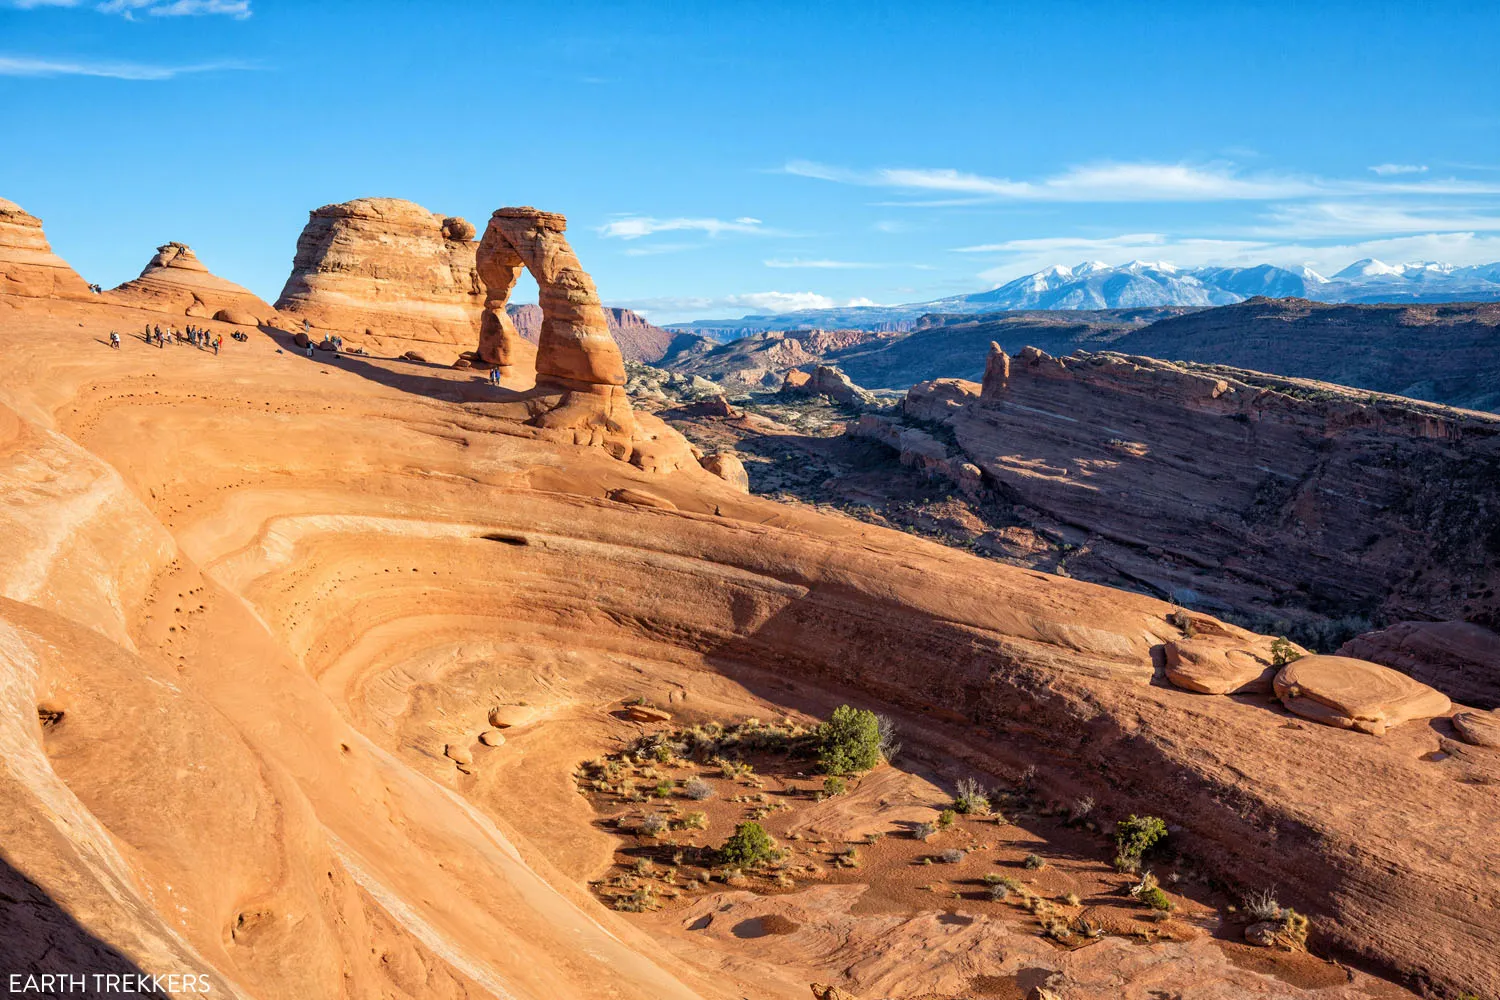
The arch sits next to a large “bowl.” You can walk out to the far end of the bowl for another unique photo of Delicate Arch.
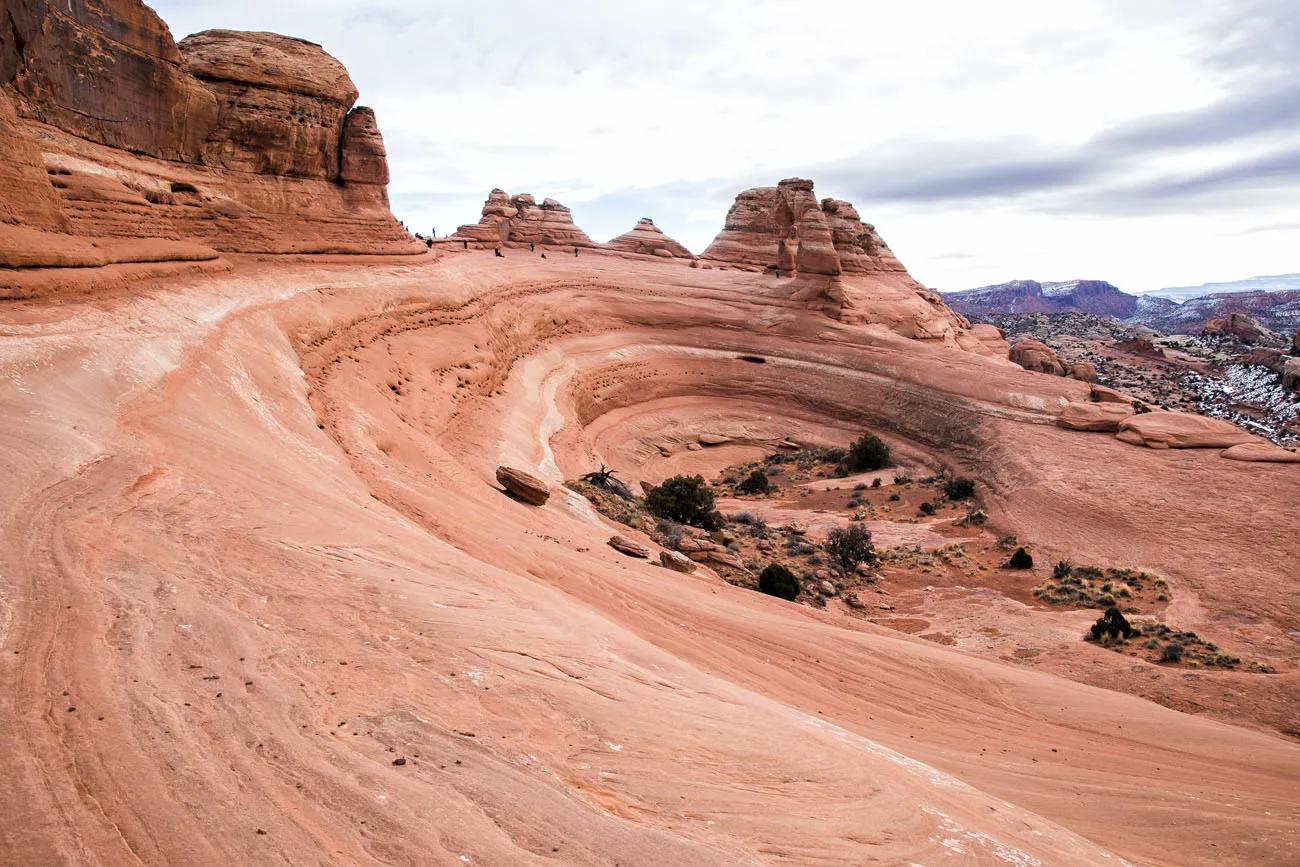
Photo taken at sunrise in December.
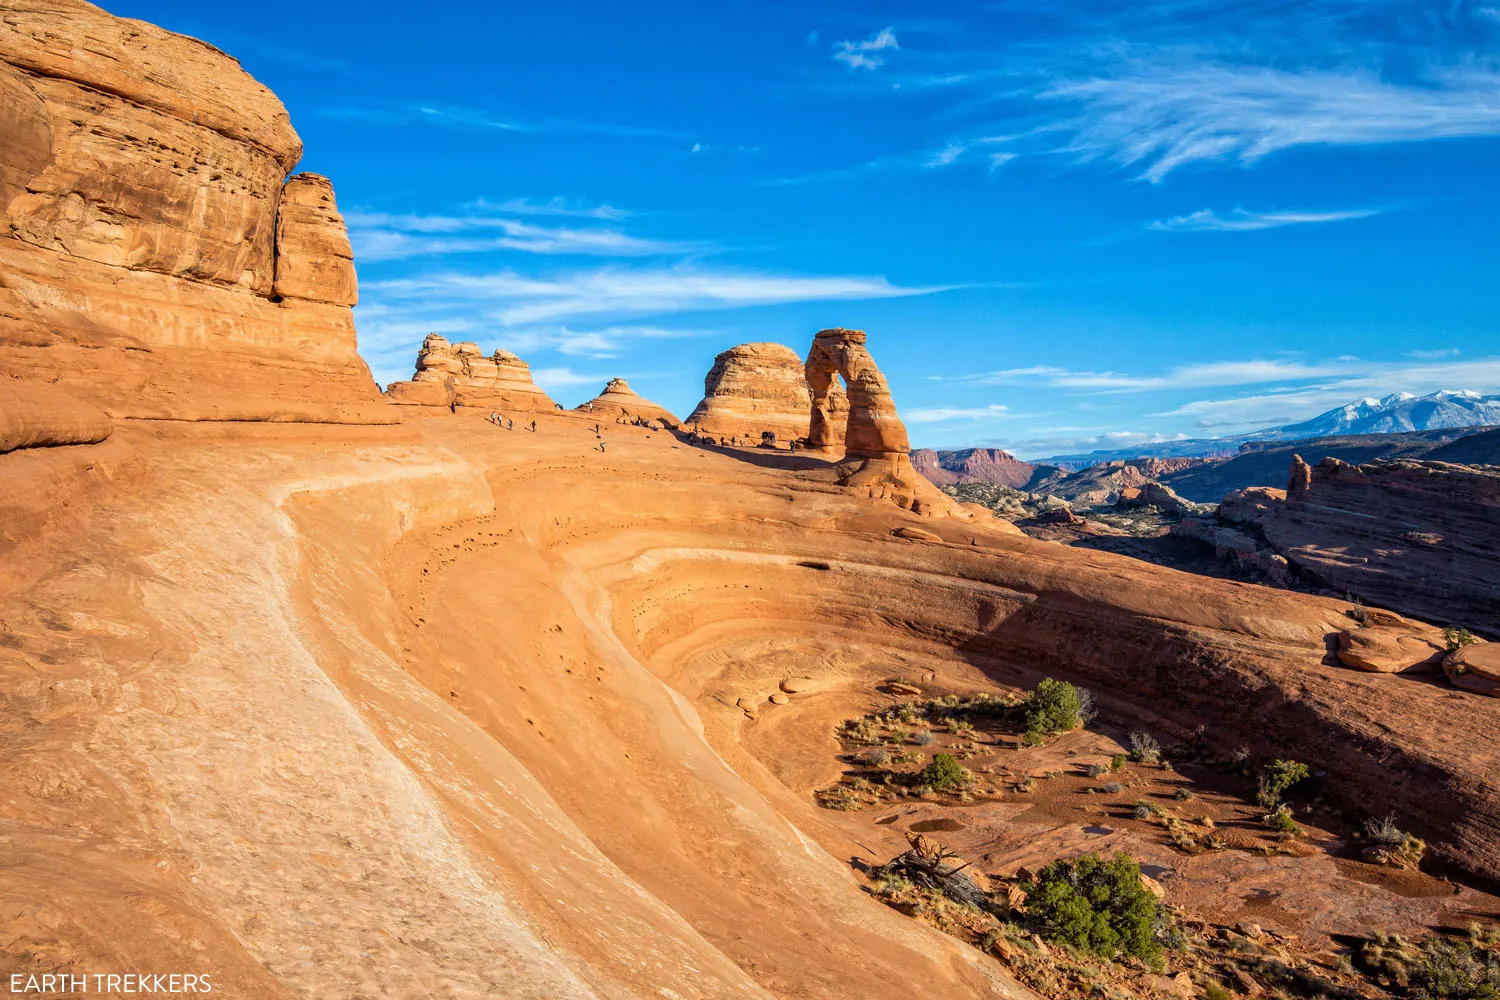
Photo taken in the afternoon in November.
Expect Scorching Hot Conditions in the Summer
During the summer months, Arches National Park can feel like a furnace. In July, average daytime highs hover just below 100°F. On many days, midday temperatures can creep up over the 100° mark. There is zero shade on the trail and the sandstone rock absorbs the heat from the sun, which makes conditions feel even hotter.
If you are visiting from June through August, consider skipping this hike midday. Temperatures begin to cool off around sunset. Or, get here early to avoid the heat (and the crowds).
Bring sunscreen and carry at least 2 liters of water per person.
Before you go, get updated conditions on the National Park Service website.
What Should You Bring on the Hike?
Bring 1 to 2 liters of water per person, snacks, sunblock, and your camera, of course. A good pair of sturdy walking shoes are sufficient.
If you plan to do this hike midday in the summer, sun protection is very important (there is zero shade along the trail), plus bring extra water (at least 2 liters per person).
Essential Hiking Gear: What Should You Bring on a Day Hike?
If you are new to hiking or are curious about what you should bring on a hike, check out our Hiking Gear Guide. Find out what we carry in our day packs and what we wear on the trails.For Your Trip to Arches
We are frequent visitors to Utah and have TONS of guides to help you plan your trip.
BEST OF ARCHES | Get started with our article Best Things to Do in Arches National Park.
ITINERARIES | For a quick visit, don’t miss our guide on how to spend One Day in Arches. On an even quicker visit, learn how to visit Arches and Canyonlands in One Day.
MOAB | Moab is great home base for Arches National Park. In our Where to Stay in Moab article, pick out your home away from home as you explore the national parks.
ROAD TRIP IDEAS | The Utah’s Mighty 5 Road Trip is extremely popular, since it includes all five national parks in Utah. If you slow down, you can go off the beaten path (well worth it!) and road trip through Arches, Canyonlands, and Capitol Reef National Parks. We have even more ideas in our Utah National Parks Itinerary.
If you have any questions about how to hike the Delicate Arch Trail, or questions about photographing Delicate Arch, let us know in the comment section below.
More Information about Utah
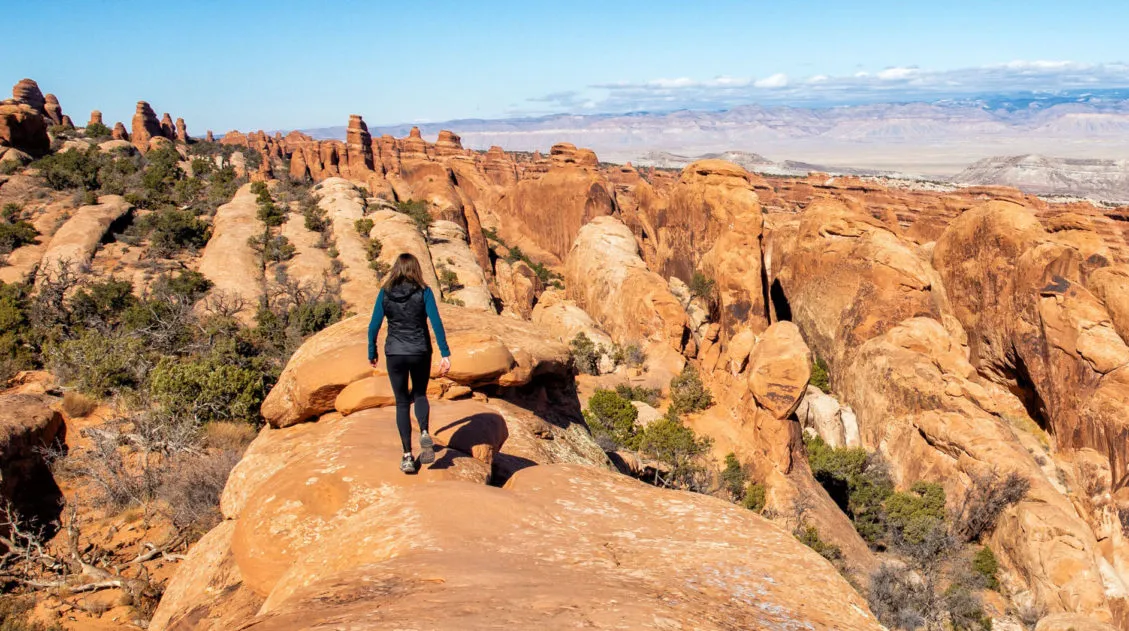
Devils Garden Trail: The Best Hike in Arches National Park
Pinterest Facebook Flipboard The Devils Garden Trail has all of the ingredients for a perfect hike in Arches National Park. If you hike the entire 7.8-mile loop, you get to see eight arches! Along the way, go rock scrambling, hike along fins of sandstone rock, and enjoy some of the best views of the park. […]
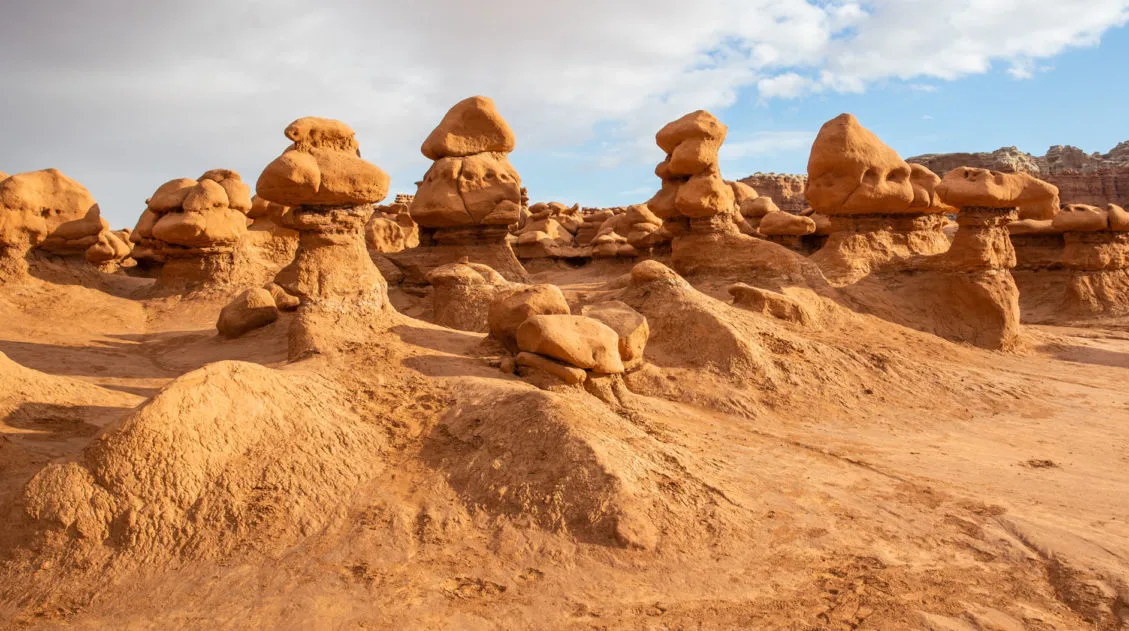
Goblin Valley State Park: Things to Do with Limited Time
Goblin Valley is an easy to visit state park that is located in southeastern Utah. With its hoodoos, toadstools, “goblins,” and short but sweet hiking trails, this park is pure fun to visit. Kids, and kids at heart, will LOVE this park!! The main section of hoodoos and goblins is free to explore…there is no […]

Best Things to Do in Dead Horse Point State Park
Have you ever visited a place where you didn’t quite know what to expect and then it just blew you away? For us, that was Dead Horse Point State Park. Nearby Arches and Canyonlands National Parks get all of the attention (and all of the visitors). When looking for more things to do in the […]
16 Amazing Things to Do in Arches National Park (+ HELPFUL Tips)
Arches National Park is a wonderland of desert vistas, short hiking trails, strange rock formations, and you guessed it, arches. Not only will you find over 2,000 arches here, but you will also see hoodoos, fins of sandstone rocks, massive mesas, and balanced rocks. Here are the best things to do in Arches National Park. […]
Two Week American Southwest Road Trip: Grand Canyon & Utah’s Mighty 5
This is one of the best road trips in the USA. On this American Southwest road trip, you will visit Utah’s Mighty 5, the Grand Canyon, and a handful of wonderful state parks and national monuments. This is the itinerary I wish we had when we planned our first road trip to the American Southwest. […]
One Perfect Day in Canyonlands National Park
Canyonlands is an enormous National Park. Over 330,000 acres are filled with arches, buttes, mesas, canyons, hiking trails, dirt roads, campgrounds, and overlooks. It would take days, weeks even, to fully explore all that Canyonlands has to offer. However, if you only have one day in Canyonlands, you have just enough time to visit the […]
How to Drive the White Rim Road in One Day
Driving the White Rim Road is one of the best experiences in Canyonlands National Park. For 100 miles, this road circles around the Island in the Sky mesa, taking you past canyons, buttes, and the Colorado and Green Rivers. This drive takes most people two to three days. If you have less time, it is […]
The Ultimate Arches and Canyonlands One Day Itinerary
Canyonlands and Arches are two national parks that sit side-by-side near Moab, Utah. Since these parks are neighbors, it is possible to visit both of them in one very busy day. In this guide, we cover the best way to spend one day in Arches and Canyonlands National Parks. We are frequent visitors to this […]

Best of Bryce: 8 Amazing Things to Do in Bryce Canyon
Bryce Canyon is the smallest national park in Utah. Despite its small size, there is still a lot to do here. Walk the Rim Trail, gaze across the amphitheater from numerous overlooks, go on a scenic drive, and journey below the rim to venture into a sea of hoodoos…these all top the list of things […]
12 Amazing Things to Do in The Needles, Canyonlands National Park
The Needles is an often overlooked section of Canyonlands National Park. But those who take the time to visit the Needles are rewarded with thrilling, unique hiking trails, low crowds, and jaw-dropping views of Canyonlands National Park. In this post, we cover the 12 best things to do in the Needles…12 great reasons why this […]
6 Epic Utah Road Trip Routes for Your Next Adventure
Utah is home to five of the most stunning national parks in the United States. Throw in some national monuments and a few spectacular state parks and you have a extraordinary road trip destination. If you are planning a Utah road trip itinerary, we have tons of information to share with you. About Our Experiences […]
One Perfect Day in Arches National Park (+ Avoid the Crowds)
If you only have one day in Arches National Park, what should you do? Arches National Park is a relatively small national park with a handful of must-see sights. With one day in Arches, you can visit these top sights and a few off-the-beaten-path places. After multiple visits to Arches National Park, we have learned […]
14 Amazing Things to Do in Capitol Reef National Park
Capitol Reef, often an overlooked national park, is full of many wonderful surprises. With two amazing scenic drives, hiking trails that rival those in Zion, rugged, remote areas to explore by 4×4, short, easy slot canyons, historical landmarks, and even delicious pie, this national park is absolutely amazing. In this post, learn about the best […]
US National Parks List: All 63 Parks, Map & Free Printable Checklist
There are 63 national parks in the United States, and we’ve visited 56 of them, from the remote wilderness of Denali to the coral reefs of the Virgin Islands. We’re a family of avid hikers who have spent over a decade exploring these parks, from multi-day backcountry trips to scenic drives with kids in tow. […]
Arches, Canyonlands and Capitol Reef: 7 to 10 Day Road Trip Itinerary
Arches, Canyonlands, and Capitol Reef National Parks are three spectacular parks to visit in Utah. With 10 days, you can visit each of them, plus a few more cool spots, on this epic road trip. Tim and I did this road trip in November 2020. Prior to this trip, we had already visited each of […]

United States Travel Guide: Places to Visit in the USA
Plan your visit to the United States. Learn about the best things to do, how to plan your time, road trip ideas, and sample itineraries.


Comments 24