
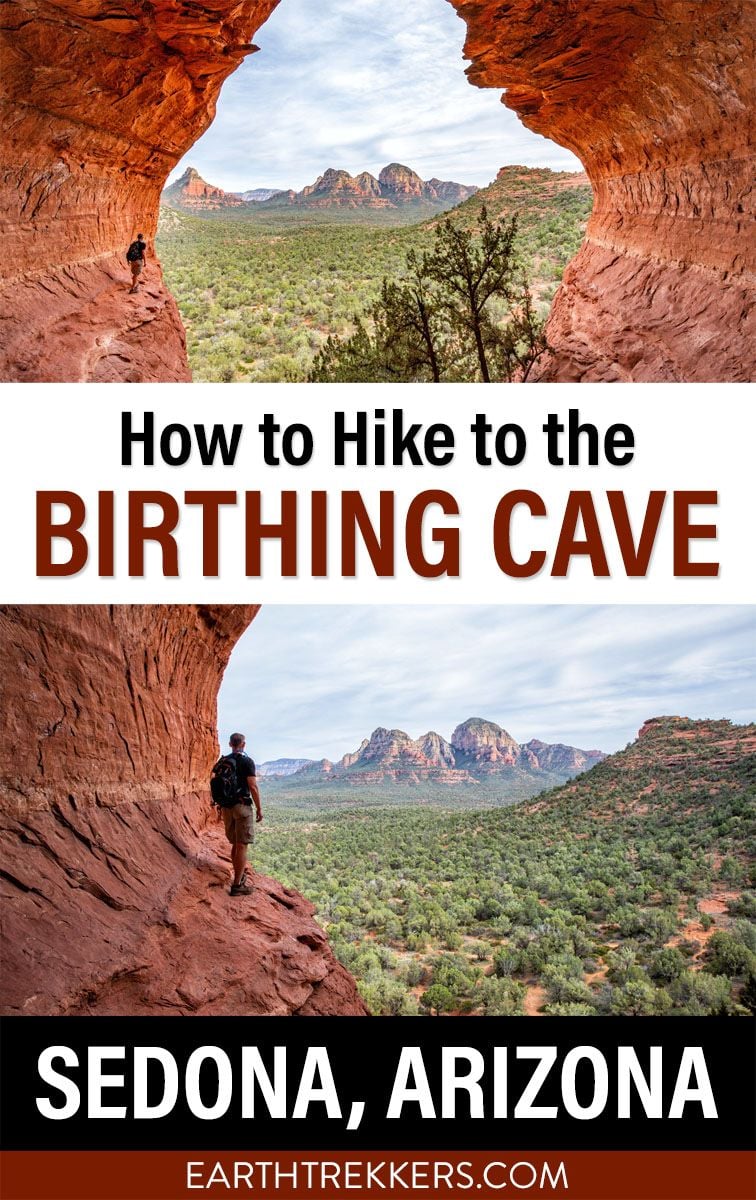
In Sedona, there are many hidden caves to hike to. The Birthing Cave is one of the fastest and easiest to visit.
Round trip, this hike comes in at 2 miles and most people can do this in about an hour, if you move fast. However, the trick is finding parking (this is a very popular hike in Sedona) and then photographing the cave.
This is a short, fun hike in Sedona. Here’s how to do it and come away with some epic photos.
Birthing Cave Hiking Stats
Distance: 2 miles round-trip
Total Ascent: 250 feet
Difficulty: Easy until you get to the cave; climbing up into the Birthing Cave is moderate to difficult
Length of Time: 1 to 2 hours
Trailhead: Long Canyon Trailhead
Location: West Sedona
When to Go: All year. The best time is the spring and fall, when temperatures are mild, but expect big crowds. During the summer, expect very hot temperatures but lower crowds. In the winter, temperatures can get below freezing but crowds are also lower.
Red Rock Pass: A Red Rock Pass is not required for this hike.
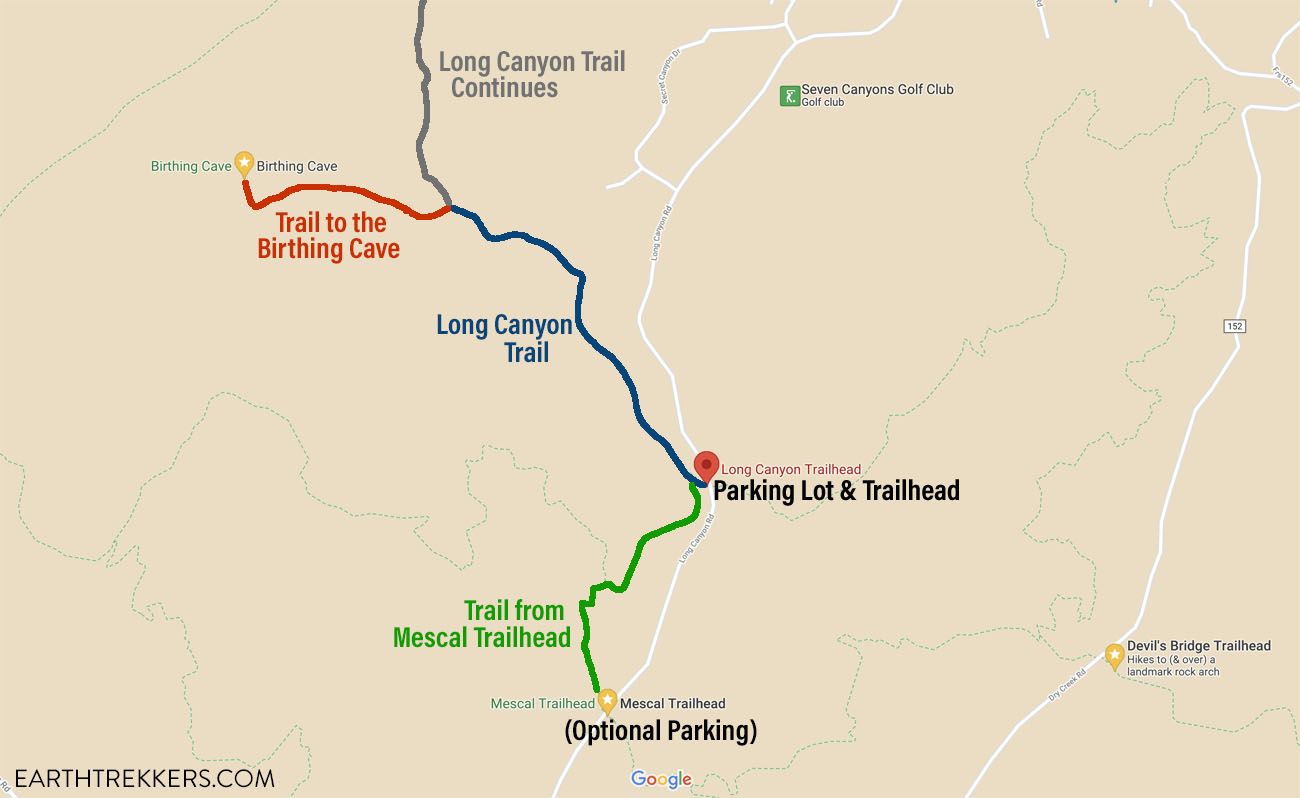
Map of the Birthing Cave hike. The blue trail is the Long Canyon Trail. At the split, stay left to continue on the red trail to the Birthing Cave. The green trail is the connector trail between the Mescal Trailhead and Long Canyon Trailhead.
Please practice the seven principles of Leave No Trace: plan ahead, stay on the trail, pack out what you bring to the hiking trail, leave areas as you found them, minimize campfire impacts, be considerate of other hikers, and do not approach or feed wildlife.
How to Hike to the Birthing Cave
Step-By-Step Trail Guide
Getting to the Trailhead
Park at the Long Canyon Trailhead, which is located on Long Canyon Road. This parking lot is very small, with enough room for just several cars. Overflow parking is located along the shoulder of Long Canyon Road but this is also very limited. There are no toilets at this trailhead.
If you cannot find a parking space, you can try the nearby Mescal Trailhead, which is also located on Long Canyon Road. There is a trail on the west side of Long Canyon Road that connects Mescal Trailhead to Long Canyon Trail (the Mescal Connector). This trail is 0.5 miles one-way.
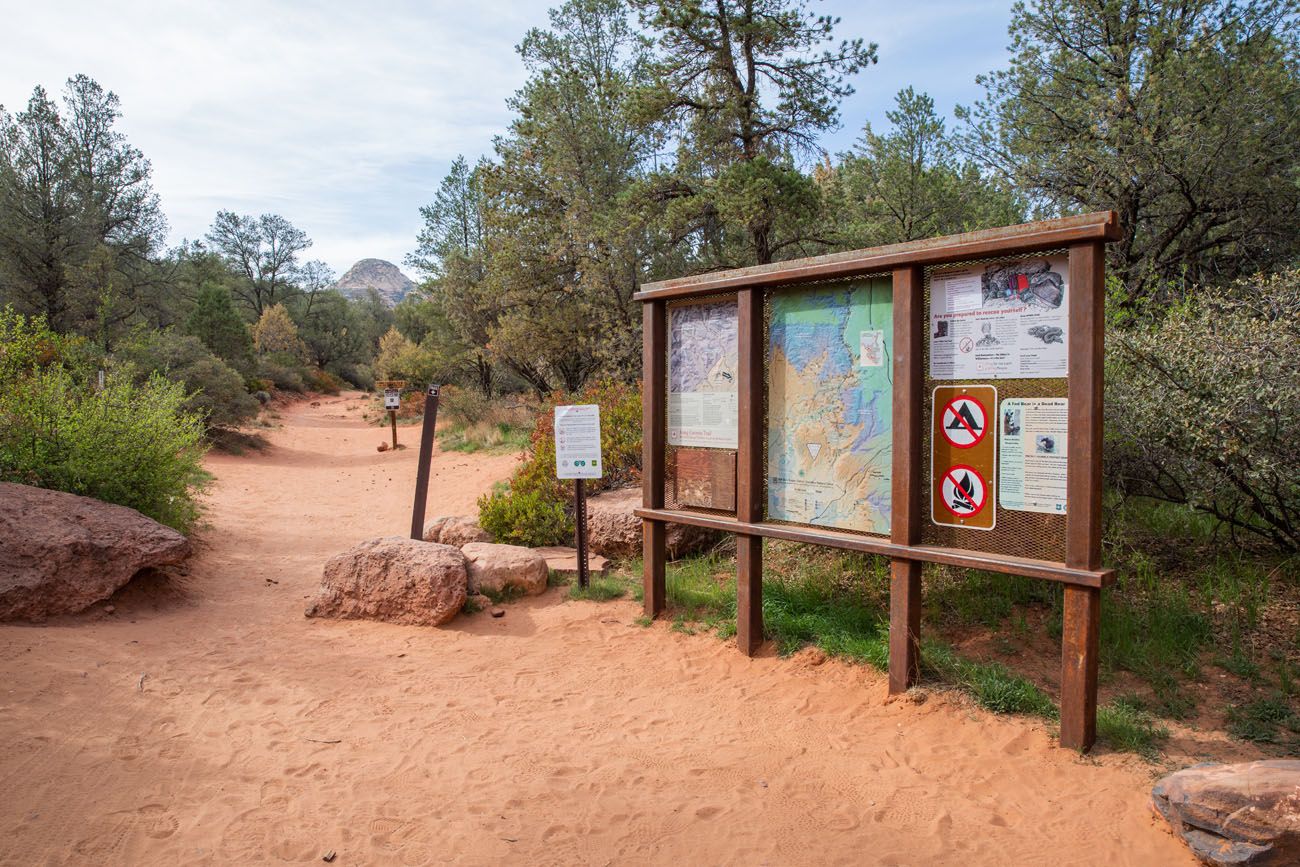
Long Canyon Trailhead
Hiking to the Birthing Cave
For the majority of this hike, you will be walking on a wide, flat, sandy trail. It’s not until the very end when the trail gains any real elevation. From the parking area, it’s a quick walk to get to the cave. On this hike, most of your time will be spent enjoying the view and taking photographs.
From the Long Canyon Trailhead, walk on the Long Canyon Trail for 0.6 miles. At this point, there will be a wooden fence in front of you. Just before you reach this fence, turn left onto an unmarked narrower trail. You will now be walking towards the red cliffs.
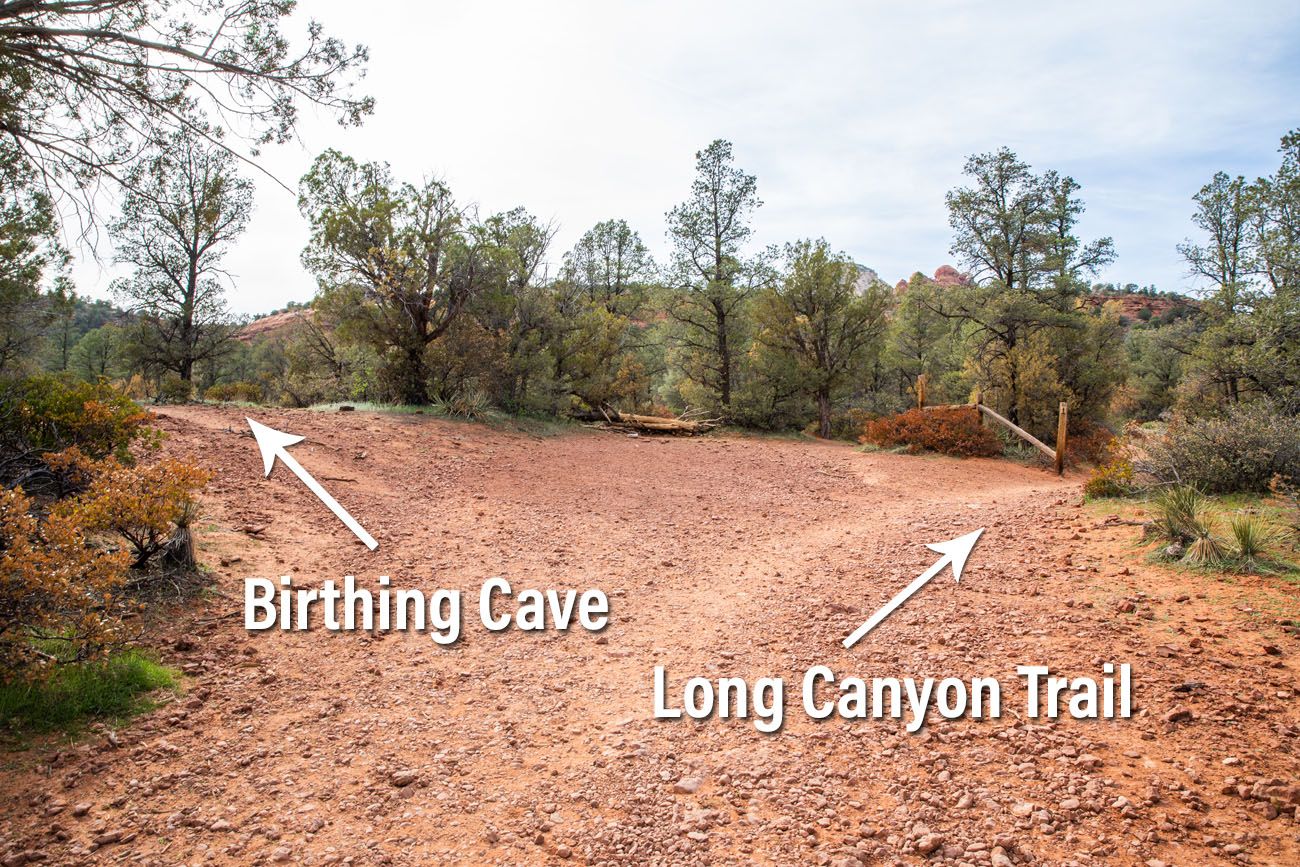
This is the trail split at 0.6 miles into the hike. Go left to hike to the Birthing Cave.
Follow this narrow trail for 0.3 miles. As you get closer to the cliffs, look for a trail to the right that leads up into the cliffs. Or, just listen for the sounds of talking and laughter from those who already made it to the Birthing Cave.
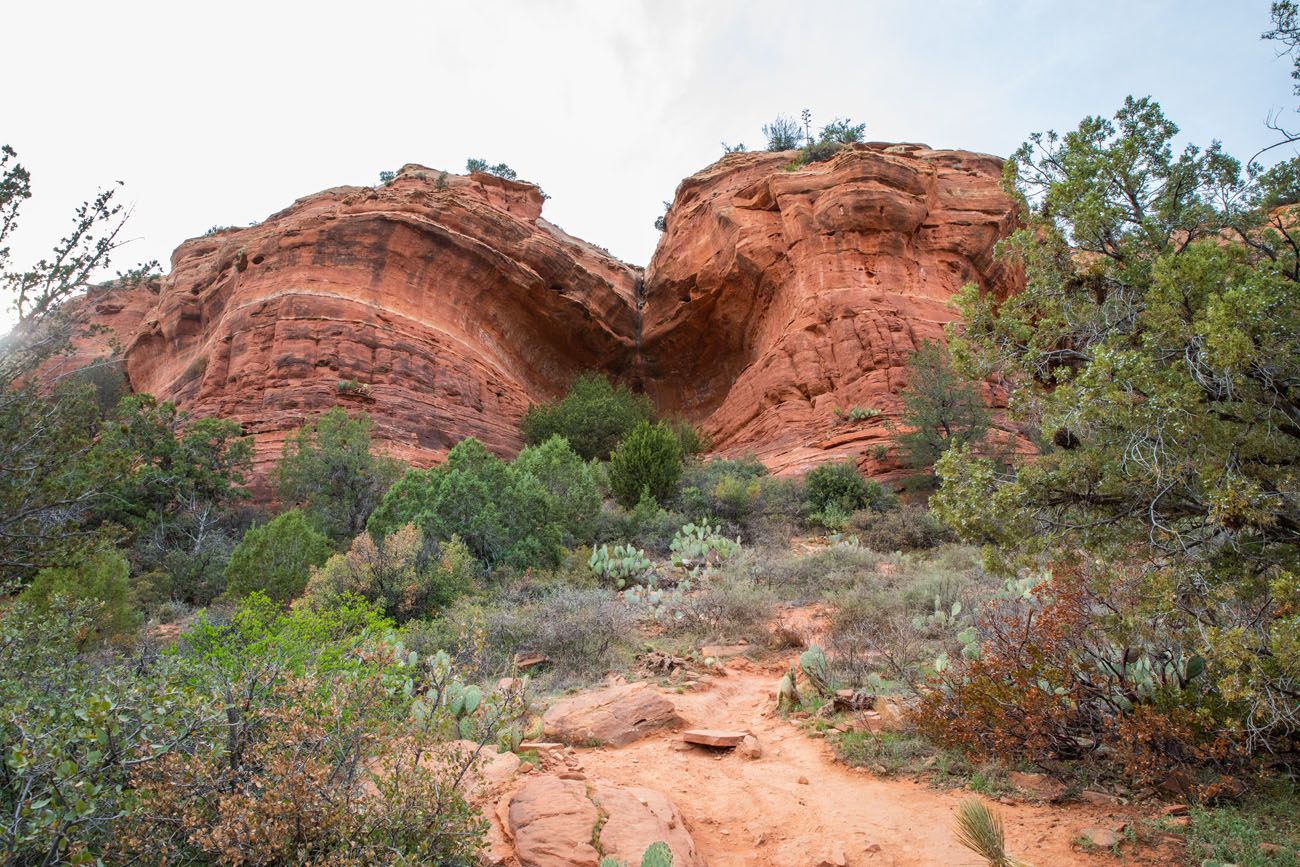
This is the trail that leads up to the Birthing Cave. Keep an eye out for this heart-shaped depression, which is the Birthing Cave.
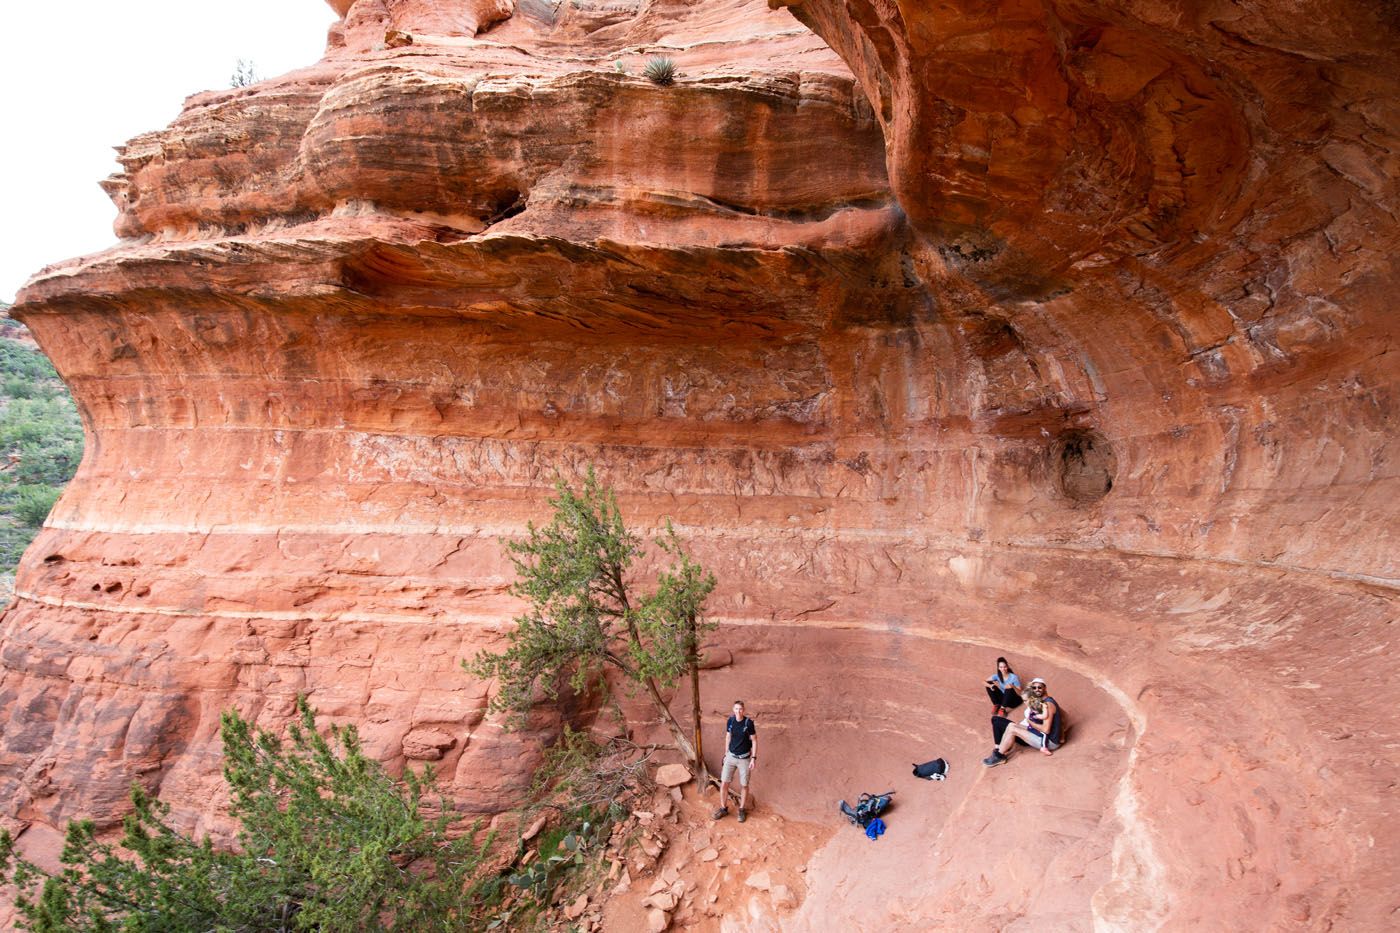
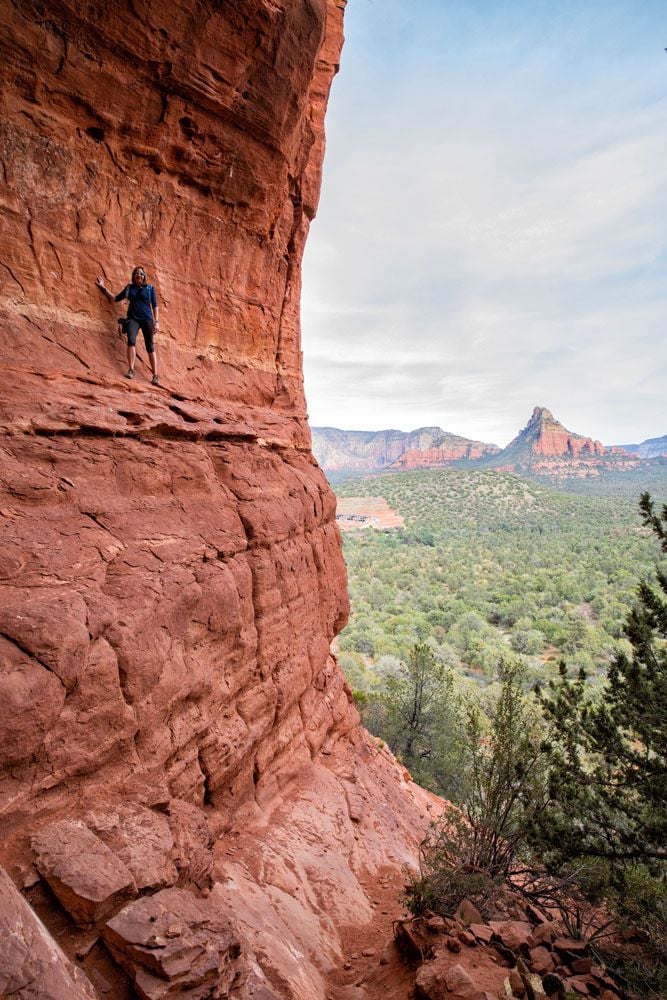
This trail to the Birthing Cave is very obvious and almost impossible to miss. What you are looking for is a heart-shaped depression in the cliffs, which is the Birthing Cave. At this point, it is a short, moderate climb to get up to the cave.
Inside the Birthing Cave
Now that you are here, what do you do?
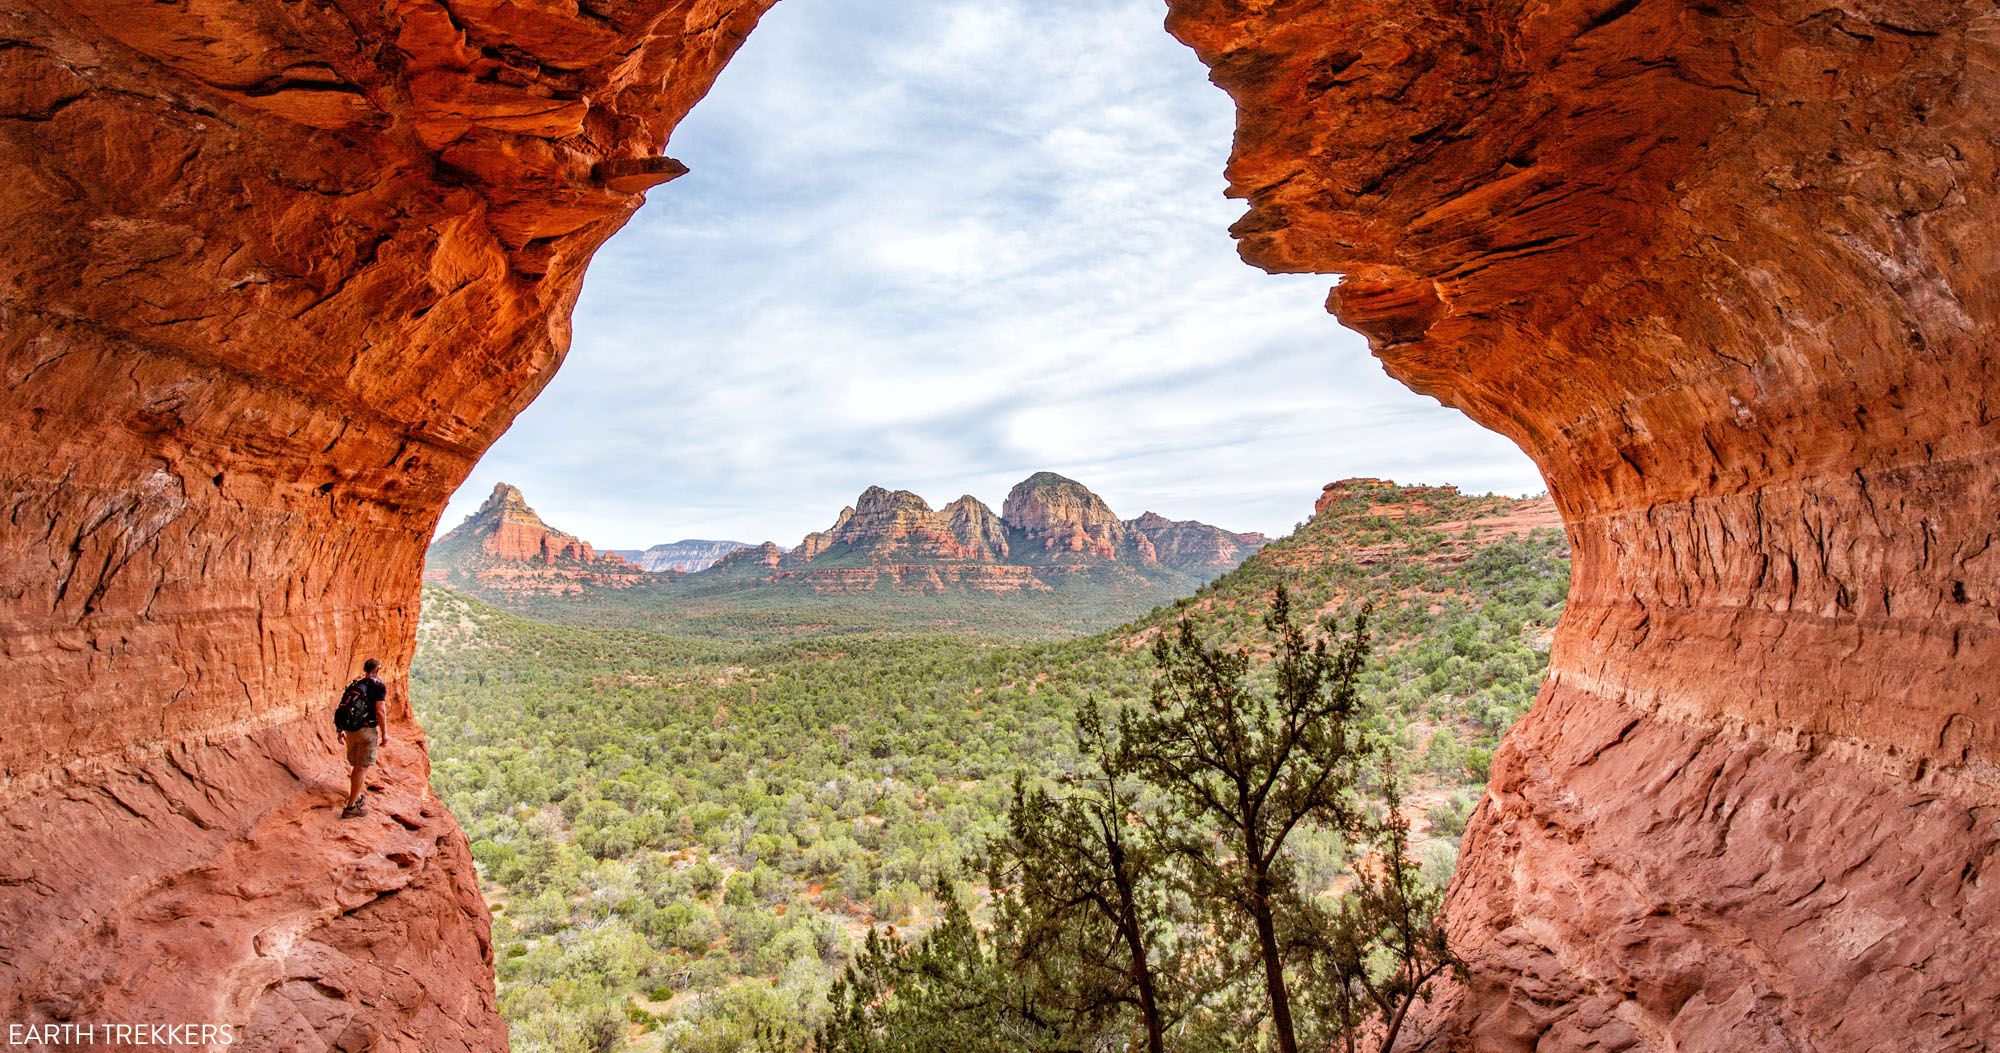
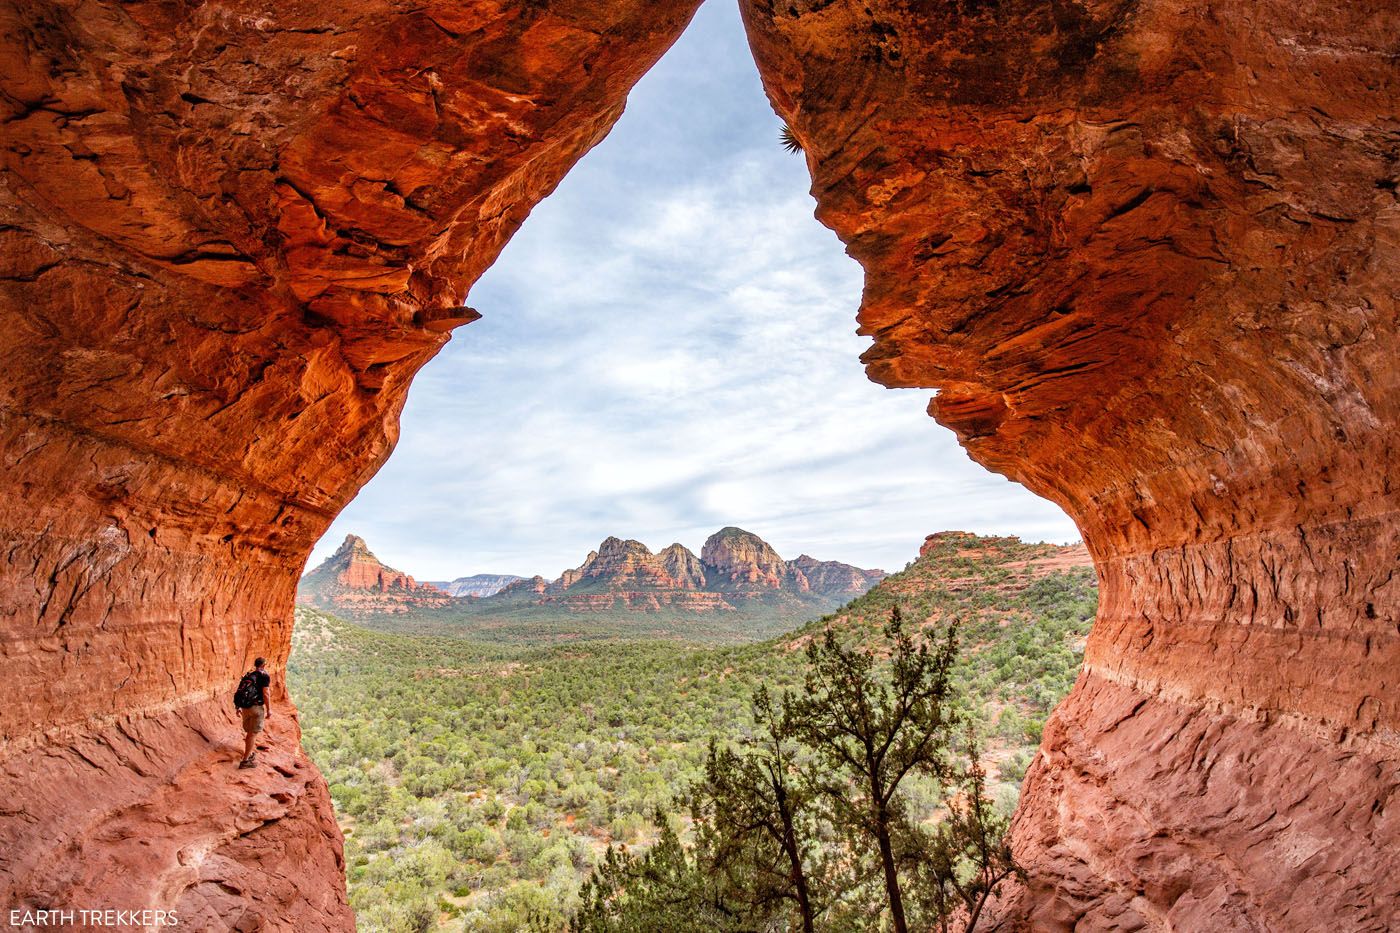
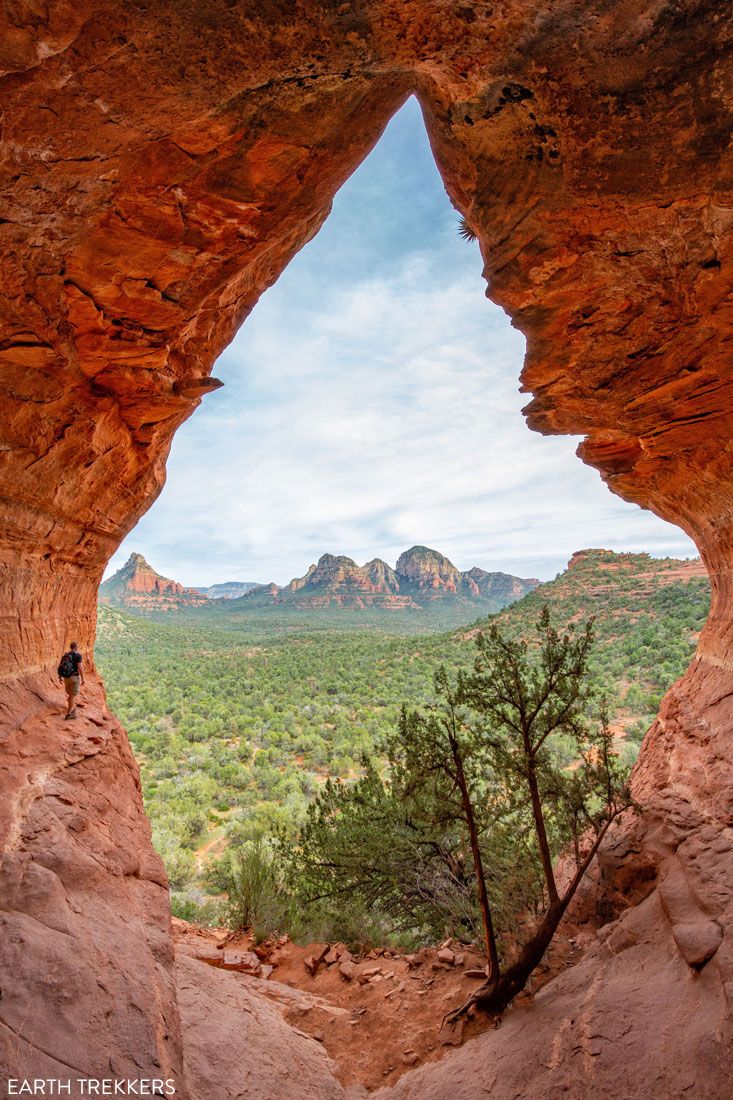
From the entrance of the cave, you can turn around and look out for sweeping views of the red rocks of Sedona. For the best view (to get higher than the shrubs and short trees at the cave entrance), you will have to climb up onto the cave walls. You don’t have to go far, just three or four feet to the first ledge, for better views from the cave.
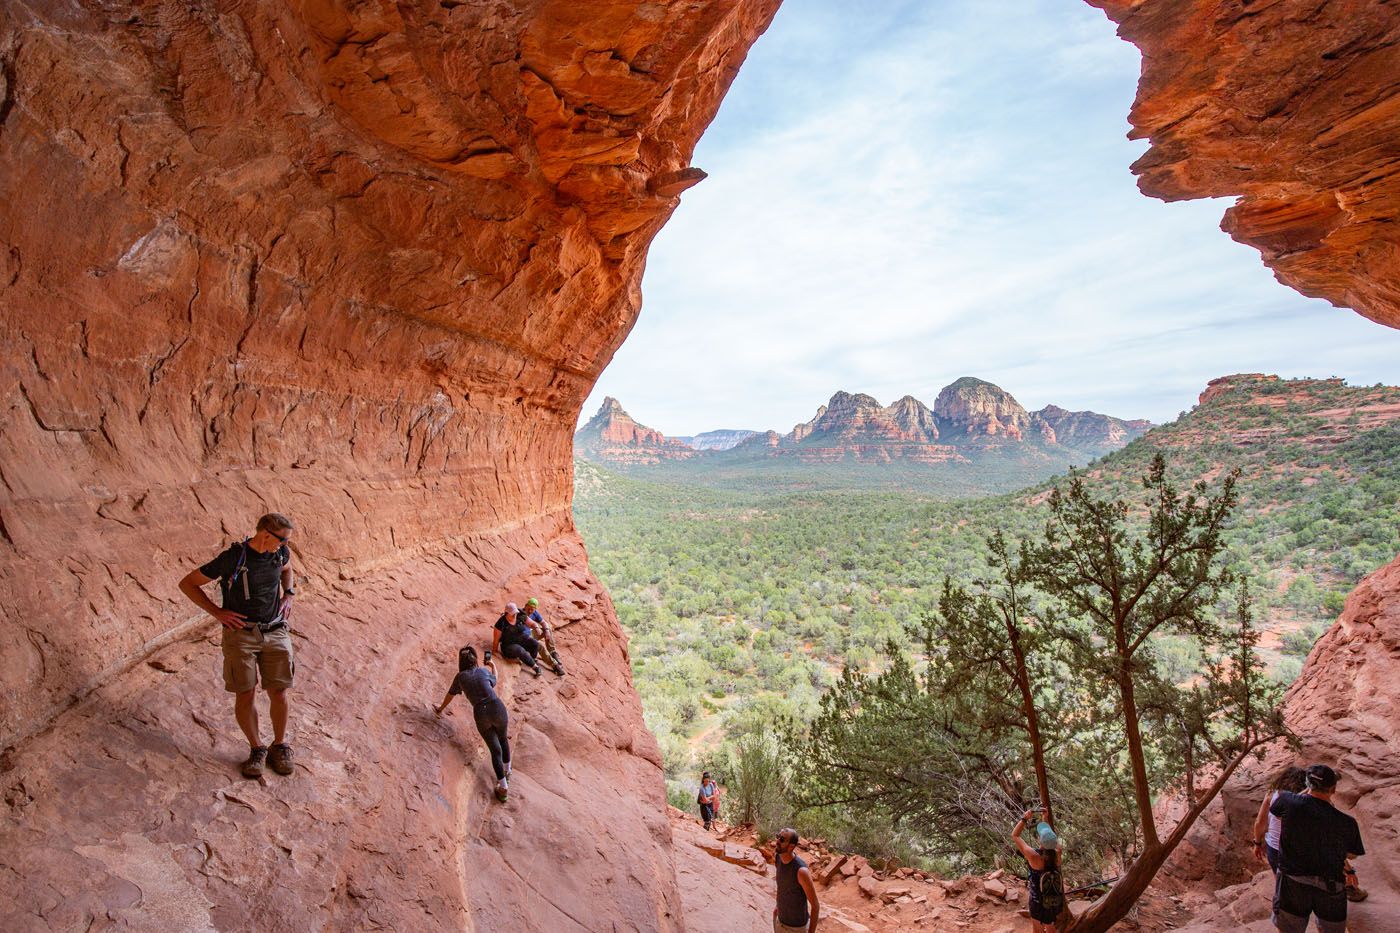
Inside the Birthing Cave
The walls of the cave are a smooth slickrock. There is very little to hold onto as you climb up, so wearing a good pair of hiking shoes with traction is highly recommended.
You don’t have to go up very high for great views out of the cave. However, if you are sure-footed, it’s worth it to climb up to the higher levels. Just be very careful because it is slippery. If you choose to hike out onto the ledges, which are at the edge of the cave entrance, it will be a long fall to the ground below. So again, be very careful here.
Why is it called the Birthing Cave? There are several theories as to why this cave is called the Birthing Cave. One theory states that the indigenous Hopi people sent pregnant women here when it was time to give birth. But if you look at photos of the cave, it resembles part of the female anatomy, which several of our Facebook fans immediately picked up on when we posted these photos.
How to Photograph the Birthing Cave
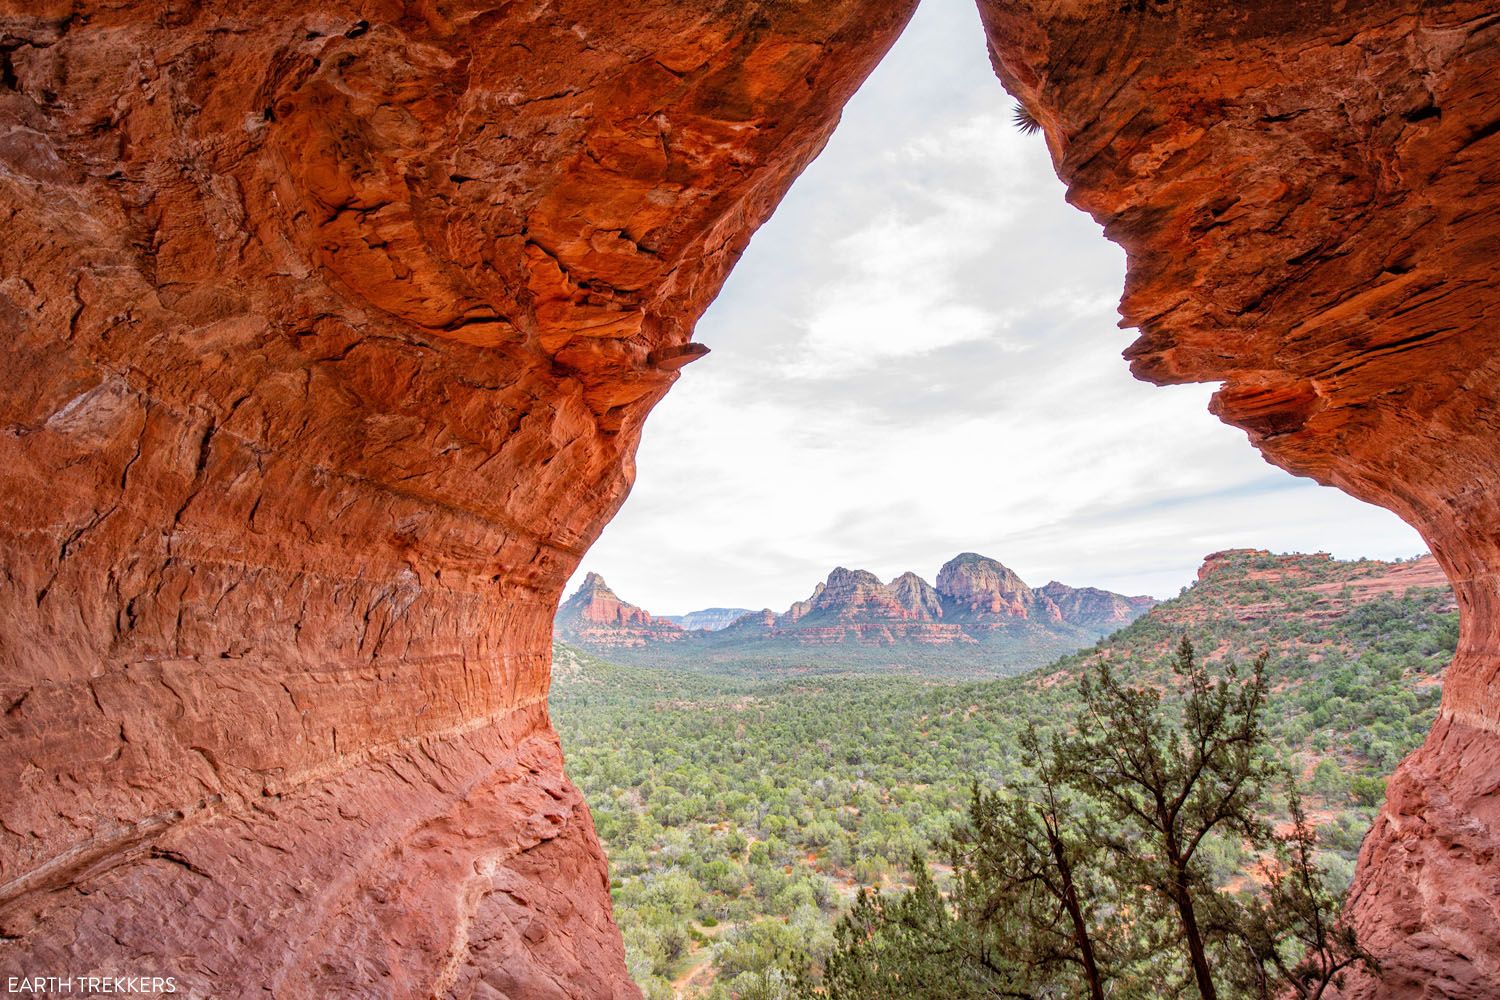
If you want to capture a photo of the entire cave entrance, the best place to do this is at the circular depression at the back of the cave. To get our photo of the Birthing Cave entrance, I used a Canon 5D Mark III camera with a 16 – 35 mm lens. I was able to get the entire cave in one shot at 16 mm. I also tried out the panorama feature on my iPhone from the same vantage point, but this cut off the sides of the cave walls and it distorted the appearance of the cave.
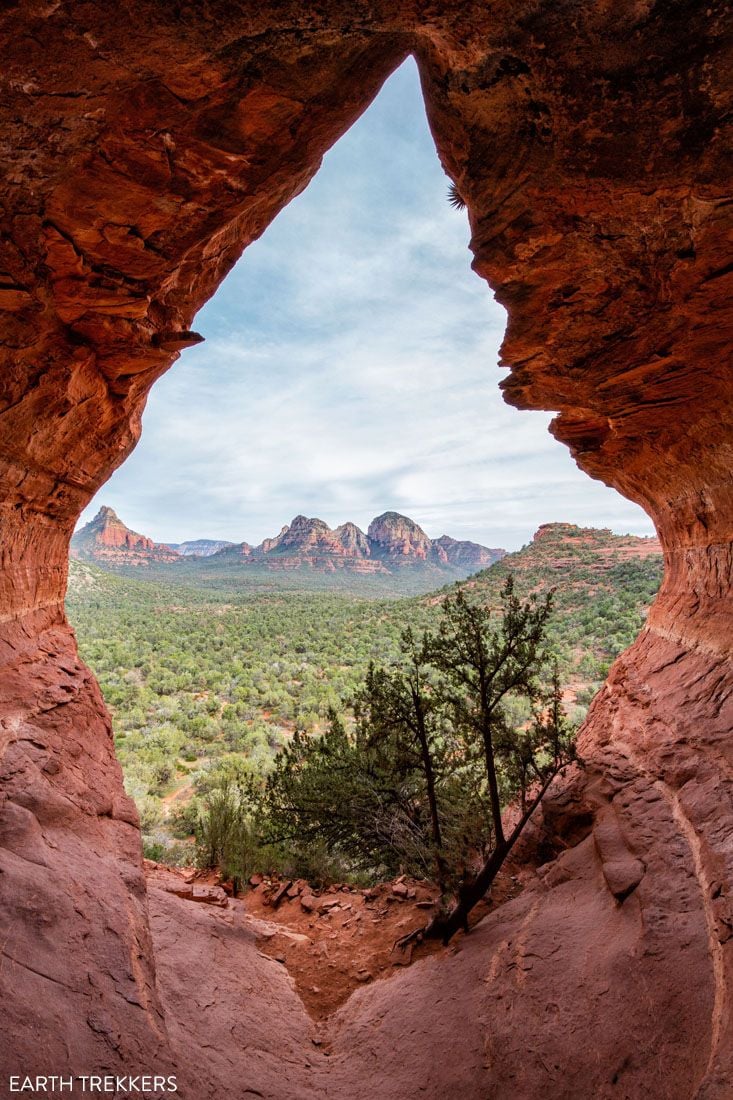
So, if you want to get a photo of the entire Birthing Cave entrance, you will need a wide angle lens and be prepared to climb up to the back of the cave.
Just note, it is very slippery climbing up here. Put your camera in your backpack or carry it on a strap so you can climb up, using both hands, to this photo spot.
Want to learn more about our photography gear? Click here to visit our Photography Gear Guide.
Photos of the Birthing Cave
Below are photos from inside the Birthing Cave.
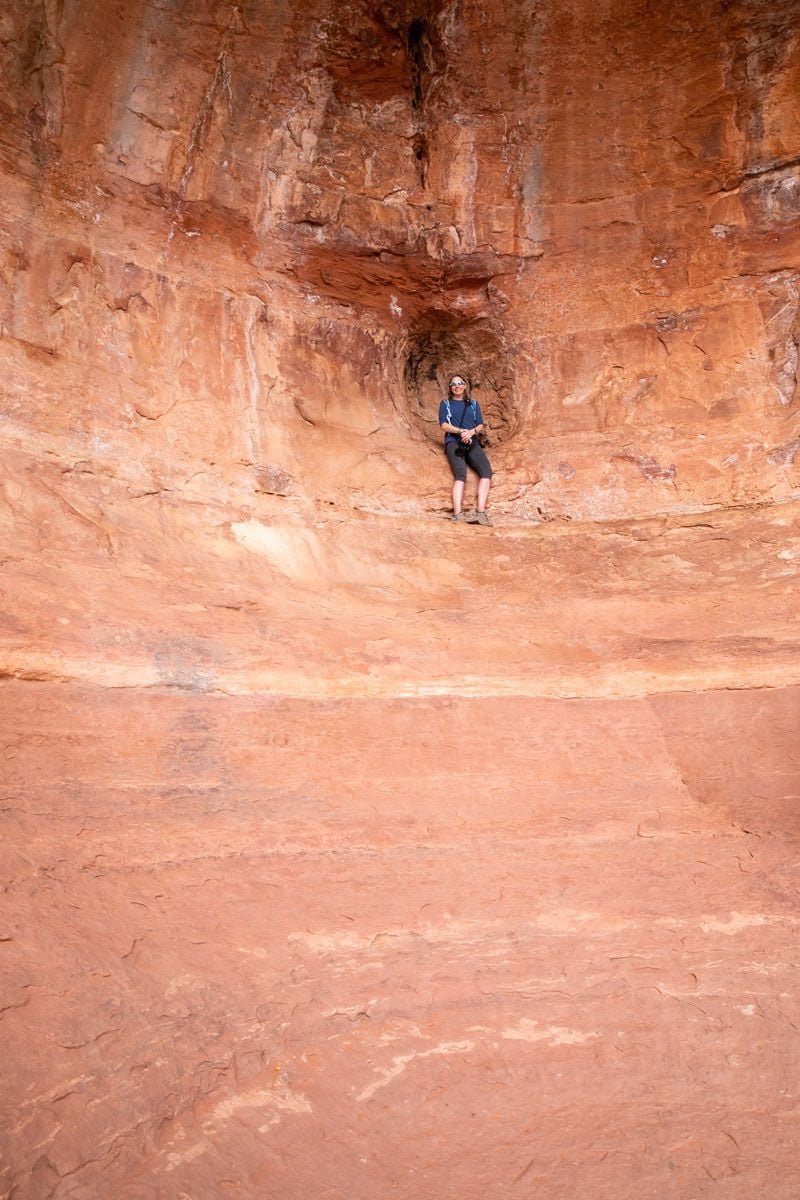
I am sitting at the circular depression on the back wall of the cave. From here, you have the best angle to get a photo of the entire cave.
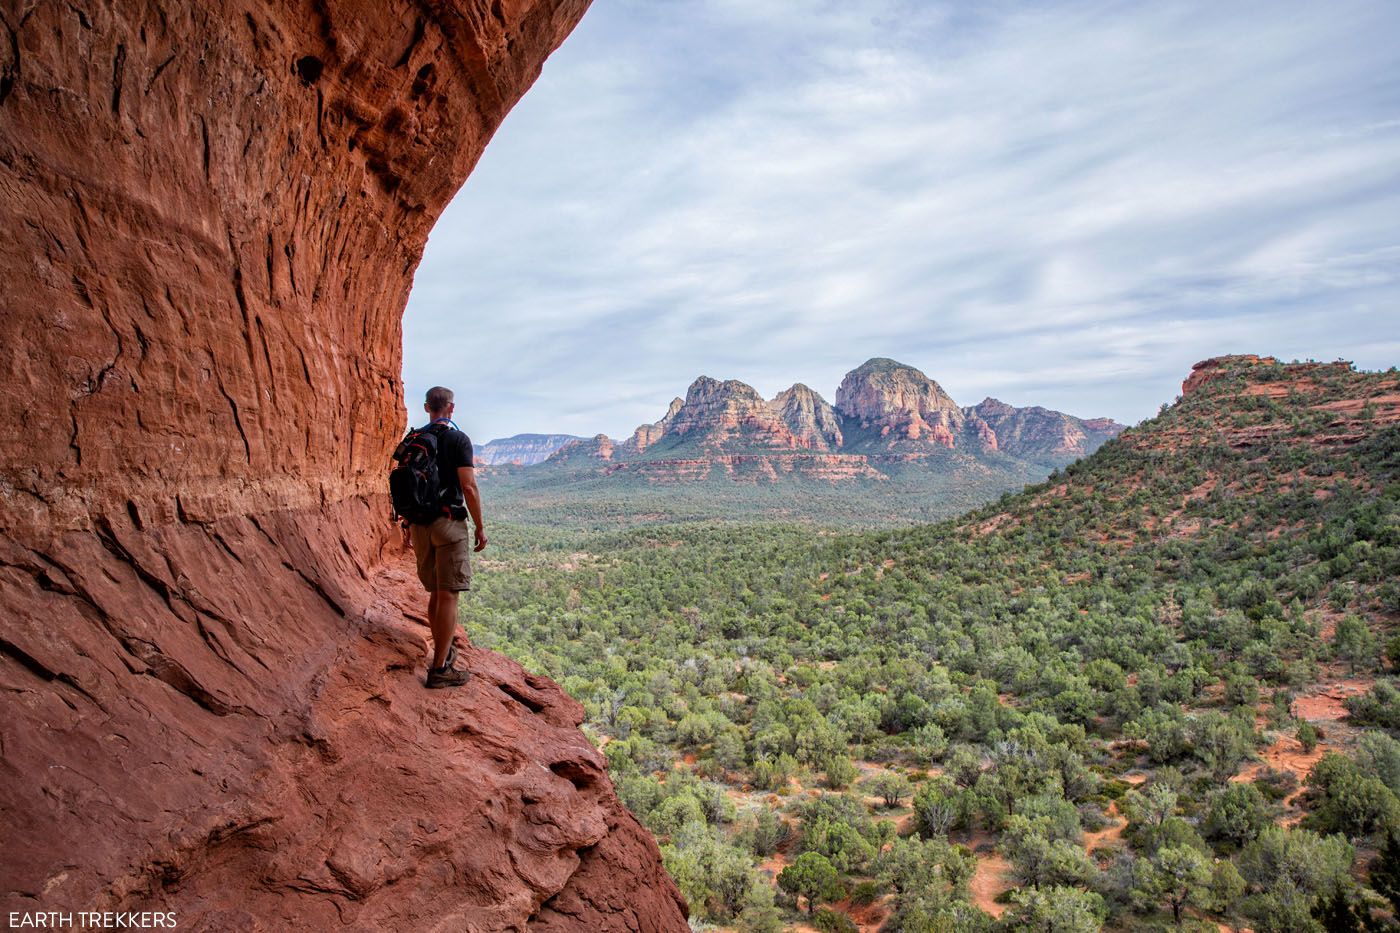
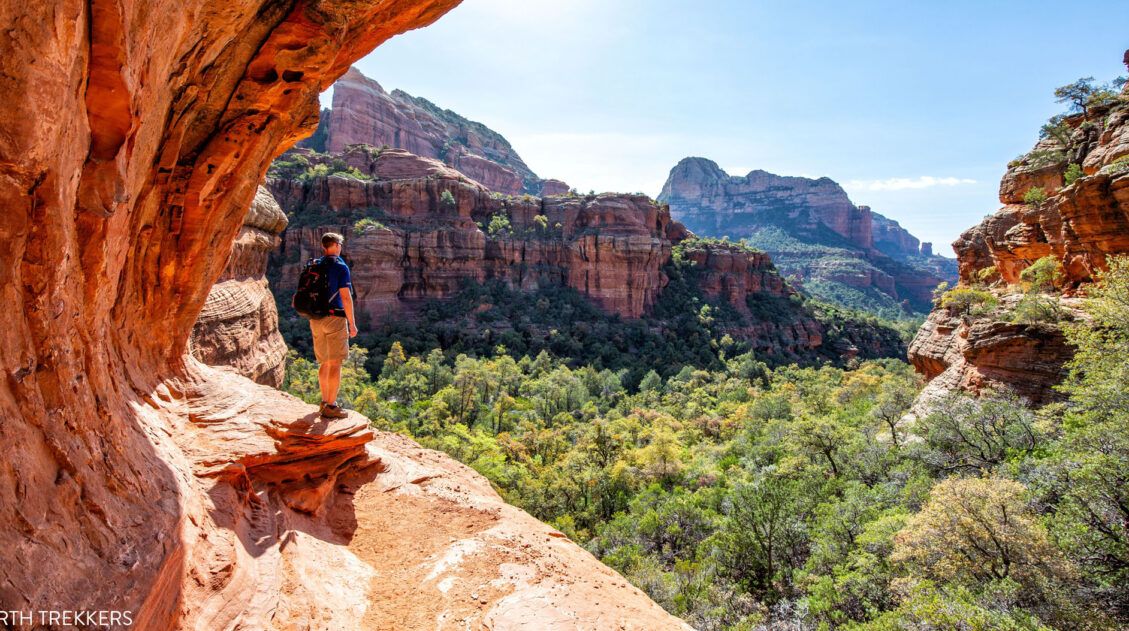
Looking back at the Birthing Cave from the left ledge.
I am standing on the left ledge of the cave. If you do this, be very careful, as it’s a big drop if you slip.
One more view of the cave.
Finishing the Hike
To end the hike, retrace your steps back to the Long Canyon Trailhead. If you hike fast, this takes about 20 minutes.

Best Time of Day to Visit the Birthing Cave
We were here at 4:30 pm in April, a great time to visit the Birthing Cave. By mid to late-afternoon, crowds begin to lessen on the Sedona hiking trails. This time of day is also a great time for photography from this cave.
The cave faces southeast, so in the afternoon the cave is in the shade and the red rocks that you see from the cave are lit up by the late afternoon sun. If you are here for sunset, I think it would be beautiful.
We were not here in the morning, but based on the direction that the cave faces, I think early morning would be a hard time to take photos, as you would be looking directly into the sun.
Midday, from 9 am to 3 pm, expect big crowds on the trails and inside the cave.
Tips to Have the Best Experience
Leave No Trace. Practice the seven principles of Leave No Trace. This includes packing out what you bring to the hiking trail, be considerate of other hikers, and stay on the trail.
Be prepared to spend at least 15 minutes at the Birthing Cave. There will most likely be other groups of people here, and some of them will be scrambling up to the “best photo spot,” so expect to wait your turn to do the same.
Be very careful inside the Birthing Cave. If you are not wearing proper footwear, are afraid of heights, or just feel uneasy hiking up the cave walls, skip it. It’s not worth risking injury just to get a photo.
What to Bring on the Hike
Hiking shoes. You can get by with a good pair of walking shoes or running shoes for this hike. However, if you plan to climb up into the Birthing Cave, I recommend wearing hiking shoes. The extra traction on hiking shoes will make your climb up into the cave and on the cave ledges much easier and safer.
Water and snacks. Bring at least 1 liters of water in the summer.
Sunscreen, hat, and sunglasses. There is very little shade on the trail. The cave is shaded from the sun midday and in the afternoon.
Camera. Even a smartphone will do. Use the panorama feature to capture as much of the cave as you can.
Essential Hiking Gear: What Should You Bring on a Day Hike?
If you are new to hiking or are curious about what you should bring on a hike, check out our Hiking Gear Guide. Find out what we carry in our day packs and what we wear on the trails.If you have any questions about how to hike to the Birthing Cave, let us know in the comment section below.
More Information for Your Trip to Sedona
Learn more about Sedona in our Sedona Travel Guide, where we list more great hikes to do, where to stay and eat, and provide sample itineraries in Sedona, whether you have just one day, two days, or much longer.
If this is part of a bigger road trip through the USA, visit our United States Travel Guide and our Arizona Travel Guide for more inspiration and travel planning tips.
12 Best Sedona Hikes, Ranked Shortest to Longest
Pinterest Facebook Flipboard If you are looking for an epic hiking destination, it’s tough to beat Sedona, Arizona. With its red rock scenery, arches, hidden caves, and network of hiking trails, this is a great place to explore on foot. Add in the abundance of top-notch hotels and restaurants in Sedona and you have an […]
Sedona Itinerary | Best Way to Spend 1 to 6 Days in Sedona
There are many different ways to piece together a Sedona itinerary. Your perfect itinerary depends on your traveling style. Whether you are an avid hiker, a family traveling with kids, or someone who wants to experience Sedona without spending time on the hiking trails, we have some great suggestions for you. In this guide, learn […]
15 Amazing Things to Do in Sedona (Beyond Just Hiking the Trails)
What do you look for when picking the perfect vacation spot? Outdoor adventures? Shopping? Wineries? Great restaurants? Beautiful sunsets? A fun place to take the kids? What if I told you that you could get all of these in one place…Sedona, Arizona. In this article, learn about the best things to do in Sedona with […]
How to Hike to Cathedral Rock in Sedona, Arizona
Hiking to Cathedral Rock is an essential experience in Sedona. This hike is short and sweet, and with some rock scrambling and jaw-dropping views, it’s tons of fun from start to finish. Cathedral Rock is one of the most popular hikes in Sedona. Do not expect solitude on this trail. This experience is much more […]
How to Hike the Brins Mesa – Soldier Pass Loop in Sedona
The Brins Mesa and Soldier Pass Loop combines two scenic hiking trails into one awesome experience. Since this is done as a loop, you are always hiking through new landscapes, so the view is always changing. From Brins Mesa, you get panoramic views of the surrounding red rock mountains. On the Soldier Pass Trail, you […]
How to Hike the Bell Rock and Courthouse Butte Loop Trail
If you are looking for an easy hike with great views of two of Sedona’s most iconic formations, Bell Rock and Courthouse Butte, then put the Bell Rock and Courthouse Loop Butte Trail on your to do list. This hike is done as a loop, so your views are always changing. It’s a relatively flat […]
10 Days in the American Southwest: The Ultimate Road Trip
The American southwest is one of the USA’s best road trip destinations. It’s unbelievable how much there is to see and do here. There are the breathtaking vistas of the Grand Canyon, thrilling hiking trails in Zion National Park, and millions of hoodoos to photograph in Bryce Canyon. Are you getting excited yet? The list […]
The Ultimate Arizona Road Trip Itinerary
On this Arizona road trip itinerary, you will visit three national parks, drive past the buttes and mesas of Monument Valley, walk through magical Antelope Canyon, and hike the desert hills of Sedona. Arizona is home to some of the most iconic landscapes in the United States and this road trip is the perfect way […]
Grand Canyon National Park Travel Guide
Grand Canyon National Park For millions of years, the Colorado River has carved its way through the Colorado Plateau, forming this expansive, awe-inspiring landscape that we call the Grand Canyon. And it certainly is grand. Words cannot describe what it is like to gaze across the Grand Canyon for the first time. Grand Canyon National […]
Upper or Lower Antelope Canyon: Which One Should You Visit?
Tim and I visited Upper and Lower Antelope Canyon on the same day. We took the same tours, walked through the same red sandstone walls, and came away with completely different favorites. Tim’s was Lower. Mine was Upper. That split tells you something important: these aren’t two versions of the same experience. They’re genuinely different […]
20 Fun, Short Hikes in the US National Parks
One of the best ways to experience the national parks is from a hiking trail. Hike to amazing viewpoints, deep into the forests, through scenic canyons, and to hidden lakes and waterfalls. Along the way, you have a better chance of spotting wildlife and potentially leaving the crowds behind. Here are 20 fun, short hikes […]

Comments 9