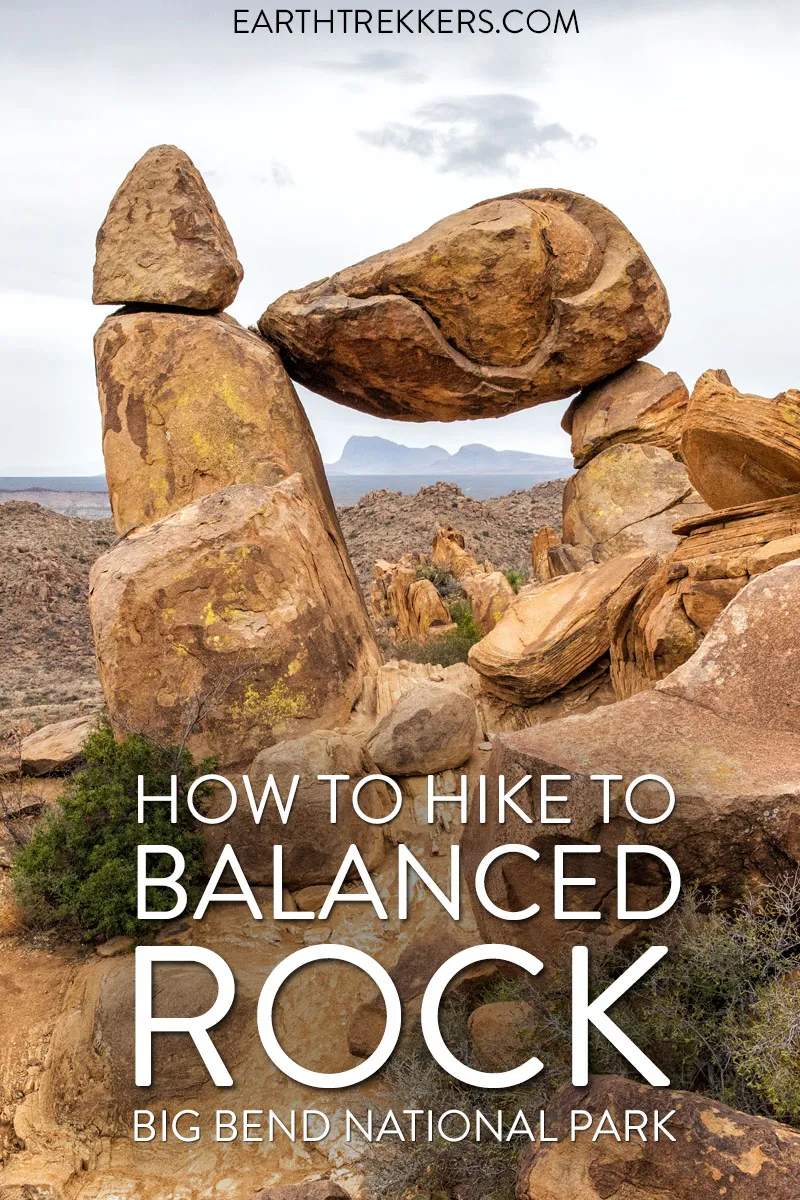
The Balanced Rock hike is one of our favorite short hikes in Big Bend National Park and one of the most rewarding for the effort required. The trail is only 2.2 miles round trip, with just a brief stretch of rock scrambling near the end, making it accessible for most hikers and genuinely fun for kids.
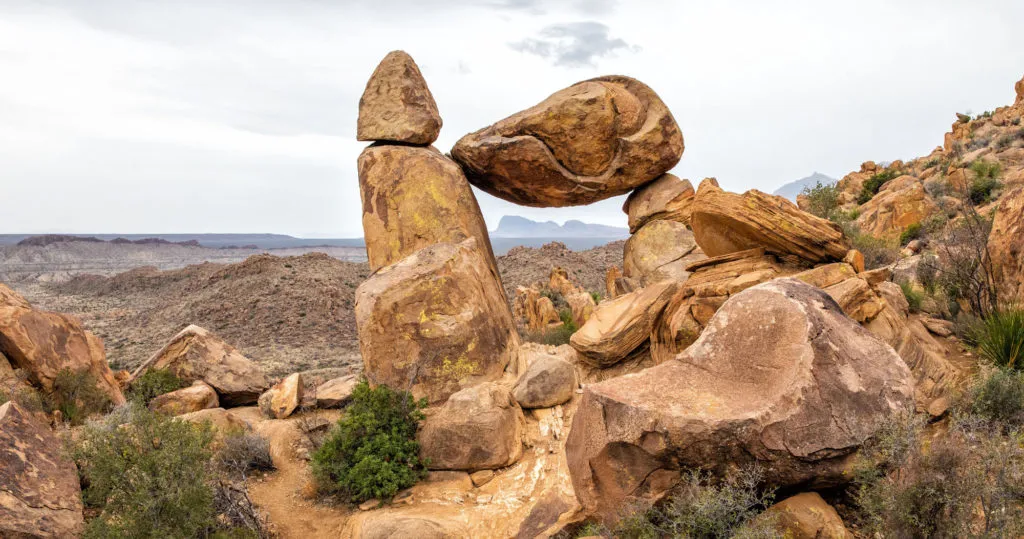
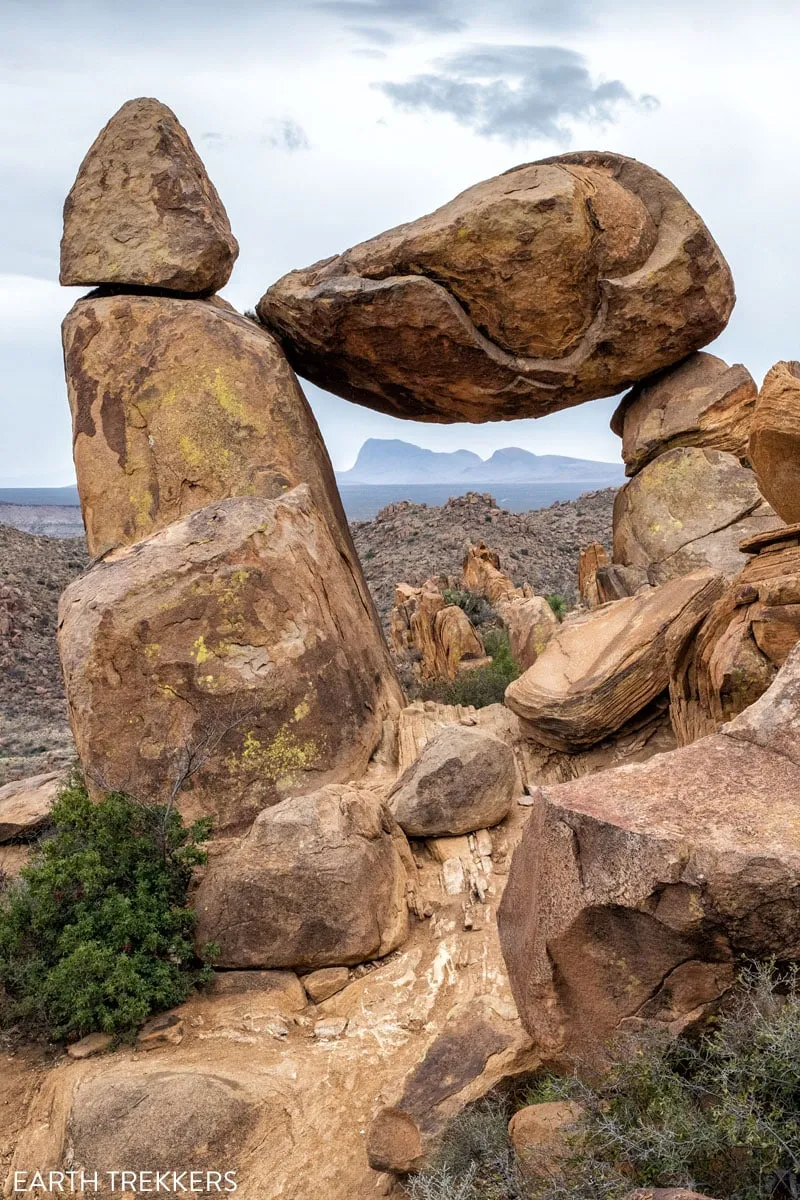
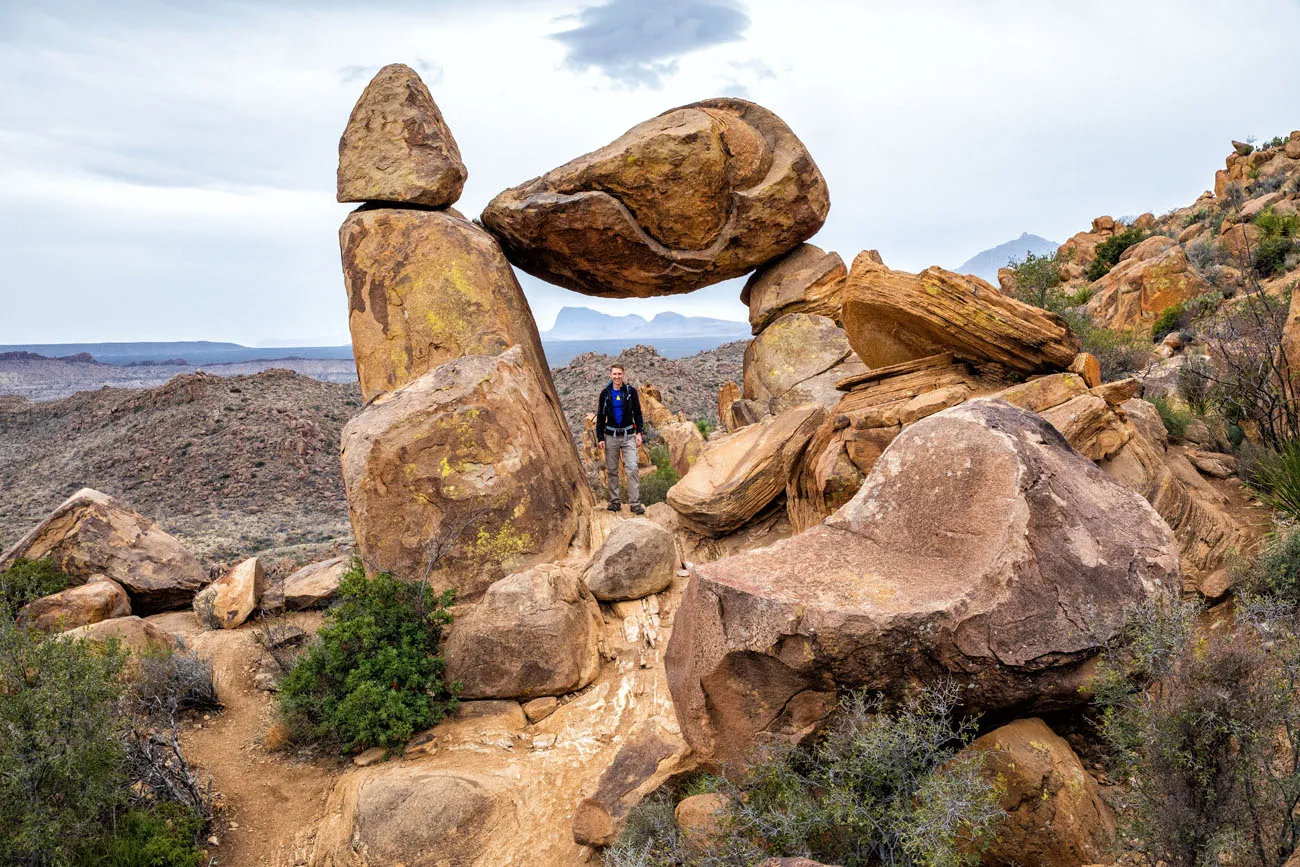
But what makes this hike worth doing isn’t the distance. It’s the destination. Balanced Rock is one of the most striking geological formations in the park, with a massive boulder perched on top of two others, framed by an opening that looks out over the Chihuahuan Desert. Tim and I have done a lot of hikes in Big Bend, and this one always comes up when we talk about the highlights.
Here’s everything you need to know before you go.
Balanced Rock: The Essentials
TRAIL NAME | Grapevine Hills Trail
DISTANCE | 2.2 miles out-and-back
ELEVATION GAIN | 311 feet
DIFFICULTY | Easy to moderate
TIME | 1 to 2 hours
TRAILHEAD | Grapevine Hills parking lot
PARKING | Small dirt lot, approximately 10 vehicles
DOGS ALLOWED | No
SHADE | None
ENTRANCE FEE | Required (Big Bend National Park fee applies)
Getting to the Trailhead
To get to the trailhead, you will drive 6.3 miles on a gravel road that is named Grapevine Spring. This road starts on Gano Springs Road, not far from Panther Junction Visitor Center and the turn off to go to Chisos Basin Visitor Center.
This road is suitable for most standard cars, but an SUV or vehicle with high ground clearance is ideal. The final two miles are the roughest. Take it slowly and you’ll be fine. Check current road conditions with the NPS before you go, as conditions can change seasonally.
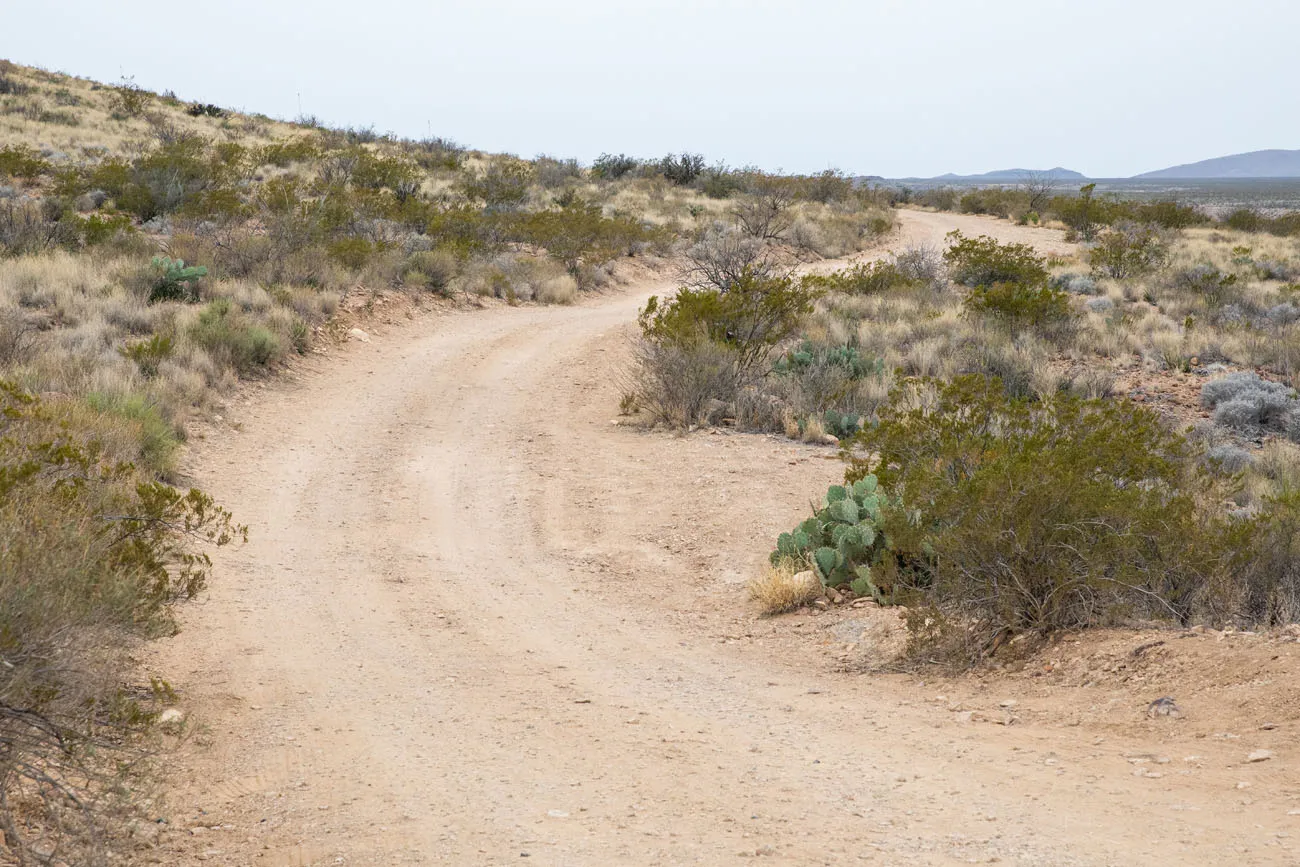
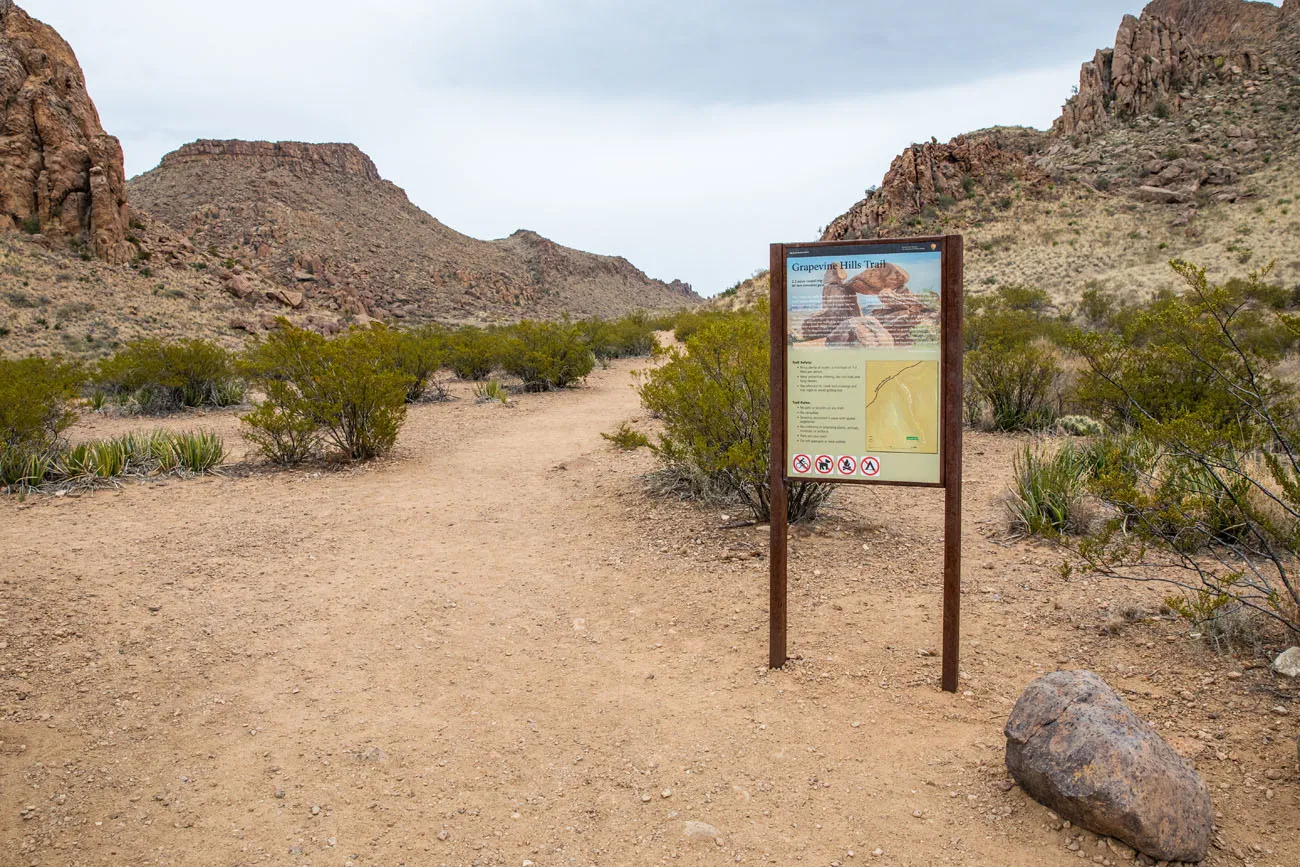
Park in the small parking lot. There is a sign here marking the start of the trail.
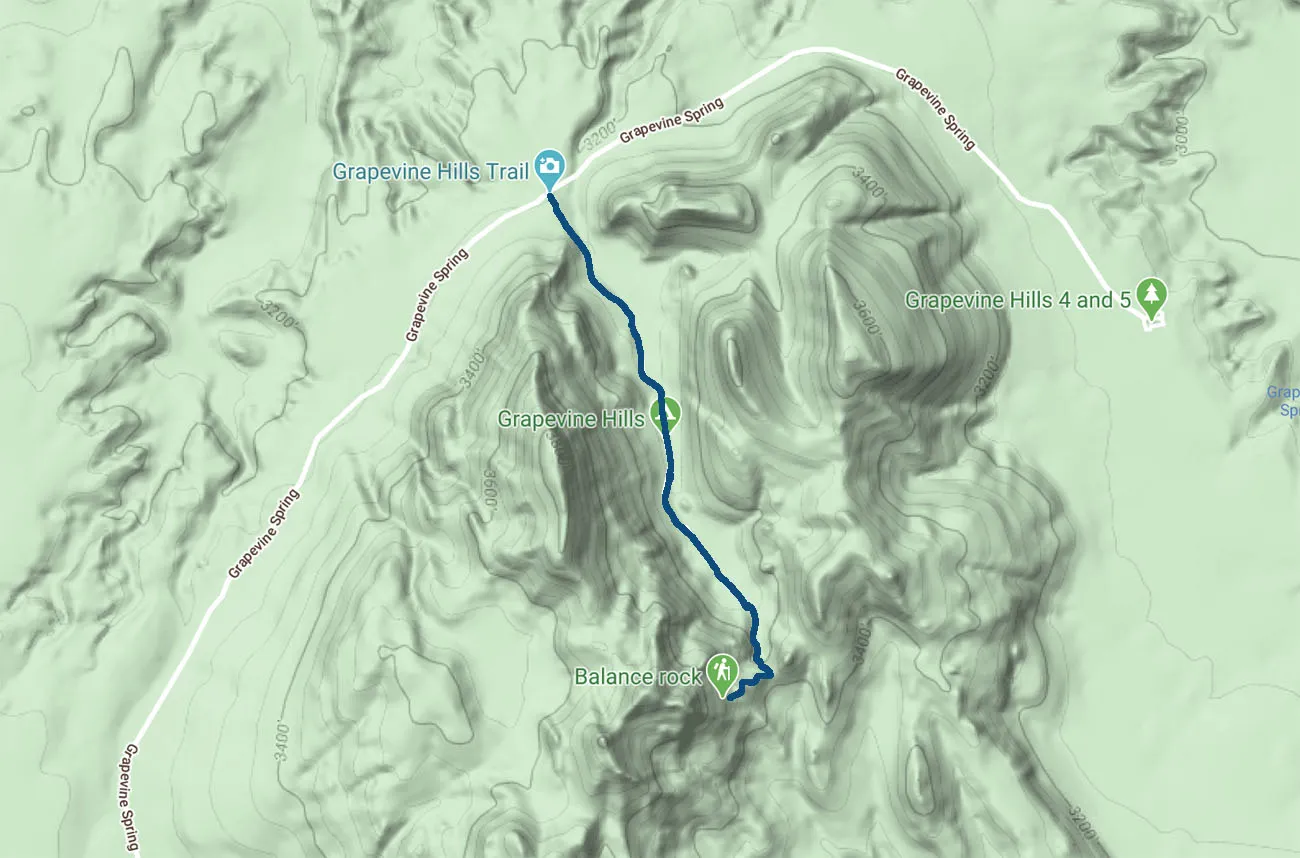
Balanced Rock Trail Map
Grapevine Hills Trail is the name of the trail that leads to Balanced Rock.
This hike is 2.2 miles out-and-back, has just over 300 feet of elevation gain, and takes 1 to 2 hours.
Please practice the seven principles of Leave No Trace: plan ahead, stay on the trail, pack out what you bring to the hiking trail, leave areas as you found them, minimize campfire impacts, be considerate of other hikers, and do not approach or feed wildlife.
Balanced Rock Hike
Hiking to Balanced Rock
Distance: 1.1 miles | Time: 45 minutes
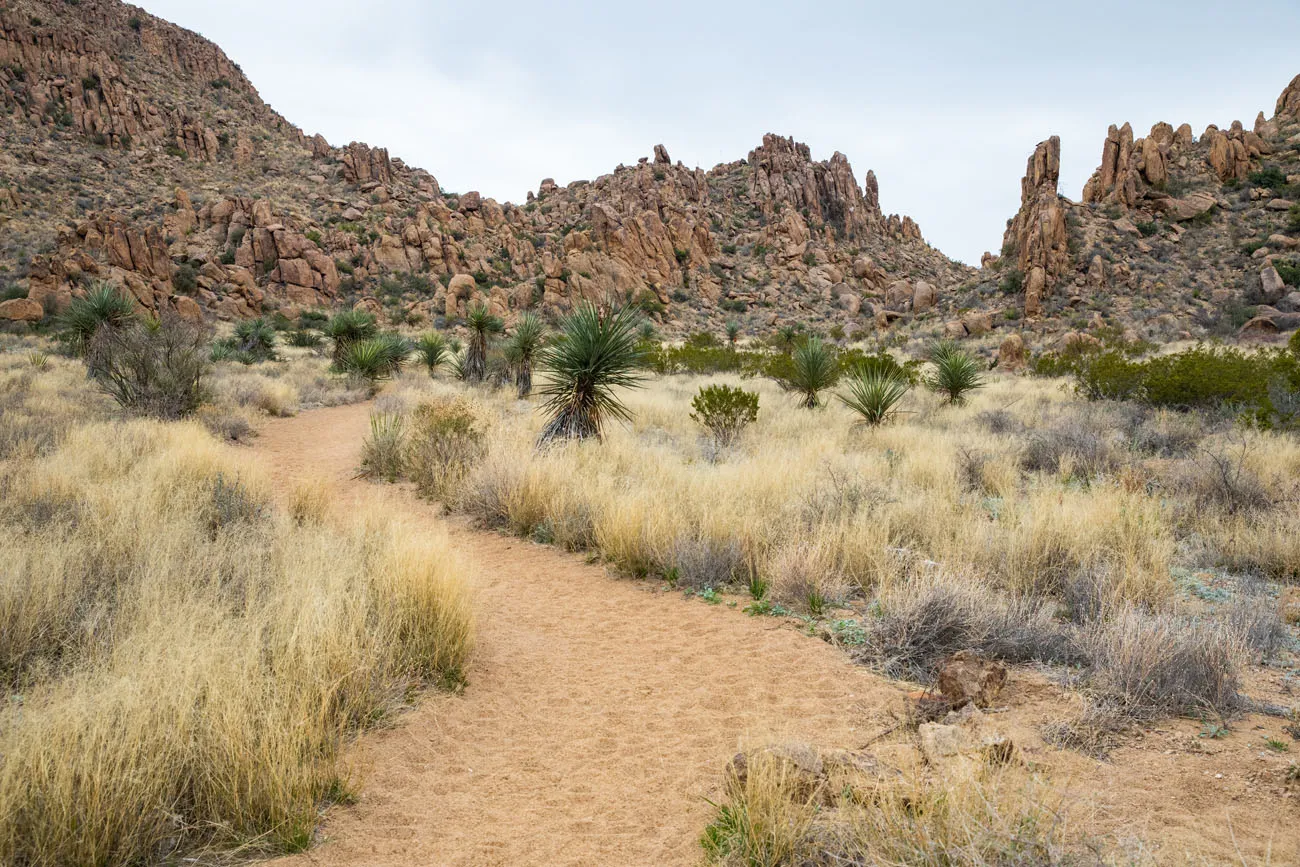
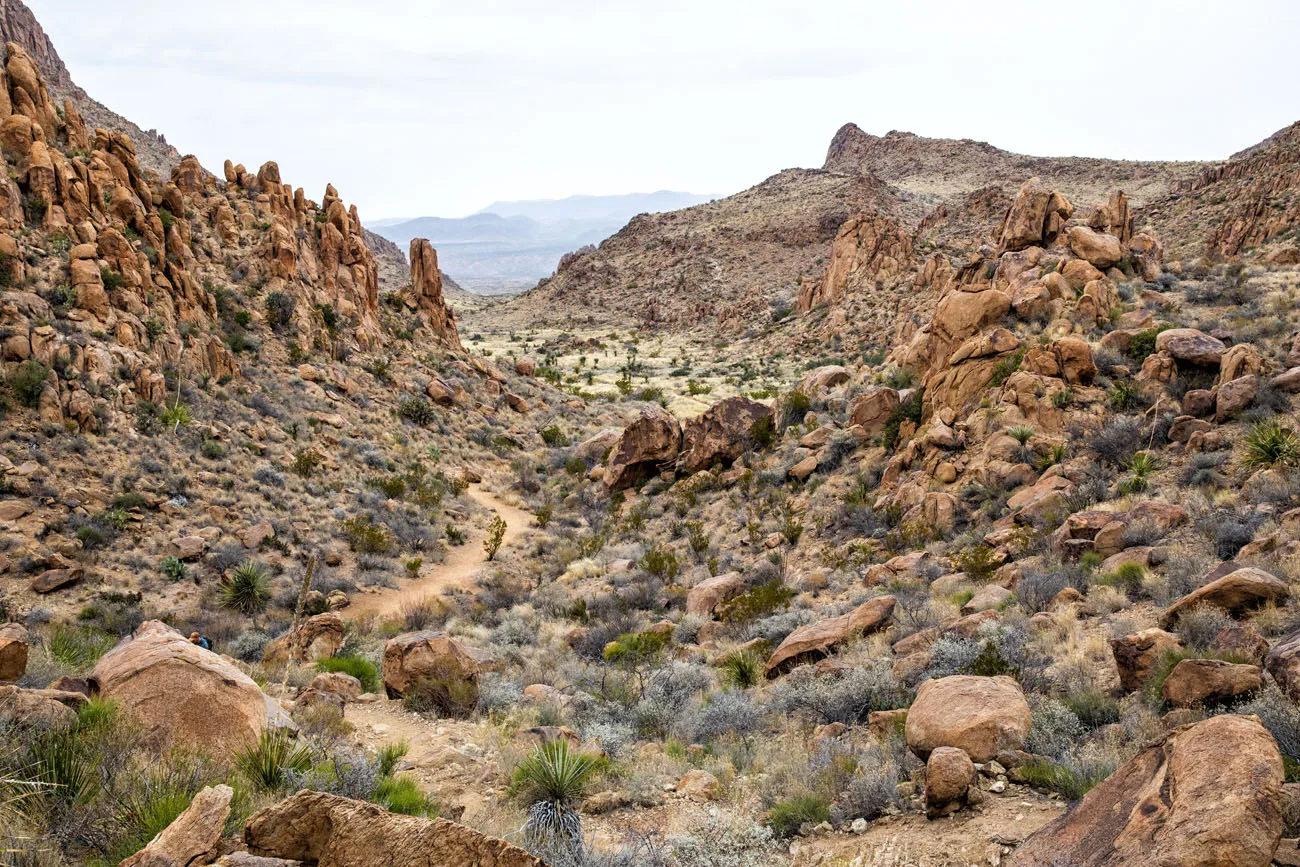
Most of the trail goes through a wide, sandy wash. It is a very slight uphill walk to get to Balanced Rock on this section of trail.
Because of the sand, it can be slow going here. But it is a little faster on the return hike.
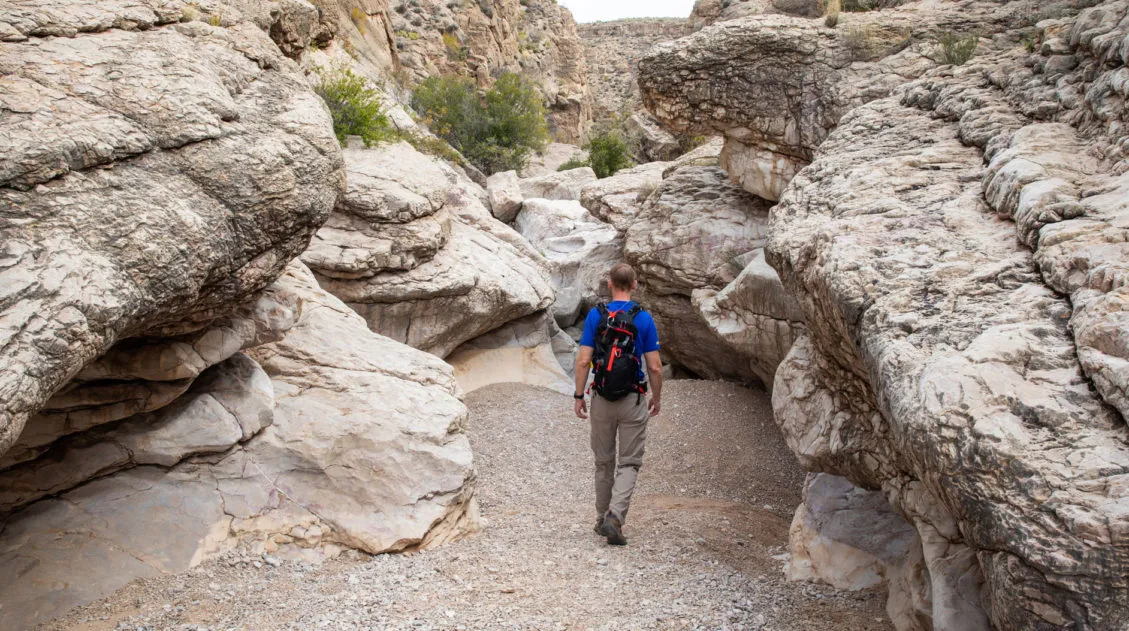
The final quarter mile of trail is the most challenging and the most fun. The trail steeply climbs up some rocky cliffs. It is at this point that you will have to do a little bit of rock scrambling to get up and over the large boulders on the trail.
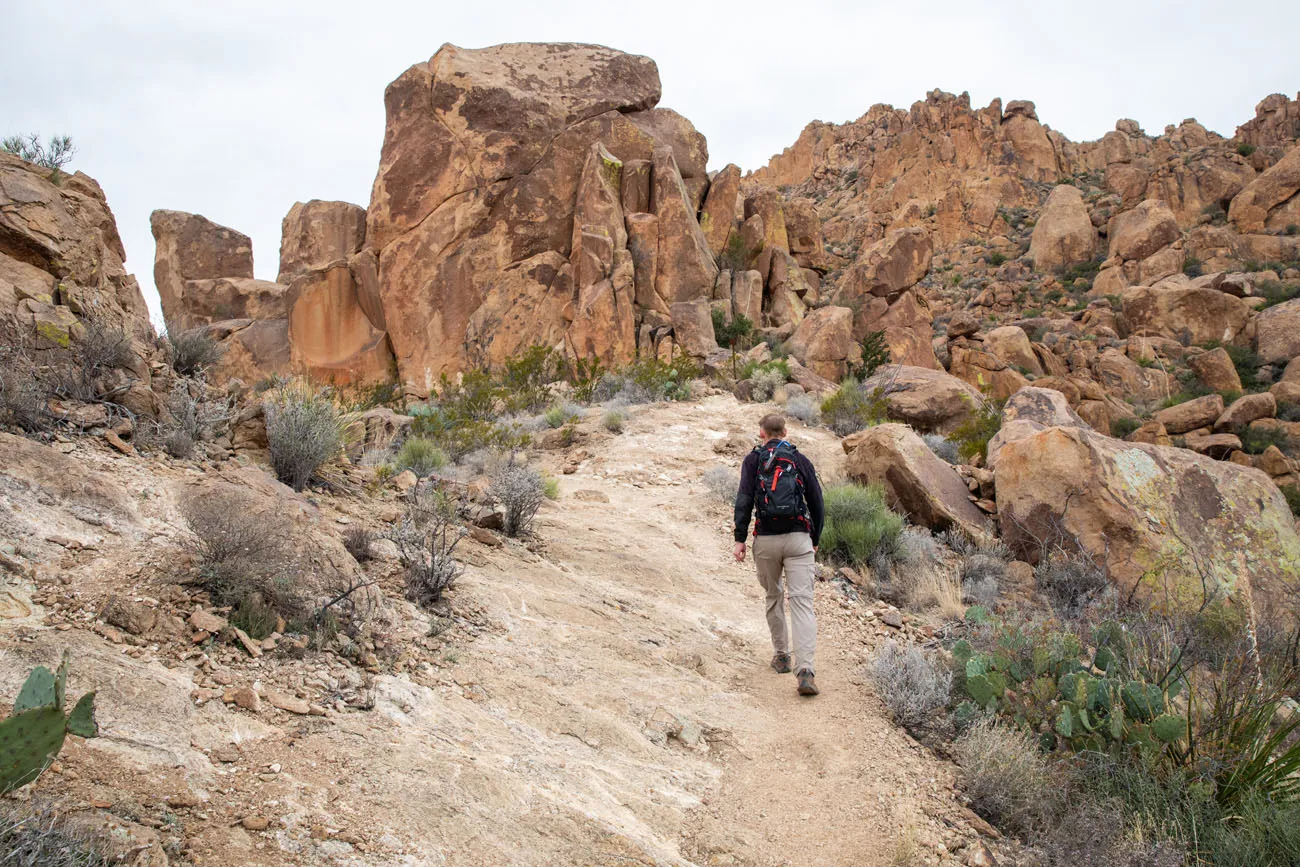
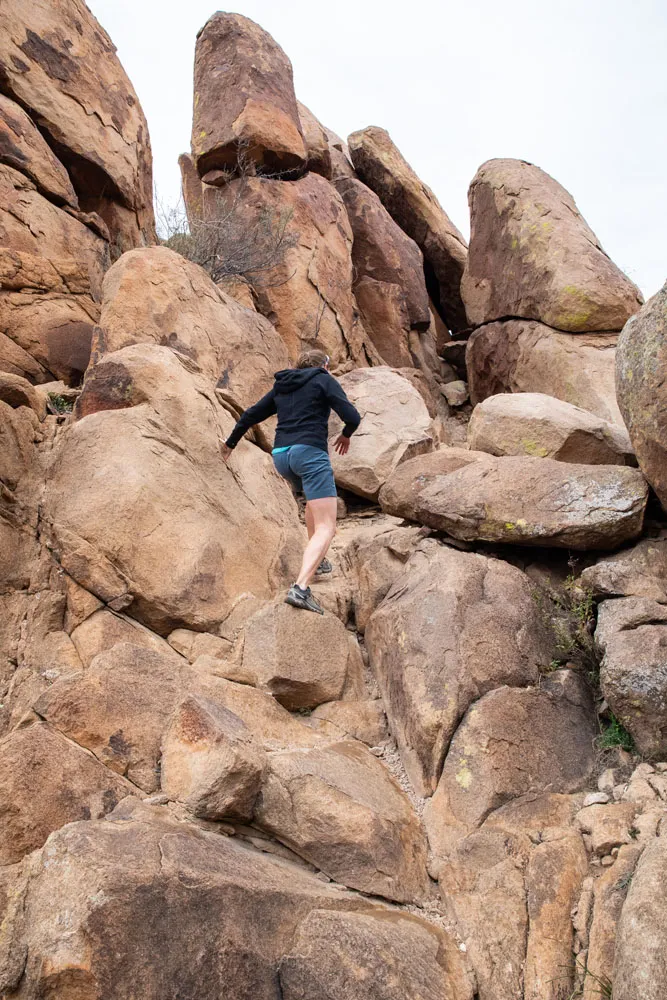
As you climb up and over these rocks, make sure you look back along the trail. The view is beautiful.
Balanced Rock Photos
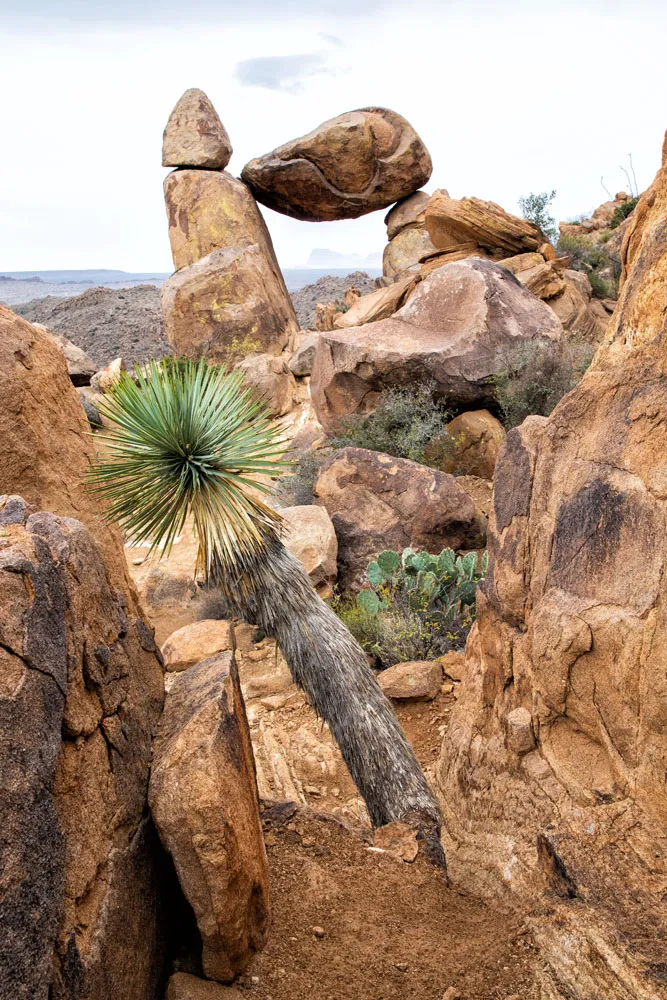
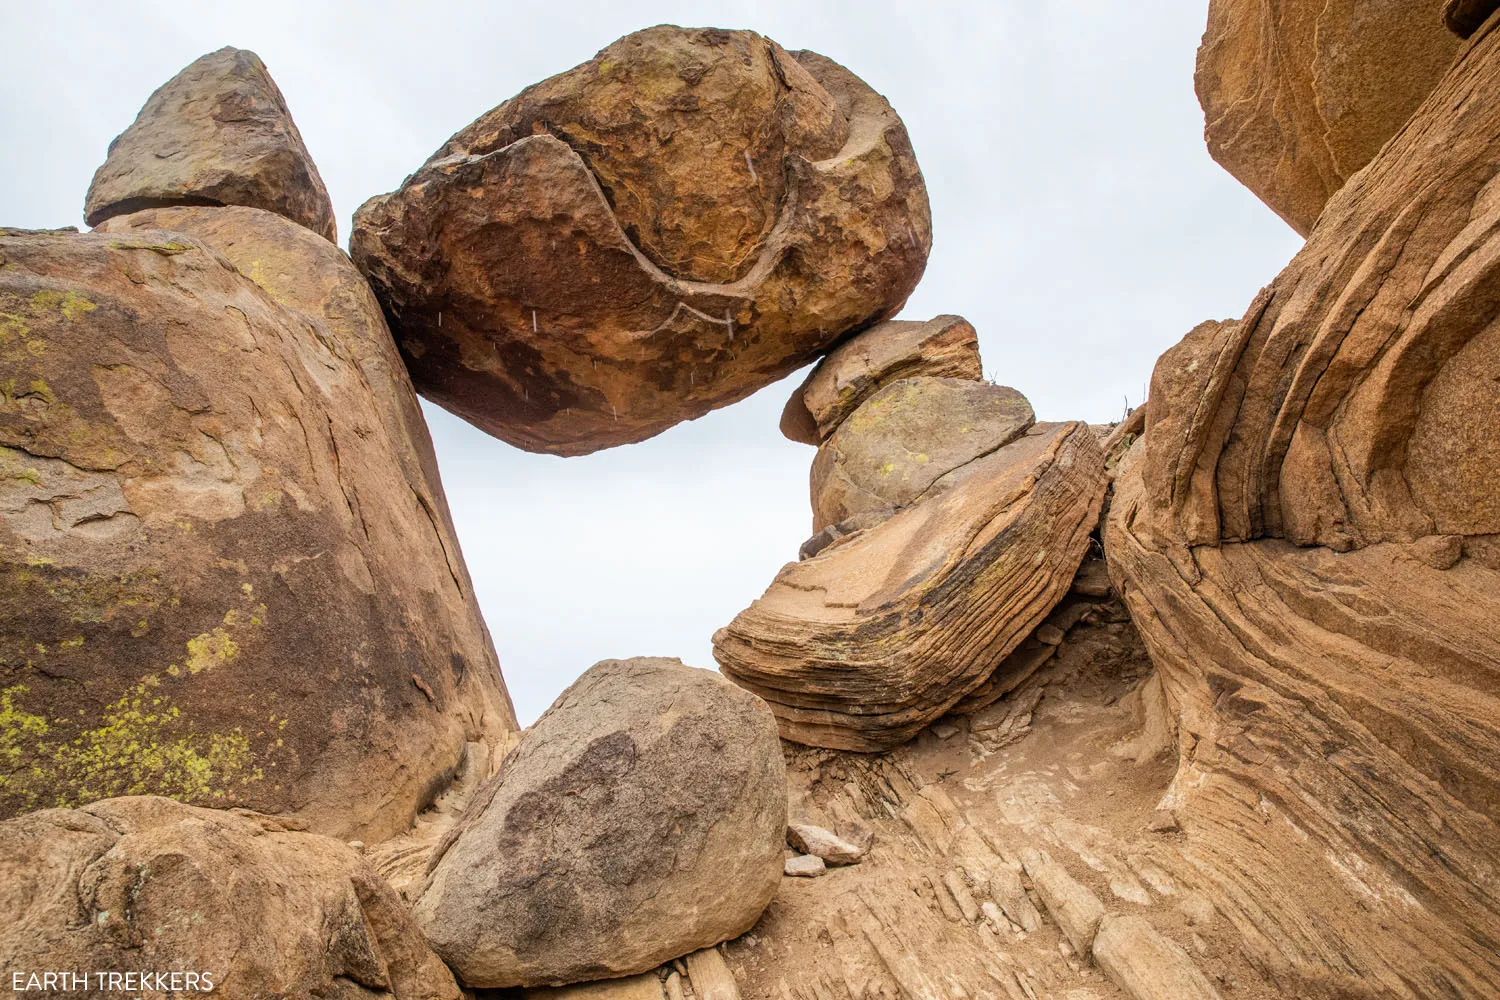
The trail ends at Balanced Rock. There are several good photo spots here. You can stand right in front of it to take a photo, or walk underneath of it and look out over the desert.
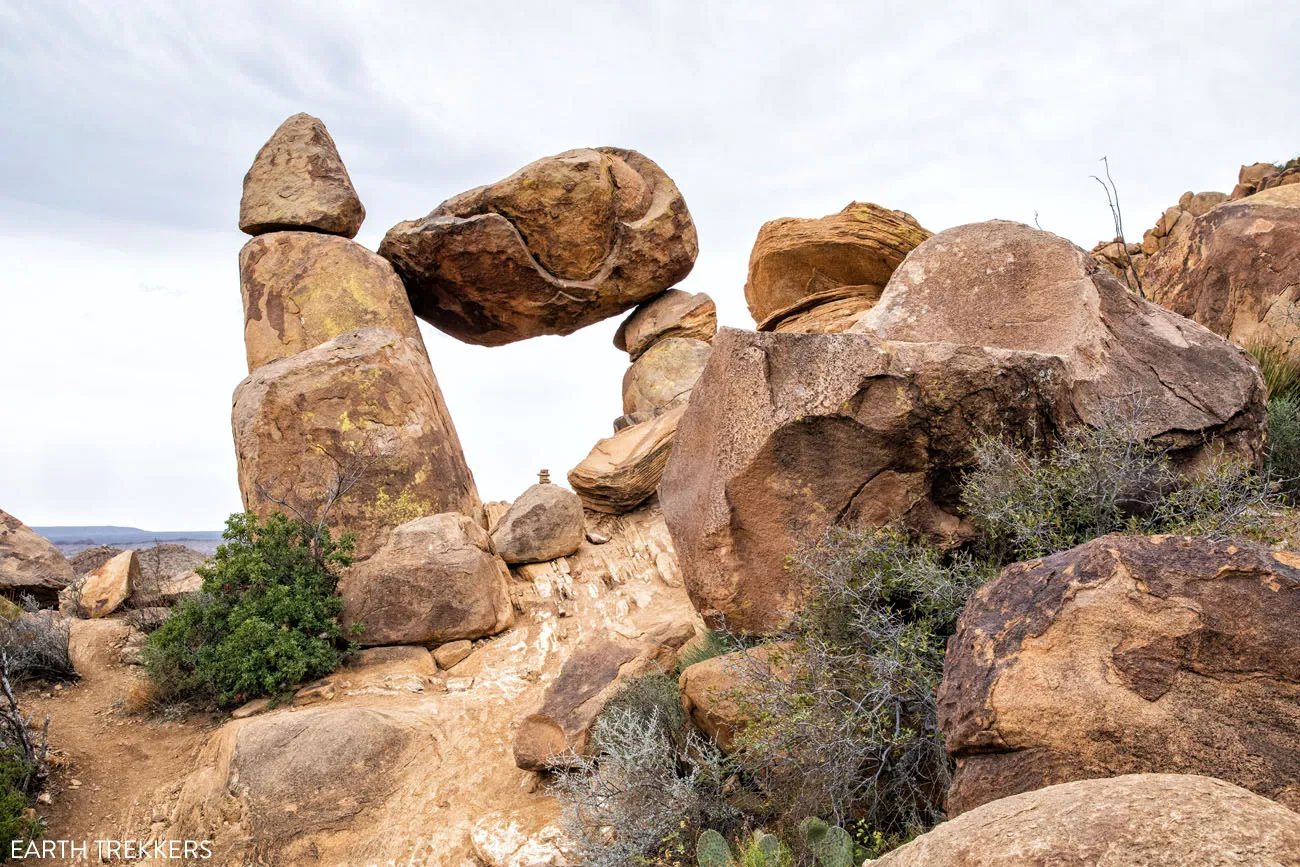
If you climb up the onto the boulders that sit opposite of Balanced Rock, this is the view you get ↓
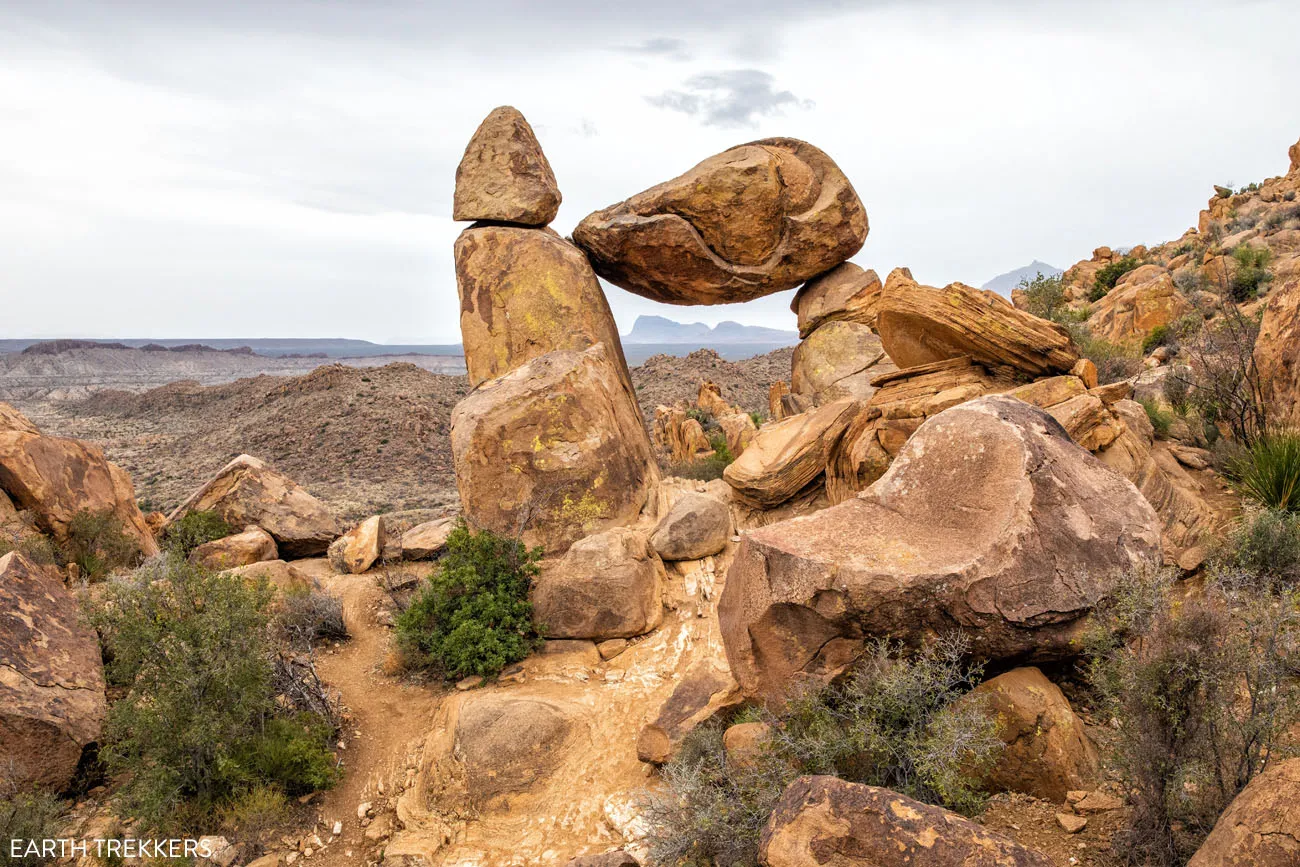
You can also get a unique view from just underneath Balanced Rock ↓
The Return Hike
Distance: 1.1 miles | Time: 30 to 45 minutes
To get back to your car, retrace your steps.
What Makes Balanced Rock So Unusual?
Balanced Rock is what geologists call a “precariously balanced rock,” a formation created not by one dramatic event, but by millions of years of gradual erosion.
The rock itself is igneous, formed when magma pushed up through the earth’s crust roughly 38 million years ago and slowly cooled underground. Over time, wind and water eroded the softer material around it, leaving the harder core exposed.
The result is what you see today: a massive boulder resting on two others, looking like it could topple at any moment, although it has been sitting exactly like that for longer than humans have existed.
Grapevine Hills, the area surrounding the trail, is an exposed laccolith, which is a dome of igneous rock that formed the same way, giving the whole landscape its distinctive rounded, boulder-strewn character.
Best Time to Hike Balanced Rock
We hiked to Balanced Rock in early March on a cloudy morning, and the conditions were just about perfect — comfortable temperatures, no crowds, and soft light that made the rock formations look even more dramatic. If you can time your visit for a weekday morning, that’s the sweet spot.
Timing matters on this trail more than most. There is zero shade from trailhead to Balanced Rock, and the Chihuahuan Desert heat builds fast. An early morning start is strongly recommended regardless of when you visit.
November through April is the best overall window. Crowds are generally light November through mid-February, peaking the month of March, which coincides with Spring Break in Texas.
Expect hot temperatures May through September, getting cooler as the calendar flips into October.
Tips for Hiking to Balanced Rock
- Start early. There is no shade anywhere on this trail. An early morning start keeps you ahead of the heat and the crowds, especially on weekends and during spring break.
- Bring more water than you think you need. The NPS recommends 1 liter per person per hour. The dry desert air means you’re losing moisture faster than you realize, even on cooler days.
- Watch the descent. The rocky scramble section near Balanced Rock is fun on the way up, but the rocks are covered with a fine layer of sand and gravel that makes them slippery coming down. Take your time.
- Follow the metal trail markers. The trail can be hard to follow on the steep rocky section near the top. Look for metal posts with arrows — they’ll keep you on the right path.
- Watch where you put your hands. Big Bend is home to dozens of snake species, several of them venomous. The shaded crevices between boulders are exactly where they like to rest. Look before you grab.
- No dogs allowed. Dogs are not permitted on any hiking trails in Big Bend National Park, including this one.
- Parking is limited. The trailhead lot fits roughly 10 vehicles. Arrive early on busy days or you may find it full.
Before you go, check trail conditions and closures on the National Park Service website.
Our Thoughts on the Hike
Tim and I loved this hike. It’s quick, it’s easy, and seeing Balanced Rock is awesome.
Kids can do this hike. We saw kids as young as 8 on this trail when we did it, but kids younger than 8 will be able to handle this hike. Most of the trail is flat. The final steep section should not be a problem for most kids…in fact, it will probably be their favorite section of trail. When we did this hike, kids were having a blast climbing the rocks near Balanced Rock.
This is one of our favorite short hikes in Big Bend National Park. Also on this list are Santa Elena Canyon and the Ernst Tinaja Trail.
Plan Your Trip to Big Bend
Balanced Rock is a great introduction to Big Bend, but the park has much more to offer. If you’re planning a longer visit, here are some of our other favorite hikes and guides:
- Ernst Tinaja Trail — A short slot canyon hike with a series of striking waterholes. One of the most unique trails in the park.
- South Rim Trail — The best full-day hike in Big Bend, with sweeping views over the Chihuahuan Desert from the Chisos Mountains.
- Emory Peak — The highest point in the park and one of the most rewarding summit hikes in Texas.
- 15 Best Hikes in Big Bend National Park — Our full roundup organized by area and difficulty.
- 3 Days in Big Bend — The itinerary we recommend for a first visit, covering all three regions of the park.
Do you have any questions about the Balanced Rock hike? Let us know in the comment section below.
Continue Exploring Big Bend & Texas
25 Best Things to Do in Big Bend National Park
Pinterest Facebook Flipboard Discover the best things to do in Big Bend National Park, including the must-see highlights, unique experiences you won’t find anywhere else, and practical tips to help you plan your visit. Big Bend National Park is one of those places that genuinely surprises you. Tim and I had heard it described as […]
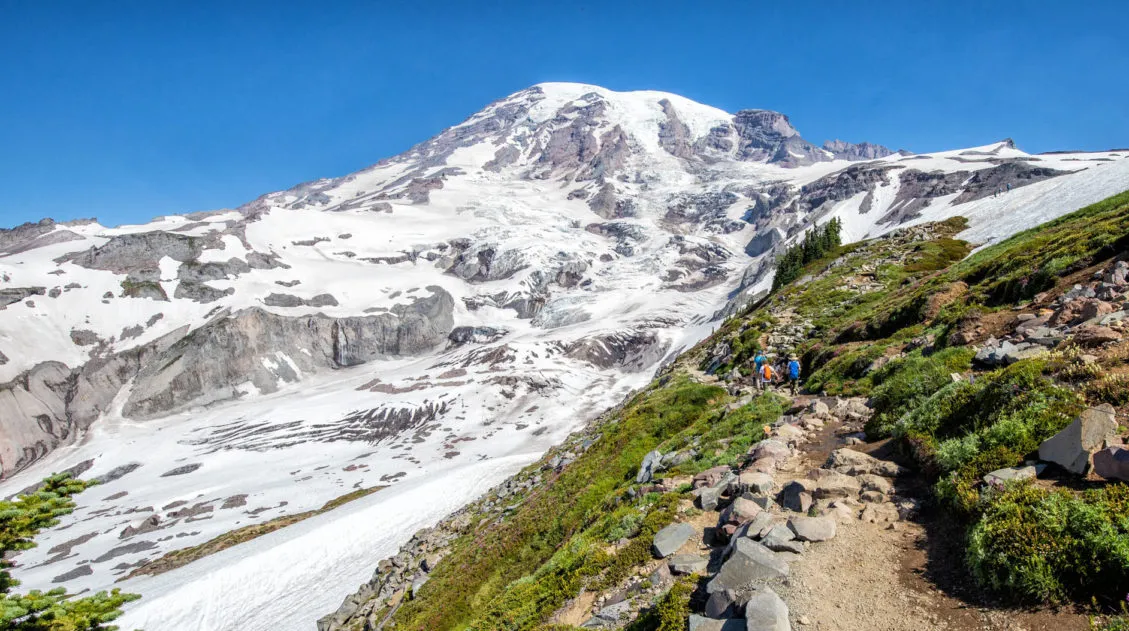
20 Fun, Short Hikes in the US National Parks
One of the best ways to experience the national parks is from a hiking trail. Hike to amazing viewpoints, deep into the forests, through scenic canyons, and to hidden lakes and waterfalls. Along the way, you have a better chance of spotting wildlife and potentially leaving the crowds behind. Here are 20 fun, short hikes […]
15 Best Hikes in Big Bend National Park (By Area & Difficulty)
Big Bend National Park is one of the most underrated hiking destinations in the United States. Tucked into the southwestern corner of Texas along the Rio Grande, it packs an extraordinary range of terrain into one park — slot canyons, volcanic rock formations, a full mountain range, and miles of river canyon trails. We visited […]
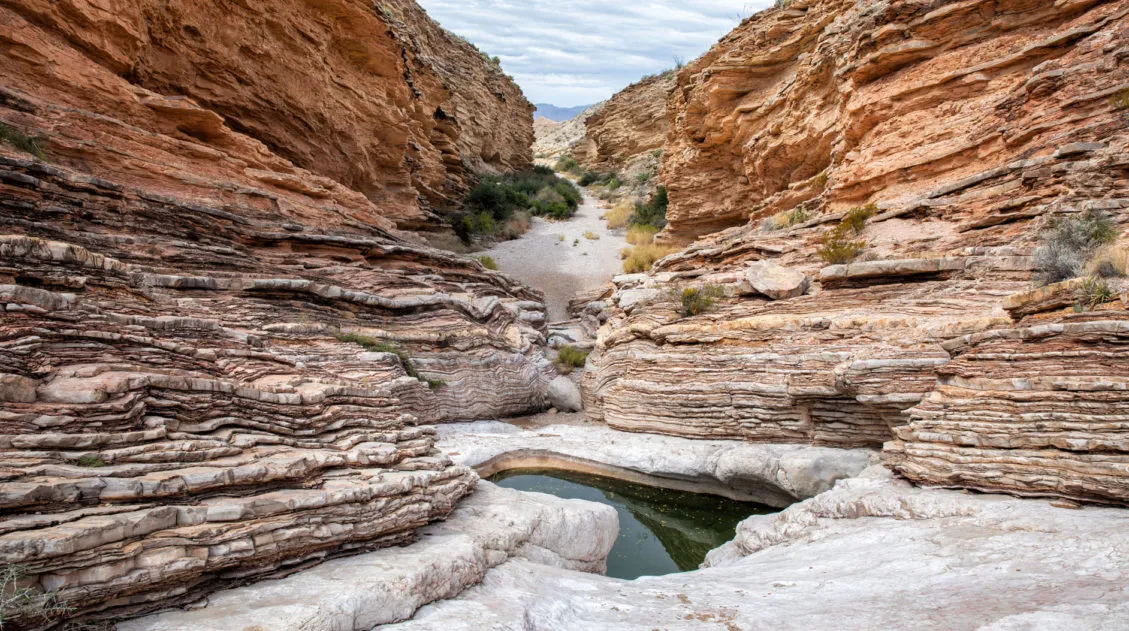
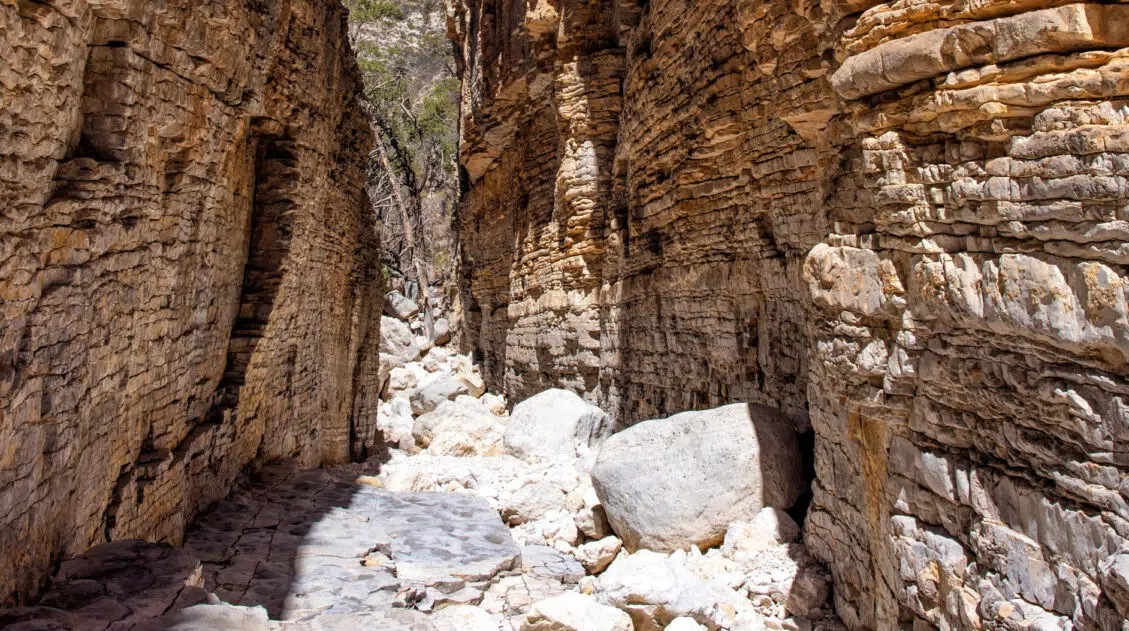
Ernst Tinaja Trail: Big Bend’s Most Underrated Adventure
The Ernst Tinaja Trail is one of the most unique hikes to do in Big Bend National Park. This is a short, easy trail through a slot canyon, featuring a series of waterholes located within colorful layers of limestone rock. Those looking for a little more adventure can continue the hike past the water-filled pools and rock […]
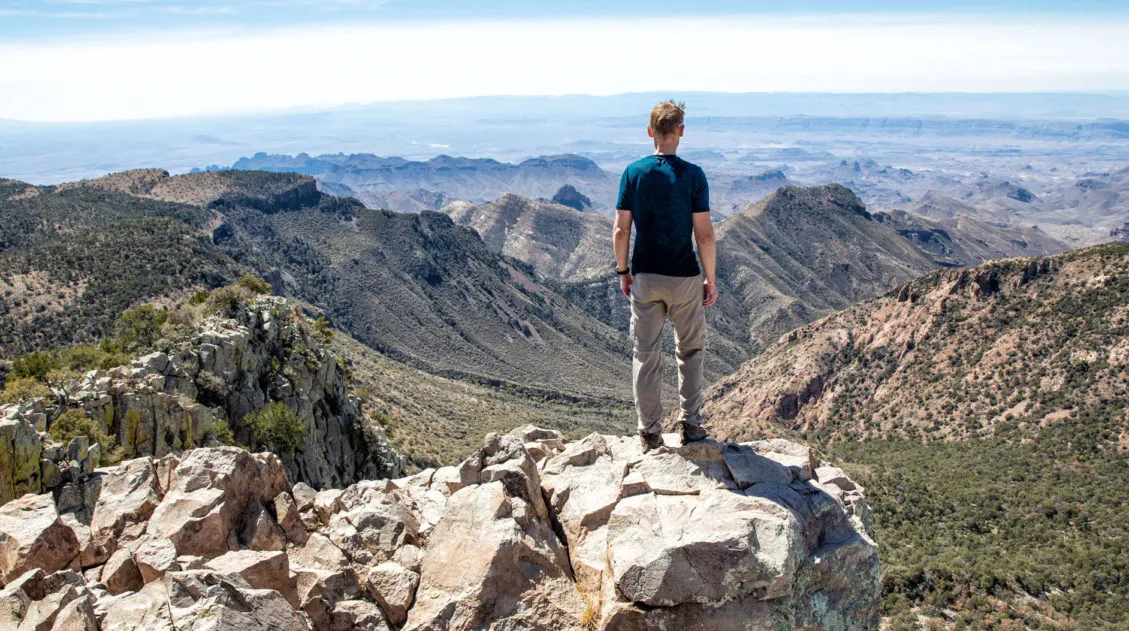
Emory Peak Trail, Big Bend: Everything You Need to Know
Emory Peak is the highest point in Big Bend National Park and the Chisos Mountains, and the hike to the summit is one of the best things you can do in the park. The 10.4-mile out-and-back gains nearly 2,500 feet of elevation and finishes with a short rock scramble to the top, where 360-degree views […]
Devil’s Hall Trail Guide: What to Expect | Guadalupe Mountains NP
The Devil’s Hall Trail is one of the most unique hikes in Guadalupe Mountains National Park. It’s a 4.2-mile round-trip route through Pine Springs Canyon that ends at a narrow limestone slot canyon with 50-foot walls and just 15 feet of width at its narrowest point. Along the way, you’ll scramble through a rocky wash, […]
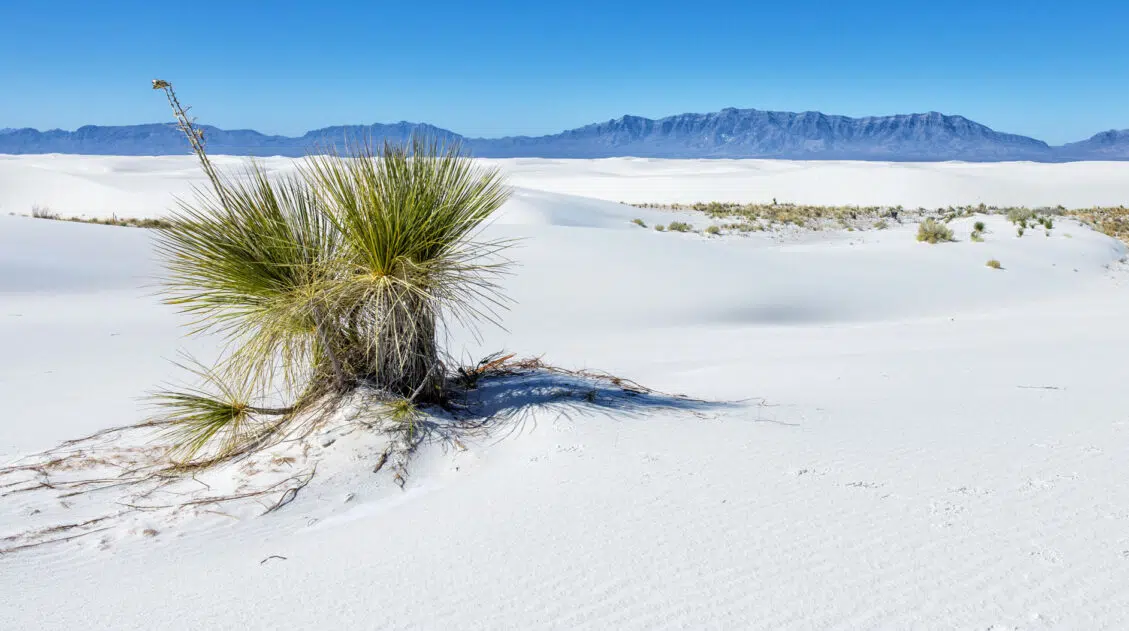
11 Amazing Things to Do in White Sands National Park
White Sands National Park is home to the largest gypsum dunefield in the world. These pure white dunes create a fun place to explore, for both kids and adults. Hike out into the dunes, learn about the wildlife that calls this park home, and go sledding on sand as white as the snow…these are just […]

15 Best Things to Do in Guadalupe Mountains National Park
Tim and I have hiked a lot of national parks, and Guadalupe Mountains is one that genuinely surprised us. We expected a remote desert park with a few good trails. What we found instead was a place with incredible variety — a slot canyon, a fossilized coral reef trail with almost no one on it, […]
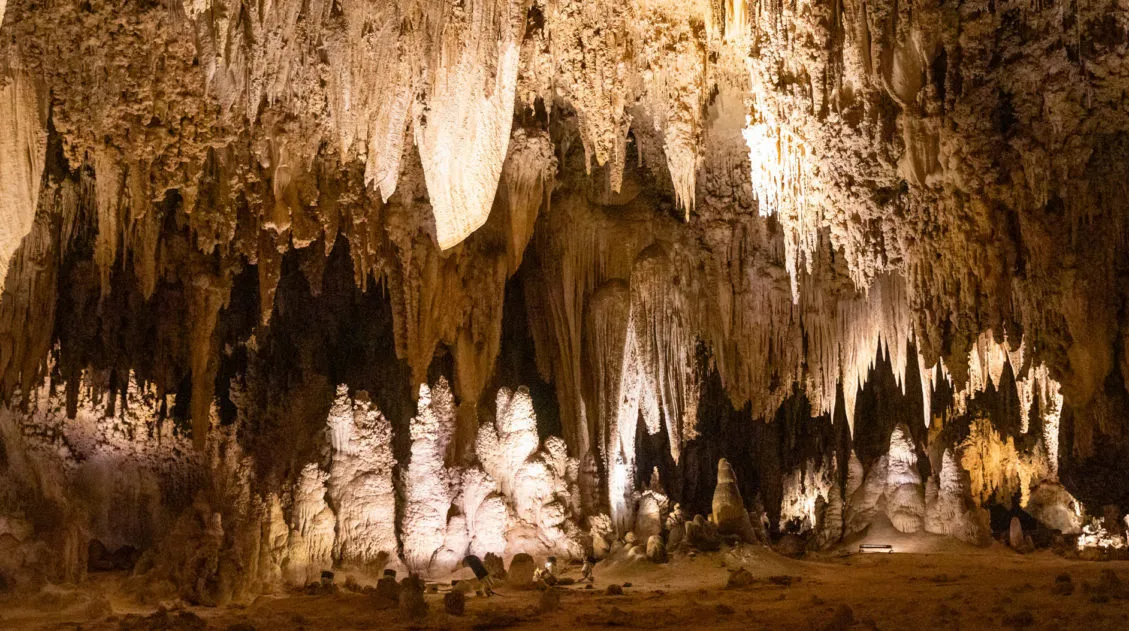
Best Things to Do in Carlsbad Caverns National Park
In this guide, we cover the best things to do in Carlsbad Caverns, tour options (both ranger-guided and self-guided), timed entry reservations, plus lots of helpful information. Located in the Guadalupe Mountains of New Mexico sits an underground fantasy land of limestone chambers, stalactites and stalagmites, and long, twisting tunnels. Carlsbad Caverns is breathtaking in […]
20 Epic Hikes in the US National Parks
With 63 national parks and thousands of miles of hiking trails, your options are endless for exploring the American national parks. We narrowed down the list for you to 20 of the best hikes in the US national parks, 20 amazing ways to explore this beautiful country. Hike to the tallest peaks, through massive canyons, […]
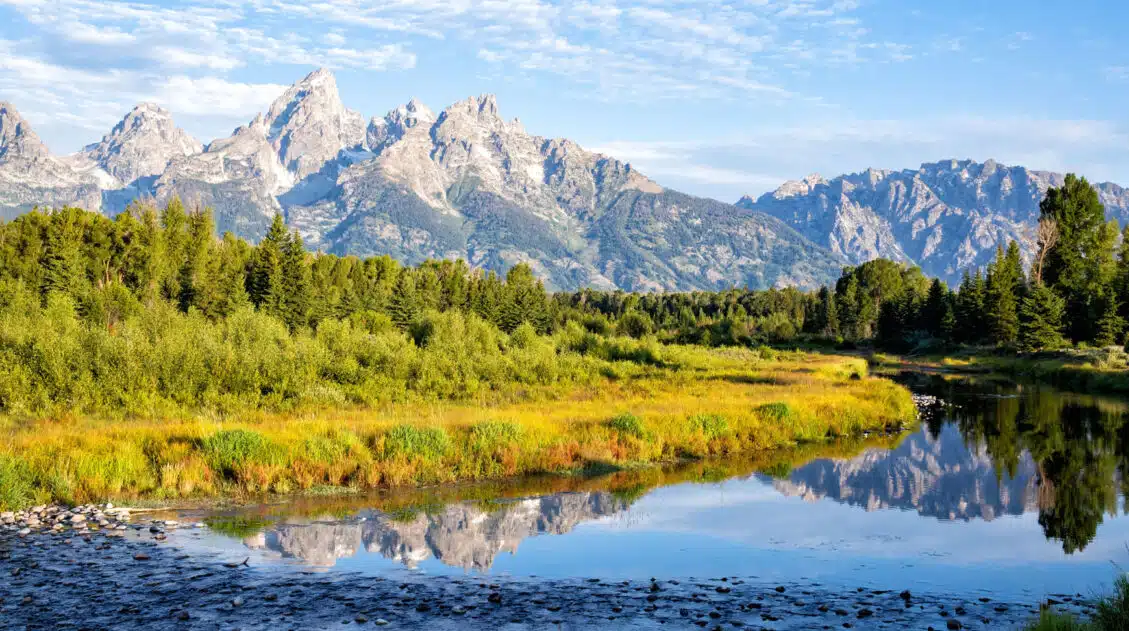
US National Park Itineraries & Road Trip Ideas
National Park Itineraries The national parks are best experienced as a road trip and with 56 parks visited between us, we’ve done a lot of them. Whether you’re dreaming of a two-week American Southwest loop, a classic Yellowstone and Grand Teton combo, or a deep dive into Utah’s Mighty 5, we’ve put together detailed itineraries […]
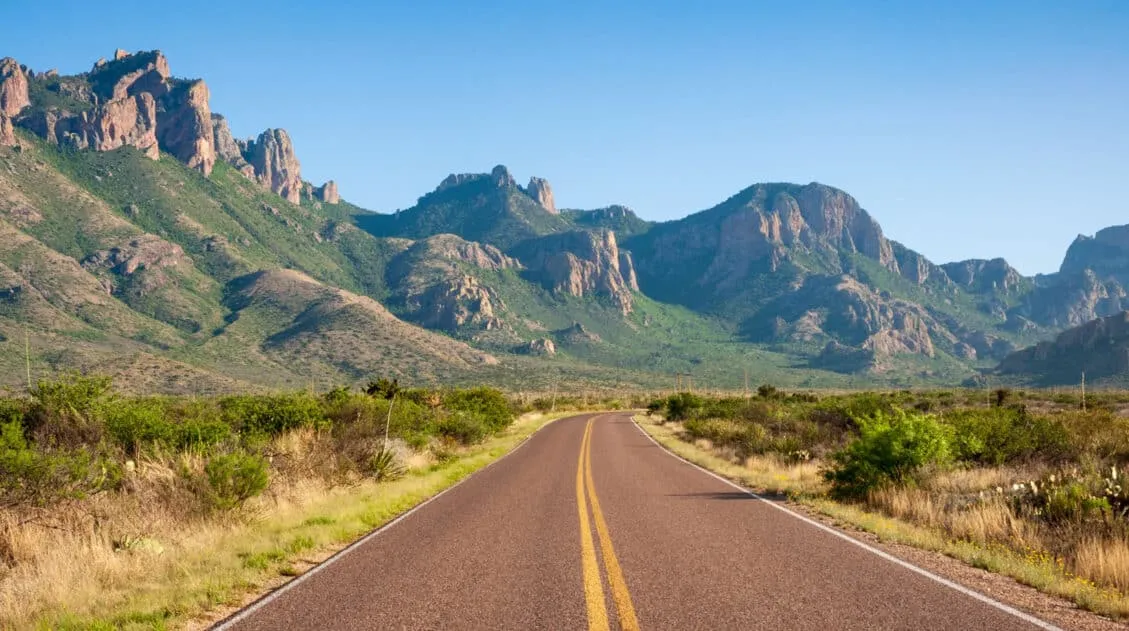
Texas Travel Guide: How to Plan a Trip to Texas
Texas Travel Guide Texas is bigger than most people expect — and more varied. In the same trip, you can hike volcanic rock formations and slot canyons in Big Bend, stand at the highest point in the state in the Guadalupe Mountains, and eat your weight in barbecue in Austin. Tim and I have visited […]

Comments 2