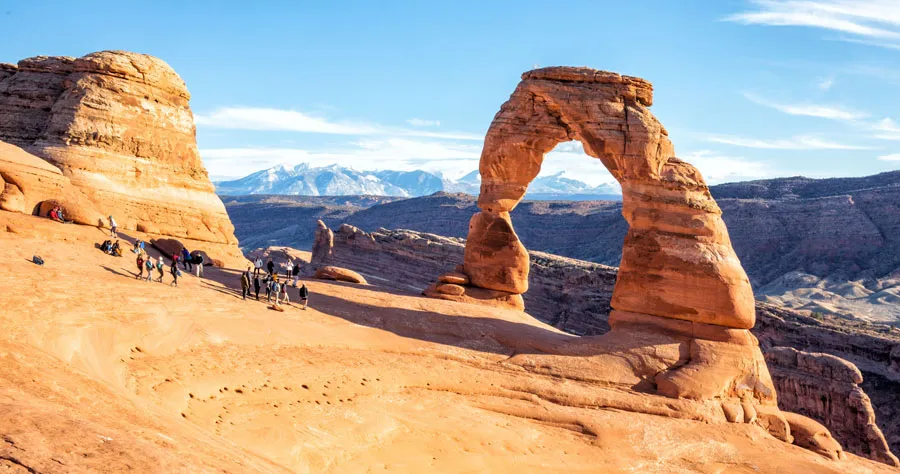
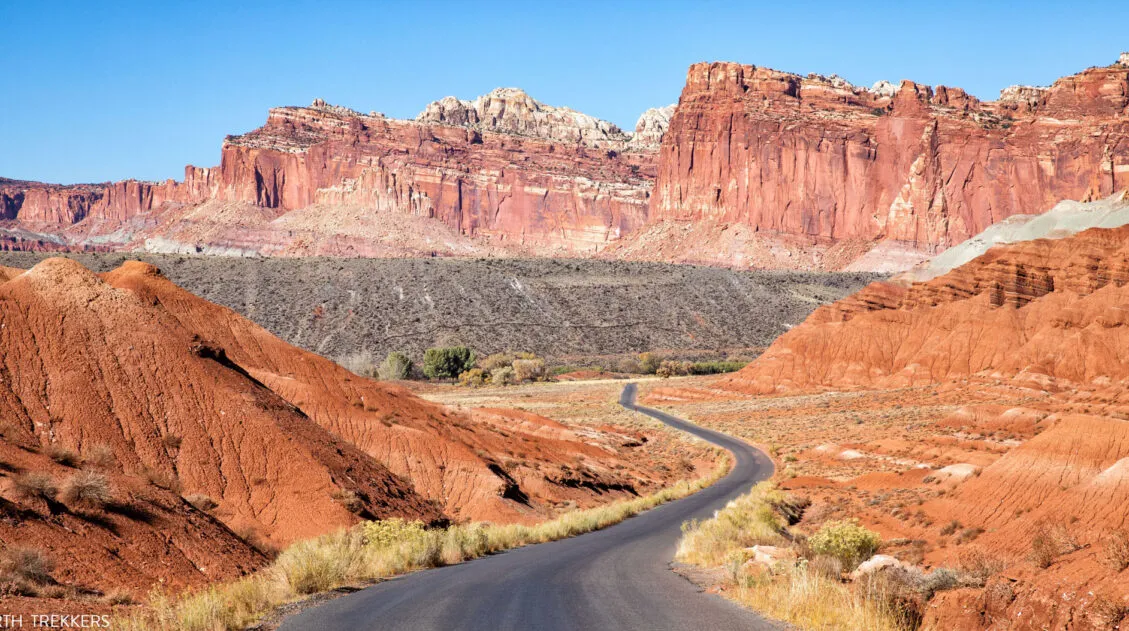
Driving the White Rim Road is a bucket list adventure. Over the course of 100 miles, you will circle around the Island in the Sky mesa. Along the way, you will drive along cliff edges, past canyons carved out by the Colorado and Green Rivers, and to viewpoints that will take your breath away.
Once you do this drive, you will never look at Canyonlands National Park the same way again.
In order to drive the White Rim Road, you will have to do some advance planning. In this article we share with you everything we learned about the White Rim Road, from what to expect along the drive, how to choose a campsite, when to go, and more.
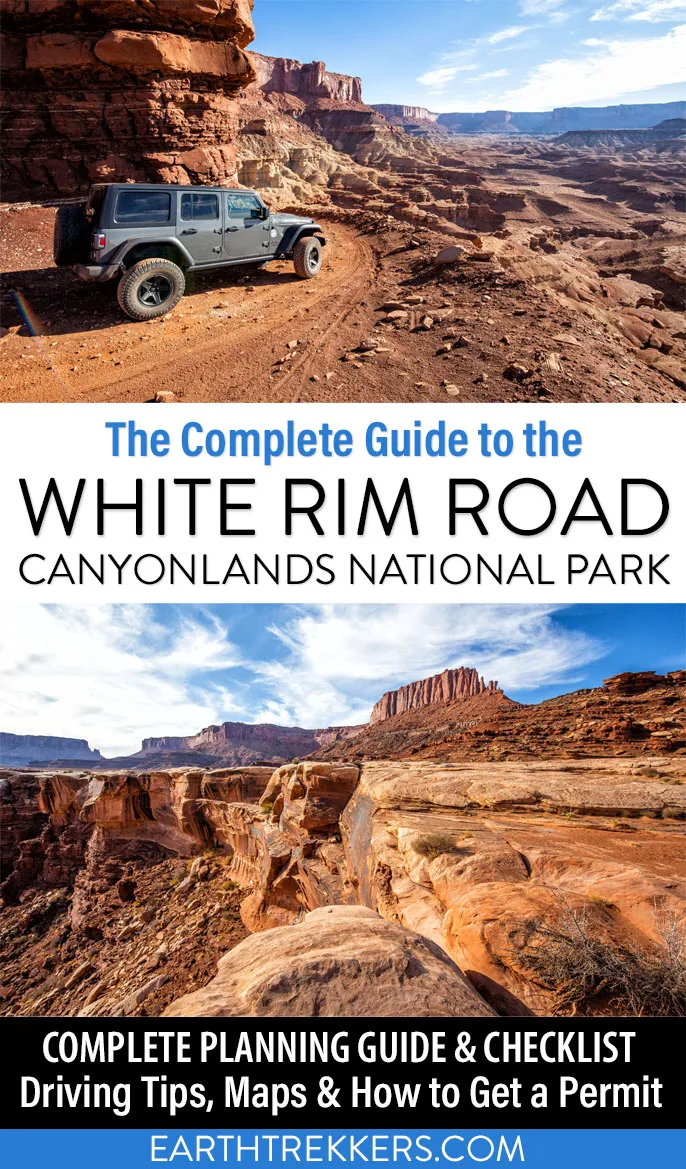
This article is part 2 in our two-part series about the White Rim Road. For a full breakdown of the route, with maps, photos, and driving tips, read our guide to the White Rim Road Route ↓
How to Drive the White Rim Road: Map, Photos & Driving Tips
Detailed guide to the White Rim Road route, with lots of photos so you know what to expect.History of the White Rim Road
The White Rim Road was constructed in the 1950’s by the Atomic Energy Commission to gain access to the uranium deposits in this area. However, the mines produced very little uranium and were soon abandoned.
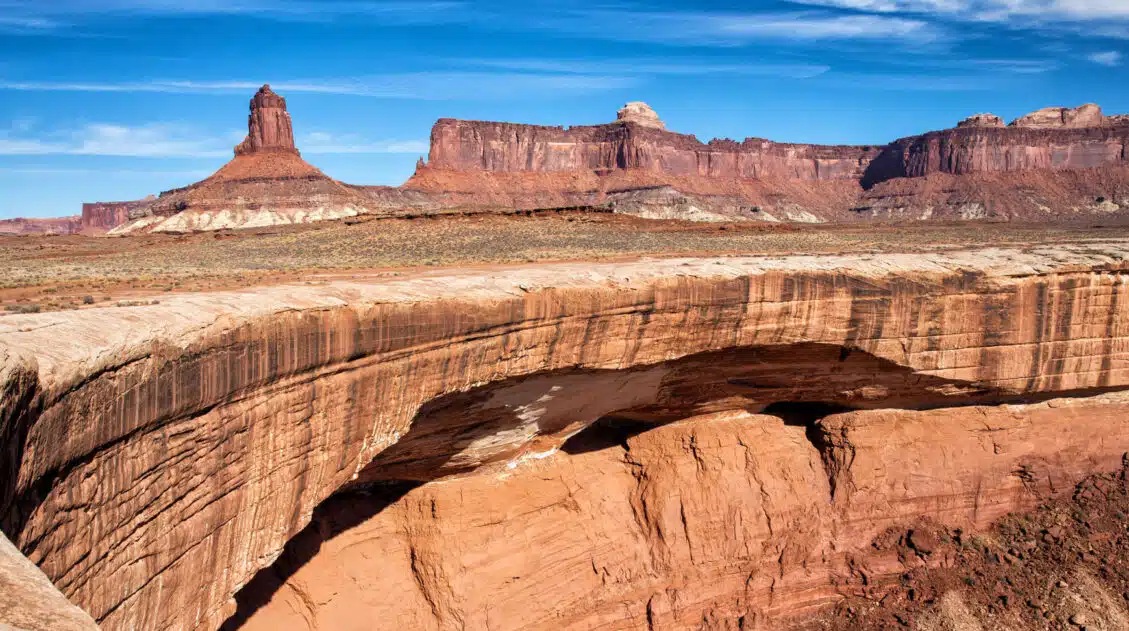
The road gets its name because it traverses the top of White Rim Sandstone. Geologically, this is the layer of rock that sits right below the mesa of Island in the Sky.
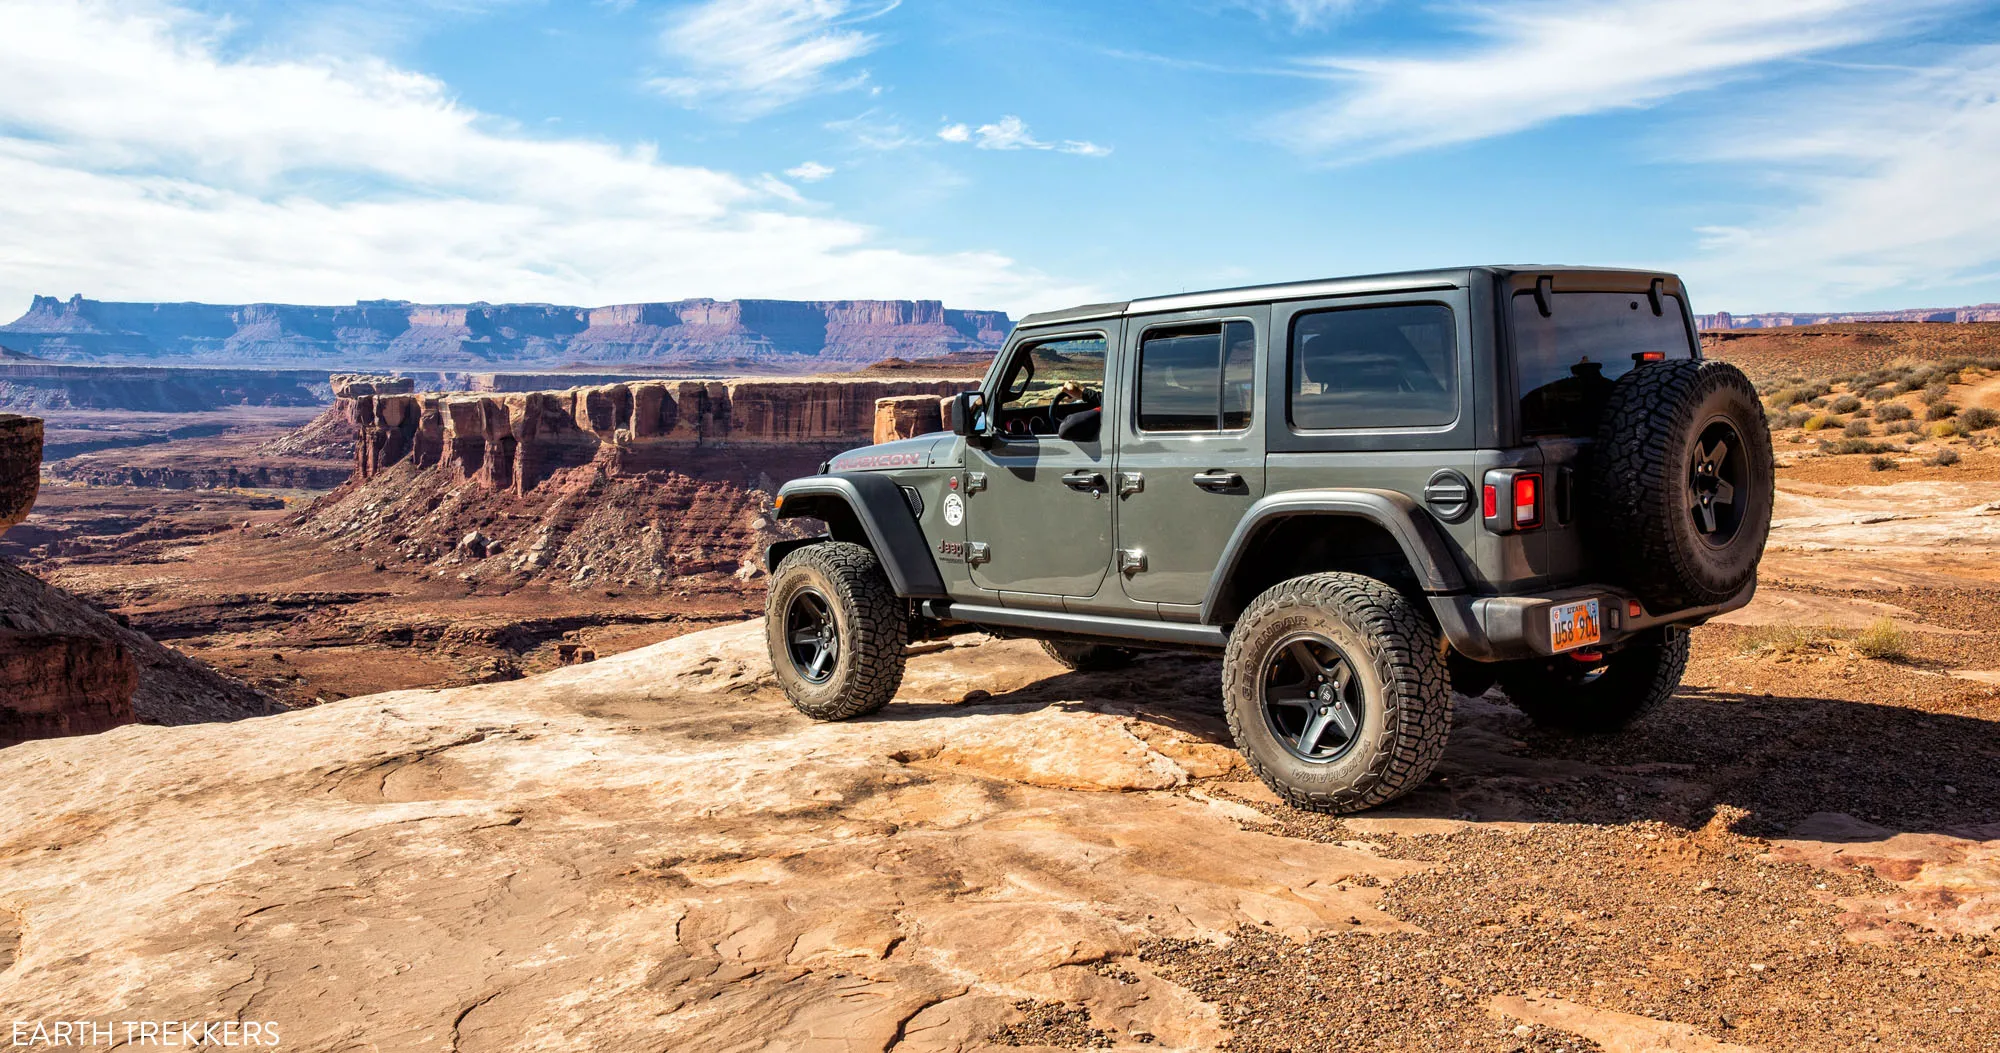
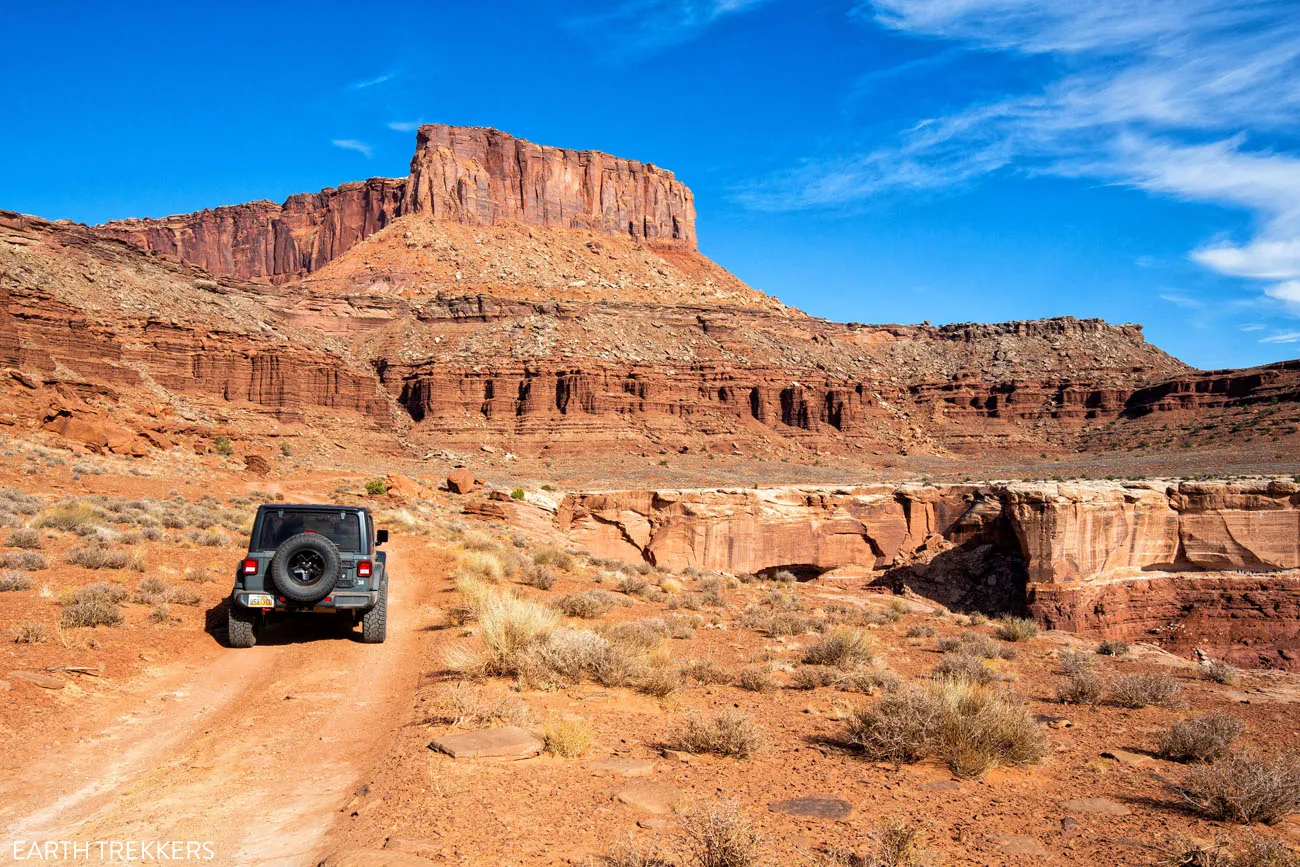
Our Jeep with the Grand View Point and the Island in the Sky mesa in the background.
A Brief Overview of the White Rim Road
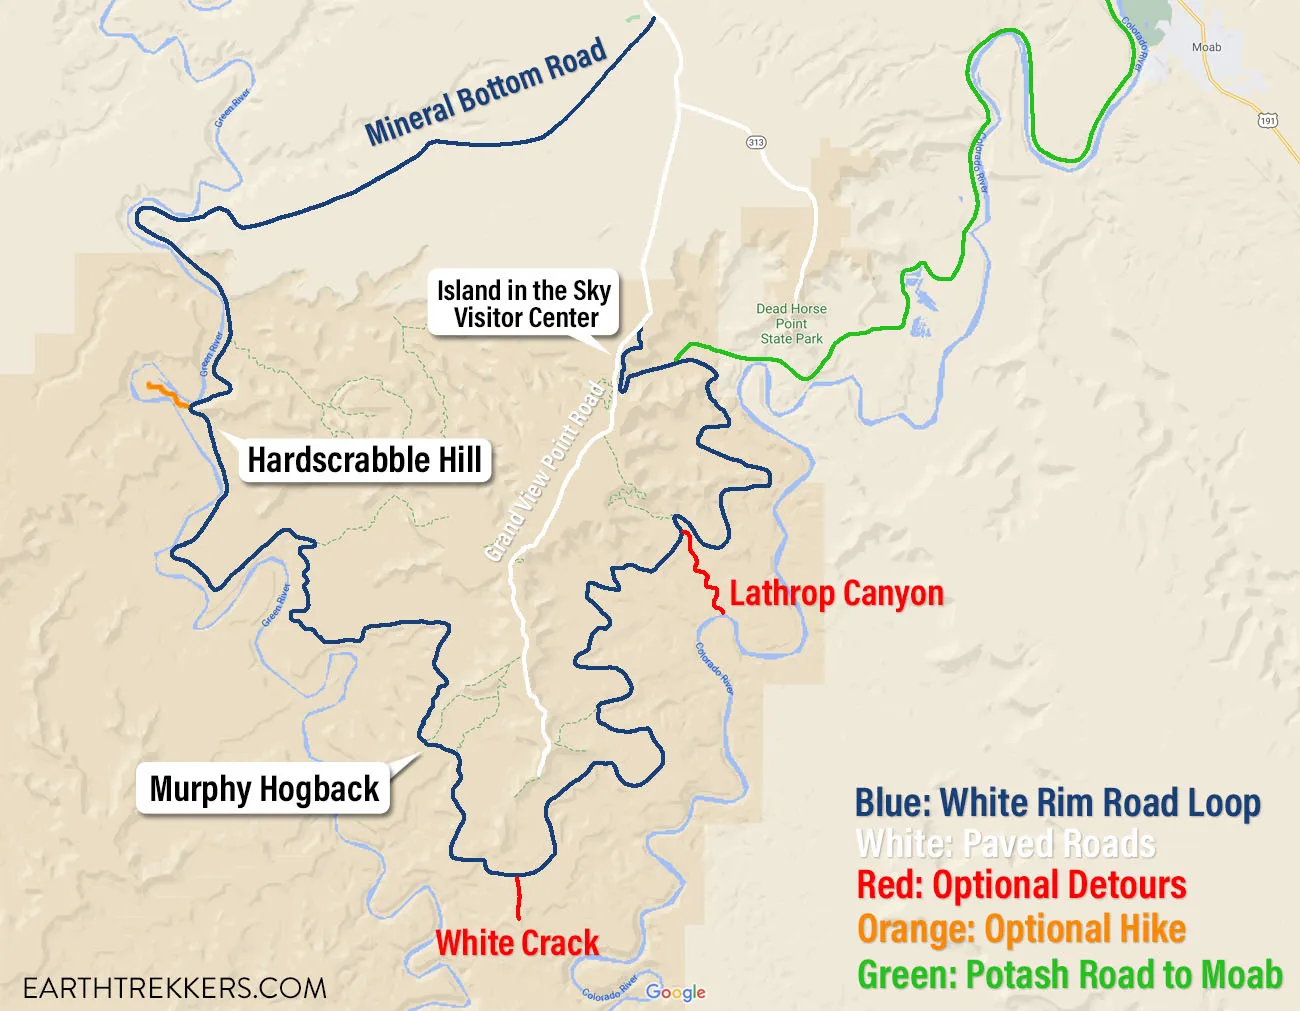
If you drive the White Rim Road as a complete loop, starting and ending at the Island in the Sky Visitor Center, it is 100 miles long. A brief portion of this distance is on paved road. On average, it takes two to three days to drive the White Rim Road.
There are a few things you MUST have in order to drive the White Rim Road:
- A high-clearance 4×4 vehicle
- Permit
- Entrance fee into Canyonlands National Park
What Type of Vehicle Should You Drive?
In order to drive the White Rim Road, a high-clearance 4×4 vehicle is required by the National Park Service. It must be a true 4×4 (not AWD) and have high-clearance. You will drive some very rough sections, over large rocks and boulders, and on rutted roads.
We were told that the White Rim Road is getting rougher every year since little maintenance is being done on the road.
We rented a Jeep Rubicon from Canyonlands Jeep Adventures in Moab. With the extra lift and the rugged tires, it was a great decision. Our Jeep had zero issues on the drive and handled the challenging hills and rough roads like it was nothing.
ATVs, UTVs, and OHVs are not permitted on the White Rim Road. Motorbikes are permitted on the White Rim Road.
Our Jeep on the final descent of Hardscrabble Hill
Please practice the seven principles of Leave No Trace: plan ahead, stay on the trail, pack out what you bring to the hiking trail, leave areas as you found them, minimize campfire impacts, be considerate of other hikers, and do not approach or feed wildlife.
Permits for the White Rim Road
To drive the White Rim Road, you must have a permit. There are park rangers who patrol the road and check vehicles and cyclists for the appropriate permit.
Backcountry Permit
If you plan to drive the White Rim Road over multiple days, you will need an overnight backcountry permit.
You can reserve overnight permits up to four months before the following season (up to six months before your dates of travel). For the spring and fall seasons, the most popular time to drive the White Rim Road, permits can sell out very quickly. I recommend making your reservation as soon as permits become available for your date of travel.
Here is when overnight permits become available:
- March 10 – June 9 (opens November 10)
- June 10 – September 9 (opens February 10)
- September 10 – December 9 (opens May 10)
- December 10 – March 9 (opens August 10)
You will reserve your permit on Recreation.gov. For more information and to confirm the above dates, visit the National Park Service website.
Day Use Permit
Day use permits are limited to 50 vehicles per day. 25 of these permits are available online up to 24 hours before your trip. They are available starting at 8:00 AM MT one day in advance. The remainder of the permits will be available at the visitor center. Learn more here.
PRO TRAVEL TIP: If you have a backcountry permit to camp along the White Rim Road, you do not need a Day Use Permit.

Monster Tower
How Long Does It Take to Drive the White Rim Road?
On average, it takes two to three days to drive the White Rim Road. Overnight, you will sleep in one of the campsites located along the road (these require an advance reservation). During the longer days of summer, it is possible to drive the entire White Rim Road in one day, just be prepared for a very long day.
It is possible to drive part or all of the White Rim Road in one day. With such a short duration of time, we recommend driving just a portion of the White Rim Road if you only have one day. However, if you are doing this in the late spring and early summer, when the days are long, it is possible to do the full drive in one BIG day. Get the details in our guide How to Drive the White Rim Road in One Day.
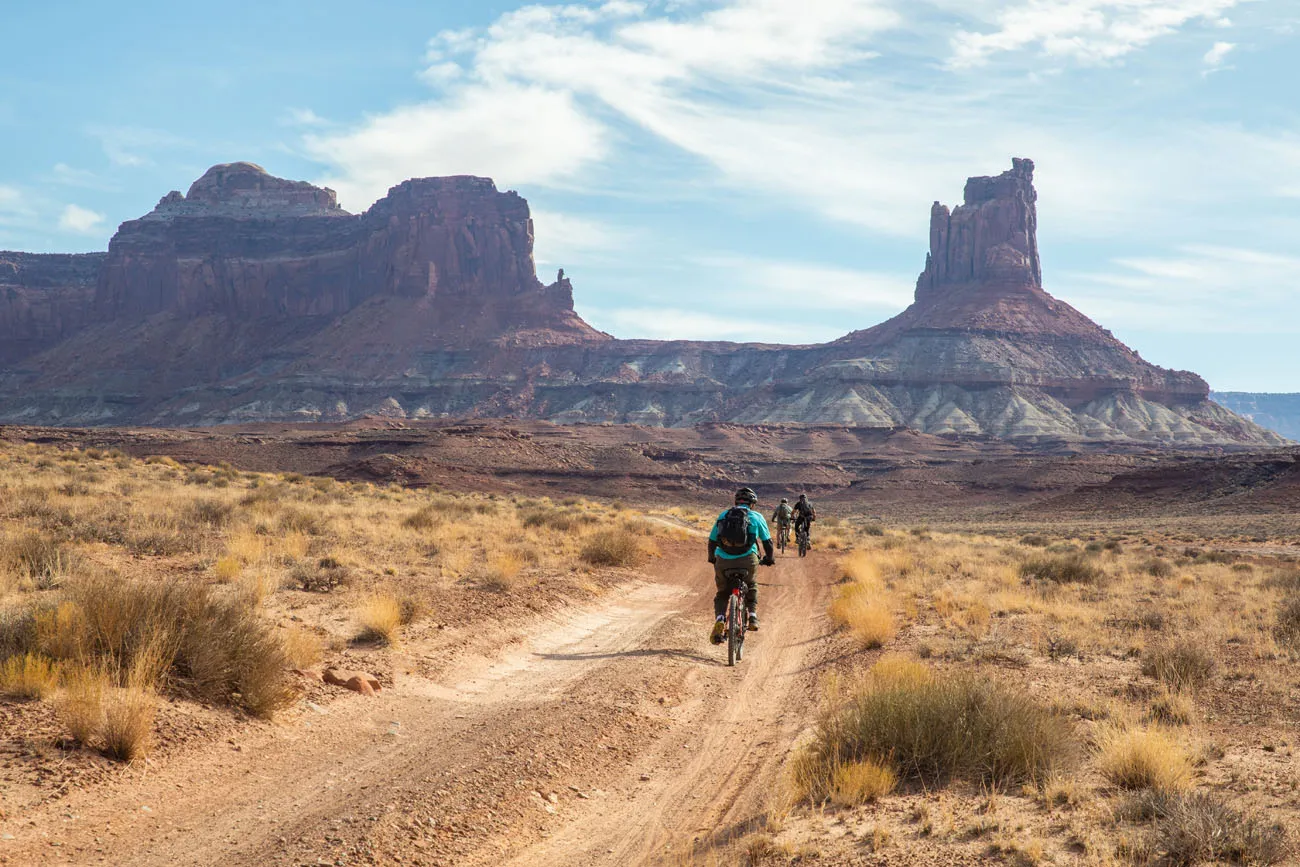
By mountain bike, it takes three to five days to cycle the White Rim Road. You can do this independently or part of an organized tour.
What We Did
We drove the White Rim Road in two days (November 12 and 13, 2020).
We did not attempt to reserve a campsite when they were first released, and just chose one of the remaining campsites about a month before we took this trip. So, it was very slim pickings.
Our campsite was Airport D, which is located about 18 miles from the entrance onto the White Rim Road near the Island in the Sky Visitor Center. Since this campsite is located so close to the starting point (or ending point, depending on the direction you choose to go), it’s not an ideal location.
We started on Mineral Bottom Road, doing most of the loop on our first day, arriving at our campsite around 3:30 pm. On day two, this gave us enough time to drive the detour to Lathrop Canyon, drive the Shafer Trail Road twice, and then head back to Moab on Potash Road.
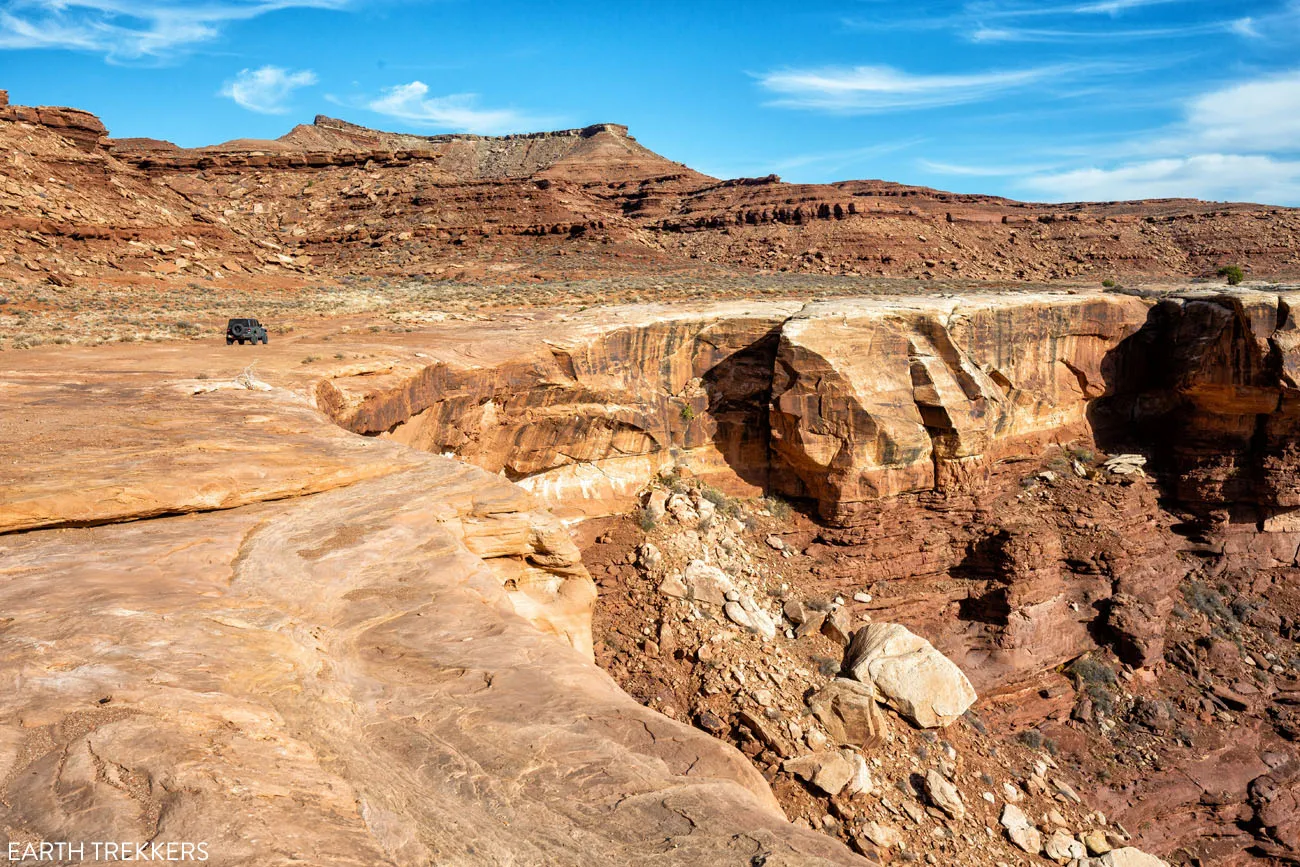
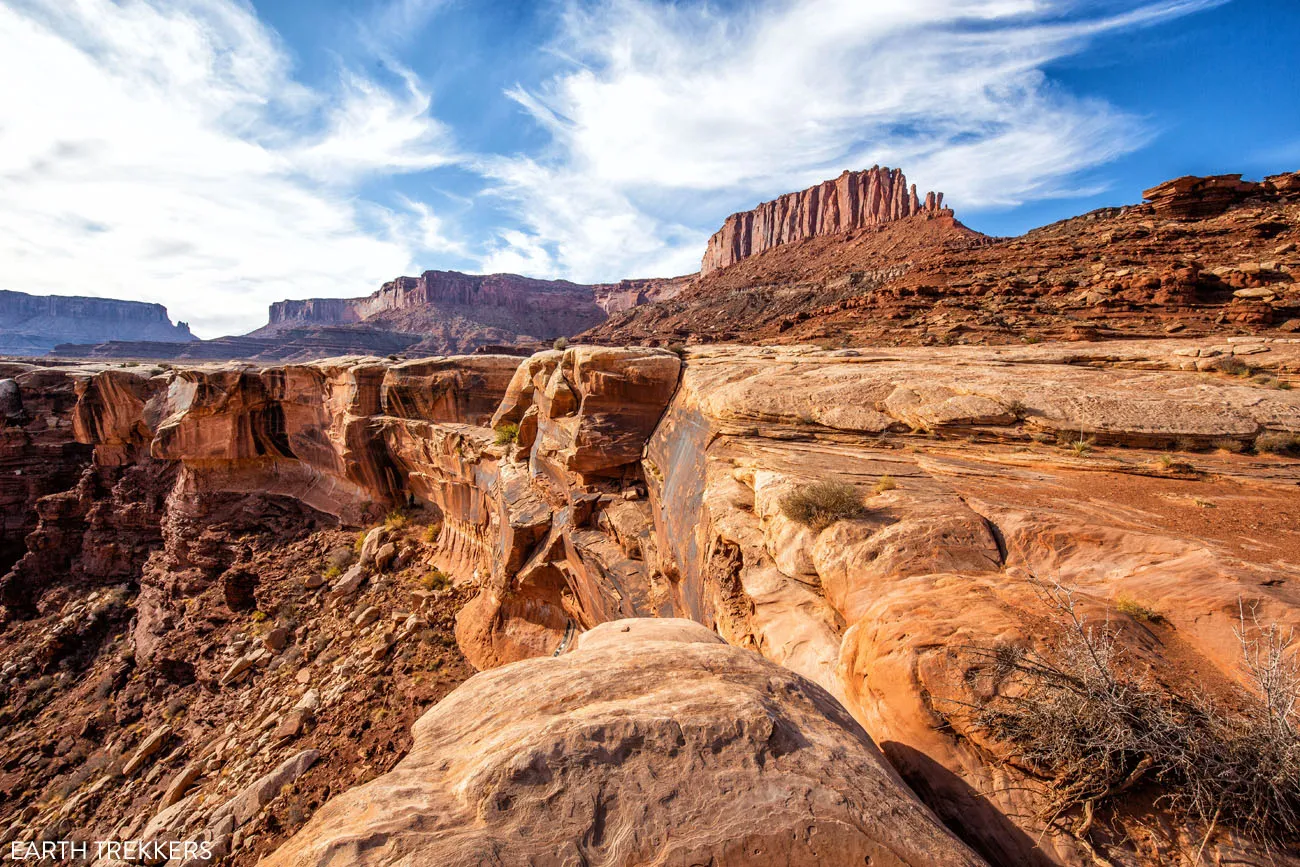
At times the road takes you right to the edge of the canyons. This is Monument Basin.
Which Direction Should You Go?
You can drive the White Rim Road in either direction. It is a two-way road, although it may not look like that in many of our photos. For most of the drive, the road is only wide enough for one vehicle. However, there are pull outs which are just wide enough to let another vehicle pass.
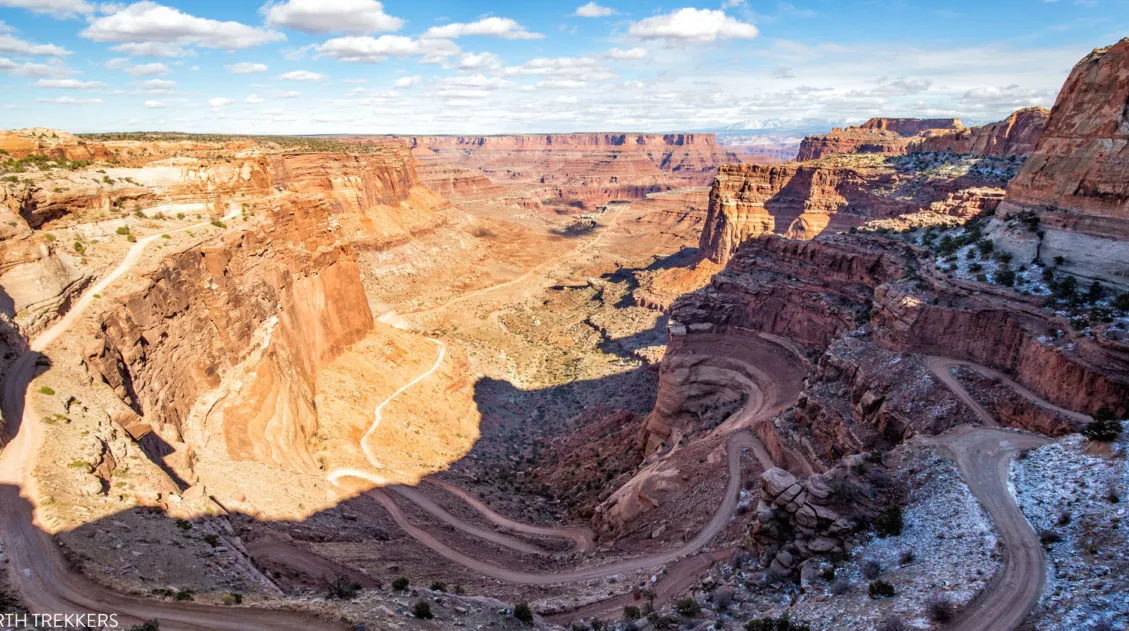
Most people choose to drive the White Rim Road in the clockwise direction. You will start your adventure on the legendary Shafer Trail switchbacks and then head around the mesa of Island in the Sky. By doing the White Rim Road in a clockwise direction, you will drive up the two most difficult driving portions of the drive, Murphy’s Hogback and Hardscrabble Hill.
For many people, the direction you drive the White Rim Road will depend upon your campsite(s) location.
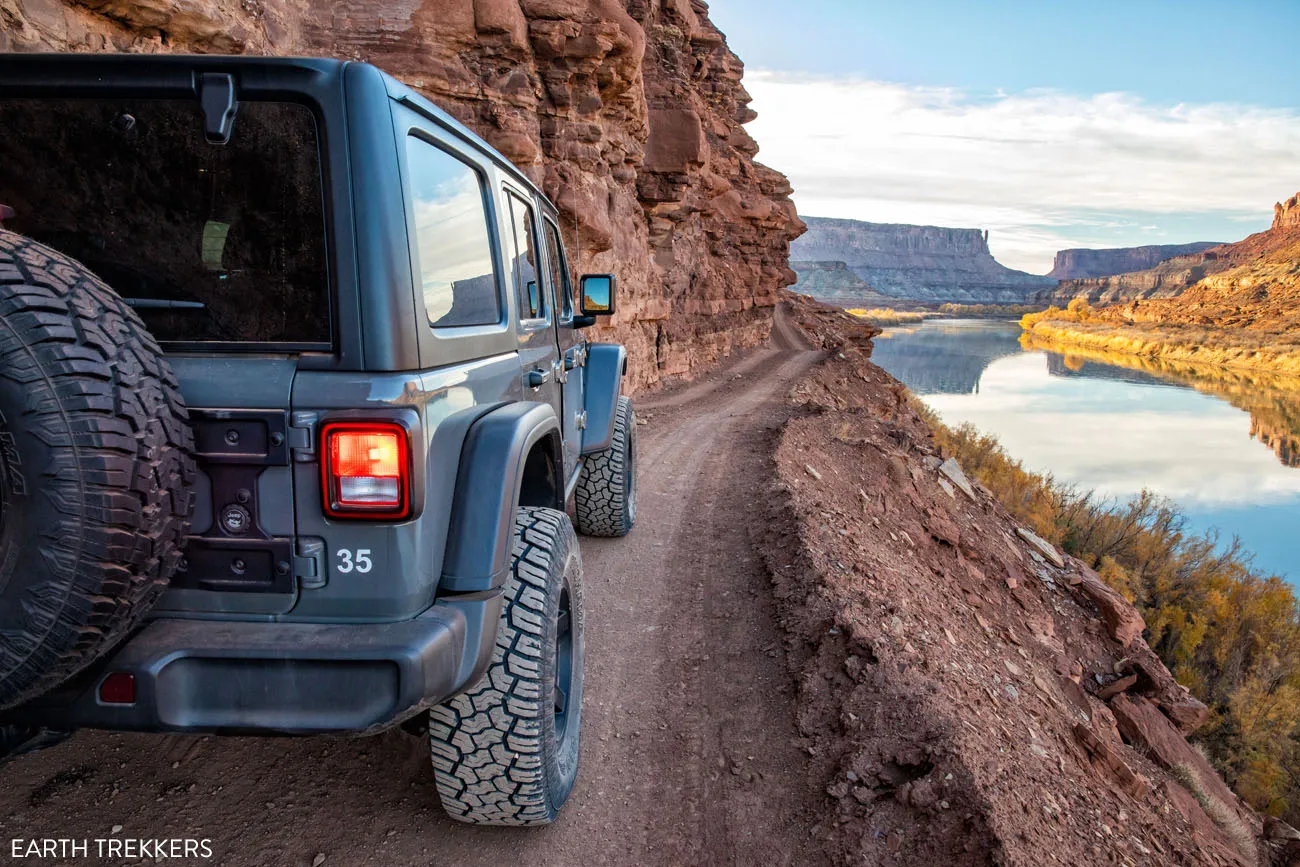
Driving along the Green River. This section of the drive is between Hardscrabble and Labyrinth campsites.
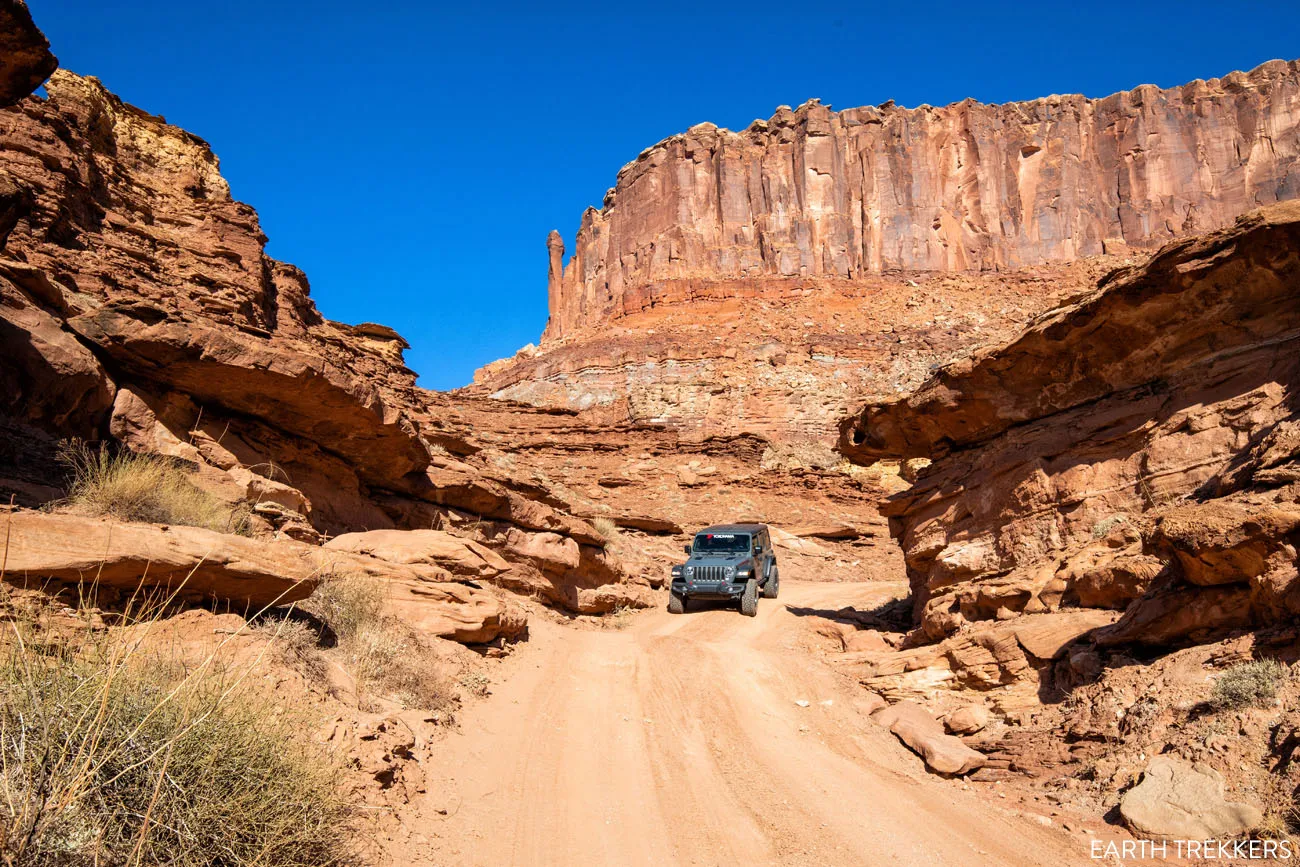
How Difficult is This Drive?
Most of the drive is easy. For the most part, the road is a rough, dirt road. There will be some very rough sections, where the road is littered with rocks and small boulders or you will drive over rough slickrock. If you are passenger, be prepared to be tossed around a bit in your seat.
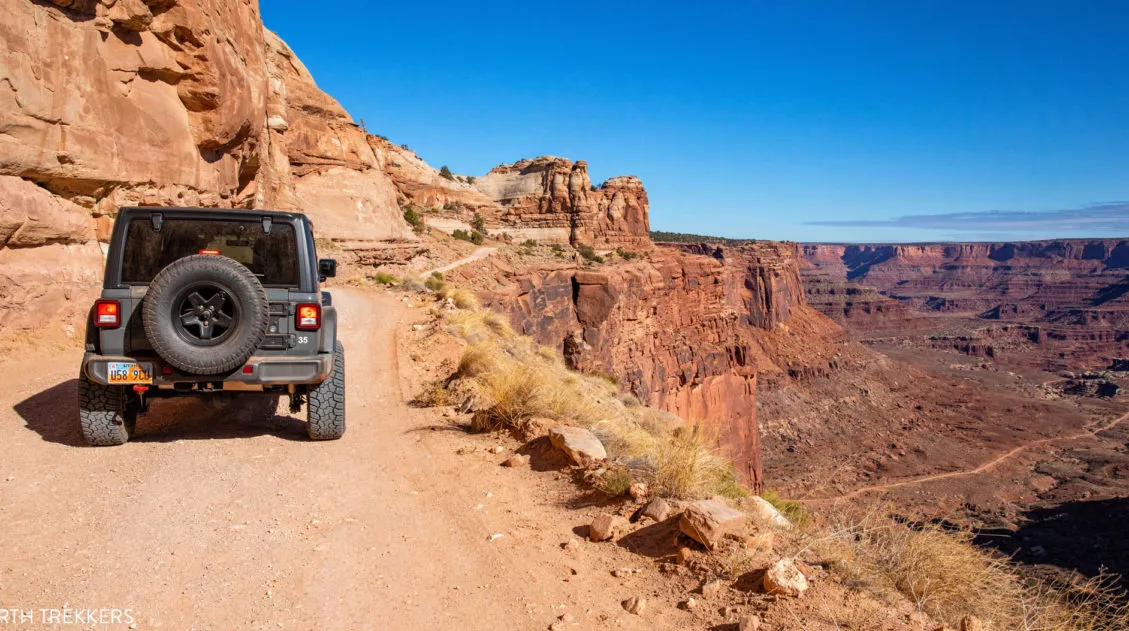
There are short sections where the road is narrow with a drop off on one side. These sections are on the Shafer Trail, along the Green River near Labyrinth campground, and a few places where the road gets near the edges of the canyons.
The trickiest parts of the drive are Hardscrabble Hill and Murphy’s Hogback. In these two sections, you will ascend (or descend) a very narrow, steep road. On Hardscrabble Hill, there are a few wider sections to allow another vehicle to pass. However, on Murphy’s Hogback, the road is only wide enough for one vehicle. If you meet another vehicle on this hill, one of you will have to reverse to a wider section of the road.
In order to drive the White Rim Road, you should have some experience driving unpaved roads. You also need to be able to drive in reverse, for when you meet another car on the road. If you are the one closest to a pull-out, you will need to drive in reverse to this point in order to let the other vehicle pass.
Plus, you need to be able to drive on narrow roads with drop-offs. If you have a fear of heights, you might want to skip this drive.
You should also know how to put your vehicle in 4WD and when to use 4WD High vs. 4WD Low. And make sure you know how to change a flat tire.
Best Time to Drive the White Rim Road
The best time to drive the White Rim Road is the spring and fall seasons, when the temperatures are mild.
Flood season is from early May through late June, so expect wet conditions during this time. Rain can temporarily make the dirt roads impassable, so keep this in mind when choosing your travel dates.
In the summer, daytime temperatures can soar, but the days are long and the nights are cooler, nice weather for camping.
In the winter, be prepared for snow and ice on the road and below-freezing temperatures overnight. Shafer Road and parts of the White Rim Road can close in the winter months due to snow. If you plan to do this drive in the winter, get updates on the national park service website.
The graphs below depict the average monthly temperatures and precipitation for the nearby town of Moab, which will help you plan your trip.
We did this drive in mid-November. The high temperature was in the high 30’s and at night it got down to almost 20 degrees Fahrenheit.
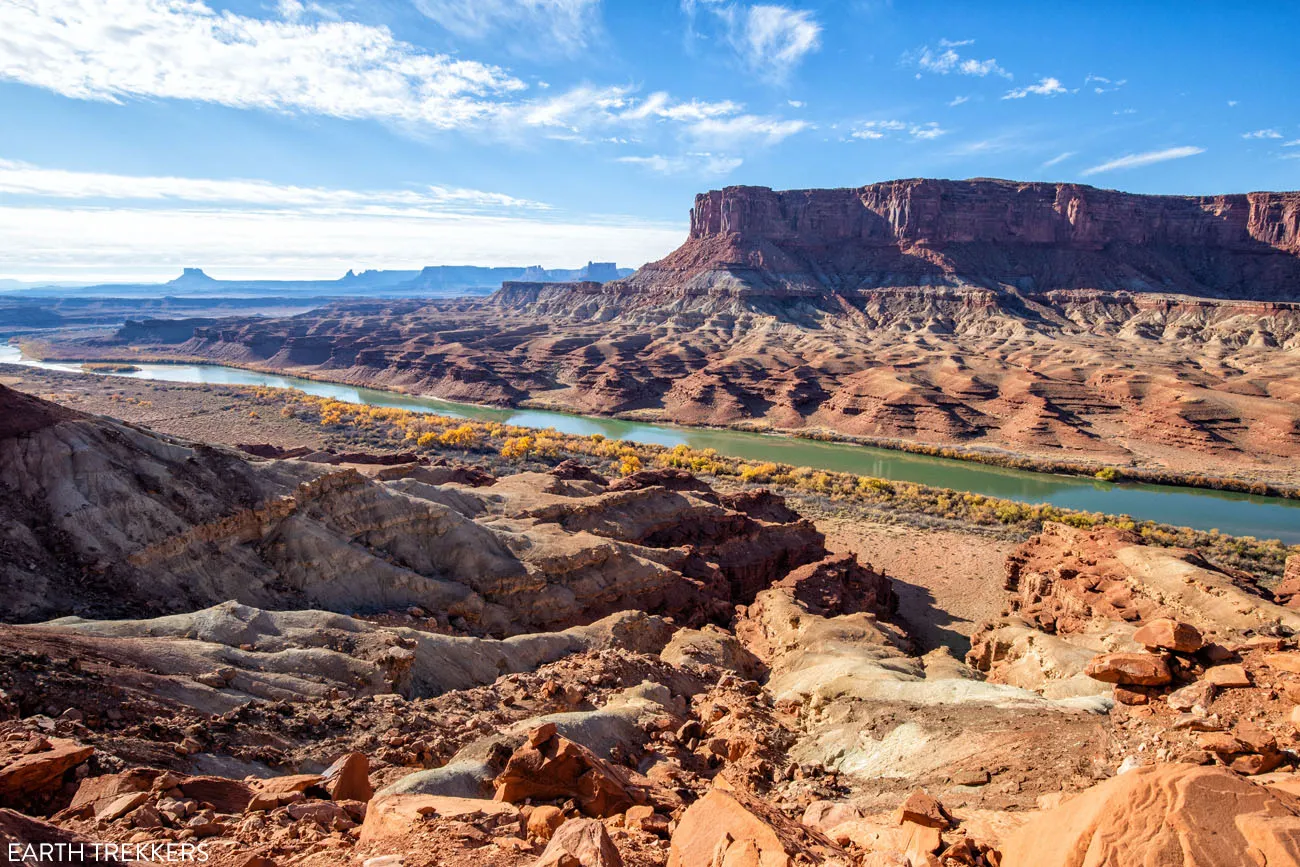
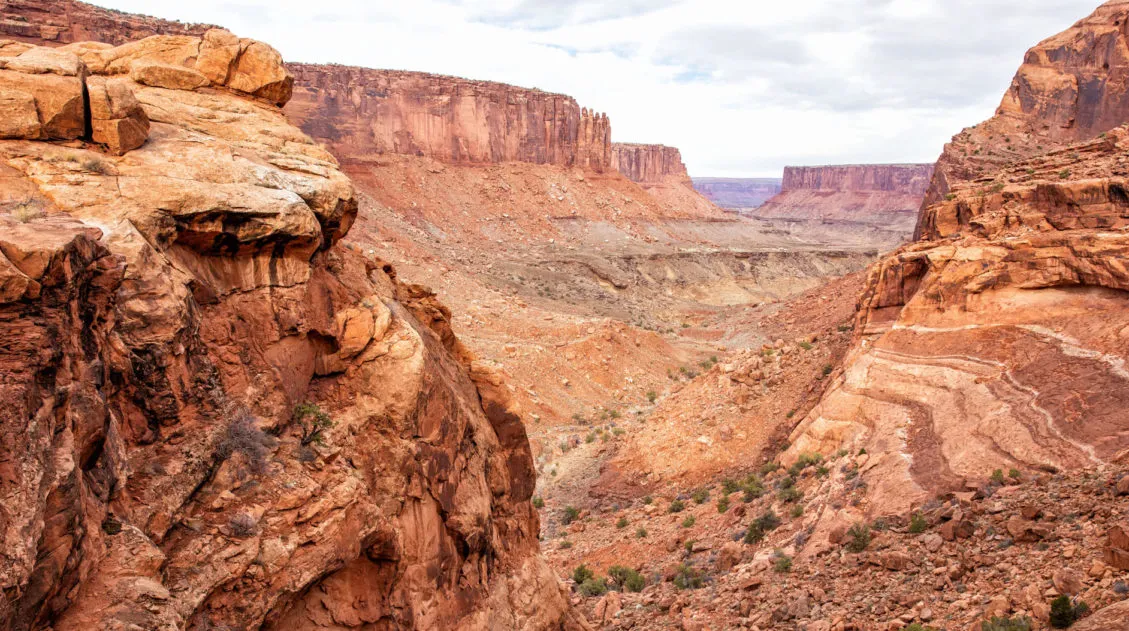
The view of the Green River from Hardscrabble Hill. Off in the distance is The Maze district of Canyonlands National Park.
Campsites on the White Rim Road
There are ten camping areas with a total of 20 individual campsites on the White Rim Road.
If you plan to drive the White Rim Road in two days, I recommend reserving a campsite near the halfway point of the drive. These camping areas are Gooseberry (2 sites), White Crack (1 site), and Murphy Hogback (3 sites).
If you plan to do this drive in three days, reserve two different campsites, one near the beginning and one near the end of the drive.
At camping areas with more than one campsite, the sites are spaced out so that you have some level of privacy. They are located such that you are out of earshot the other campsites and some are also out of sight of each other.
We stayed at Airport D. We really got lucky. This campsite is the best of all 4 sites at Airport, in my opinion. It was secluded and out of sight of the remainder of the campsites. It was a longer walk to the toilet but it was worth it for the isolation. Plus, the Airport Tower makes a nice backdrop.
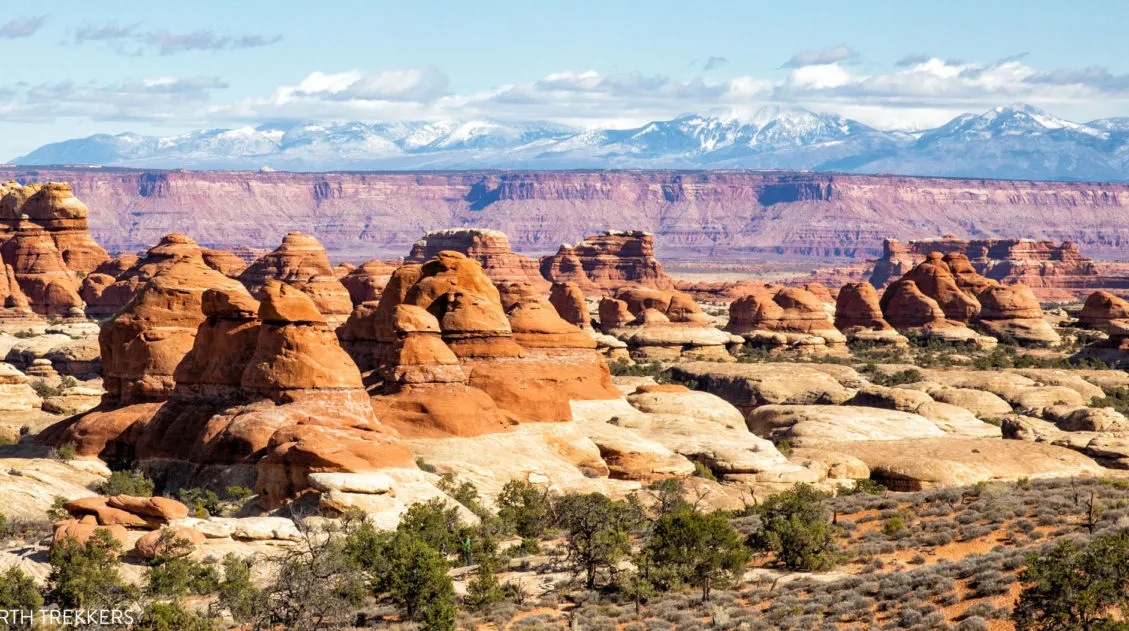
If you can, we highly recommend White Crack. There is only one campsite here, so if you are looking for solitude, this is a great place to be. Also, since it is located at the tip of a peninsula, you get to have one of the best views of the drive right from your own private campsite. From here, you can see The Needles, The Maze, and the mesa of Island in the Sky.
For a map of the camping area locations, click here.
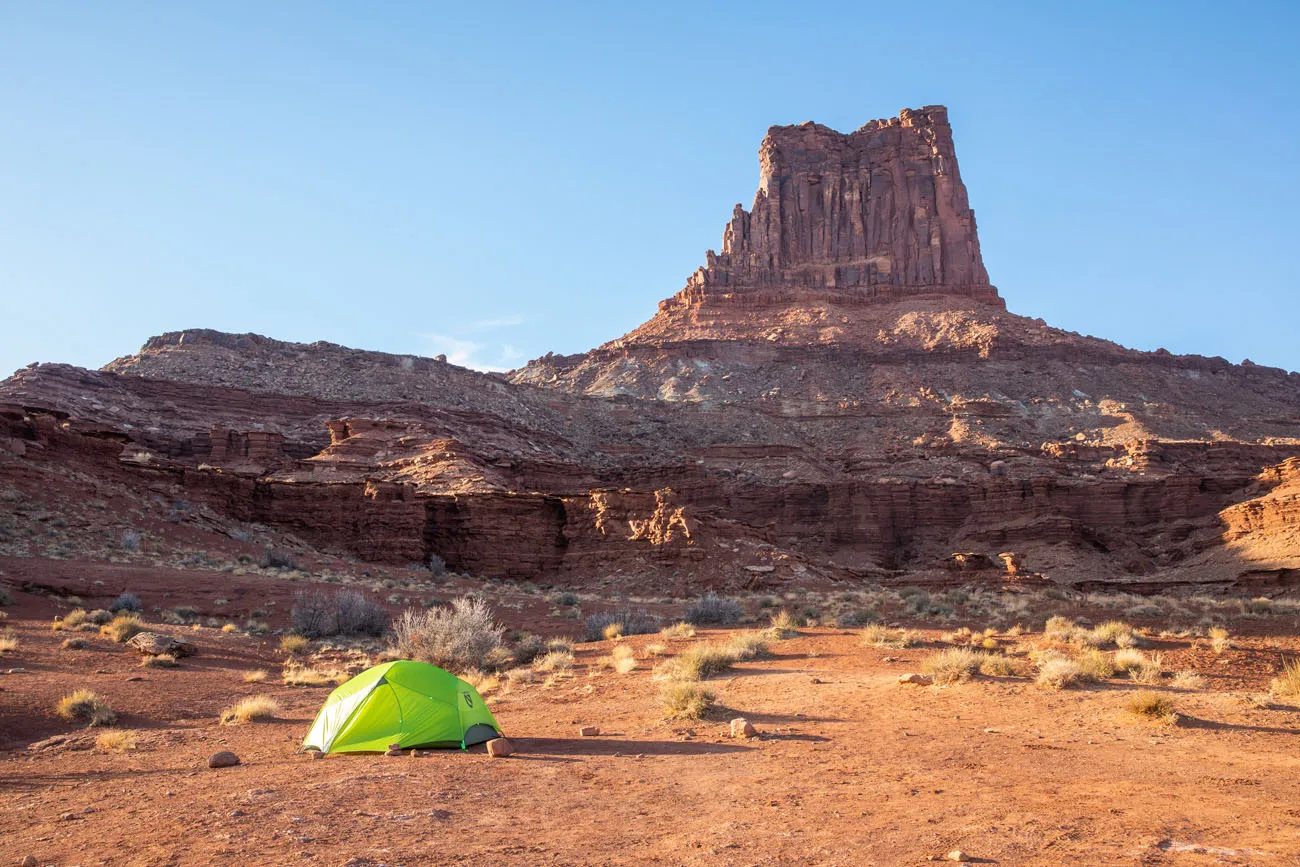
Airport D campsite

All detours, hiking trails, and camping areas are well marked with signs like this one.
Cellular Service
Cellular service on the White Rim Road is very spotty/nonexistent. We had minimal cell service near the Gooseberry and Airport camping areas. From our campsite, we had just enough service to send a text and photo home to Tyler and Kara. But for the remainder of the White Rim Road (the entire western part of the drive) we had no cellular service.
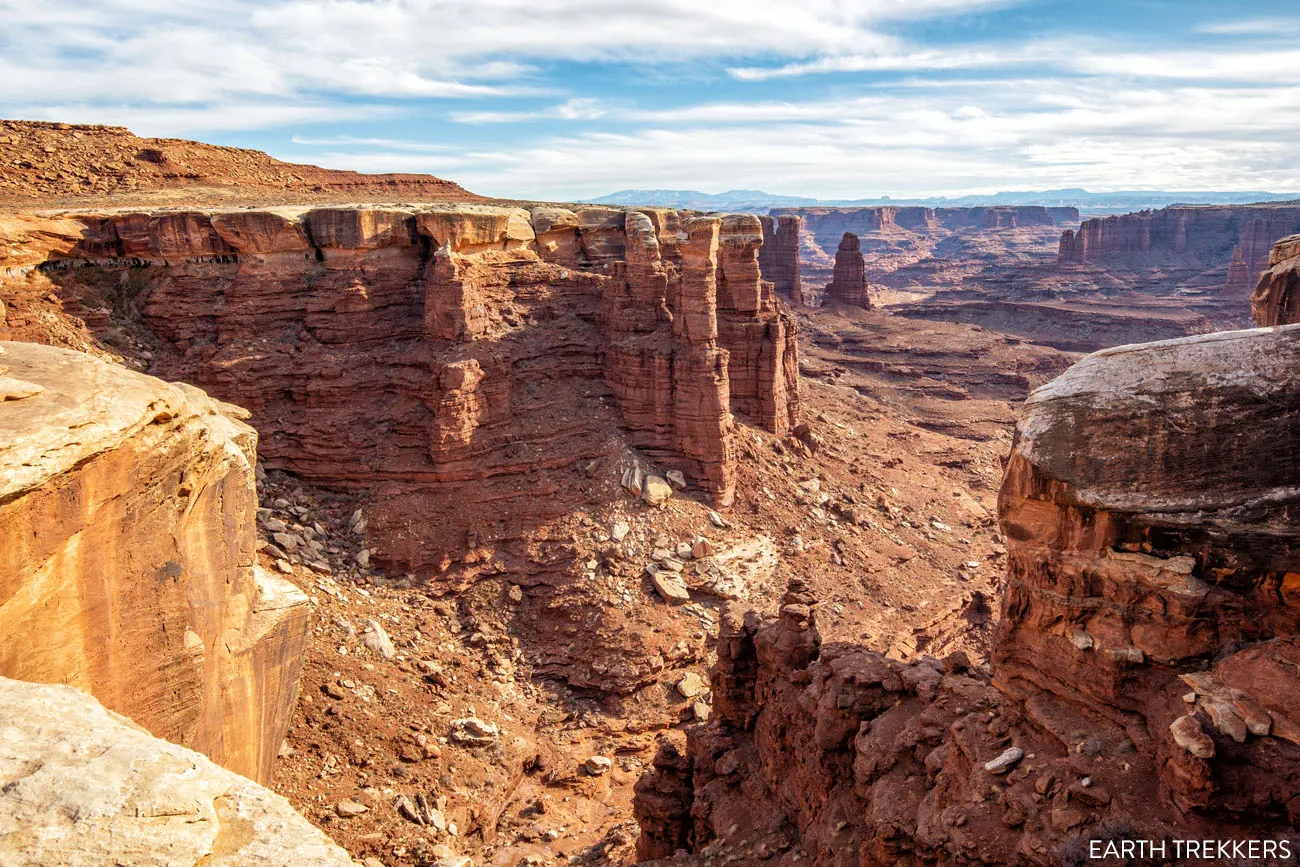
Monument Basin
More Important Things to Know
Before you go, get an update on current road conditions. Road conditions do change, so stop by the Canyonlands Island in the Sky Visitor Center and ask about the current conditions of the roads before embarking on this adventure. For example, when the National Park Service issued our backcountry permit, they warned us of “obstacles developing in deep sand” when ascending Hardscrabble Hill in the counterclockwise direction. But upon checking current conditions at the visitor center we were told that that section of the road had been recently repaired. Lucky us!
Before you go, get updates on the weather. Some portions of this route may be impassable when wet.
Know your driving skills. Make sure you are comfortable maneuvering a vehicle over rough rocky surfaces. And make sure you are comfortable ascending and descending narrow rough roads with a sharp drop-off edge in reverse in case you do come across oncoming vehicles.
The section of the loop between the Mineral Canyon Switchbacks and White Crack Road (the western section of the White Rim Road) is noticeably rougher and more technical than the section between Shafer Trail and White Crack Road. The Lathrop Canyon Road detour and the Colorado River Overlook detour are also very rough.
Before starting any of the major ascents and descents, scout the road for oncoming vehicles first.
Always keep an eye out for mountain bikers. We saw more mountain bikers than we saw cars.
There is no potable water along the White Rim Road. Make sure you bring an adequate supply of water.
Toilets are located at each camping area and camping areas are roughly spaced out 15 miles apart.
Make sure you have a full tank of gas. One tank is enough to drive the entire White Rim Road, drive the extra detours to White Crack and Lathrop Canyon, and get to and from Moab. On our one tank of gas, we drove from Moab to Mineral Bottom Road, drove the White Rim Road plus detours to White Crack and Lathrop Canyon, up and down the Shafer Trail, and then took Potash Road back to Moab. In our Jeep Rubicon, we still had roughly 100 miles of gas remaining once we returned to Moab.
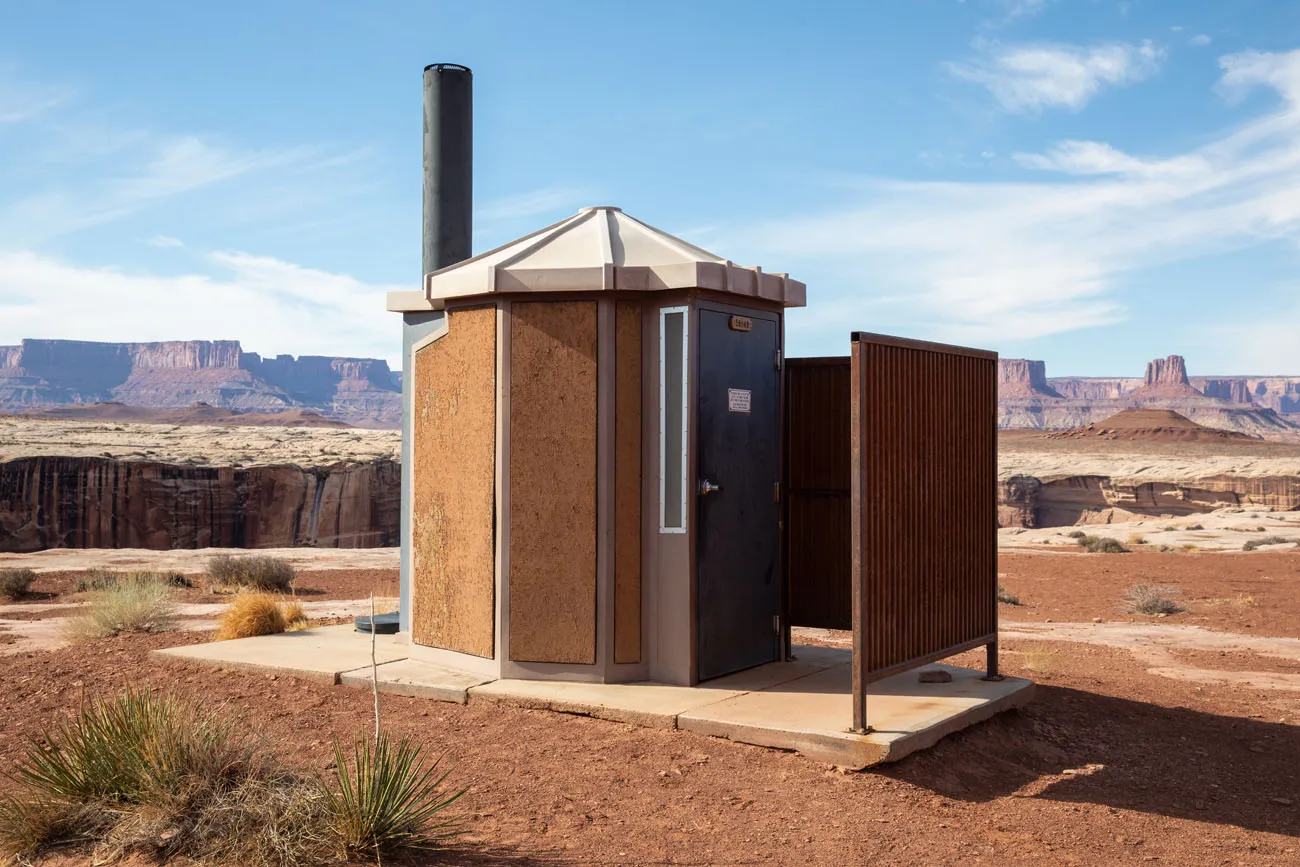
One toilet is shared between multiple campsites at each camping area.
Planning Checklist
6 months before: Reserve your backcountry permit(s).
3 – 4 months before: Reserve your 4×4 vehicle if you need one. Make your hotel reservations in Moab if you plan to stay here before or after the drive.
2 weeks before: Start checking weather conditions. Visit the Canyonlands National Park website for updates about closures in the park. Begin putting together the gear you will bring with you.
1 – 2 days before: Stock up on the food and water you will take on the White Rim Road. Get one last update on weather conditions. Fill your vehicle with gas. Make sure your camera batteries are charged and your memory card has lots of space…you’ll be taking lots of photos!
Day 0: Have fun driving the White Rim Road!
The view from Monument Basin up to Grand View Point and White Rim Overlook.
Just in case you missed it, read part 1 of our 2 part series, Guide to the White Rim Road Route. This post describes the route in detail with lots of photos and tips on what to expect during the drive.
If you have any questions about driving the White Rim Road, let us know in the comment section below.
More Information about Utah & Canyonlands National Park
Canyonlands National Park Travel Guide
Pinterest Facebook Flipboard Canyonlands National Park Canyonlands National Park is one of the most underrated national parks in the USA. It’s also one of our favorites. This sprawling national park preserves the canyons, buttes, mesas, and arches that have been carved out by the Colorado and Green Rivers. It also contains the rock art of […]
How to Drive the White Rim Road in One Day
Driving the White Rim Road is one of the best experiences in Canyonlands National Park. For 100 miles, this road circles around the Island in the Sky mesa, taking you past canyons, buttes, and the Colorado and Green Rivers. This drive takes most people two to three days. If you have less time, it is […]
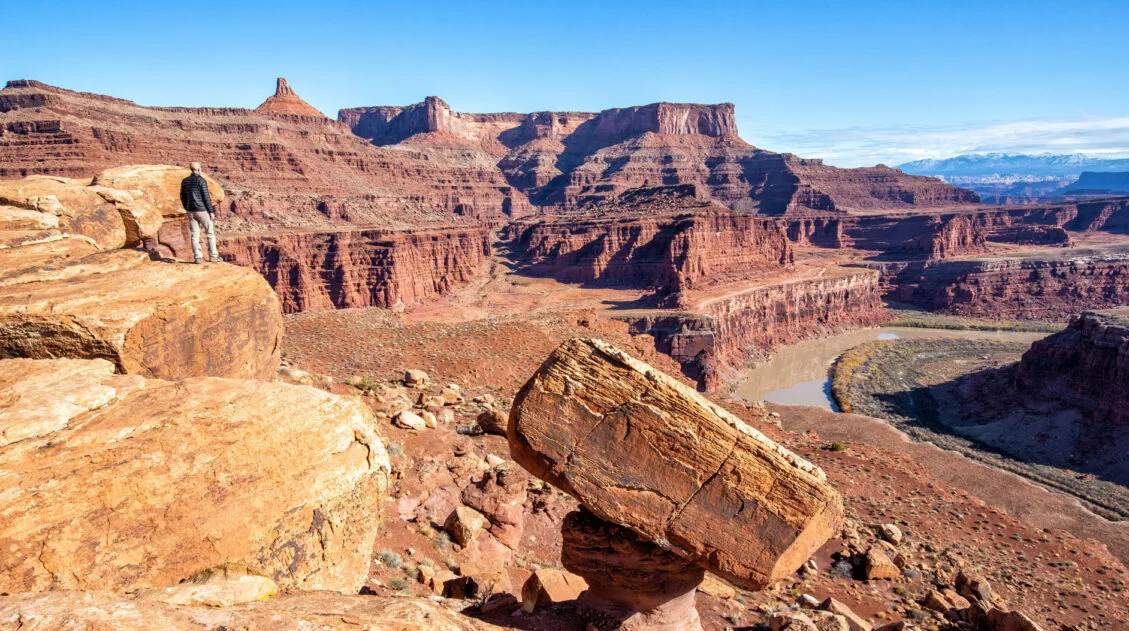
How to Drive Shafer Canyon Road and Potash Road | Moab, Utah
Have you seen photos of the Shafer Canyon switchbacks and said to yourself, wow, I’d really love to drive on that road? Do you like the idea of venturing away from the crowds and driving through some truly dramatic landscapes? Or, do you want to get a unique perspective of Canyonlands National Park and Dead […]
Best Things to Do in Island in the Sky: Canyonlands National Park
Canyonlands National Park is an underrated park located near Moab, Utah. Compared to its smaller and more popular neighbor Arches National Park, Canyonlands feels more rugged, more remote, and a whole lot larger. Island in the Sky, the most popular section of Canyonlands, is filled with jaw-dropping vistas and short but sweet hiking trails. Here […]
12 Amazing Things to Do in The Needles, Canyonlands National Park
The Needles is an often overlooked section of Canyonlands National Park. But those who take the time to visit the Needles are rewarded with thrilling, unique hiking trails, low crowds, and jaw-dropping views of Canyonlands National Park. In this post, we cover the 12 best things to do in the Needles…12 great reasons why this […]
How to Hike the Syncline Loop in Canyonlands National Park
For years, I heard amazing things about the Syncline Loop. This tough hike is known for its outstanding views, and due to the primitive nature of the trail, it is only recommended for experienced hikers. It got such rave reviews in the hiking community and it sounded so thrilling that we couldn’t wait to hike […]
Arches, Canyonlands and Capitol Reef: 7 to 10 Day Road Trip Itinerary
Arches, Canyonlands, and Capitol Reef National Parks are three spectacular parks to visit in Utah. With 10 days, you can visit each of them, plus a few more cool spots, on this epic road trip. Tim and I did this road trip in November 2020. Prior to this trip, we had already visited each of […]
One Perfect Day in Arches National Park (+ Avoid the Crowds)
If you only have one day in Arches National Park, what should you do? Arches National Park is a relatively small national park with a handful of must-see sights. With one day in Arches, you can visit these top sights and a few off-the-beaten-path places. After multiple visits to Arches National Park, we have learned […]
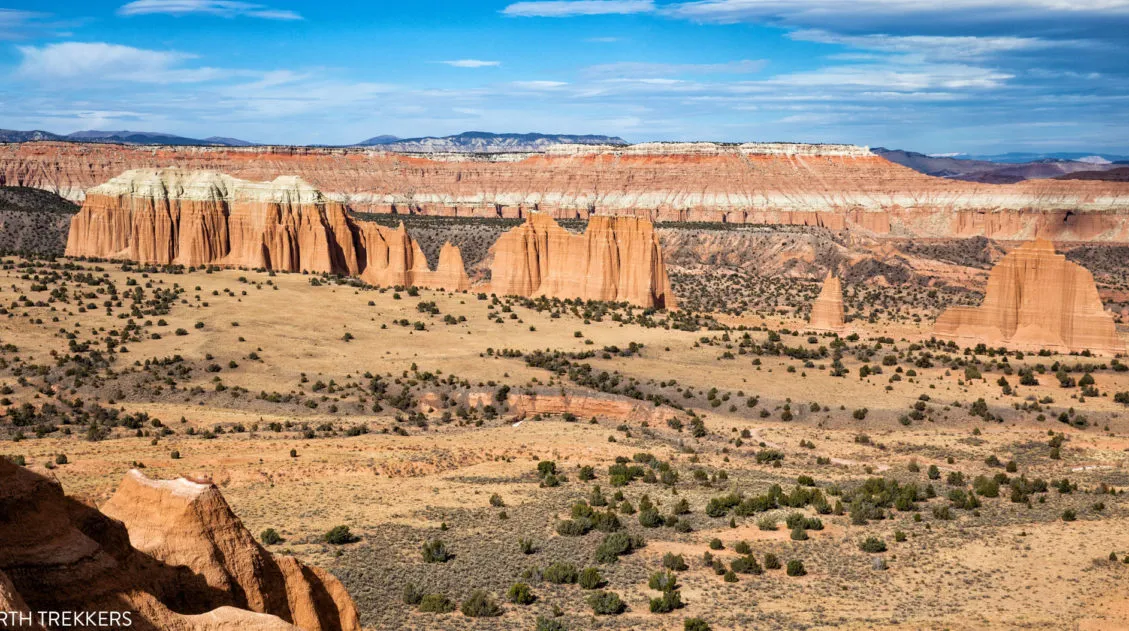
Complete Guide to the Cathedral Valley Loop (+ Map & Best Route)
Cathedral Valley is a rugged, remote district of Capitol Reef National Park. Few people travel out this way, to see this valley and its sandstone monoliths, colorful Bentonite hills, and vast desert scenery. But that’s part of its appeal. If you like the idea of leaving the crowds behind and exploring the backcountry, the Cathedral […]
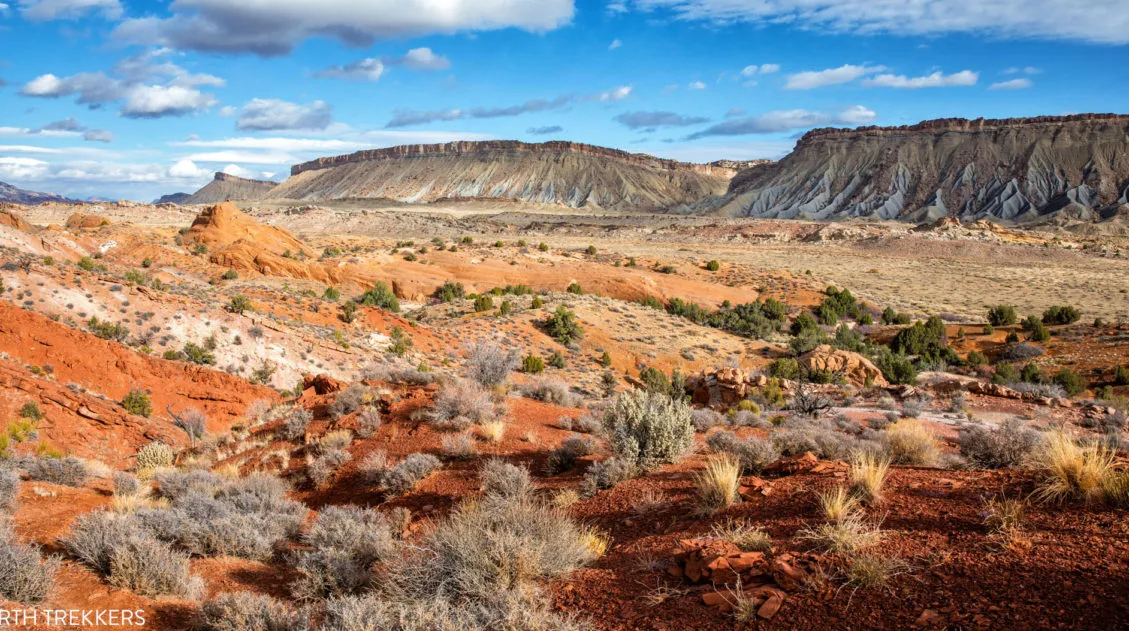
How to Loop the Fold in Capitol Reef National Park
Desert vistas, slot canyons, colorful hills made of bentonite and sandstone, marine fossils…these are just a few of the things that you will see when you Loop the Fold in Capitol Reef National Park. This incredibly scenic drive takes you through the remote, southern section of Capitol Reef. On this drive, you will circle around […]
Our 15 Favorite US National Parks: A Few May Surprise You
Stretching from the South Pacific, across the United States and into the Caribbean, are 63 national parks. These national treasures are filled with scenic drives, hundreds of miles of hiking trails, wildlife, historic sites, and endless opportunities for adventure. In this guide, we cover 15 of the best national parks in the USA and what […]
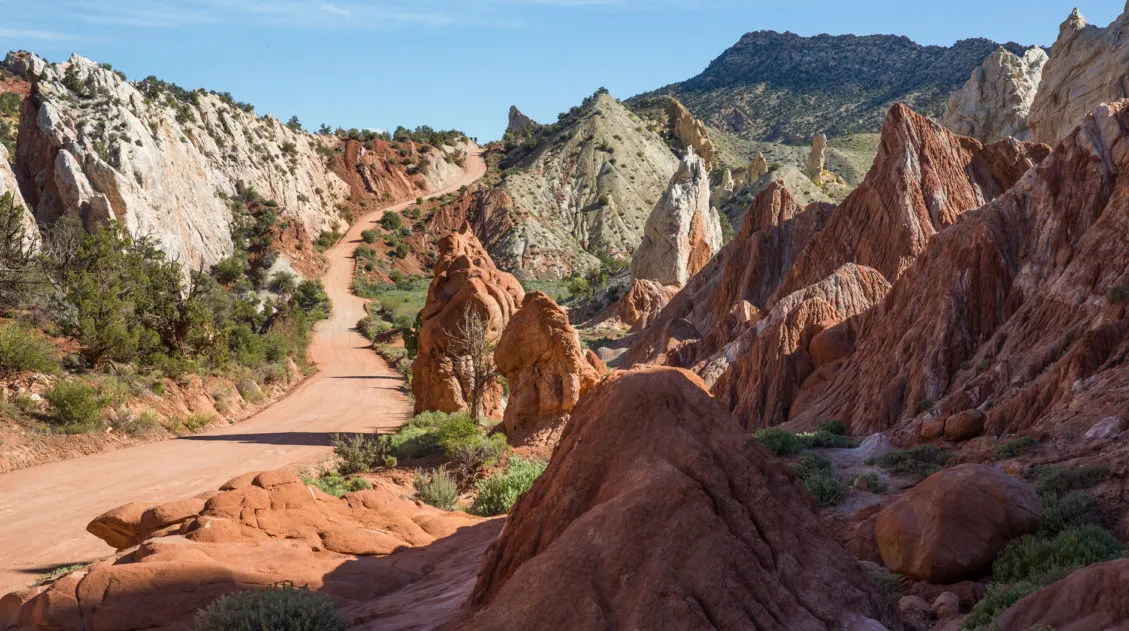
What’s It Like to Drive Cottonwood Canyon Road?
Cottonwood Canyon Road is a scenic, unpaved road that travels through Grand Staircase-Escalante National Monument. It connects the town of Cannonville with Highway 89, just west of Big Water. Tim and I drove this road during our first road trip through Arizona and Utah (we’ve since been back multiple times). Since we were traveling from Page, […]
The Ultimate Capitol Reef National Park Itinerary
With beautiful scenic drives, slot canyons, backcountry roads, historical sites, thrilling hikes, and stunning landscapes, Capitol Reef is an unexpectedly amazing national park. If you are planning your Capitol Reef National Park itinerary, we have lots of information to help you plan your trip. Capitol Reef National Park is a highly underrated park. The views […]

United States Travel Guide: Places to Visit in the USA
Plan your visit to the United States. Learn about the best things to do, how to plan your time, road trip ideas, and sample itineraries.

Comments 9