For years, I heard amazing things about the Syncline Loop. This tough hike is known for its outstanding views, and due to the primitive nature of the trail, it is only recommended for experienced hikers. It got such rave reviews in the hiking community and it sounded so thrilling that we couldn’t wait to hike this trail.
Maybe our expectations were too big, but Tim and I did not like this hike as much as I thought we would. Yes, there are some great views along the way. Yes, the route finding is fun. We saw a total of two people on the trail, so the solitude you get on this hike is incredible. But in a place like Canyonlands, where the views from the rim are jaw-dropping, this hike failed to live up to the hype.
A big chunk of this hike is spent in a canyon with very little views. And the views that you do get don’t come close to what you see from the viewpoints along the rim of the Island in the Sky mesa. It’s a long, tough day and I think there are better ways to spend your time in Canyonlands (we have a full list at the end of this post).
However, if you are lured by the solitude and the challenge of this hike, keep reading.
Syncline Loop Hiking Stats
Distance: 8.5 miles (13.8 km) loop
Difficulty: Strenuous
Total Ascent: 2,050 feet (625 m)
Starting Elevation: 5,650 feet (1,725 m)
Highest Elevation: 5, 750 feet (1,750 m)
Lowest Elevation: 4,175 feet (1,275 m); at 3.25 miles (5.1 km) in the clockwise direction
Length of Time: The national park service recommends 6 to 8 hours for this hike although it can be done much faster. We did it in 3 hours and 40 minutes.


Syncline Loop Elevation Profile in the clockwise direction.
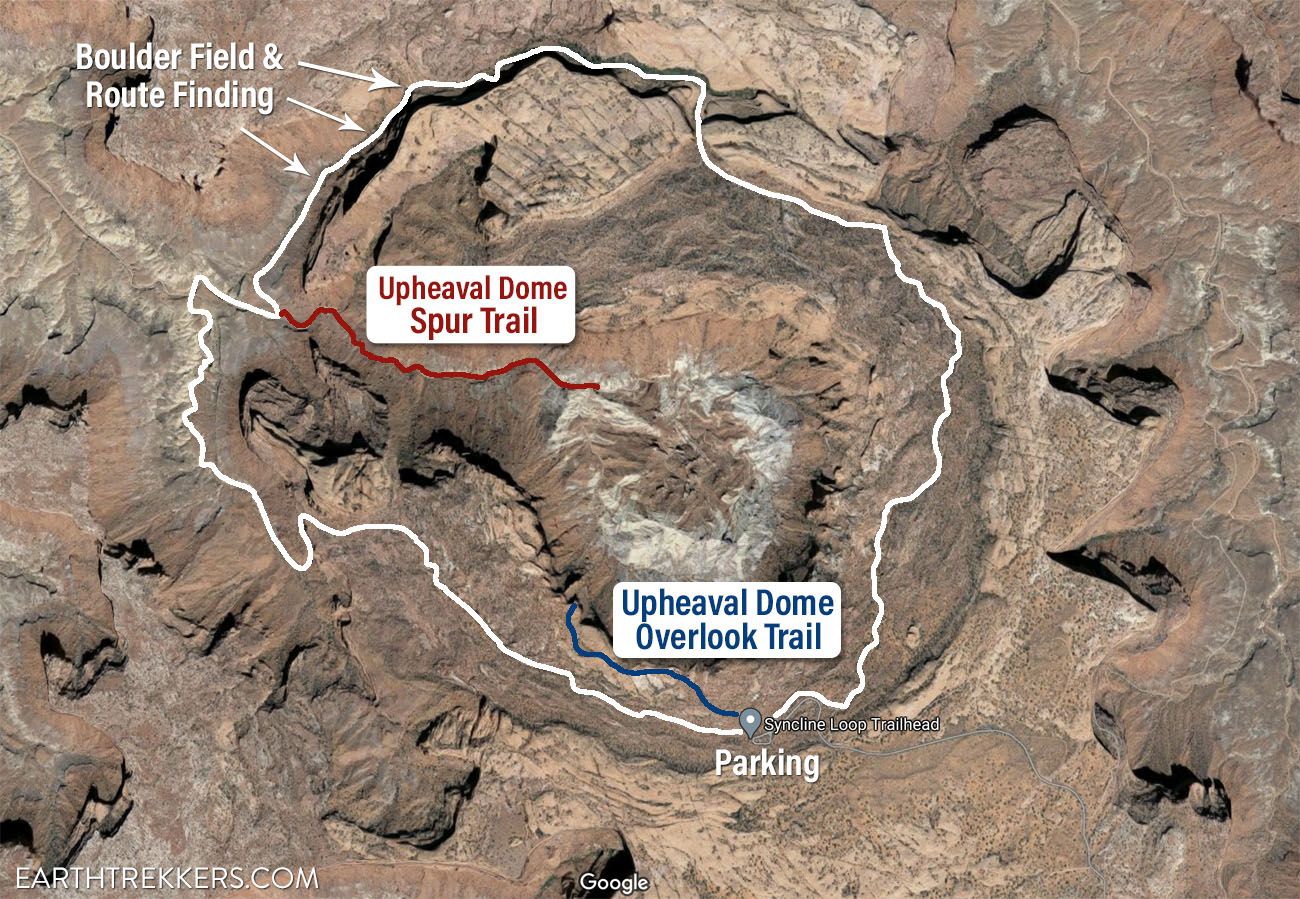
Syncline Loop Trail Map. The Syncline Loop Trail is in white. The blue and red trails are optional spur trails.
Please practice the seven principles of Leave No Trace: plan ahead, stay on the trail, pack out what you bring to the hiking trail, leave areas as you found them, minimize campfire impacts, be considerate of other hikers, and do not approach or feed wildlife.
When Can You Hike the Syncline Loop?
You can hike the Syncline Loop all year. Spring and fall are the best months, when temperatures are mild. In summer, expect soaring temperatures midday. During the winter months, temperatures are cool and snow and ice on the trail is a possibility.
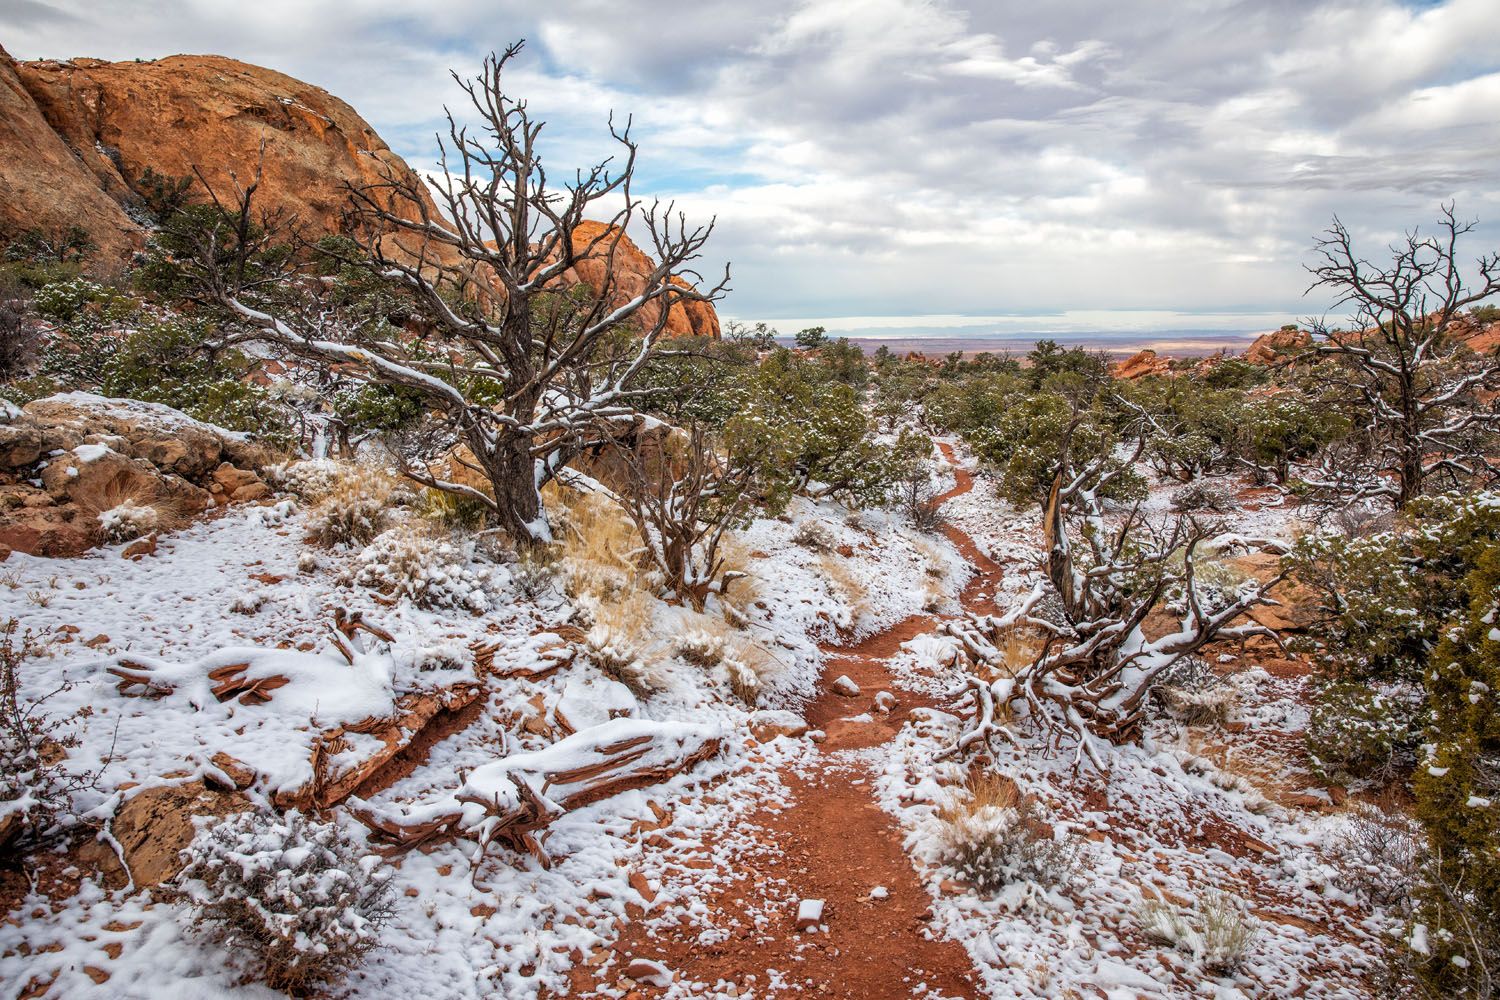
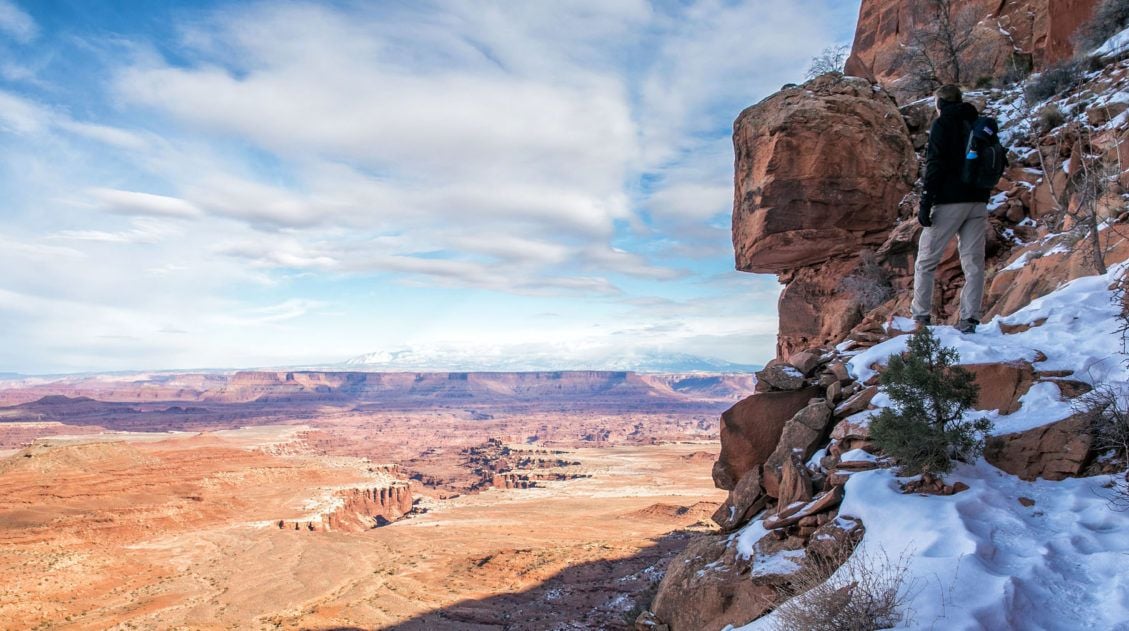
We hiked the Syncline Loop in early November. It snowed two days before our hike, which you will see in our photos below. But during this time, crowds were light and temperatures were low, making this a great time to visit Canyonlands National Park.
If you plan to do this hike in summer, make sure you’re well acclimated to the heat. Start early and carry plenty of water. There have been heat-related illnesses and deaths on this trail in recent years, so it can be dangerous to hike here in summer.
How to Hike the Syncline Loop
Step-By-Step Trail Guide
Getting to the Trailhead
The Syncline Loop is located in the Island in the Sky district of Canyonlands National Park.
The trailhead is located at the end of Upheaval Dome Road. Park in the lot at the very end of the road. There are restrooms here if you need one.
Two hikes start at this parking lot: the Syncline Loop and Upheaval Dome overlook. Late morning through midday, it could be tough to get a spot here, so try to get here early in order to get a parking space.
Which Direction Should You Hike the Syncline Loop?
Since this is a loop, you can hike the trail in both directions. The most popular way to hike the Syncline Loop is in the clockwise direction. In this direction, it will be a steep descent into the canyon and then a somewhat slow and steady climb back up to the rim. The strenuous climb through the boulder field comes halfway into the hike.
If you do this in the counter-clockwise direction, it’s a slow and steady descent down to the canyon. You’ll hike down through the boulder field, the trickiest part of the hike, both physically and mentally, since this is where you need to do some route finding. The hike will end with a steep, strenuous climb back up to the rim.
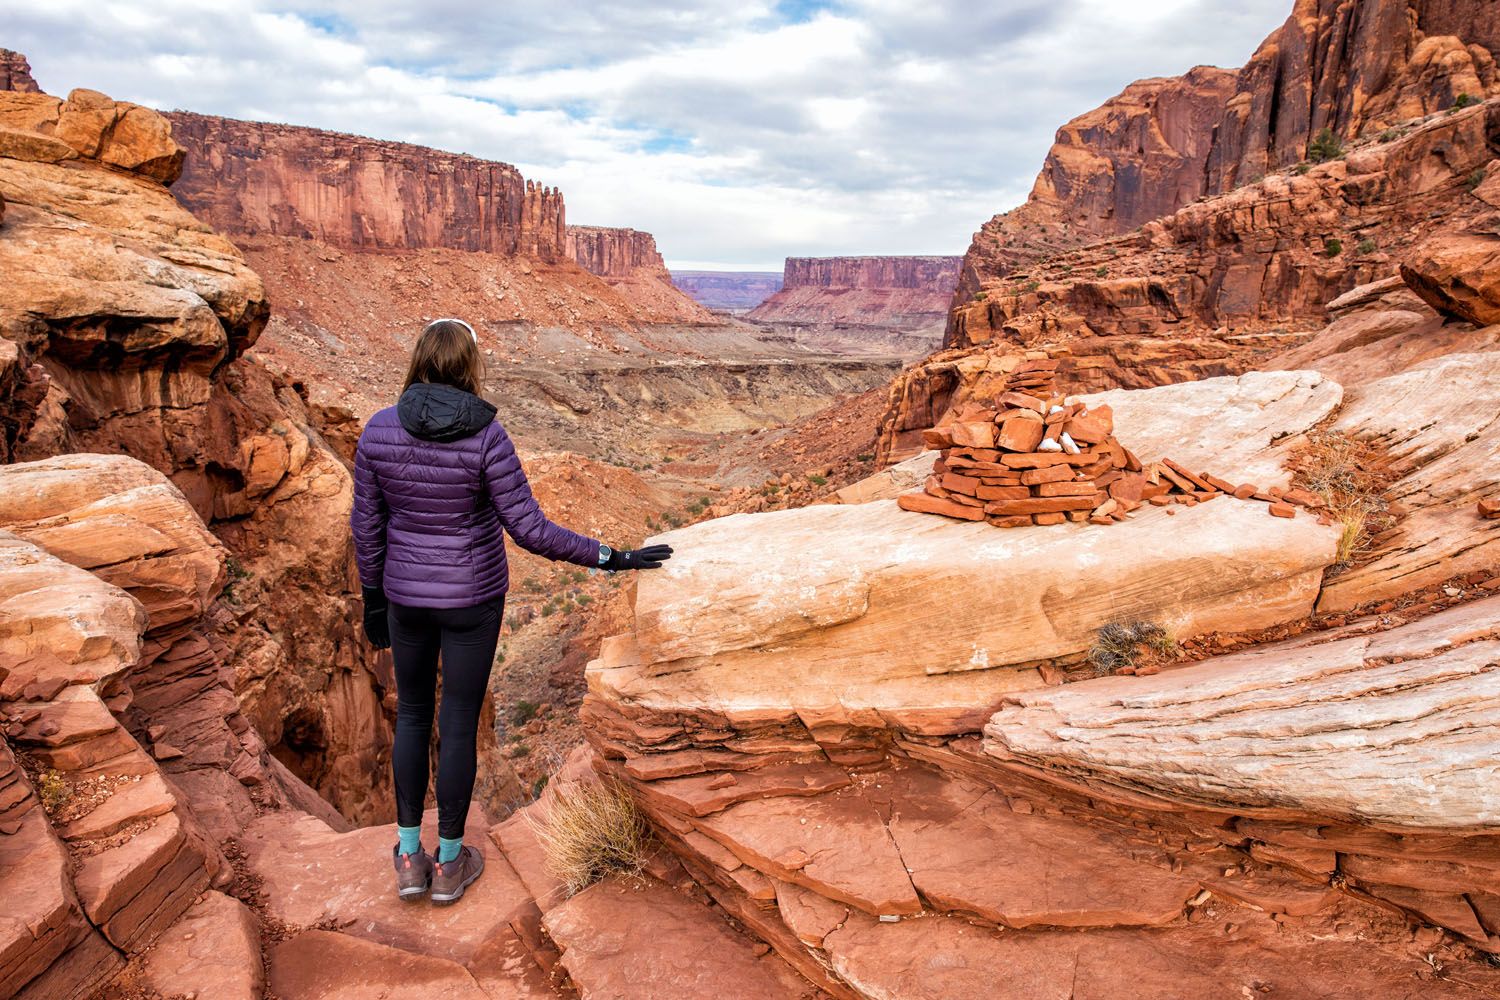
We hiked it in the clockwise direction. I think the best parts of this hike are the views from the rim into the canyon, which is just before you start the big descent, and the route finding through the boulder field. For us, the second half of the hike, essentially getting from the boulder field back to our car, was monotonous and rather boring. We actually couldn’t wait for this hike to be over, and we hardly ever feel that way about a hike.
I almost wonder if we would have liked the Syncline Loop more if we did it in the opposite direction. It would be more challenging but it would also be more interesting. You get the boring walk through the canyon finished early in the hike. The hike down through the boulder field will be challenging (I think it would be easier to hike up through this section), as well as the climb back up to the rim. But your views for the second half of the hike will be amazing. Just be prepared for a tough climb at the end of a long hike, if you do it in the counter-clockwise direction.
In this post, I am describing the route in the clockwise direction, since that’s how we did the hike. But from our photos and trail description, you can decide which direction is best for you.
On the Trail
From the Rim to the Canyon
From the trailhead, follow the signs for the Syncline Loop. Almost immediately, the trail will split. Go left to continue along the Syncline Loop. The trail to the right leads to two overlooks of Upheaval Dome.
Note: You will not see Upheaval Dome from the Syncline Loop hiking trail, although you will spend the next 4 to 8 hours hiking around it. It’s well worth it to hike the 1.8 mile (2.9 km) round trip trail to both overlooks. Maybe not today, to save your energy for the Syncline Loop, but you could add it on to the end of the hike or do it on a different day in Canyonlands.
WHAT IS UPHEAVAL DOME?: There are several theories as to what left this crater in the ground. Most likely it is an impact crater formed by a meteorite but some theories suggest this crater was formed when a salty dome pushed its way up through the sandstone rock. Either way, this is a unique spot to explore in Canyonlands since it looks vastly different from the canyons you see from the overlooks.
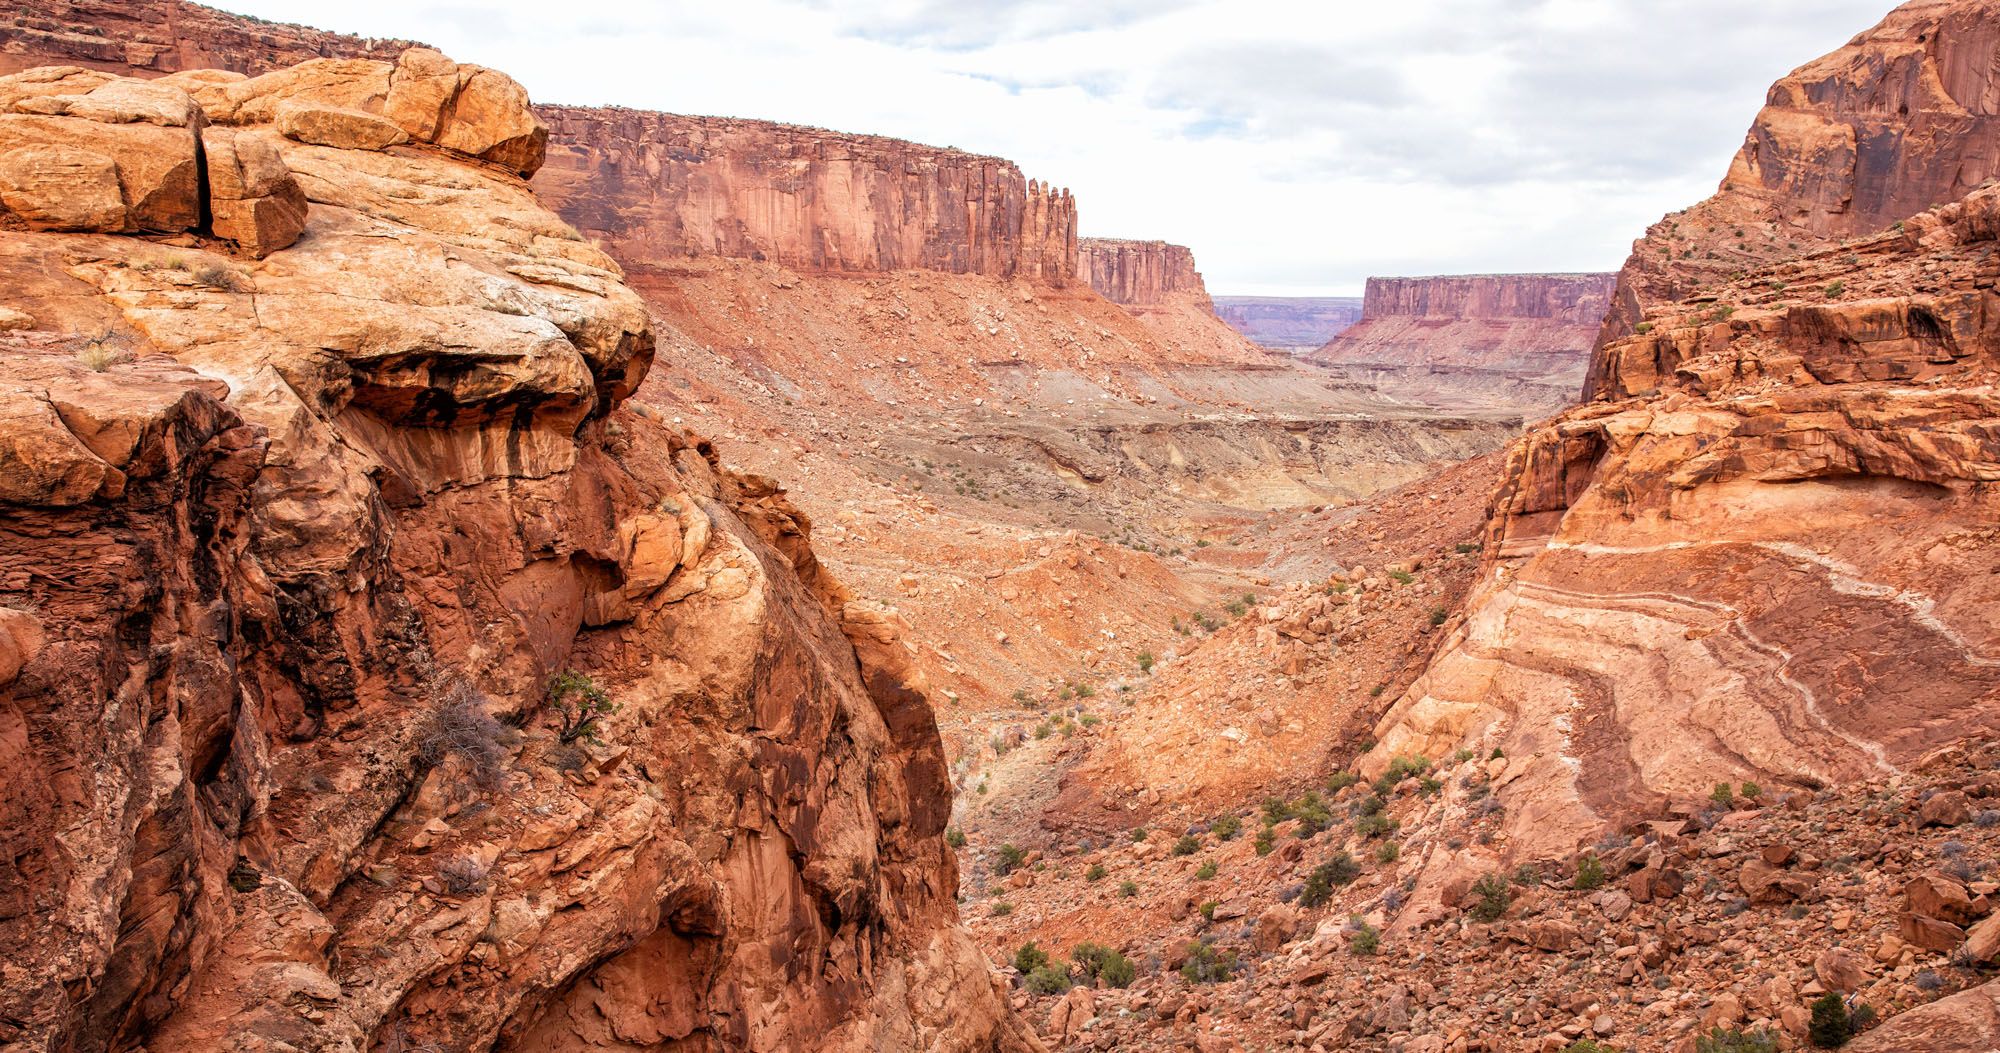
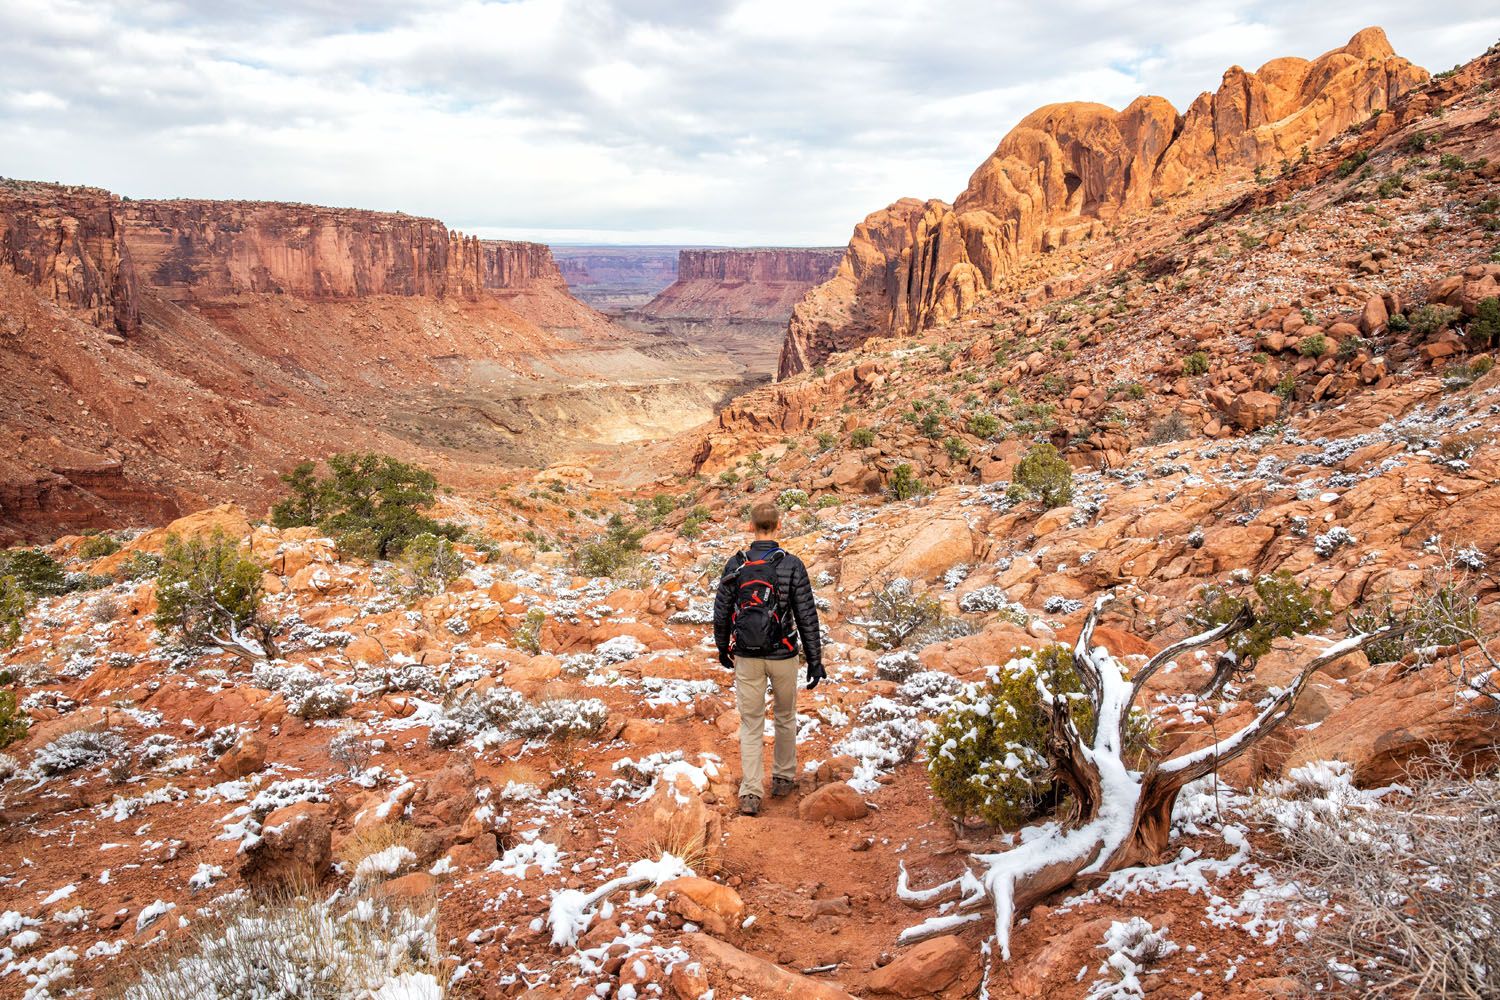
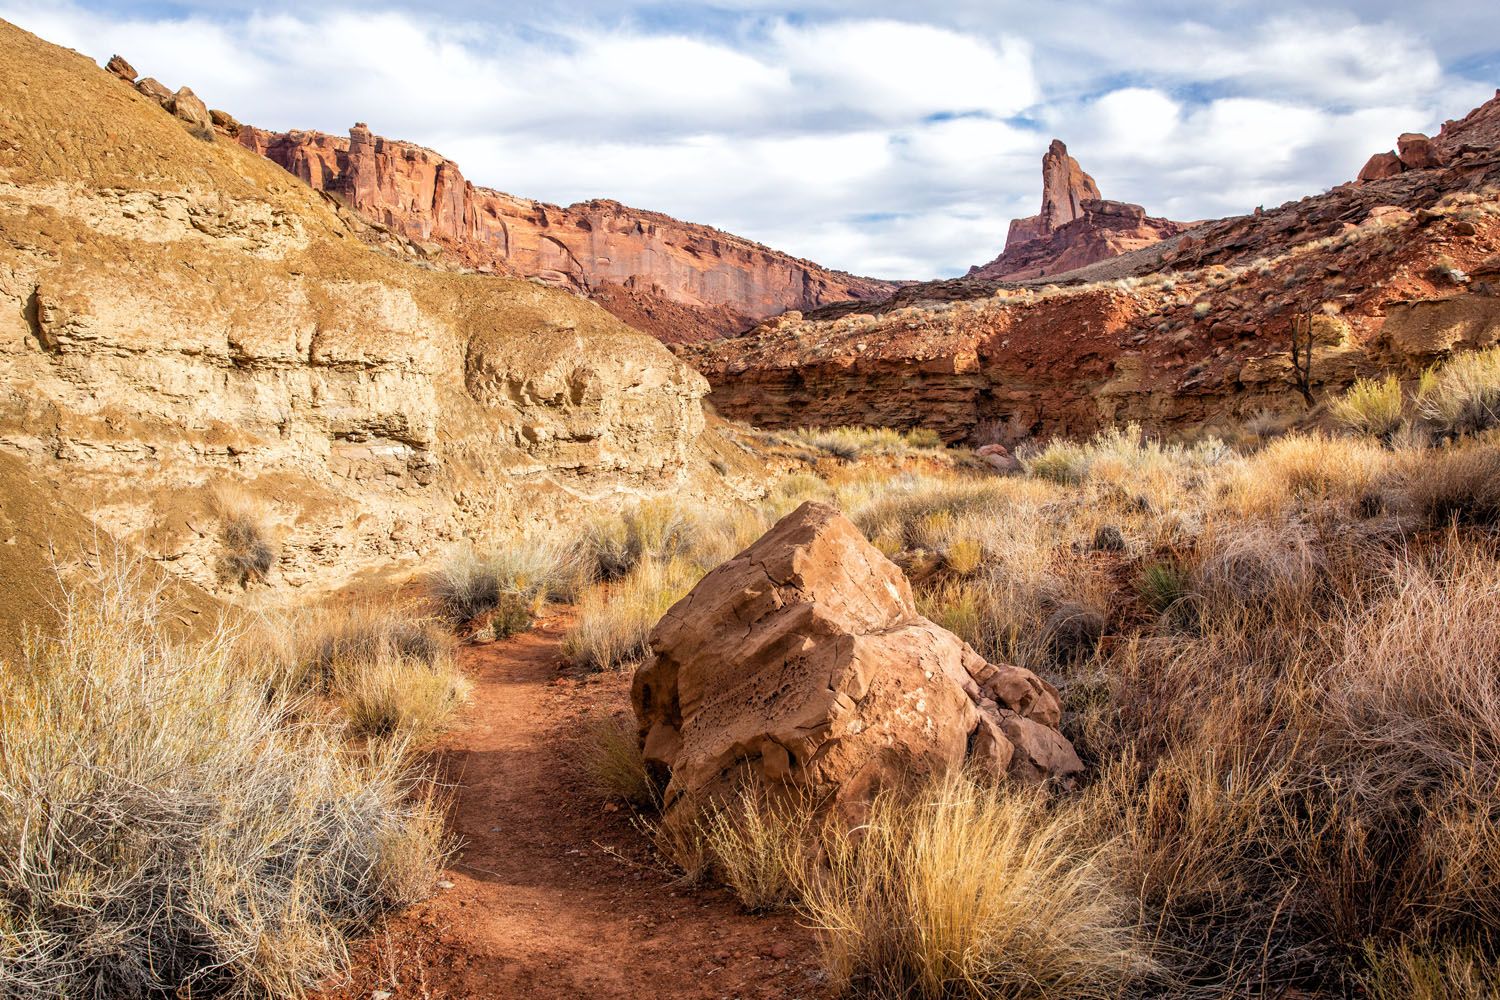
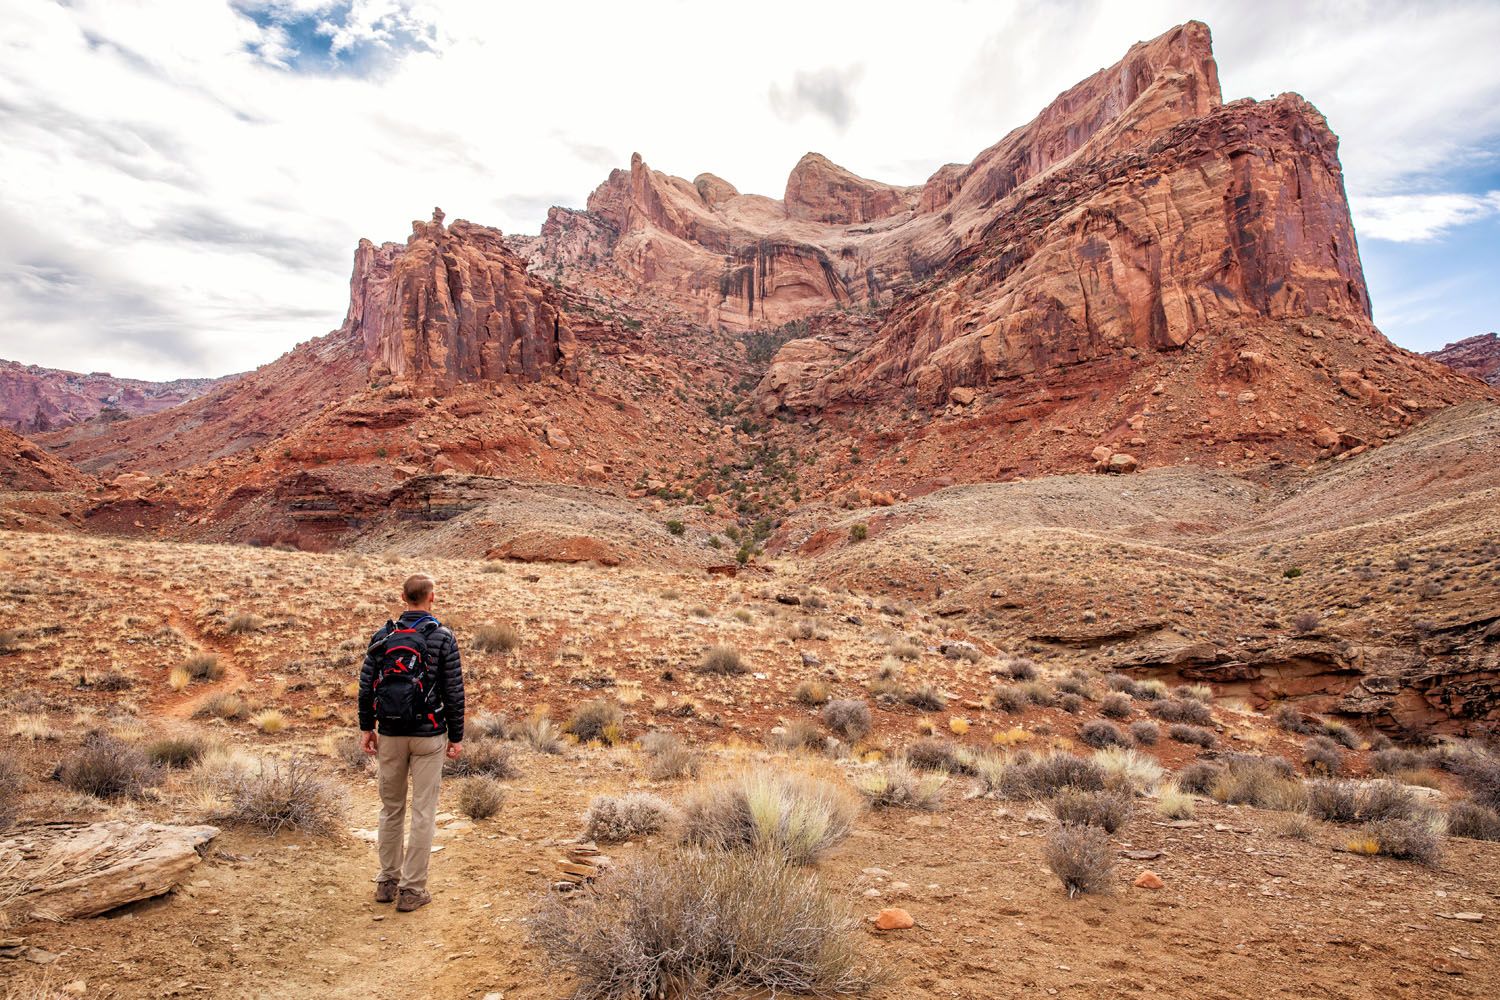
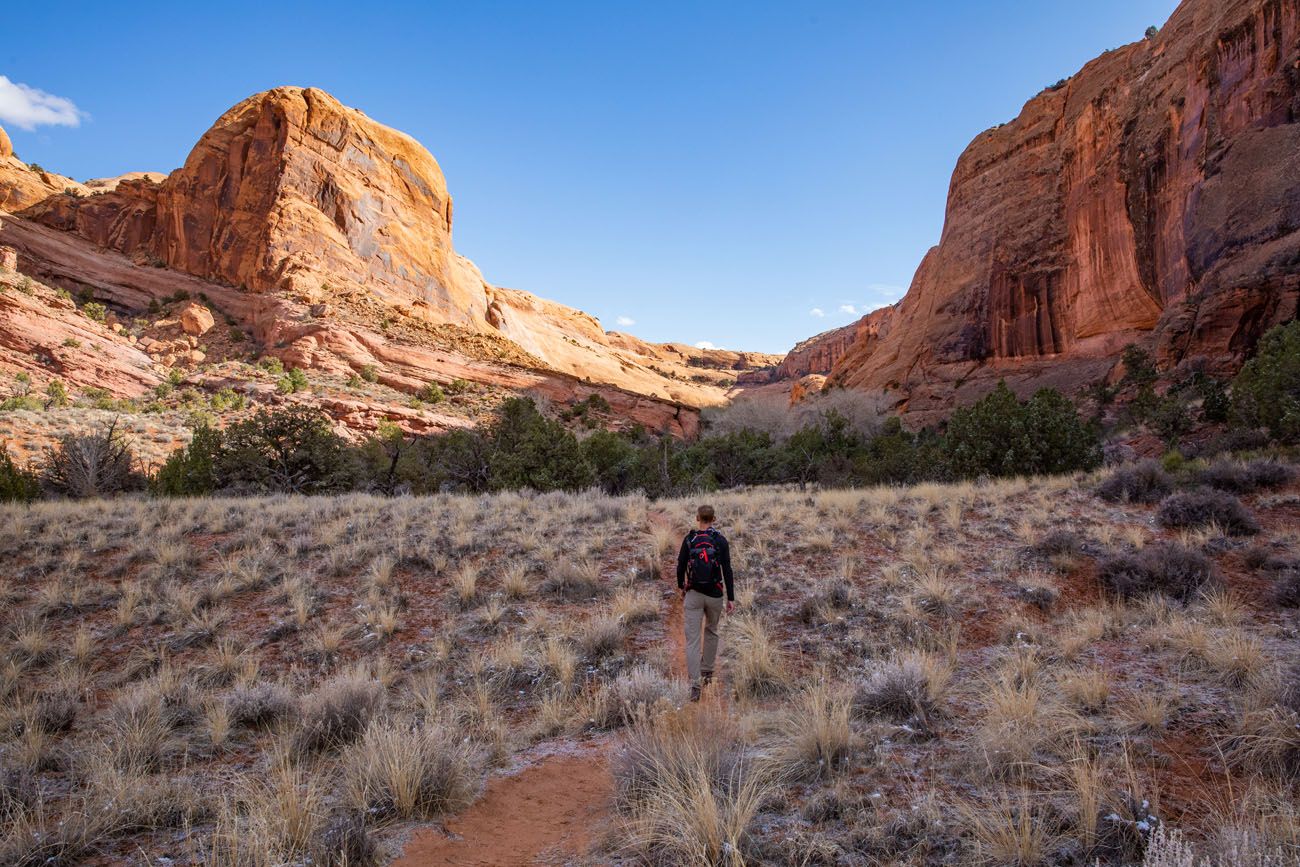
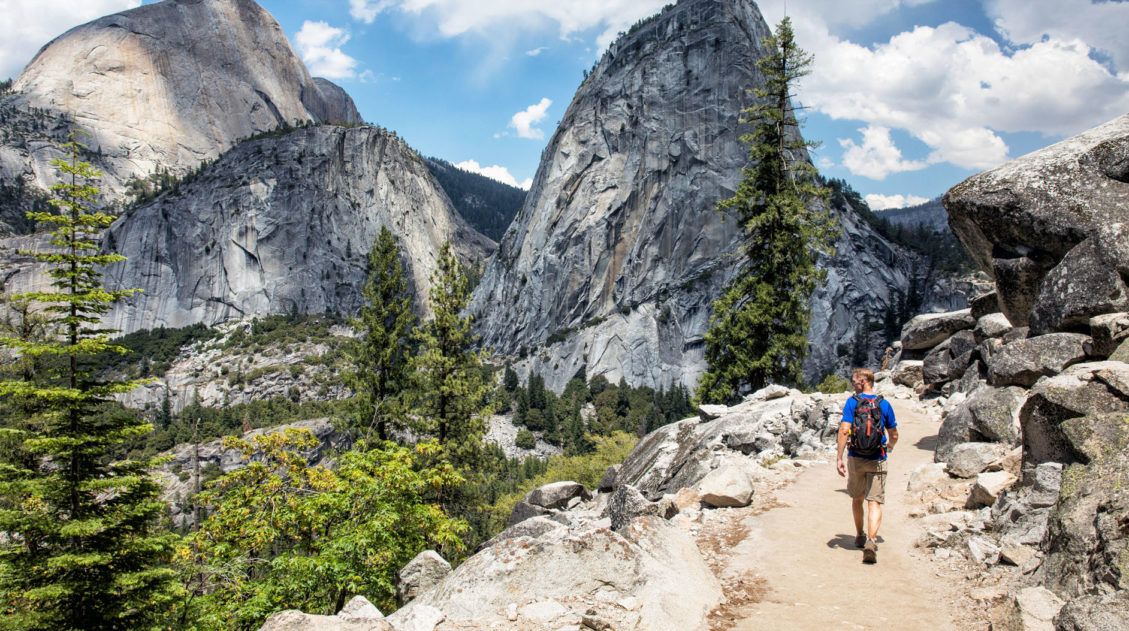
I loved the first few miles of this hike. We were totally on our own, the views were beautiful, and we were finally hiking a trail that had been on my to-do list for a very long time.
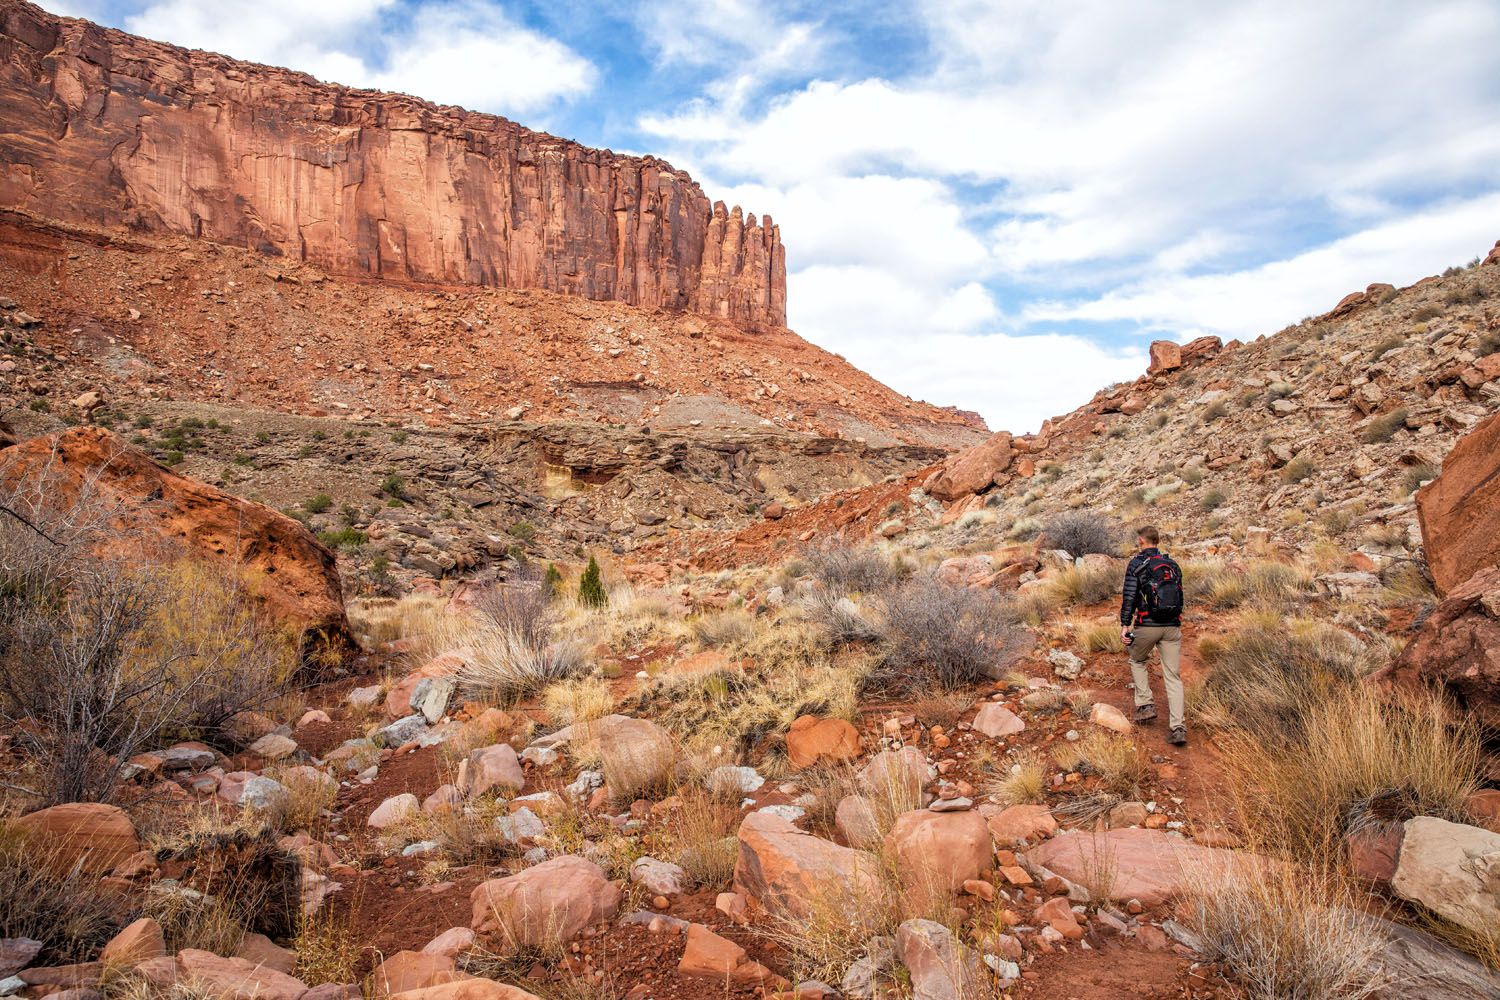
The first mile is easy. It’s a mostly flat walk through desert scenery.
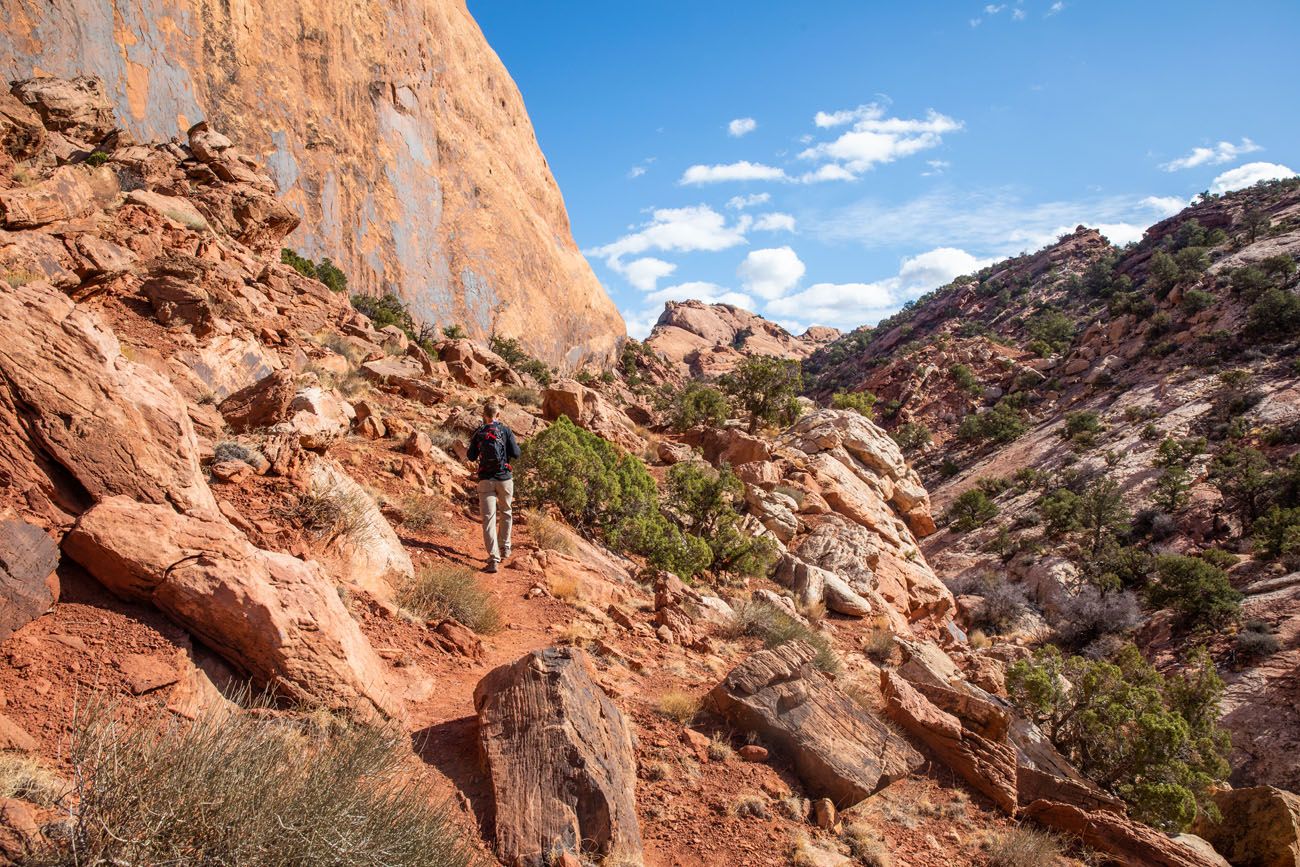
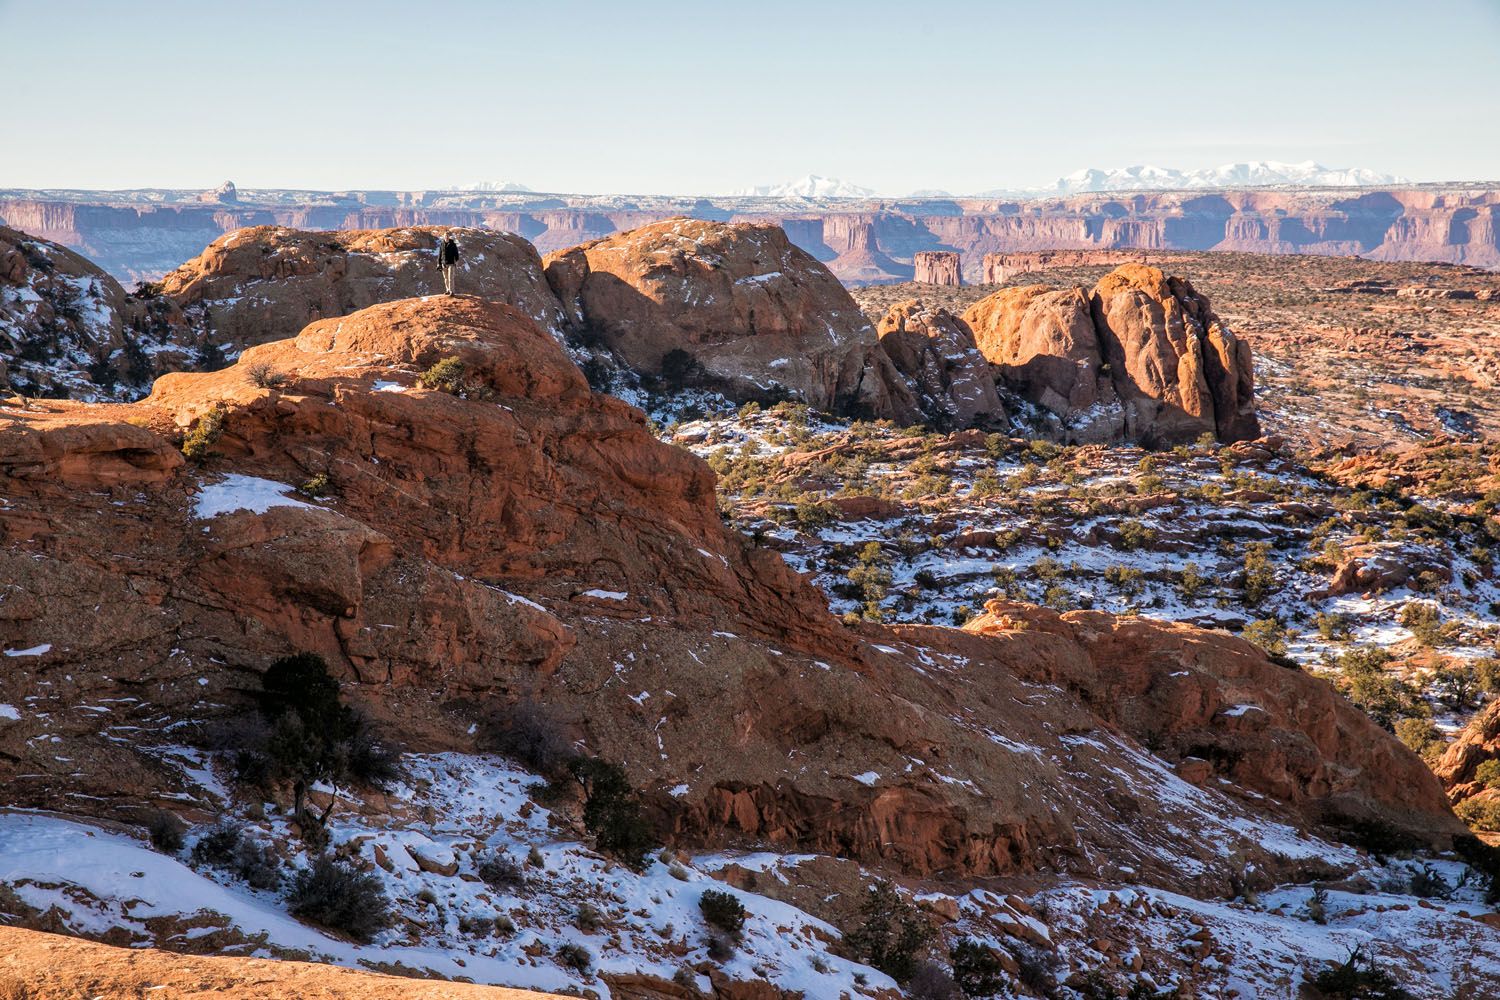
Mile 2 was my favorite mile of the entire loop. As you drop down into the canyon, the trail is steep, with lots of switchbacks. But the views along the way are incredible. This would be a very tough climb if you hike the Syncline Loop in the opposite direction.
A look back up the trail to the rim.

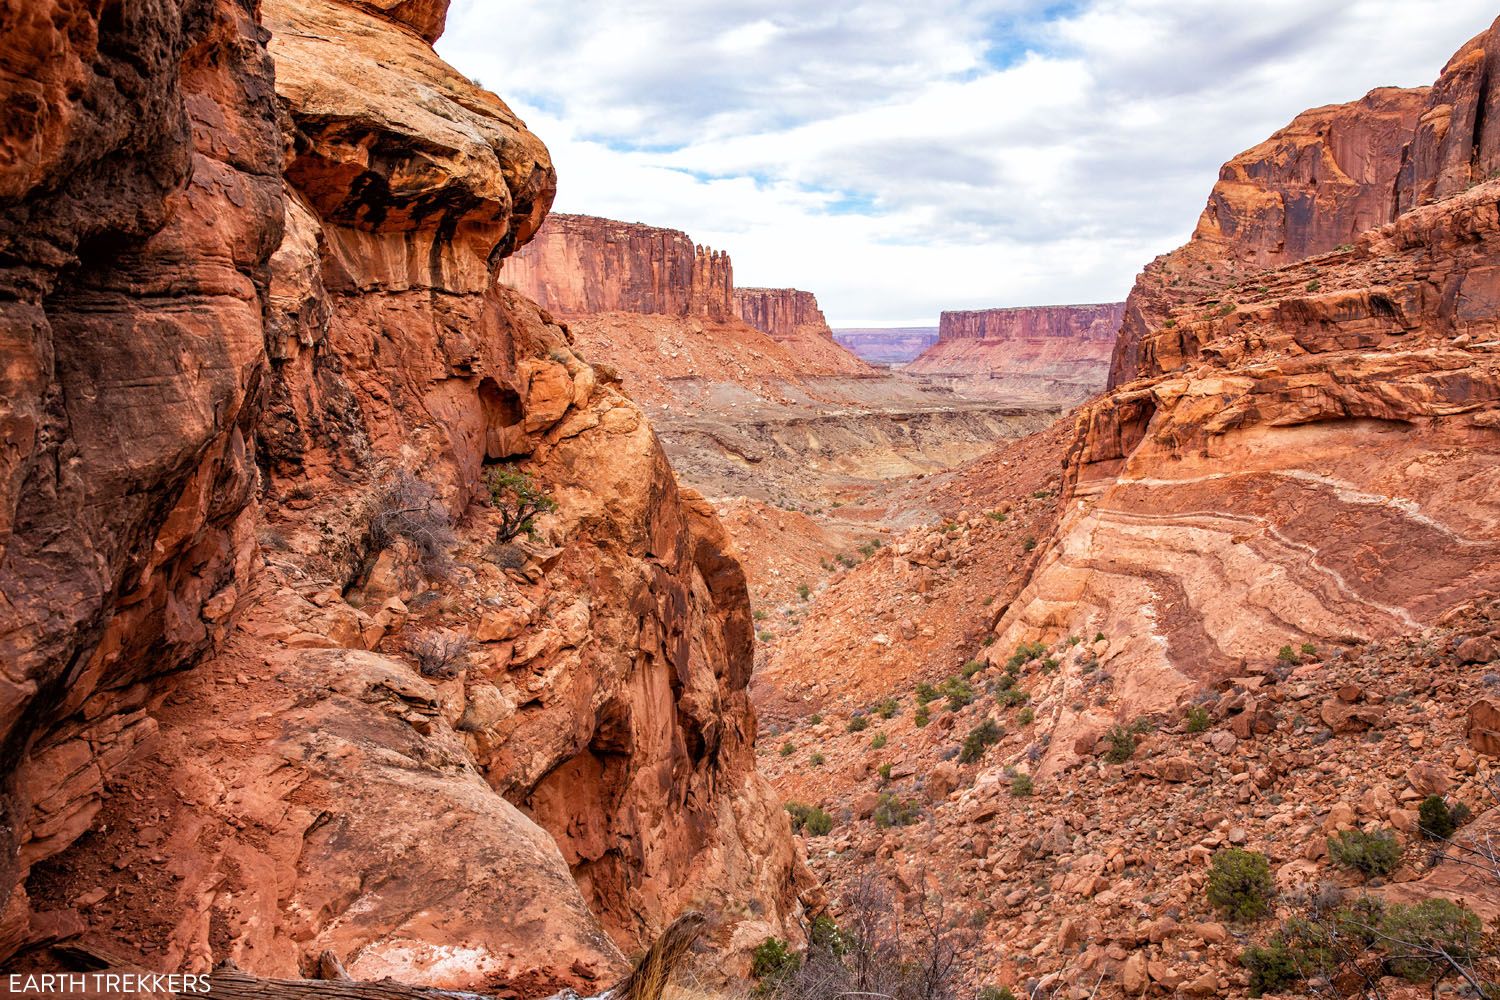
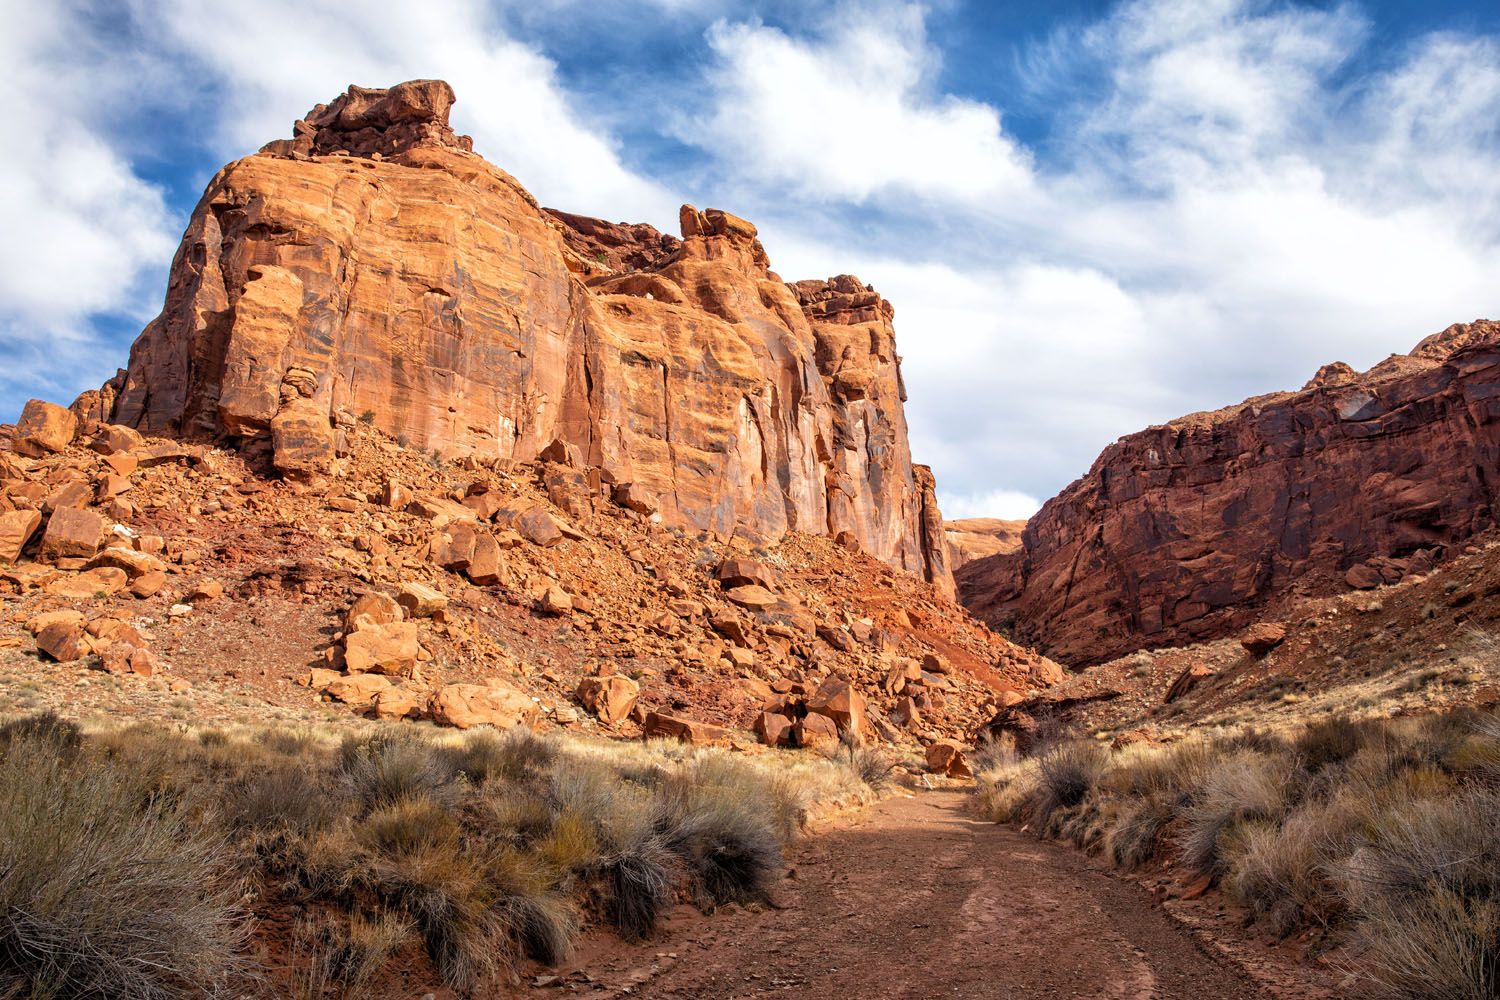
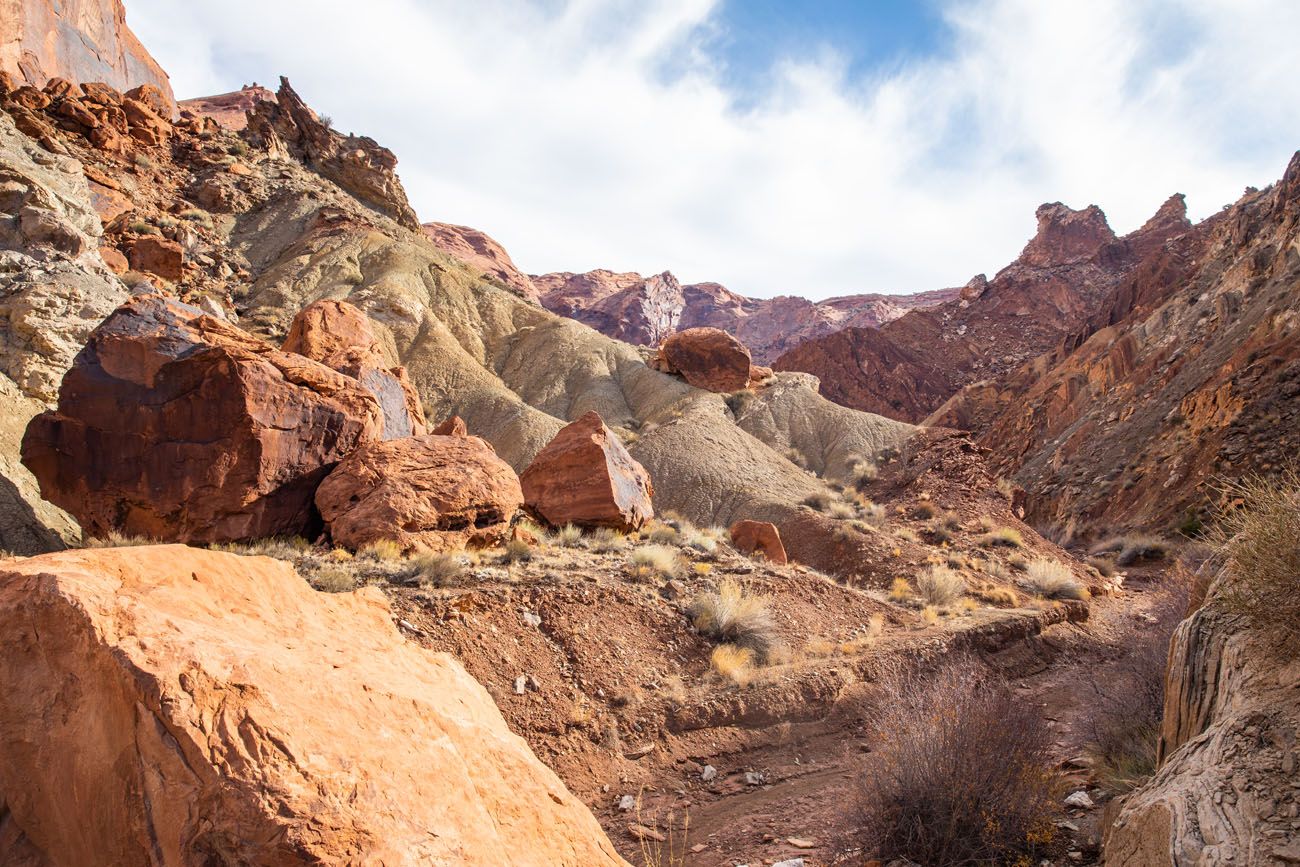
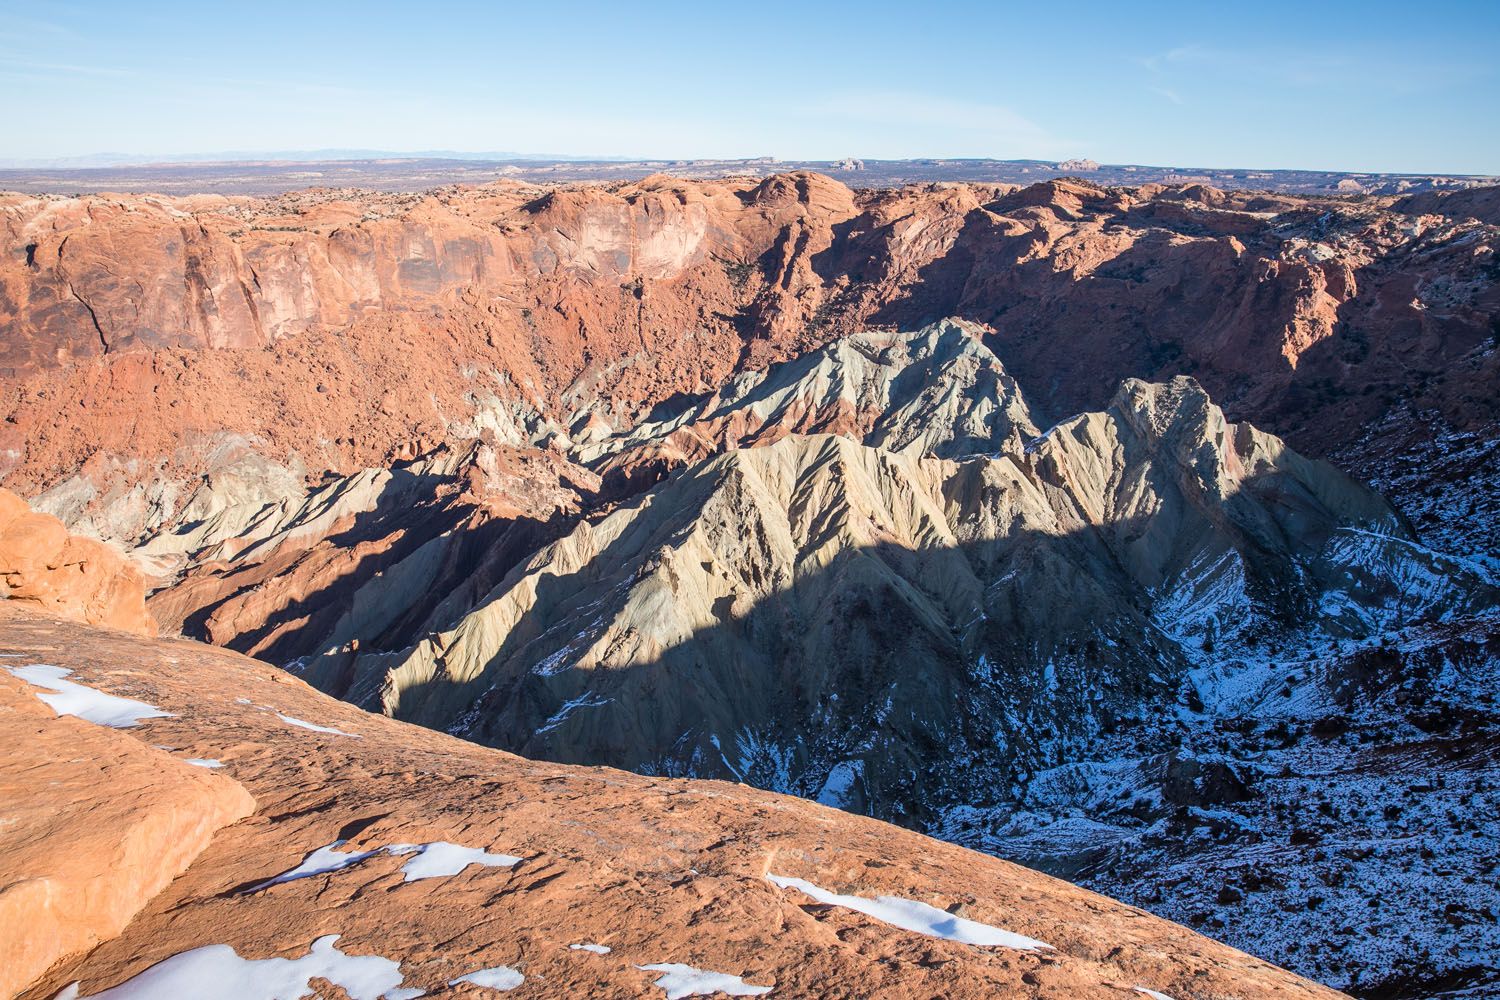
Once you are in the canyon, the trail levels out again. I really liked this part of the hike, too. The canyon walls are immense and it is very cool to get the experience of going below the rim in Canyonlands National Park.
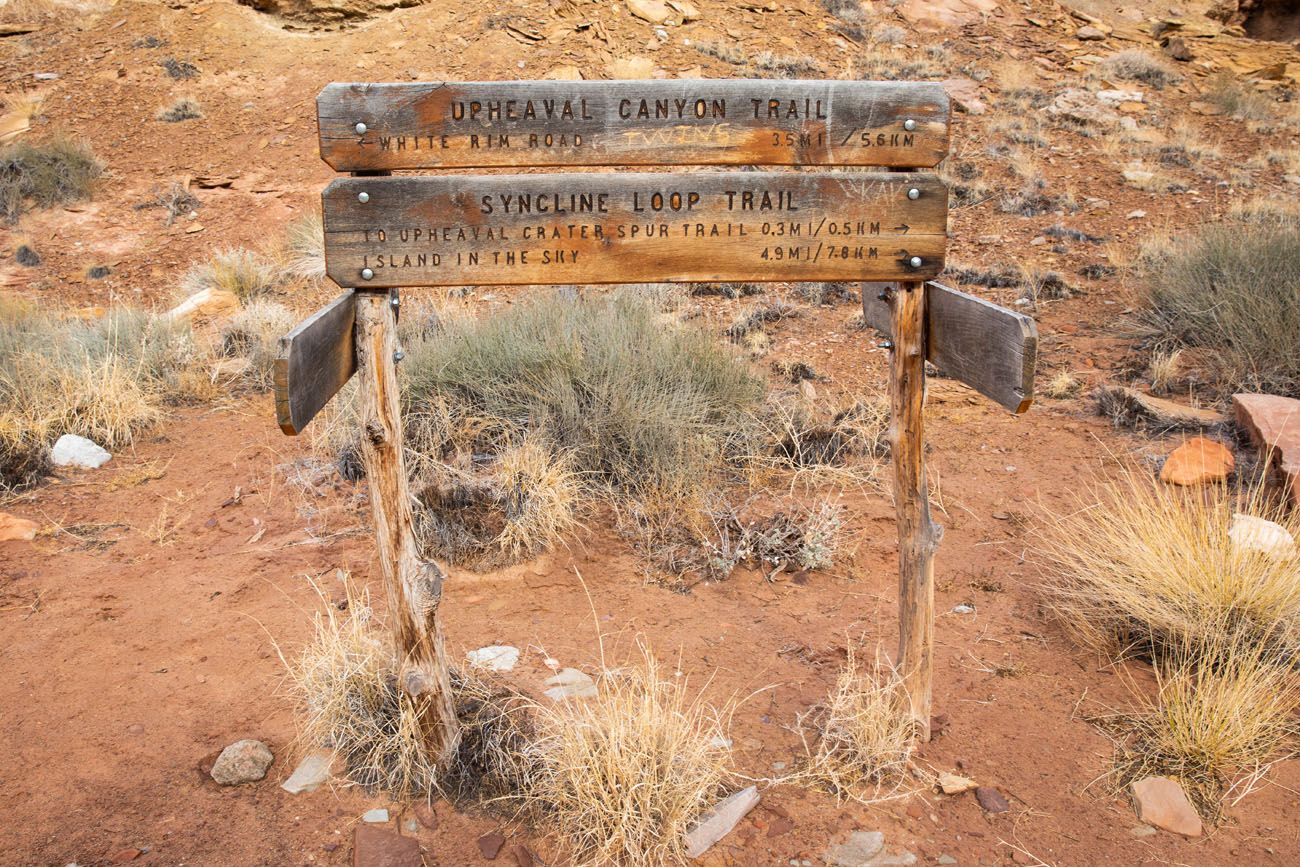
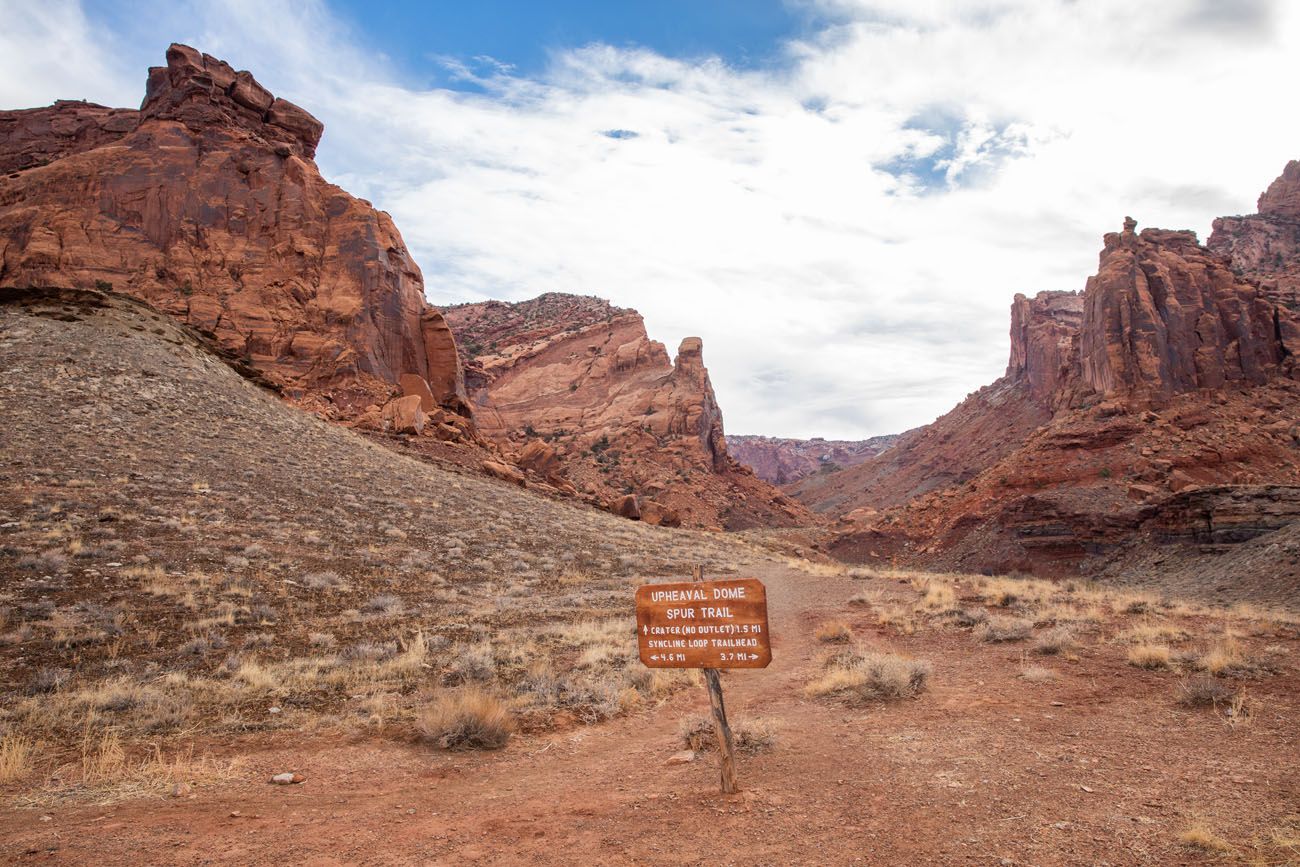
The trail splits several times on this hike, but all junctions are marked with signs like the one below. Stay right to continue on the Syncline Loop.
Upheaval Dome Spur Trail
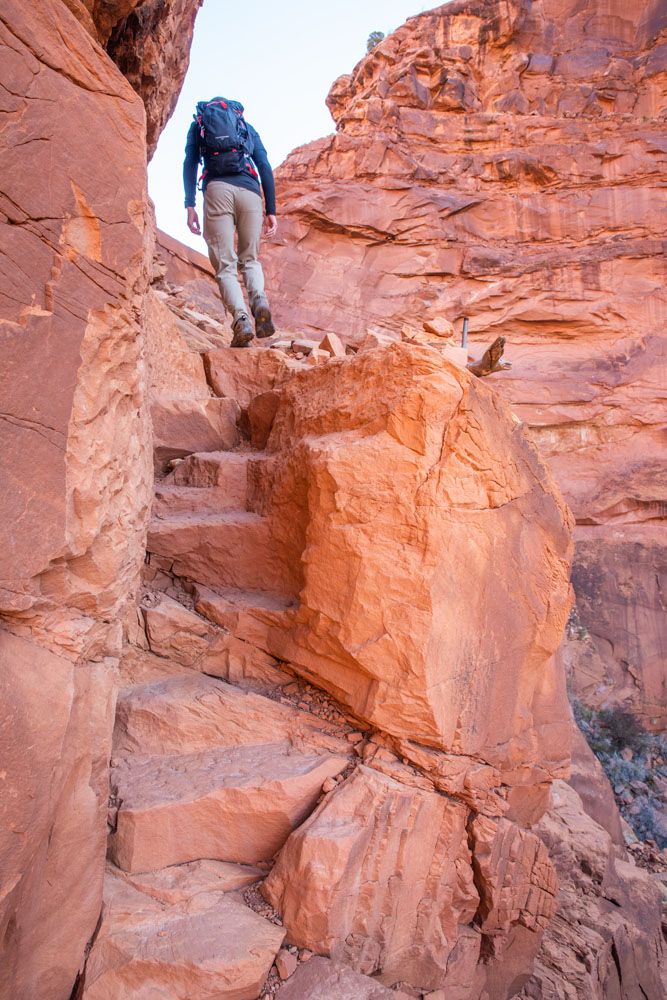
After a short but very steep climb up a stone staircase, you have a decision to make (but I’m going to make it easy for you).
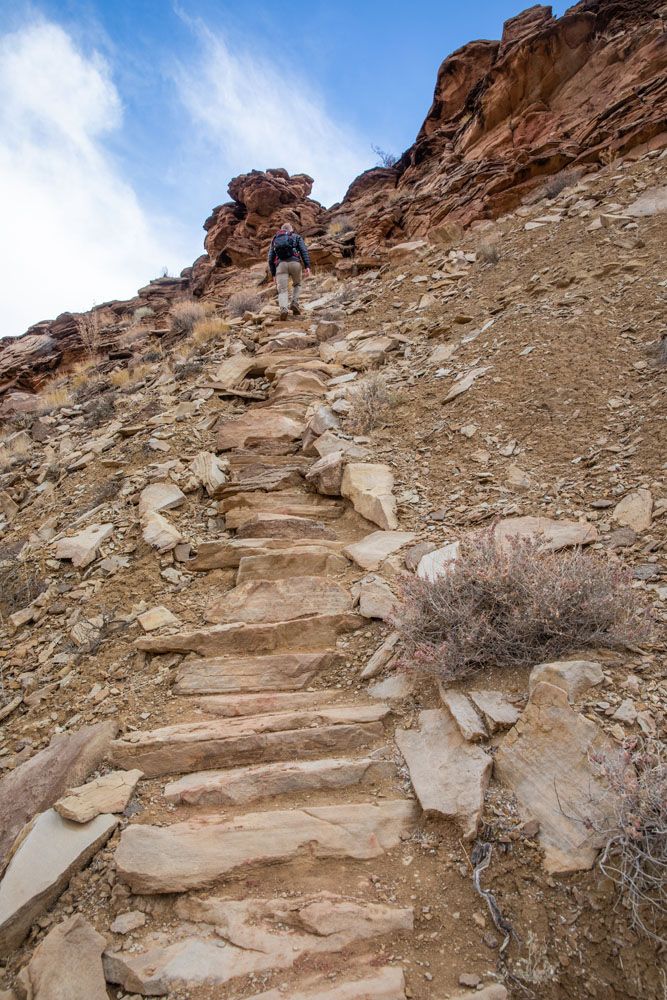
This stone staircase is the first climb of the hike (in the clockwise direction).
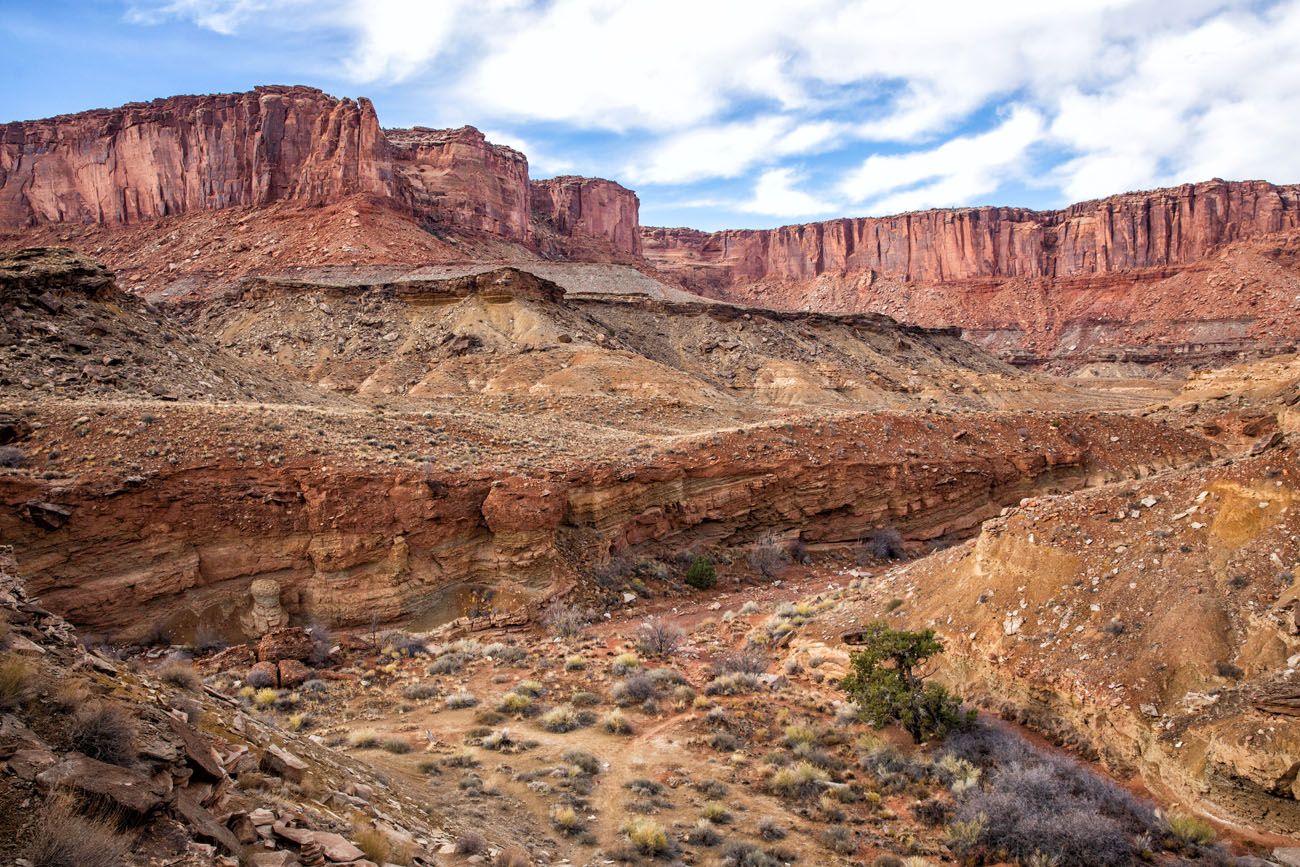
View from the top of the staircase.
Another view from the top of the stone staircase.
You have the option to hike the spur trail into Upheaval Dome. This adds on 2.5 miles (4 km) round-trip plus 300 feet (90 m) of elevation gain onto your overall hiking distance, for a grand total distance of 11 miles (17.8 km). It’s a mostly flat walk, so it’s not difficult, but this will add at least one hour onto your hiking time.
Worth it? Nope.
This is a boring walk up a wash with a few rock scrambling sections. The view of Upheaval Dome is not at all worth the time and effort it takes to hike this spur trail, in our opinion. Even from here, standing in the crater, the views aren’t that great.


Elevation profile of the hike if you add on the spur trail.
HIKING TIP: Instead of hiking this spur trail, add on the Upheaval Dome Overlook Trail to the end of this hike. It’s shorter and the views are well worth the effort.
If you are curious, you could walk a quarter mile of the trail, to get to the wash, to see more of the high canyon walls.
The view of Upheaval Dome from the end of the spur trail.
Second Half of the Syncline Loop
The second half of the hike is all about climbing back up to the rim.
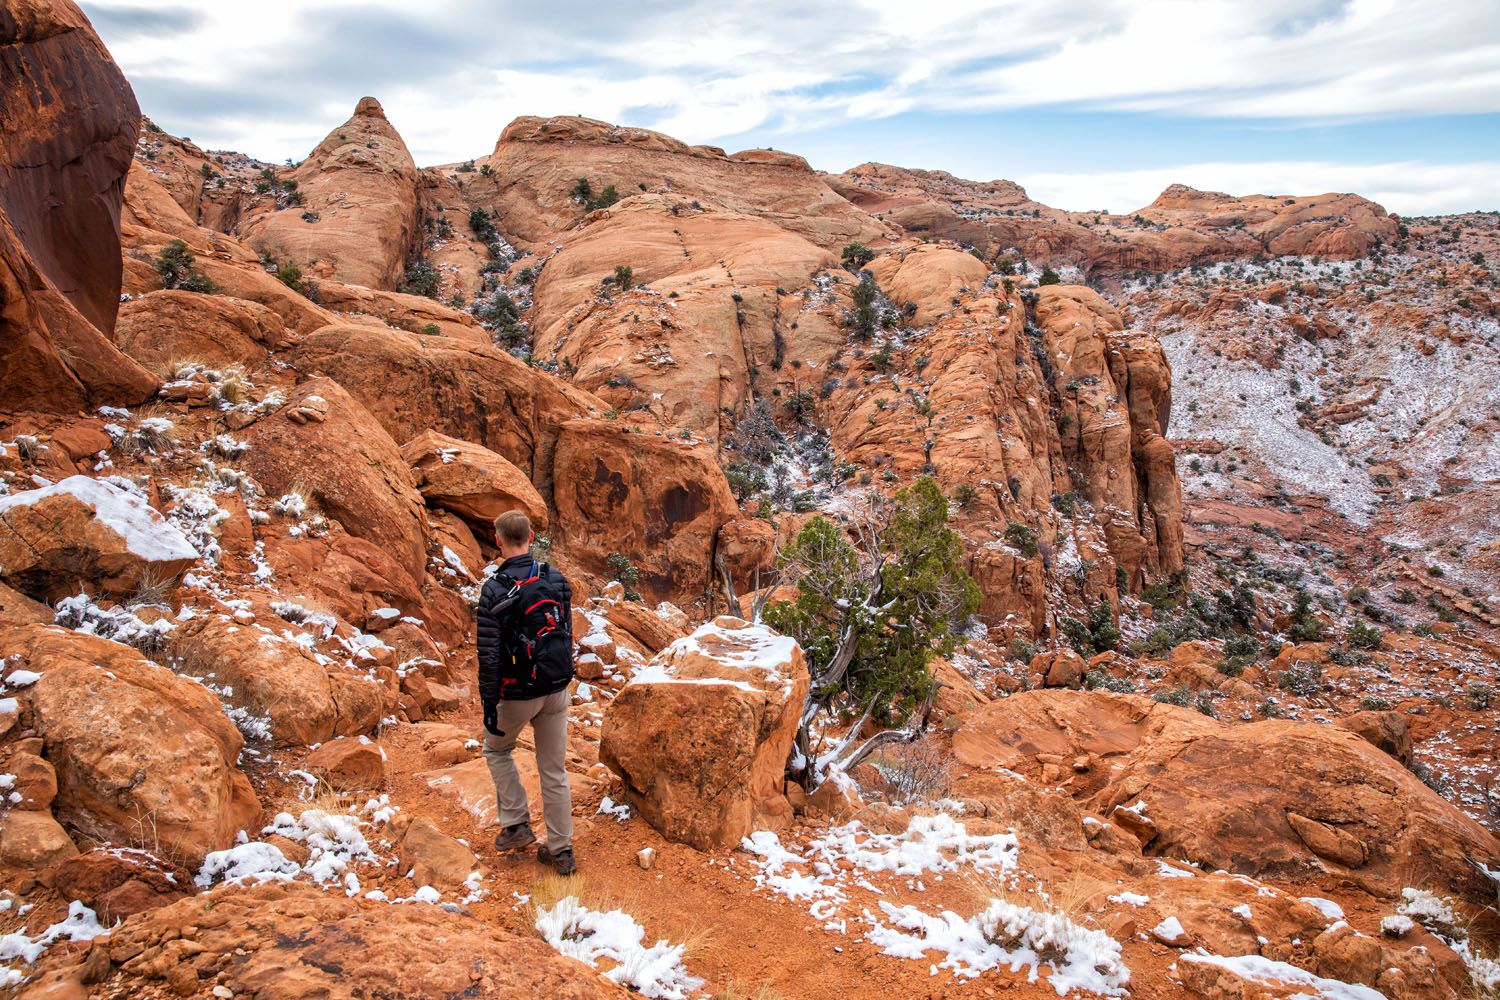
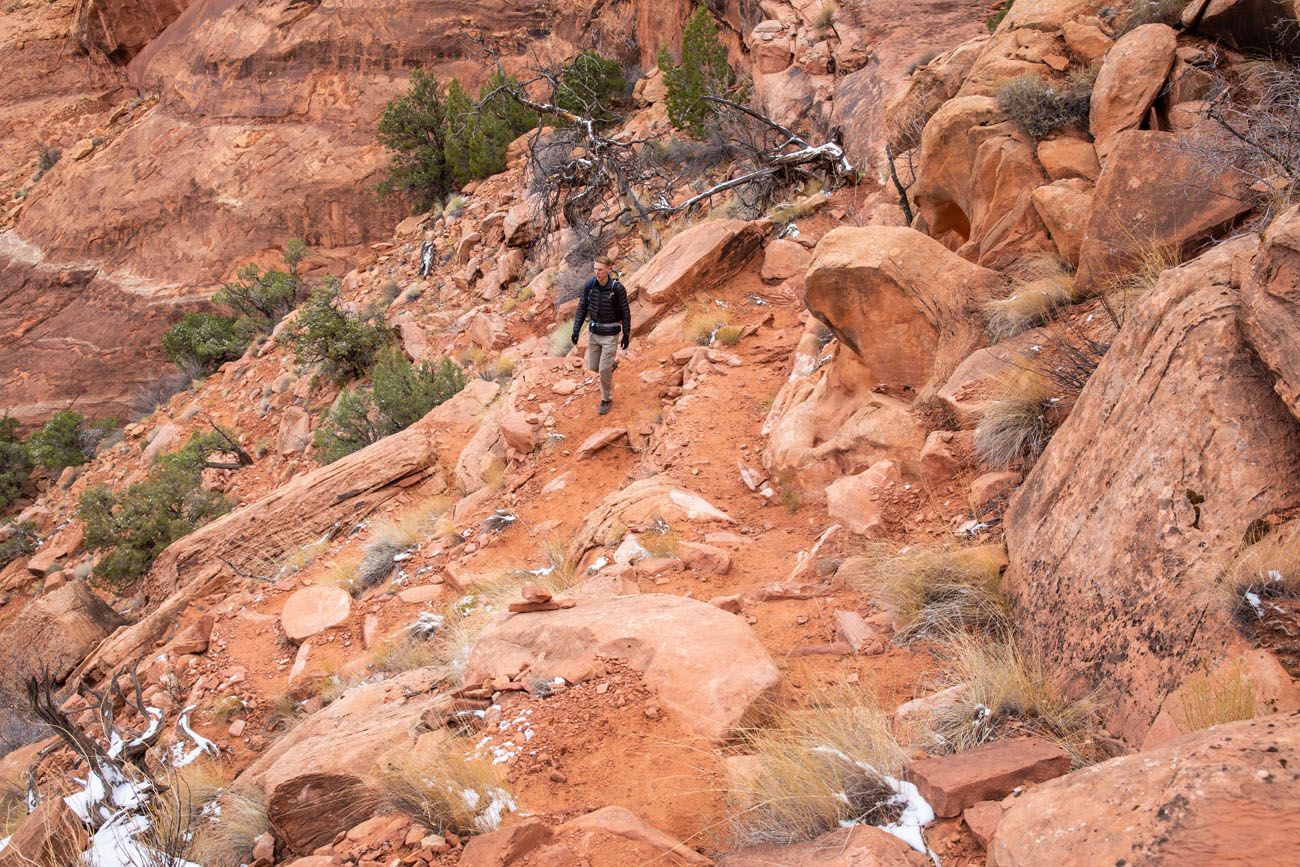
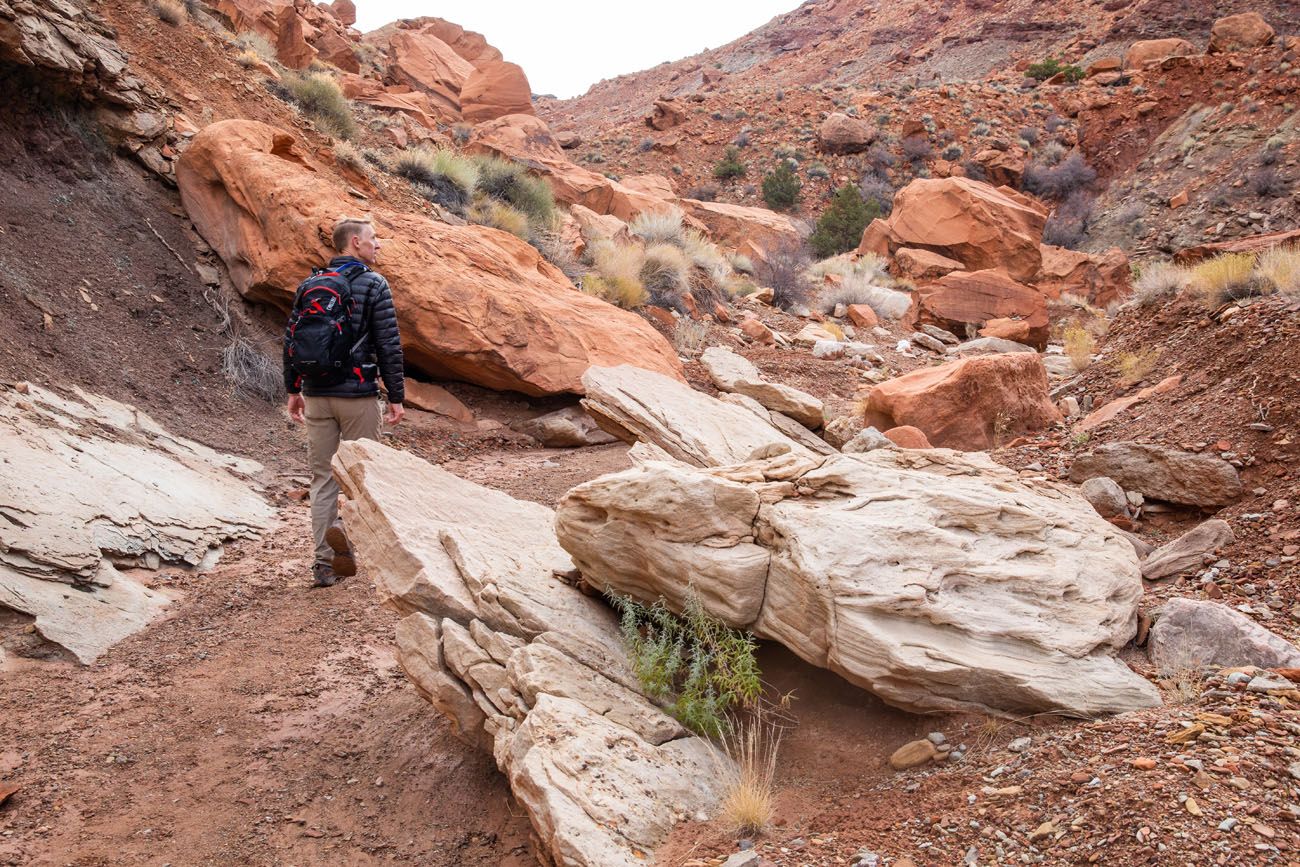
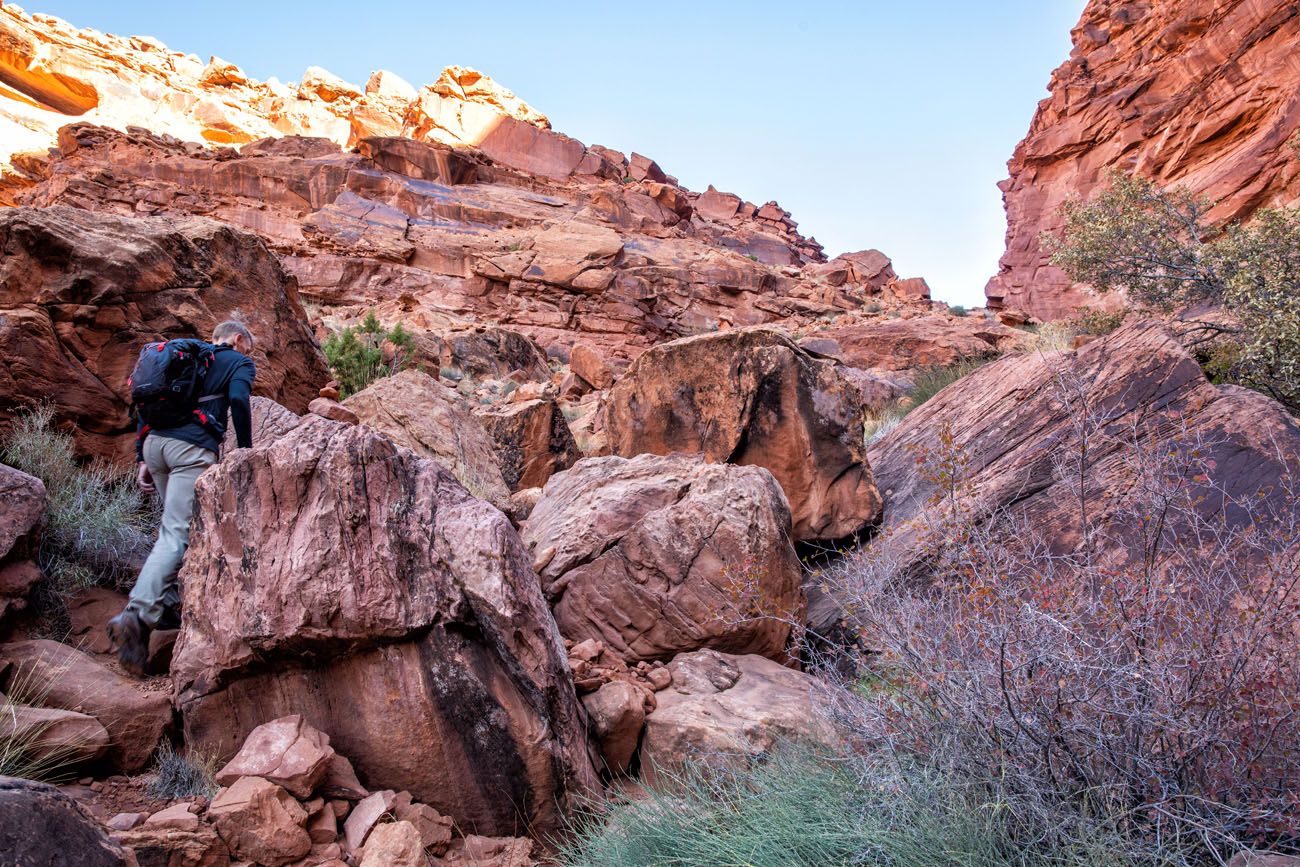
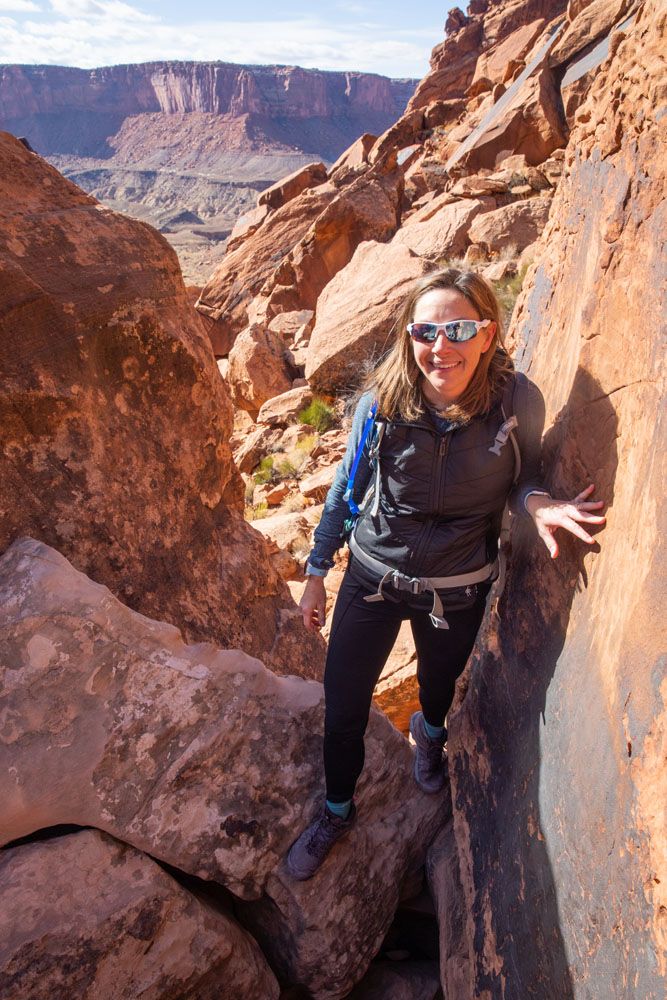
Just beyond the spur trail, the fun really begins. The wall in front of you is the most challenging section of the hike. This is the legendary boulder field and the place where you will test out your route finding skills.

At first, it’s not too bad. The trail is very easy to follow, as it heads up into the canyon.
Once you get to the boulders, you have to pay attention. In all honesty, the route finding is really not all that difficult. There are so many rock cairns that as long as you take your time, and hike from one rock cairn to the next, that you should not lose your way.
NOTE: If you have a GPS, just be aware that it may not be accurate on this section of the hike. Since you are hiking up through a canyon, it may lose the signal. Tim and I wear Garmin Fenix watches and the GPS was useless on this part of the hike. However, there were enough rock cairns that staying on the trail was rather easy.
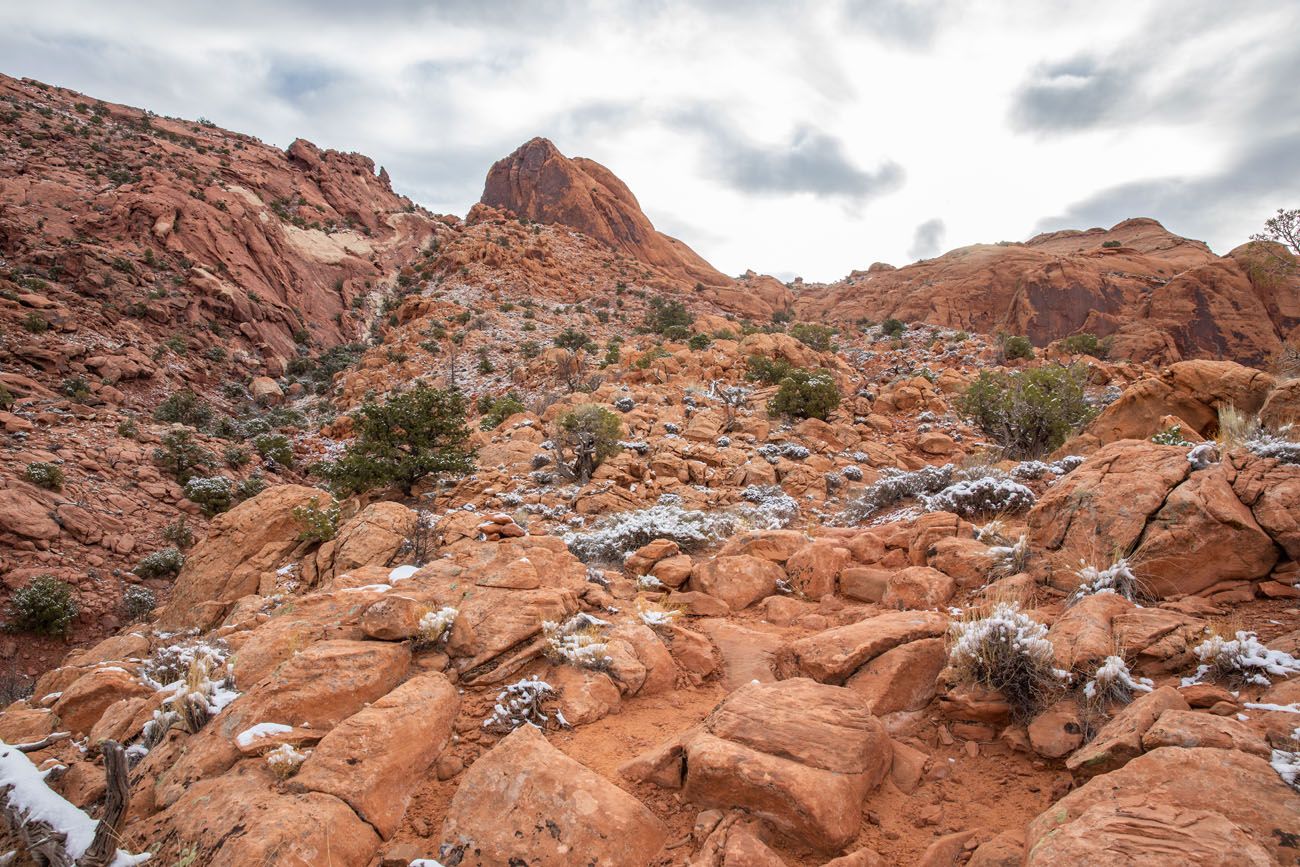
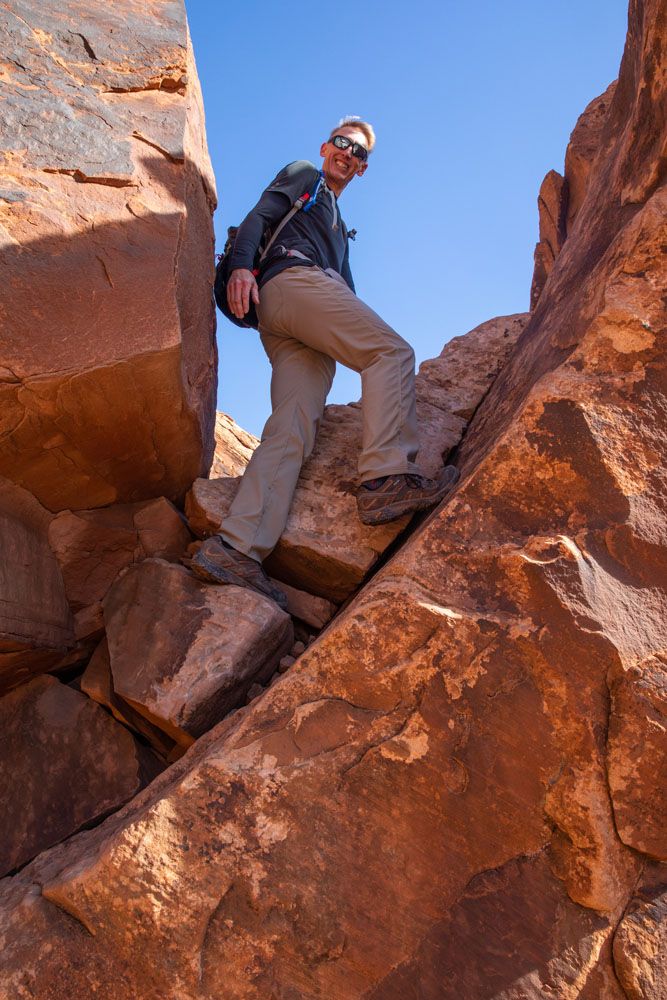
It is a tough climb up through the boulder field. The incline is very steep and you will do some rock scrambling here. If you like a challenge, and you probably do if you are considering this hike, you’ll love this part of the hike.

View from the top of the boulder field.
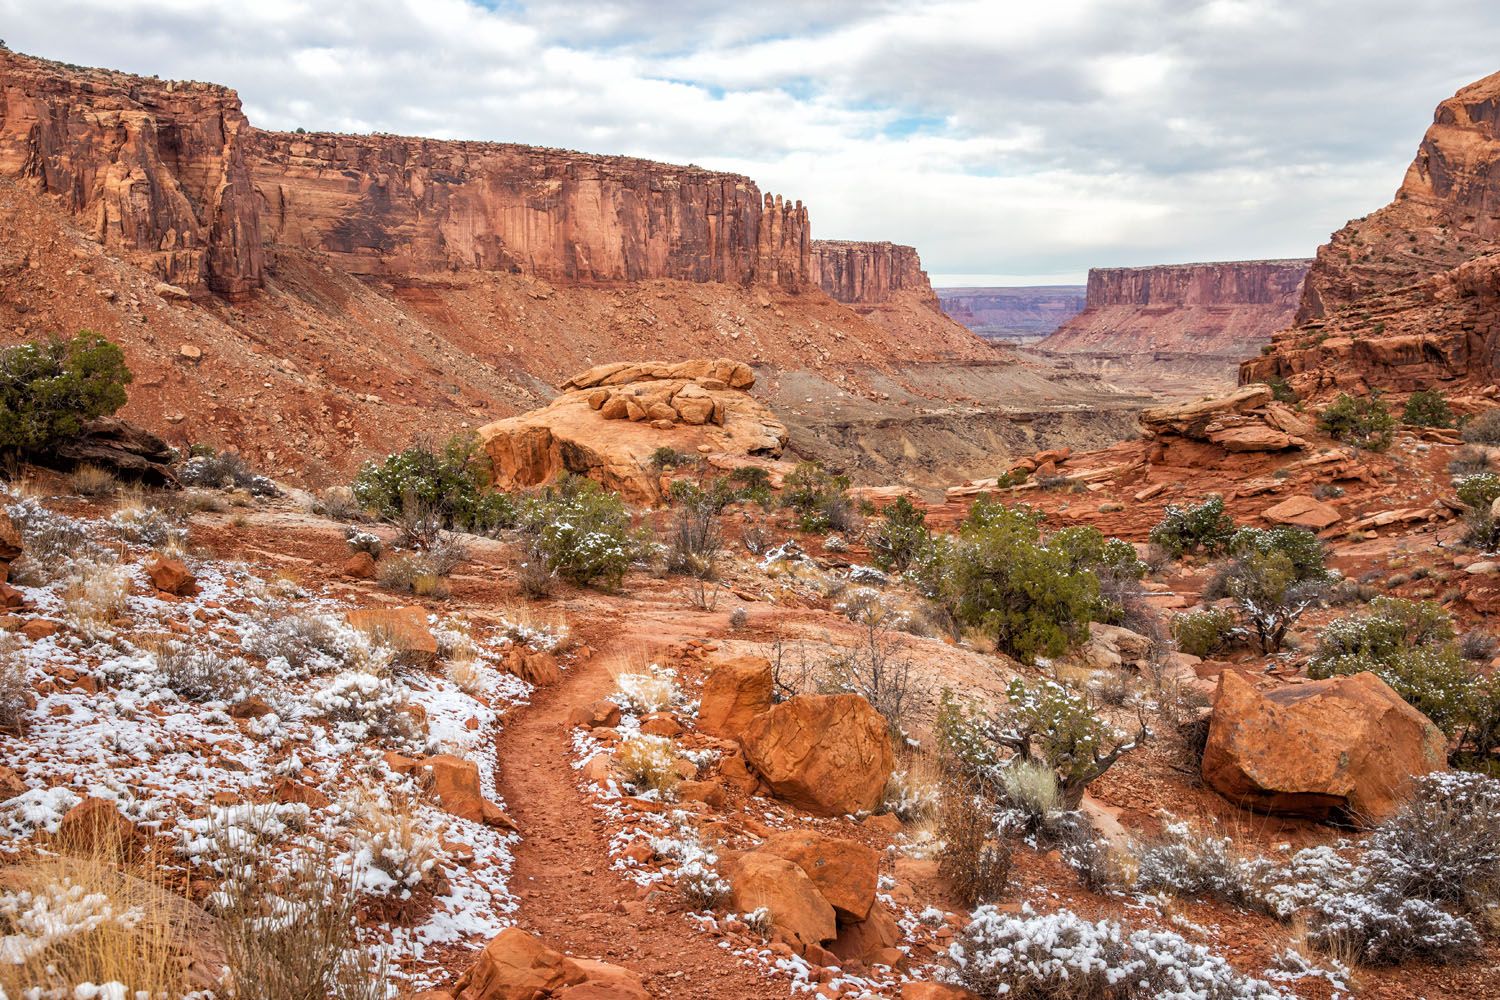
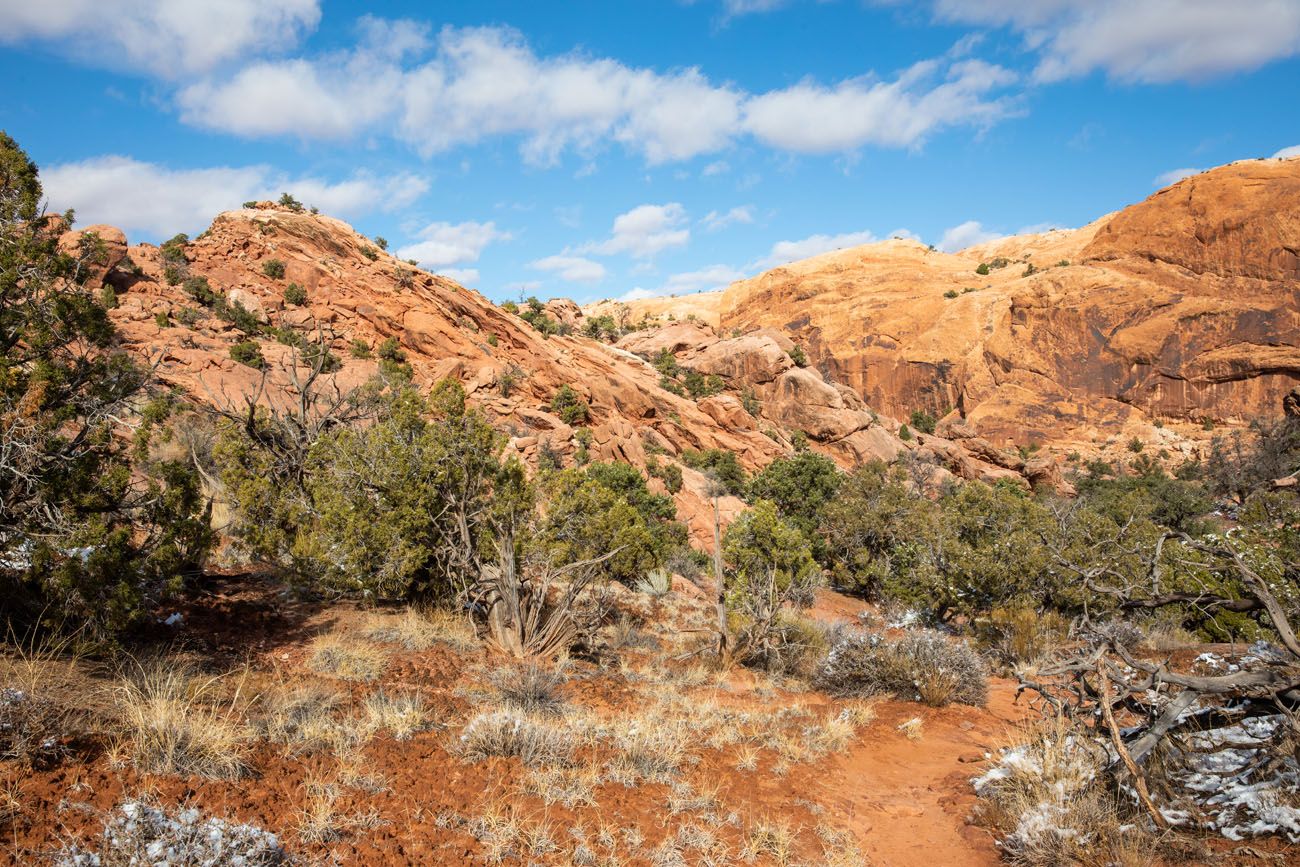
At the top of the boulder field, the trail levels out somewhat. At this point, you still have about 4 miles to go until you finish the hike. You are still gaining elevation, but it’s slow and steady and very manageable.
At first, you will walk through a canyon. The trail weaves in and out of small groves of trees.
After one more short, steep climb, you hike up through the top of the canyon, until you get to the parking lot. These final four miles are monotonous, and the views don’t change much.
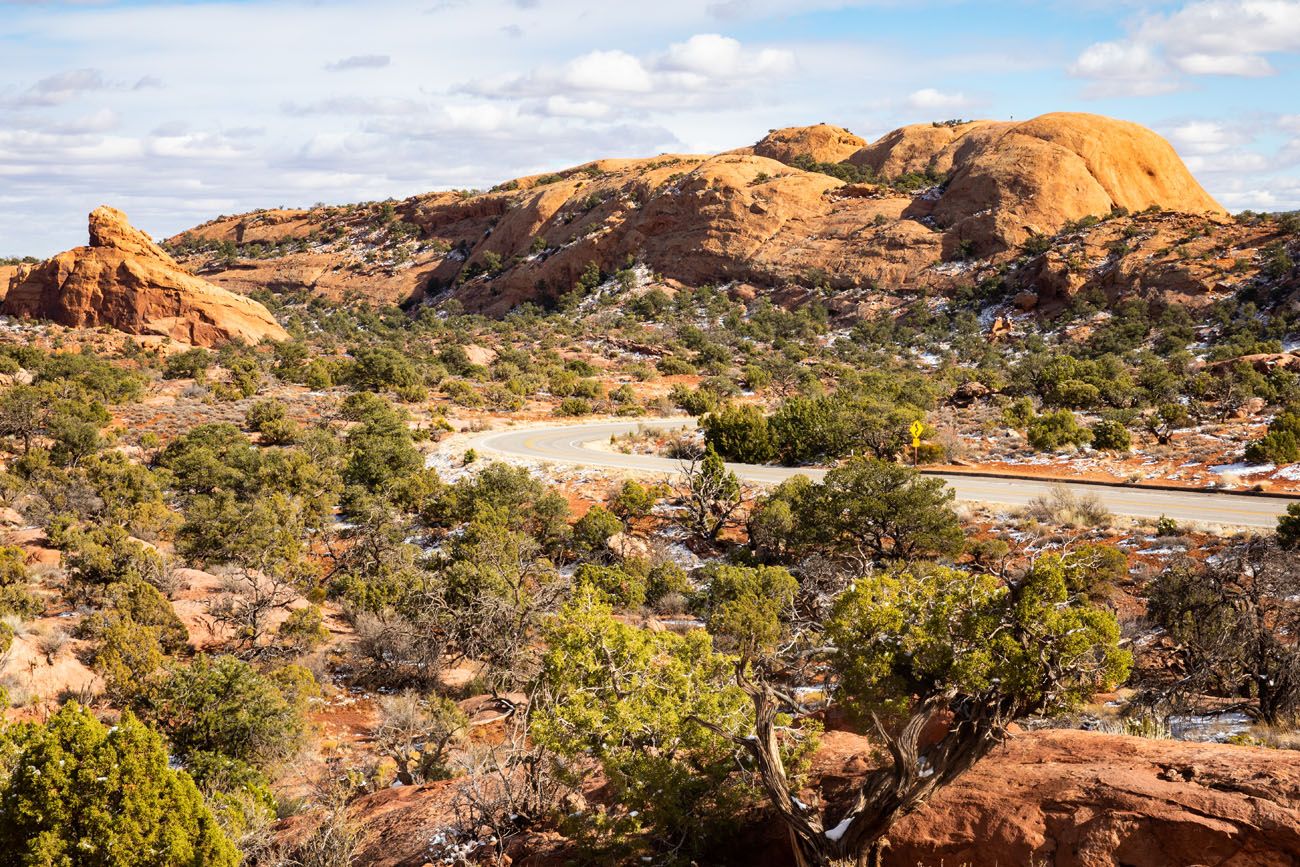
Once you see the road and Whale Rock, you are almost finished the hike.
Once you get back to the trailhead, you have the option to hike the Upheaval Dome Overlook Trail. Here are the views.
Is the Syncline Loop Worth It?
Maybe.
This is a long, tough hike. In our opinion, there are better ways to spend your time in Canyonlands National Park than doing this hike. Here are some things I would recommend doing first.
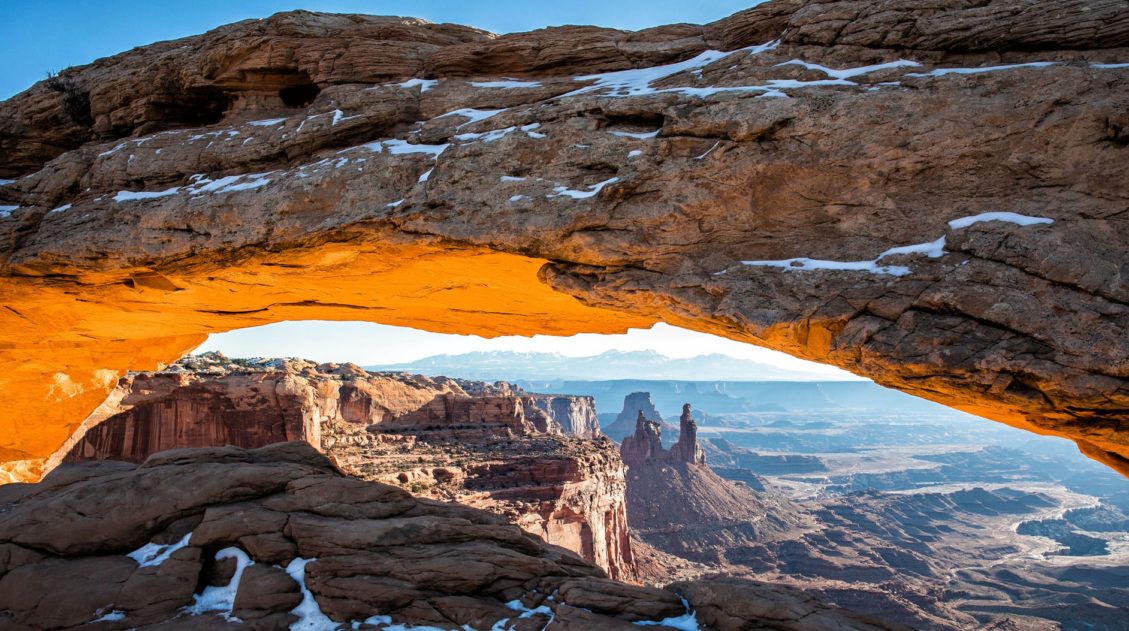
1. The views from the overlooks of the mesa are incredible and there are bunch of short, easy hikes that we really enjoyed. Grand View Point and Mesa Arch are must-see’s, but for a bigger list take a look at our guide Things to Do in the Island in the Sky.
2. If you want to hike below the rim and have outstanding views the entire way, consider hiking the Gooseberry Trail. It’s another strenuous hike, but it’s shorter than the Syncline Loop and will take less of your time.
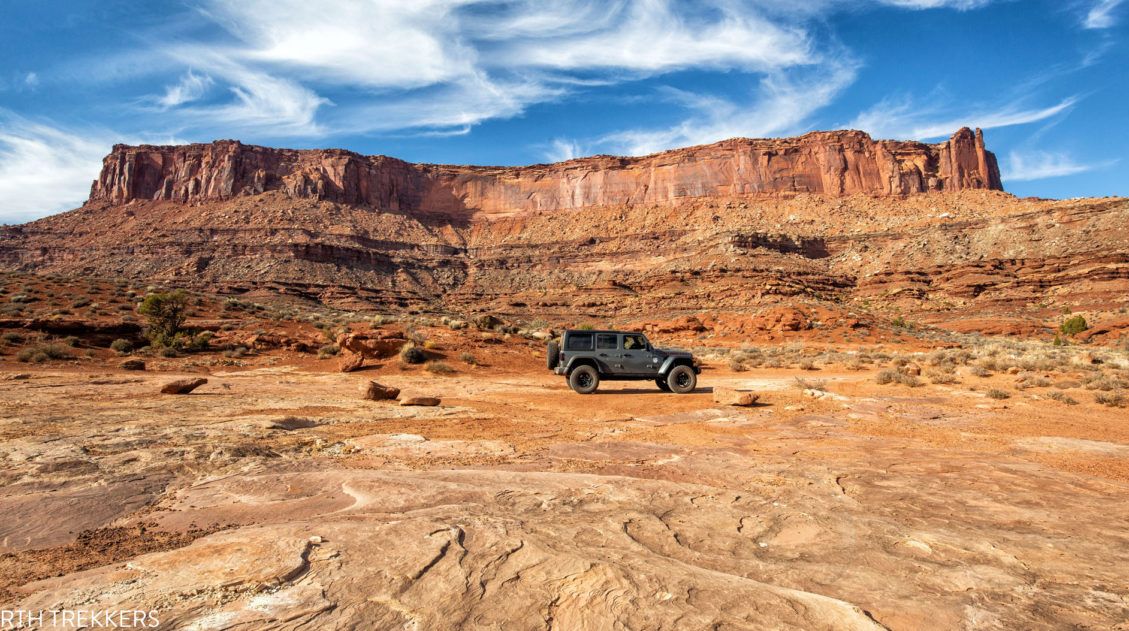
3. Consider spending a day on the White Rim Road. If you have a 4×4 vehicle, you can drive down the Shafer Trail switchbacks and drive a portion of the White Rim Road. With two days, you can drive the full loop. Both require a permit and some advance planning, but this was our favorite experience in Canyonlands and it blows away the Syncline Loop hike.
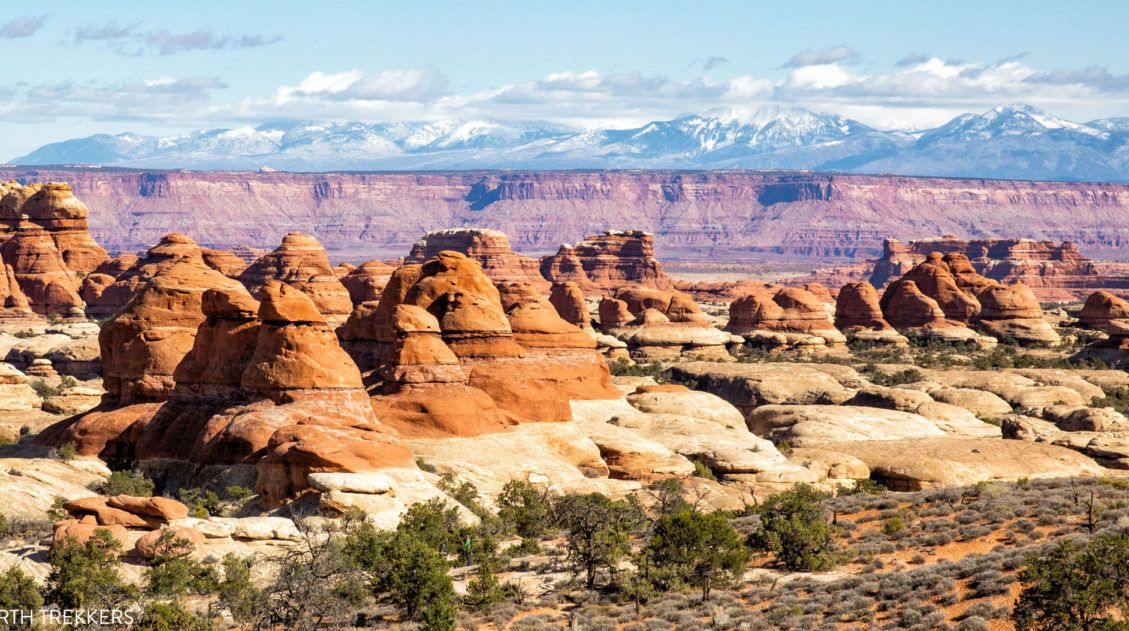
4. Hike the Chesler Park – Joint Trail Loop in the Needles. This hike is incredibly fun, the views are jaw-dropping, and this is our favorite hike in Canyonlands.
If you are an experienced hiker and want to hike what some people refer to as “the premier trail” in Canyonlands, then it is worth it to do this hike. I’m glad I did it, even though it didn’t live up to my expectations.
If you already hiked this trail, what do you think? Is it worth it? Let us know in the comment section below.
Tips to Have the Best Experience
Start the hike early, ideally by 7 am. This ensures that you get a parking space and gives you plenty of time to complete the hike.
Leave No Trace. When you are in the park, practice the seven principles of Leave No Trace. This includes packing out what you bring into the park, be considerate of other hikers, stay on the trail, and do not remove anything from the park.
Do not expect your cell phone to work. For most of this hike we had zero cellular service.
What to Bring on the Hike
Hiking shoes. Don’t do this hike in anything other than hiking shoes or hiking boots.
Hiking poles. Hiking poles take the stress off of your legs and help to ease leg pain and fatigue.
Water and snacks. At least 4 liters of water in the summer.
Sunscreen, hat, and sunglasses. For most of this hike you will be exposed to the sun, with very little shade.
Camera. Even a smartphone will do.
Essential Hiking Gear: What Should You Bring on a Day Hike?
If you are new to hiking or are curious about what you should bring on a hike, check out our Hiking Gear Guide. Find out what we carry in our day packs and what we wear on the trails.If you have any questions about hiking the Syncline Loop, or if you want to share your experience, let us know in the comment section below. We would love to hear about your experience and I’m sure other readers would, too.
More Information about Canyonlands
Read all of our articles about Utah in our Utah Travel Guide and the USA in our United States Travel Guide.
Best Things to Do in Island in the Sky: Canyonlands National Park
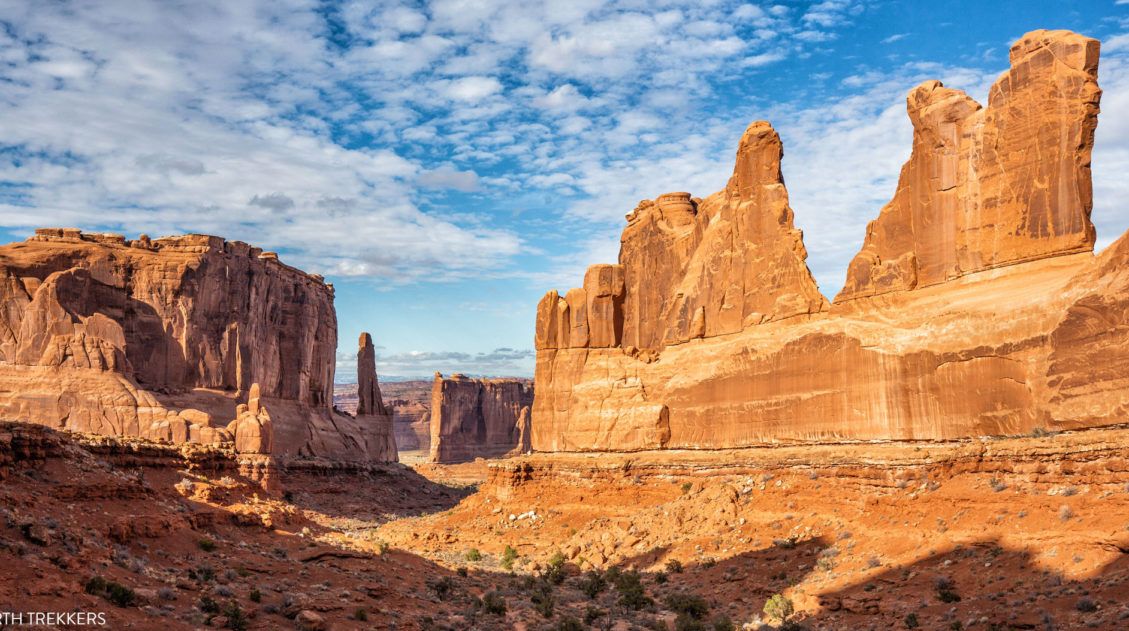
Pinterest Facebook Flipboard Canyonlands National Park is an underrated park located near Moab, Utah. Compared to its smaller and more popular neighbor Arches National Park, Canyonlands feels more rugged, more remote, and a whole lot larger. Island in the Sky, the most popular section of Canyonlands, is filled with jaw-dropping vistas and short but sweet […]
Hiking the Gooseberry Trail in Canyonlands National Park
There are a number of hikes in Canyonlands National Park that offer sweeping views over the White Rim. Grand View Point Trail and White Rim Overlook both fit into this category. However, if you want to journey below the level of the mesa and hike onto the White Rim, the Gooseberry Trail is a great […]
How to Drive the White Rim Road: Map, Photos & Driving Tips
Driving the White Rim Road is the experience of a lifetime. If you are looking for adventure, solitude, incredible views, and a totally different way to experience Canyonlands National Park, put this drive on your list. Along the drive, you will gaze up at the Island in the Sky mesa and peer down into the […]
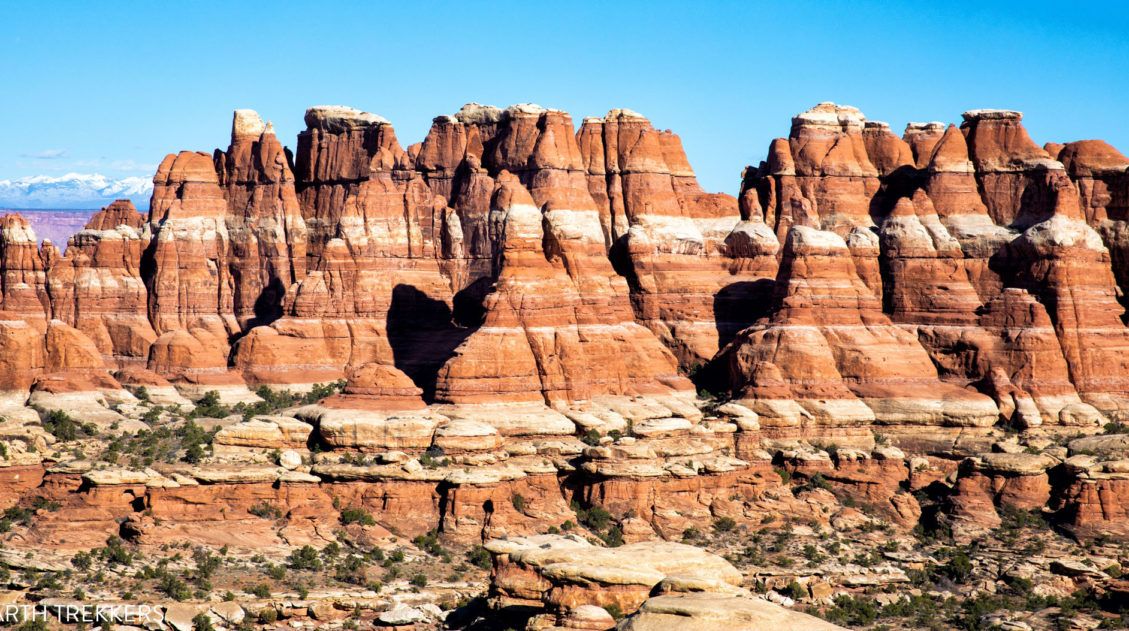
12 Amazing Things to Do in The Needles, Canyonlands National Park
The Needles is an often overlooked section of Canyonlands National Park. But those who take the time to visit the Needles are rewarded with thrilling, unique hiking trails, low crowds, and jaw-dropping views of Canyonlands National Park. In this post, we cover the 12 best things to do in the Needles…12 great reasons why this […]
Ultimate Guide to the Chesler Park Loop in the Needles
If you want to get an up-close look at the “Needles,” the sandstone spires that make the Needles district of Canyonlands National Park so uniquely beautiful, put Chesler Park on your list. It is possible to hike out and back to Chesler Park on a short day hike. But if you don’t mind going farther, […]

How to Drive Shafer Canyon Road and Potash Road | Moab, Utah
Have you seen photos of the Shafer Canyon switchbacks and said to yourself, wow, I’d really love to drive on that road? Do you like the idea of venturing away from the crowds and driving through some truly dramatic landscapes? Or, do you want to get a unique perspective of Canyonlands National Park and Dead […]

Best Things to Do in Dead Horse Point State Park
Have you ever visited a place where you didn’t quite know what to expect and then it just blew you away? For us, that was Dead Horse Point State Park. Nearby Arches and Canyonlands National Parks get all of the attention (and all of the visitors). When looking for more things to do in the […]
6 Epic Utah Road Trip Routes for Your Next Adventure
Utah is home to five of the most stunning national parks in the United States. Throw in some national monuments and a few spectacular state parks and you have a extraordinary road trip destination. If you are planning a Utah road trip itinerary, we have tons of information to share with you. About Our Experiences […]
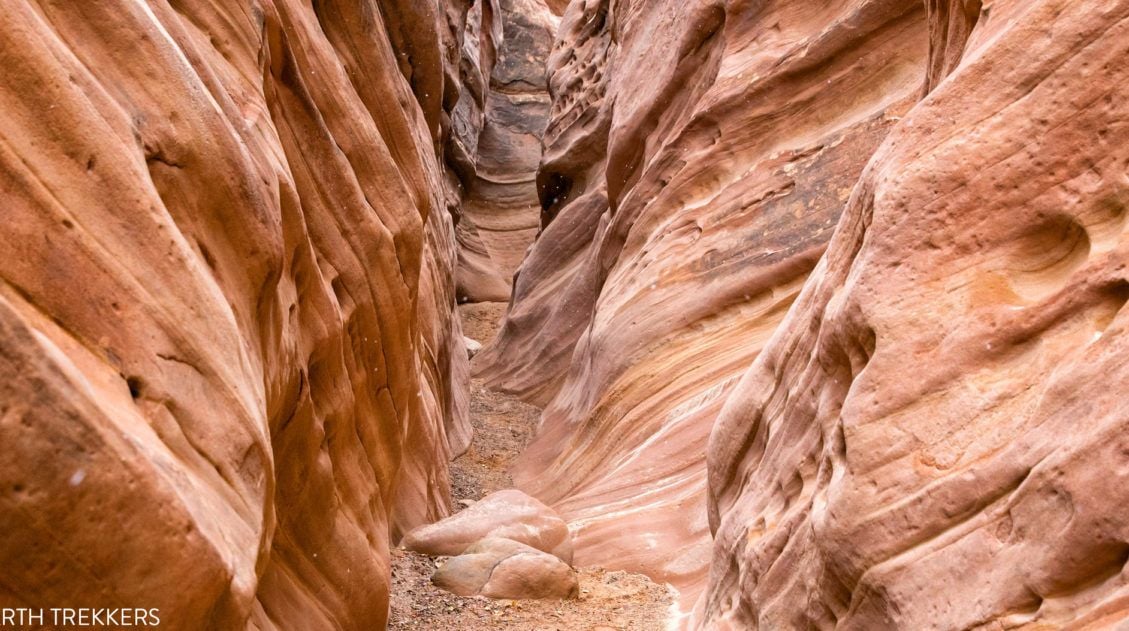
Little Wild Horse Canyon – Bell Canyon Loop: A Step-By-Step Guide
Little Wild Horse Canyon is one of the most thrilling slot canyons in Utah. With tight passageways, curving, scalloped walls, and short sections of easy rock scrambling, this hike is fun for both kids and adults. You can hike the narrowest (and most fun) section of Little Wild Horse as a fast out-and-back hike, or […]
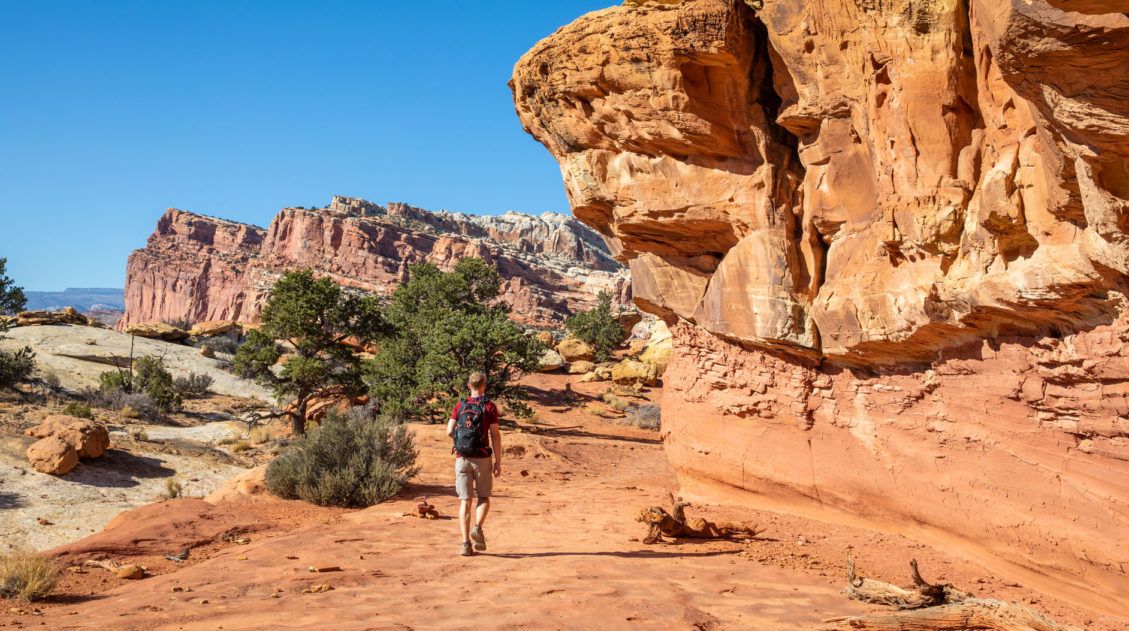
15 Best Hikes in Capitol Reef National Park
The hikes in Capitol Reef National Park are some of the most underrated in Utah. From short, easy trails along Highway 24 to scenic routes like Cassidy Arch and Grand Wash, this park is packed with adventure, without the crowds you’ll find in Zion or Arches. Drive deeper into the park and you’ll discover the […]
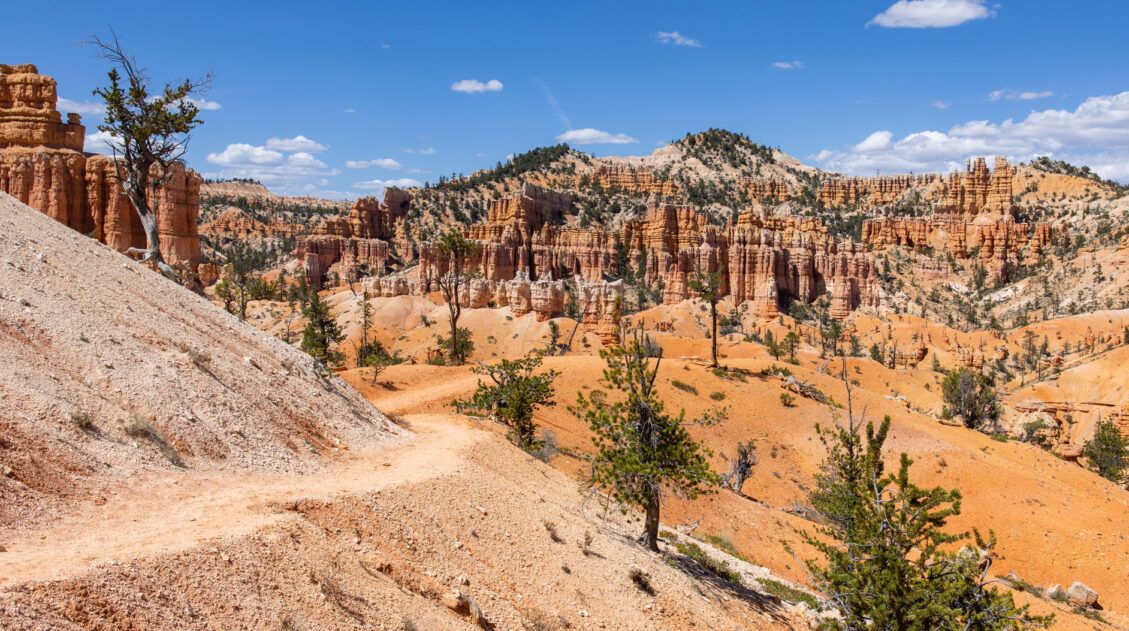
The Amazing Fairyland Loop: An Underrated Hike in Bryce Canyon
Tucked away from the park’s busier viewpoints, the Fairyland Loop offers jaw-dropping vistas, towering hoodoos, and a sense of solitude that’s hard to find on more popular routes. It’s a tough hike, but the reward is a scenic walk through one of the most beautiful landscapes in the American Southwest. The Fairyland Loop is often […]
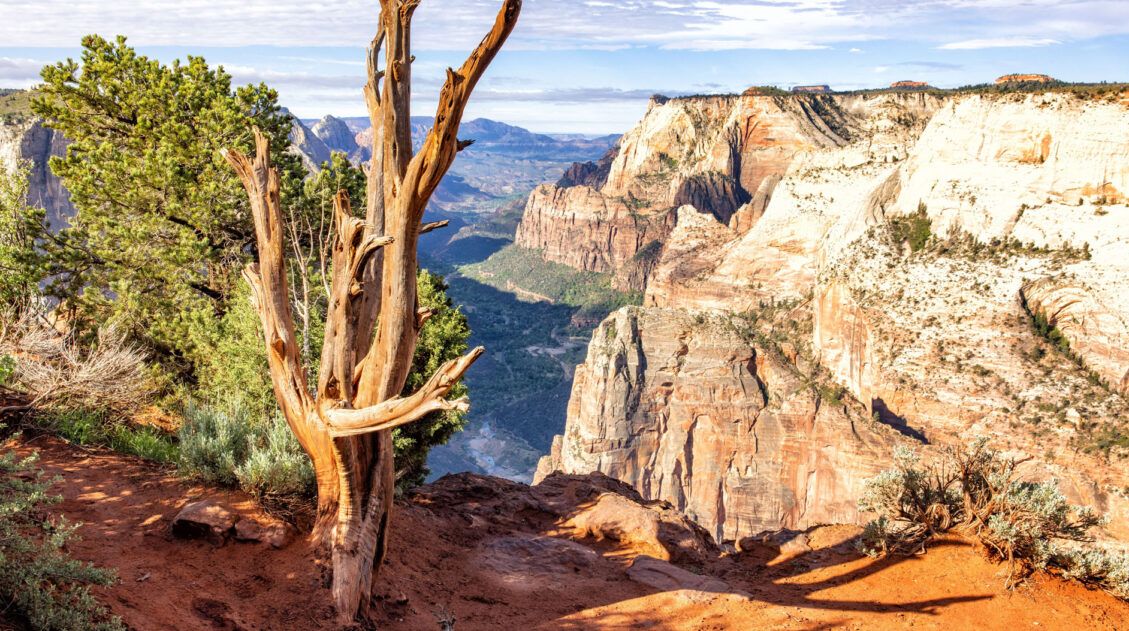
Best Hikes in Zion: 15 Trails from Beginner to Advanced
Zion National Park is one of the best places in the United States to go hiking. From the awe-inspiring hike up Angels Landing to the family-friendly Riverside Walk to multi-day backpacking adventures, there is something here for everyone. In this guide, we cover the best hikes in Zion National Park, from popular trails to hidden gems. […]
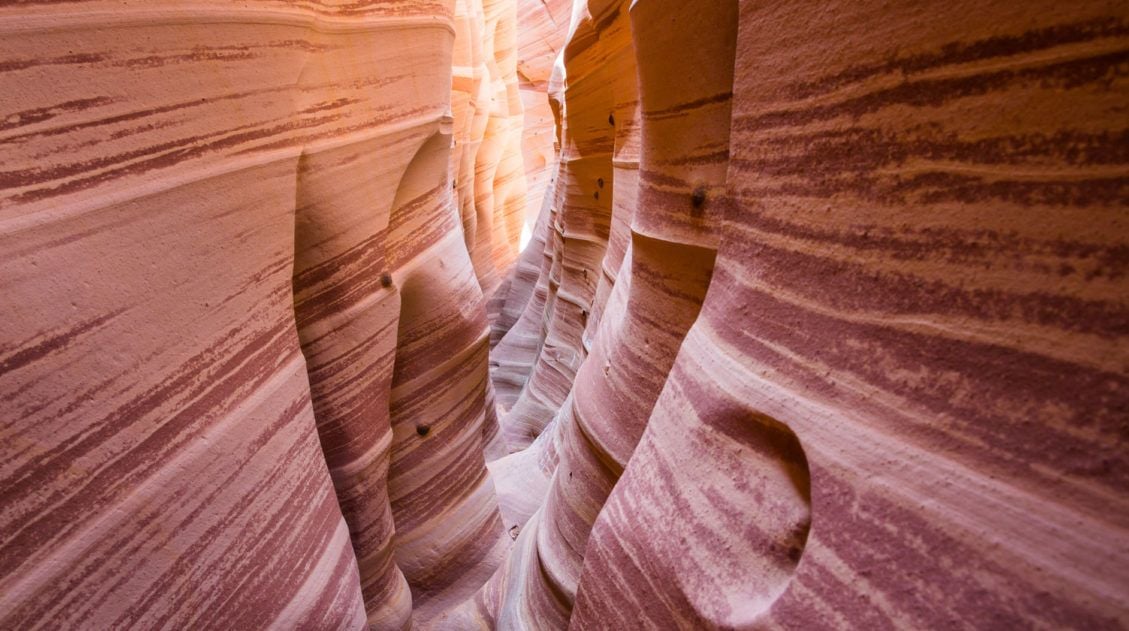
How to Hike Zebra Slot Canyon in Grand Staircase-Escalante
Zebra Slot Canyon is a very short slot canyon, named for its striped canyon walls. It’s a gorgeous spot, maybe not quite as pretty as Antelope Canyon in Arizona, but since you can explore this on your own without a guide or tour group, it’s more fun. Hiking Zebra Slot Canyon can be a little […]
The Ultimate Guide to the 63 US National Parks
Stretching from the South Pacific, across the United States to the Caribbean, are 63 national parks. These national treasures preserve iconic landscapes, majestic mountains, primordial forests, arid deserts, misty coastlines, immense canyons, wildlife, and historic landmarks. We have visited 56 of the 63 US national parks, from the towering granite walls of Yosemite and the […]

Comments 3