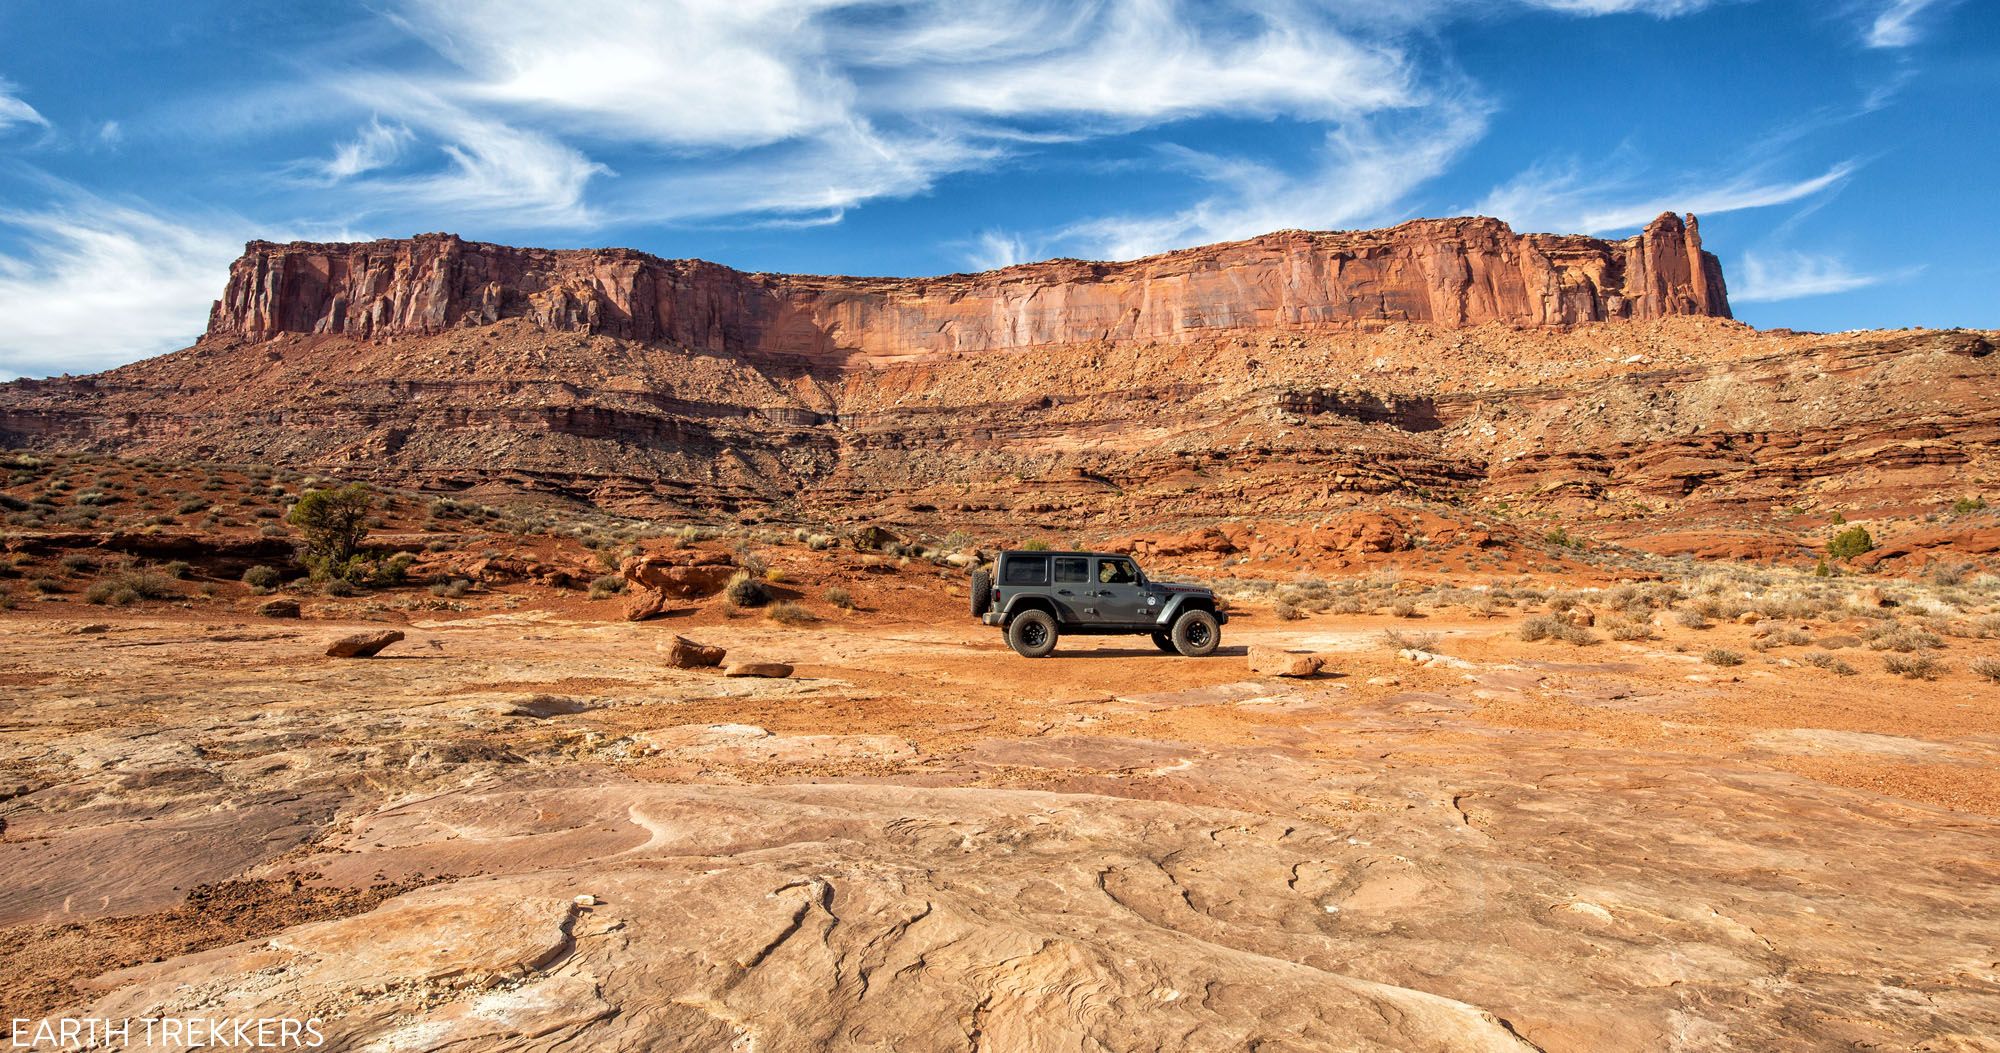
Driving the White Rim Road is the experience of a lifetime. If you are looking for adventure, solitude, incredible views, and a totally different way to experience Canyonlands National Park, put this drive on your list.
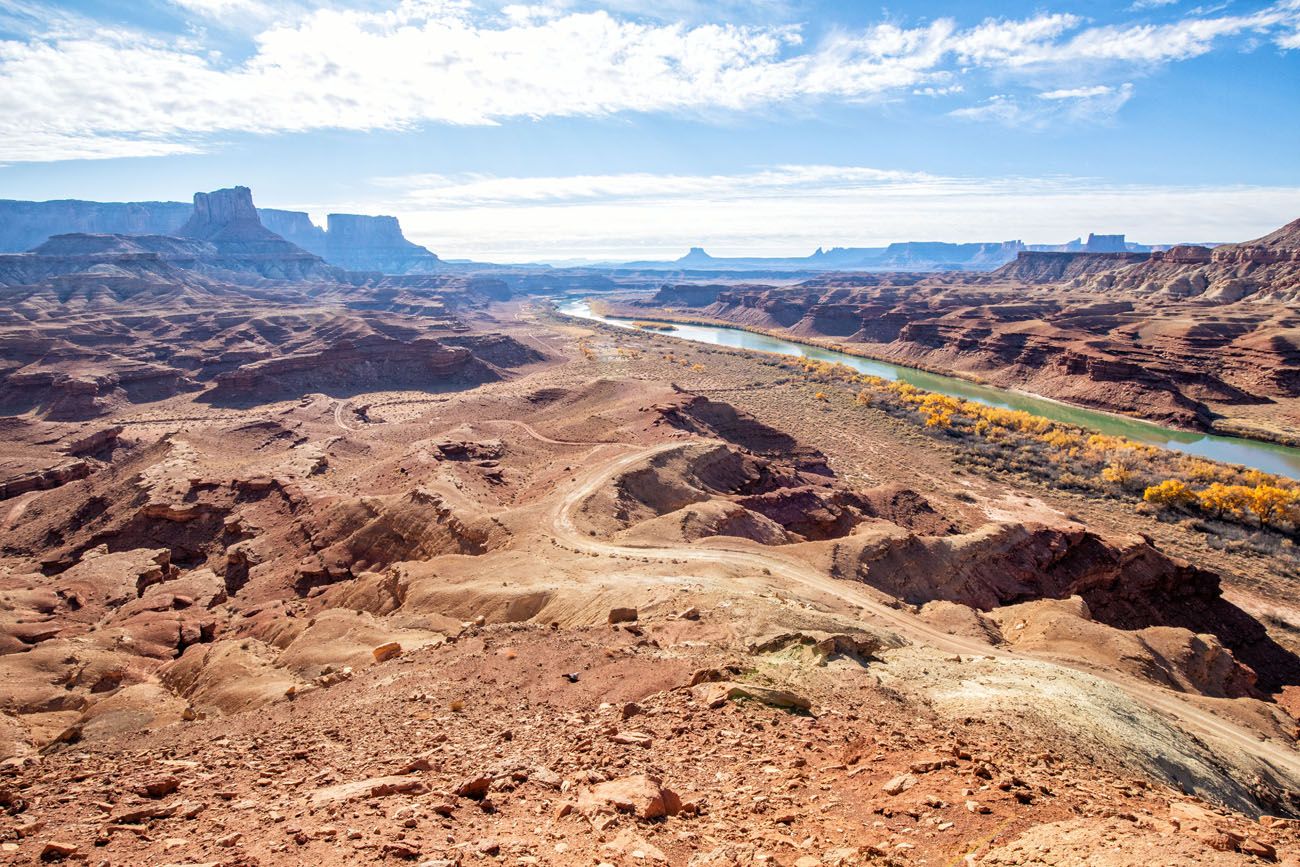
Along the drive, you will gaze up at the Island in the Sky mesa and peer down into the canyons carved out by the Green River and Colorado River. You will drive along narrow cliff edges, past scenic overlooks, around towering buttes, and up and over rocky hills.
From your campsite, watch the sunset and gaze up into the night sky. If you are lucky enough to do this on a clear night, the view is spectacular. Canyonlands is a dark sky park and the number of stars you can see is astonishing.
From the White Rim Road, you have the option to go hiking or drive the short detour roads, if you want explore more of this remote landscape.
100 miles may sound like a long way to go, but there is never a boring moment on the White Rim Road.
The number of vehicles on the White Rim Road is limited, the campsites are spaced far apart, and you will drive for miles without seeing another person. This is a great way to escape the crowds and really get to know this national park.
We have so much information to share with you that it could not all fit into one article. In this article (part 1 of our two part series), learn about the driving route. Part 2 covers the planning and logistics for the White Rim Road) ↓
White Rim Road: Detailed Planning Guide and Checklist
Things to know before you go: permits, how to plan for the drive, and helpful tips.Overview of the White Rim Road
Distance: 100 miles
Length of Time: 2 to 3 days is average. It can be done in one very long day during the summer season, when the days are long. For the best experience, we recommend spending at least night on the White Rim Road, so you can slow down and savor this journey.
Permits: A backcountry permit is necessary if you plan to spend more than one day, camping overnight along the White Rim Road. A day use permit is necessary if you plan to do this drive in one full day.
When to Go: You can do this drive all year. The best time is the spring and fall months when temperatures are mild.
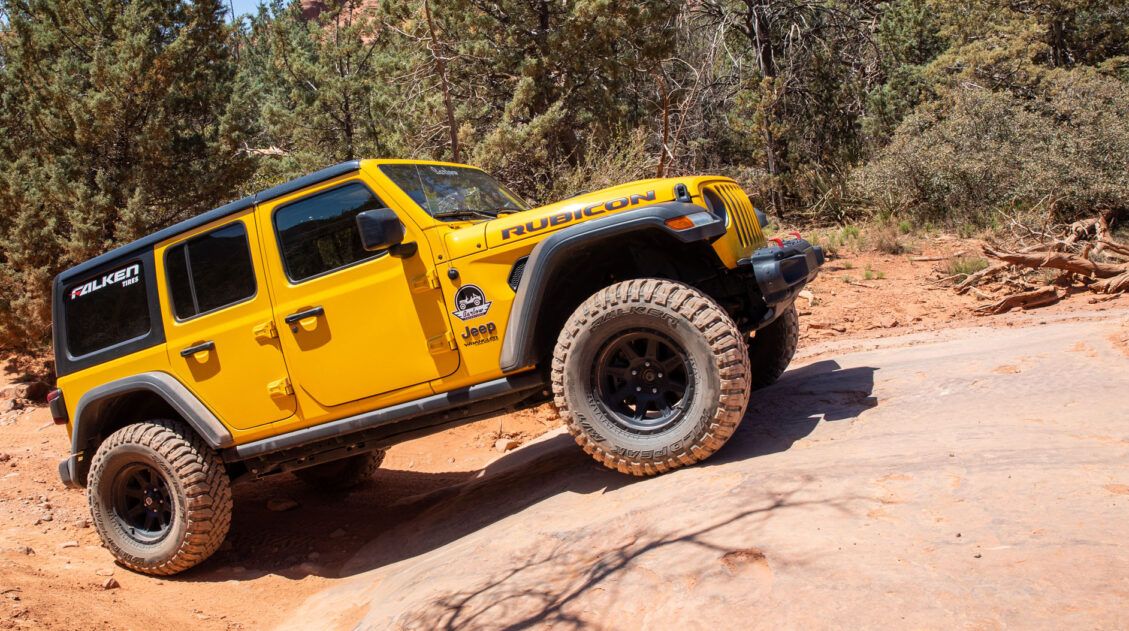
Note: The driving distances in this article were taken from the odometer on our Jeep Rubicon.
Please practice the seven principles of Leave No Trace: plan ahead, stay on the trail, pack out what you bring to the hiking trail, leave areas as you found them, minimize campfire impacts, be considerate of other hikers, and do not approach or feed wildlife.
Map of the White Rim Road
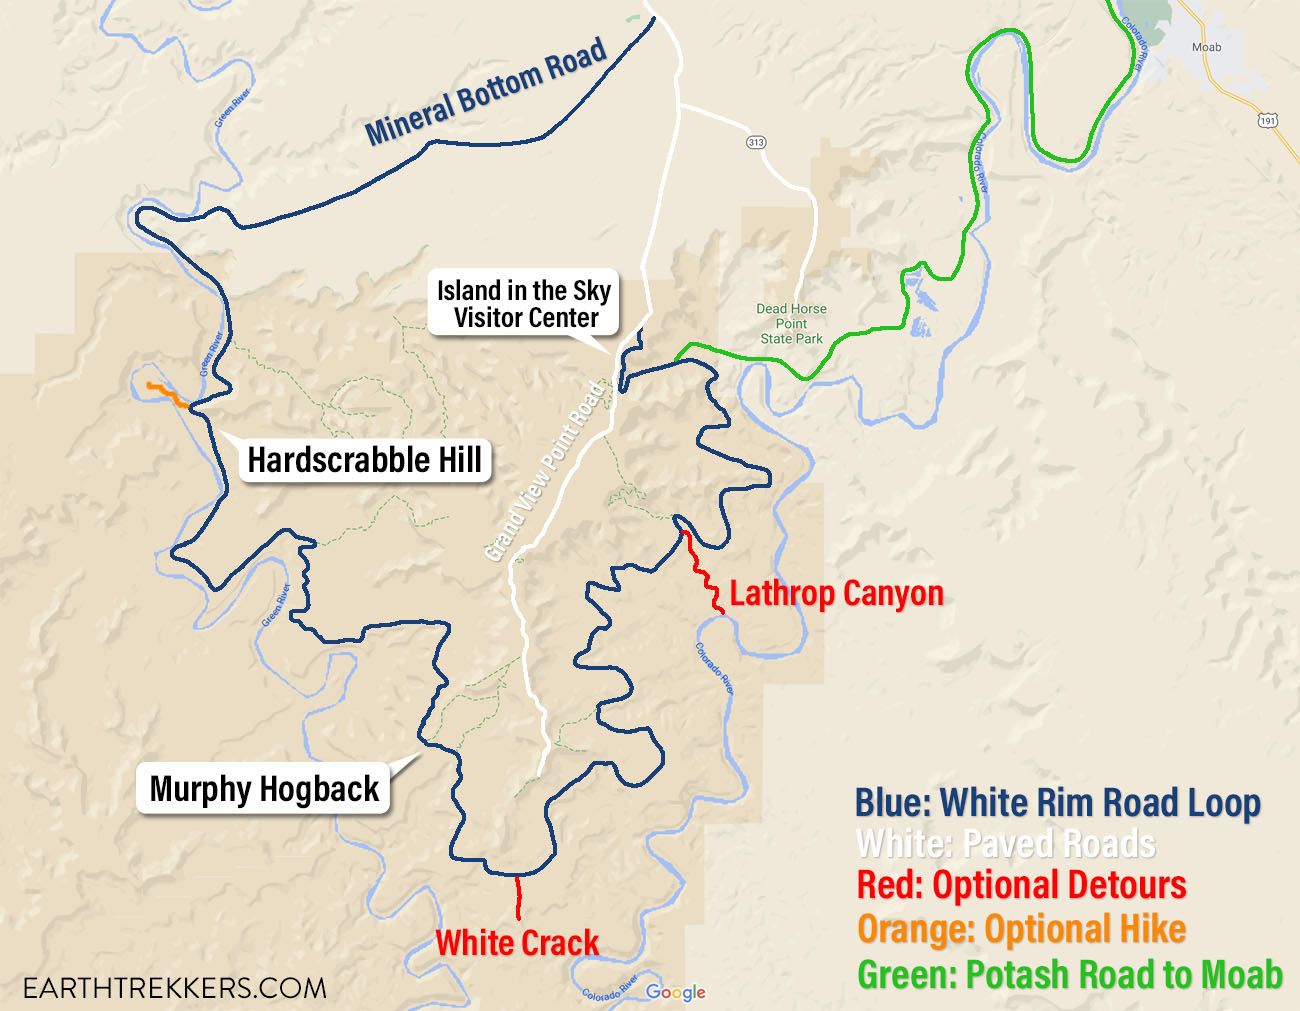
Clockwise or Counter-Clockwise?
The White Rim Road can be driven in either direction. Most people drive the White Rim Road in a clockwise direction, starting with the Shafer Trail Road.
We did the drive in a counter-clockwise direction because of the location of our campsite. Our campsite was Airport D, which is located 18 miles from the visitor center. We chose to drive the bulk of the loop on day 1, starting on Mineral Bottom Road, and driving 70 miles to the Airport campground. On day 2, we drove the detour road to Lathrop Canyon, drove up and down the Shafer switchbacks, and then returned to Moab on Potash Road.
How to Drive the White Rim Road: Counter-Clockwise Route
Below is the entire White Rim Road route in the counter-clockwise direction, from start to finish. Along the drive, we list the mile markers for campgrounds, detours, hiking trails, and viewpoints. We also highlight some of our favorite viewpoints along the drive.
If you plan to drive the White Rim Road in the clockwise direction, we provide driving distances to the same viewpoints, campgrounds, etc. at the end of this post.
Note: The distances of the detours (for example, the short drive to White Crack campsite) are not included in the overall distance of the White Rim Road.
0.0 Mineral Bottom Road
From Grand View Point Road, turn onto Mineral Bottom Road. Note: You will not enter the park. Mineral Bottom Road intersects Grand View Road before you get to the visitor center. If you have not already paid your Canyonlands entrance fee, or if you do not have an America the Beautiful Pass, you need to go the visitor center first to pay your fee.
Once you turn onto the dirt road, reset your trip odometer and follow along our mileage markers. Keep in mind that odometer measurements can vary between vehicles.
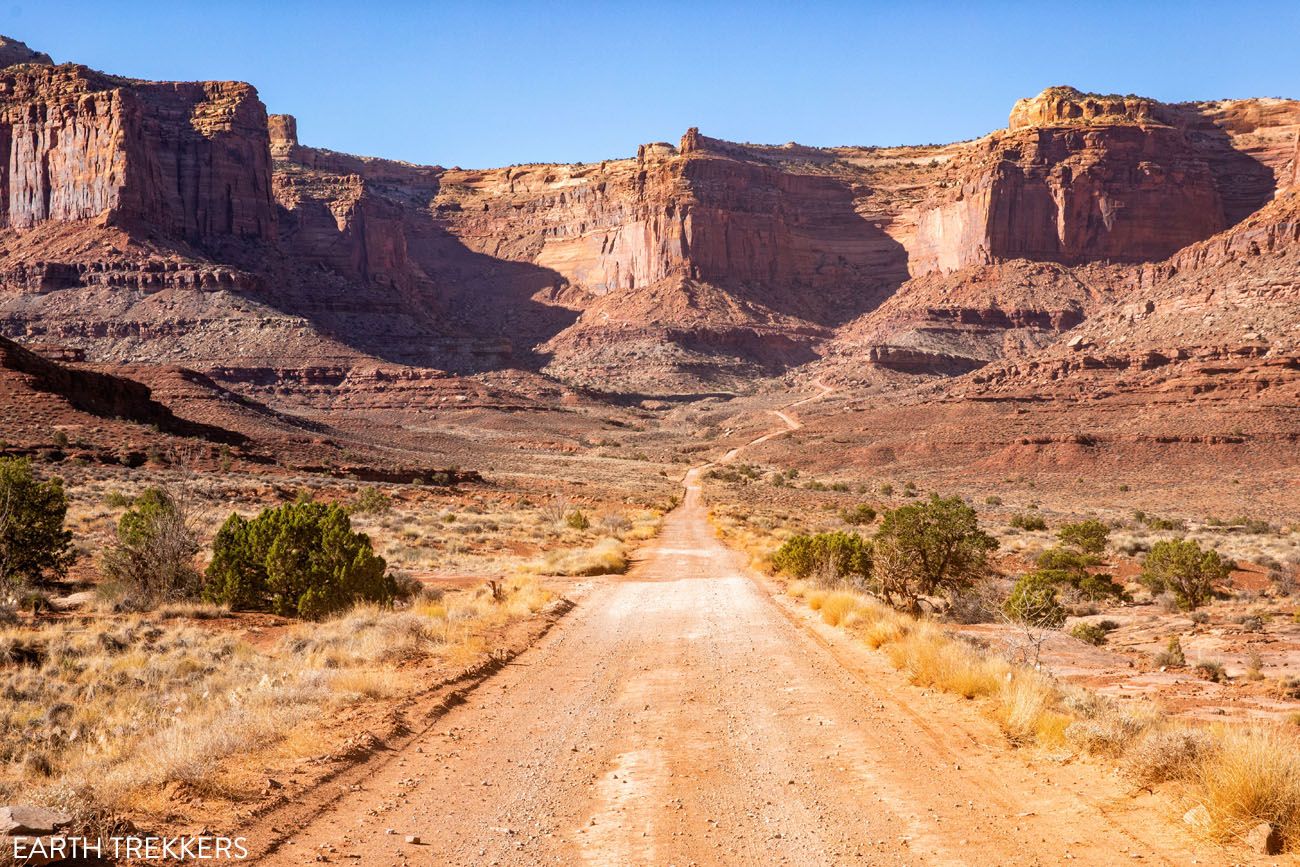
The first 13.1 miles, the distance between the start of the drive to the Mineral Canyon switchbacks, follows a well graded dirt road that slowly descends about 1,000 feet in elevation. There isn’t much to look at during this section of the drive. It’s also the fastest part of the entire drive, since the road is in great condition and it’s relatively flat.
13.1 Mineral Canyon Switchbacks
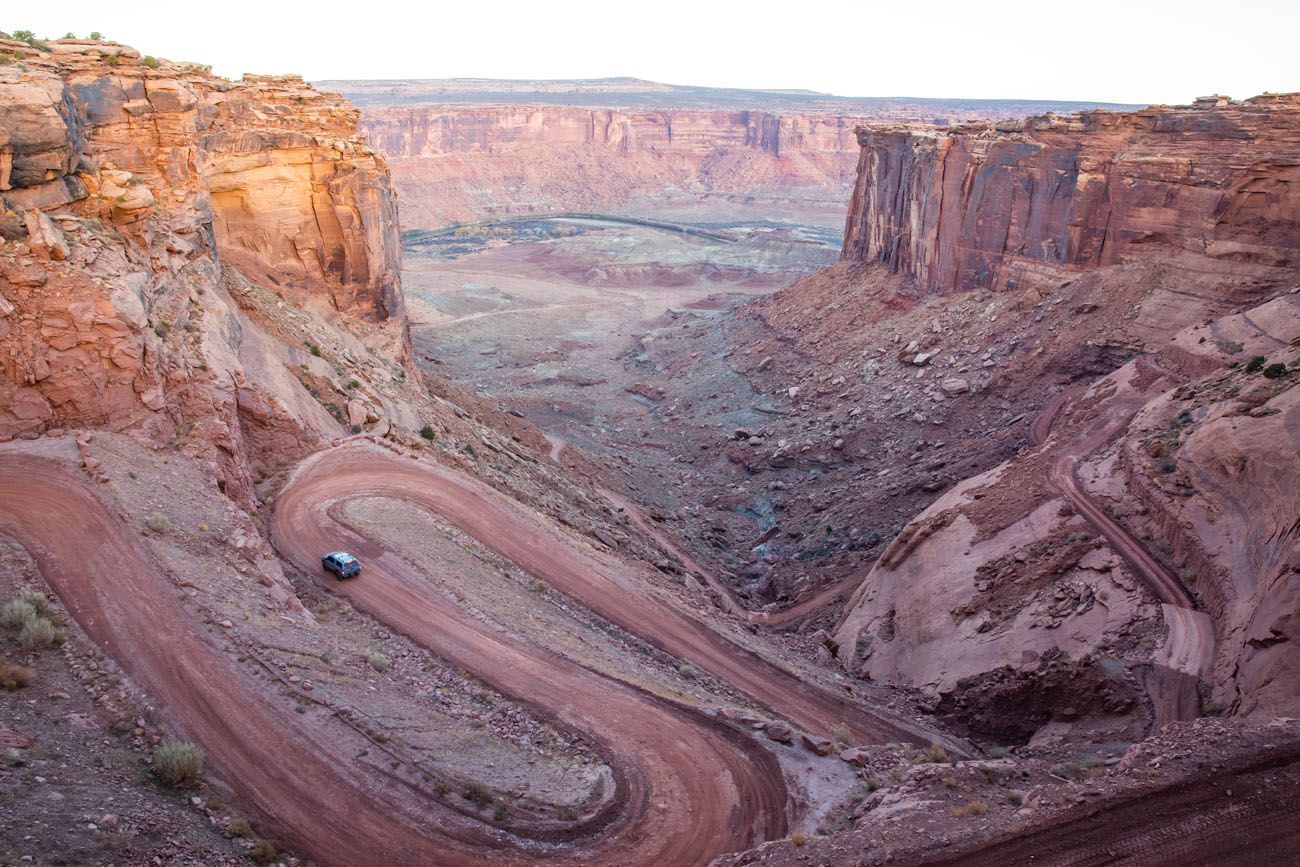
From the top of the Mineral Canyon Switchbacks you will descend another 1,000 feet but over a much shorter distance. This section of the drive is thrilling and a nice intro to the White Rim Road experience.
14.5 Bottom of the Mineral Canyon Switchbacks
At the bottom of the switchbacks, turn left at the junction onto White Rim Road. The road will now flatten out and will shortly begin to follow along the side of the Green River.
18.2 Canyonlands National Park
At this point you officially enter Canyonlands National Park.
20.5 Labyrinth Campground
21.2 Upheaval Dome Trailhead
Upheaval Dome is one of the longest and most difficult hikes to do in the Island of the Sky. From the White Rim Road, it is a 3.5 mile walk just to get to the hiking trail. If you plan to add this on to your drive along the White Rim Road, you will need most of the day to do it, since the hike from this point is roughly 15 miles long and very strenuous.
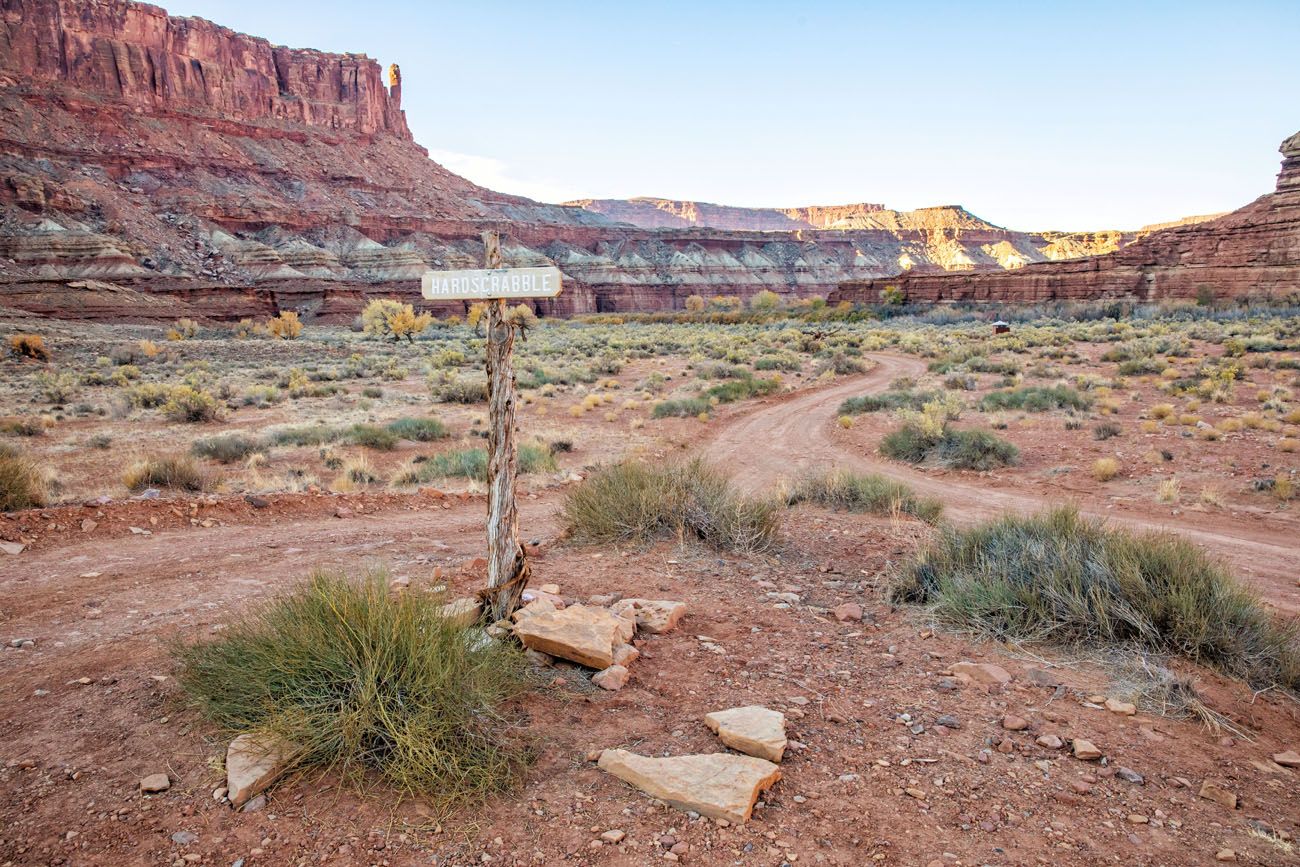
22.5 Hardscrabble Campground
This turnoff will lead to the Hardscrabble Bottom Campground. Unless you are camping here, continue on White Rim Road to begin your ascent up Hardscrabble Hill (about 400 feet of elevation gain). Note that this side of the hill does have some loose sand.
24.1 Fort Bottom Trailhead & Hardscrabble Hill
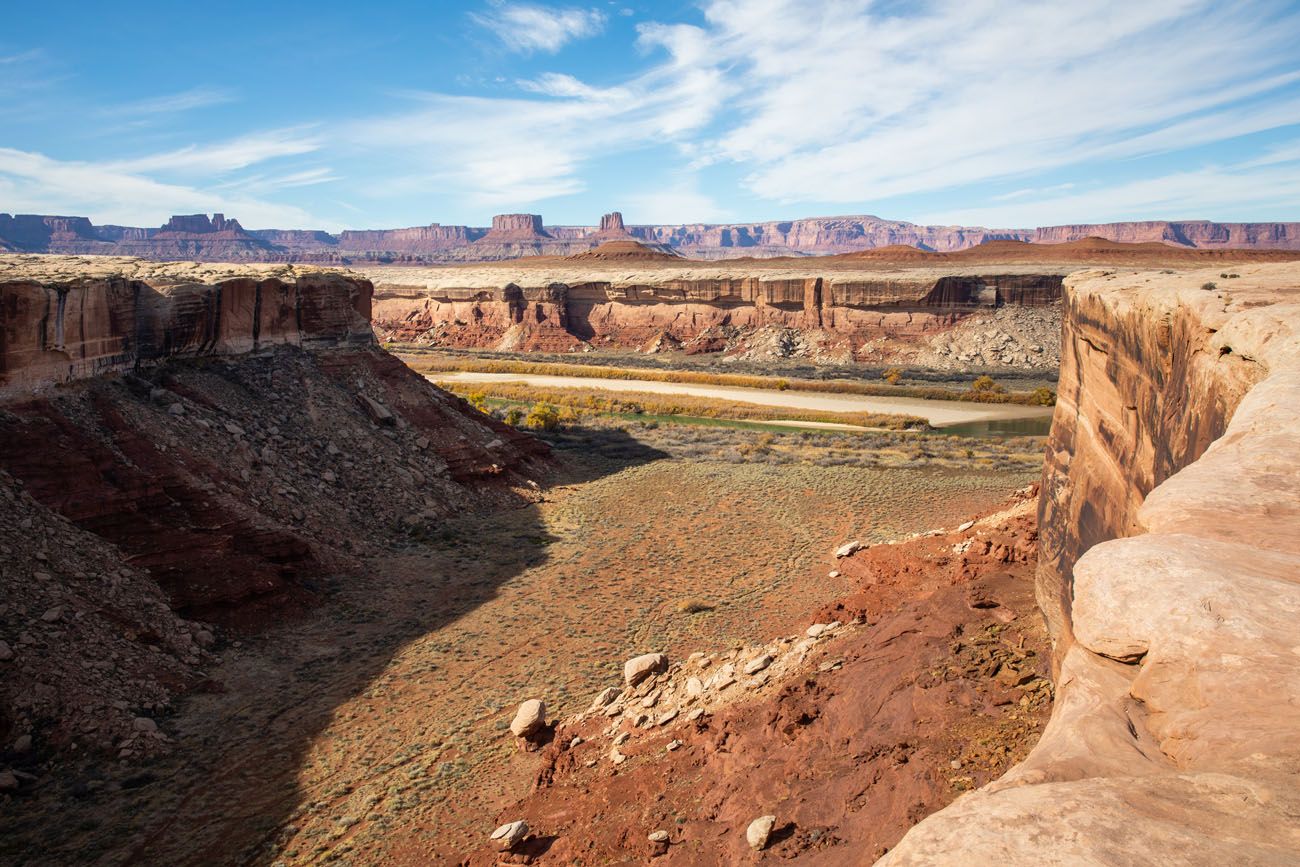
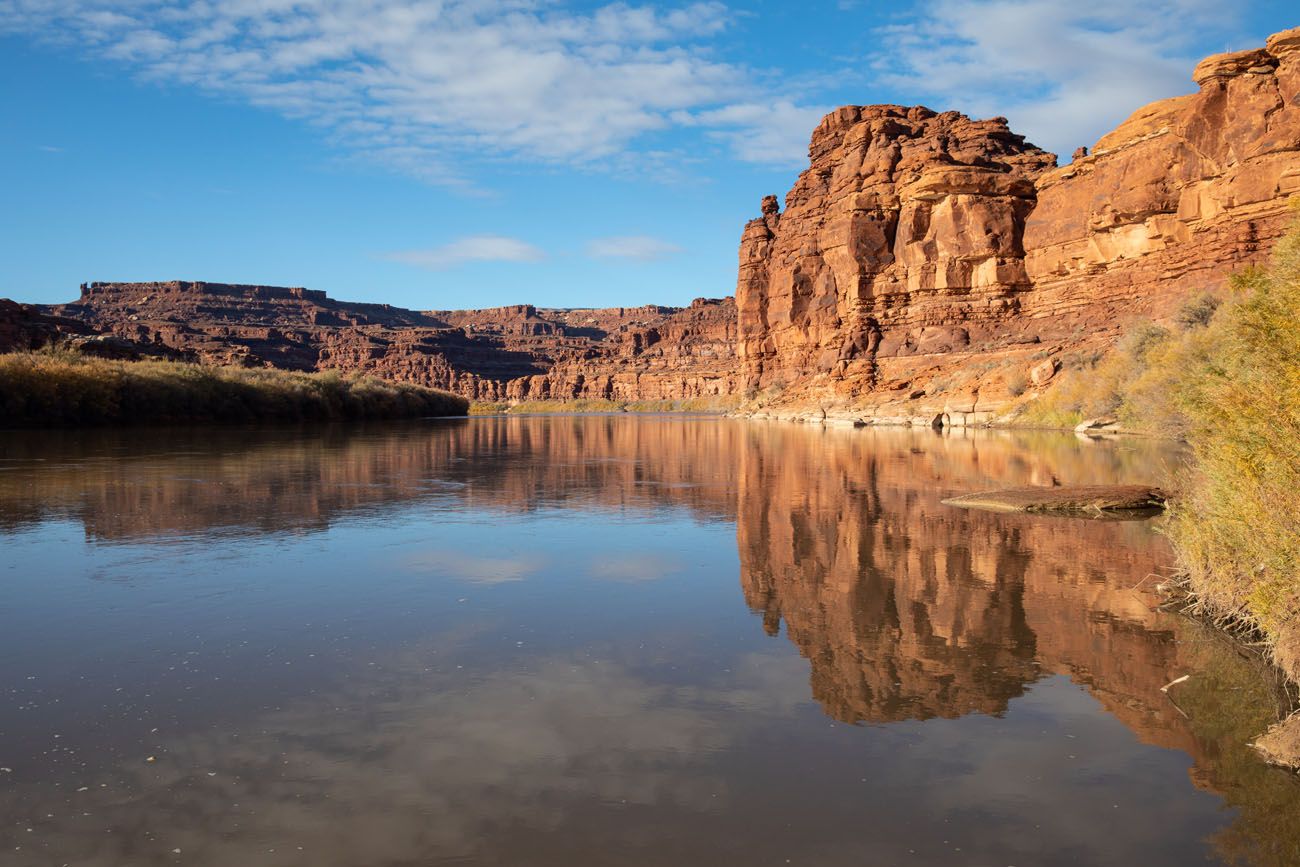
This short and easy hike (distance: 3 miles, time: 1 to 1.5 hours) leads to a viewpoint of the Green River. The cabin next to the river was built to hold patients who were being transported down the river to a tuberculosis center.
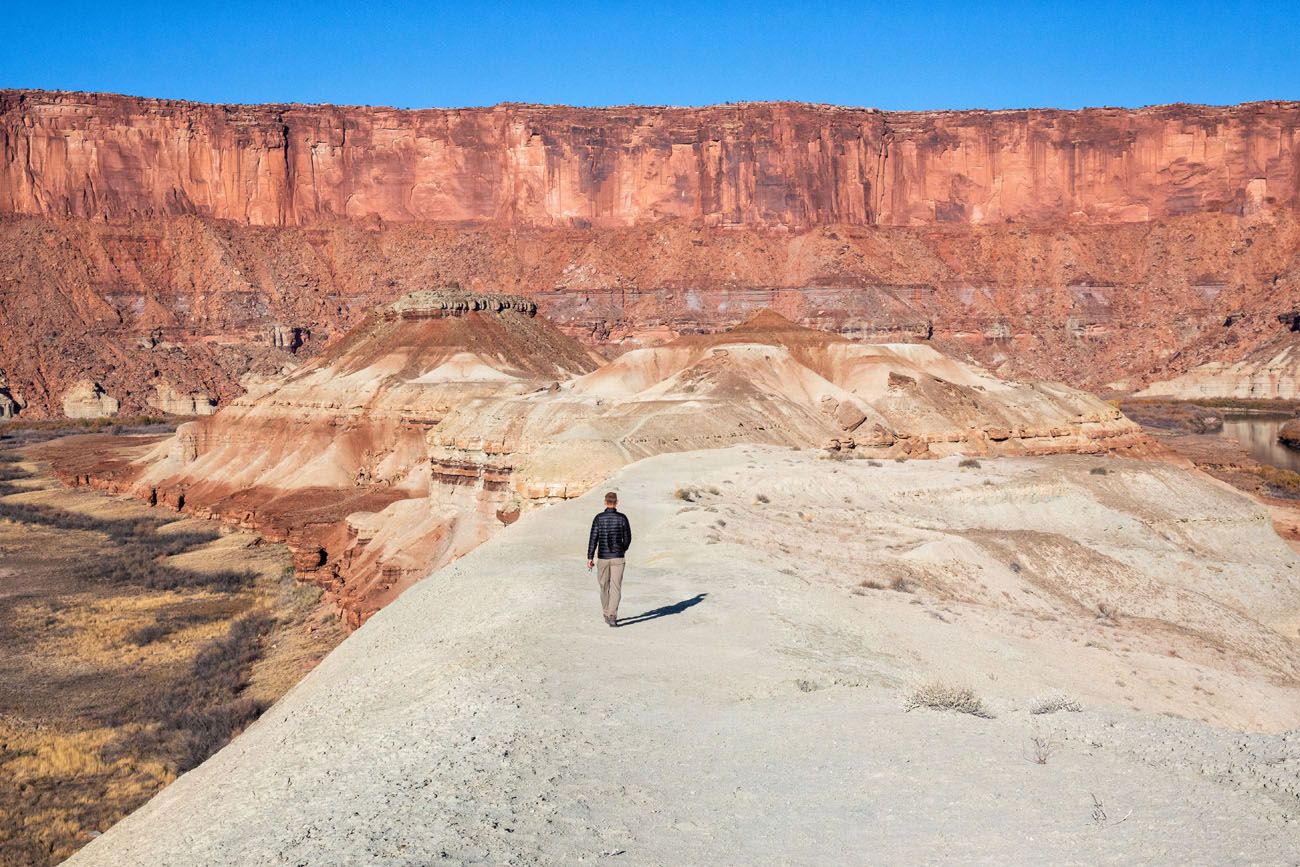
Fort Bottom Trail
From this viewpoint you can just barely see the cabin next to the Green River.
Tim and I liked this hike. It’s short, it’s fun, and the views are beautiful. However, if you are short on time (driving the White Rim Road in one day) I recommend skipping this hike to save some time.
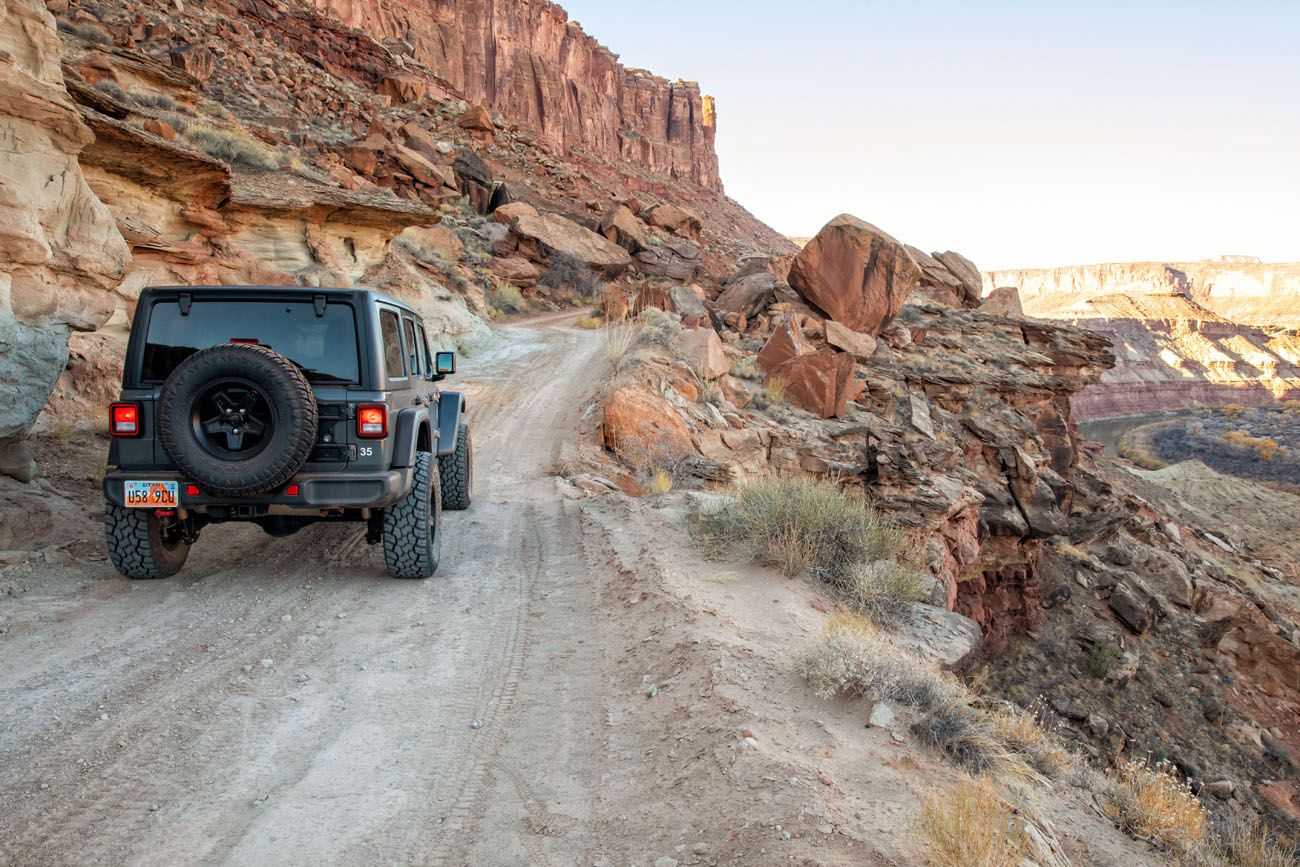
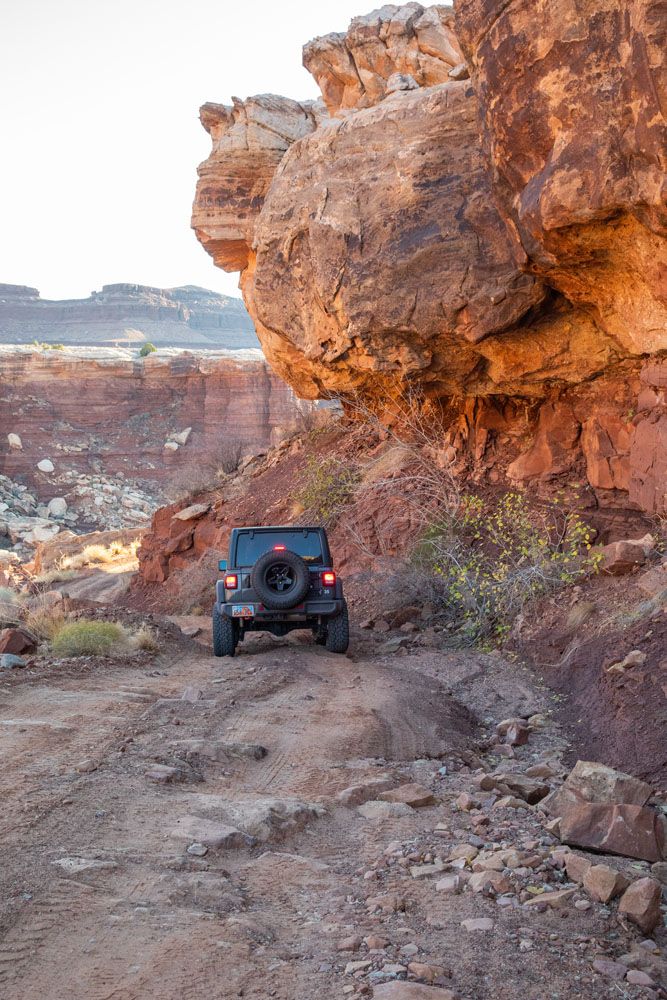
This point is also the start of the descent down Hardscrabble Hill. This is one of the trickiest parts of the White Rim Road. Scout the view down the hill for oncoming cars. It’s easier to wait at the top than try to pass another vehicle on this stretch of road.
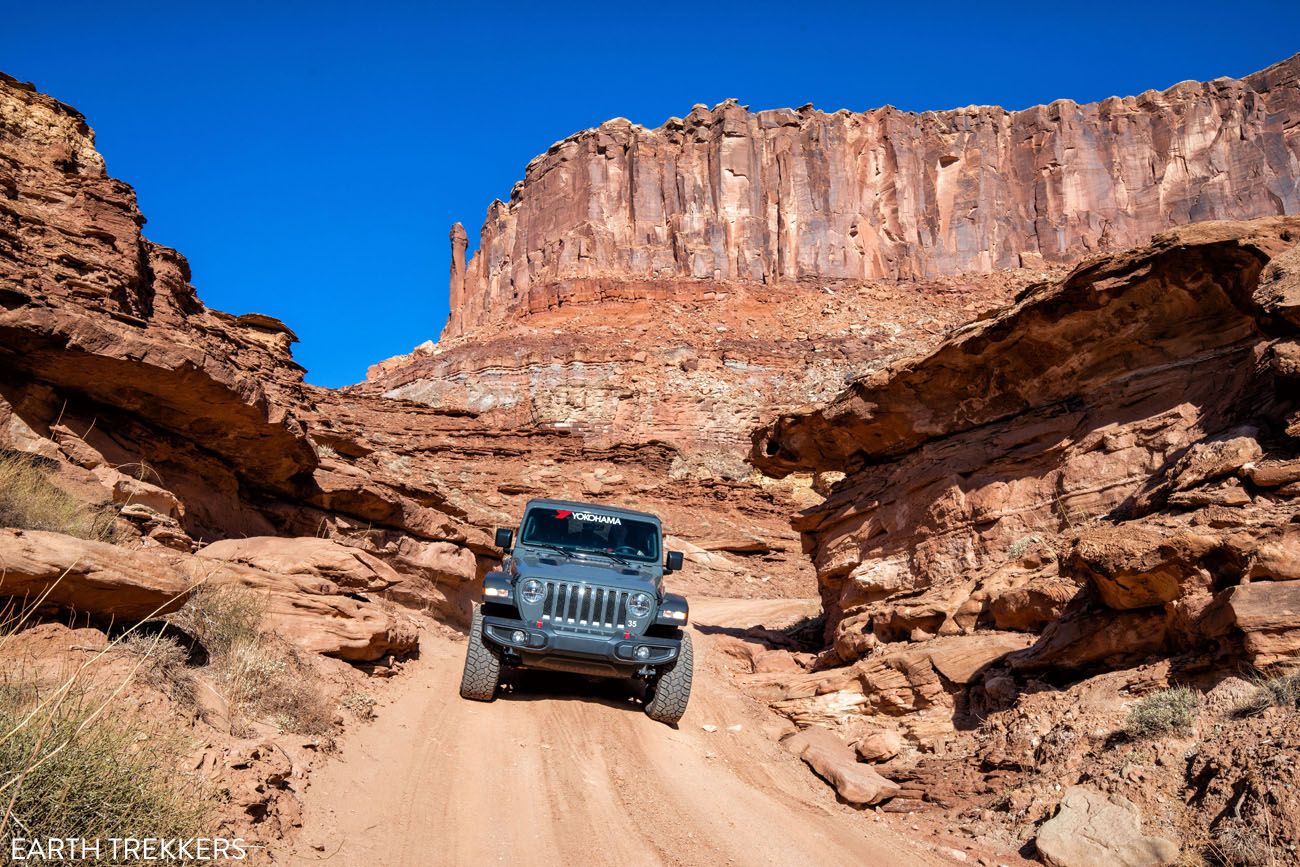
Almost at the bottom of Hardscrabble Hill
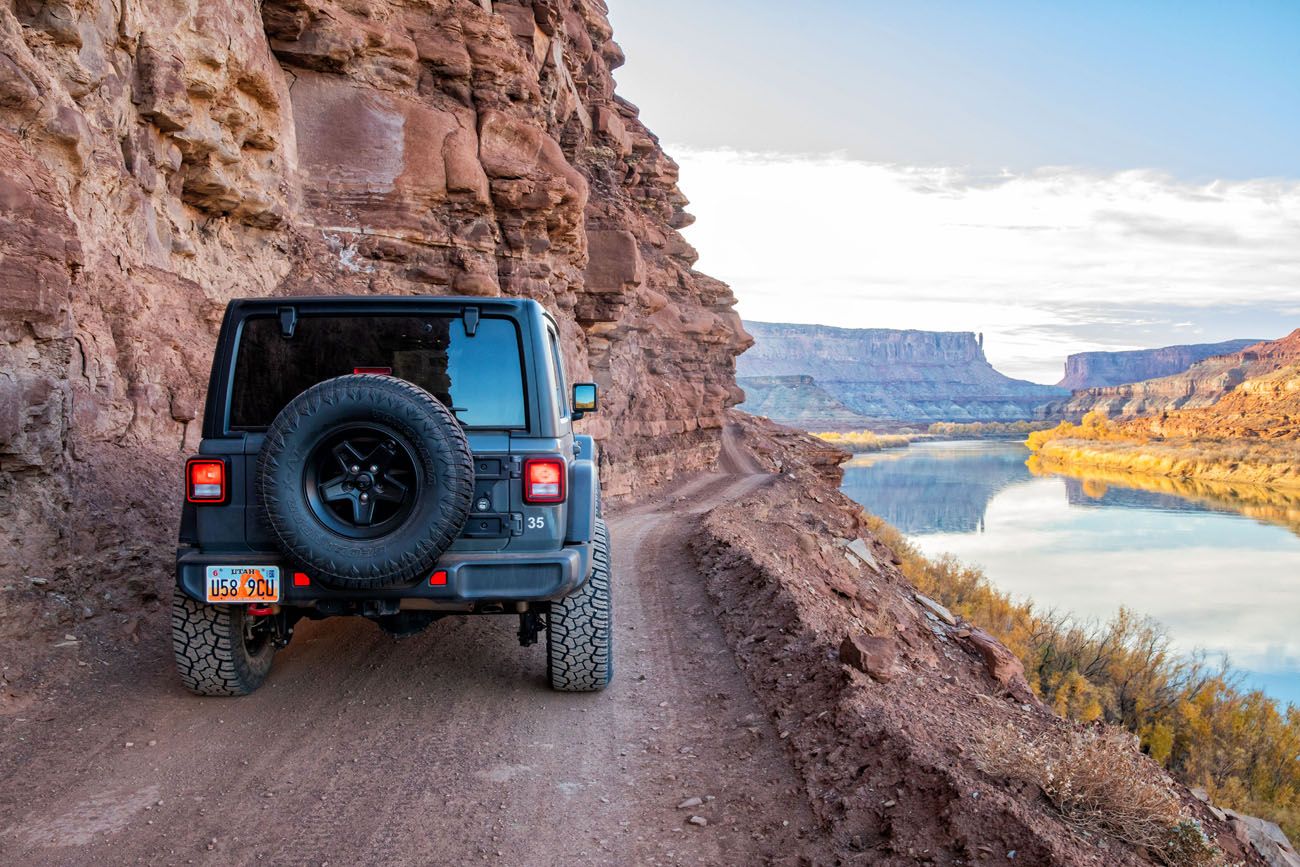
26.0 Bottom of Hardscrabble Hill & Potato Bottom Campground
Once past Hardscrabble Hill, the White Rim Road runs along the Green River. This portion of the road is noticeably rocky but it offers spectacular river views.
Potato Bottom

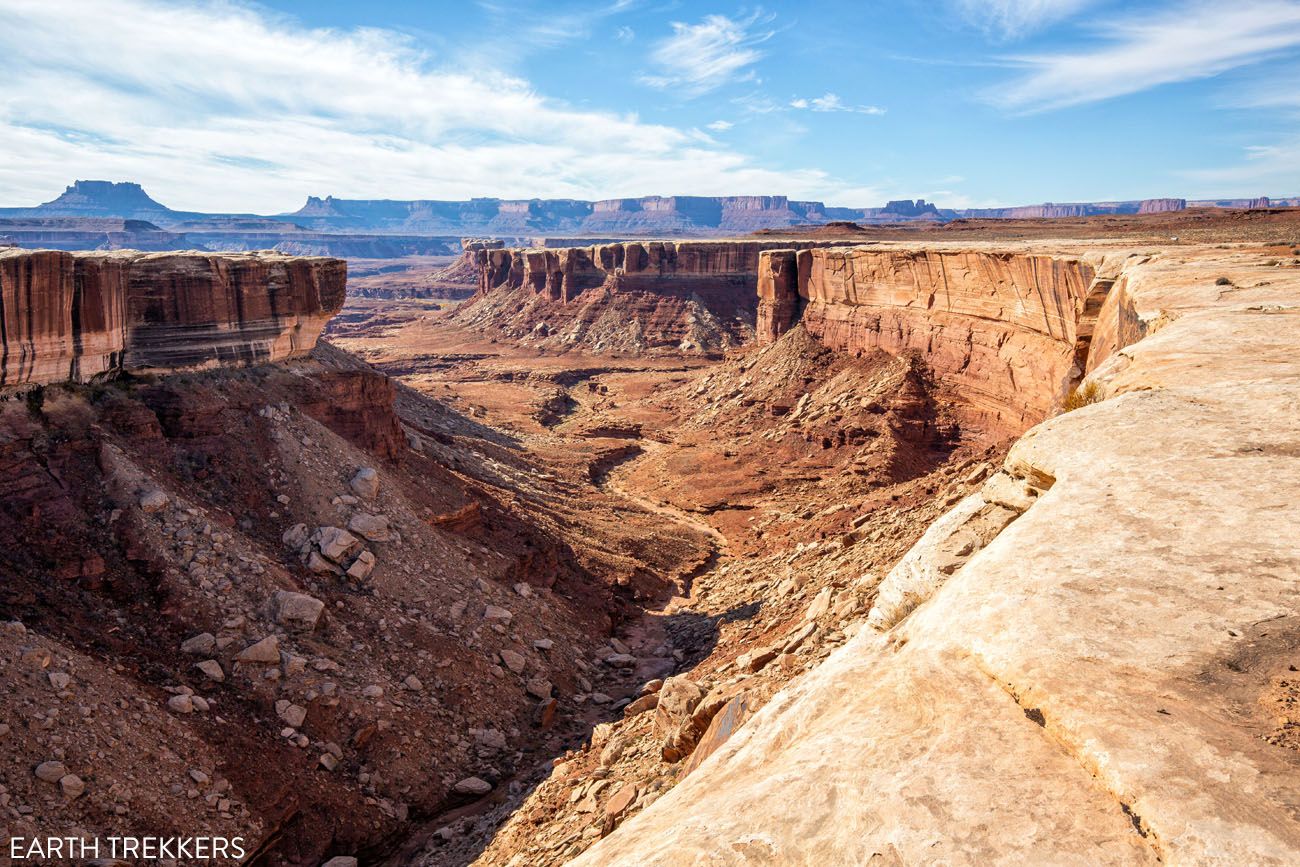
33.3 Holeman Canyon Viewpoint
This is your first opportunity to look down into one of the lower canyons. From here the road will become less rocky. Enjoy bouncing up and down as you ride over the little dirt hills and before the road turns rocky again.
36.4 Candlestick Campground & Viewpoint
This is another place to look down into a canyon.
As you continue on White Rim Road you will soon ascend another hill. This hill is smaller than the Hardscrabble Hill (about 200 feet of elevation gain). After the descent another lower canyon, called Soda Springs Basin, will open up on the right side. It will be tempting to stop right away to take a look, but as you drive around the canyon you will get better views.
39.6 Soda Springs Basin Viewpoint #1
40.6 Soda Springs Basin Viewpoint #2
42.5 Soda Springs Basin Viewpoint #3

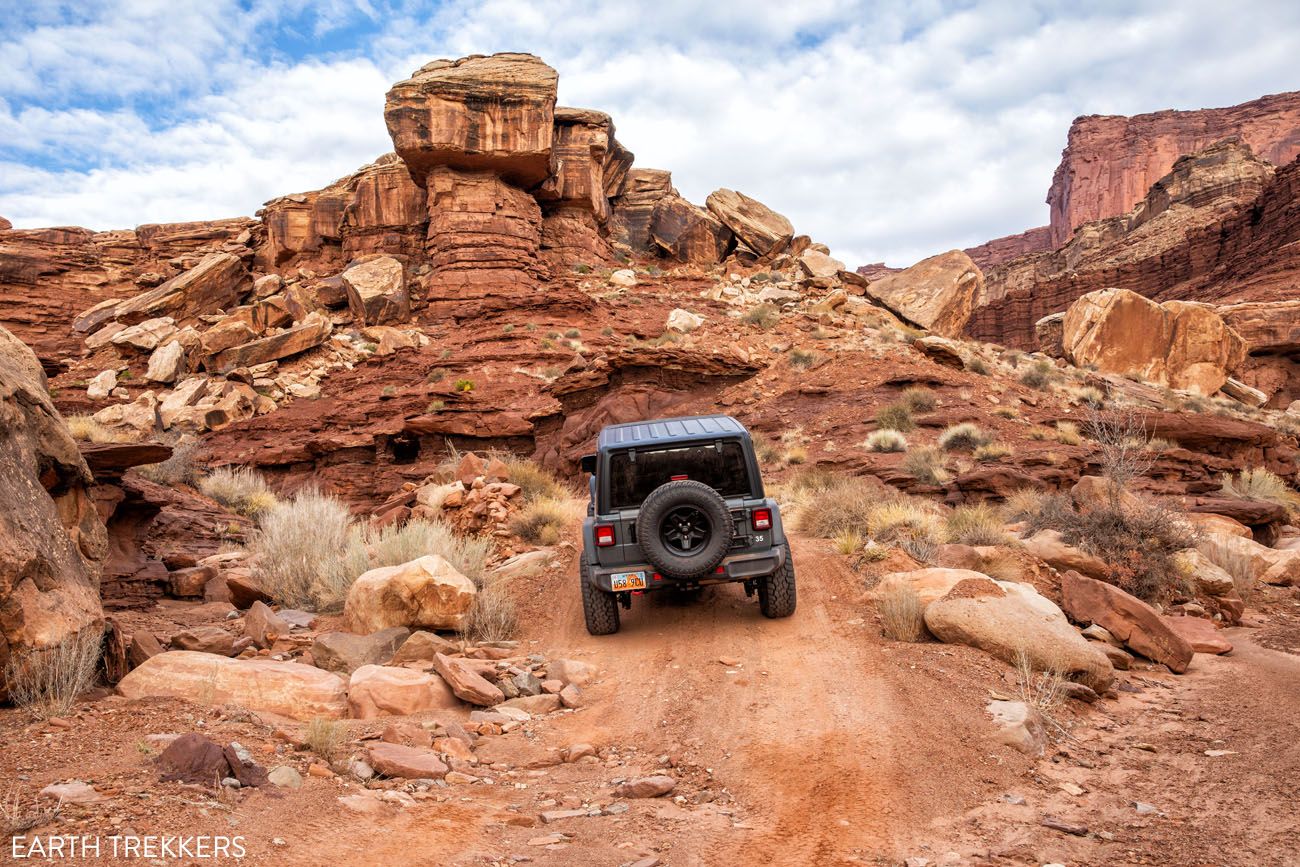
Once you leave this viewpoint, you will begin the climb to the top of Murphy Hogback hill. The road will become more technical during this ascent and we recommend using 4WD here. It will start with an ascent of roughly 300 feet over the first mile, flatten out for about 1.8 miles, and then end with another ascent of roughly 420 feet over the final mile.
44.5 Soda Springs Basin Viewpoint #4
During the flatter section of the drive up Murphy Hogback you get a nice view over Soda Springs Basin.

The road to the top of Murphy Hogback
46.2 Top of Murphy Hogback & Murphy Hogback Campground
It’s a short, steep, narrow, and rocky drive down Murphy Hogback Hill.
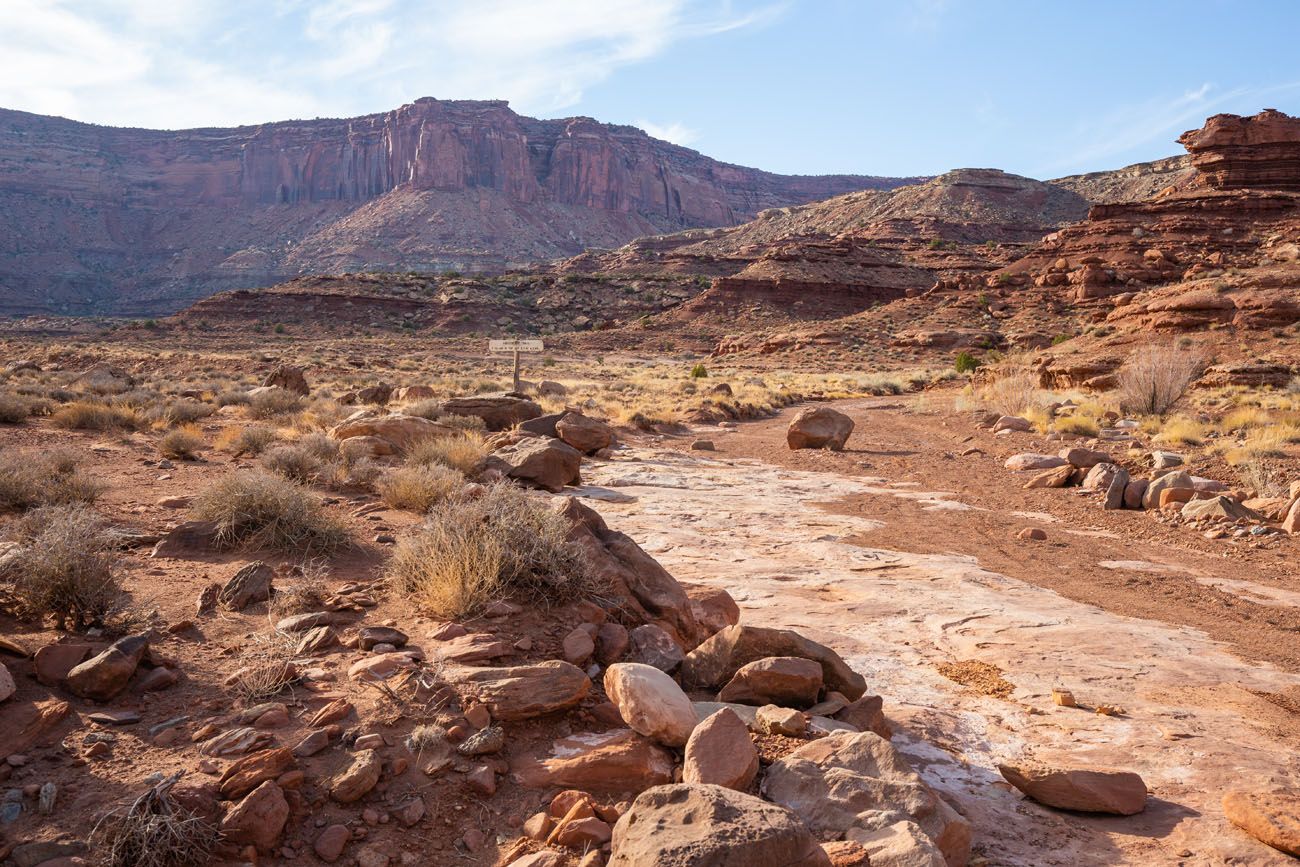
47.6 Murphy Wash
The drive down Murphy Hogback hill ends at the Murphy Wash. You can hike the Murphy Trail from this point, a 7-mile out-and-back hike that climbs to the top of the Island in the Sky mesa.
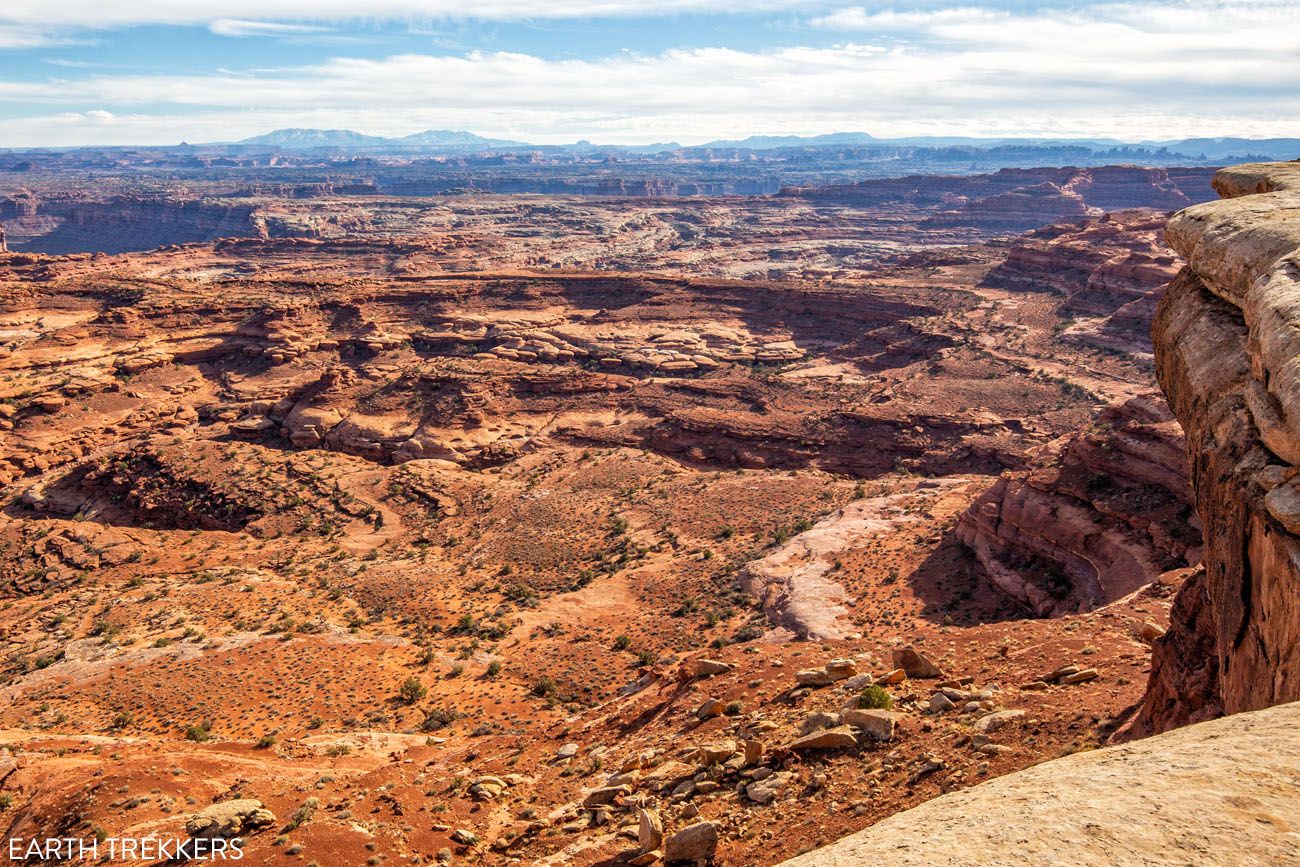
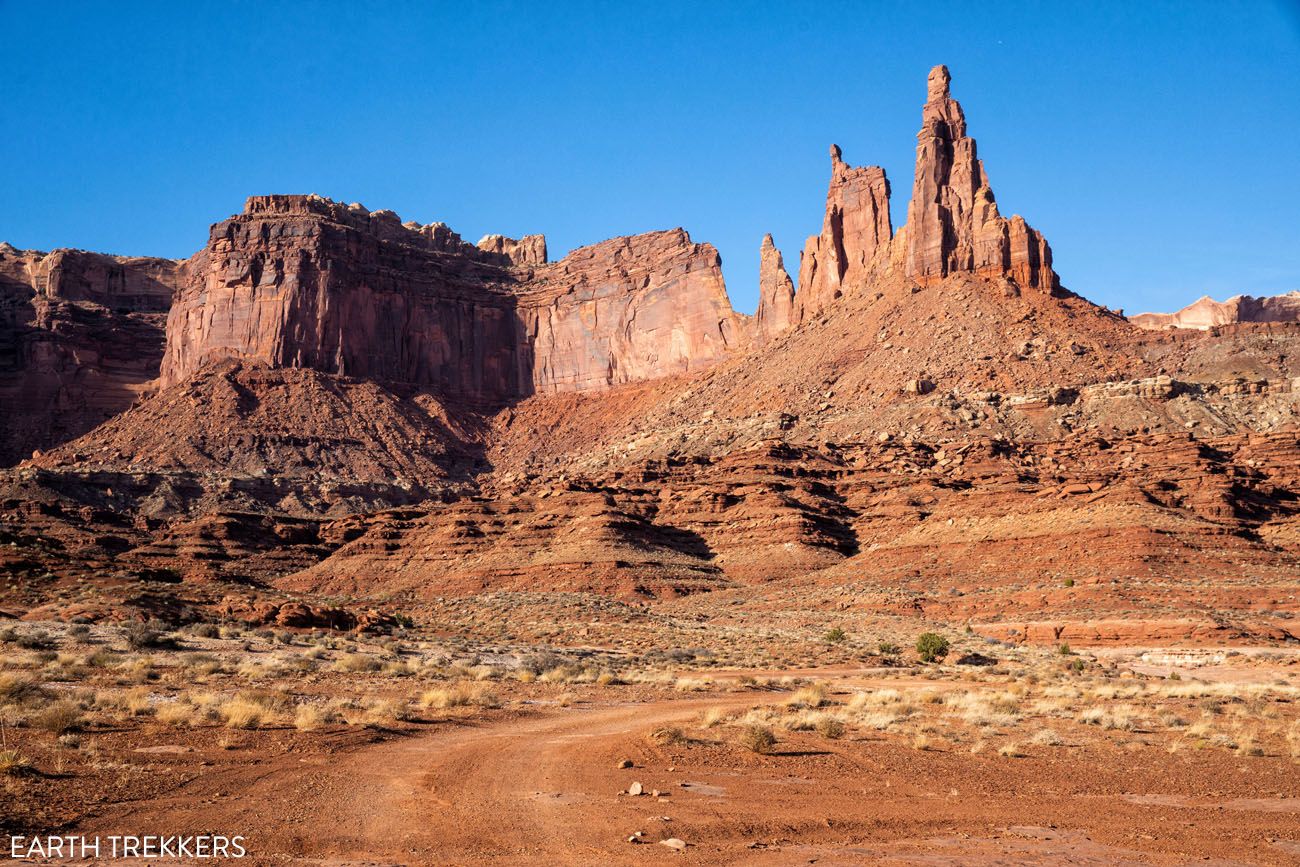
51.0 Murphy Canyon Viewpoint
As you drive between this viewpoint and the junction for White Crack Road, you will overlook another basin called the Twins Basin. Look for the two pillars we referred to as “The Twins”.
53.7 White Crack Road Junction
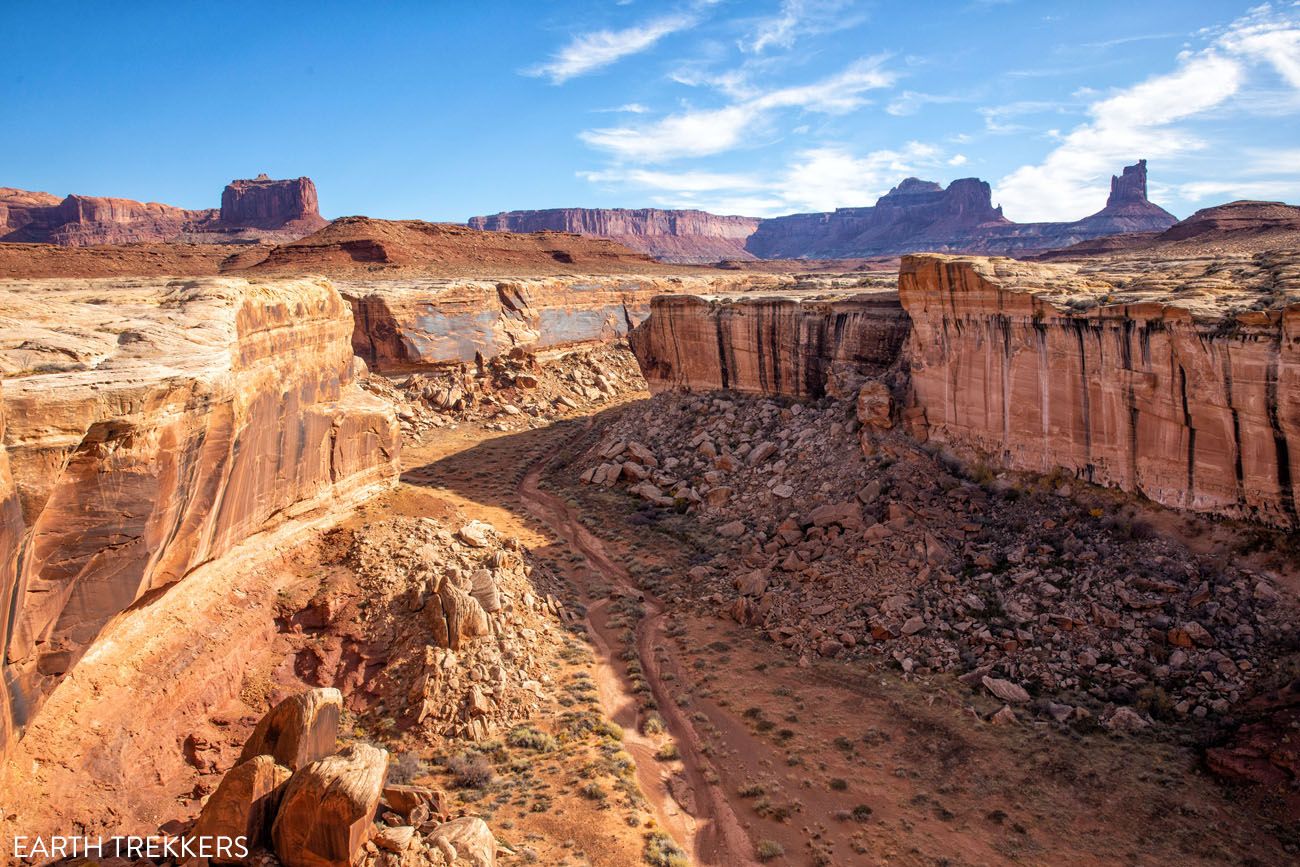
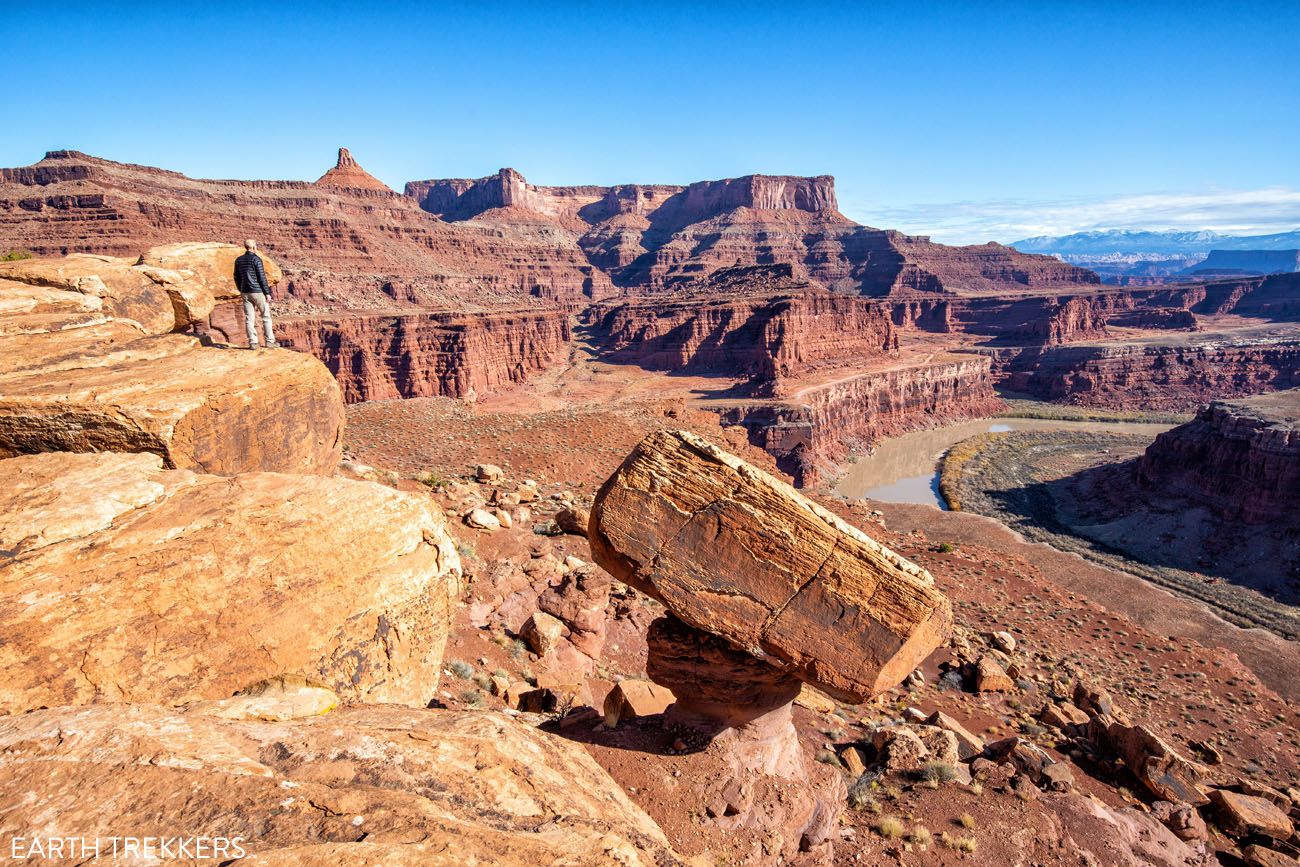
This detour is a must see! The 1.4 mile road (one-way) is relatively easy to traverse, ending at the White Crack Campground. Park and walk along the white rocks to enjoy views out over the confluence of the Green River and Colorado River that rival those of the South Rim of the Grand Canyon. In the distance you can see the thin spires of the Canyonlands Needles district.
Looking south from White Crack. Off in the distance you can see The Needles district of Island in the Sky.
Looking east from White Crack
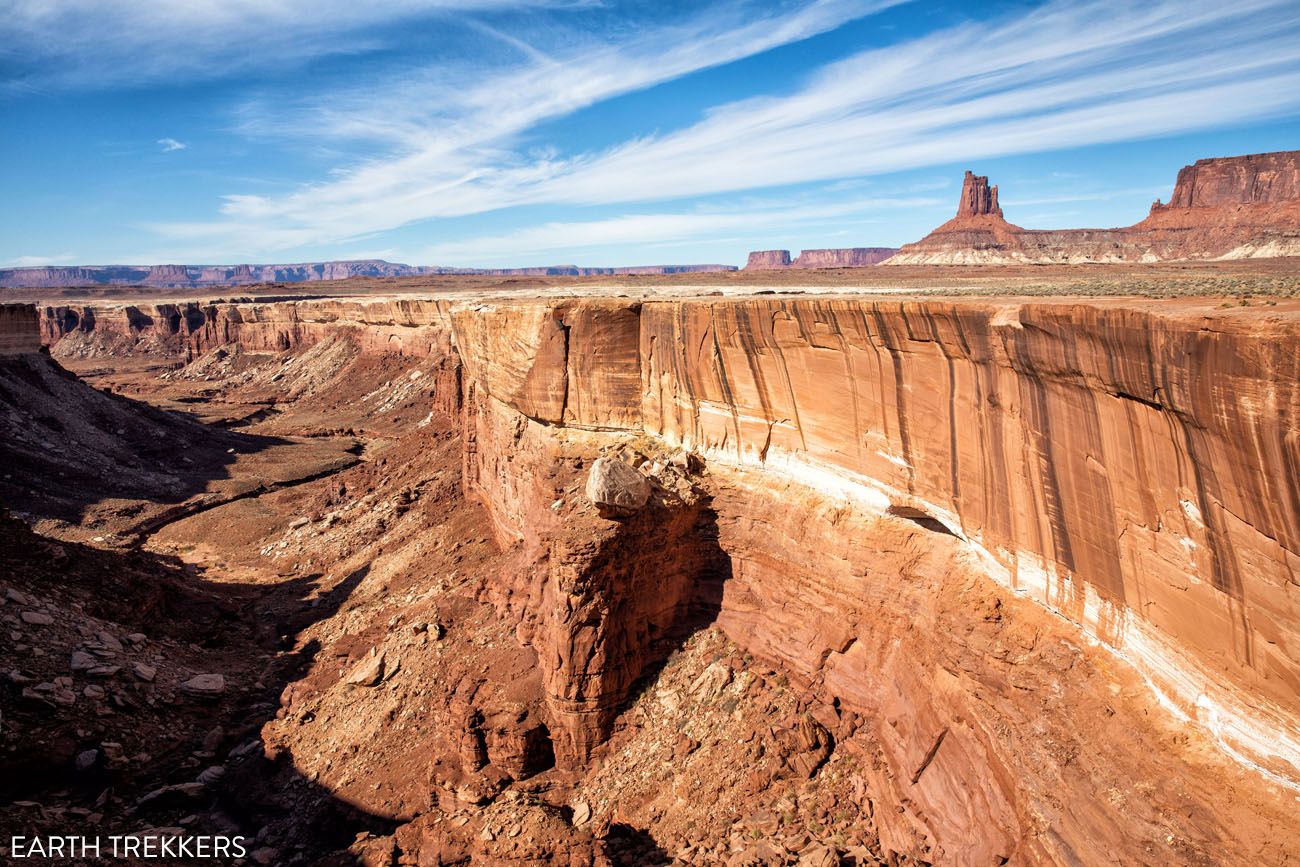
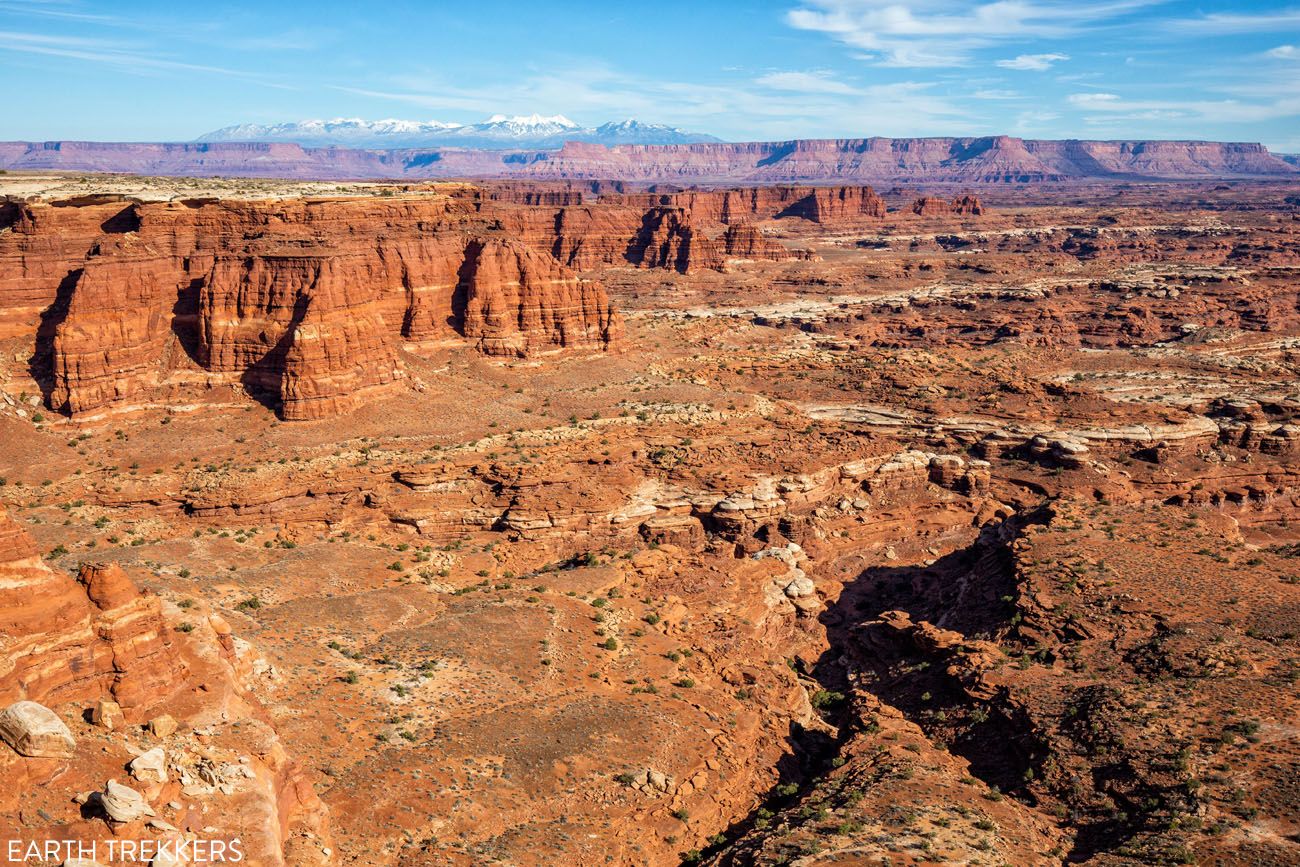
55.9 Monument Basin Viewpoint #1
This stop offers a great view of the Monument Basin Canyon. The Island in the Sky’s mesa with Grand View Point towers above you. For the remainder of the adventure you’ll now be looking out over the Colorado River.
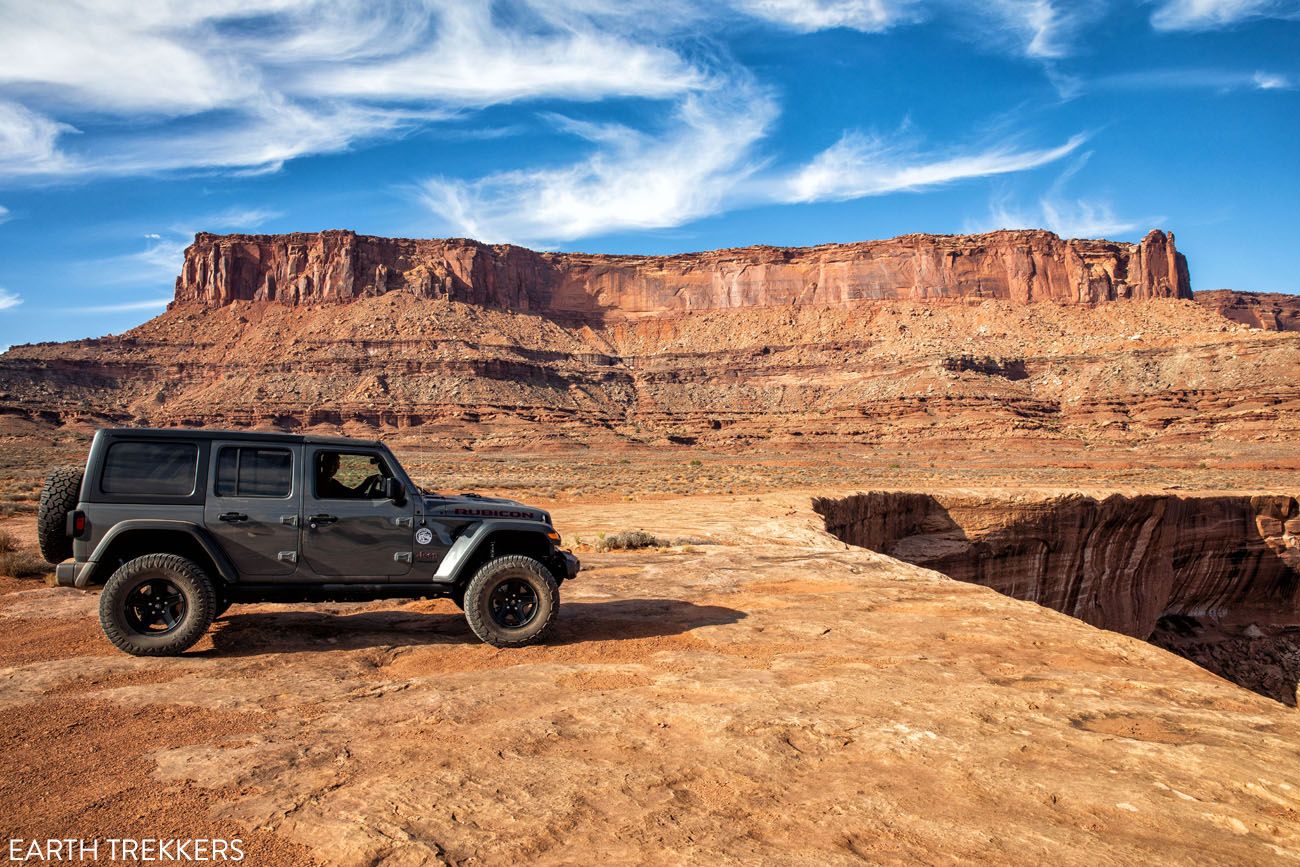
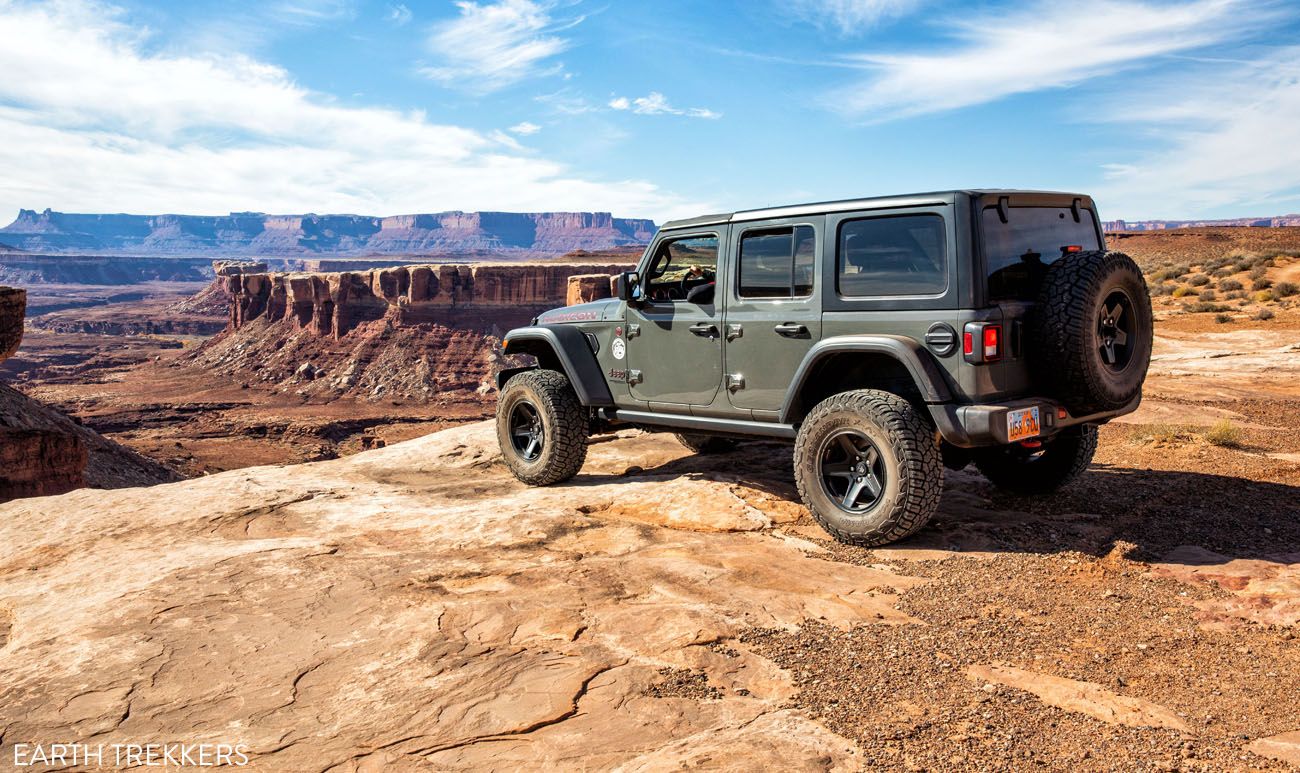
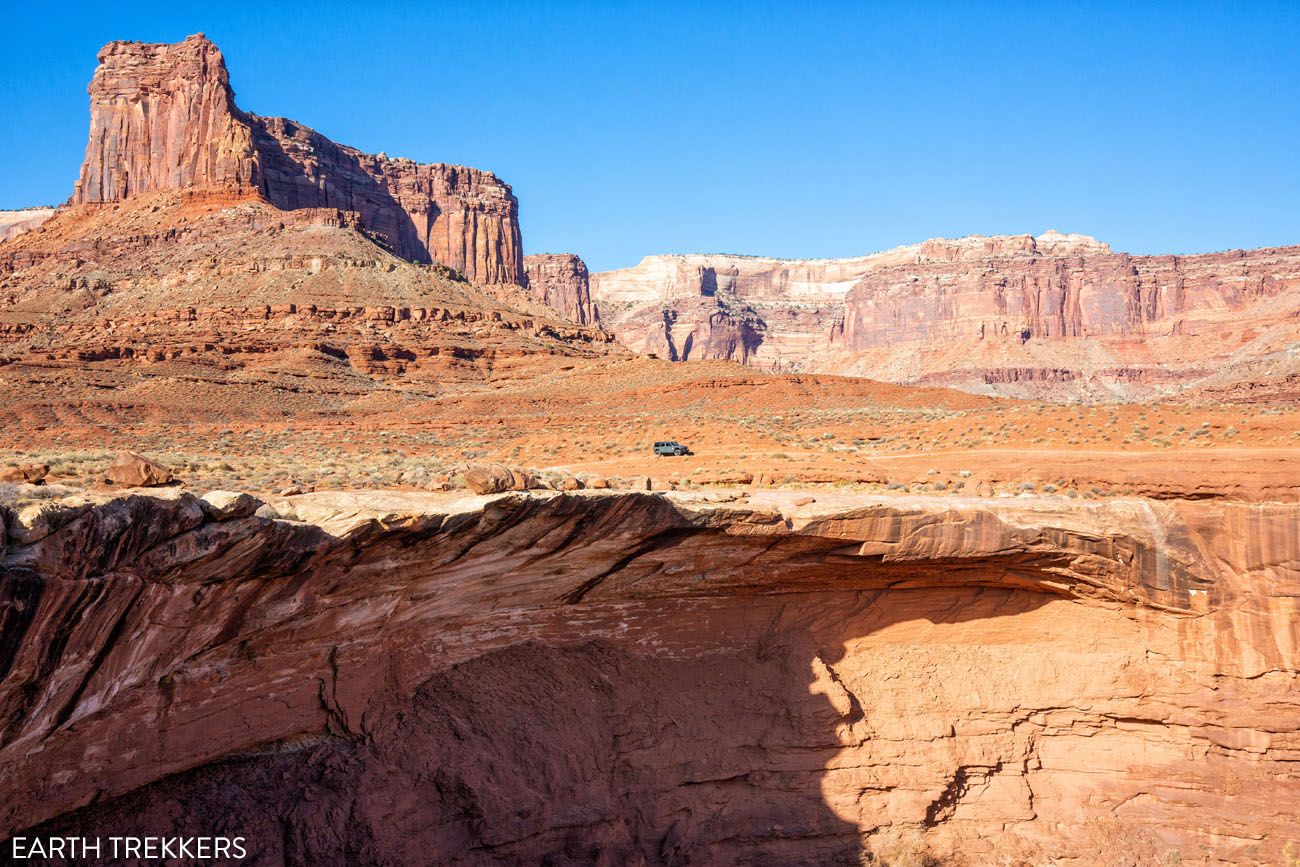
57.4 Monument Basin Viewpoint #2
Stop here for another view of the canyon.
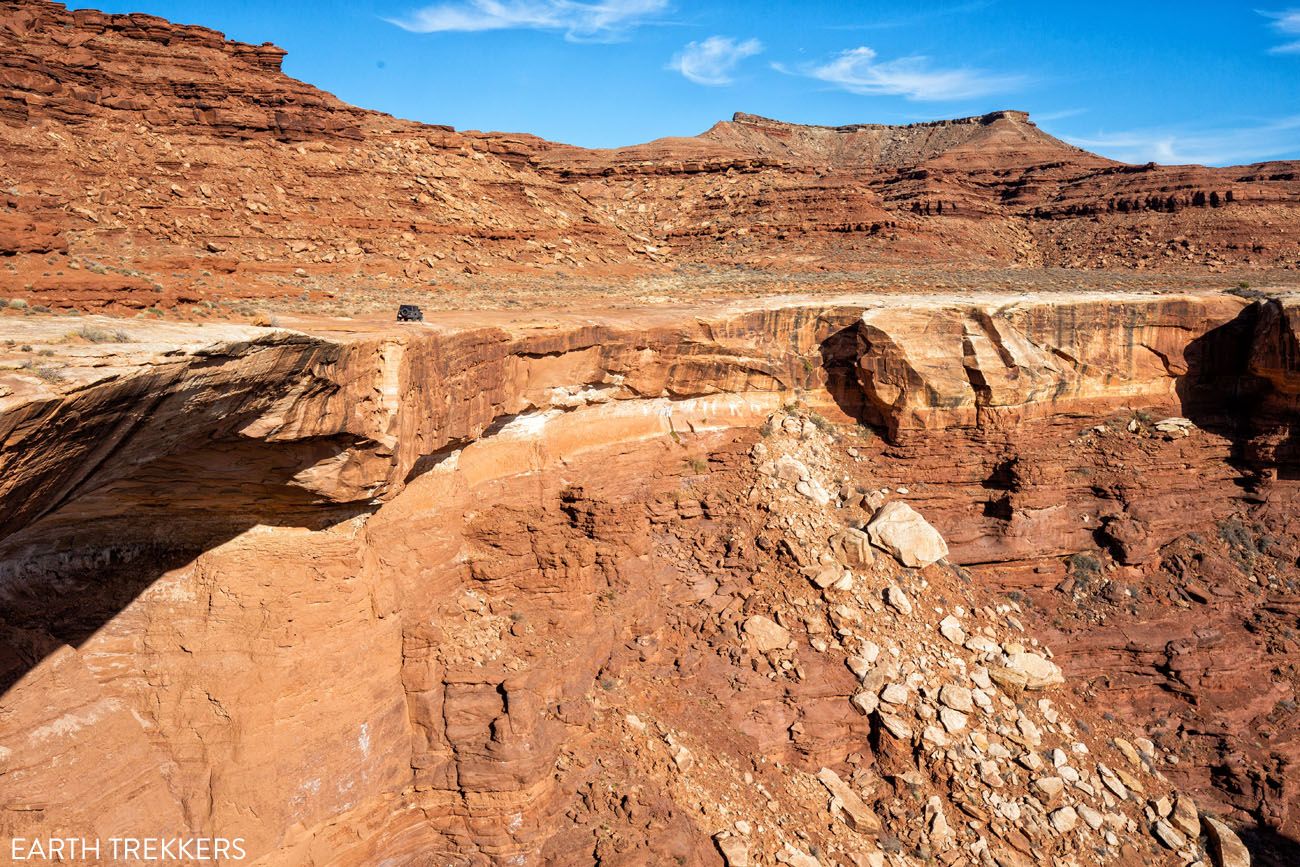
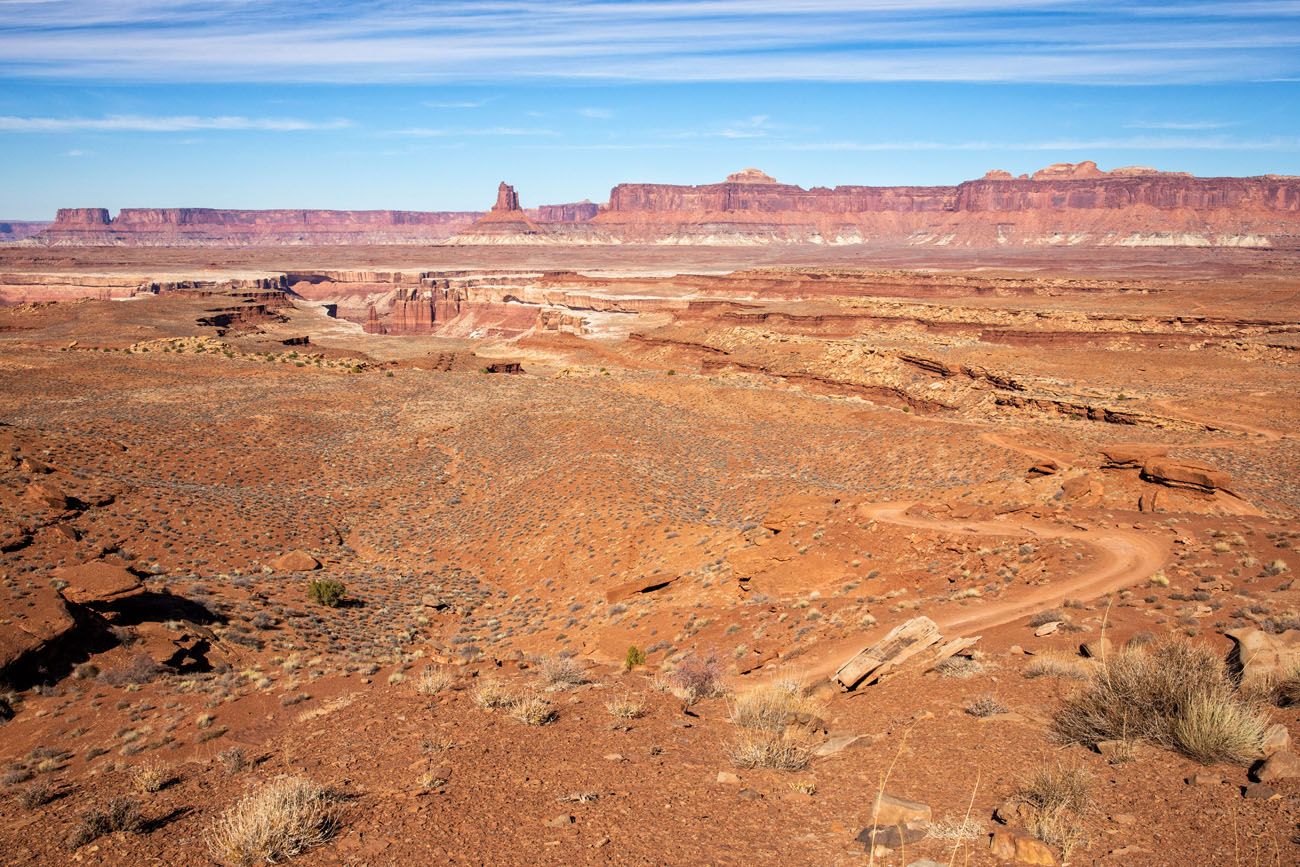
This photo, with our Jeep in the distance, really shows how vast these landscapes are.
As you drive from this viewpoint to the Monster Tower viewpoint you will pass by two more canyons (Gooseberry Canyon and South Fork of Buck Canyon).
The trailhead for the Gooseberry hike. This hike is 5.4 miles round trip and takes you to the top of the Island in the Sky Mesa.
67.4 Monster Tower Viewpoint
69.0 Airport Tower Viewpoint
71.3 Airport Campground
About a half a mile beyond Airport Campground you will have a view into Lathrop Canyon.
72.1 Lathrop Canyon Road Junction
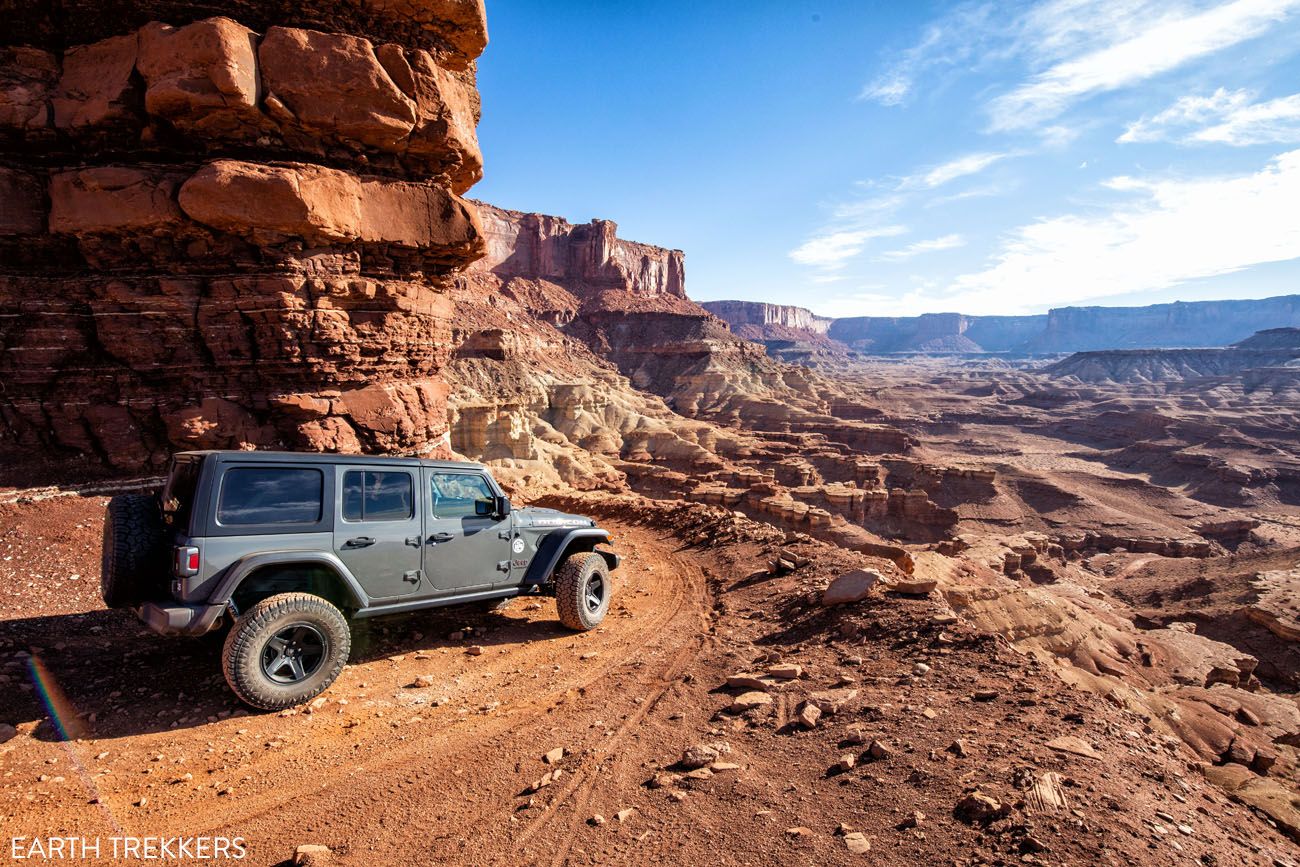
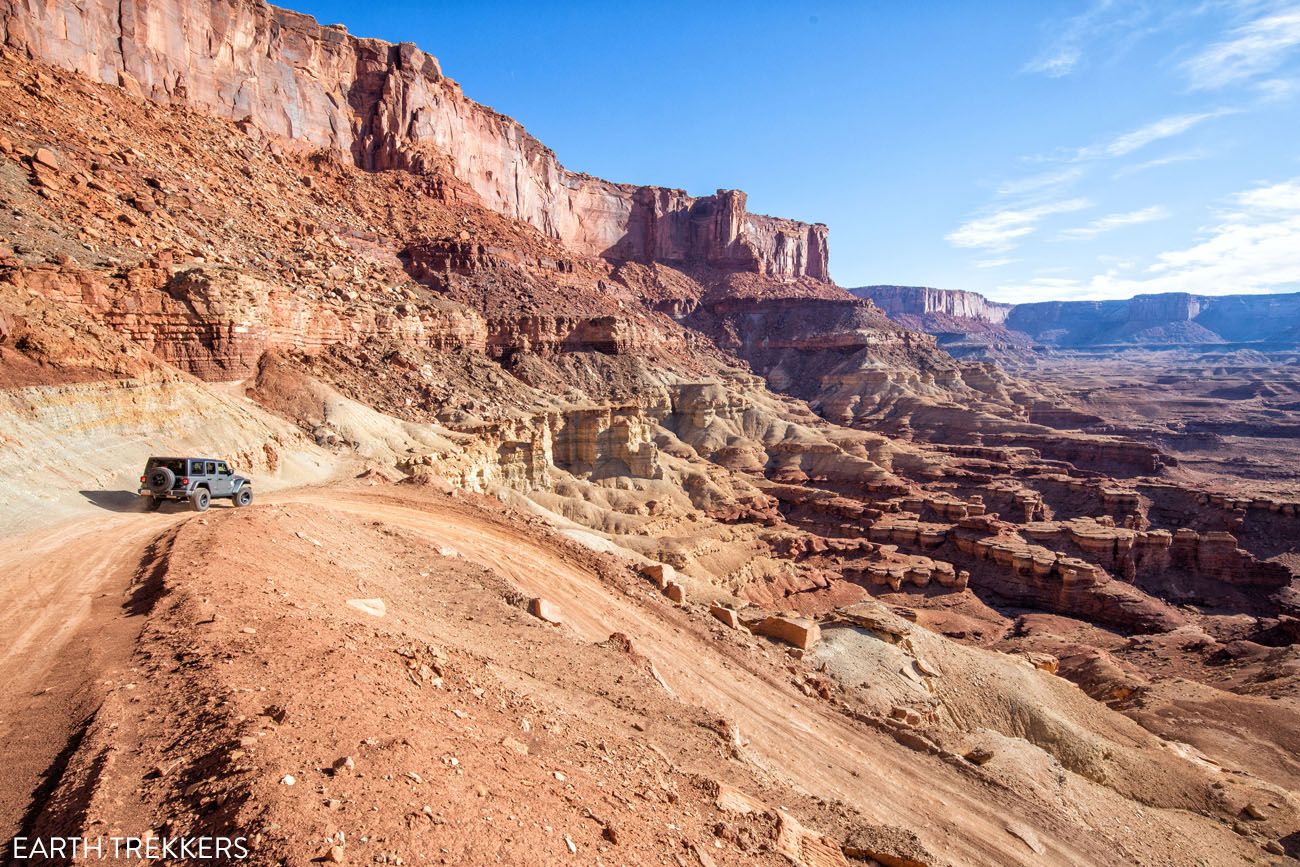
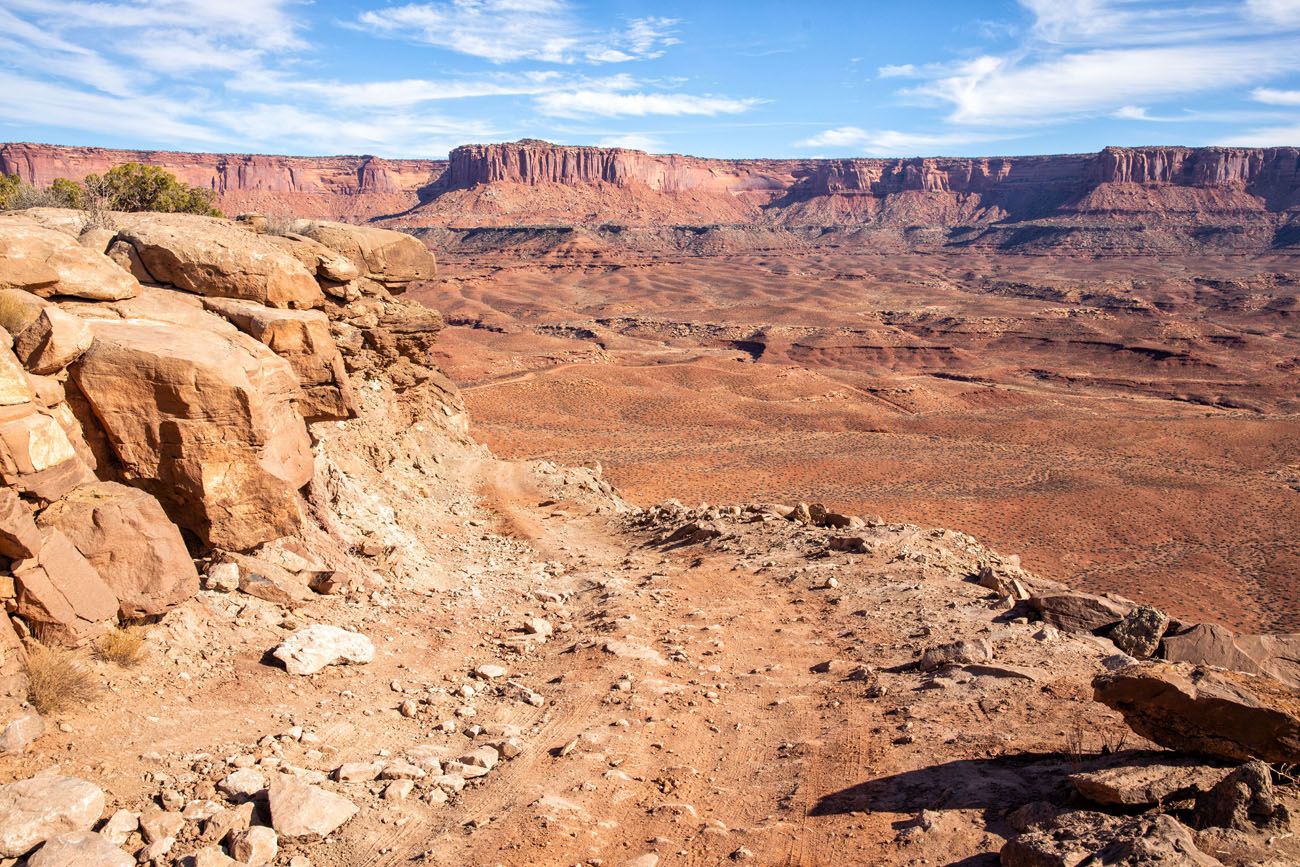
This detour will take you 4 miles one-way through Lathrop Canyon, ending at the Colorado River. It is a rough rocky descent that eventually gives way to a sandy track. Upon returning to the White Rim Road enjoy the mesa views above you.
The first part of Lathrop Canyon is the trickiest, with a rough road and a few tight switchbacks to get down into the canyon.
Colorado River
On the drive out of Lathrop Canyon
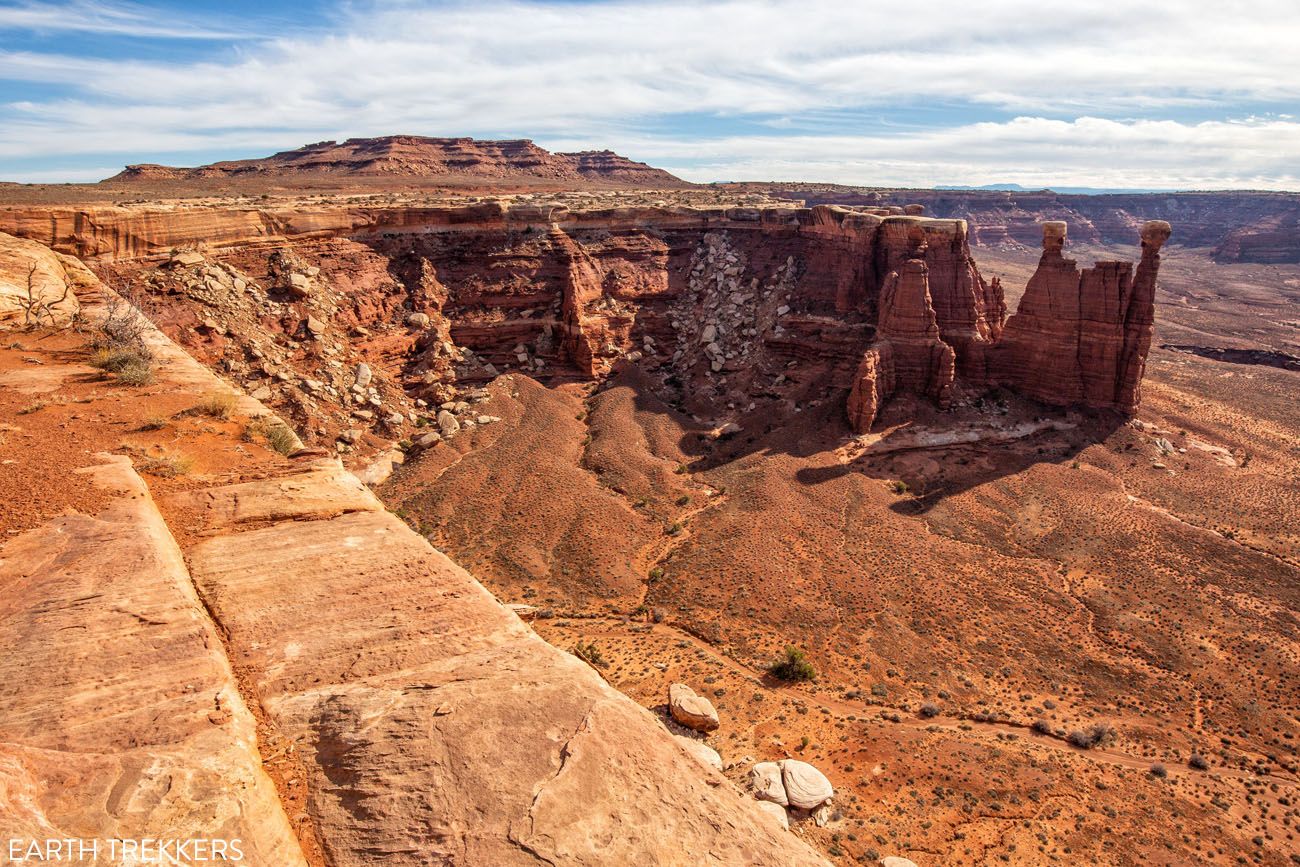
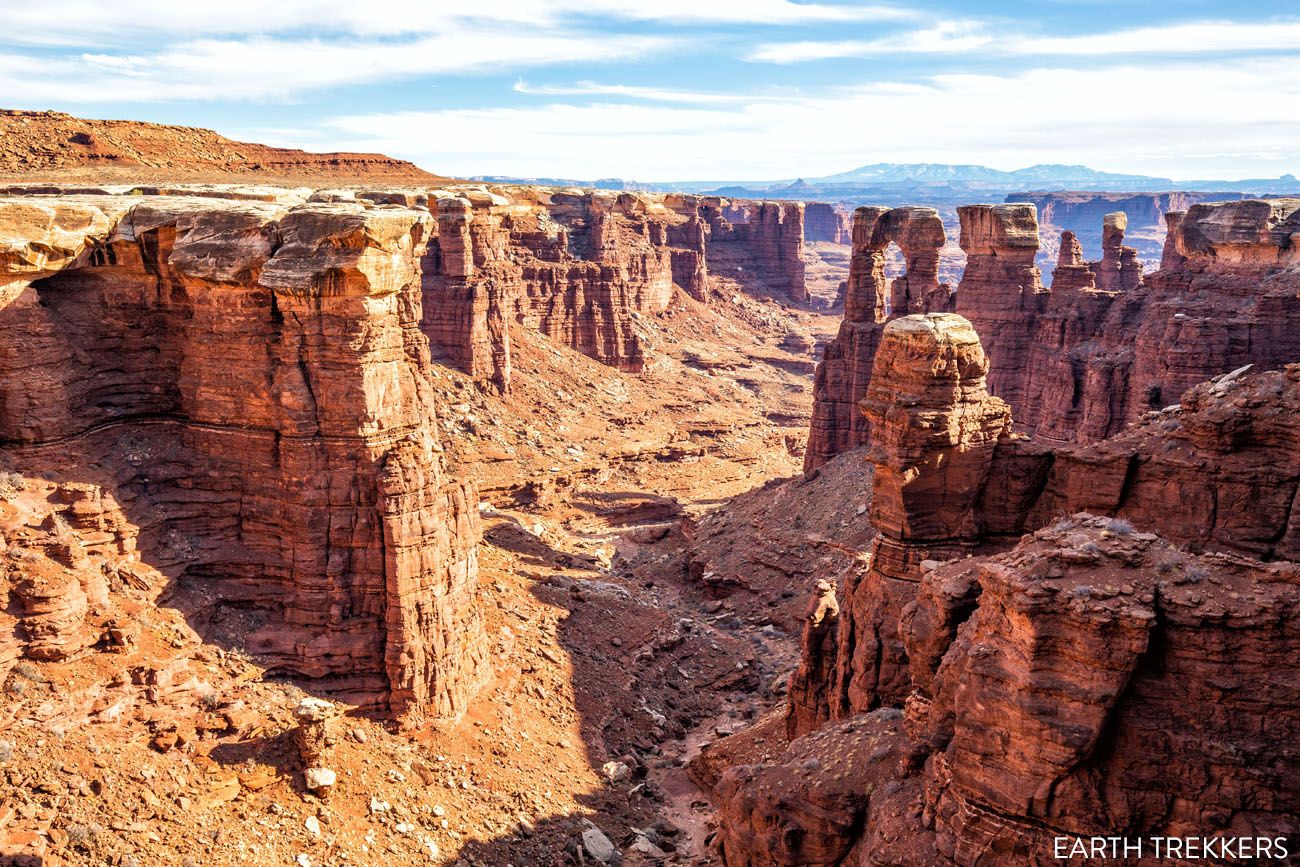
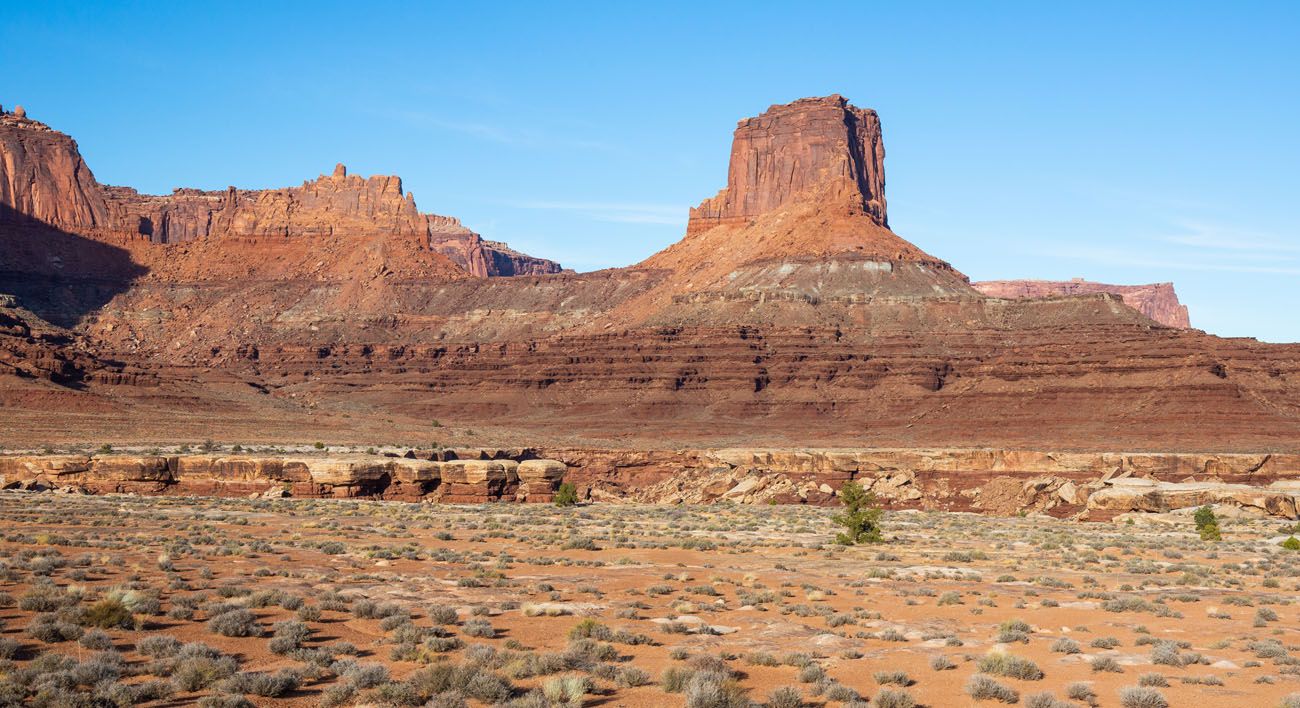
75.1 Little Bridge Canyon Viewpoint
This stop offers a view across the canyon with a mesa as the backdrop. 0.6 miles further offers a similar view but this time with a few pillars in the foreground.
78.6 Musselman Canyon Viewpoint
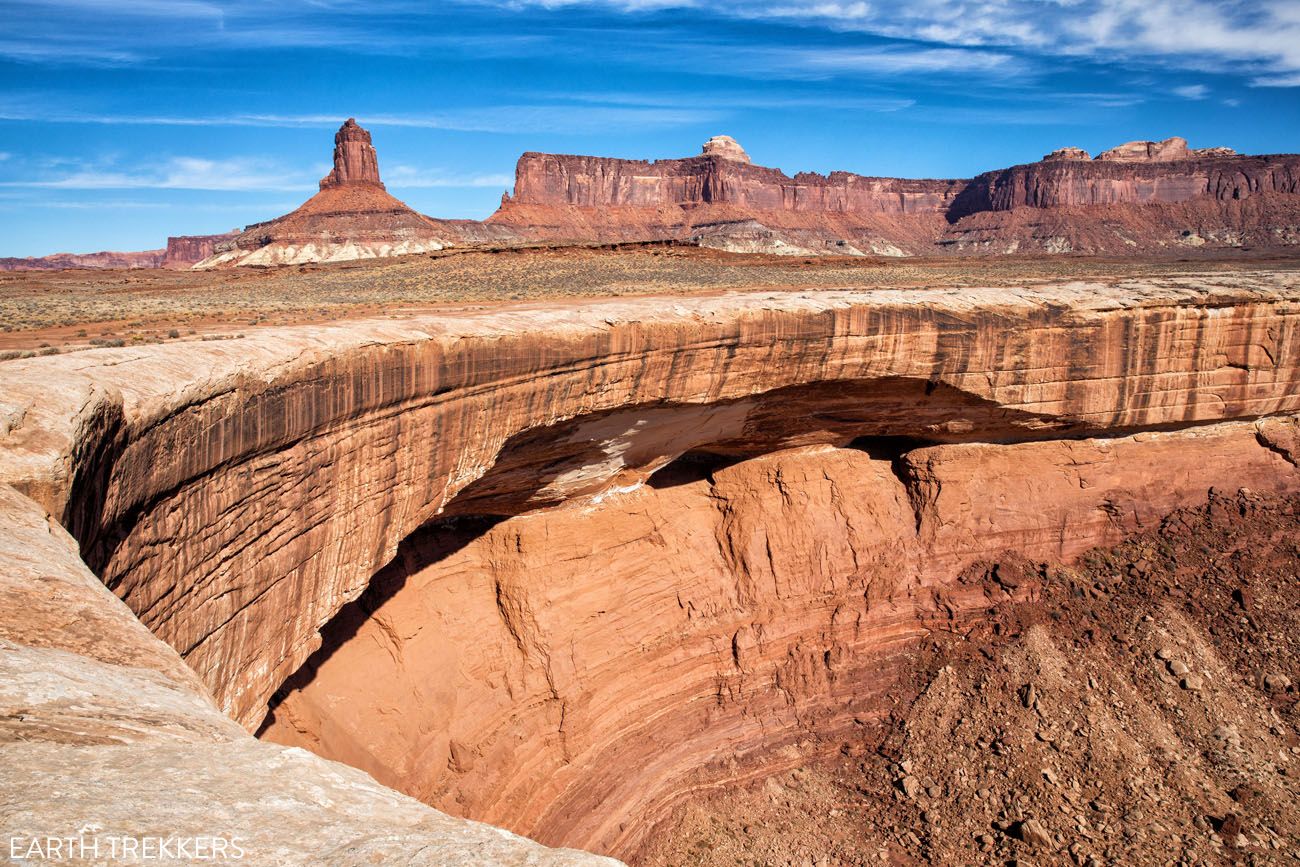
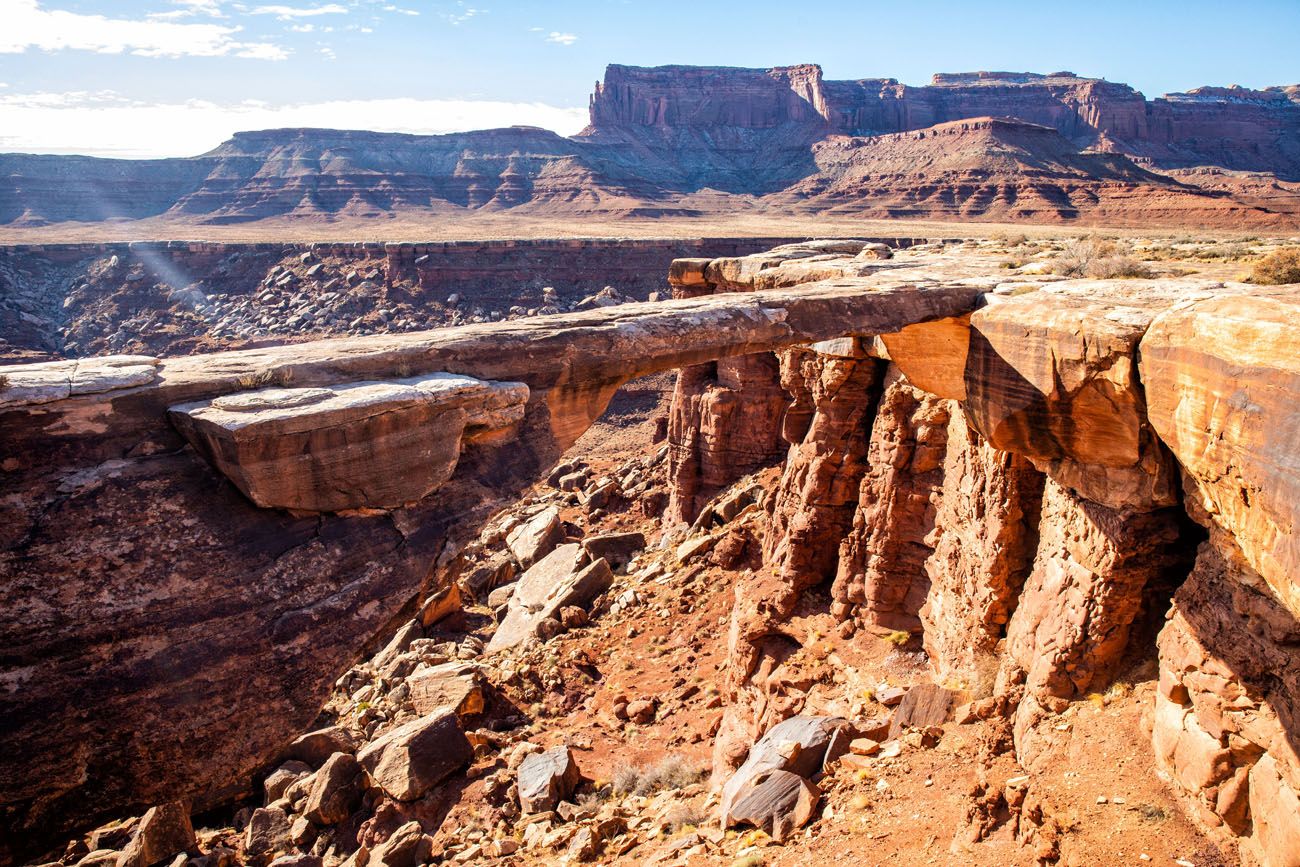
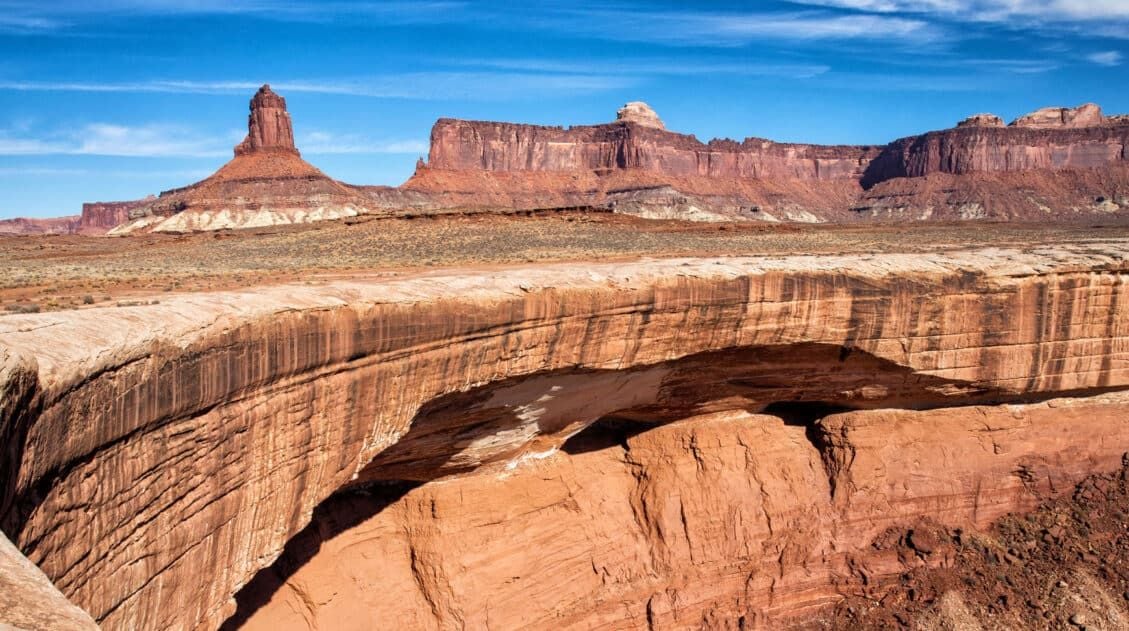
79.7 Musselman Arch
Turn right into the parking area at the posted sign. It is a short walk to the arch. Note: do not stand on the arch.
80.0 Colorado River Overlook
Turn right at the posted sign and follow the short but rough road to the overlook.
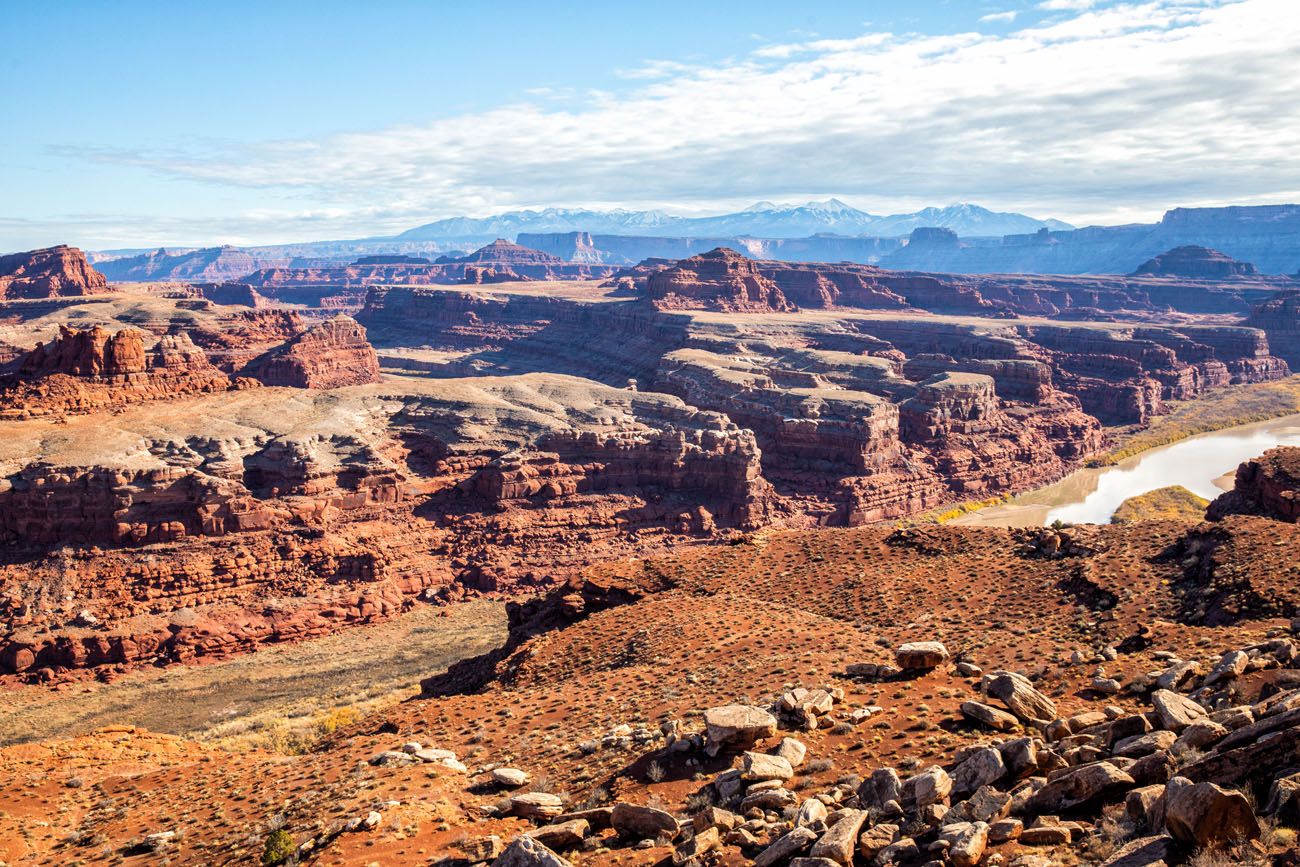
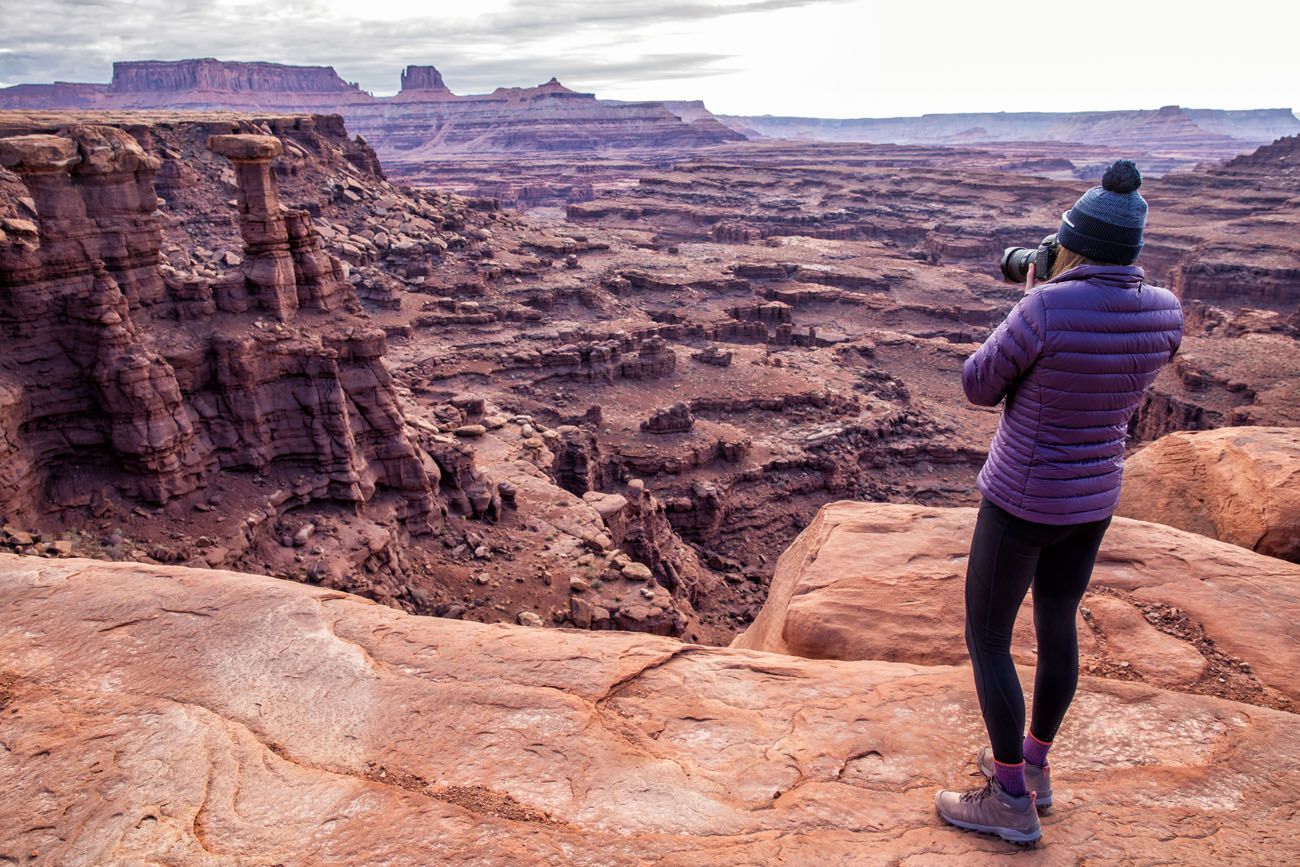
81.8 Gooseneck Overlook
Just beyond the posted sign for Gooseneck Overlook there is a pullout on the left for parking. It is a 0.3 mile walk to the overlook. The overlook doesn’t allow you to see the full gooseneck of the Colorado River (you’ll need to go to Dead Horse Point in Dead Horse Point State Park to see that), but you still get a great view of one of the horseshoe bends that makes up the gooseneck.
From this viewpoint you can see the Colorado River, Dead Horse Point State Park, Potash Road, and the La Sal Mountains.

83.0 Potash Road & Shafer Trail Road Junction
Turning right onto Potash Road will take you back to Moab. This is a rough road that eventually gives way to pavement. But this adventure wouldn’t be complete without ascending Shafer Trail to the top of the Island in the Sky.
Despite being a dirt road, ascending the Shafer Trail switchbacks was one of the smoothest road sections of this adventure. There are plenty of pullouts to allow for an oncoming vehicle to pass. Just keep looking for vehicles and mountain bikers and be prepared to wait in one of the pullout areas to allow them to pass.
The view up Shafer Canyon and the top of the Island in the Sky mesa.
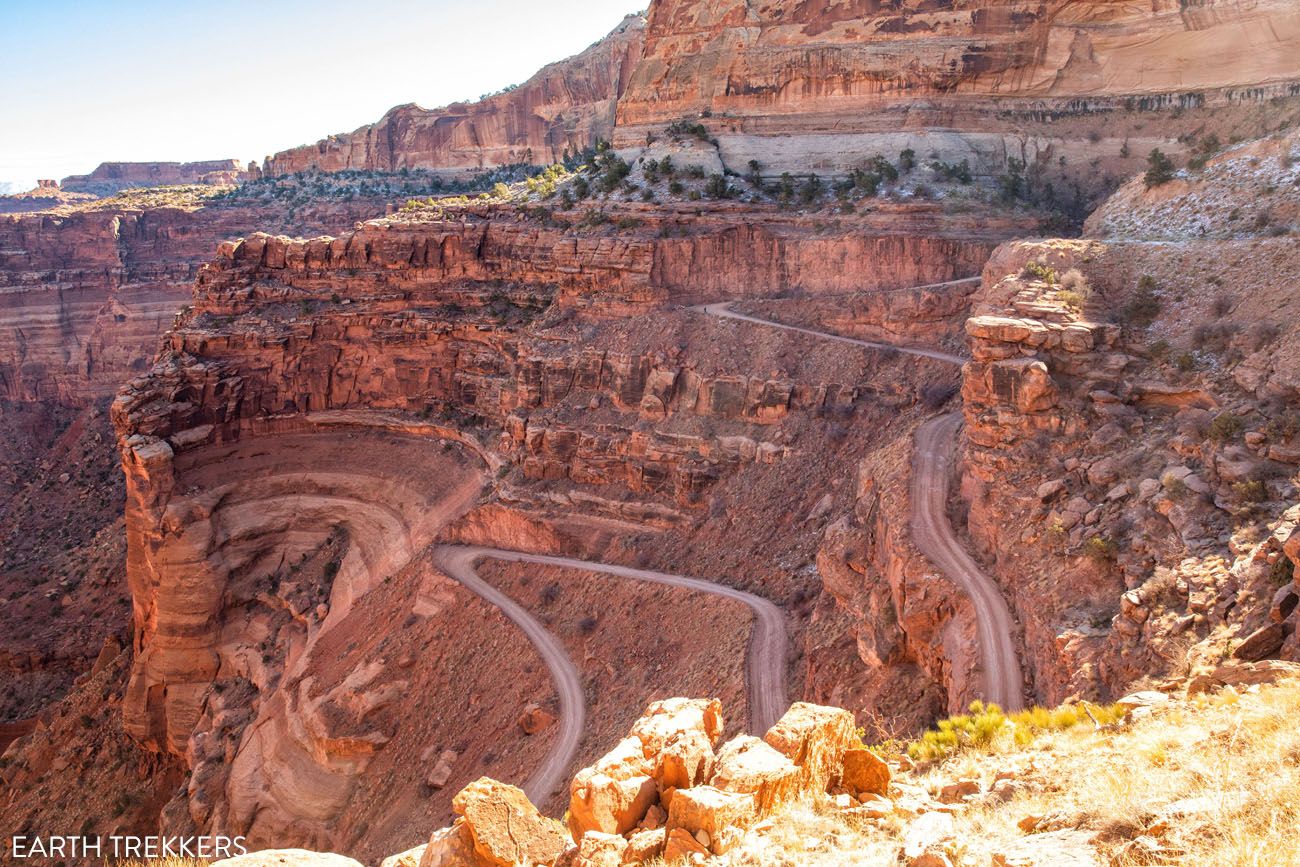
At the top of Shafer Canyon. In the valley, you can see the White Rim Road as it heads east.
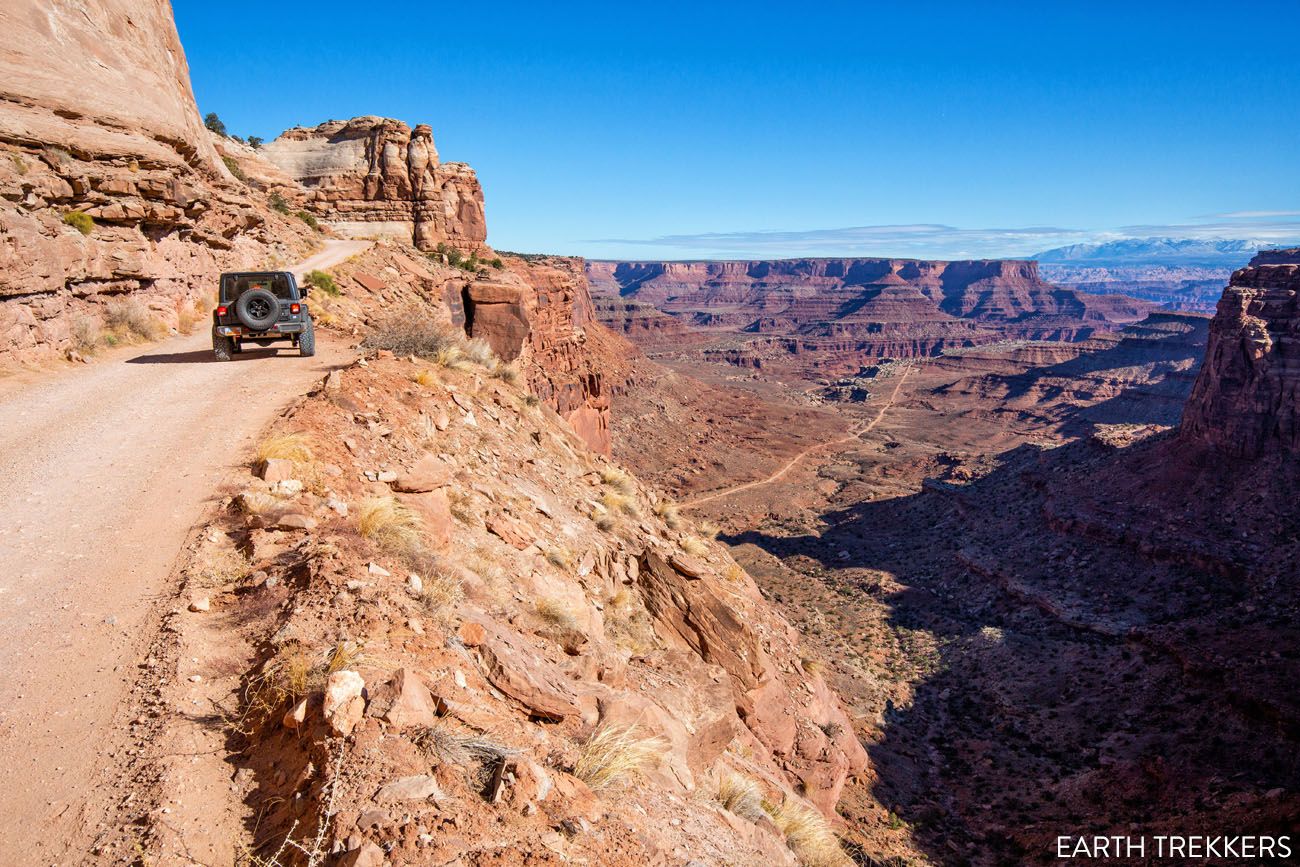
86.4 Shafer Trail Viewpoint
Before you approach the top of the Shafer Trail there is a nice area to pull over on the right with dramatic views down.
Tim at the top of Shafer Trail.
88.0 The End!
You end at the main paved road that takes you into the Island of the Sky district of Canyonlands National Park. Turning left onto the paved road will take you into the park with the Visitor Center only one mile away. Turning right onto the paved road will take you towards Dead Horse Point State Park, Arches National Park, and Moab. Pavement never felt so smooth!
Note: If you start and end at the visitor center, the entire loop is 98.2 miles (not including the detours along the White Rim Road), according to our odometer. Some sources will list slightly longer distances, for a total of 100 miles.
Alternative Route Back to Moab
If you like the idea of returning to Moab on more gravel roads, you can take Potash Road back to Moab. To do this, you would have to drive back down the Shafer Canyon switchbacks then turn onto Potash Road. This route takes you under Dead Horse Point, along the Colorado River, and past Thelma and Louise Point. Learn more in our post about Shafer Canyon Road and Potash Road.
How to Drive the White Rim Road: Clockwise Route
If you plan to drive the White Rim Road in the clockwise direction, here are mile markers for the same detours, hiking trails and viewpoints we list above, only without the photos (or this post would be super long).
On Grand View Point Road, 1 mile before you reach the visitor center, turn left onto Shafer Trail (labeled as Shafer Canyon Road on Google Maps) which is a dirt road. Once you turn onto the dirt road, reset your trip odometer and follow our mile markers. Keep in mind that odometer measurements can vary between vehicles.
0.0 Your journey starts with the descent down the Shafer switchbacks. Despite being a dirt road, this is one of the smoothest road sections of this adventure. There are also plenty of pullouts as you descend to allow for oncoming vehicles to pass. Keep an eye out for oncoming vehicles and be prepared to wait in one of the pullout areas to allow them to pass.
1.6 Shafer Trail Viewpoint. Stop here for dramatic views of the Shafer switchbacks.
5.0 Potash Road and White Rim Road Junction. Turning left onto Potash Road will take you back to Moab. This is a rough road that eventually gives way to pavement. But this adventure is just beginning so head straight and follow the White Rim Road.
6.2 Gooseneck Overlook. Just before the posted sign for Gooseneck Overlook there is a pullout on the right for parking. It is a 0.3 mile walk to the overlook. The overlook doesn’t allow you to see the full gooseneck of the Colorado River (you’ll need to go to Dead Horse Point in Dead Horse Point State Park to see that), but you still get a great view of one of the horseshoe bends that makes up the gooseneck.
8.0 Colorado River Overlook. Turn left at the posted sign and follow the short but rough road to the overlook.
8.3 Musselman Arch. Turn left into the parking area at the posted sign. It is a short walk to the arch.
9.4 Musselman Canyon Viewpoint. This stop offers a view across the canyon with the La Sal Mountains as a backdrop.
12.3 Little Bridge Canyon Viewpoint. This stop offers a view across the canyon with a few pillars and a mesa as the backdrop.
15.9 Lathrop Canyon Road Junction. This detour will take you 4 miles one-way through Lathrop Canyon, ending at the Colorado River. It is a rough rocky descent that eventually gives way to a sandy track. Upon returning to White Rim Road enjoy the mesa views above you.
16.7 Airport Campground. As you continue onward you will pass the North Fork of Buck Canyon.
19.0 Airport Tower Viewpoint. You’ll need to look back to see the Airport Tower which will be towering above you.
20.6 Monster Tower Viewpoint. Look back to see Monster Tower, which will be towering above you. The Middle Fork of Buck Canyon is to your left. As you drive from this viewpoint to the Monument Basin viewpoints, you will pass by two more canyons, the South Fork of Buck Canyon and Gooseberry Canyon.
30.6 Monument Basin Viewpoint #1. Offers a view of Monument Basin Canyon.
32.1 Monument Basin Viewpoint #2. Offers another view of the canyon. The Island in the Sky’s Grand View Point will be towering above you.
34.3 White Crack Road Junction. This detour is a must see! The 1.4 mile road (one-way) is relatively easy to traverse, ending at the White Crack Campground. Park and walk along the white rocks to enjoy views out over the confluence of the Green River and Colorado River, that rival those of the South Rim of the Grand Canyon. In the distance you can see the thin spires of the Canyonlands Needles district.
37.0 Murphy Canyon Viewpoint. This viewpoint overlooks Murphy Canyon and the Twins Basin. Look for the two pillars we referred to as “The Twins.” For the remainder of the adventure you’ll now be looking out over the Green River.
40.4 Murphy Wash and the beginning of the Murphy Hogback ascent
41.8 Top of the Murphy Hogback ascent and Murphy Hogback campground
43.5 Soda Springs Basin Viewpoint #1. During the flatter section of the Murphy Hogback descent you have a great view over Soda Springs Basin.
45.5 Soda Springs Basin Viewpoint #2. This viewpoint marks bottom of the drive down Murphy Hogback.
47.4 Soda Springs Basin Viewpoint #3
48.4 Soda Springs Basin Viewpoint #4
51.6 Candlestick Campground and Viewpoint. From here the road become less rocky. Enjoy bouncing up and down as you ride over the little dirt hills and before the road becomes rocky again.
54.7 Holeman Canyon Viewpoint. The road travels alongside the Green River and offers spectacular river views. This portion of the road is noticeably rocky.
62.0 Potato Bottom Campground and the start of the Hardscrabble Hill ascent
63.9 Top of Hardscrabble Hill and Fort Bottom Trailhead
65.5 Hardscrabble Campground
66.8 Upheaval Dome Trailhead
67.5 Labyrinth Campground
69.8 Leaving Canyonlands National Park
73.5 Junction for Mineral Bottom Road. Here the White Rim Road ends and you turn right onto Mineral Bottom Road to begin the ascent up the Mineral Canyon Switchbacks.
74.9 Top of the Mineral Canyon Switchbacks. From here the last 13.1 miles follows a well graded dirt road. There isn’t much to see during this final section of the drive.
88.0 (91.6) The End! You end at the main paved road that takes you into the Island of the Sky district of Canyonlands National Park. Turning right onto the paved road will take you into the park with the Visitor Center 9.2 miles away. Turning left onto the paved road will take you towards Arches National Park and Moab.
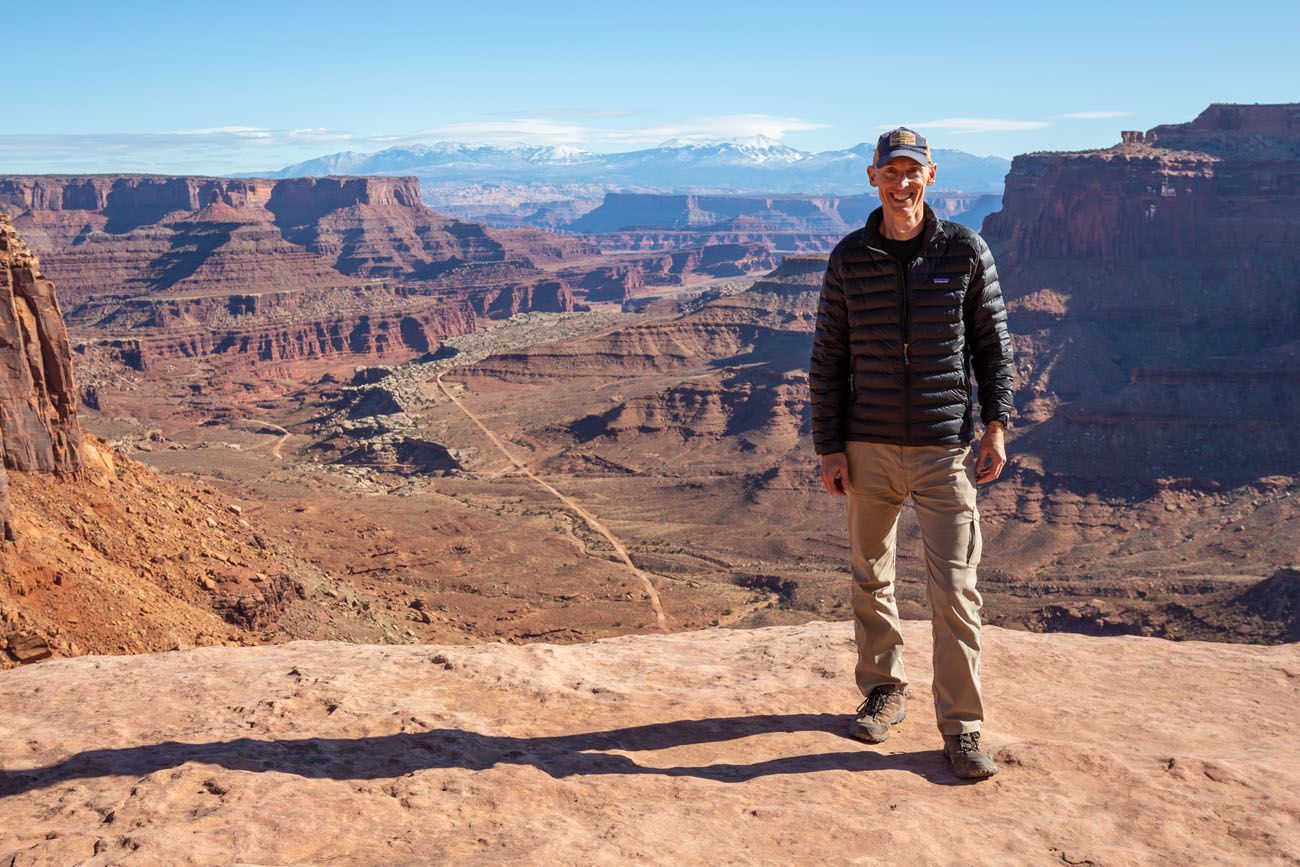
About Our Experience
We did this drive on November 12 and 13, 2020. It was colder than average for this time of year, with a high temperature in the mid to high-30’s. At night, it got down to 20 degrees Fahrenheit.
We also had limited daylight. Sunrise was at 7 am and sunset was at 5:10 pm. On our first day, we had to drive 70 miles on the White Rim Road to reach our campground (Airport D). We started the drive at sunrise to give us the full ten hours of daylight to reach our campsite. Along the drive, we kept our stops as short as possible. It felt a bit rushed, but we preferred to do the longer portion of the drive on our first day. On day 2, we had plenty of time to drive the detour to Lathrop Canyon and then take Potash Road back to Moab.
Continue to Part 2, the White Rim Road Planning Guide.
If you have any questions about how to drive the White Rim Road, or if you want to share your experience, let us know in the comment section below.
More Information about Utah
White Rim Road: Detailed Planning Guide and Checklist
Pinterest Facebook Flipboard Driving the White Rim Road is a bucket list adventure. Over the course of 100 miles, you will circle around the Island in the Sky mesa. Along the way, you will drive along cliff edges, past canyons carved out by the Colorado and Green Rivers, and to viewpoints that will take your […]

How to Drive the White Rim Road in One Day
Driving the White Rim Road is one of the best experiences in Canyonlands National Park. For 100 miles, this road circles around the Island in the Sky mesa, taking you past canyons, buttes, and the Colorado and Green Rivers. This drive takes most people two to three days. If you have less time, it is […]

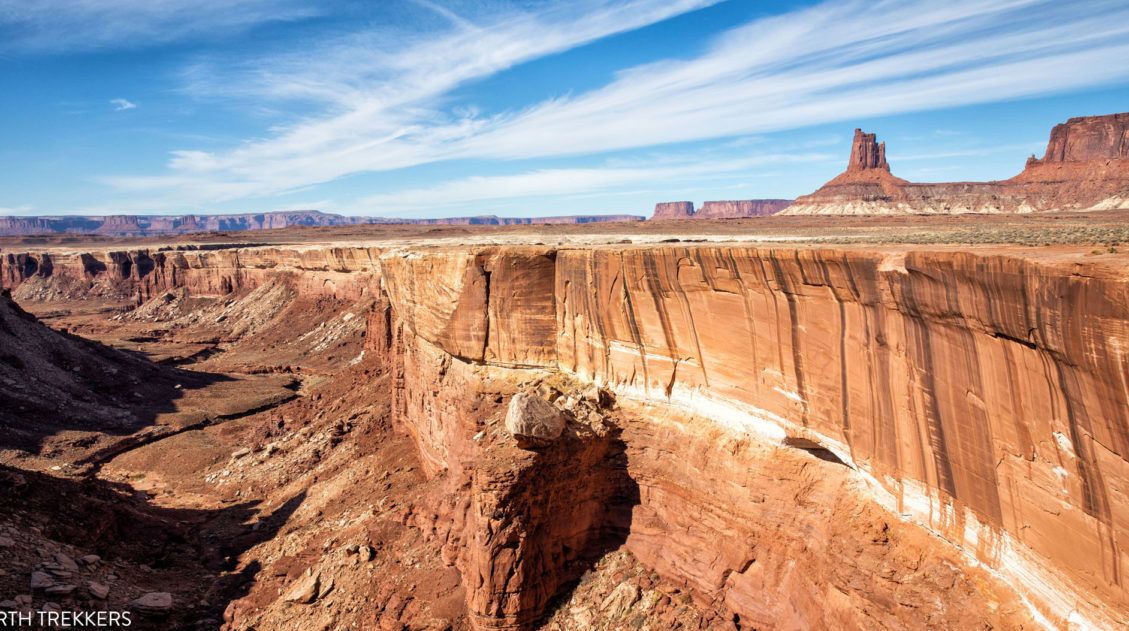
How to Drive Shafer Canyon Road and Potash Road | Moab, Utah
Have you seen photos of the Shafer Canyon switchbacks and said to yourself, wow, I’d really love to drive on that road? Do you like the idea of venturing away from the crowds and driving through some truly dramatic landscapes? Or, do you want to get a unique perspective of Canyonlands National Park and Dead […]
Best Things to Do in Island in the Sky: Canyonlands National Park
Canyonlands National Park is an underrated park located near Moab, Utah. Compared to its smaller and more popular neighbor Arches National Park, Canyonlands feels more rugged, more remote, and a whole lot larger. Island in the Sky, the most popular section of Canyonlands, is filled with jaw-dropping vistas and short but sweet hiking trails. Here […]
Arches, Canyonlands and Capitol Reef: 7 to 10 Day Road Trip Itinerary
Arches, Canyonlands, and Capitol Reef National Parks are three spectacular parks to visit in Utah. With 10 days, you can visit each of them, plus a few more cool spots, on this epic road trip. Tim and I did this road trip in November 2020. Prior to this trip, we had already visited each of […]

One Perfect Day in Arches National Park (+ Avoid the Crowds)
If you only have one day in Arches National Park, what should you do? Arches National Park is a relatively small national park with a handful of must-see sights. With one day in Arches, you can visit these top sights and a few off-the-beaten-path places. After multiple visits to Arches National Park, we have learned […]
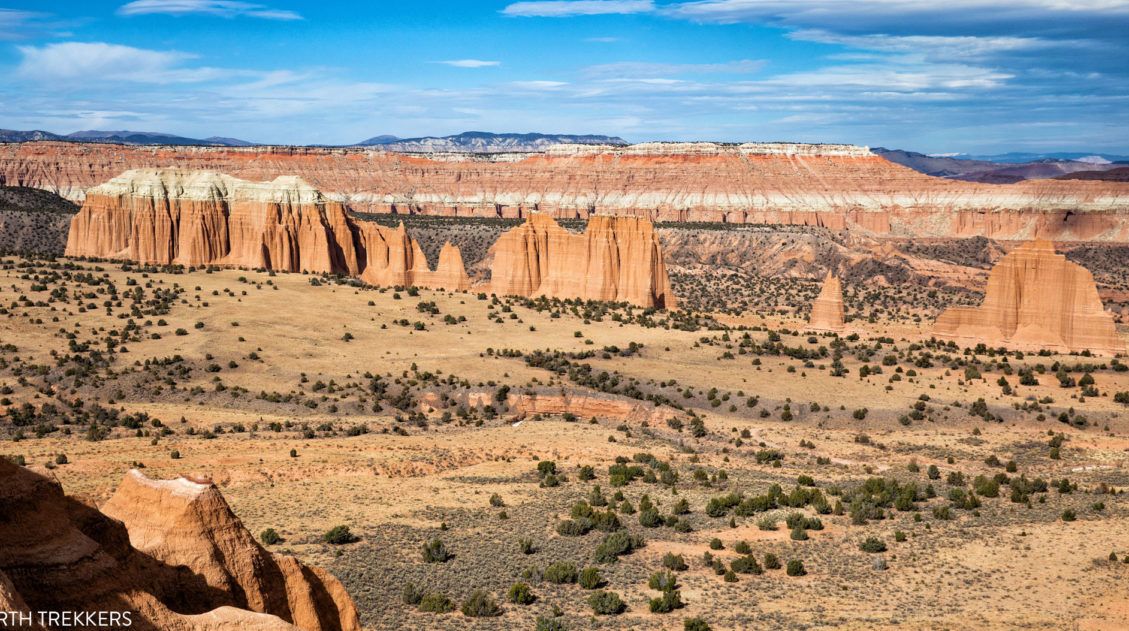
Complete Guide to the Cathedral Valley Loop (+ Map & Best Route)
Cathedral Valley is a rugged, remote district of Capitol Reef National Park. Few people travel out this way, to see this valley and its sandstone monoliths, colorful Bentonite hills, and vast desert scenery. But that’s part of its appeal. If you like the idea of leaving the crowds behind and exploring the backcountry, the Cathedral […]
10 Best Things to Do in Canyonlands National Park
Canyonlands National Park is a sprawling park that is located near Moab, Utah. This national park is made up of five sections and each of them offer a very different experience. In this guide about the best things to do in Canyonlands, we cover the top experiences for all five areas of the park. Most […]

Best Things to Do in Dead Horse Point State Park
Have you ever visited a place where you didn’t quite know what to expect and then it just blew you away? For us, that was Dead Horse Point State Park. Nearby Arches and Canyonlands National Parks get all of the attention (and all of the visitors). When looking for more things to do in the […]
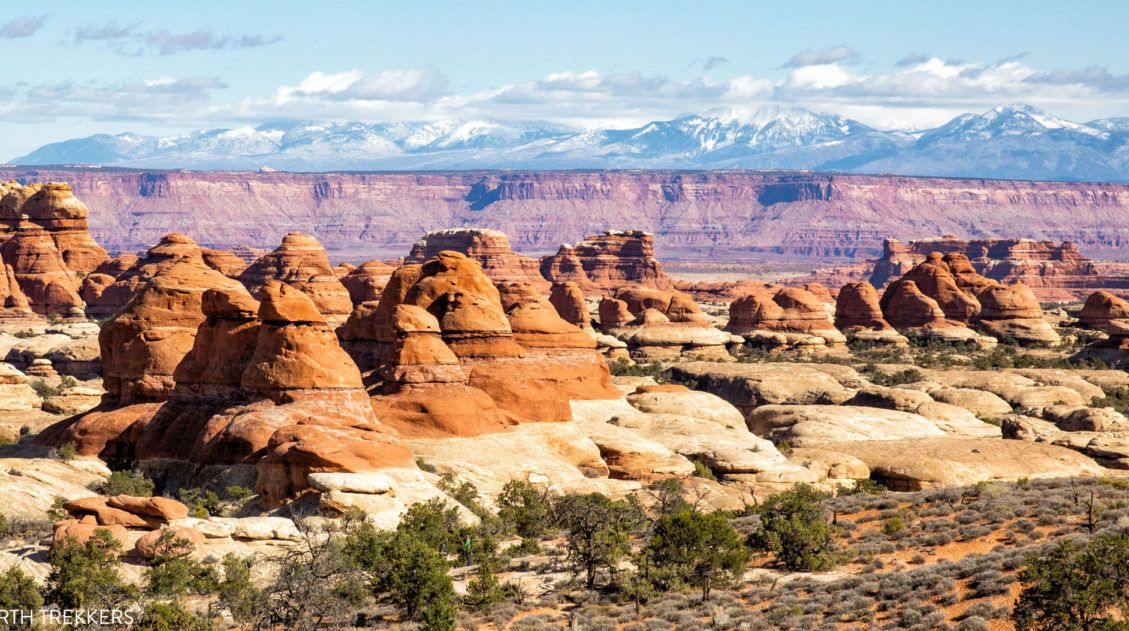
12 Amazing Things to Do in The Needles, Canyonlands National Park
The Needles is an often overlooked section of Canyonlands National Park. But those who take the time to visit the Needles are rewarded with thrilling, unique hiking trails, low crowds, and jaw-dropping views of Canyonlands National Park. In this post, we cover the 12 best things to do in the Needles…12 great reasons why this […]
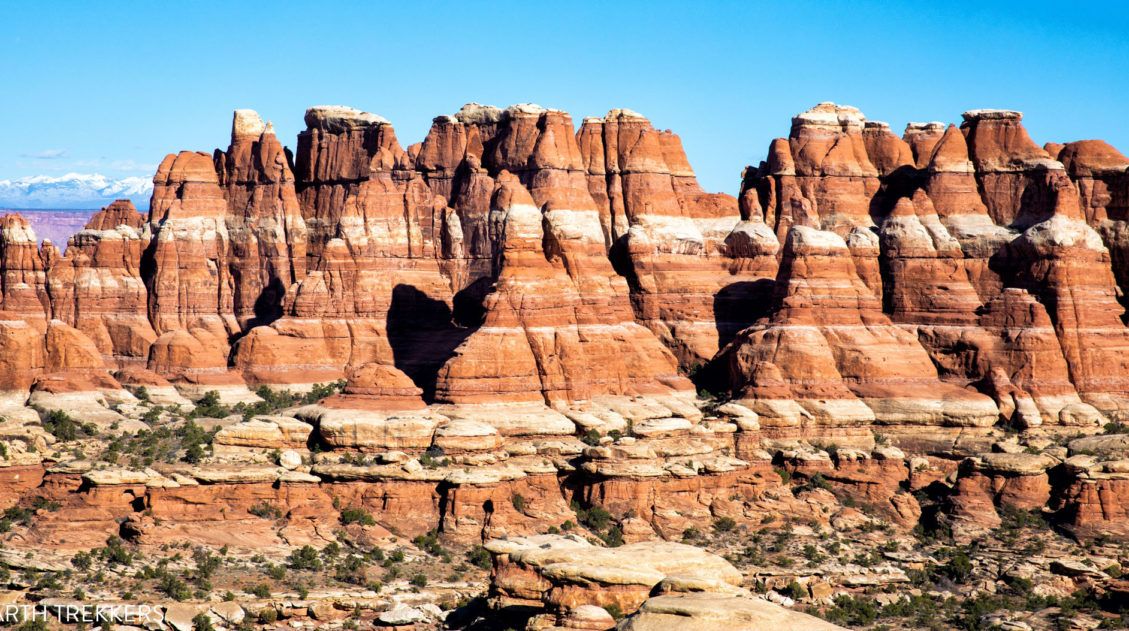
Ultimate Guide to the Chesler Park Loop in the Needles
If you want to get an up-close look at the “Needles,” the sandstone spires that make the Needles district of Canyonlands National Park so uniquely beautiful, put Chesler Park on your list. It is possible to hike out and back to Chesler Park on a short day hike. But if you don’t mind going farther, […]

Utah Travel Guide: Places to Visit in Utah
Utah Travel Guide If you like rugged, desert landscapes, it is hard to beat the beauty of Utah. Visit the state’s five stunning National Parks, stand among iconic US monuments, kayak on the Great Salt Lake, and climb through photogenic slot canyons. This state is a great one for road trippers as there are many […]
Six 4WD Roads in Sedona…Which Ones are Worth It?
One of the best ways to explore the desert landscapes and red rock scenery is to drive the 4WD roads in Sedona. These roads range from easy to difficult and take you to stunning overlooks and through remote terrain. They are lots of fun to drive and offer a unique experience if you are looking […]
The Ultimate Guide to the 63 US National Parks
Stretching from the South Pacific, across the United States to the Caribbean, are 63 national parks. These national treasures preserve iconic landscapes, majestic mountains, primordial forests, arid deserts, misty coastlines, immense canyons, wildlife, and historic landmarks. We have visited 56 of the 63 US national parks, from the towering granite walls of Yosemite and the […]

Comments 36