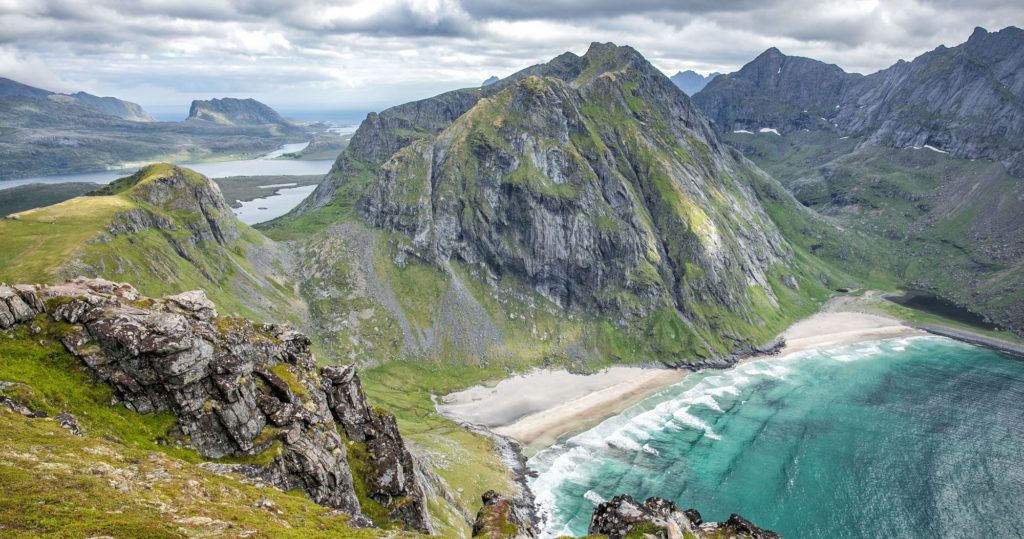
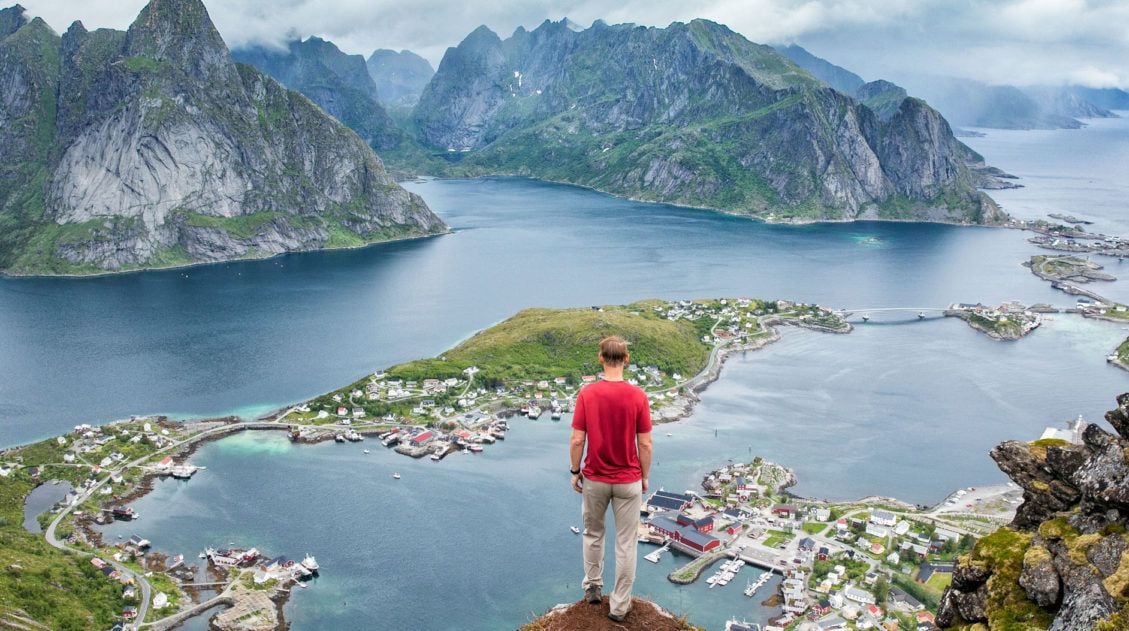
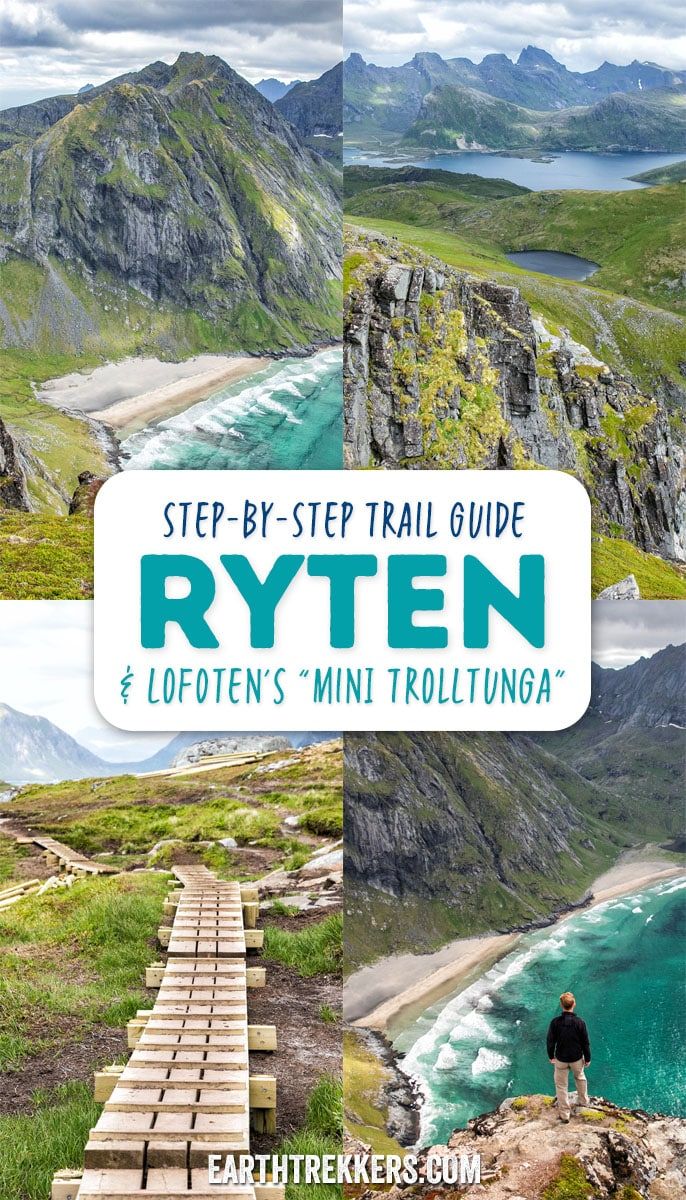
The hike to Ryten has all of the ingredients of a perfect Lofoten Islands hike: sweeping vistas across the mountains and fjords, a fun but slightly strenuous hike to a mountain peak, and a breathtaking view of a white, sandy beach. The icing on the cake is a “mini Trolltunga,” an outcropping of rock where you can get creative with your photos.
By Lofoten standards, this is a relatively easy hike. Most of the hikes we did in the Lofoten Islands featured a steep, strenuous, thigh-busting climb to a mountain peak, all for an amazing (and very worthwhile) view.
Ryten is different. Yes, you still climb a mountain, but the trail is less steep and less strenuous. Along the way, the views keep changing, which keeps things interesting. But the real reason to do this hike is for that final view from the top of Ryten.
Ryten Hiking Stats
Distance: 8.7 km (5.4 miles) round trip
Elevation Gain: 680 meters (2240 feet)
Difficulty Level: Easy to moderate
Length of Time: 3 to 5 hours
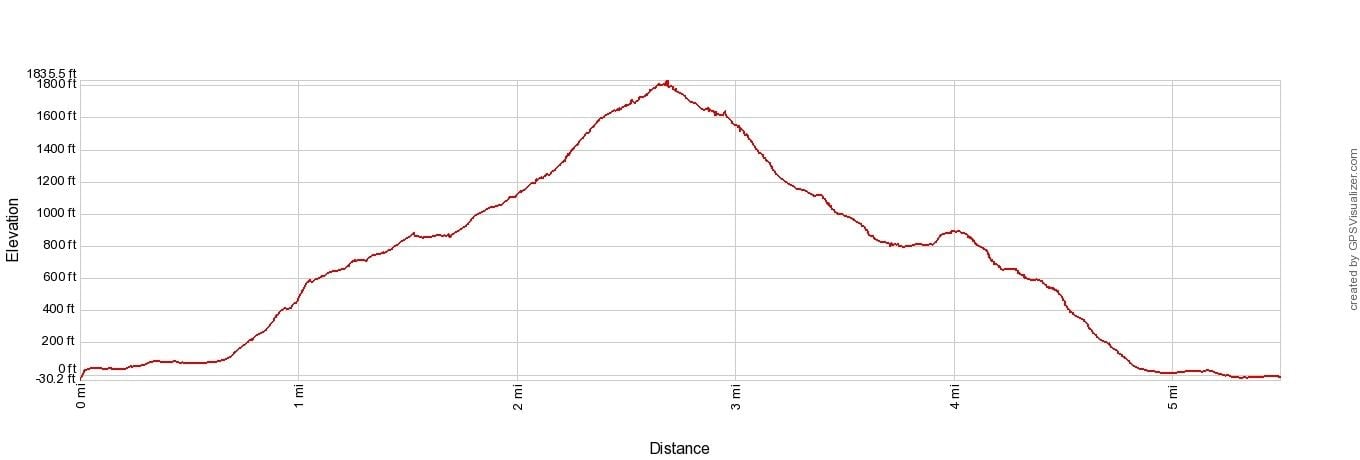
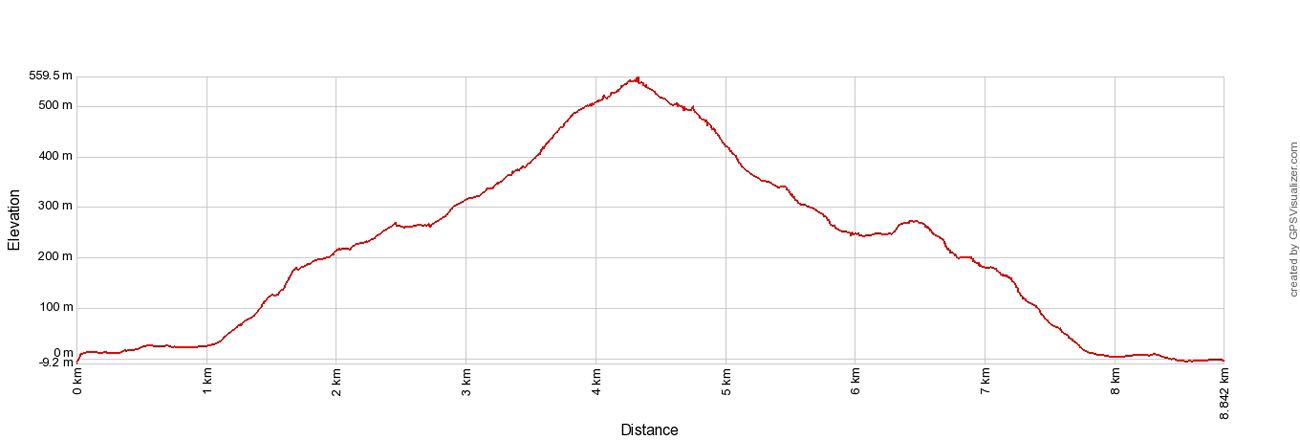
Ryten Elevation Profile
Please practice the seven principles of Leave No Trace: plan ahead, stay on the trail, pack out what you bring to the hiking trail, leave areas as you found them, minimize campfire impacts, be considerate of other hikers, and do not approach or feed wildlife.
Where is Ryten?
Ryten is located on Moskenesøya in the Lofoten Islands. The closest town is Fredvang.
There are two different ways to hike to the peak of Ryten. We hiked up the “direct route,” which starts near Ytresand and hikes directly to the top of Ryten. You can also hike to Ryten via Kvalvika Beach. This post covers the direct route to the top of Ryten.
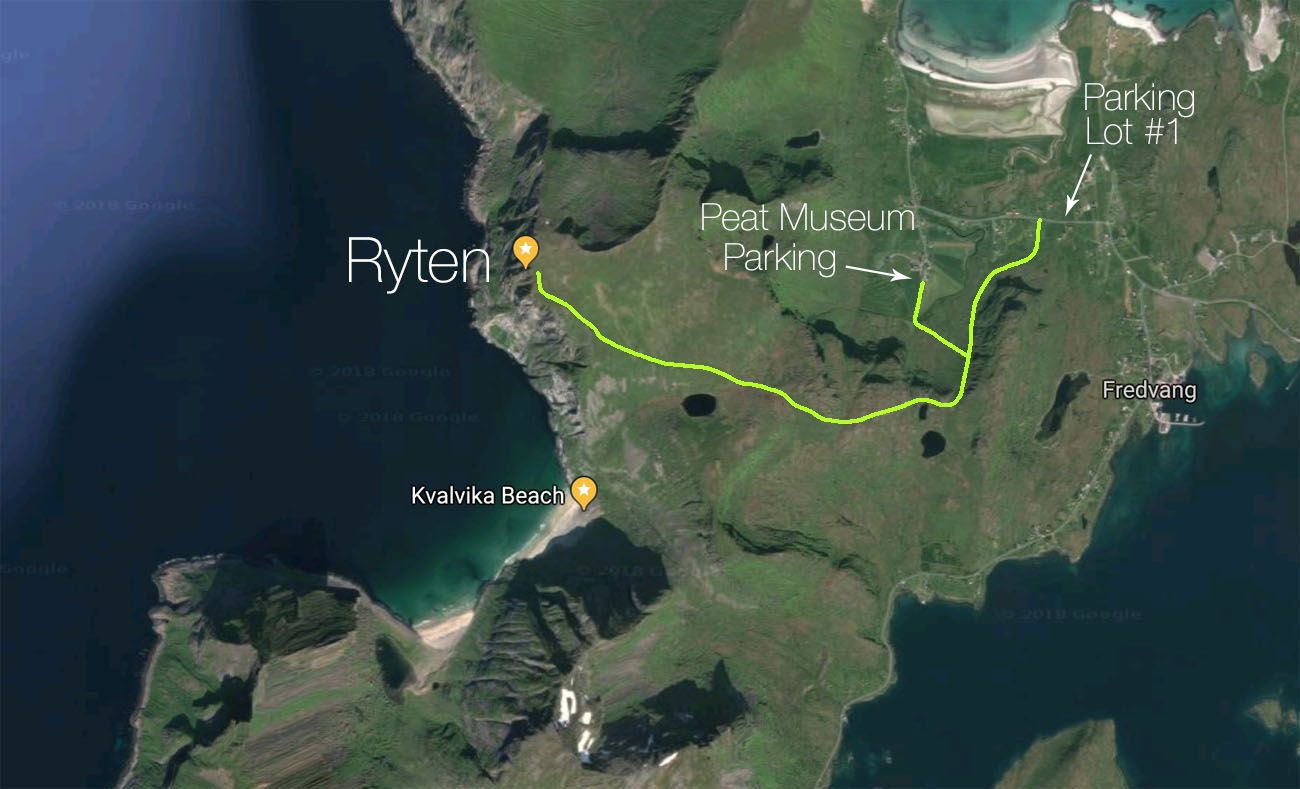
Parking has changed since we made this map. The main parking lot is at the end of Fv806, at the Peat Museum Parking on the map above. As of June 2026, it looks like Parking Lot #1 (where we parked) is permanently closed.
Where to Park
Parking has changed significantly since we first did this hike. There are now several designated parking areas, all clearly marked with information signs. Parking outside the designated areas can result in a fine of up to 900 NOK. Locals and a parking attendant actively enforce this.
Innersand Parking (Primary Lot — closest to the trailhead). This is the main parking area for the Ryten hike, run by a local farmer. It’s a large lot with restrooms and is located at the end of Fv806.
Fredvang School Lot (Free, farther away). Located behind the Fredvang school, this free lot adds roughly 2 km to the hike each way. During high season, a shuttle bus runs from here to the Kvalvika path, making it a much more practical option than it used to be. GPS: 68.0890076, 13.1746814
Parking tips: In July especially, lots fill fast and overnight campers can take up spaces before 9 am. Arrive early morning or later in the evening if possible.
Ryten Step-By-Step Trail Guide
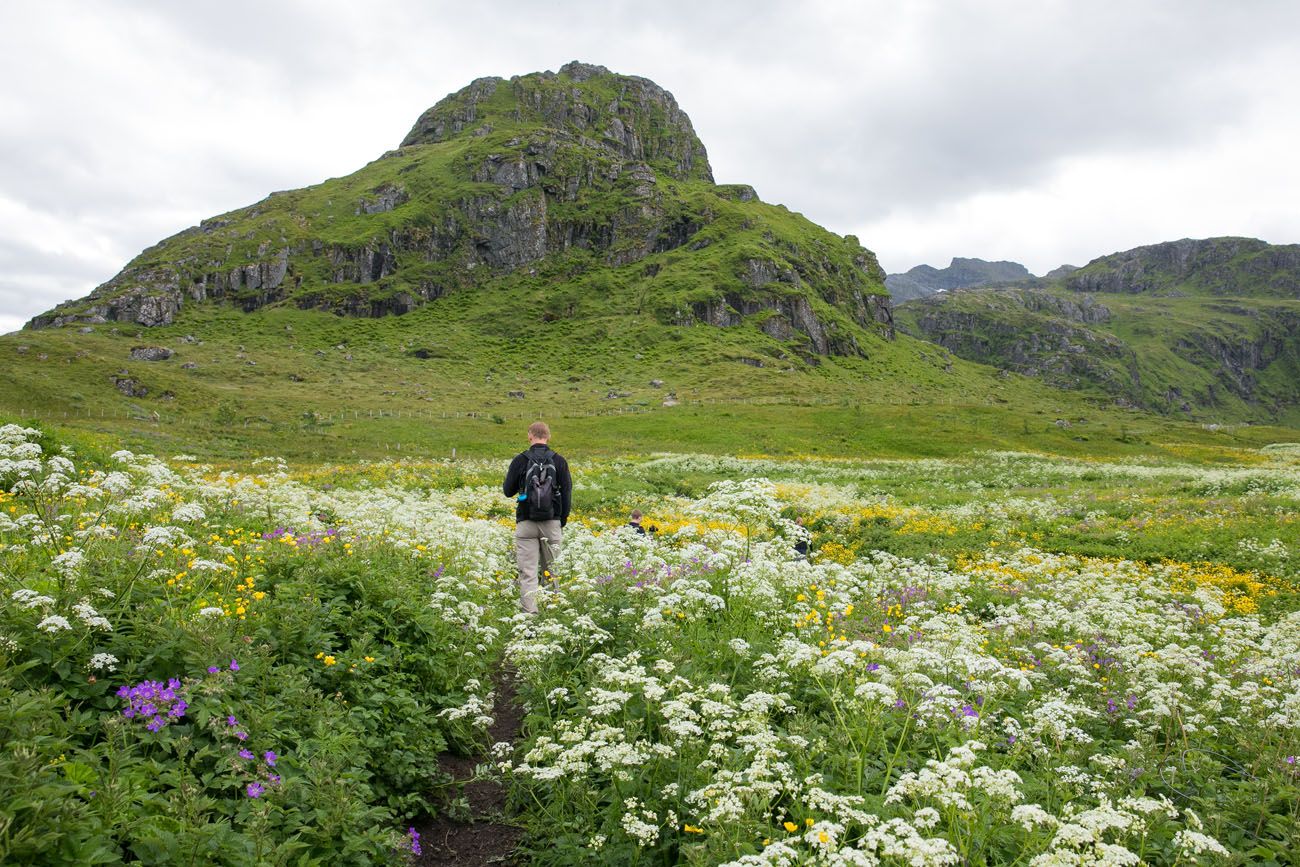
When we did this hike, we parked a lot farther from the main trail (here on Google Maps, but it looks like it is closed in 2026). We had a short, flat walk through a field of wildflowers before joining the main trail. This trail connects to the main trail just past the main parking lot.
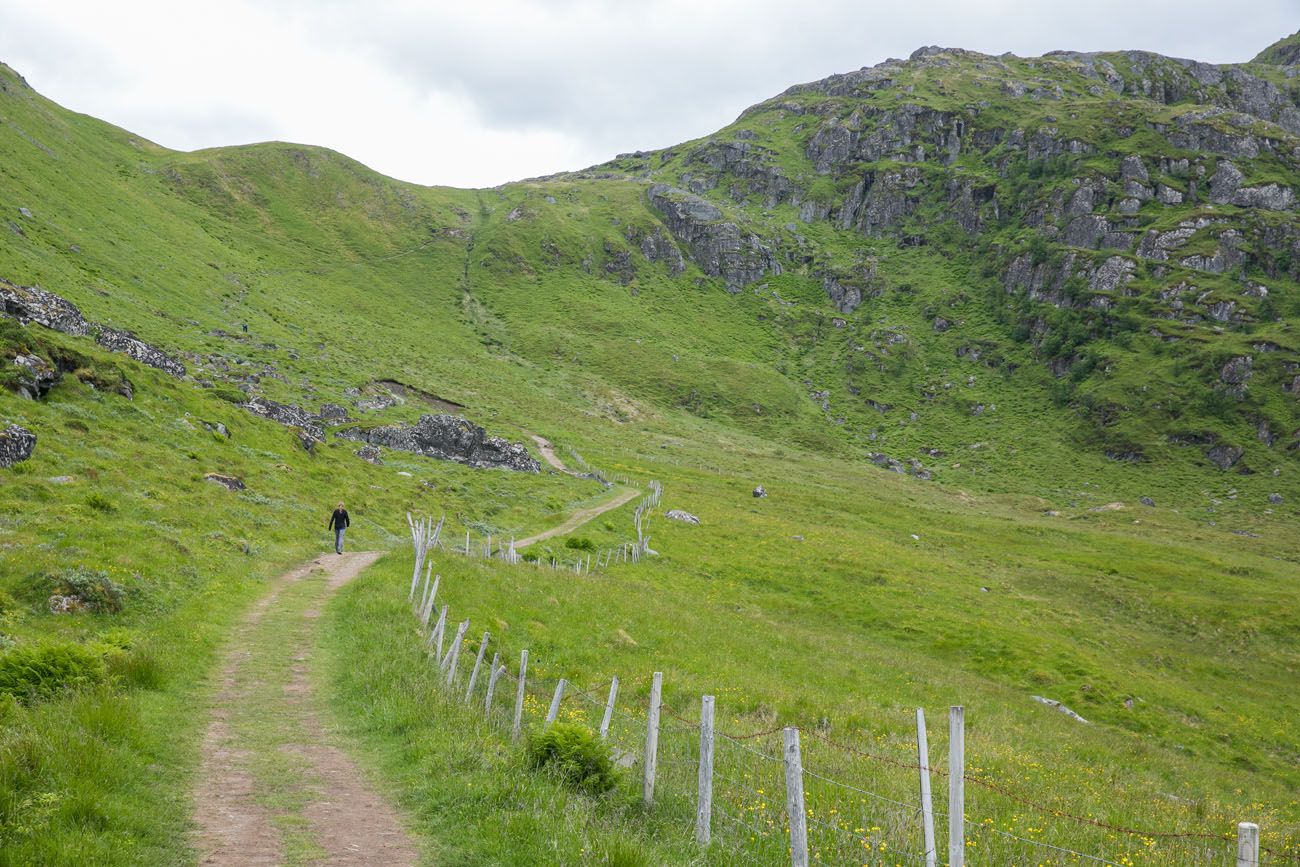
The hike starts off with a short but beautiful walk through tall wildflowers.
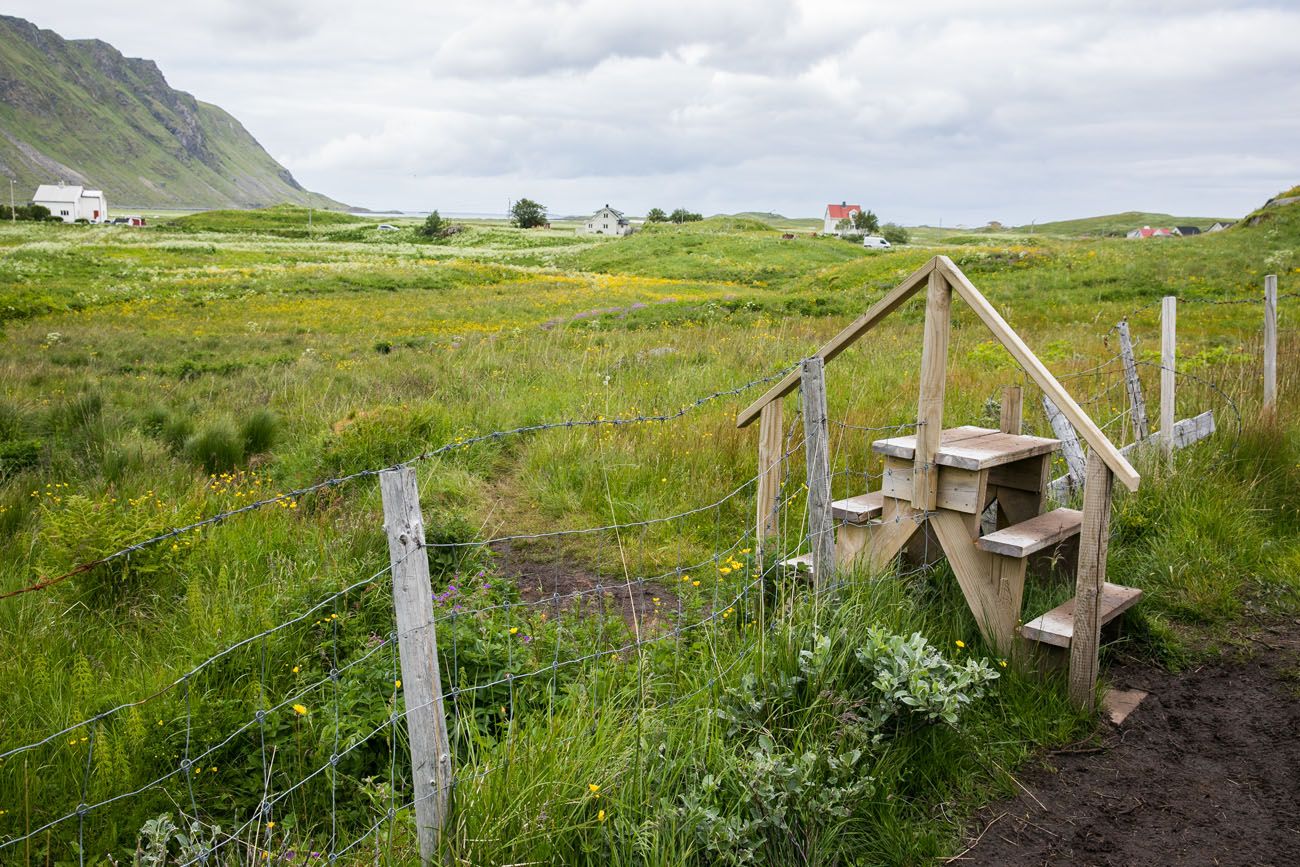
The trail takes a turn to the right and then we climbed the stile to cross over the fence.
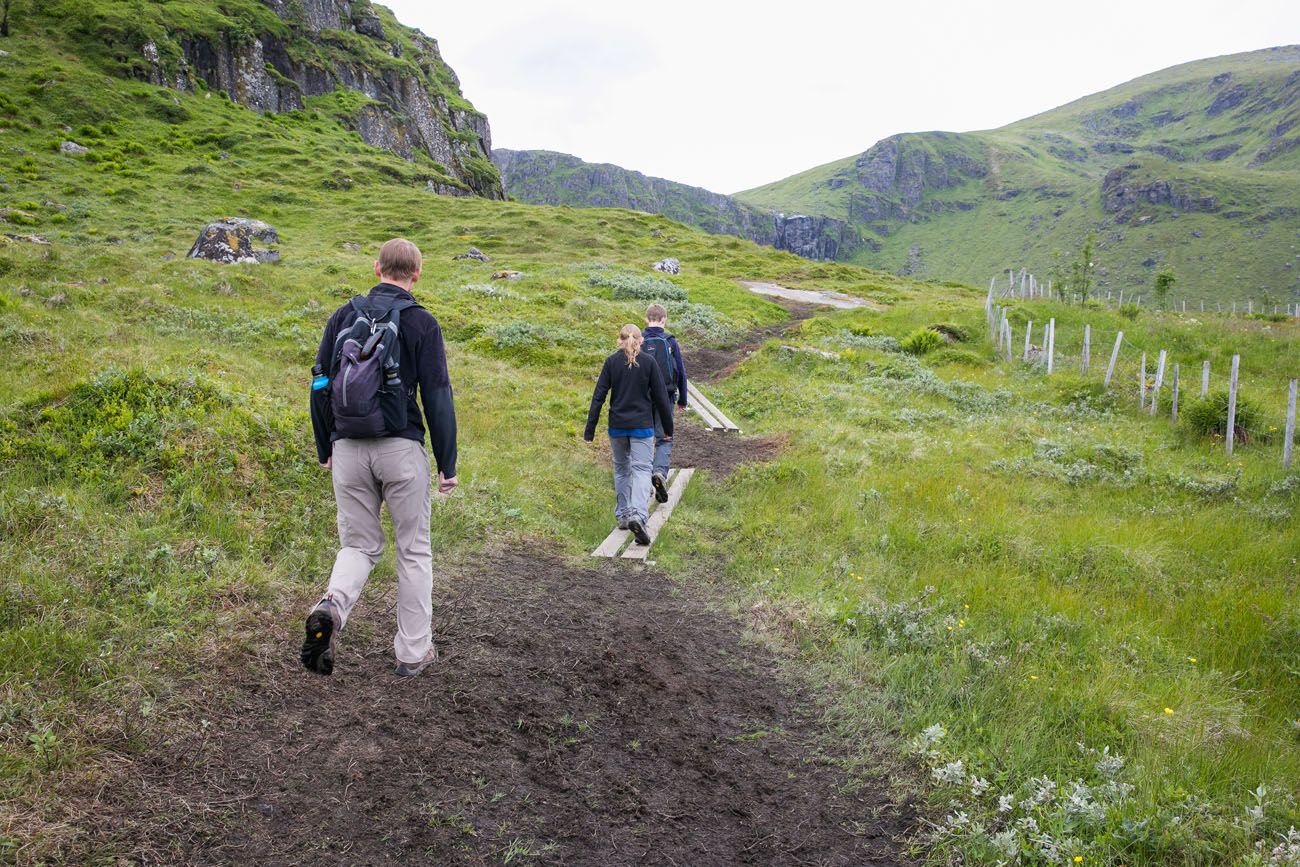
After a little more hiking, you begin the first climb of the day. At the start of this climb, the trail from the main parking lot joins the trail.

View from the top of the first climb, looking back toward the parking lots.
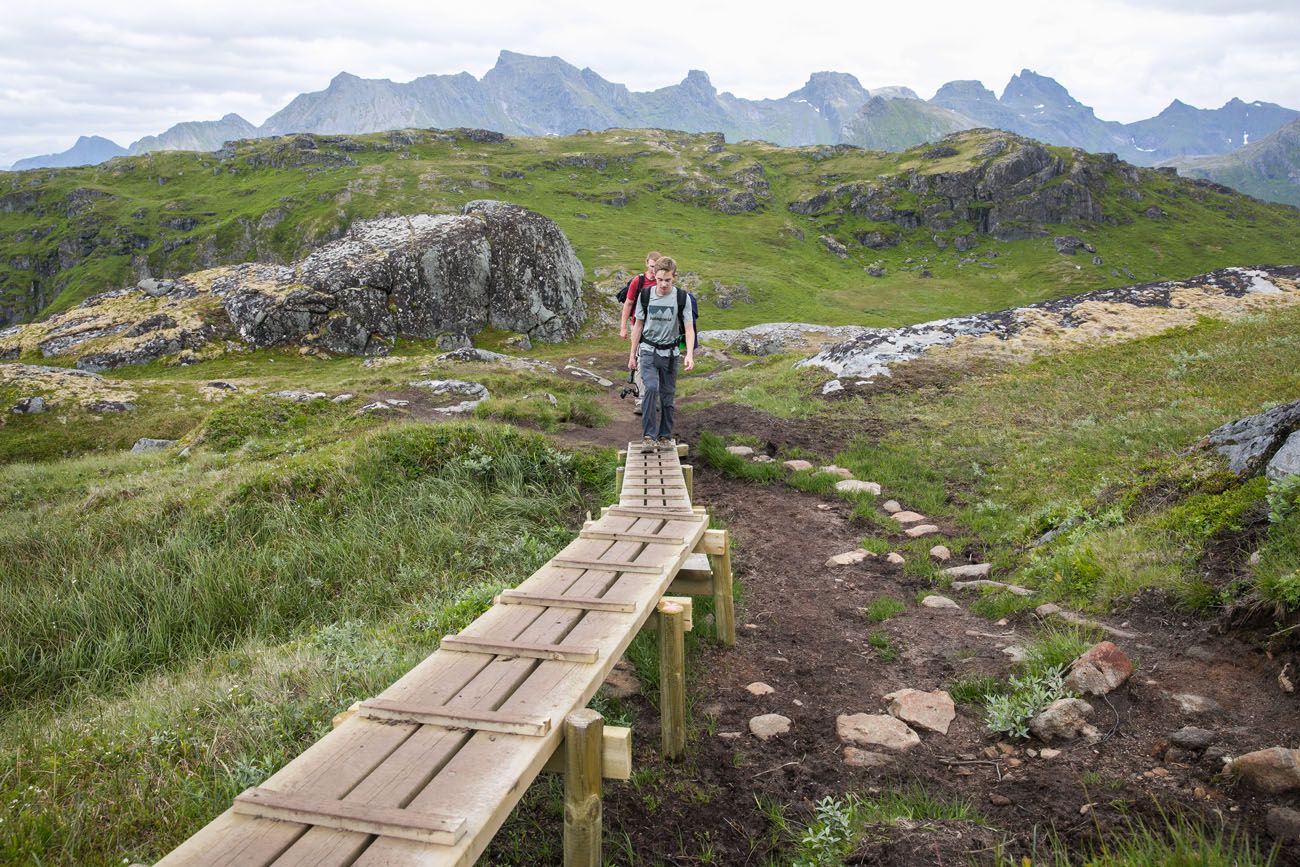
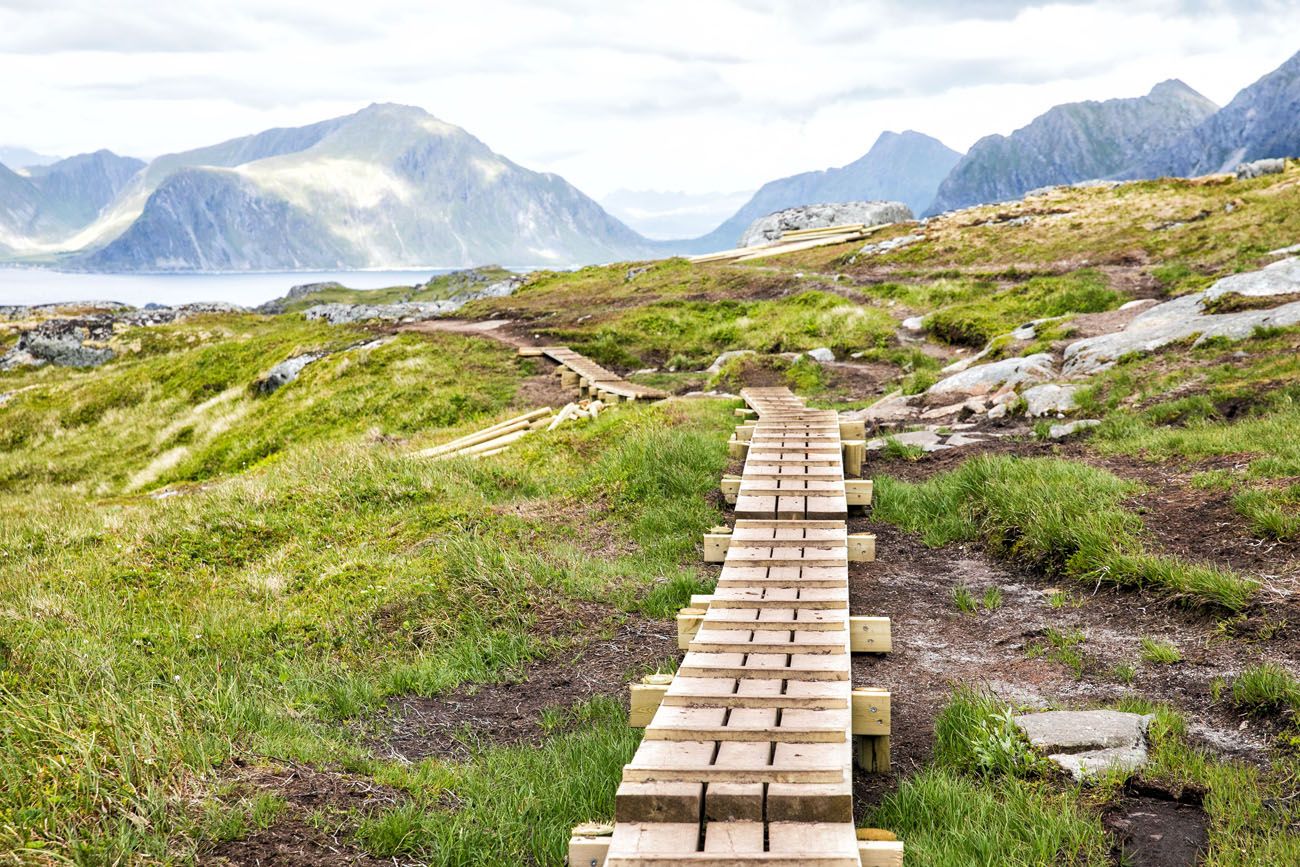
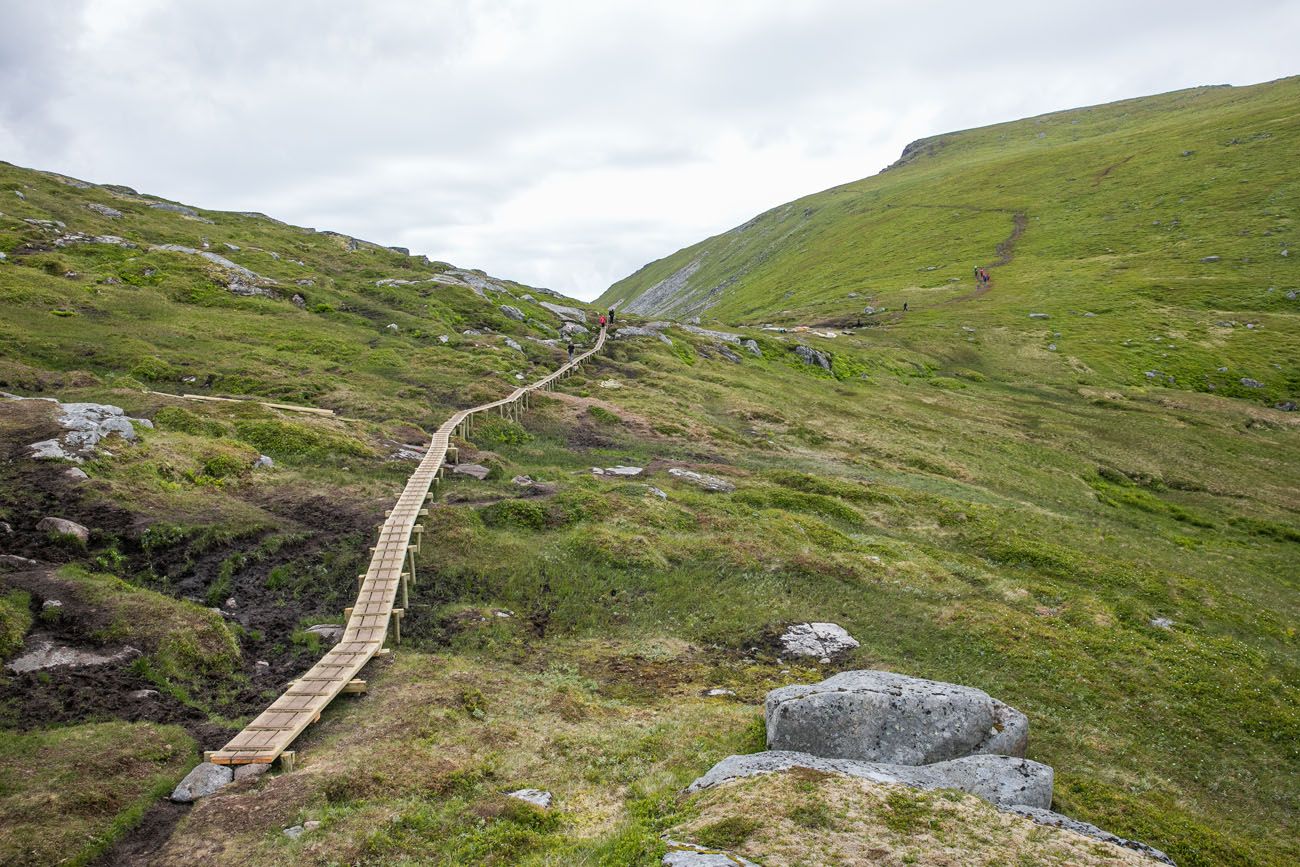
At the top of the climb, the trail heads west. The trail is very easy to follow and most likely there will be enough people that you can follow those in front of you. Along the way, you will walk across wooden bridges, saving your feet from slogging through the boggy, wet ground in some areas. They also save the trails from wear and tear.
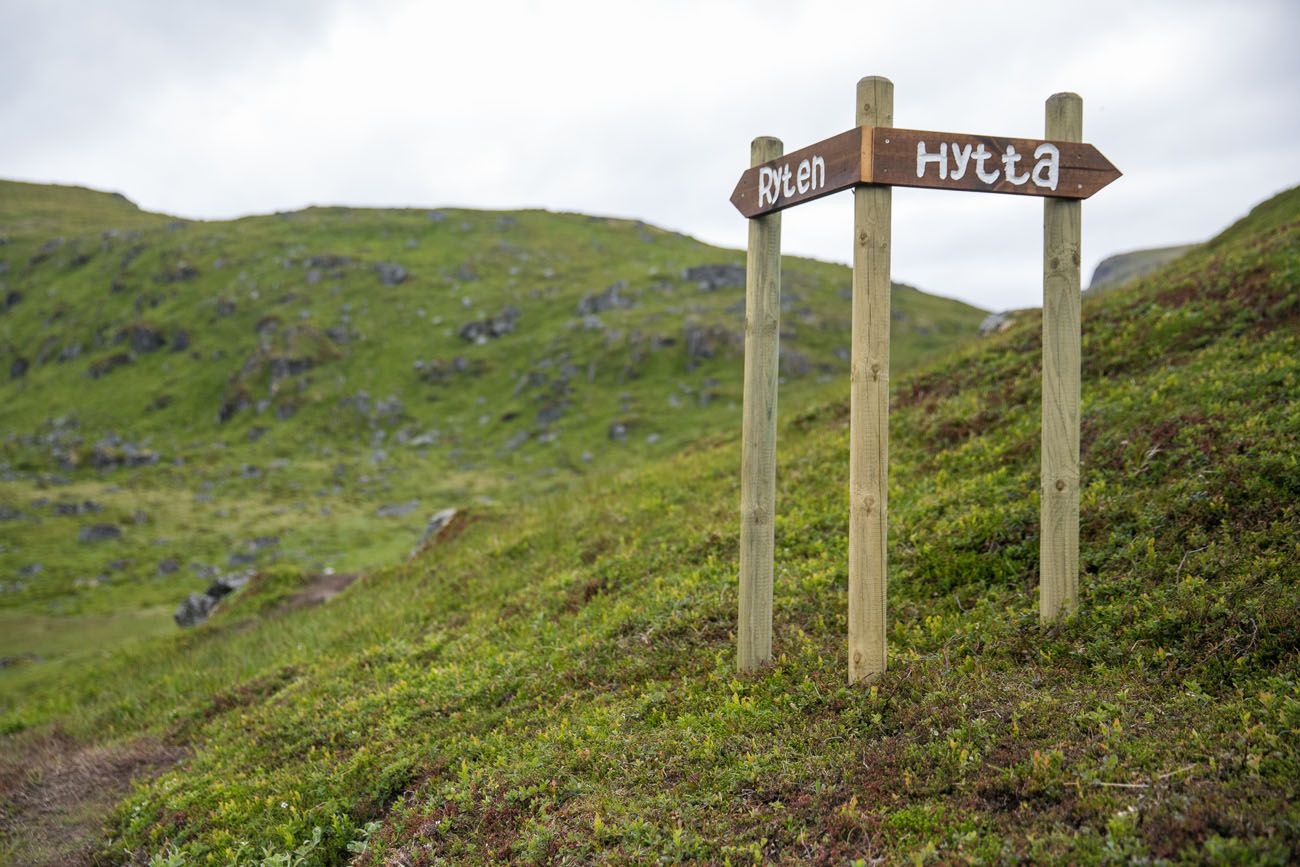
Just past the lake, the trail splits. Follow the sign towards Ryten. If you follow the sign to Hytta, you will take a short, unnecessary detour to the Fredvanghytte.
Now, you can see the final climb to the peak of Ryten. It’s not overly difficult, but when we did this, it felt like it would never end. Plus, it was crazy windy, with the wind blowing directly into our faces, slowing us down and making us very cold (even in July).
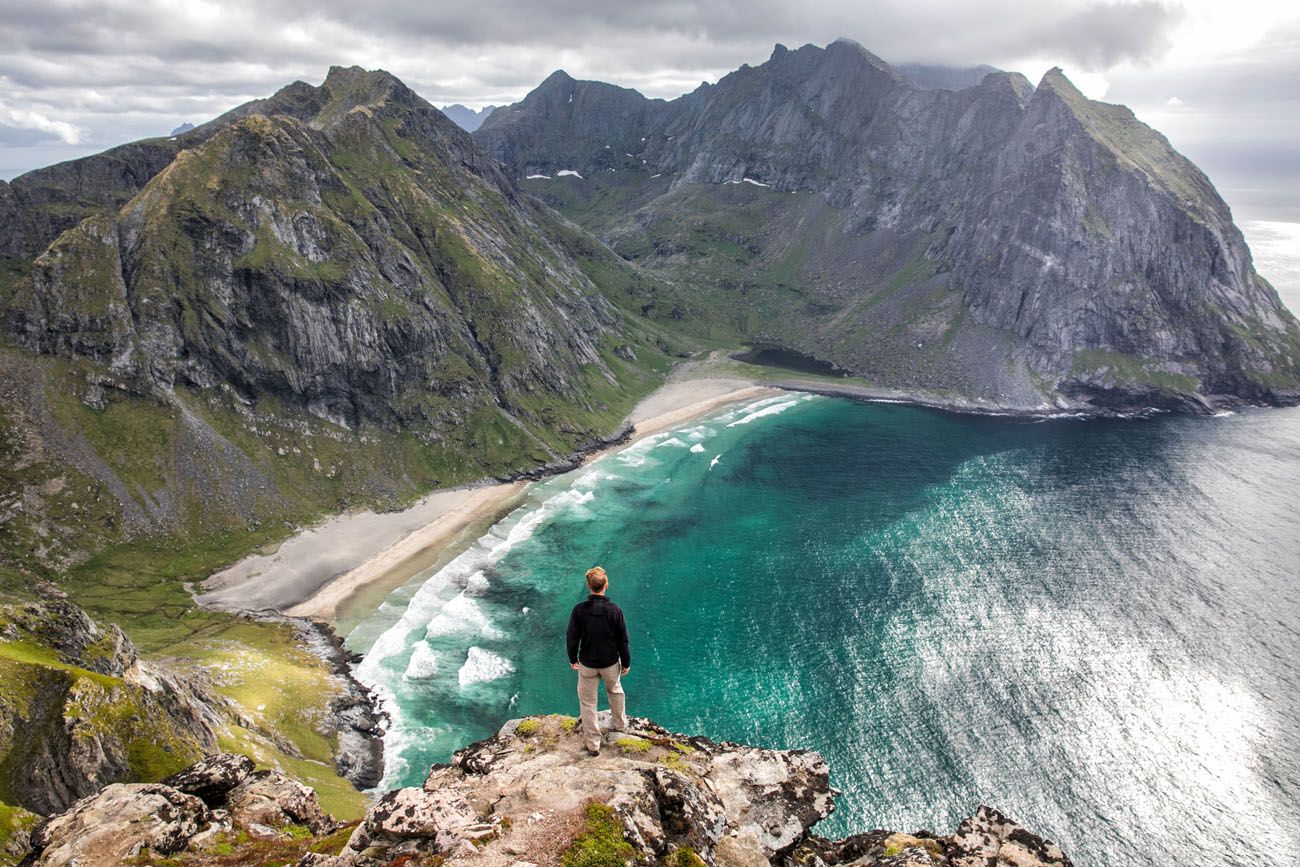
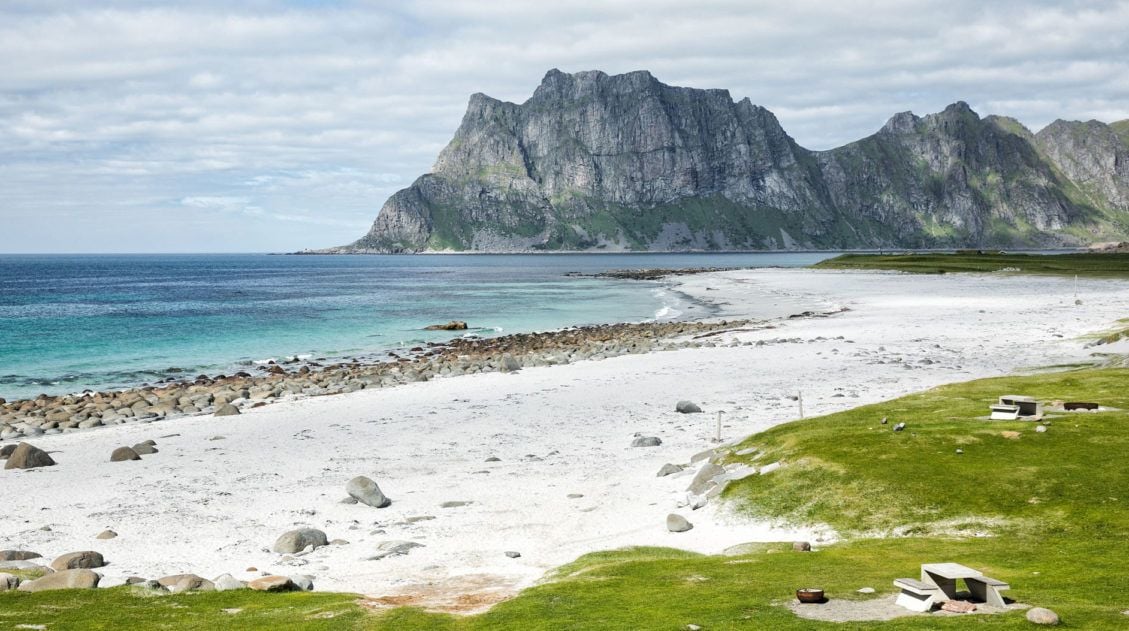
Viewpoint of Kvalvika Beach
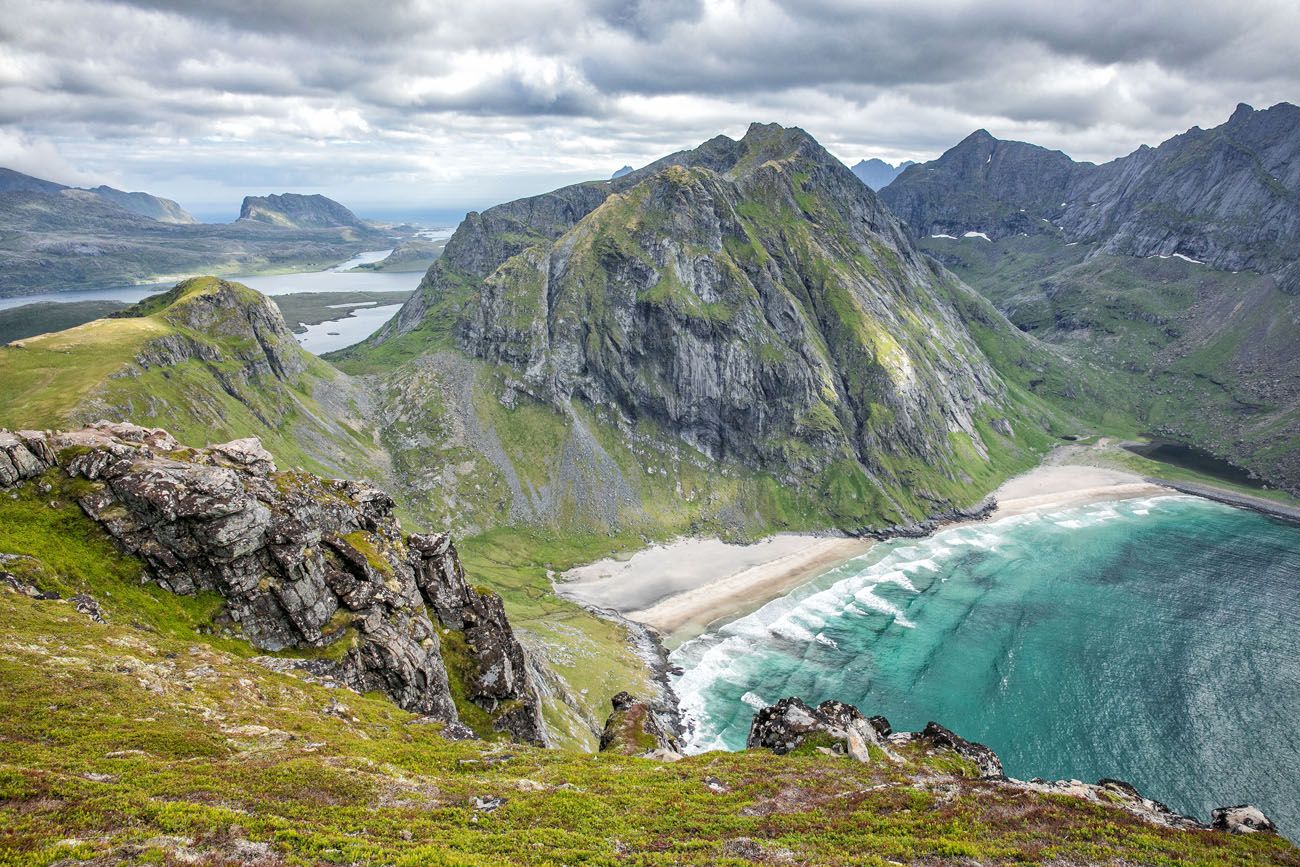
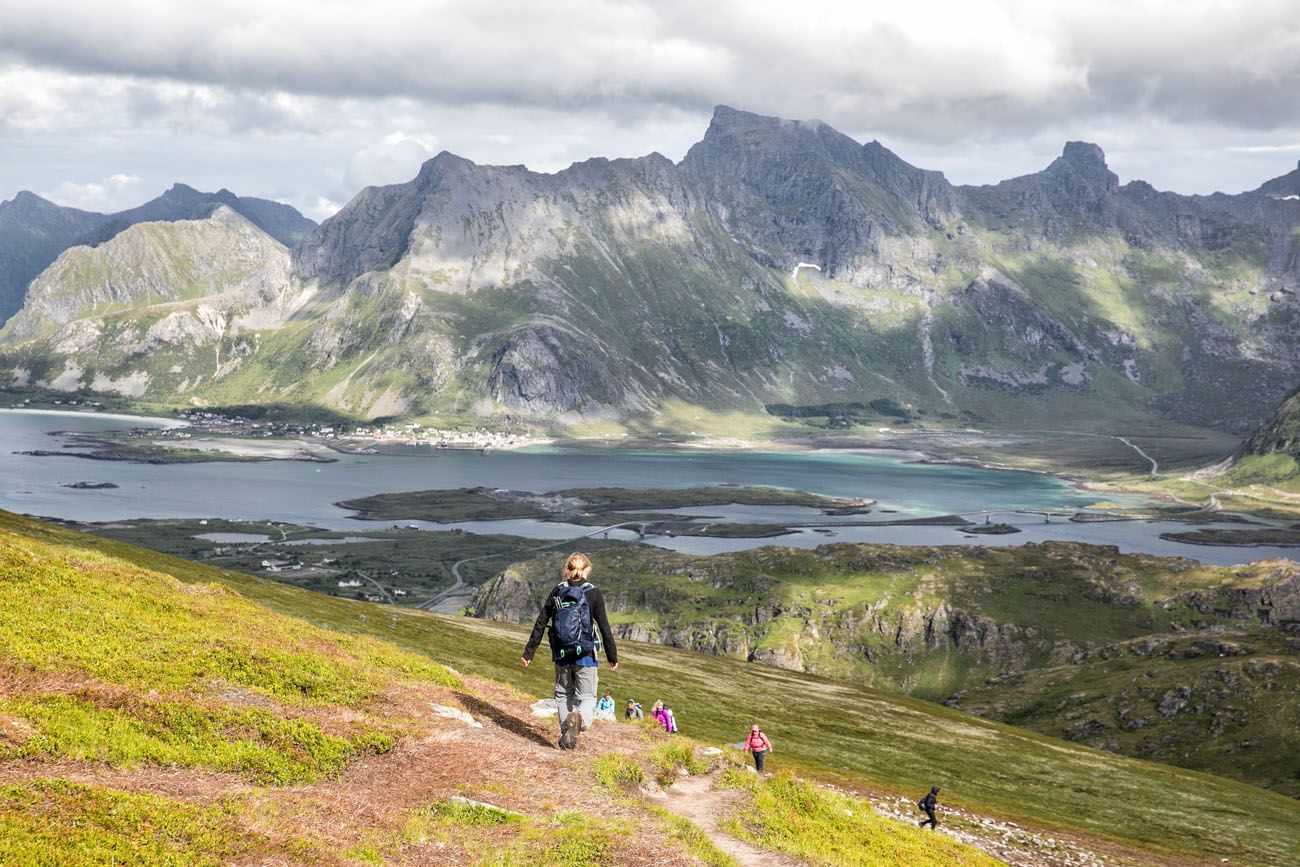
Once near the top of Ryten, enjoy the spectacular views across the Lofoten Islands. There is a viewpoint near the top of the mountain, where you can see Kvalvika Beach, the Fredvang Bridges, and out across the mountains of the Lofoten Islands.
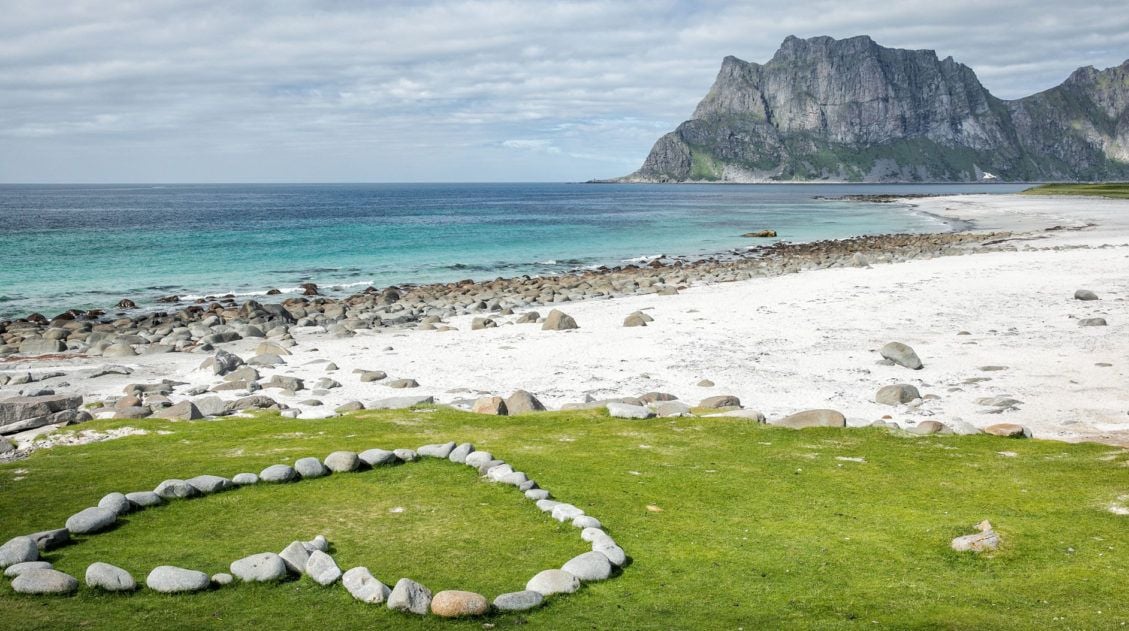
Kvalvika Beach
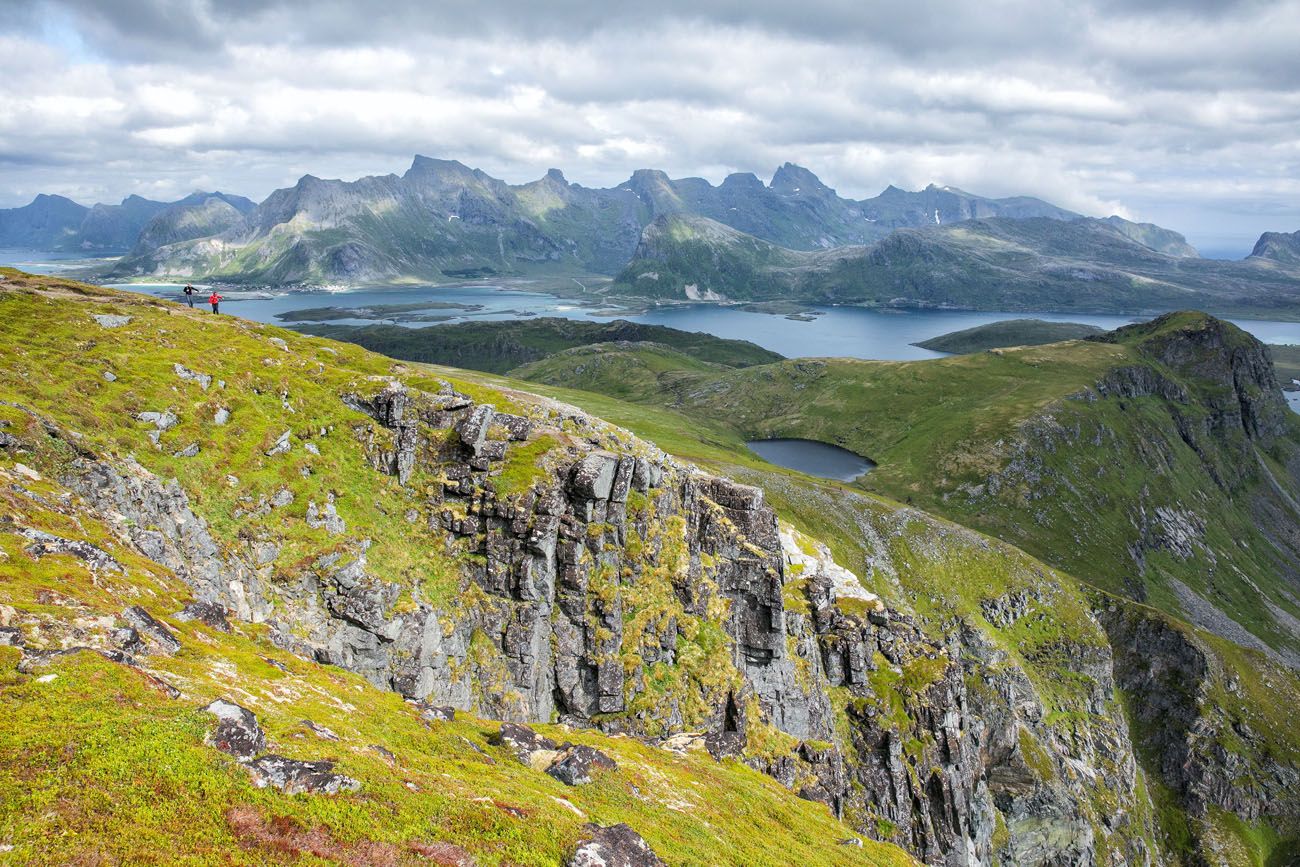
Looking back at the hiking trail. Off in the distance you can see the Fredvang Bridges.
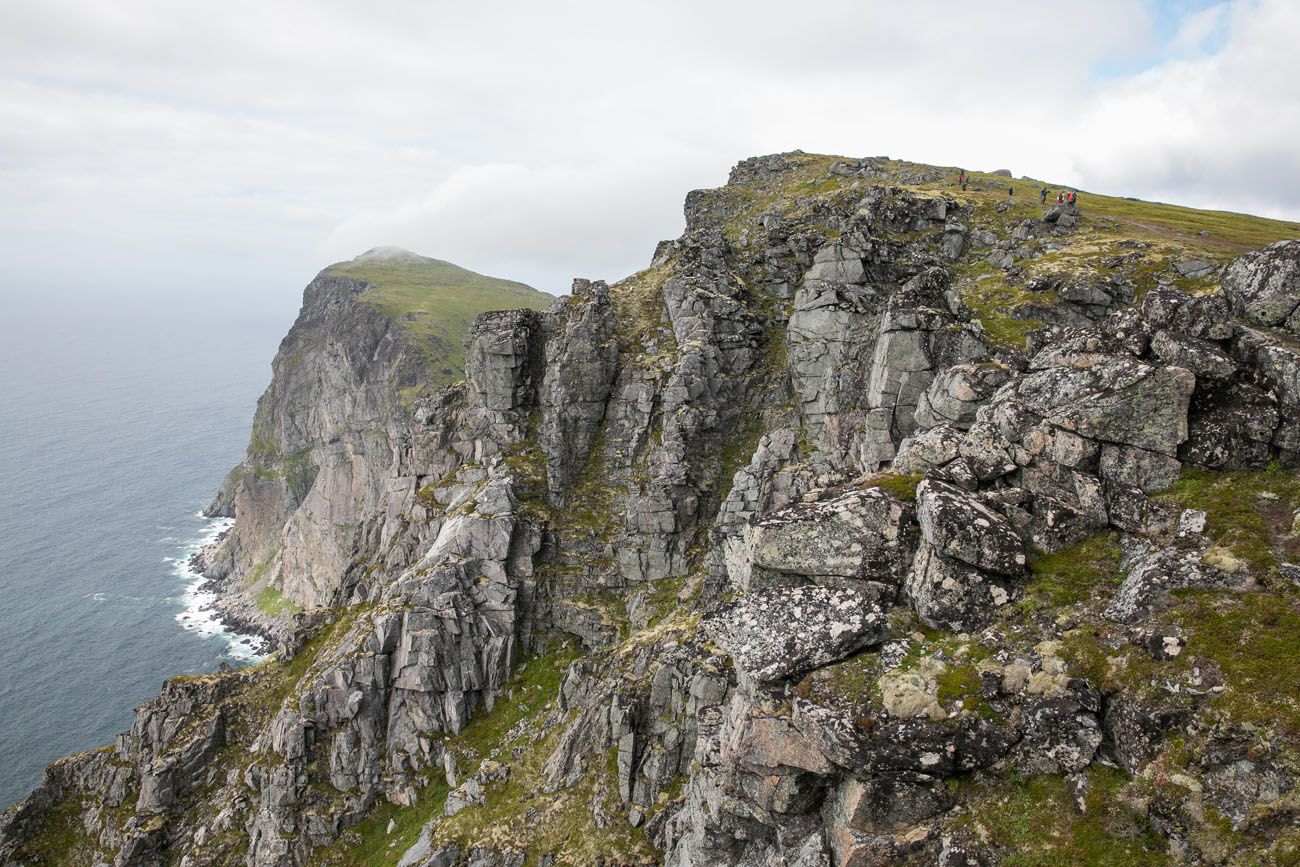
From the first viewpoint, there is still a bit of hiking to do to reach the official summit of Ryten, shown in this photo (where the people are standing).
Another view of Kvalvika Beach
The “Mini-Trolltunga” on Ryten
On top of Ryten is a very cool photo spot. There is a large rock that juts out, similar to Trolltunga, with Kvalvika Beach in the background.
If you get the angle right, you can take photos that make it look like you are standing or hanging from a rock with nothing underneath of you. This rock sits just a few feet off of the ground, so it is relatively safe. Just note, that it is located near the edge of a cliff, there is still the chance that you could fall, if you are not careful.
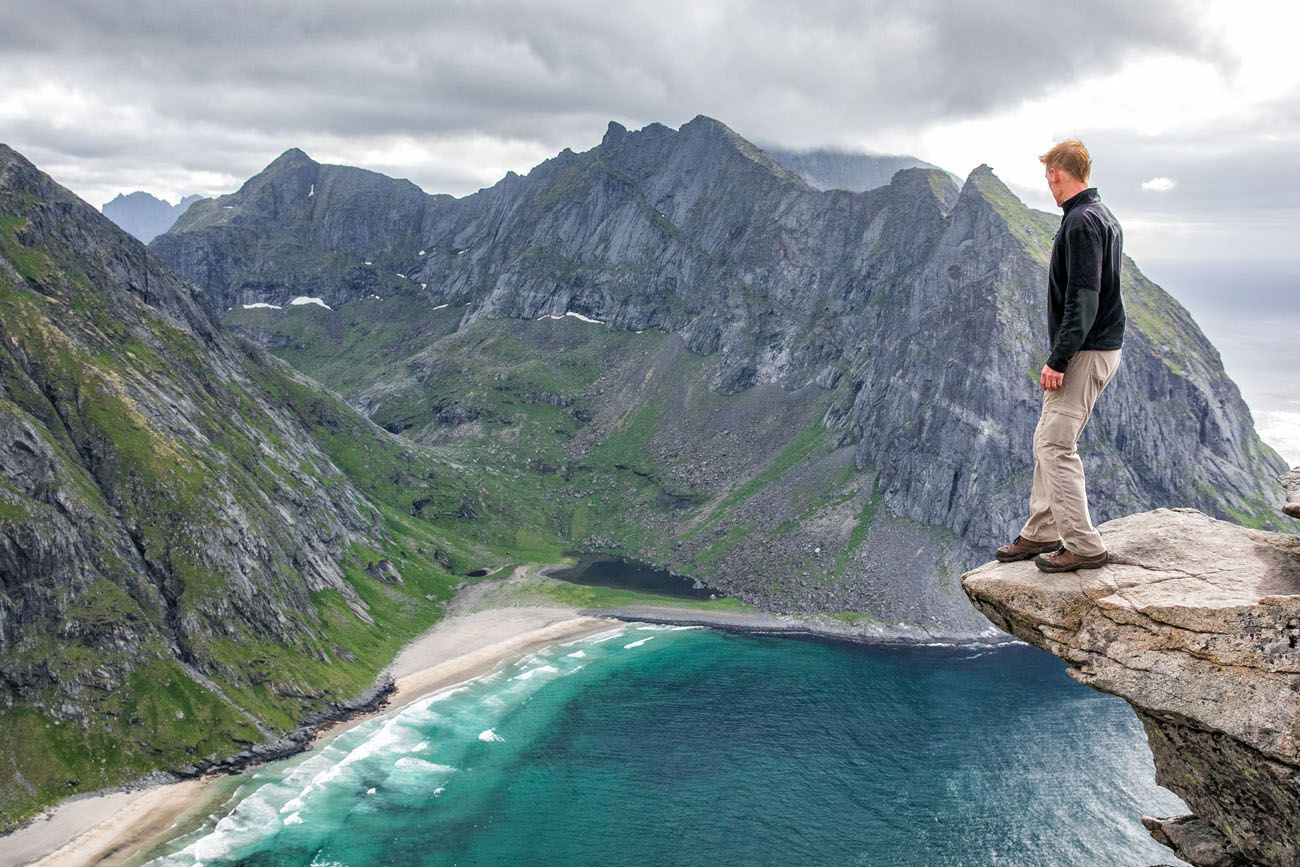
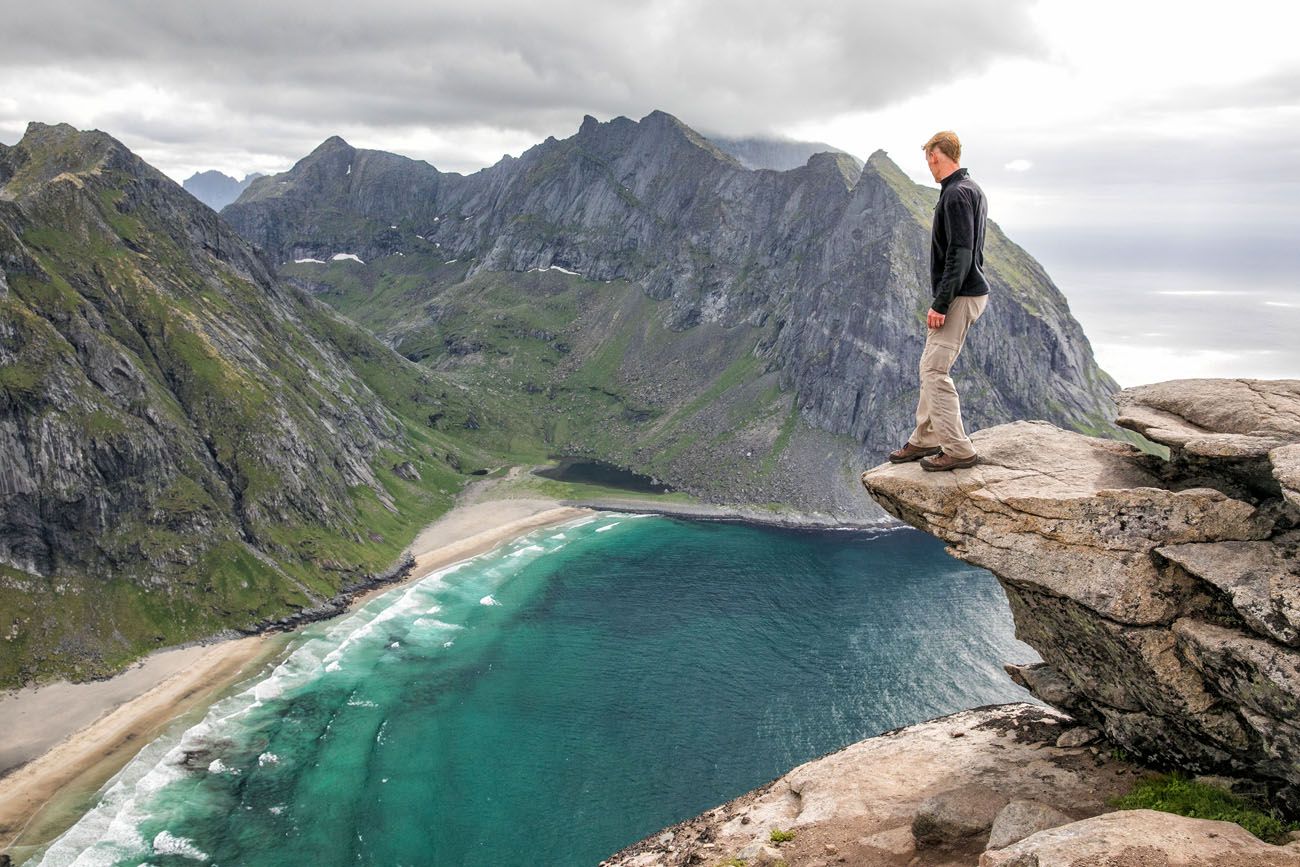
On the day we did this hike, it felt like almost hurricane force winds were blowing on top of Ryten. We all looked forward to posing on this rock, but with the high winds, we felt like it was not safe to do. Tim was the only one in our group who posed for a photo.
Most people stop here, take their semi-crazy photos, and enjoy the view over Kvalvika Beach, without going all of the way to the official summit. To complete the hike, it’s just a five minute walk up the hill to the rock cairn that marks the official summit.
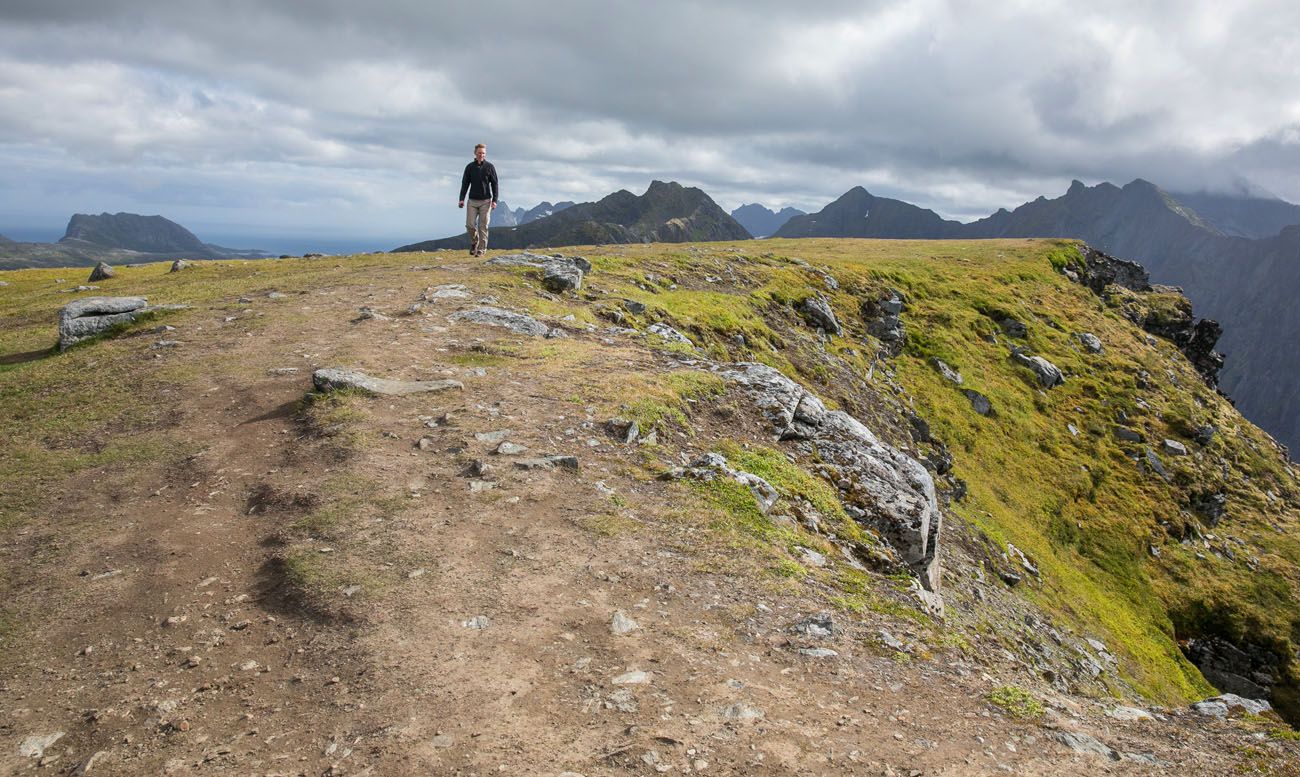
On the summit of Ryten.
Return Hike
To get back to your car, hike back the same way. It is possible to extend the hike, hiking down to Kvalvika Beach, but this adds a lot of extra distance, time, and elevation gain to the hike.
The awesome view on the return hike.
Best Time to Hike Ryten
We hiked Ryten in July, and while the views were absolutely stunning, the wind nearly knocked us off our feet on the summit. We all wanted to pose on the mini-Trolltunga rock, but the gusts made it feel genuinely unsafe. Tim was the only one who managed a photo. That’s the trade-off with summer in the Lofoten Islands: long, beautiful days with endless light, but the weather is famously unpredictable at elevation. Even in July, you want a windproof layer and to be prepared for the temperature to drop fast once you’re exposed on the ridge.
If crowds and parking stress are a concern, late August and September are our recommendation. The midnight sun is gone, but the light turns golden and dramatic in a different way, and the lots at Innersand fill more slowly than they do in peak July.
- Spring (April–May): Fewer crowds, dramatic snow-dusted peaks, but the trail can be icy or muddy at elevation. Microspikes are worth bringing.
- Summer (June–August): Best weather window and the midnight sun gives you flexible hiking hours, but July is the most crowded month. Arrive early or late to secure parking.
- Fall (September–October): Our favorite time. Fewer hikers, golden light, and the colors on the hillsides are beautiful. Weather is more unpredictable but often still clear.
- Winter (November–March): Doable with the right gear. Snowshoes or microspikes are essential, and you’ll want to check conditions carefully. The payoff is a nearly empty trail and dramatic snowy scenery.
Frequently Asked Questions
How difficult is the Ryten hike?
Ryten is rated easy to moderate. By Lofoten standards, it’s one of the more accessible mountain hikes in the archipelago. The trail gains about 520–680 meters of elevation depending on your route and has two main climbs, but neither is as relentlessly steep as something like Reinebringen. Most reasonably fit hikers will find it very manageable.
How long does it take to hike Ryten?
Plan for 3 to 5 hours round trip for the direct route from the Innersand parking area. Faster hikers can do it in under 3 hours, but most people spend time at the top enjoying the view over Kvalvika Beach and posing on the mini-Trolltunga.
Where do you park for the Ryten hike?
The main parking area is at Innersand (also called Indresand), run by a local farmer, roughly 20 minutes from Reine. Cost is 100 NOK. There are two additional lots: the Lofoten Peat Museum lot and a free lot near Fredvang school, which now has a seasonal shuttle bus to the trailhead. Do not park along the road because a parking attendant actively issues fines of up to 900 NOK.
Can you combine Ryten with Kvalvika Beach?
Yes, and it’s a great option if you have the time and energy. Rather than hiking back the same way, you can descend from Ryten down to Kvalvika Beach and return via the road, turning the hike into a loop of roughly 12–13 km with around 930 meters of total elevation gain. Budget 5–7 hours for the full loop.
What is the mini-Trolltunga on Ryten?
Near the summit of Ryten, there is a rock that juts out over the hillside with Kvalvika Beach in the background. From the right angle, photos make it look like you are standing on a ledge with nothing beneath you, similar to Trolltunga. The rock itself is only a few feet off the ground, but it sits near the edge of a cliff, so take care, especially in windy or wet conditions.
Is the Ryten hike worth it?
Absolutely. For the effort involved, the view over Kvalvika Beach from the top of Ryten is one of the best in the Lofoten Islands. We consider it one of the more rewarding hikes in western Lofoten. You get breathtaking scenery without the extreme steepness of Reinebringen or the crowd pressure that comes with it.
Can you hike Ryten year-round?
Yes, Ryten is one of the few hikes in western Lofoten that can be done in all four seasons. In winter and early spring, microspikes or snowshoes are essential and conditions can be icy, particularly on the ascent from the parking area. Always check the forecast before heading out.
Where We Stayed
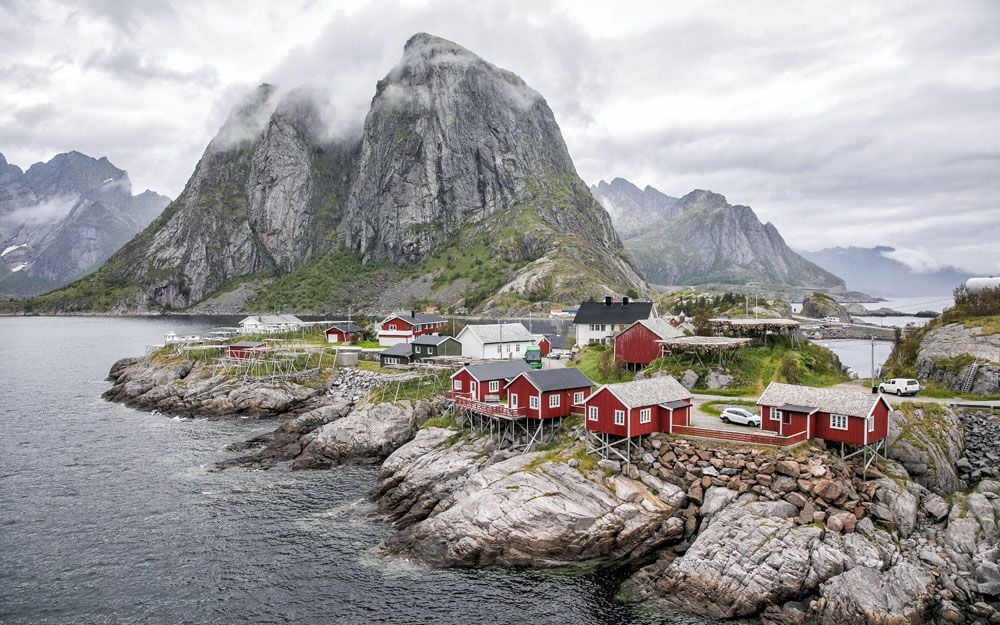
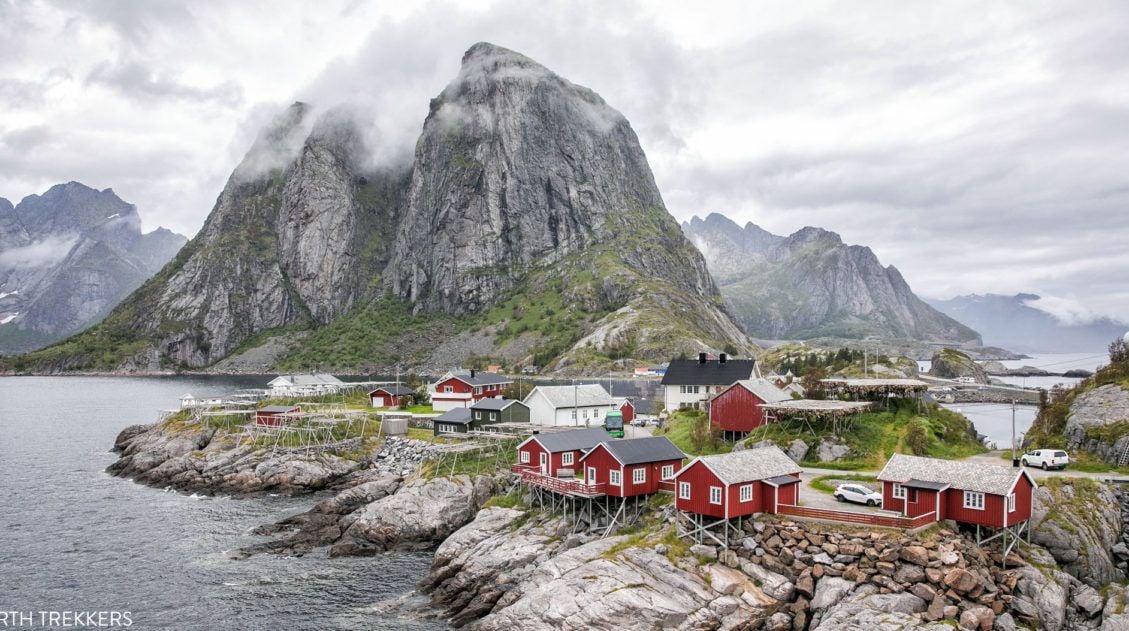
We stayed in Hamnøy at Reinefjorden Sjohus. This place is wonderful. We stayed in a 2 bedroom apartment, which is really a two-level cabin with a kitchen and a living area. The view from the living room was AMAZING! We could look across the water to Sakrisøy and Reine and see Reinebringen in the background. My only complaint is that they do not have black out curtains, so with the midnight sun, I did find it difficult to sleep. That’s easy to fix by bringing along a sleeping mask. But without a doubt, we would stay here again.

Where to Stay in the Lofoten Islands: Rorbuer, Hotels & More
Where to stay in the Lofoten Islands, organized by location and budget.Plan Your Trip to the Lofoten Islands
If the hike to Ryten has you wanting more of the Lofoten Islands, our Lofoten Islands itinerary covers how to structure your time across the archipelago, and our guide to the best things to do in the Lofoten Islands covers the highlights beyond hiking.
For hikers specifically, our roundup of the best hikes in Norway puts Ryten in context alongside the country’s other iconic trails. If you’re also planning to tackle Reinebringen, our Reinebringen hiking guide covers the current parking situation and what to expect on that trail.
If you’re building out a bigger trip through northern Norway, our 10-day Northern Norway itinerary takes you from Tromsø through Senja and the Vesterålen Islands down to the Lofoten Islands, and our Norway Travel Guide is the best place to start planning the full picture.
If you have questions about hiking to Ryten and Kvalvika Beach, or if you want to share your experience, let us know in the comment section below.
More Places to Visit in Norway
Best Hikes in Norway: 14 Epic Trails for Every Level
Pinterest Facebook Flipboard For hikers, few places in Europe can match Norway. The hikes in Norway are endlessly varied and genuinely world-class, from the fjords of southern Norway, the jagged peaks of the Lofoten Islands, and the remote coastline of Vesterålen and Senja. Alongside the Dolomites and the Swiss Alps, this is one of our […]
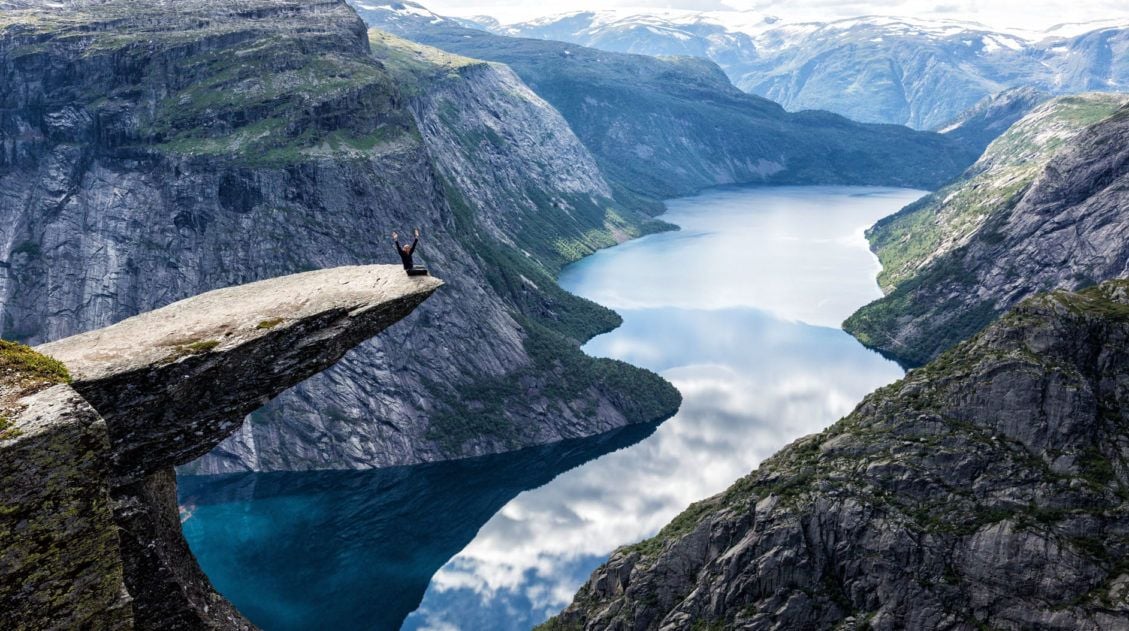
Exactly How to Hike Trolltunga: Cost, Parking, Stats & Hiking with Kids
Trolltunga is one of Norway’s most popular hikes for good reason. It is an incredibly scenic hike, ending at the Troll’s tongue, a thin sliver of rock perfect for creative photographs. This is definitely a hike to add to your bucket list. We did the Trolltunga hike on our first visit to Norway. On that trip, […]
How to Hike Reinebringen (+ Where to Park)
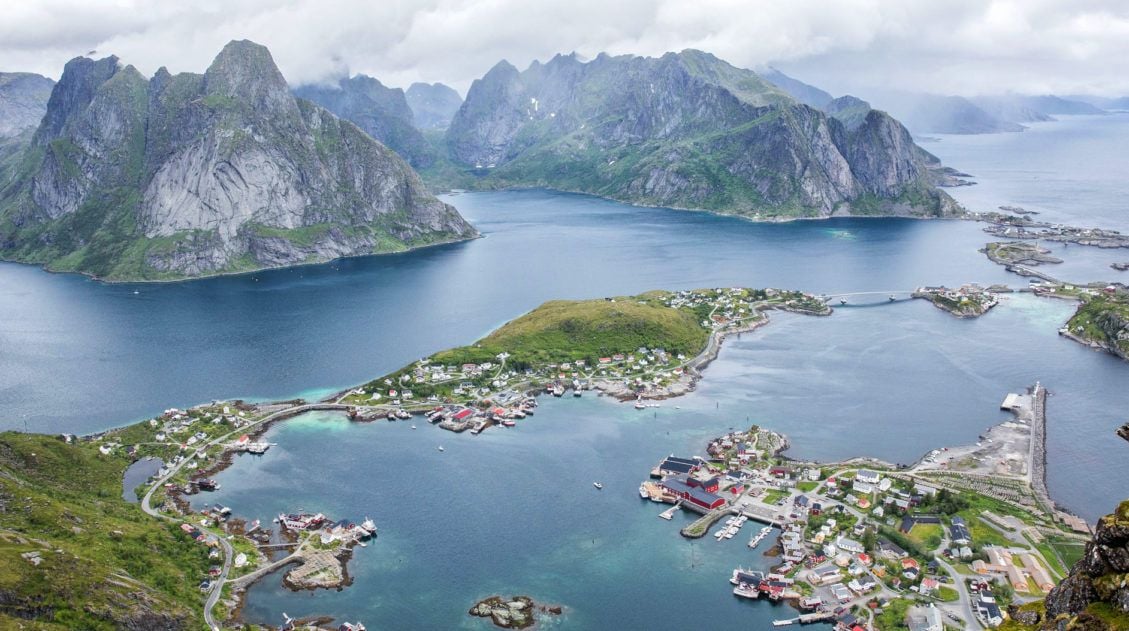
Reinebringen, with its dazzling view over the fishing villages of Reine, Sakrisøy, and Hamnøy, is the most popular hike in the Lofoten Islands, and one look at the panorama from the top tells you exactly why. We hiked Reinebringen in 2018 with our kids, who were 13 and 15 at the time, before most of […]
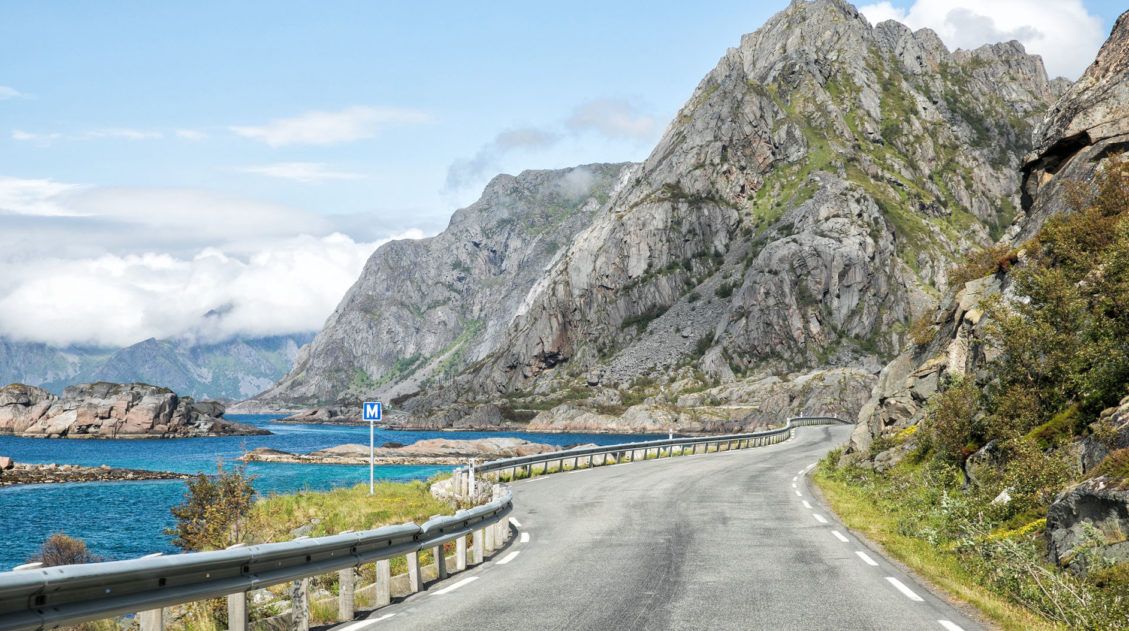
10 Day Norway Itinerary: Summer Road Trip through the Fjord Region
For hikers and outdoor enthusiasts, this Norway itinerary is perfect. In 10 days, you will be able to do four amazing hikes. Be daring and stand on Kjeragbolten, hike out to Trolltunga and pose for the camera, enjoy epic views out to the Atlantic Ocean from Romsdalseggen Ridge, and hike Norway’s most popular hike, Pulpit […]
Lofoten Islands Itinerary: 4 to 5 Days in Norway’s Most Spectacular Islands
There are places that stop you in your tracks the moment you arrive. The Lofoten Islands are one of them. We pulled over constantly, not because we planned to, but because we couldn’t drive past another mountain plunging straight into the fjord, another stretch of white sand beach backed by jagged cliffs, or another cluster […]
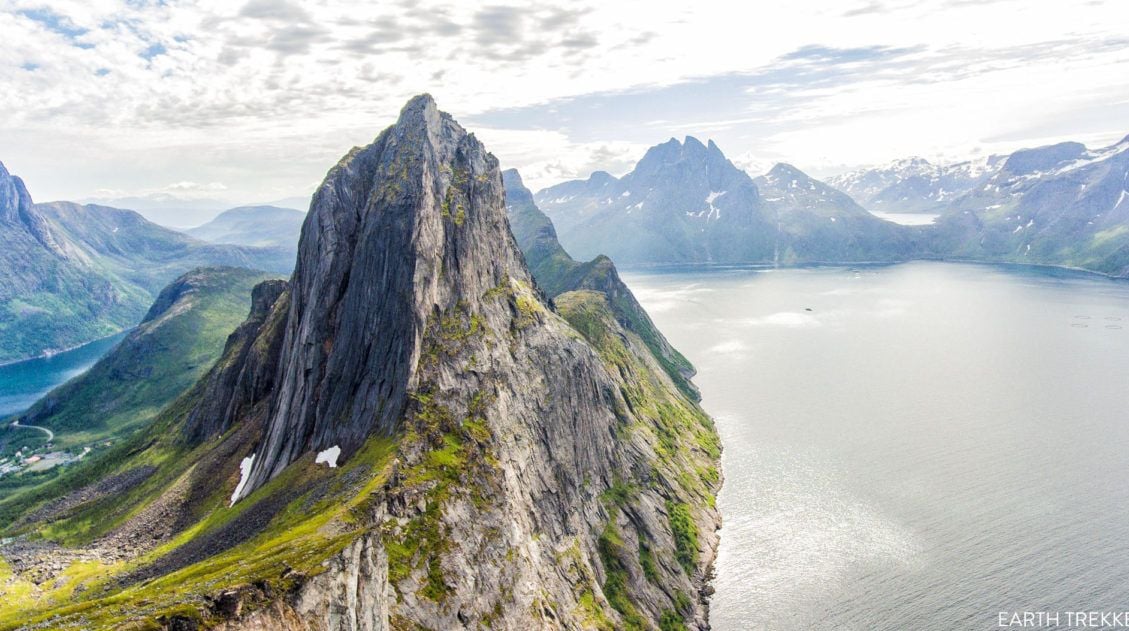
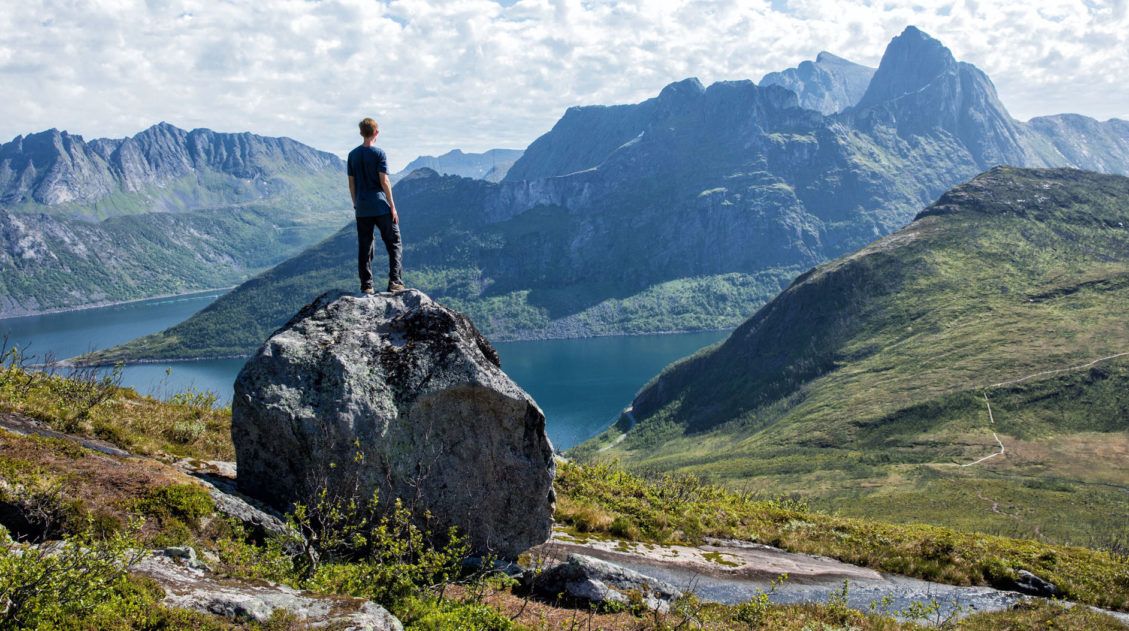
How to Hike Segla, An Iconic Peak in Senja, Norway
The hike up to the summit of Segla is one of Senja’s most popular hikes. And this was our main reason for visiting Senja. Many visitors skip past Senja, heading directly to the Lofoten Islands. But those people are missing out seeing a gorgeous part of Norway and some hidden gems. That’s fine…that means less […]
10-Day Northern Norway Itinerary: Tromsø to the Lofoten Islands
We’ve done a lot of road trips in Europe, through the Italian Dolomites, across the Scottish Highlands, and down into the fjord region of southern Norway. This Northern Norway itinerary is one of our all-time favorites. We drove this route in early July, starting in Tromsø and working our way south through Senja and the […]
Norway Bucket List: 20 Epic Things to Do in Norway
Norway is the land of fjords, quaint fishing villages, Vikings, trolls, the northern lights, the midnight sun, scenic drives, and some of the best hikes in the world. If you are planning a visit to this amazing country, here are 20 of the best things to do in Norway. So far, we have visited Norway […]
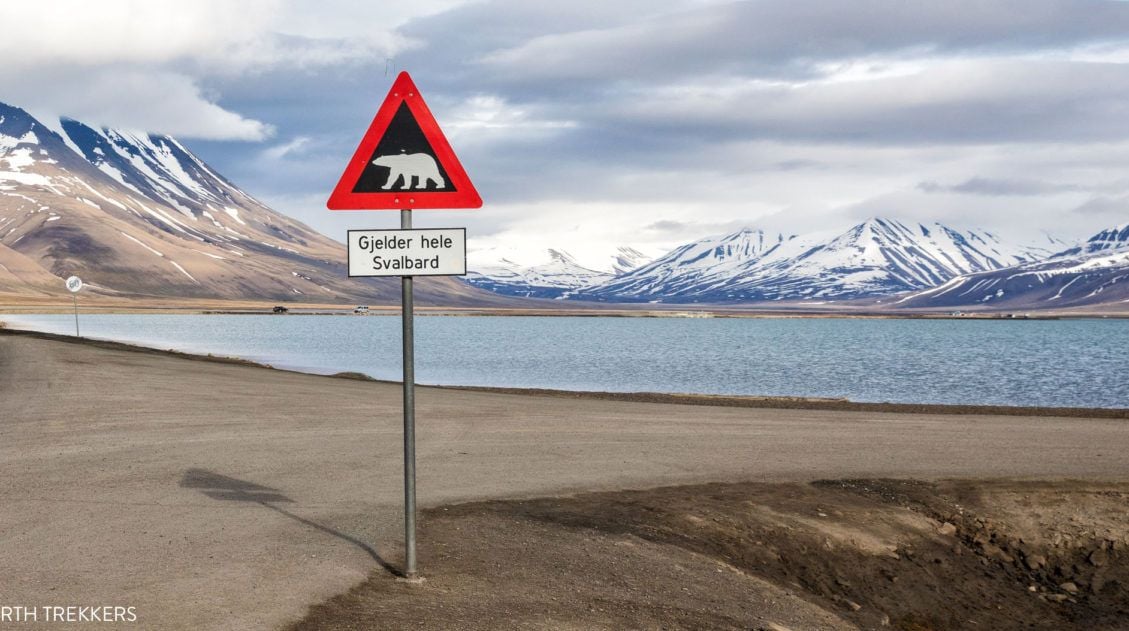
Svalbard Travel Guide & Itinerary for First Time Visitors
Svalbard. An arctic playground where there are more polar bears than people. This is a land of glaciers, the northern lights, the midnight sun, and frozen tundra. Svalbard may seem barren, but it is filled with arctic wildlife like reindeer, walrus, and polar bears. If you like the idea of exploring the great outdoors, your […]
10 Days in Norway: How to Combine the Fjords and the Lofoten Islands
After two trips to Norway, one through the fjord region, one through the far north, we started getting the same question over and over in our comments: Can we combine both into one trip? How do we do the fjords AND the Lofoten Islands in 10 days? That’s exactly what this post is for. We’ve […]
Best Things to Do in the Lofoten Islands: 16 Epic Experiences
We arrived in the Lofoten Islands after driving down from the Vesterålen Islands, and on our very first day, we climbed Svolvaergeita and hiked Svolvaer Fløya. It was a long, exhausting, unforgettable day, and somehow, it set exactly the right tone for everything that followed. By the time we left four days later, we were […]
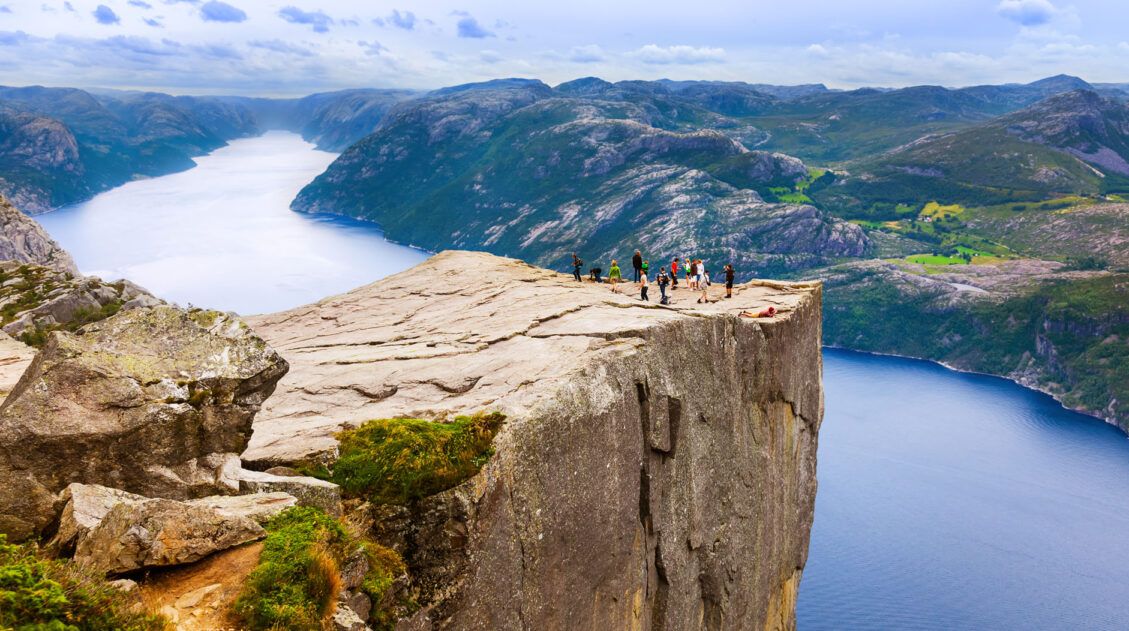
Pulpit Rock Hike: The Ultimate Trail Guide
The hike to Pulpit Rock (Preikestolen) is one of the most popular hikes in Norway. With great views, a relatively easy hiking trail, and convenient accessibility from the town of Stavanger, this hike has a big appeal for many visitors to Norway. With that being said, you should expect big crowds in the summer months. […]
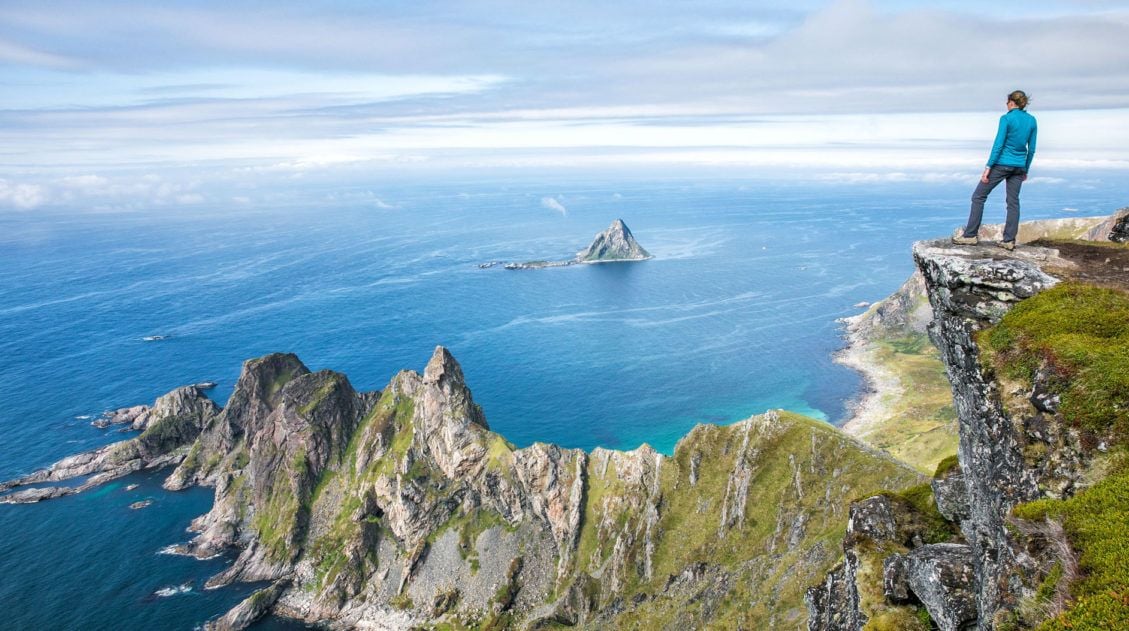
Hiking to Måtind on the Stave-Bleik Coastal Trail, Vesteralen, Norway
Norway has a way of exceeding every expectation, and the Stave-Bleik Coastal Trail on Vesteralen’s Andøya island is a perfect example. We hiked to Måtind in early July as part of a road trip from Tromsø to the Lofoten Islands, squeezing it in after a morning ferry crossing from Senja, and it turned out to […]

Comments 26