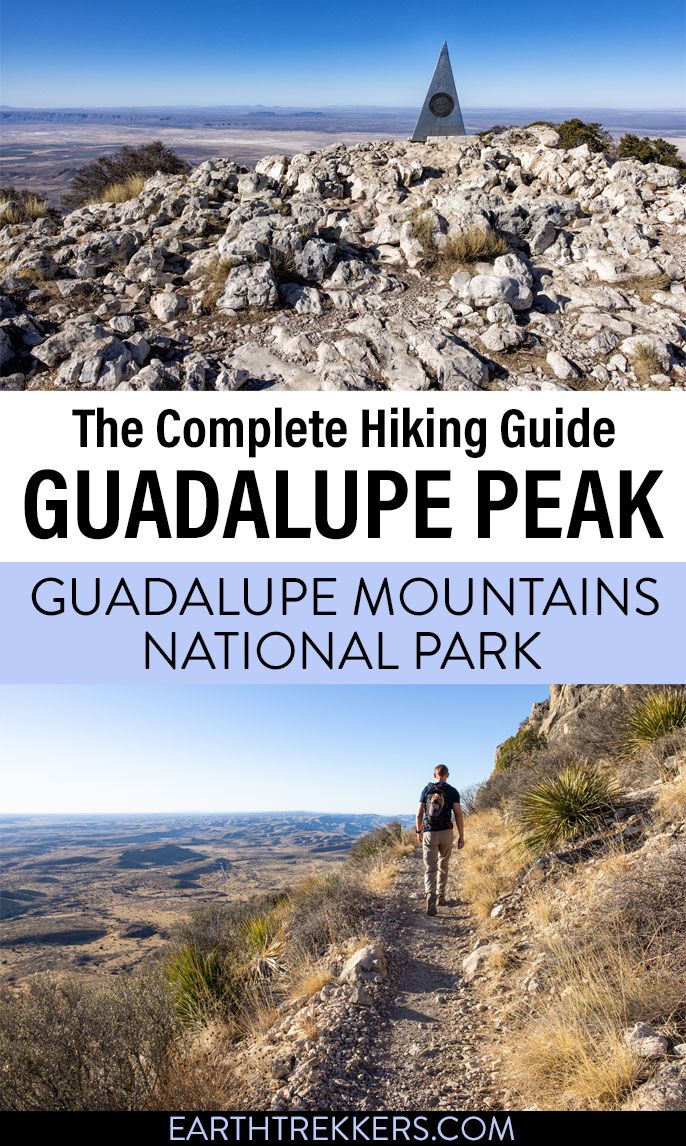
At 8,751 feet, Guadalupe Peak is the highest point in Texas. Hiking to this peak is one of the best things to do in Guadalupe Mountains National Park. This is a tough hike but the views from the top are unbeatable. In this guide, we cover everything you need to know to hike to Guadalupe Peak and climb to the “Top of Texas.”
Guadalupe Peak Hiking Stats
Distance: 8.4 miles (13.5 km) round trip
Total Ascent: 3,000 feet (914 m)
Difficulty: Strenuous
Time: 5 to 8 hours
When to Go: The trail is open all year. Spring and fall are the best times to do this hike, when temperatures are mild. During the summer months, expect hot weather, and plan on getting a very early start to beat the midday heat. In the winter, it can get below freezing.
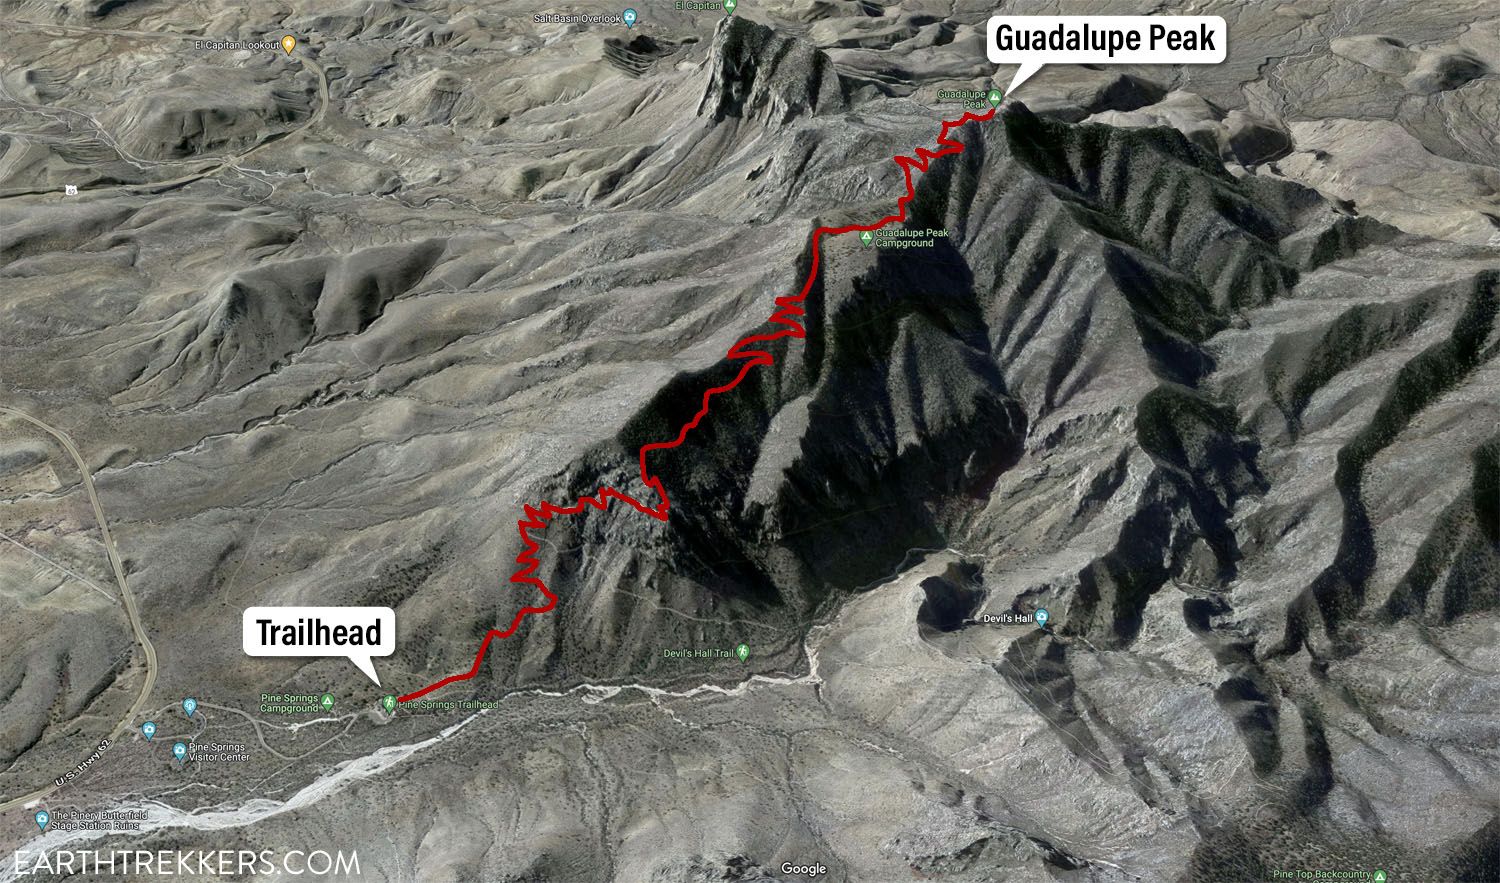
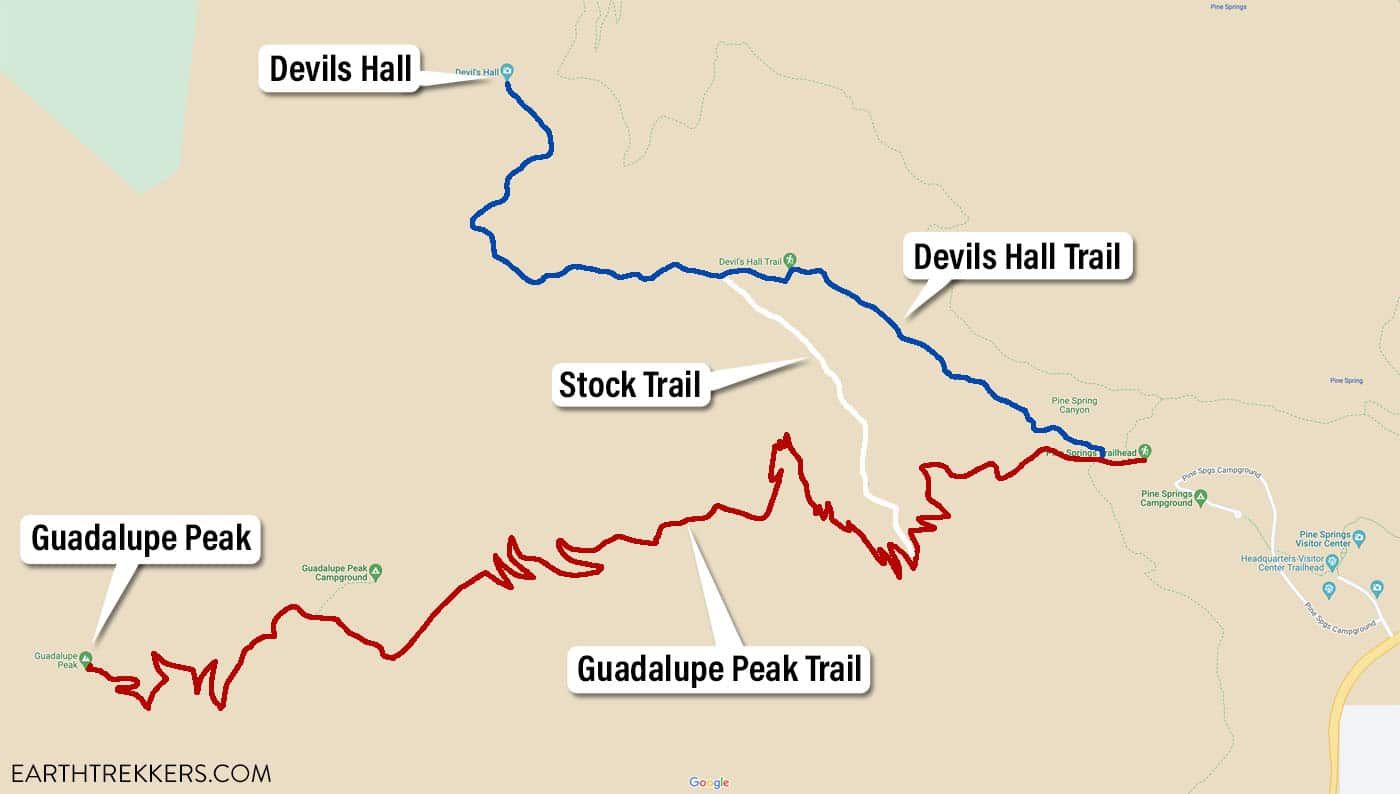
Guadalupe Peak Trail Map
Please practice the seven principles of Leave No Trace: plan ahead, stay on the trail, pack out what you bring to the hiking trail, leave areas as you found them, minimize campfire impacts, be considerate of other hikers, and do not approach or feed wildlife.
How to Hike to Guadalupe Peak
Guadalupe Peak is one of the most popular hikes in Guadalupe Mountains National Park. Many people visit this park with the main goal of getting to the summit of this mountain.
With that being said, expect big crowds on the trails, especially during the spring and fall, when the weather is ideal for visiting this national park. Spring break, which occurs in mid-March, is one of the busiest times to be here.
We hiked to Guadalupe Peak on March 15, which was during spring break. Since we got an early start, crowds were low on the way up, but we passed lots of hikers on our way back down. Out of all of the trails we hiked in Guadalupe Mountains National Park, this trail was one of the busiest (hiking the McKittrick Canyon Trail to the Notch was also very busy).
It will take most people between 6 to 8 hours to do this hike. It can be done faster (we reached the summit in 2 hours) or longer. For a hike this long, pack a picnic lunch. Guadalupe Peak is a great spot for a picnic and to give your legs a rest before starting the big descent back down the mountain.
Getting to the Trailhead
The trailhead for Guadalupe Peak is called the Pine Springs Trailhead.
The best place to park is at the parking lot right next to the Pine Springs Trailhead. The trick is getting a parking space here because the parking lot fills up early. We were able to get one of the last spots at 7:30 am.
Once this parking lot fills up, the next closest place to park is next to the Pine Springs Visitor Center. From here, it is a flat, 0.4 mile walk one-way to get to the trailhead.
If the visitor center parking lot fills up, the third overflow parking lot is located much farther away, on Highway 62. From here, it is a 0.8-mile walk to the trailhead, which adds almost 2 miles onto the hiking stats above. Rolling out of bed early has its advantages!
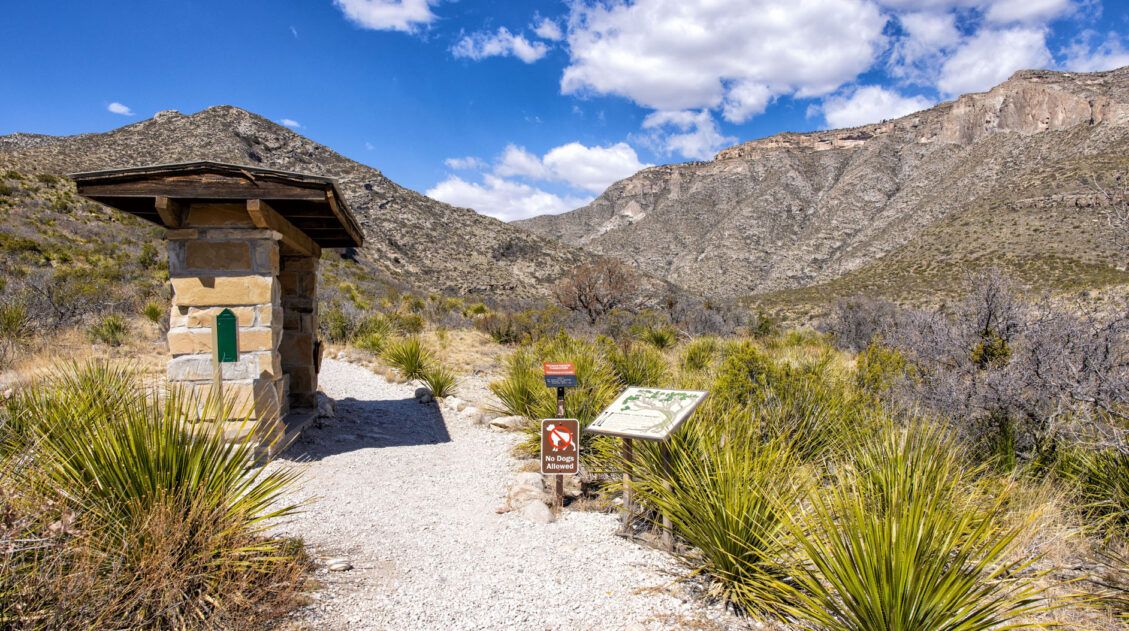
There are restrooms next to the Pine Springs Trailhead.

Parking Map
Hiking to Guadalupe Peak
The trailhead is located on the northwest corner of the parking lot. Less than a tenth of a mile into the hike, you will reach a trail junction. Take the middle trail, following the sign for the Guadalupe Peak Trail.
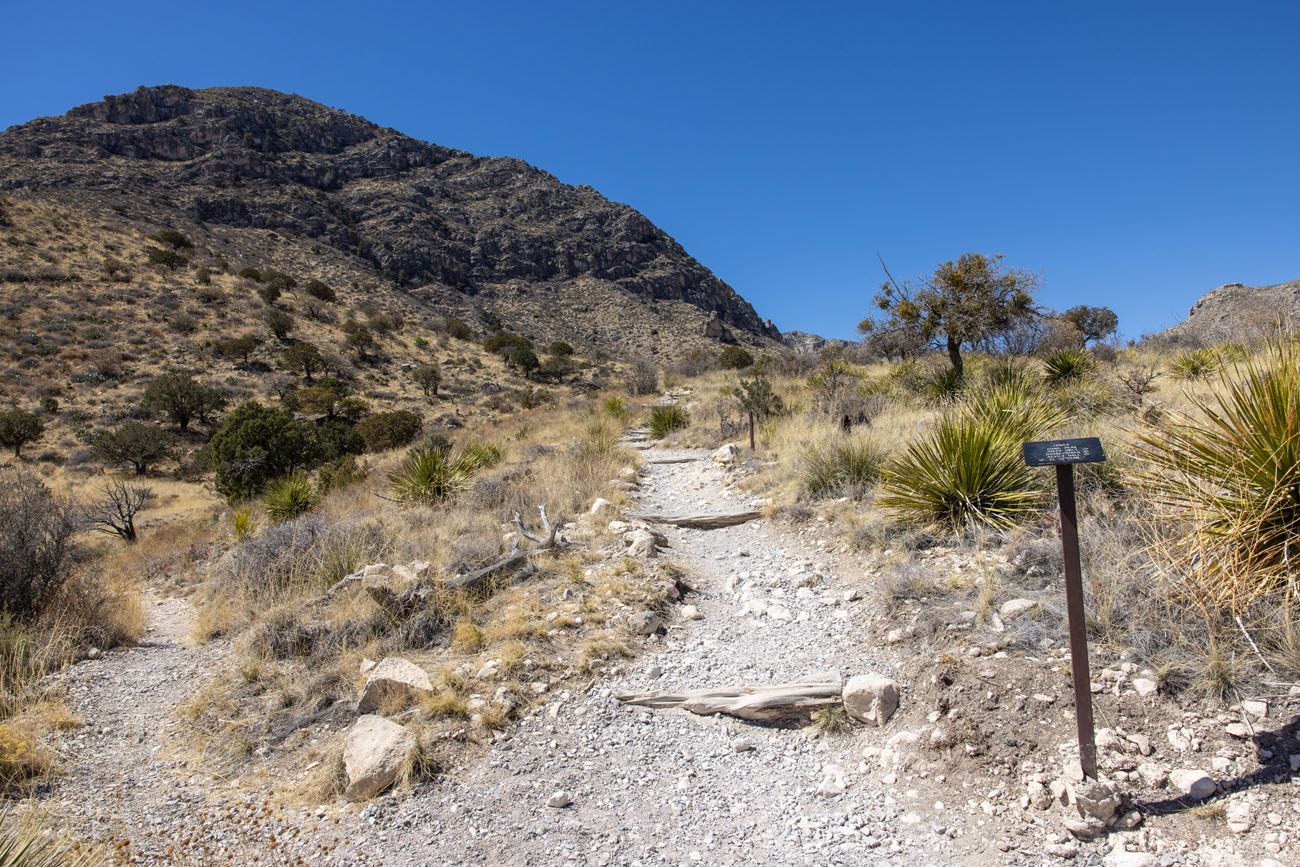
Trail junction. You will hike up and around the mountain in this photo but this is not Guadalupe Peak (you can’t see it yet).
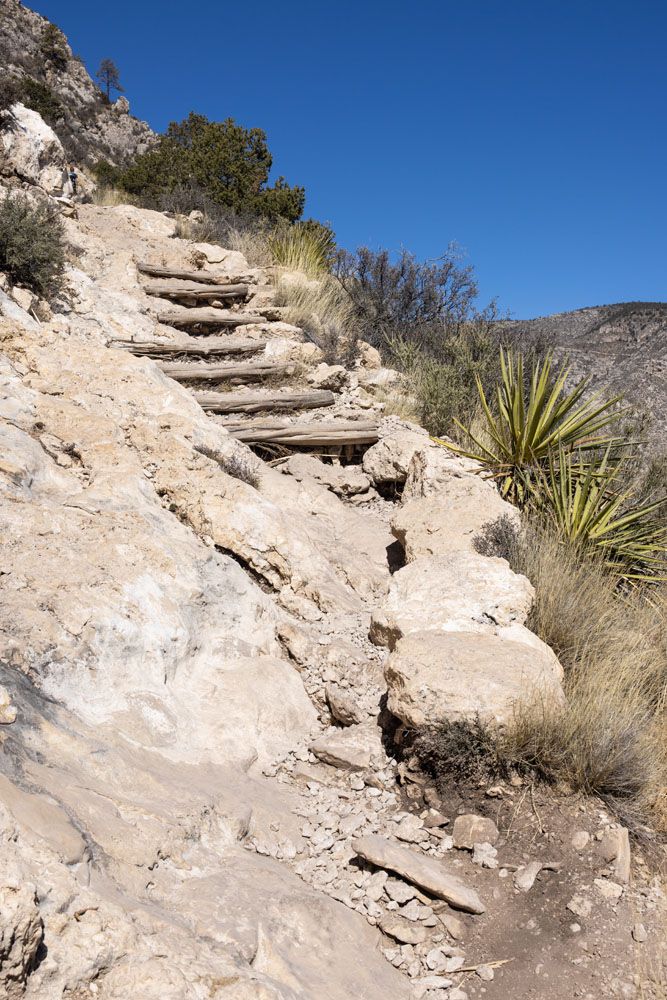
Right from the start, the trail makes its ascent up into the mountains. The first mile is the toughest. Almost right away you enter a series of switchbacks. The trail here is steep, rocky, with some occasional huge stone steps thrown in along the way.
At 0.8 miles into the hike, you will reach another trail junction. This is marked with a sign that reads “no stock beyond this point.” Continue to follow the steeper trail uphill, to stay on the Guadalupe Peak Trail. If you take the narrower trail that leads back downhill, you will be heading to Devils Hall.
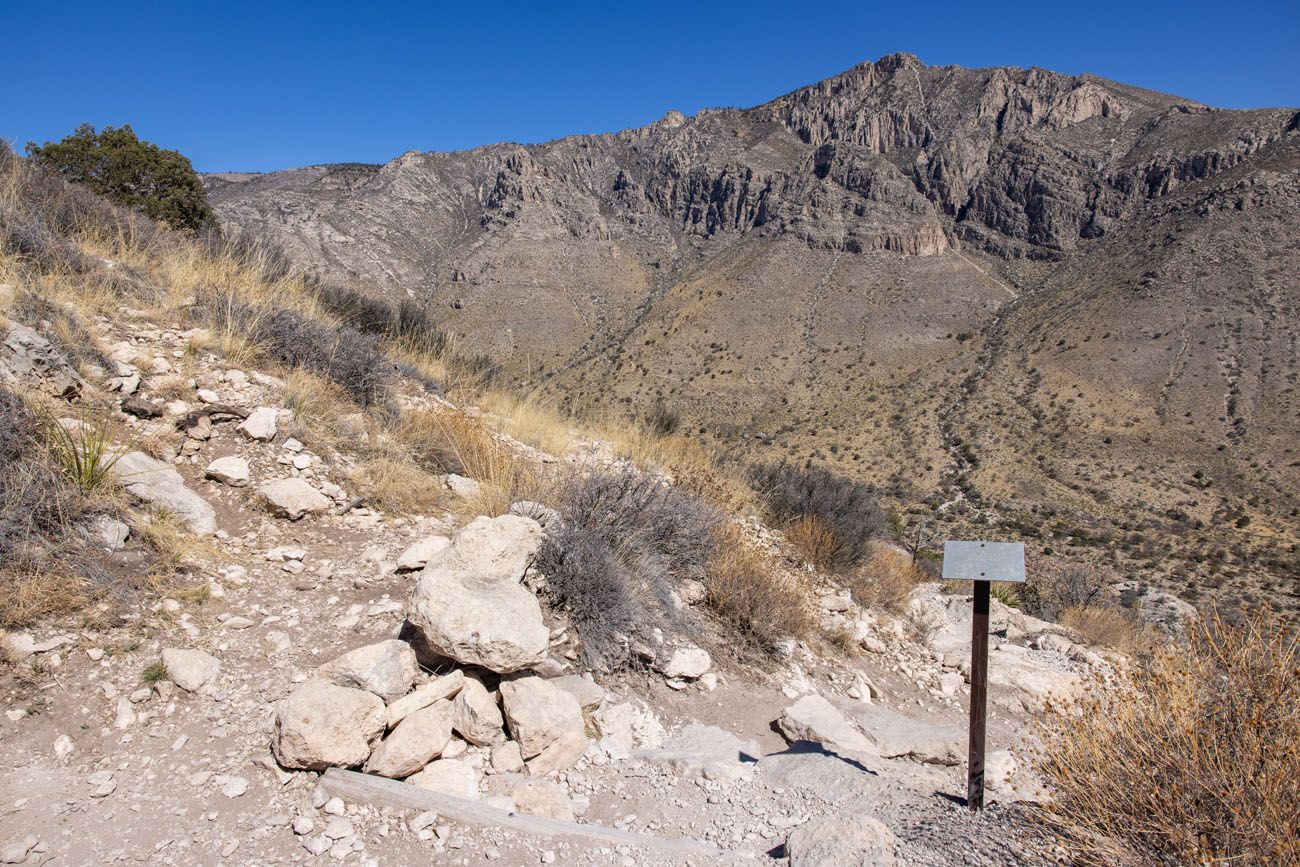
Stock Trail Junction
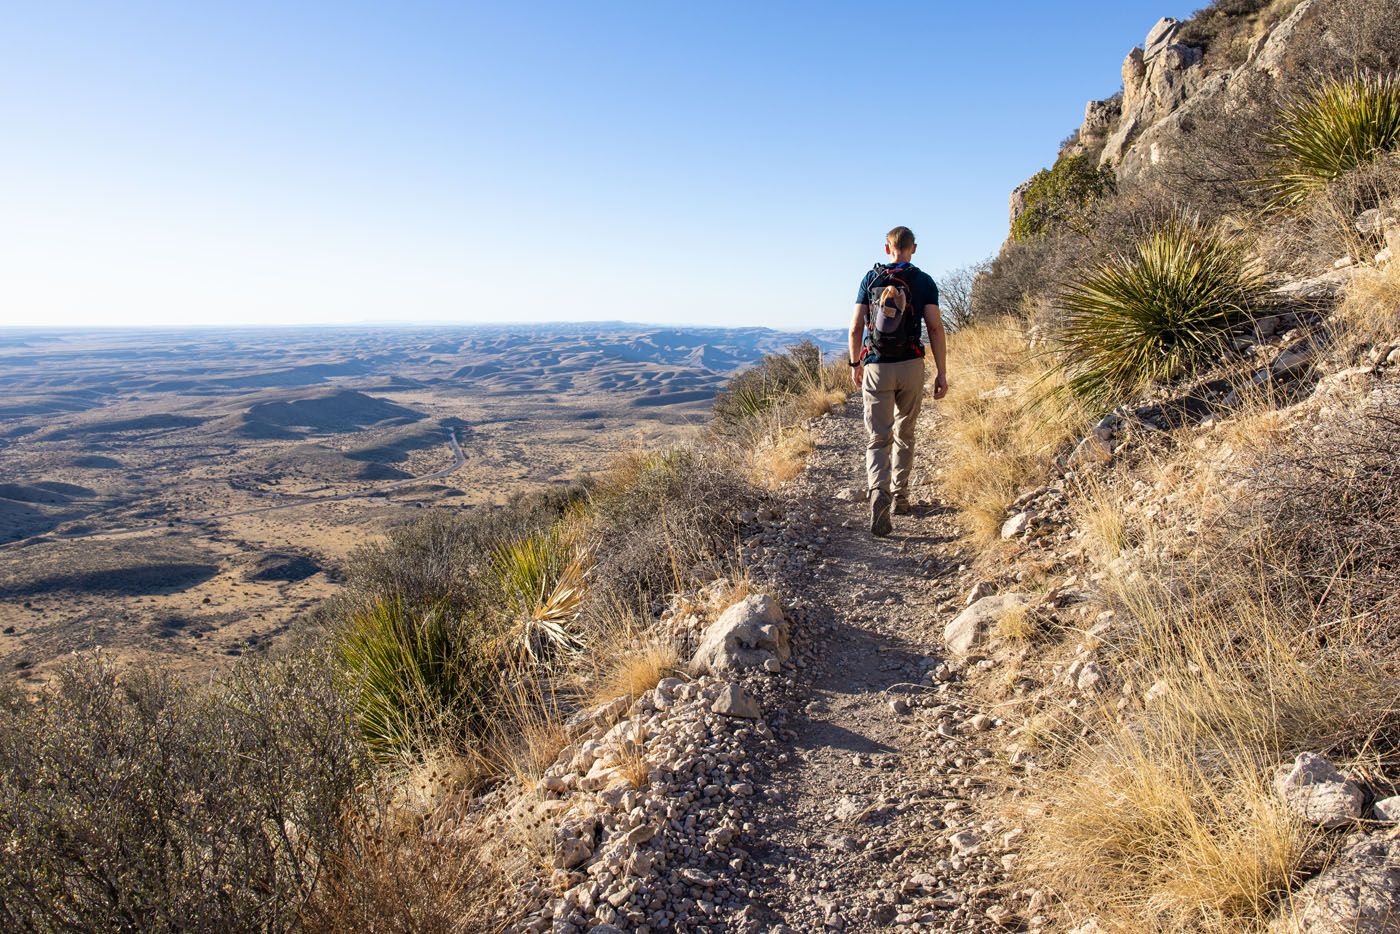
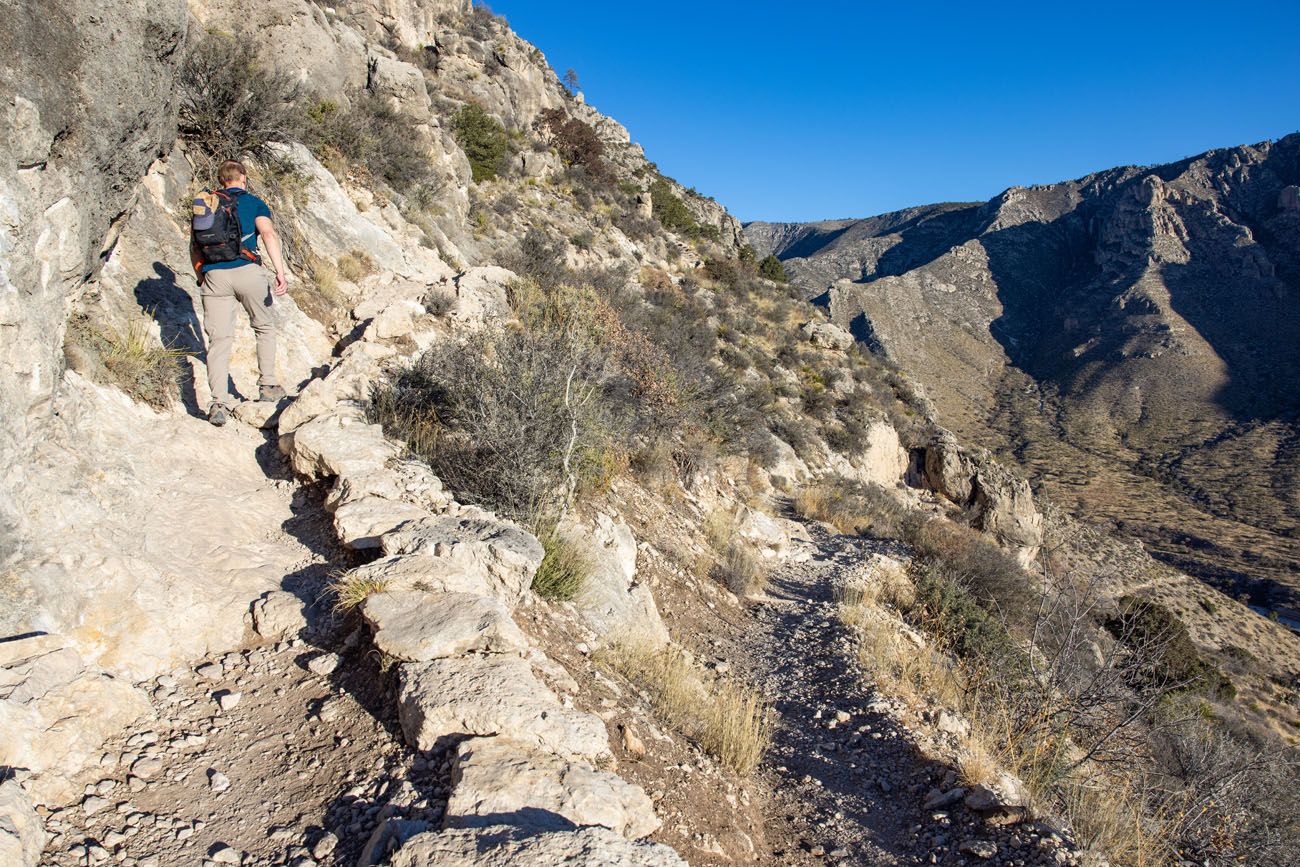
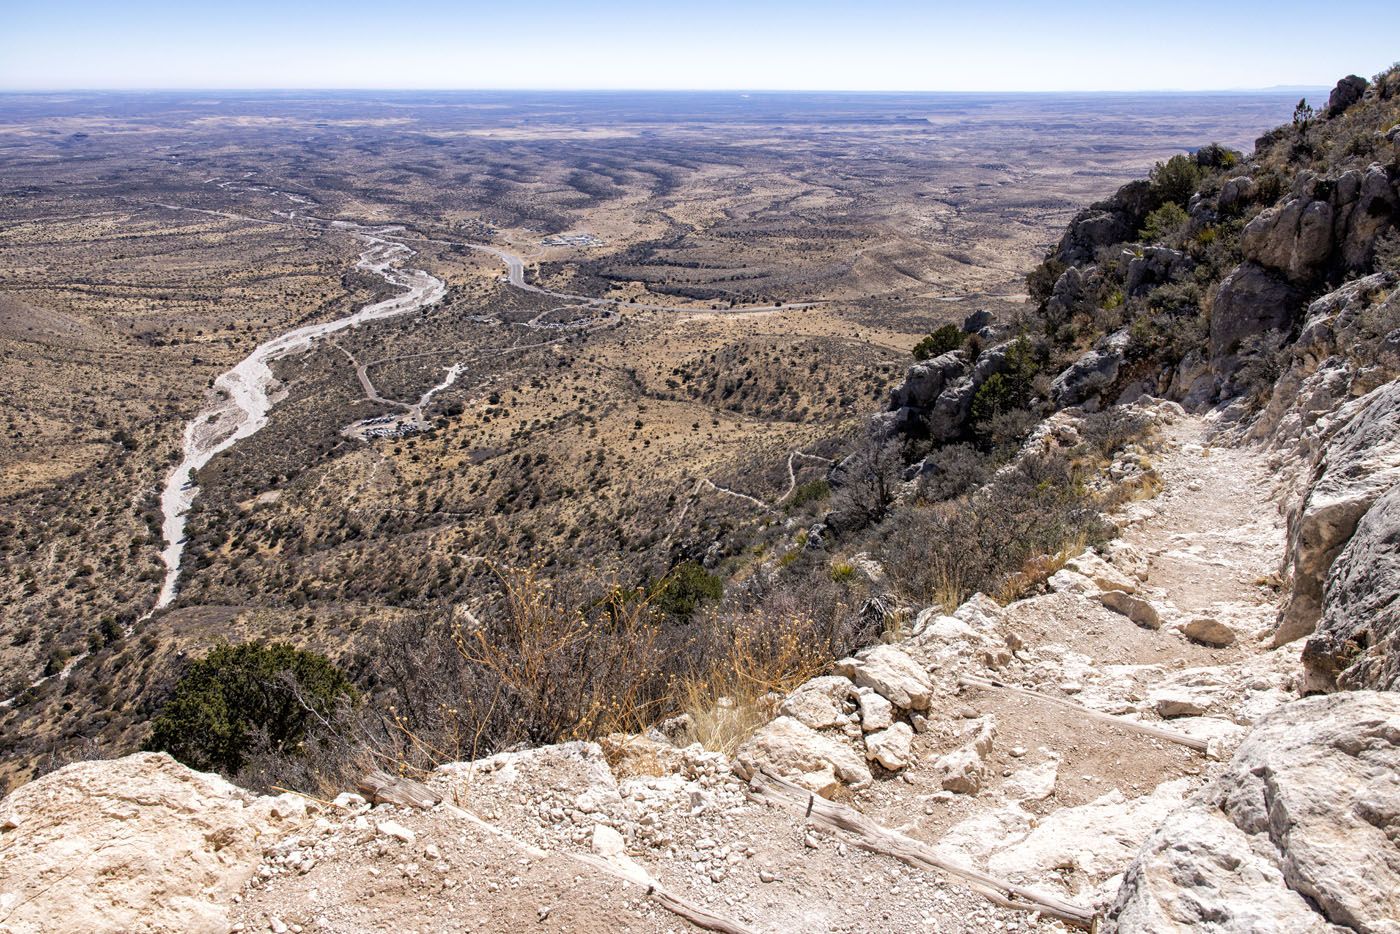
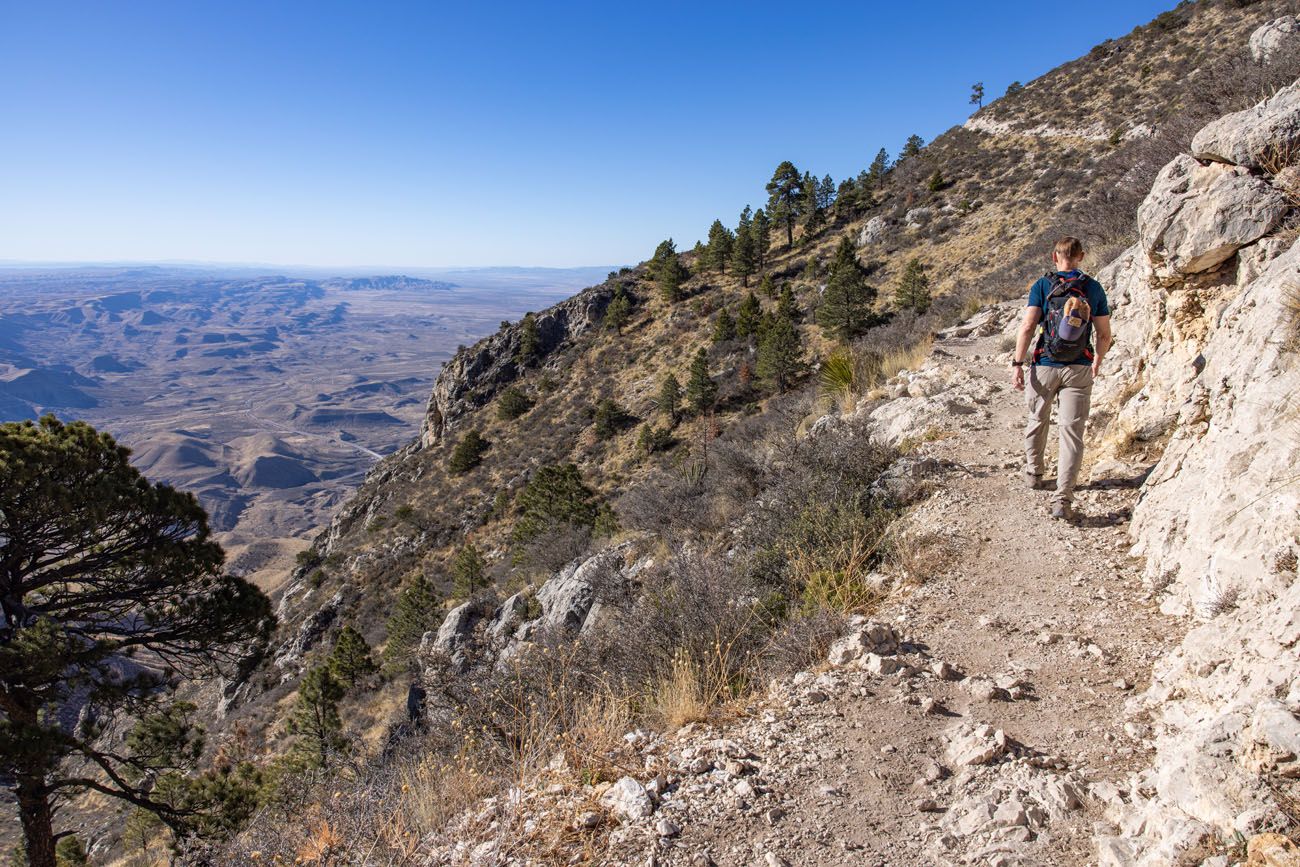
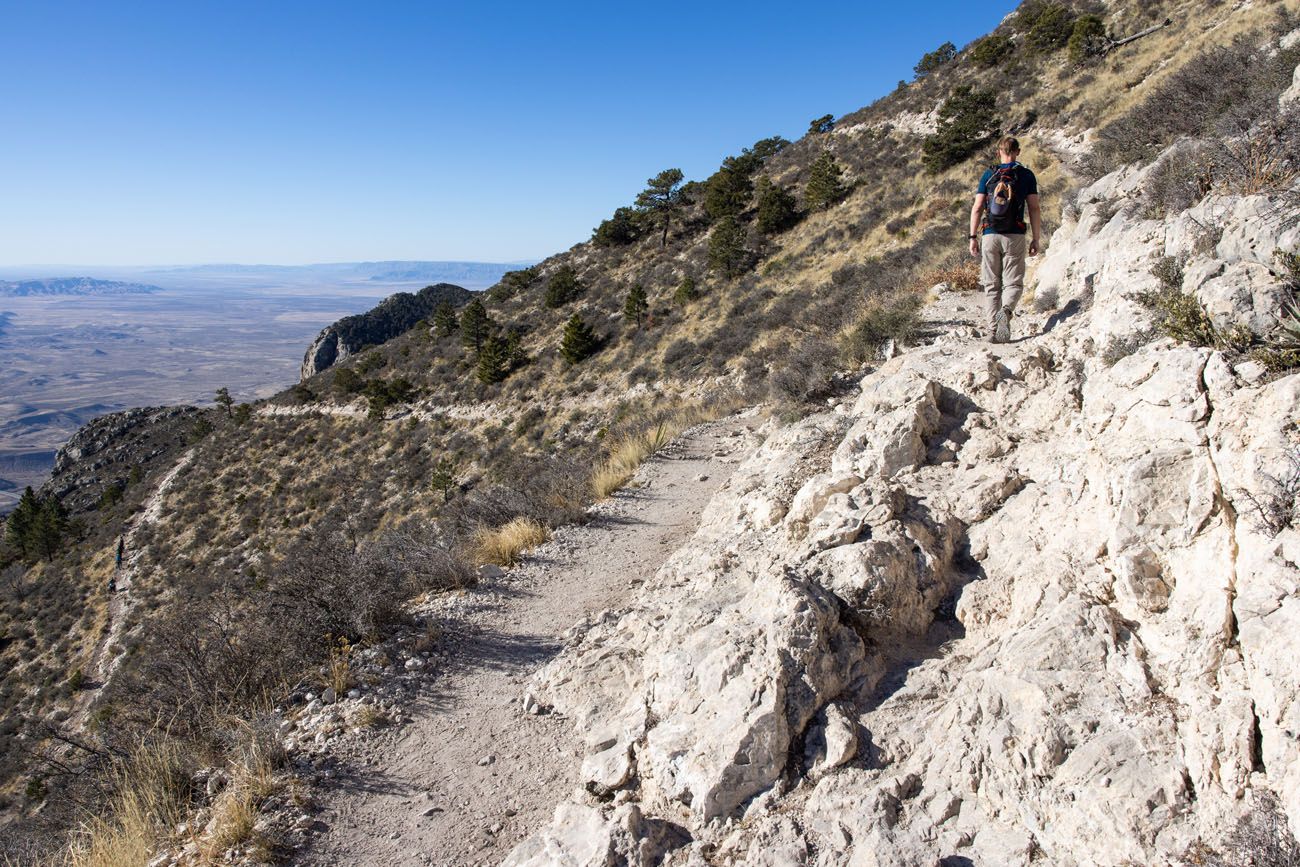
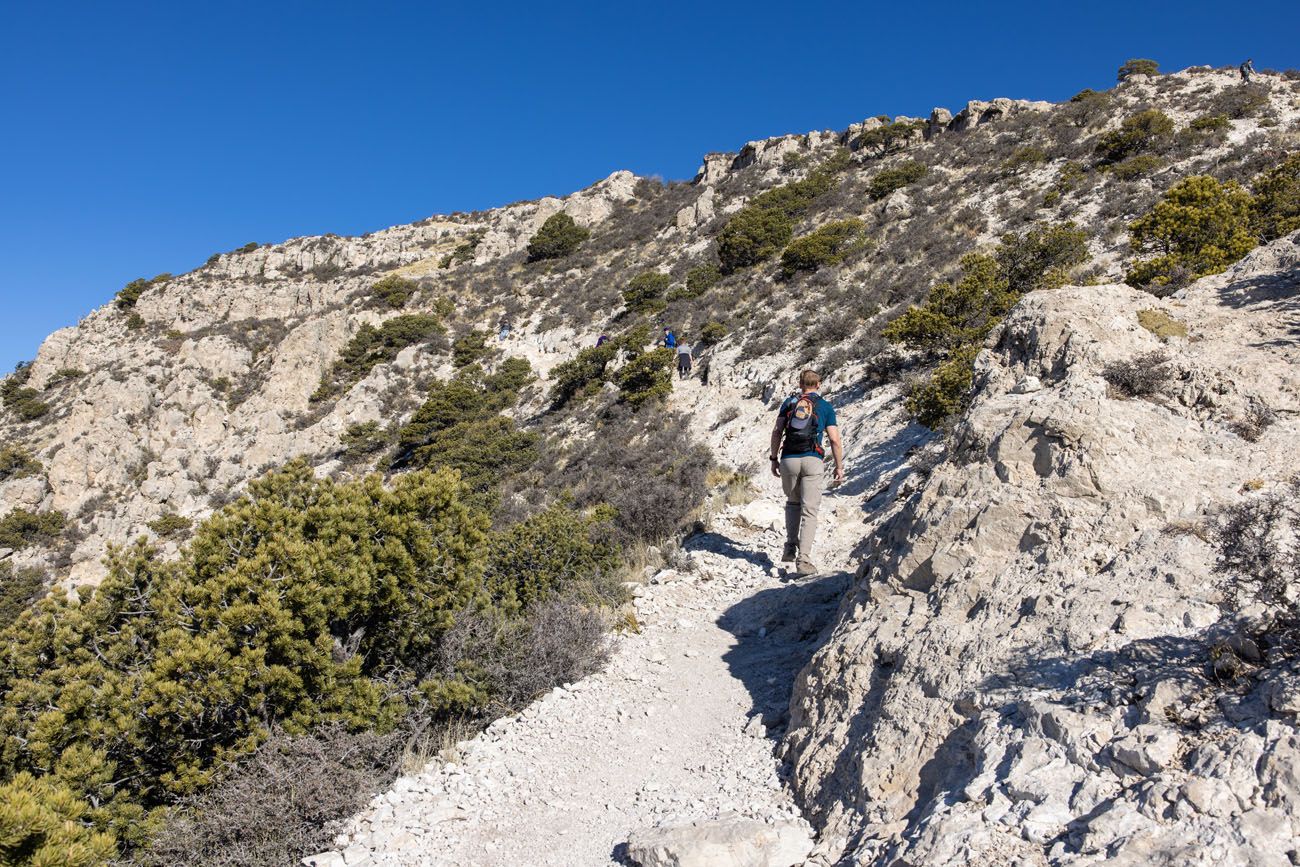
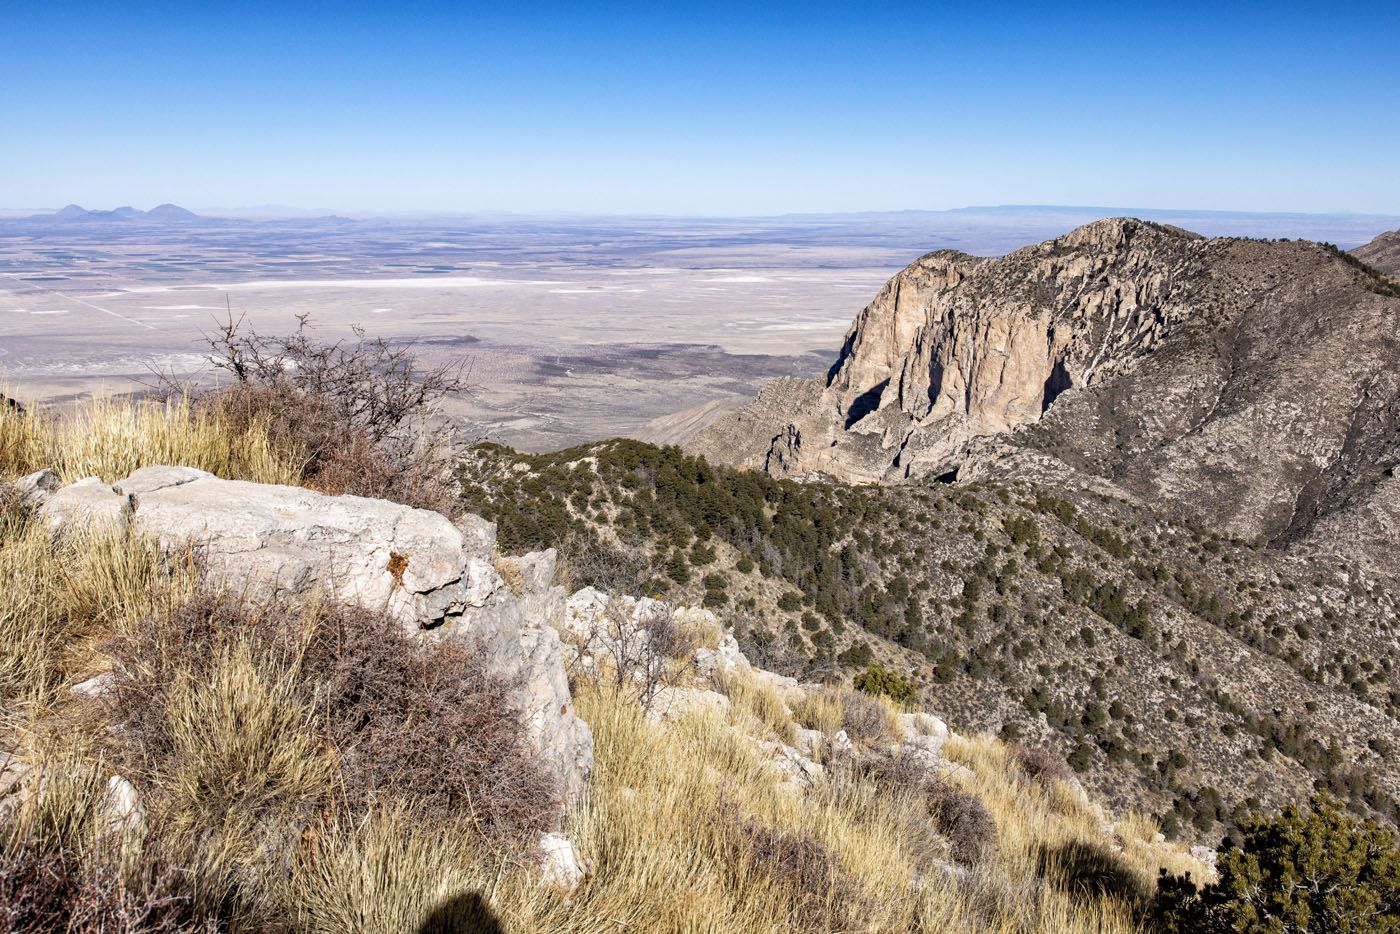
Mile two is still steep, but not quite as bad as the first mile. There will still be sets of stone steps, but there are also a few places where the trail levels out, at least for a little bit, to give you a brief break. But this part of the hike is one of the best. The views to the valley below, the parking lot, and Hunter Mountain are amazing.
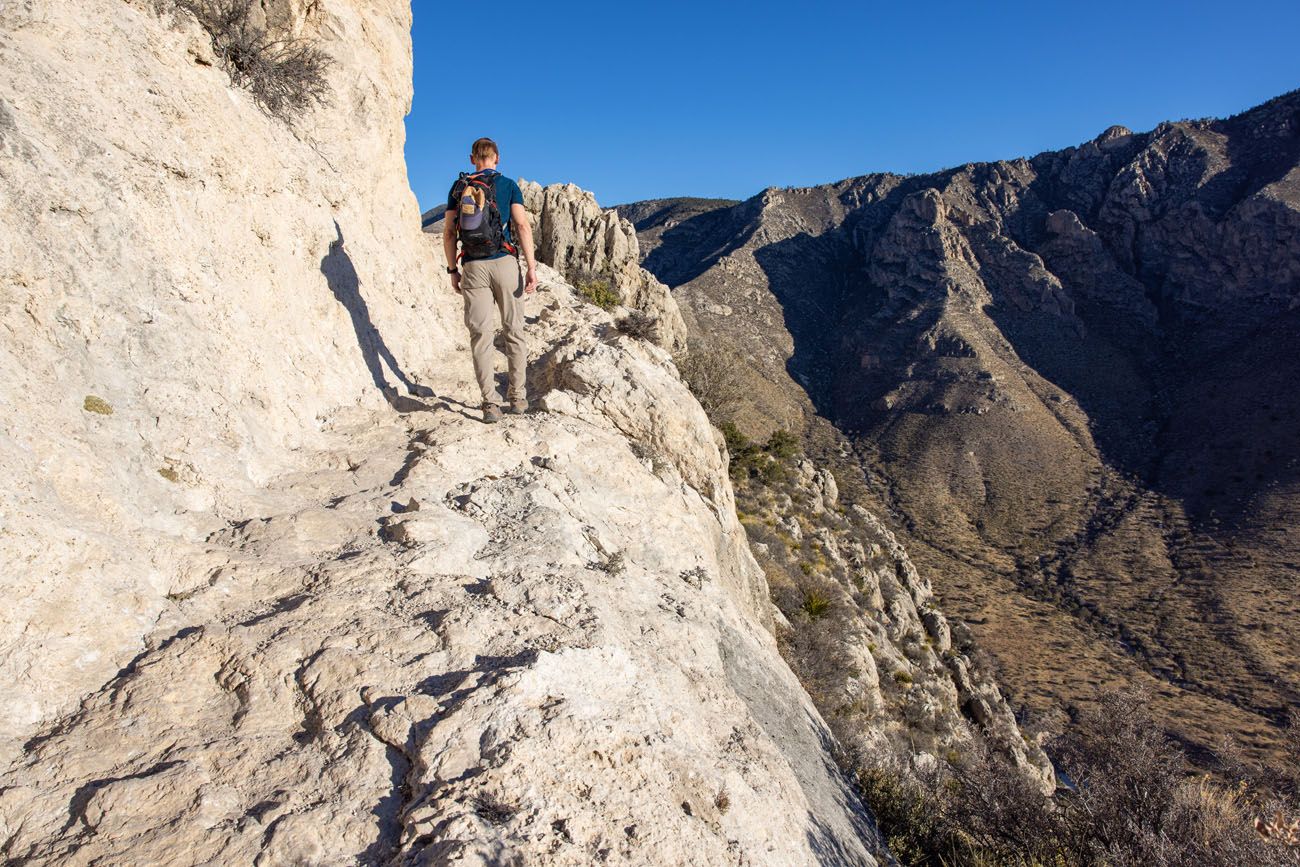
There are spots where the trail gets very narrow with a drop off on one side, as seen here.
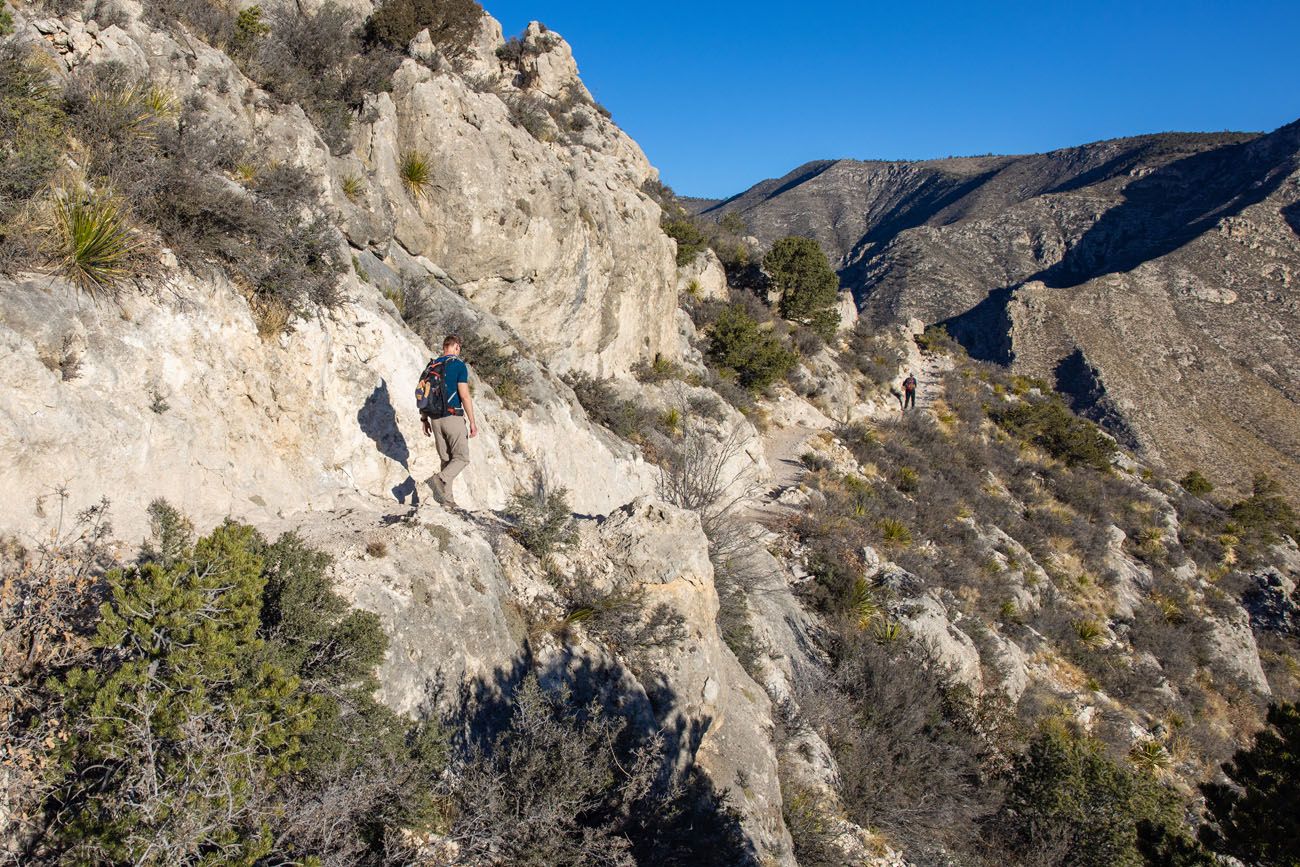
During the second mile, the trail winds around the backside of the mountain you’ve been hiking up, and parts of this trail will be shady.
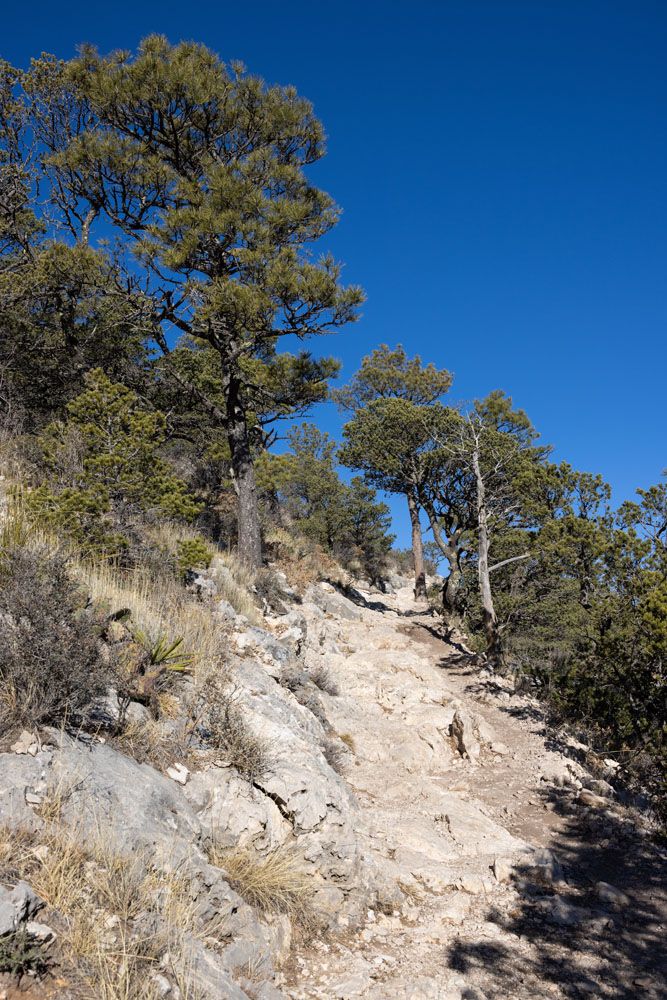
Mile three is the easiest mile on your way up to Guadalupe Peak. You are still hiking uphill, and it’s still challenging, but it’s not as steep as the first two miles. Once you reach the end of the third mile, Guadalupe Peak comes into view.
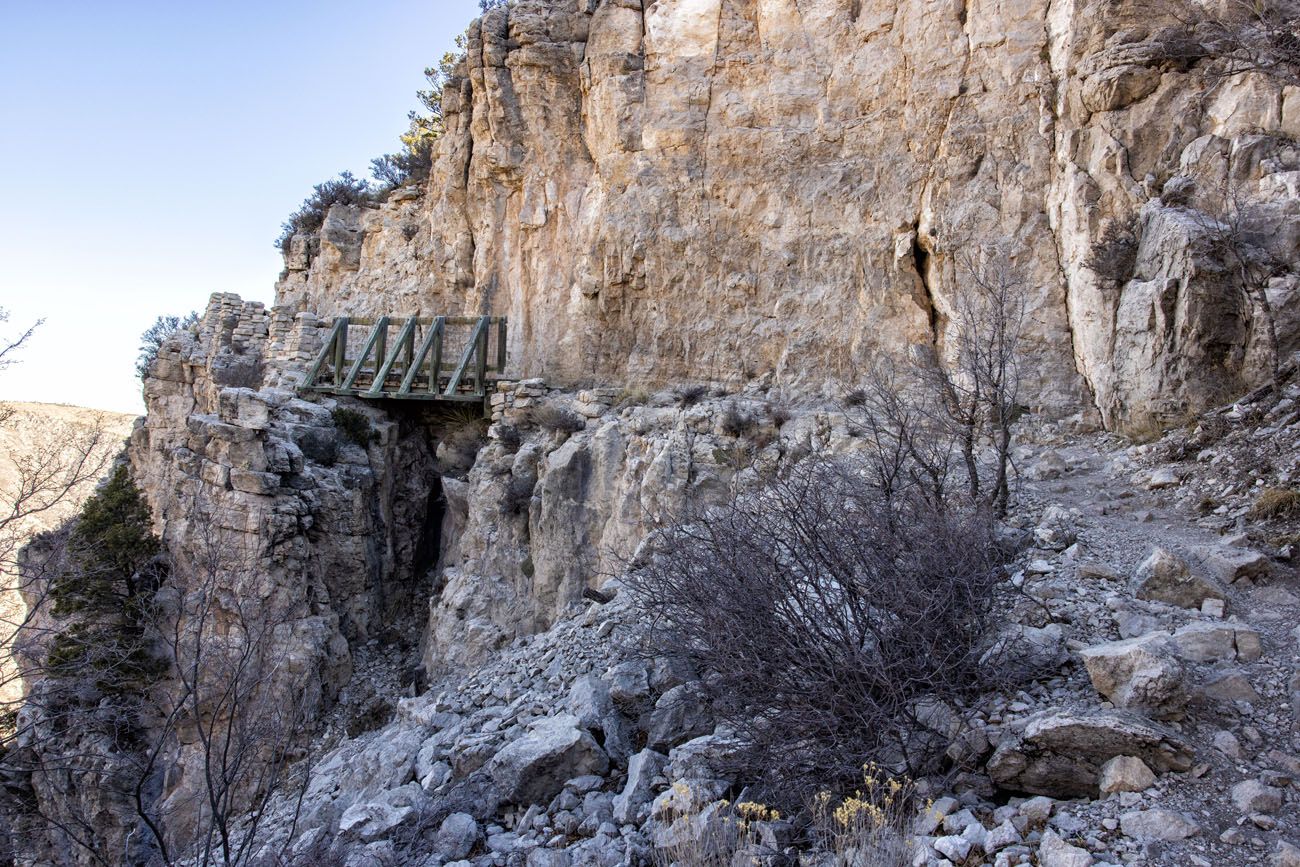
Bridge on the trail
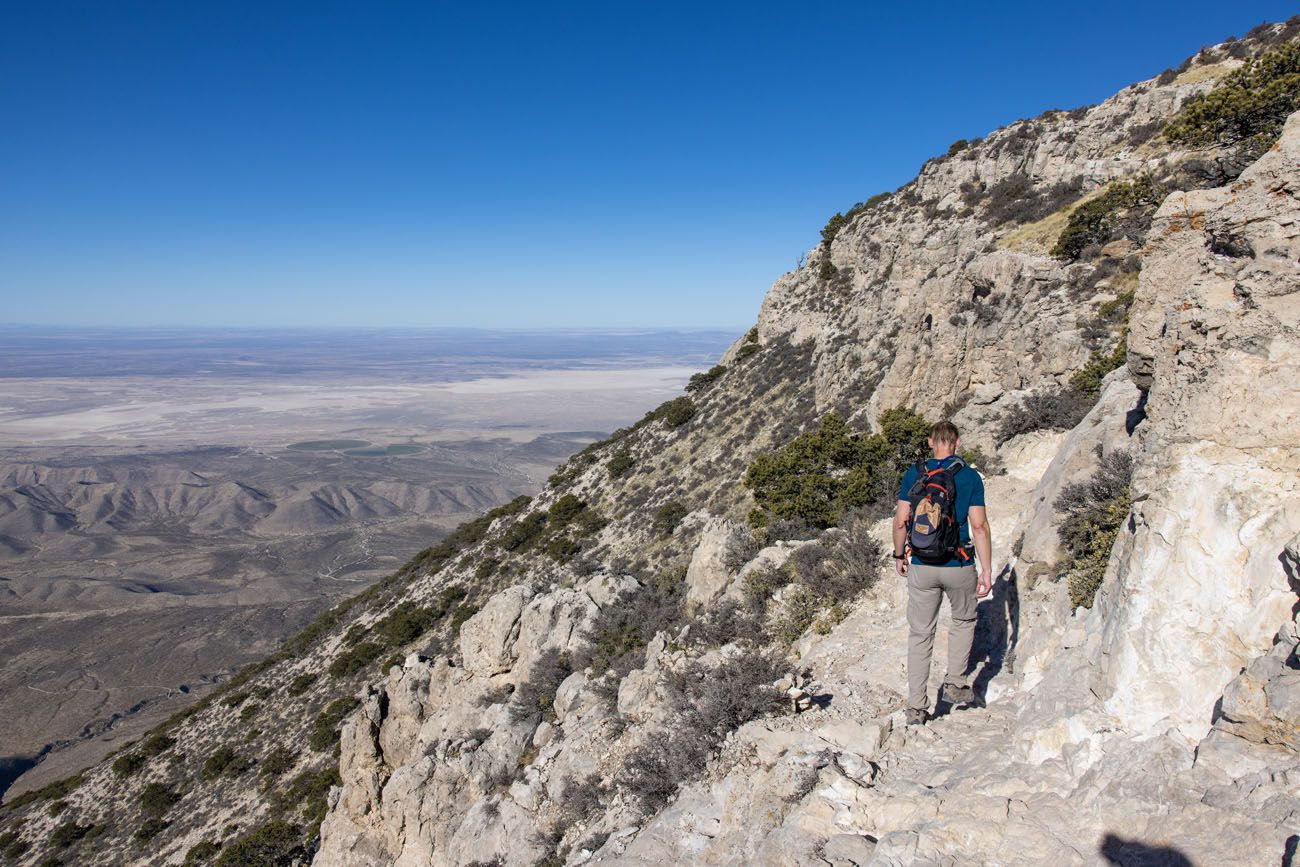
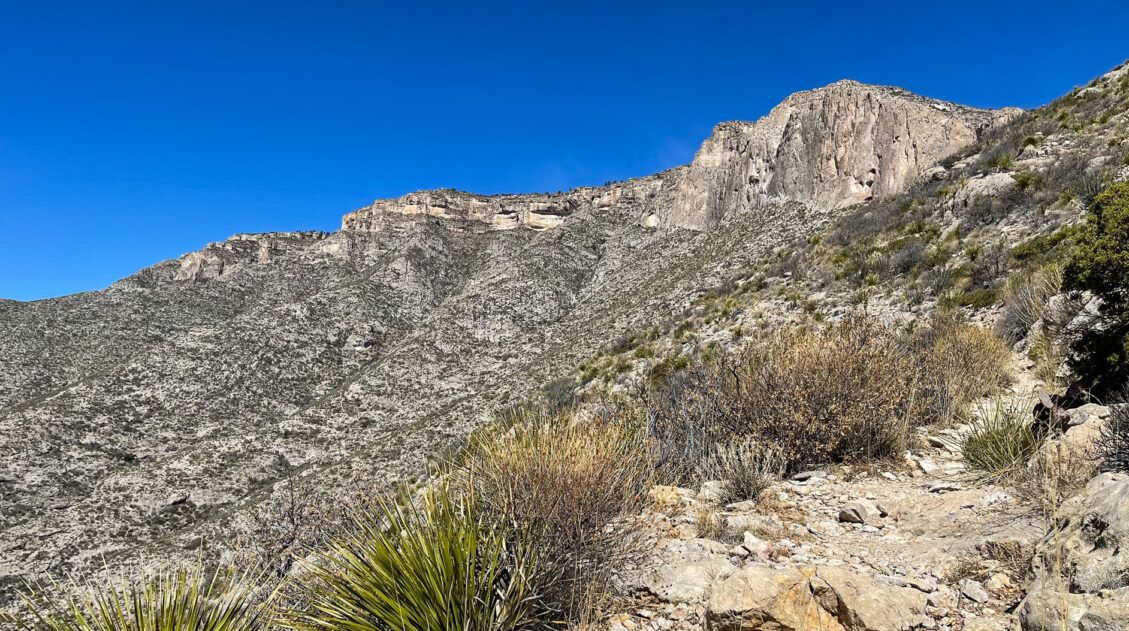
The final mile is beautiful. Once again, you are hiking on a trail with panoramic views of Guadalupe Mountains National Park and Texas. Just before you get to the peak, the trail gets steeper and there are a few sections where the trail narrows and has a drop-off on one side. The trail is about 5 feet wide and if you have a fear of heights, this may be challenging for you.
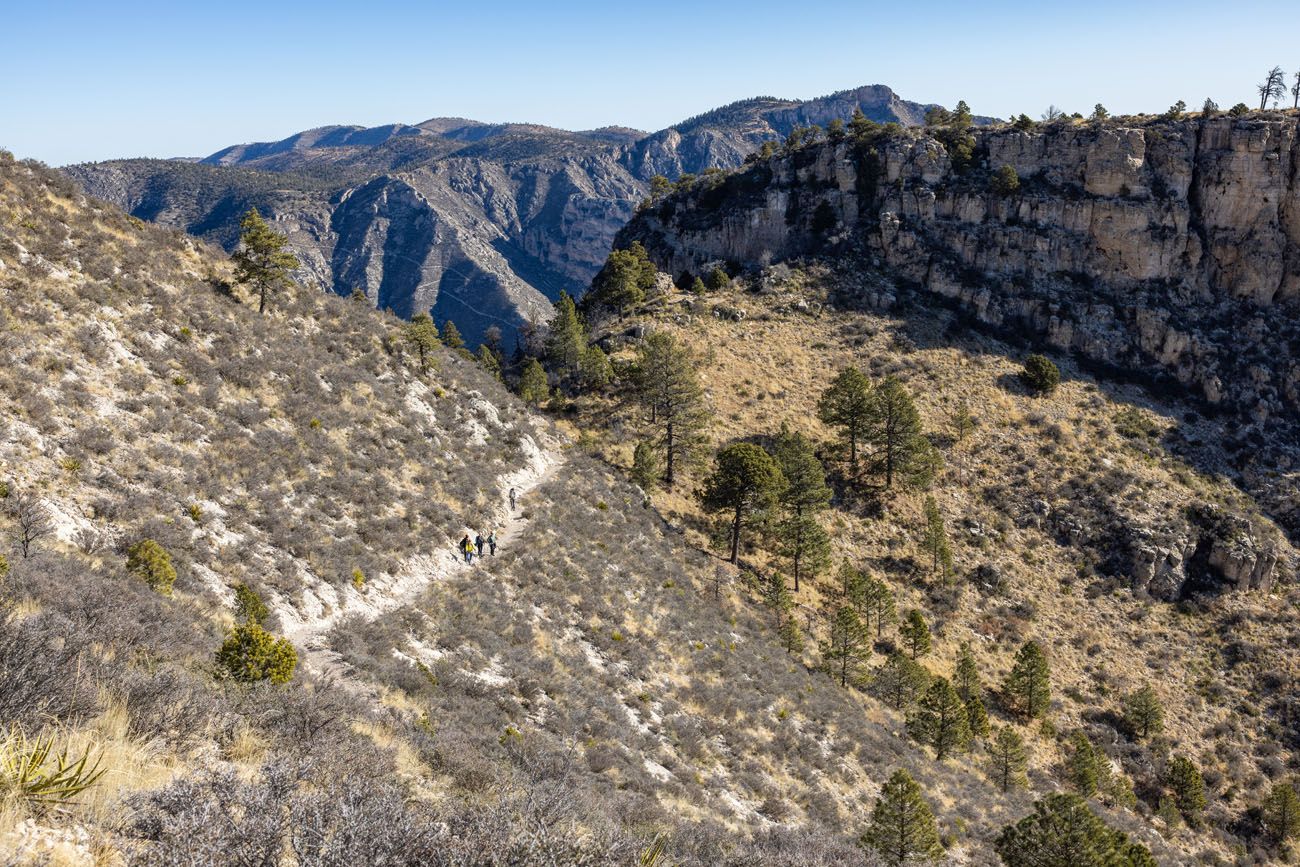
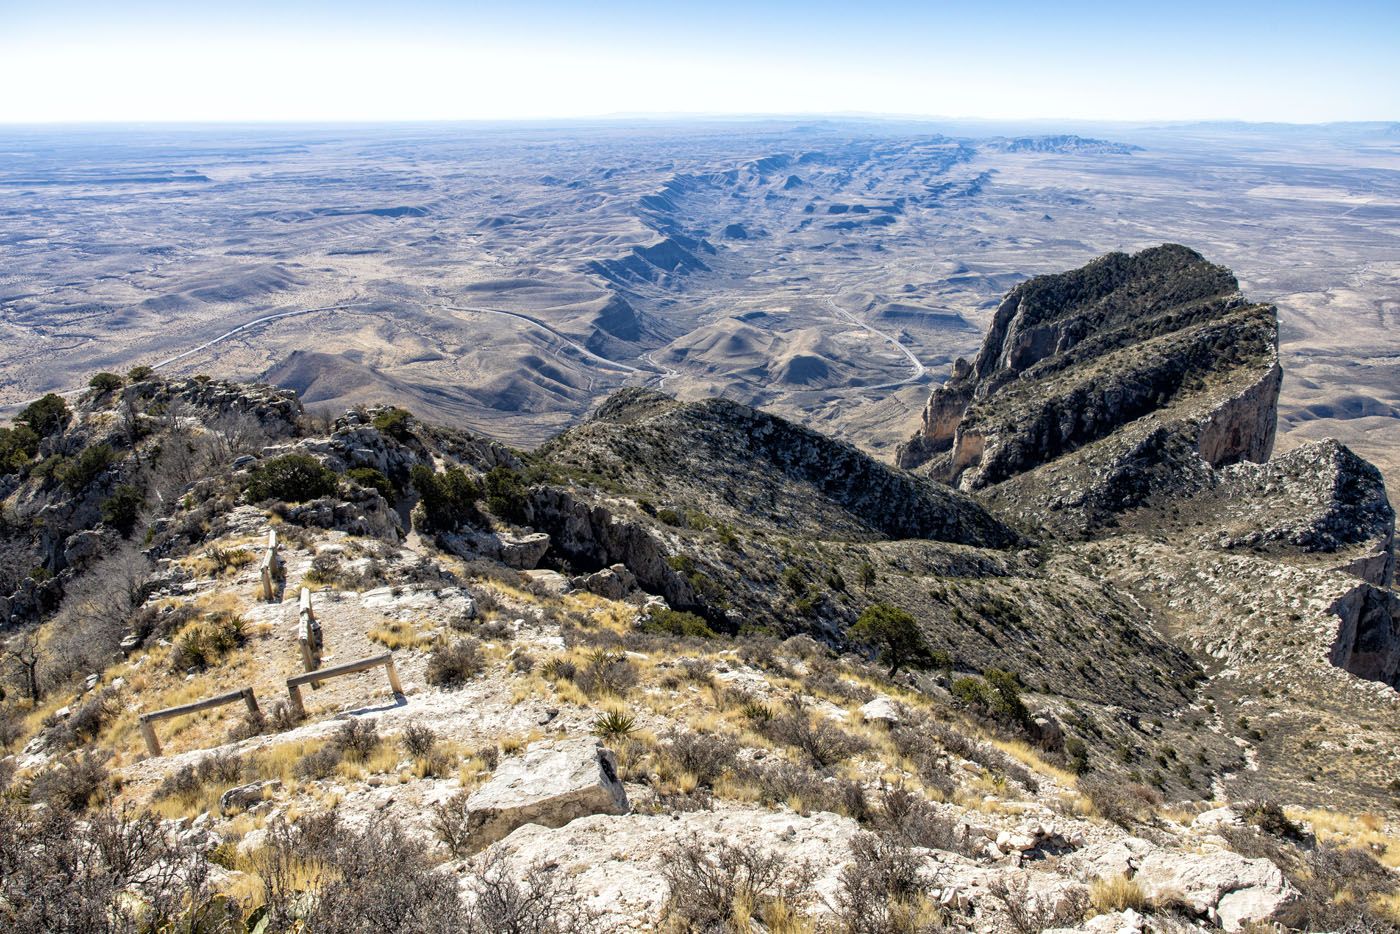
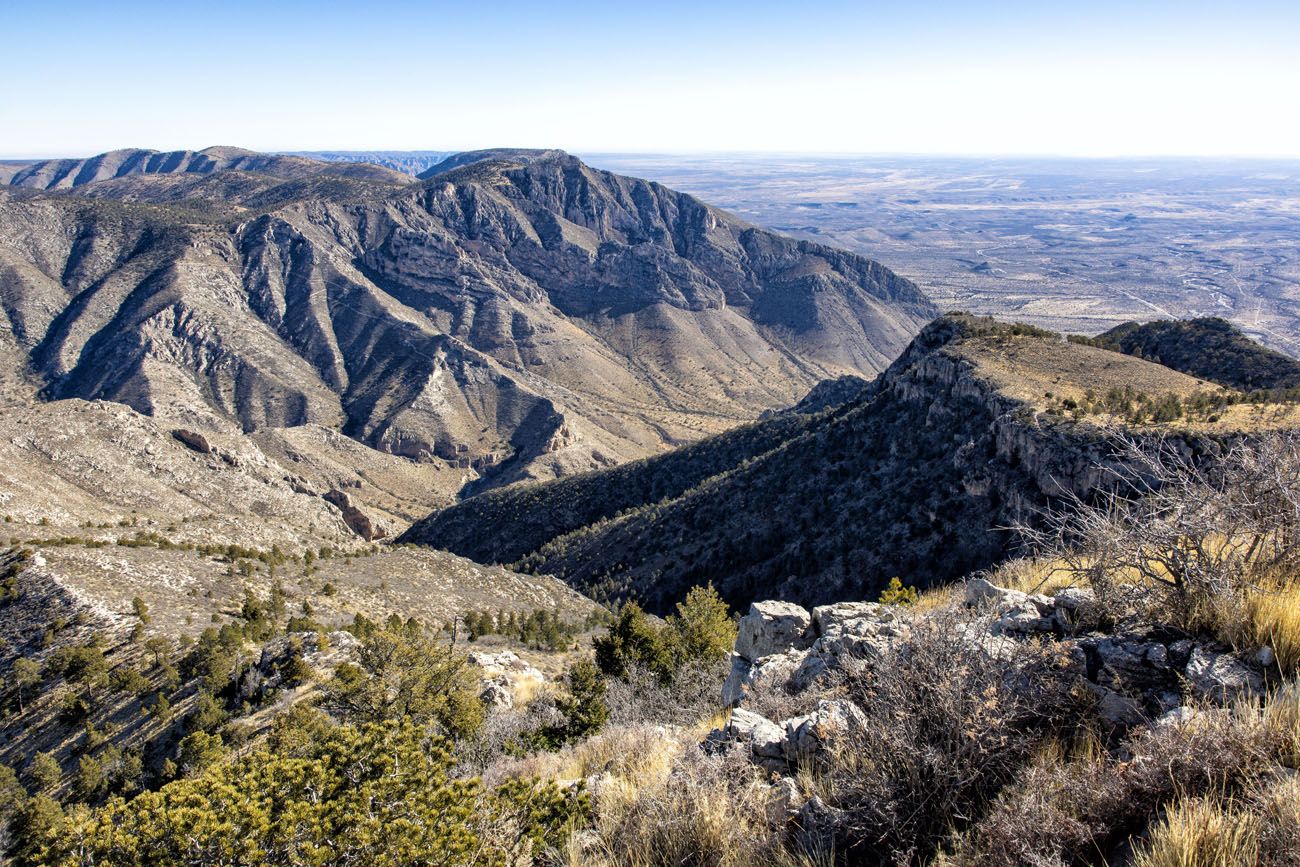
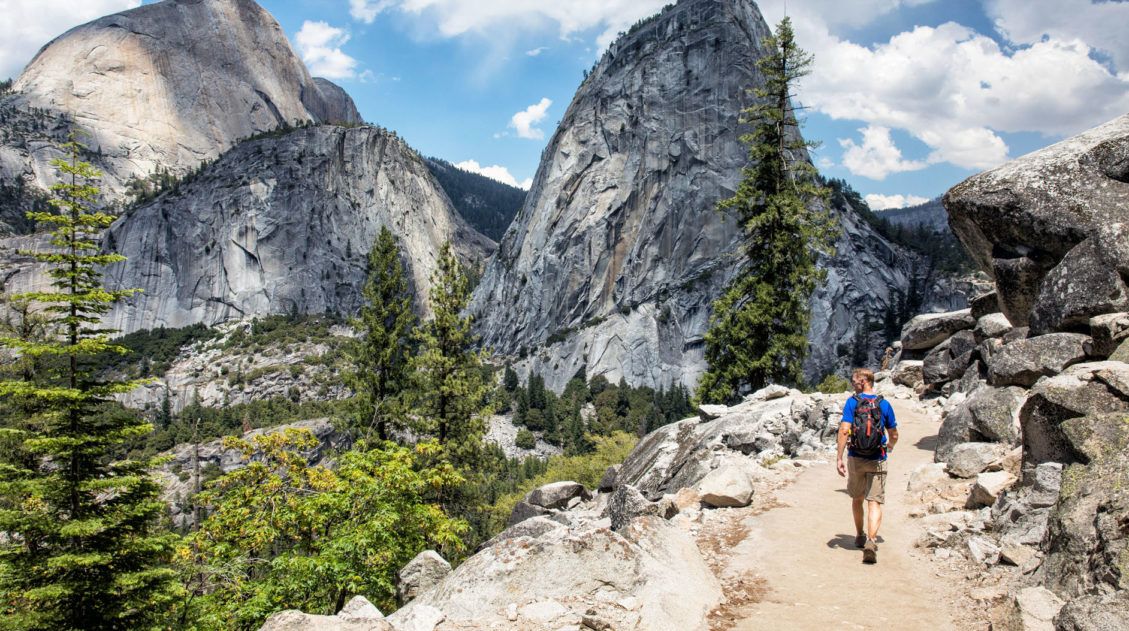
View from the trail
The final switchbacks
One last narrow section of trail, and one last steep climb, and then the summit!
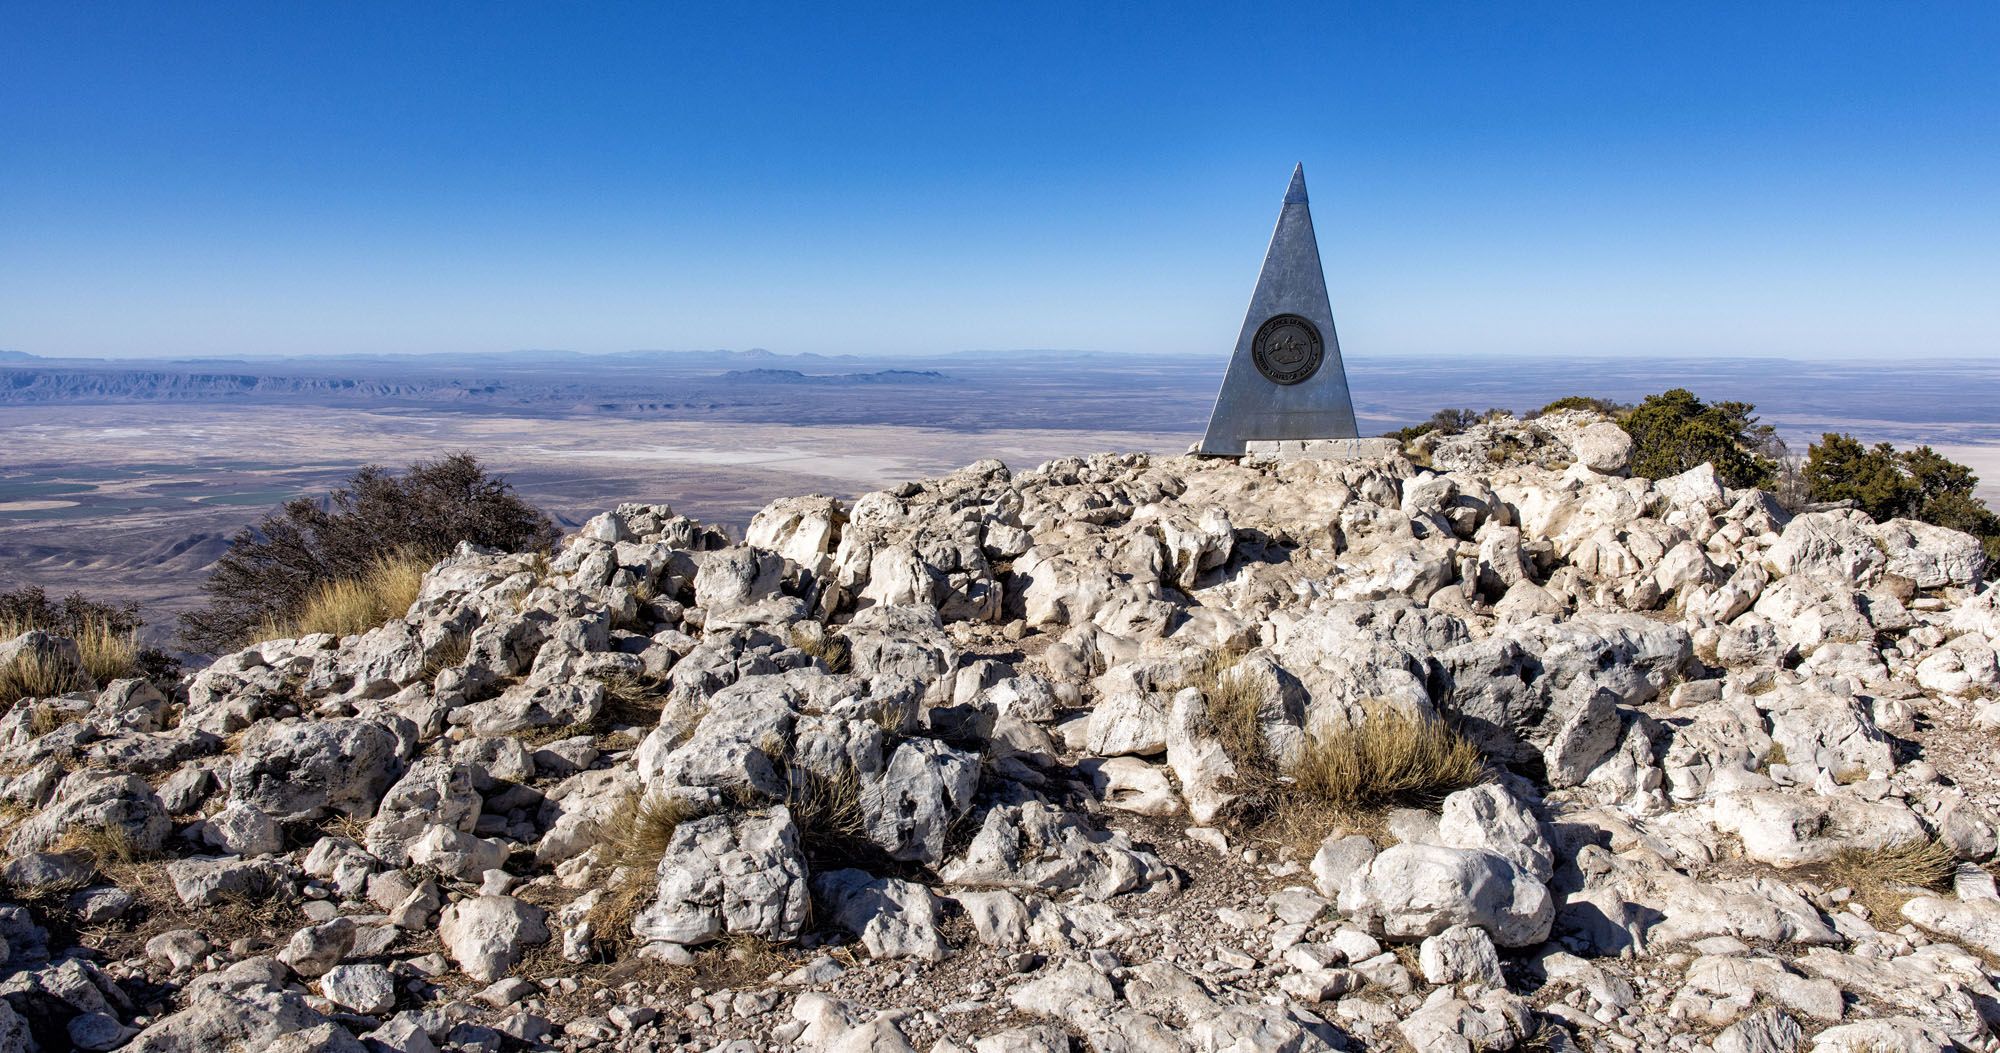
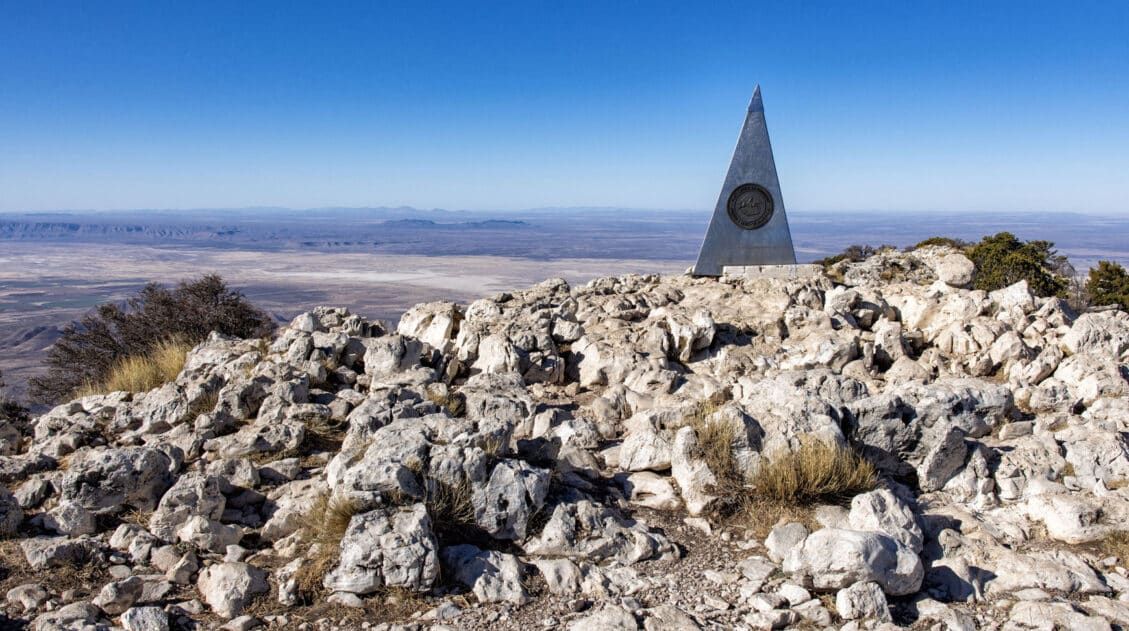
Once at the top, enjoy the view!!
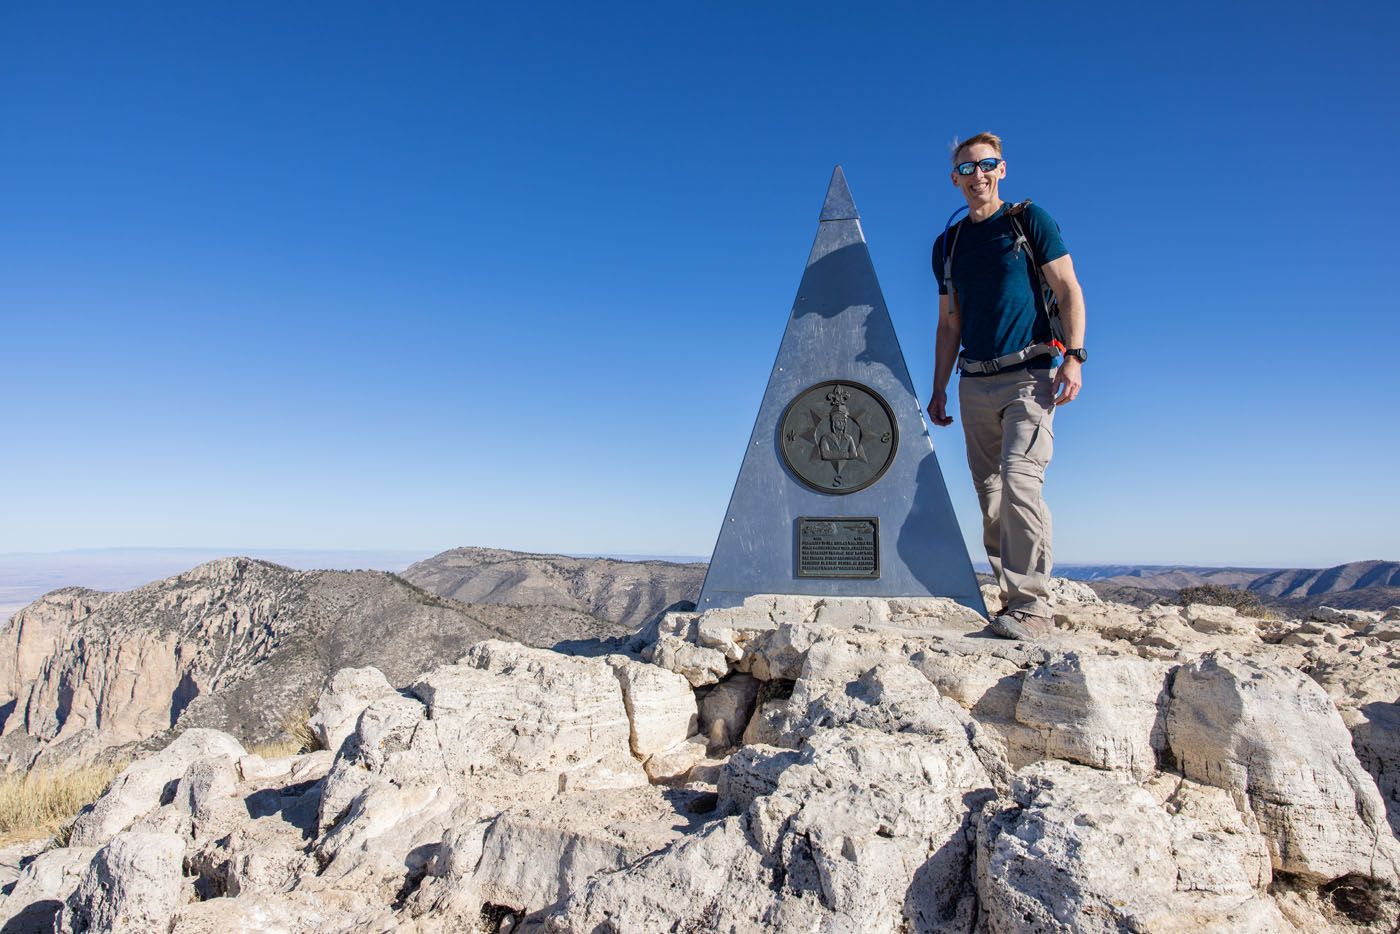
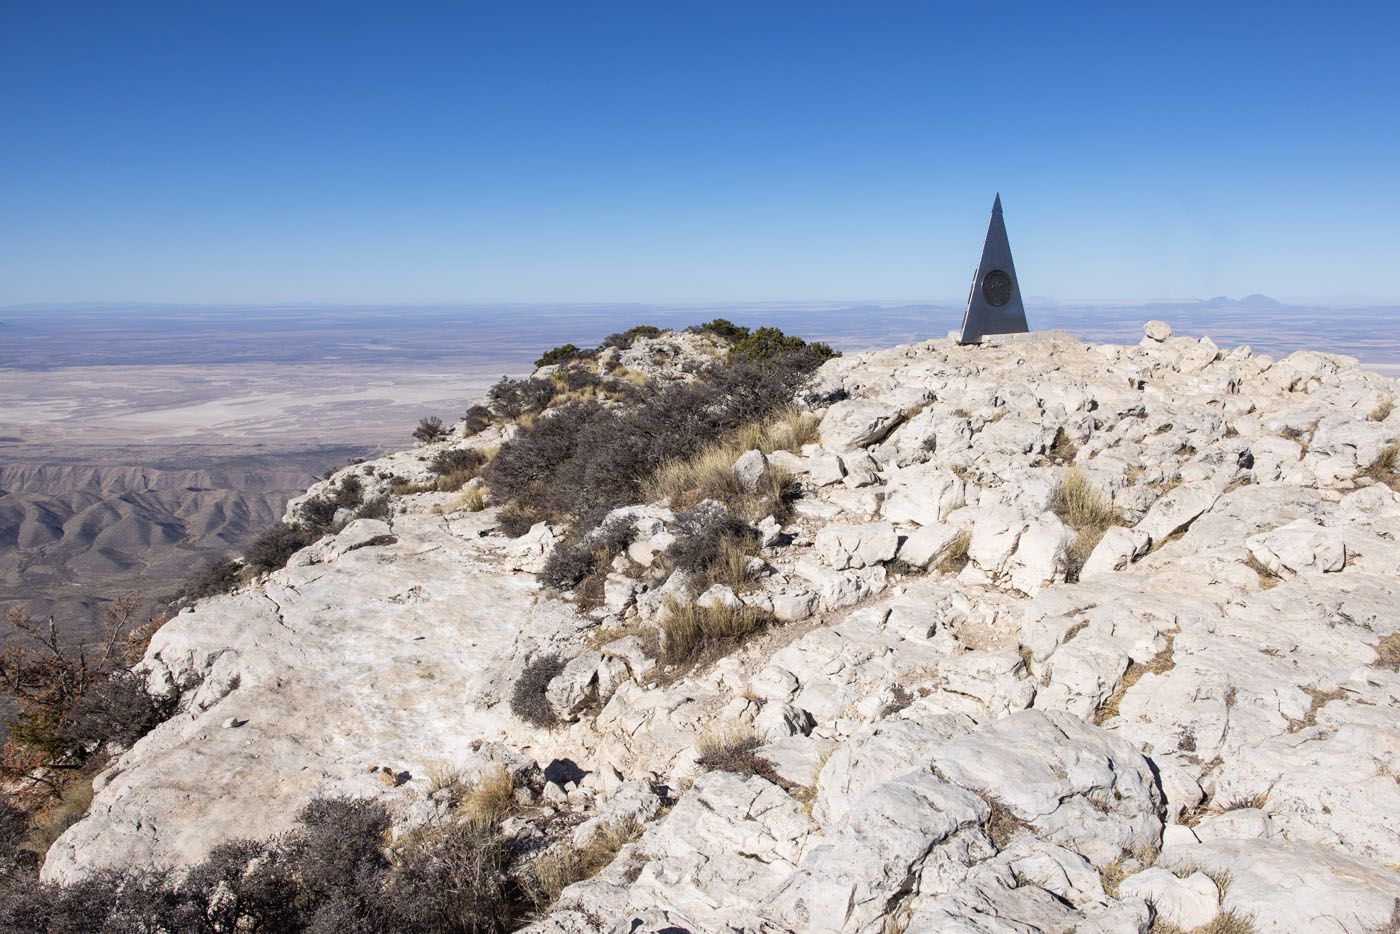
Guadalupe Peak
View from Guadalupe Peak
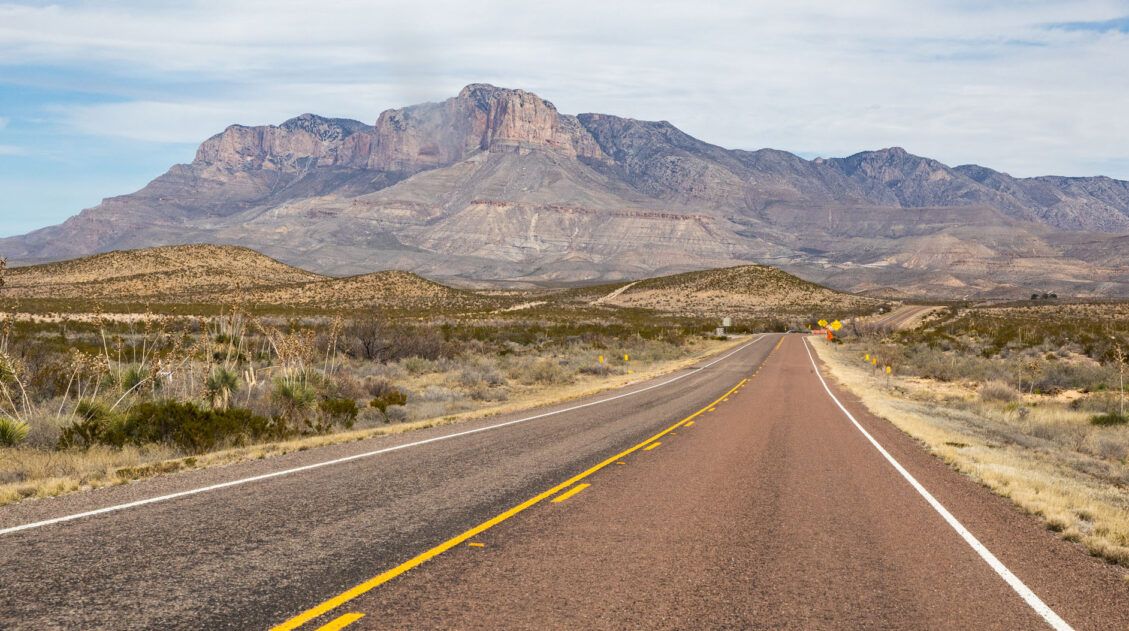
The view of El Capitan from Guadalupe Peak
Hunter Peak
The Return Hike
From Guadalupe Peak, it is an entirely downhill walk to finish the hike. That might sound like a good thing, but hiking downhill, especially on a steep trail like this one, can be very fatiguing. If you have hiking poles, this is a good time to use them. The poles will take some of the stress off of your legs, which can help reduce leg and knee pain.
Adding on Devil’s Hall
Devil’s Hall is another great hike that shares the same trailhead with Guadalupe Peak. If you are very fit, you can add on Devil’s Hall to Guadalupe Peak.
Distance: 11.25 miles (18.1 km) round trip
Total Ascent: 3,450 feet (1,052 m)
Lowest Elevation: 5,850 feet (1,783 m)
Highest Elevation (Guadalupe Peak): 8,751 feet (2,667 m)
Time: 6 to 10 hours
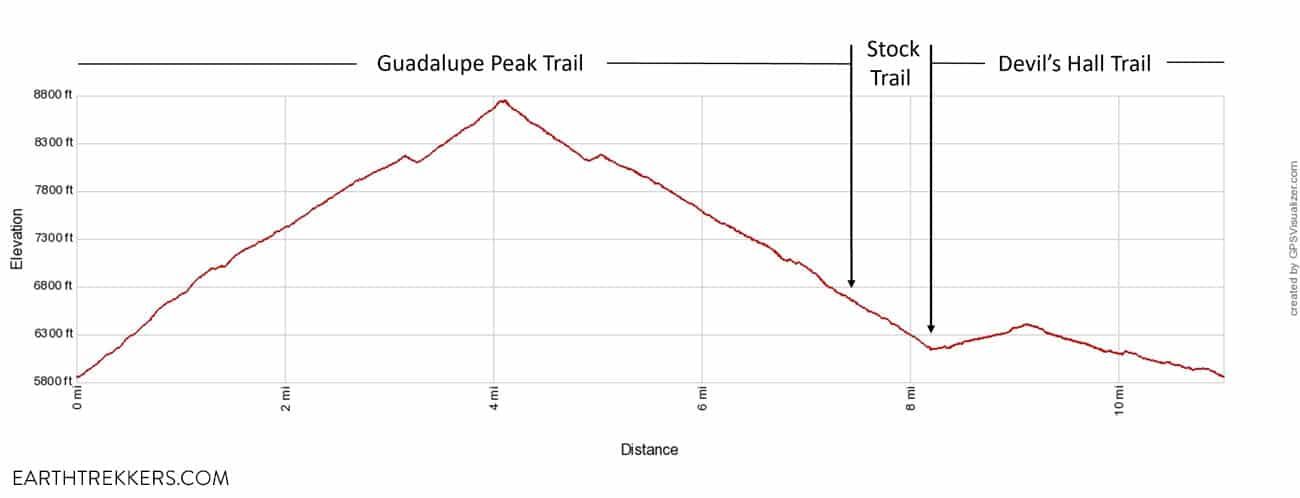

Guadalupe Peak and Devils Hall Elevation Profile
Hike to Guadalupe Peak first.
Then, to get to Devil’s Hall, as you hike back to the trailhead, keep a lookout for the trail junction with the sign that reads “no stock beyond this point.” Take this trail to the left. This stock trail heads downhill for 0.75 miles, joining up with the Devil’s Hall Trail. Basically, it’s a shortcut, so you don’t have to walk to the Pine Springs Trailhead and then start the Devil’s Hall Trail.
Once you reach the Devils Hall Trail, continue it to the end (about 1 mile). Then, to finish this hike, walk the Devil’s Hall Trail back to the trailhead.
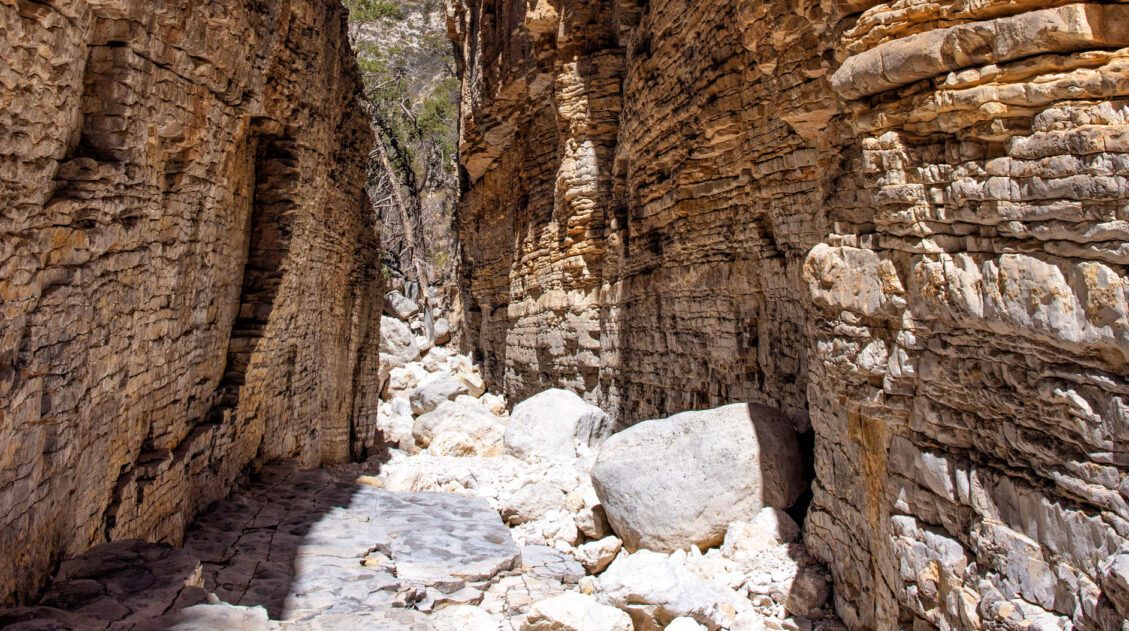
We did this and it is exhausting. The rock scrambling on the Devil’s Hall Trail is relatively easy, but by the time we got to this point, both Tim and I were tired. The rocks are slippery and it takes some concentration to watch where you are putting your feet. It’s easy to slip and fall even if you aren’t tired…after Guadalupe Peak, this becomes even more challenging.
I only recommend adding Devil’s Hall onto Guadalupe Peak if you are a very fit hiker.
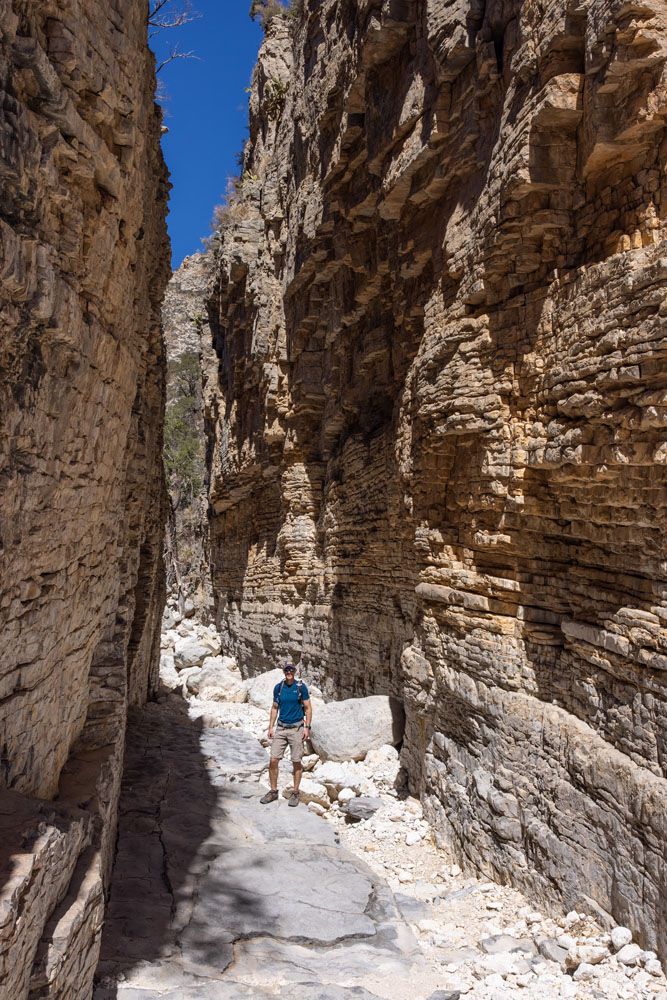
Devil’s Hall
Tips to Have the Best Experience
Start the hike early, ideally by 7:30 am (but even earlier is better). By starting early, you can get one of the parking spaces in the trailhead parking lot. You will also get ahead of the crowds and hike in the cooler part of the day.
Cellular Service. We had cellular service on Guadalupe Peak (we use Verizon). Other hikers were texting and calling friends and family to let them know their achievement.
Beware of the wind. On a windy day, winds can gust up to 80 mph on top of Guadalupe Peak. If possible, do not do this hike on a windy day. We had to postpone this hike for one day, to avoid the windy conditions.
Get updates on road conditions and trail closures, as you plan your trip and just before your visit, on the National Park Service website.
What to Bring on the Hike
- Hiking Shoes
- Water: The National Park Service recommends one gallon of water per person during the summer months. We carried 2 liters of water per person but the temperature when we did this ranged from 40°F to 65°F.
- Sunscreen
- Hat
- Sunglasses
- Lunch and snacks
- Hiking poles
- Camera or smartphone
Essential Hiking Gear: What Should You Bring on a Day Hike?
If you are new to hiking or are curious about what you should bring on a hike, check out our Hiking Gear Guide. Find out what we carry in our day packs and what we wear on the trails.If you have any questions about how to hike to Guadalupe Peak, or if you want to share your experience, let us know in the comment section below.
More Information for Your Trip to Texas
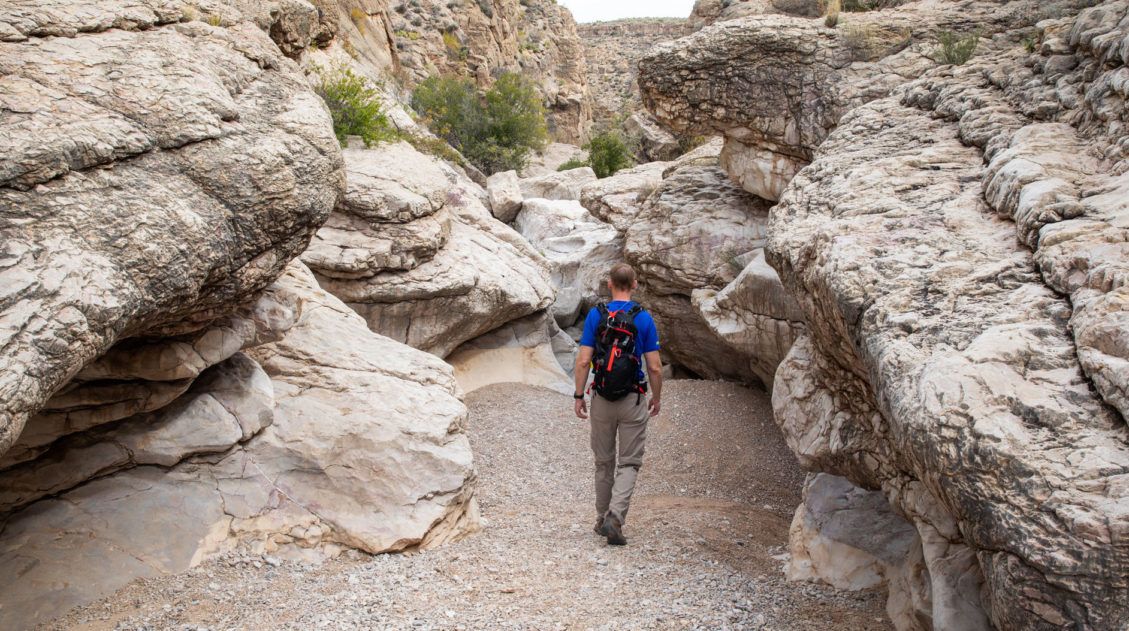
How to Hike the Devil’s Hall Trail | Guadalupe Mountains National Park
The Devil’s Hall Trail is one of the best hikes to do in Guadalupe Mountains National Park. It’s also one of the most unique. For a good portion of this hike, you will be walking through a wash. On this part of the trail, you rock scramble up and over boulders of all sizes. For […]
16 Great Things to Do in Guadalupe Mountains National Park
Canyons, gypsum sand dunes, fossilized coral reefs, the Chihuahuan Desert, and some of the highest peaks in Texas…these are all things that you can see in Guadalupe Mountains National Park. If you like hiking, you’ll love this park. Almost everything in the park requires some sort of short walk or hike…there is very little that […]
How to Hike the McKittrick Canyon Trail to Pratt Cabin, the Grotto & the Notch
Hiking the McKittrick Canyon Trail to Pratt Cabin, the Grotto, and the Notch is one of the most popular hikes in Guadalupe Mountains National Park. This hike starts off relatively easy, as it is a mostly flat walk through the canyon to get to the first two sights, the Pratt Cabin and the Grotto. Beyond […]
How to Hike the Permian Reef Trail | Guadalupe Mountains National Park
The Permian Reef Trail is an awesome hike in the McKittrick Canyon section of Guadalupe Mountains National Park. Leave the crowds behind as you ascend to the top of a Wilderness Ridge with spectacular views into McKittrick Canyon and the surrounding area. While everyone else is hiking the other two trails in this area, the […]
10 Day Texas New Mexico National Parks Road Trip Itinerary
On this 10-day Texas New Mexico road trip itinerary, you will visit four national parks plus make a quick detour to a gem of a state park that just might be one of the big highlights of the trip. Go hiking in Big Bend and Guadalupe Mountains, explore the underground wonderland of Carlsbad Caverns, and […]

How to Hike to Emory Peak in Big Bend National Park
Emory Peak is the highest peak in the Chisos Mountains and Big Bend National Park. It’s a tough hike to get here but the view over the park is unbeatable. There are two different ways to do this hike. The quickest and most direct way is to hike out-and-back to Emory Peak from the Chisos […]
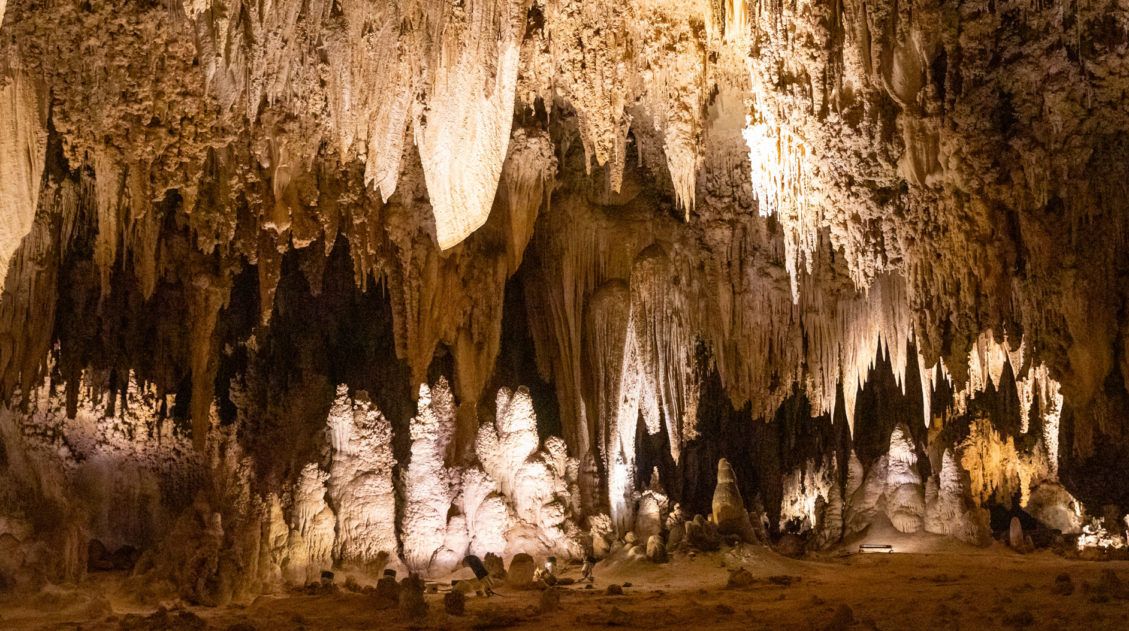
Best Things to Do in Carlsbad Caverns National Park
In this guide, we cover the best things to do in Carlsbad Caverns, tour options (both ranger-guided and self-guided), timed entry reservations, plus lots of helpful information. Located in the Guadalupe Mountains of New Mexico sits an underground fantasy land of limestone chambers, stalactites and stalagmites, and long, twisting tunnels. Carlsbad Caverns is breathtaking in […]

11 Amazing Things to Do in White Sands National Park
White Sands National Park is home to the largest gypsum dunefield in the world. These pure white dunes create a fun place to explore, for both kids and adults. Hike out into the dunes, learn about the wildlife that calls this park home, and go sledding on sand as white as the snow…these are just […]
10 Best US National Parks to Visit in March 2026
Planning a trip to the US national parks in March but don’t know which ones to visit? March brings warmer temperatures to most of the United States. Travel begins to pick up during this month, both because of the warmer weather and because families are hitting the road for spring break. There are a lot […]

3 Days in Big Bend National Park: The Perfect Itinerary
If you are planning a trip to Big Bend National Park, one of the first things you might ask is “how many days do I need?” Three days in Big Bend gives you just enough time to visit all three sections of the park, go hiking, and day trip into Mexico. In this Big Bend […]
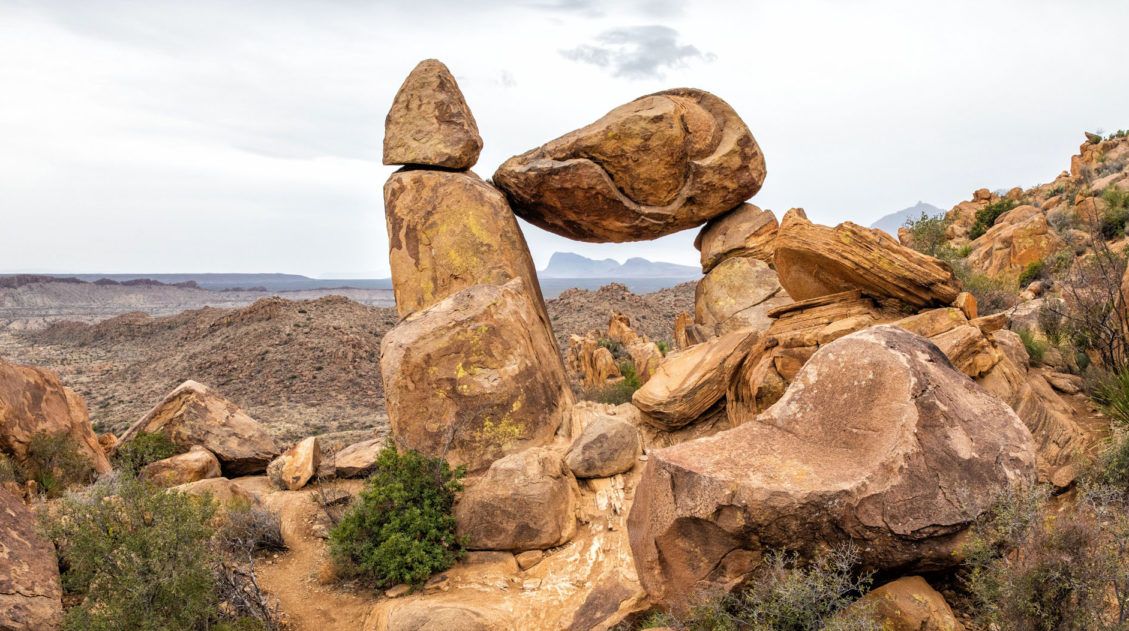
Balanced Rock Hike: A Short but Sweet Hike in Big Bend National Park
The Balanced Rock hike is one of our favorites in Big Bend National Park. It’s short, it’s relatively easy, and there is a brief section of rock scrambling that is fun for kids and adults. But the real reason for doing this hike is to see Balanced Rock, one of the most unique rock formations […]
15 Amazing Hikes in Big Bend National Park
Big Bend National Park is a hiker’s paradise. Hiking trails crisscross their way through the Chihuahuan Desert, along hot springs and the Rio Grande, and up and over the Chisos Mountains. Take your pick from short, easy strolls to off-the-beaten-path adventures to challenging mountain summits. Here are 15 of the best hikes in Big Bend […]
Texas Travel Guide
Texas Travel Guide Vibrant canyons, remote deserts, extraordinary mountain ranges, white-sand beaches, historic towns, and bustling cities… Texas is a beautiful state with much to offer for outdoor enthusiasts and party goers alike. San Antonio Austin Big Bend Guadalupe Mountains Texas & New Mexico Road Trip Top Experiences in Texas Big Bend National Park. Isolated, remote, […]

United States Travel Guide: Places to Visit in the USA
Plan your visit to the United States. Learn about the best things to do, how to plan your time, road trip ideas, and sample itineraries.

Comments 7