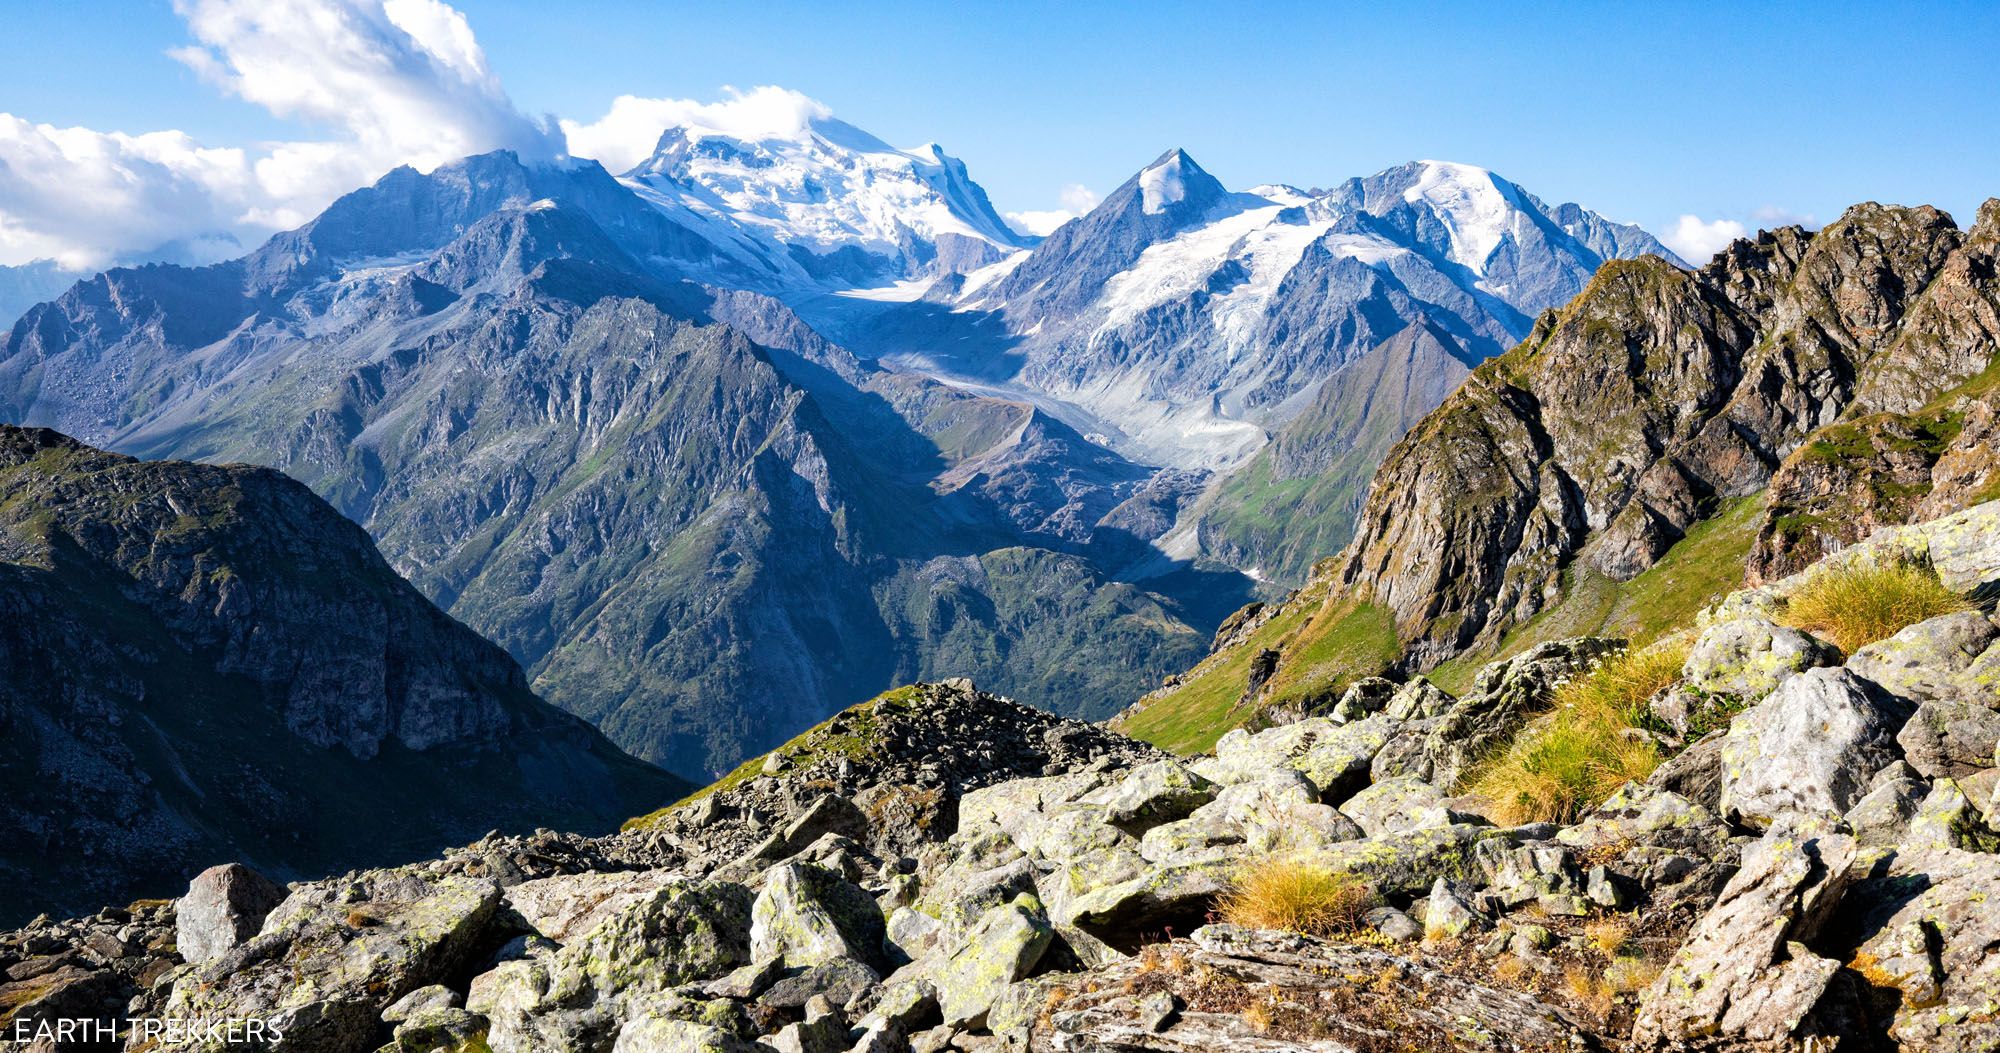
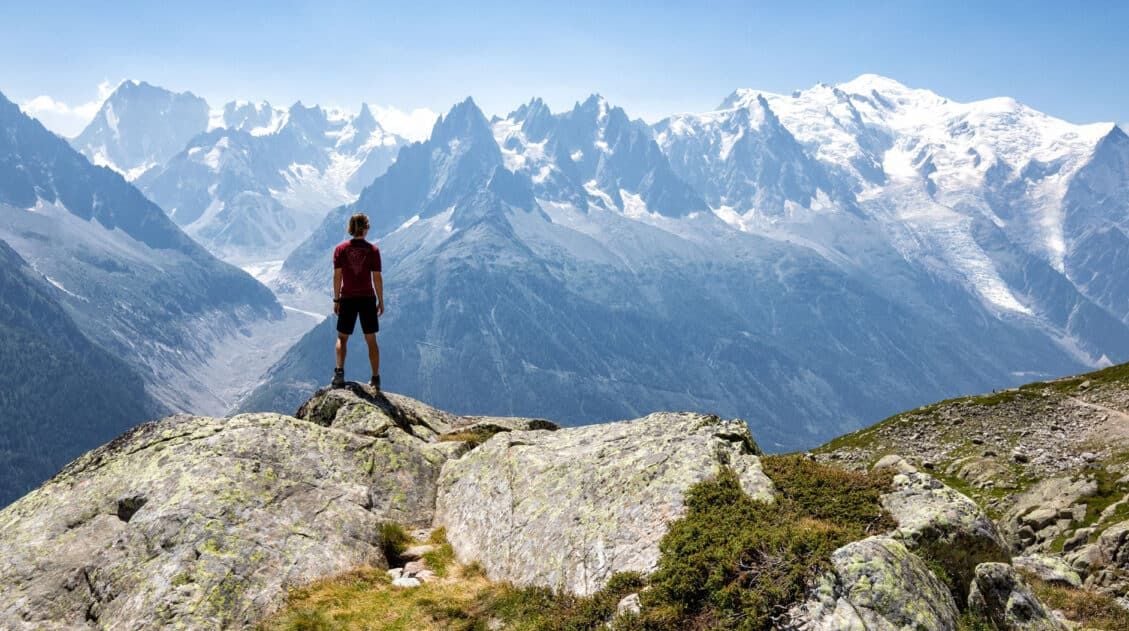
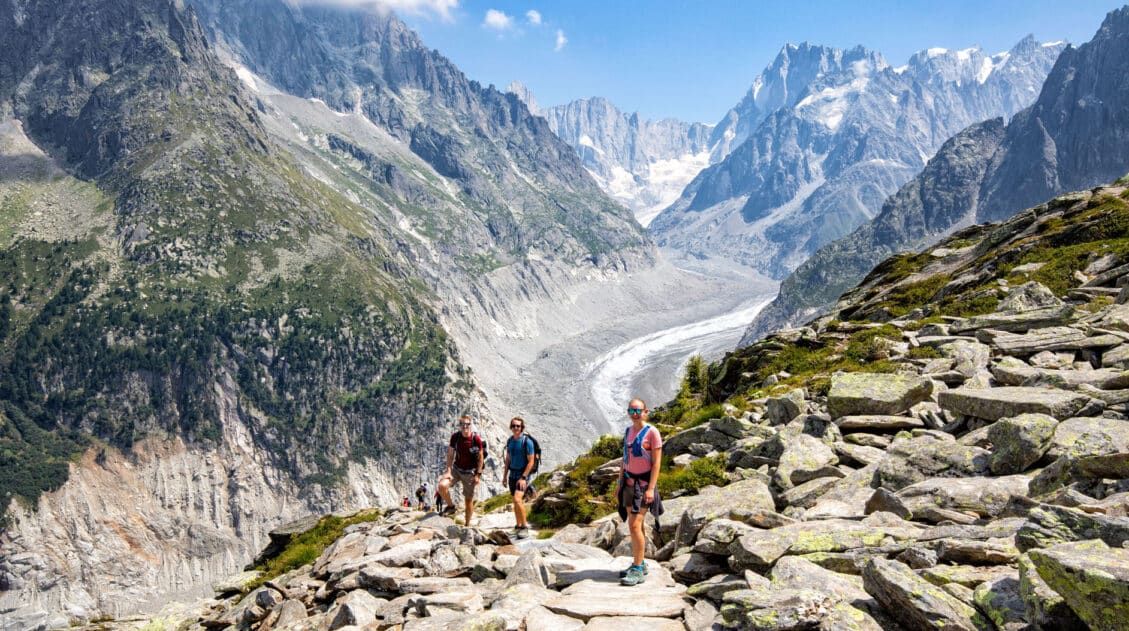
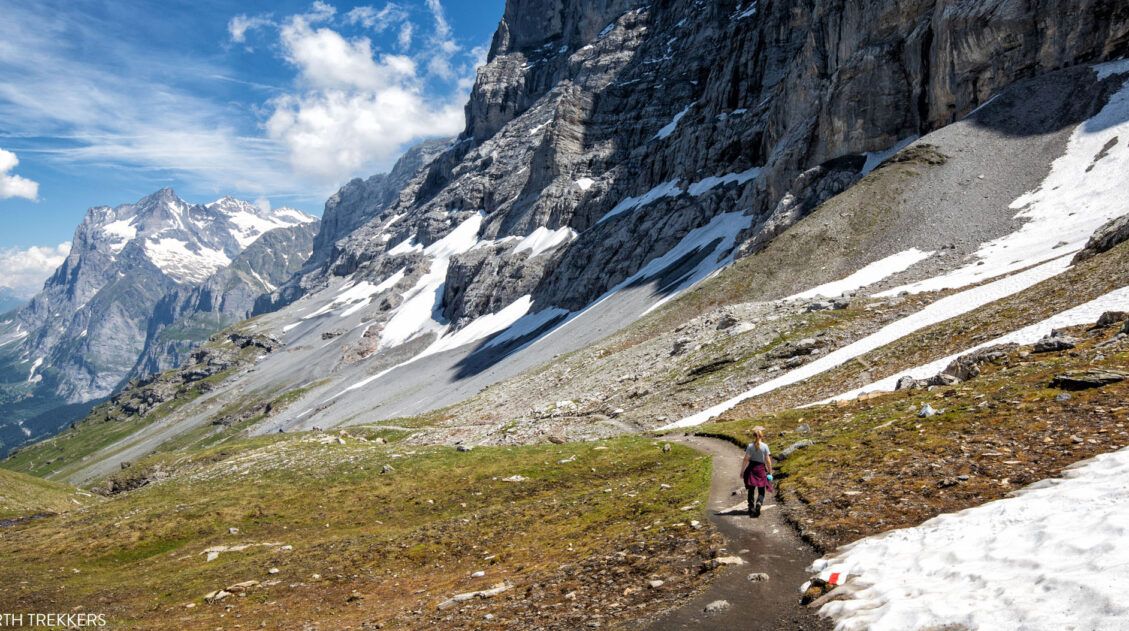
On very tired legs we started Stage 6 of the Walker’s Haute Route. Today’s hike is a quintessential day on the Haute Route. In about 7 hours, you will cross several cols, hike past glacial lakes, and enjoy views of spectacular alpine scenery. In fact, Stage 6 is the most scenic day yet.
This is another challenging day but we loved it. The views are phenomenal every step of the way. Plus, the landscape frequently changes, from a lush green valley to rocky, jagged hillsides to a barren wasteland of rocks, glaciers, and alpine lakes.
There are several different ways to hike Stage 6 of the Haute Route. Our day started at Cabane de Louvie, which is a minor but well worth it detour off the Haute Route.
If you are following the classic route, your day will start at Cabane de Mont Fort. From Cabane de Mont Fort, there are two different ways to hike Stage 6 and both routes are well described in Walking from Chamonix to Zermatt by Kev Reynolds. If the weather is good and you do not have a fear of heights, we recommend the alpine route, also called Sentier de Chamois. This is the route that we took and we highly recommend it, since the trail is fun to hike and the views are some of the best of the day.
Walker’s Haute Route Stage 6 Hiking Stats
Below are the hiking stats from Cabane du Mont Fort to Cabane de Prafleuri.
Distance: 15.2 km (9.4 miles)
Difficulty: Strenuous
Total Ascent: 1,100 m (3,600 feet)
Total Descent: 875 m (2,875 feet)
Lowest Elevation: 2,355 m (7,725 feet)
Highest Elevation (Col de Prafleurie): 2,925 m (9,600 feet)
Elevation at Cabane du Mont Fort:2,455 m (8,055 feet)
Elevation at Cabane de Prafleuri: 2,620 m (8,600 feet)
Average Time: 7.5 hours; Our Time 6.5 hours (including stops)
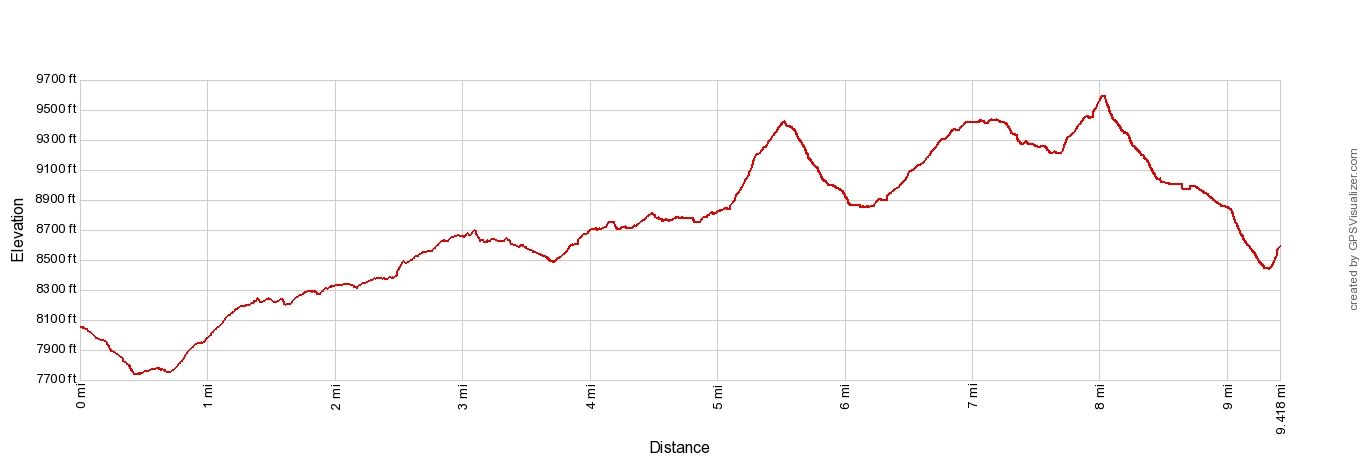
Haute Route 6 Elevation Profile: Cabane de Mont Fort to Cabane de Prafleuri
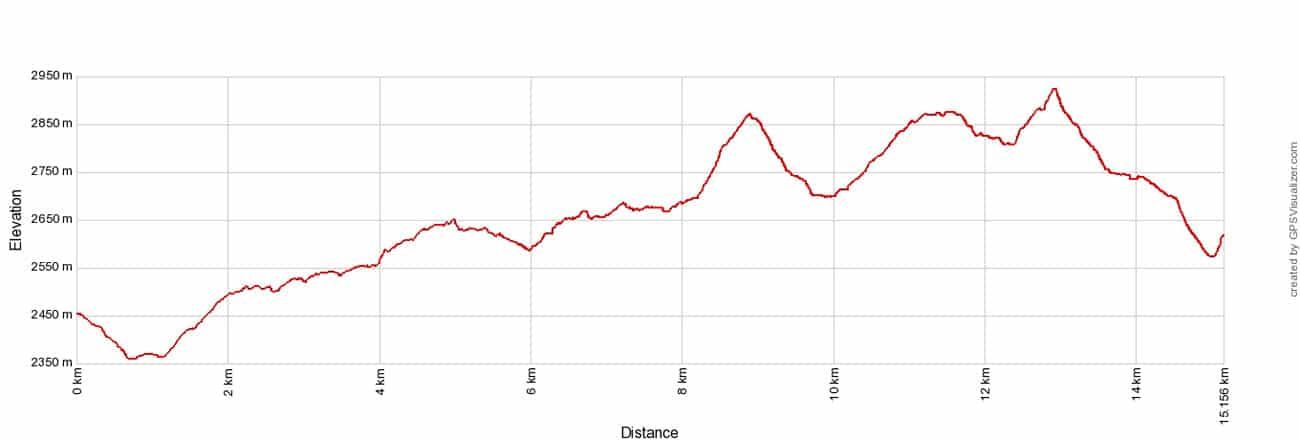
Below are the hiking stats from Cabane de Louvie to Cabane de Prafleuri.
Distance: 12.2 km (7.6 miles)
Difficulty: Strenuous
Total Ascent: 1,120 m (3,675 feet)
Total Descent: 720 m (2,360 feet)
Lowest Elevation: 2,175 m (7,135 feet)
Highest Elevation (Col de Prafleurie): 2,925 m (9,600 feet)
Elevation at Cabane de Louvie: 2,245 m (7,370 feet)
Elevation at Cabane de Prafleuri: 2,620 m (8,600 feet)
Our Time: 5.5 hours (including stops)

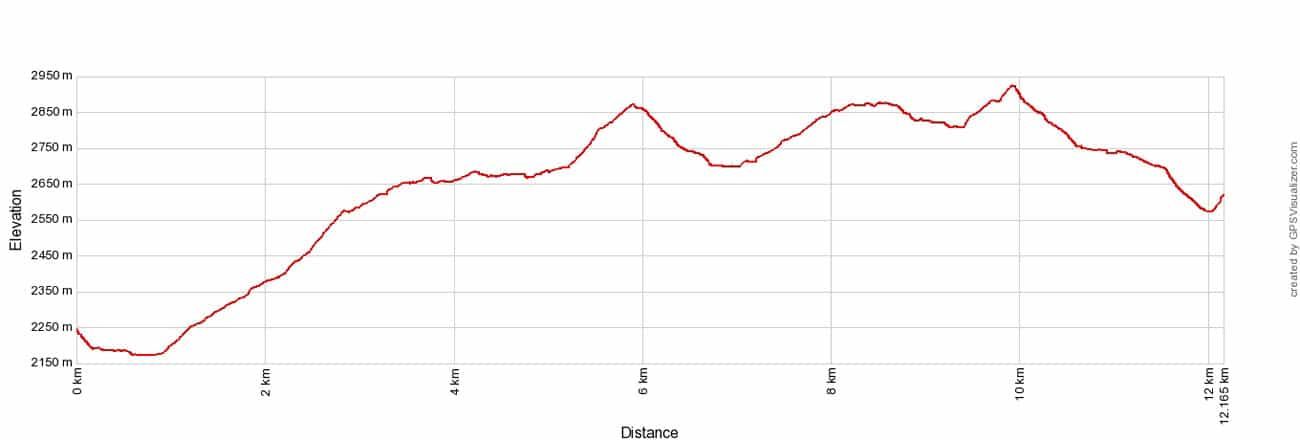
Haute Route 6 Elevation Profile: Cabane de Louvie to Cabane de Prafleuri
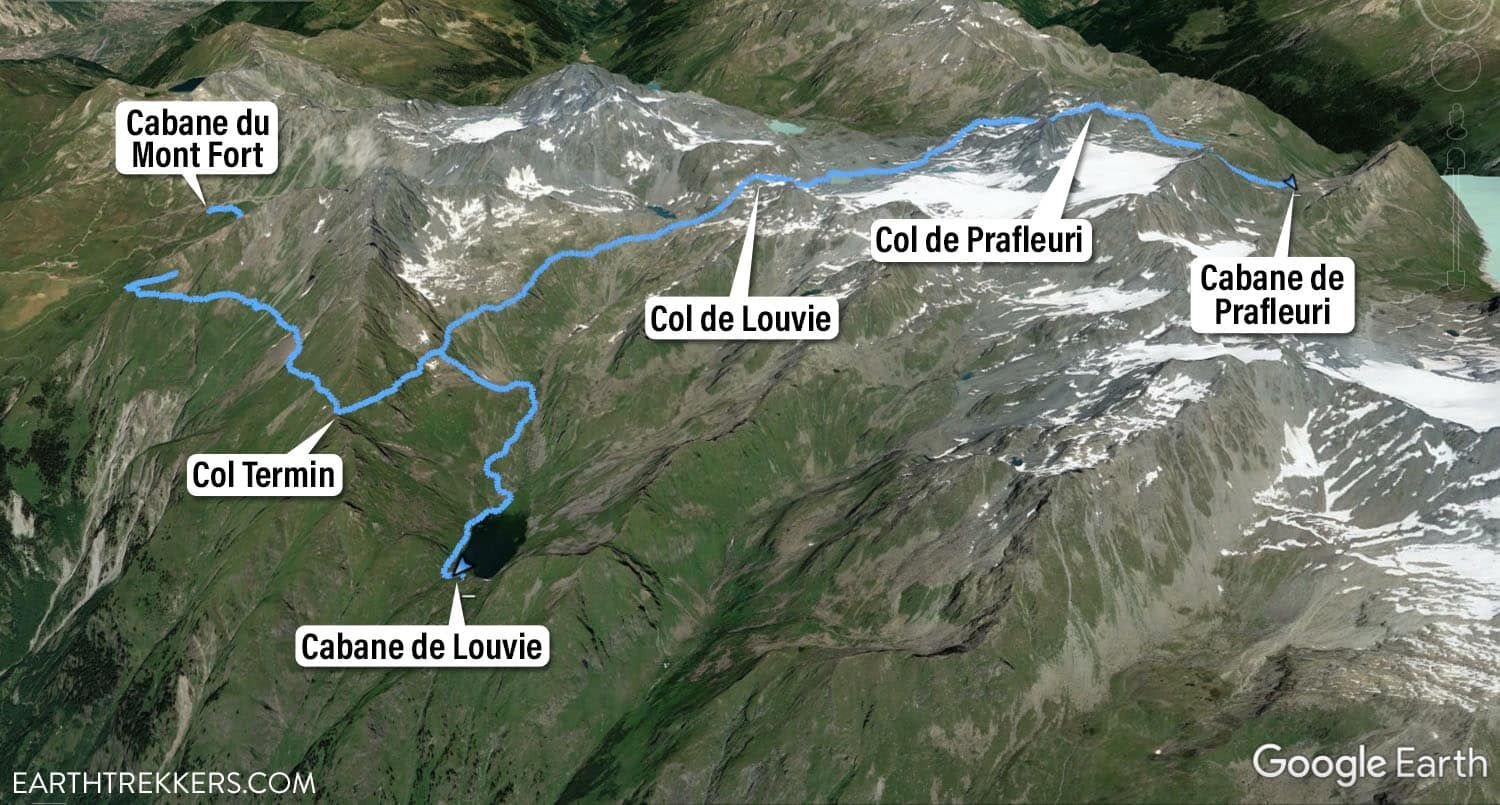
Haute Route Stage 6 map
Please practice the seven principles of Leave No Trace: plan ahead, stay on the trail, pack out what you bring to the hiking trail, leave areas as you found them, minimize campfire impacts, be considerate of other hikers, and do not approach or feed wildlife.
Walker’s Haute Route Stage 6: Trail Overview
To hike the Haute Route, we highly recommend following the trail descriptions in the book Trekking Chamonix to Zermatt, The Classic Walker’s Haute Route by Kev Reynolds. Below we list an overview of the day, so you know what to expect along the way. We also provide advice on where to eat and where to stay. Later in this guide, we list a few tips and trail clarifications to be used with the Trekking Chamonix to Zermatt book.
For this trail overview, I will start at Cabane du Mont Fort, since that is the typical starting point. If you plan to start at Cabane de Louvie, I will let you know when that trail meets up with the main Haute Route trail.
Note, if you read our Stage 5 guide, we also included the first part of Stage 6 in that guide, since we hiked a portion of the Stage 6 trail to get to Cabane de Louvie. So, you will notice an overlap between these two guides.
Cabane du Mont Fort to Col Termin
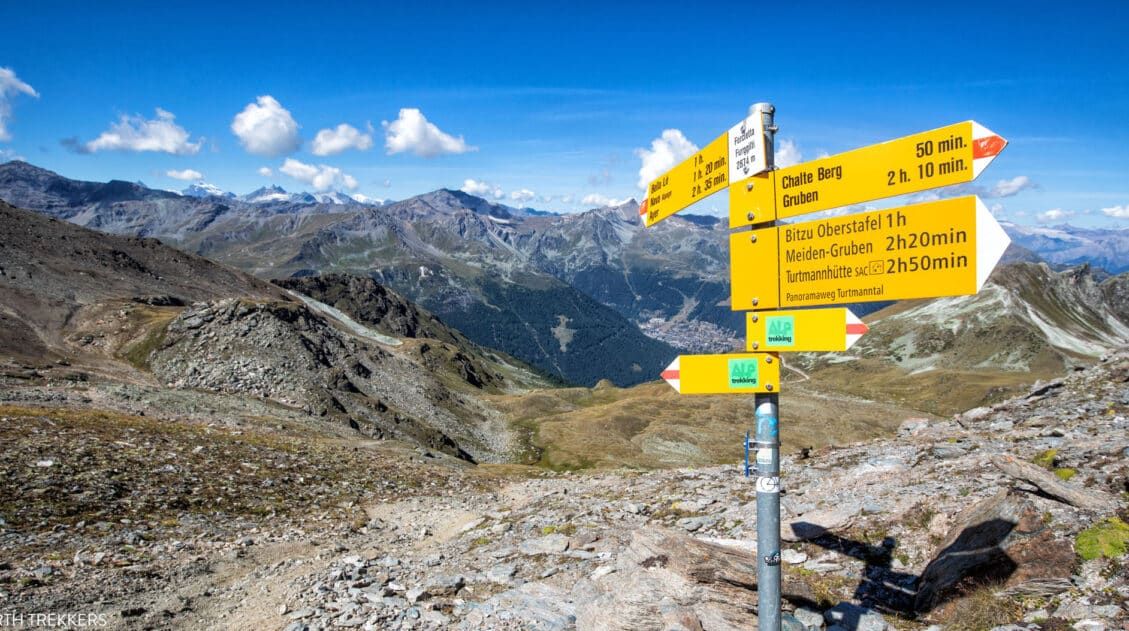
From Cabane du Mont Fort, follow signs for Col Termin. The trail signs are blue, indicating a high alpine trail.
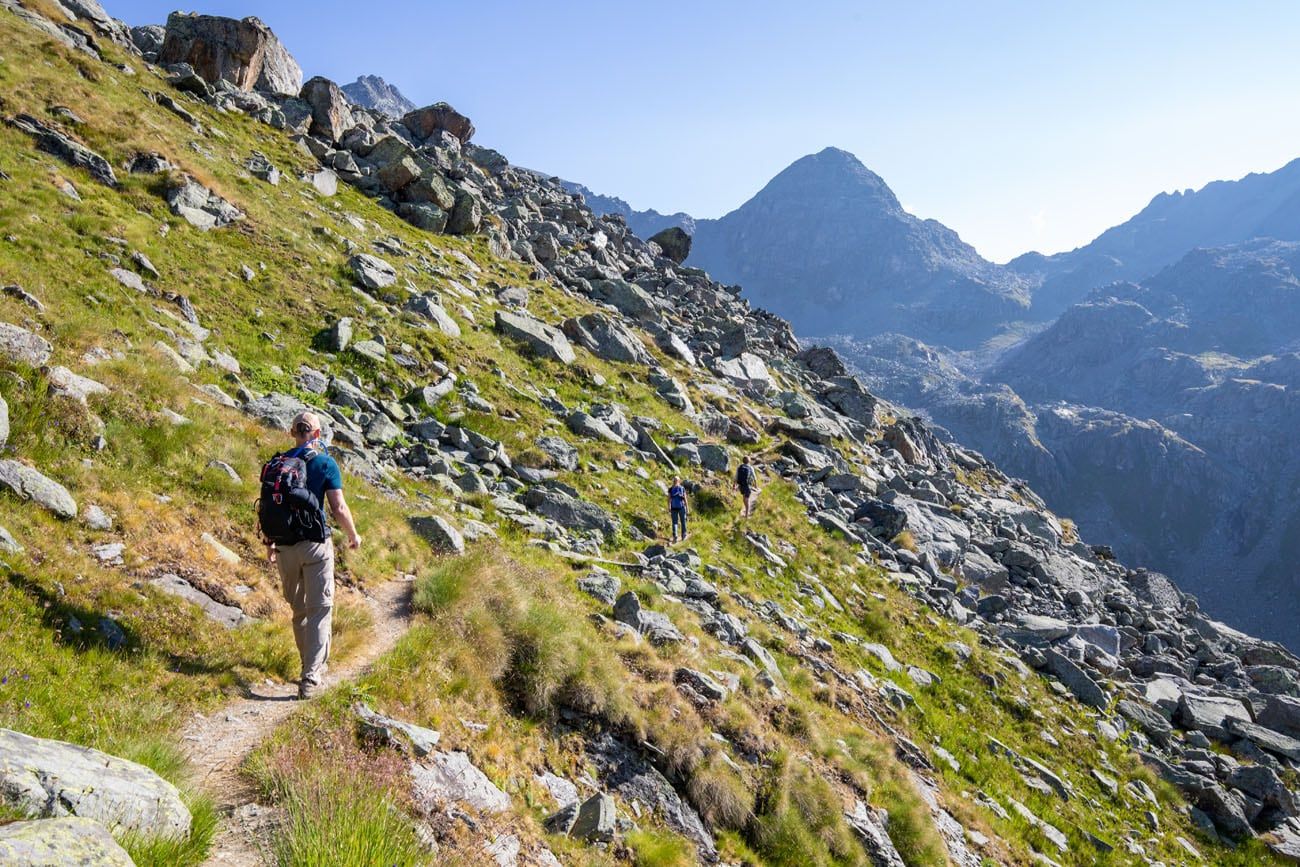
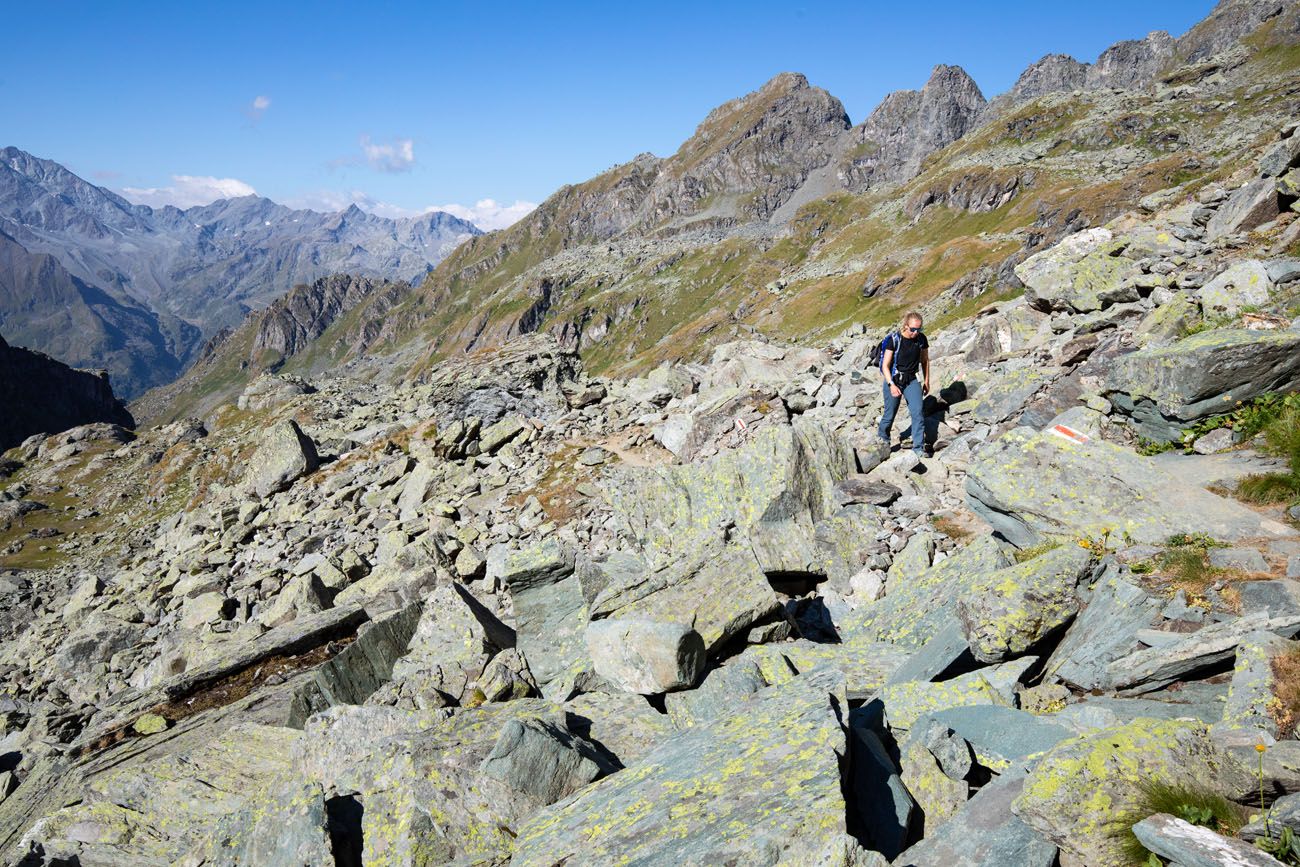
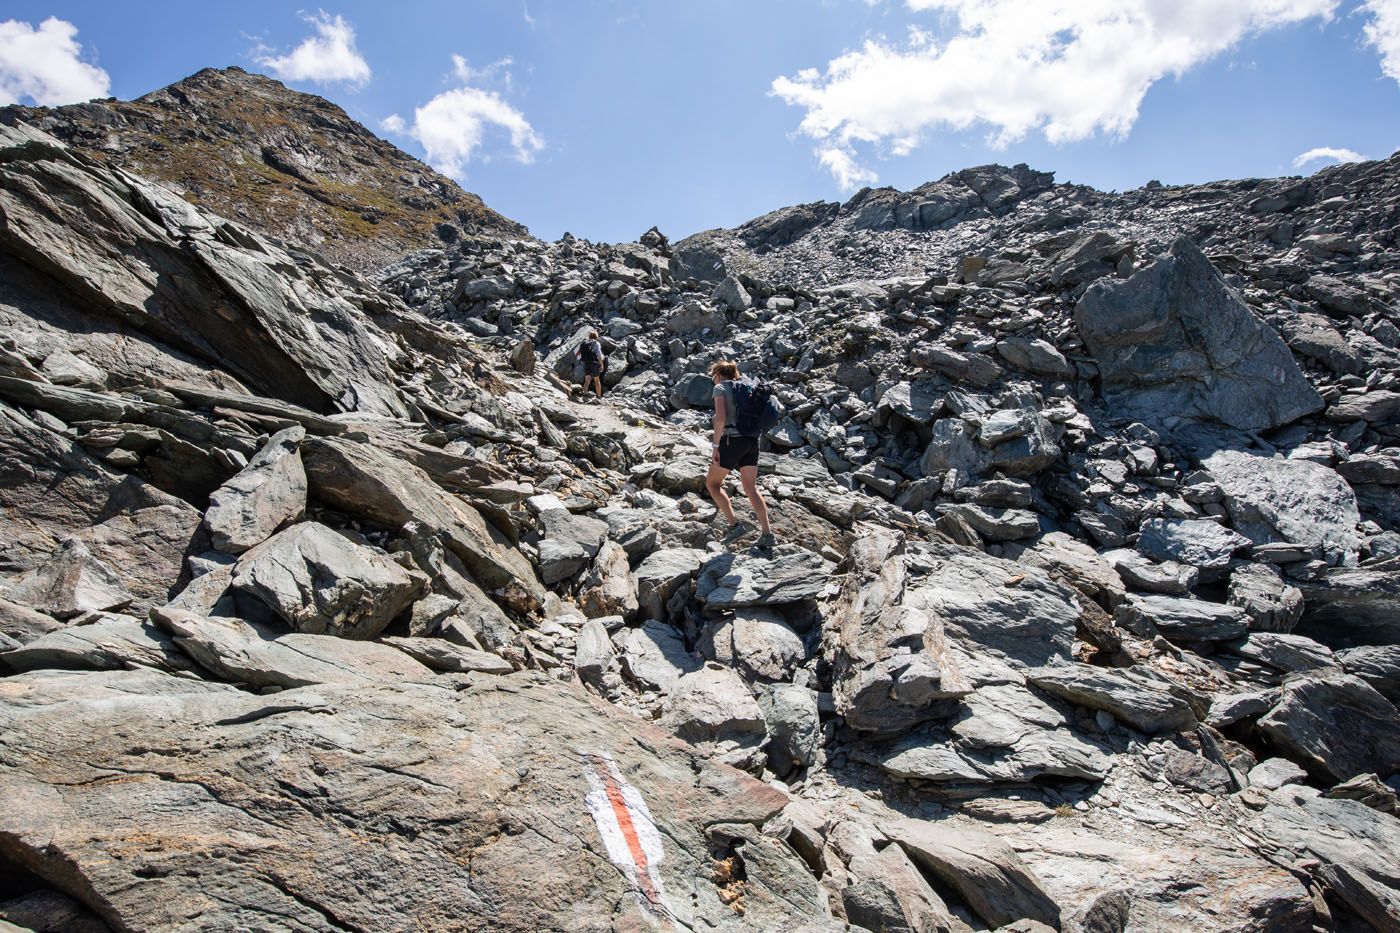
In Switzerland, alpine trails are marked with blue signs and blue and white blazes. These are more challenging trails that sometimes require special equipment. For this trail, no special equipment is necessary. You will traverse a boulder field that was formed by a recent rockslide. And since the threat of another rockslide exists, it is designated as a blue trail. But many guides still list this as the best way to hike Stage 6. Hiking through the boulder field takes no special skills, just a bit of rock scrambling in a few spots.

Boulder field
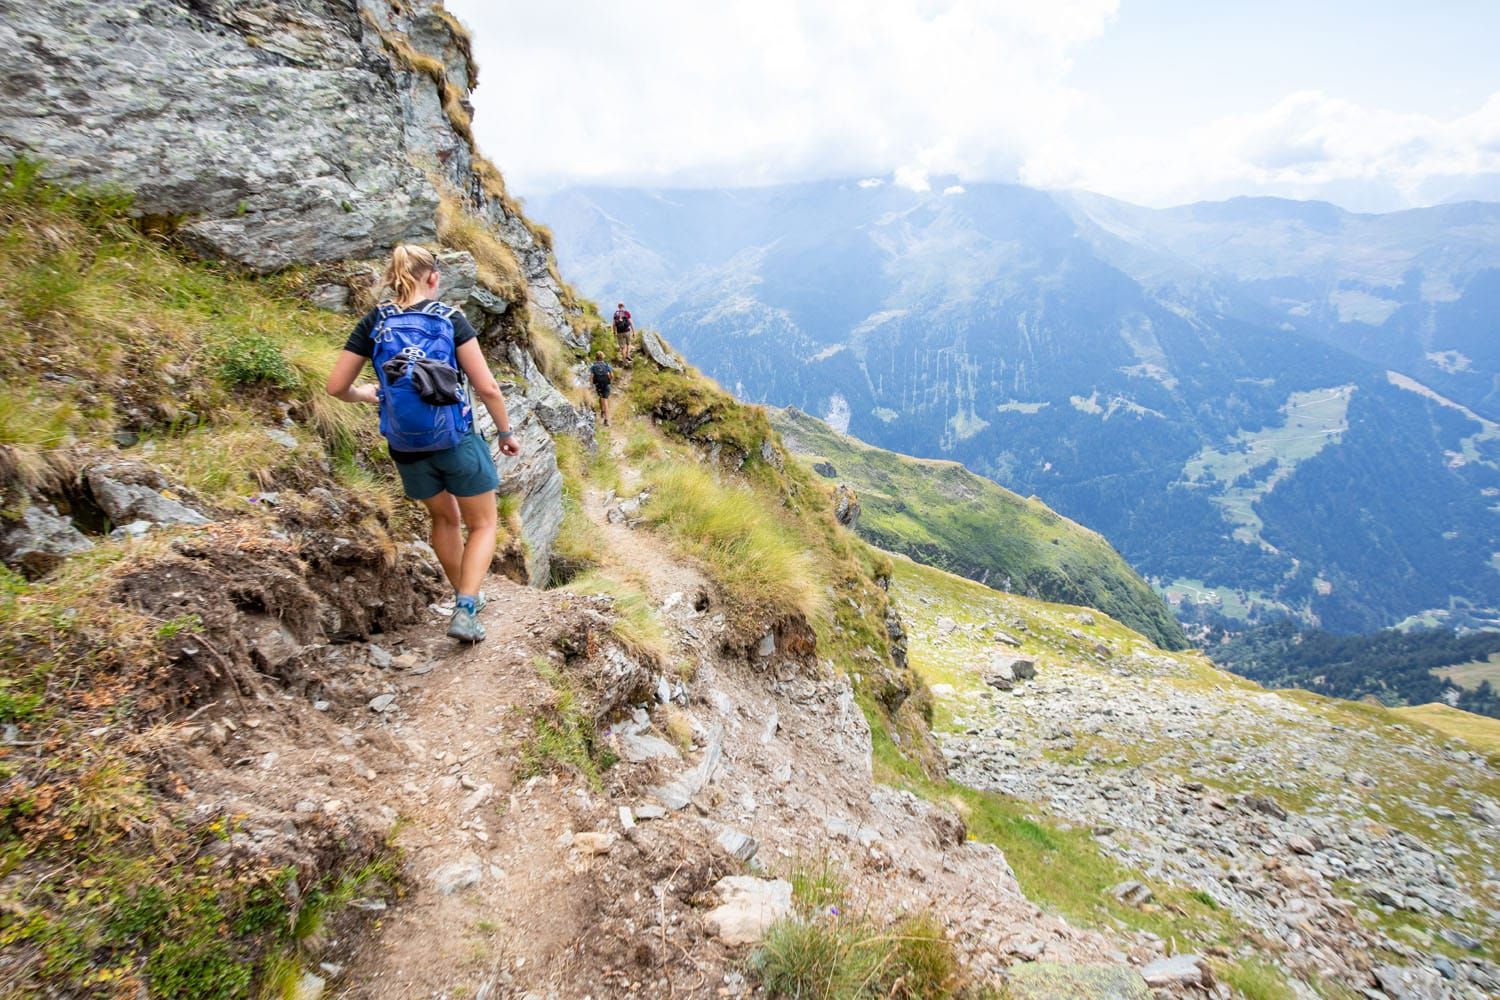
The trail will slowly climb out of the boulder field, where it becomes a dirt path that follows the side of a mountain. This is the Sentier des Chamois, a narrow trail that runs along the side of a mountain. At times there is a steep drop off from the trail, which can be narrow at times, so watch your step.
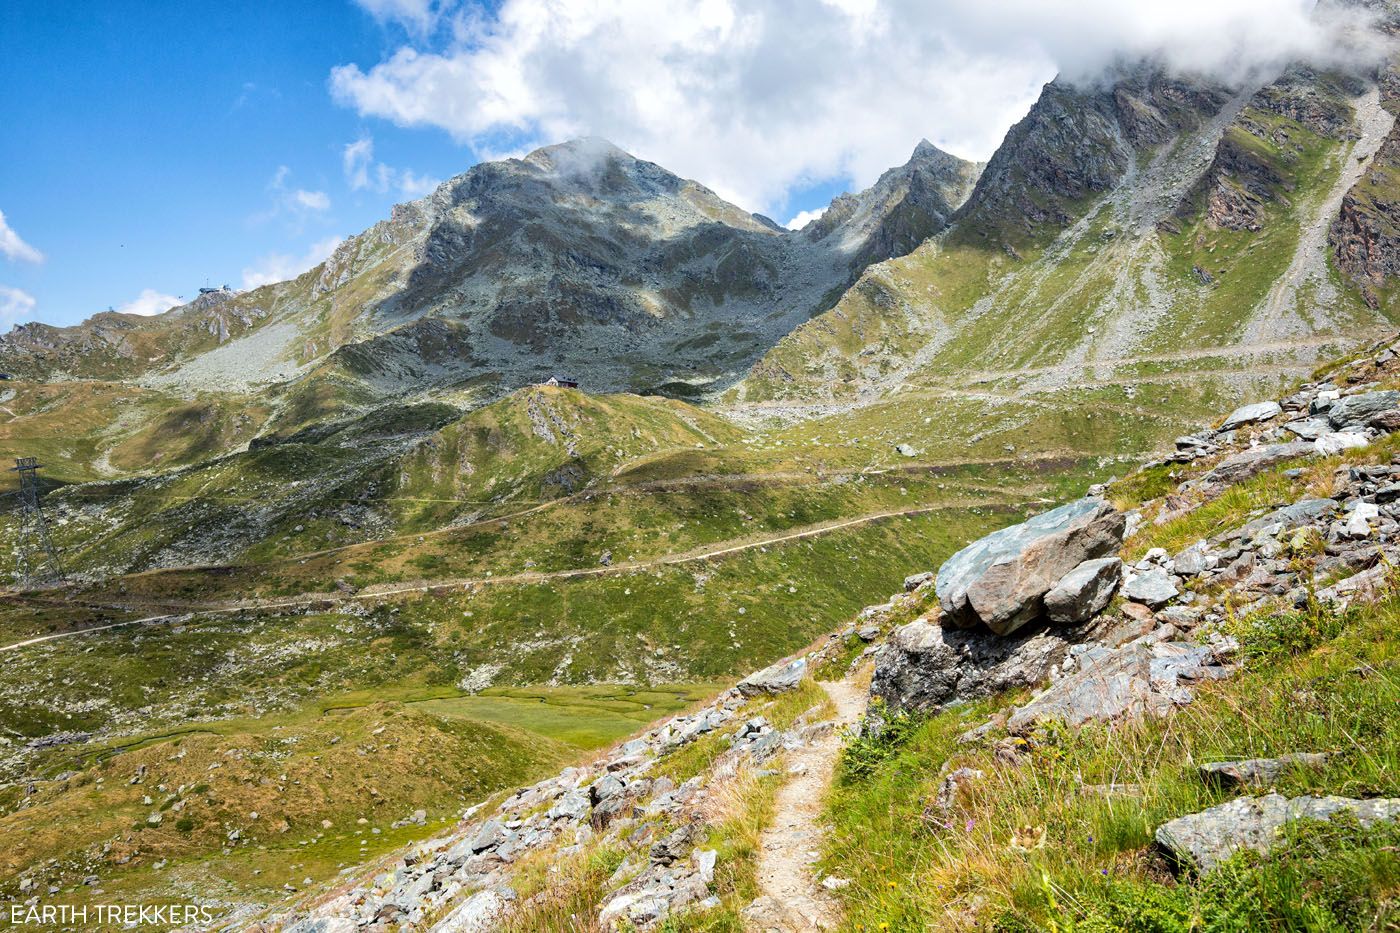
Looking back at Cabane du Mont Fort
Starting the Sentier des Chamois
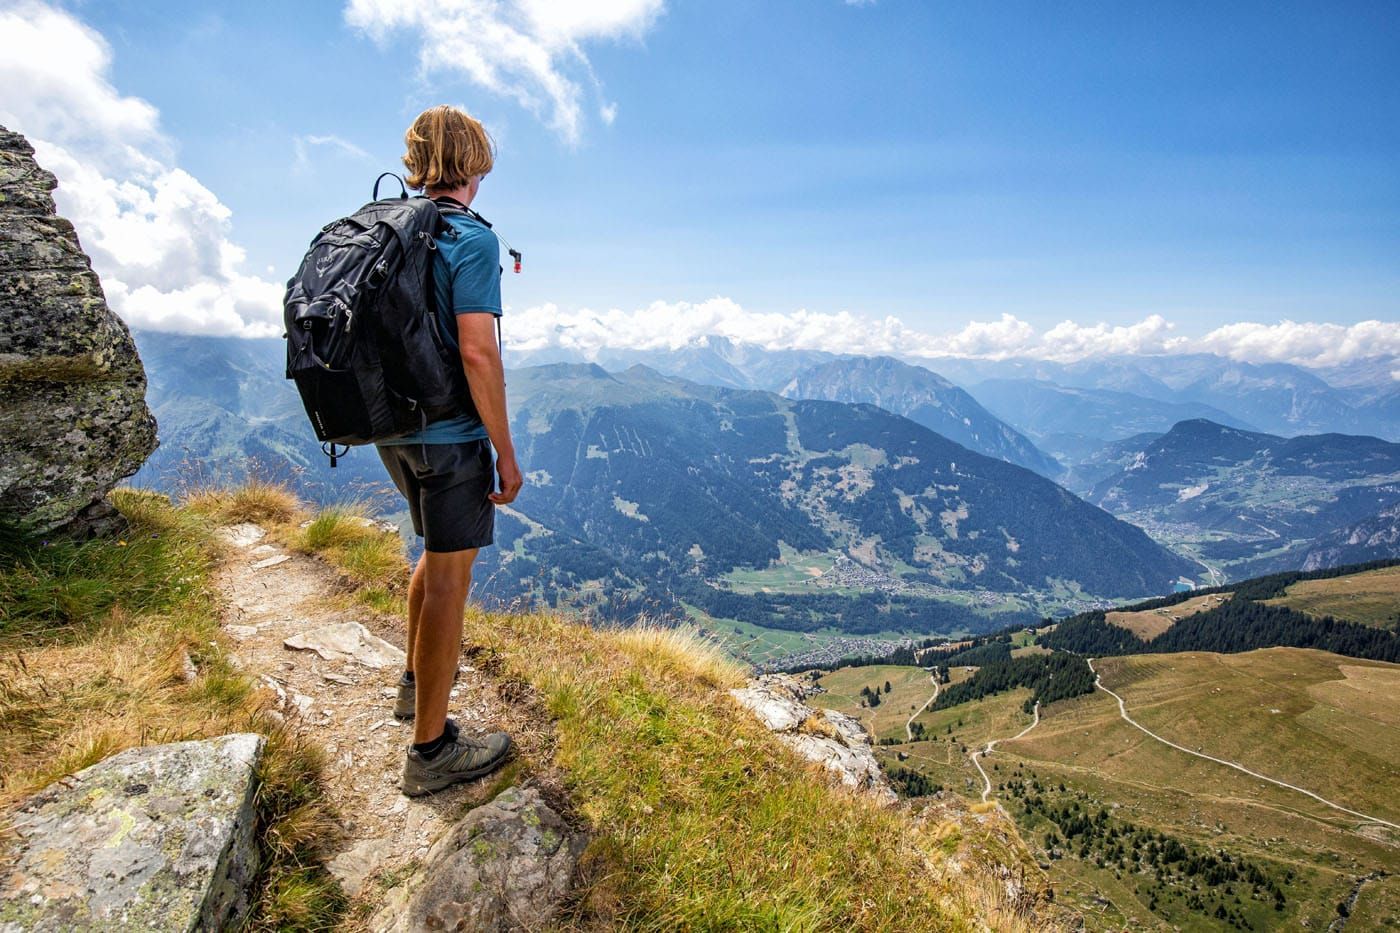
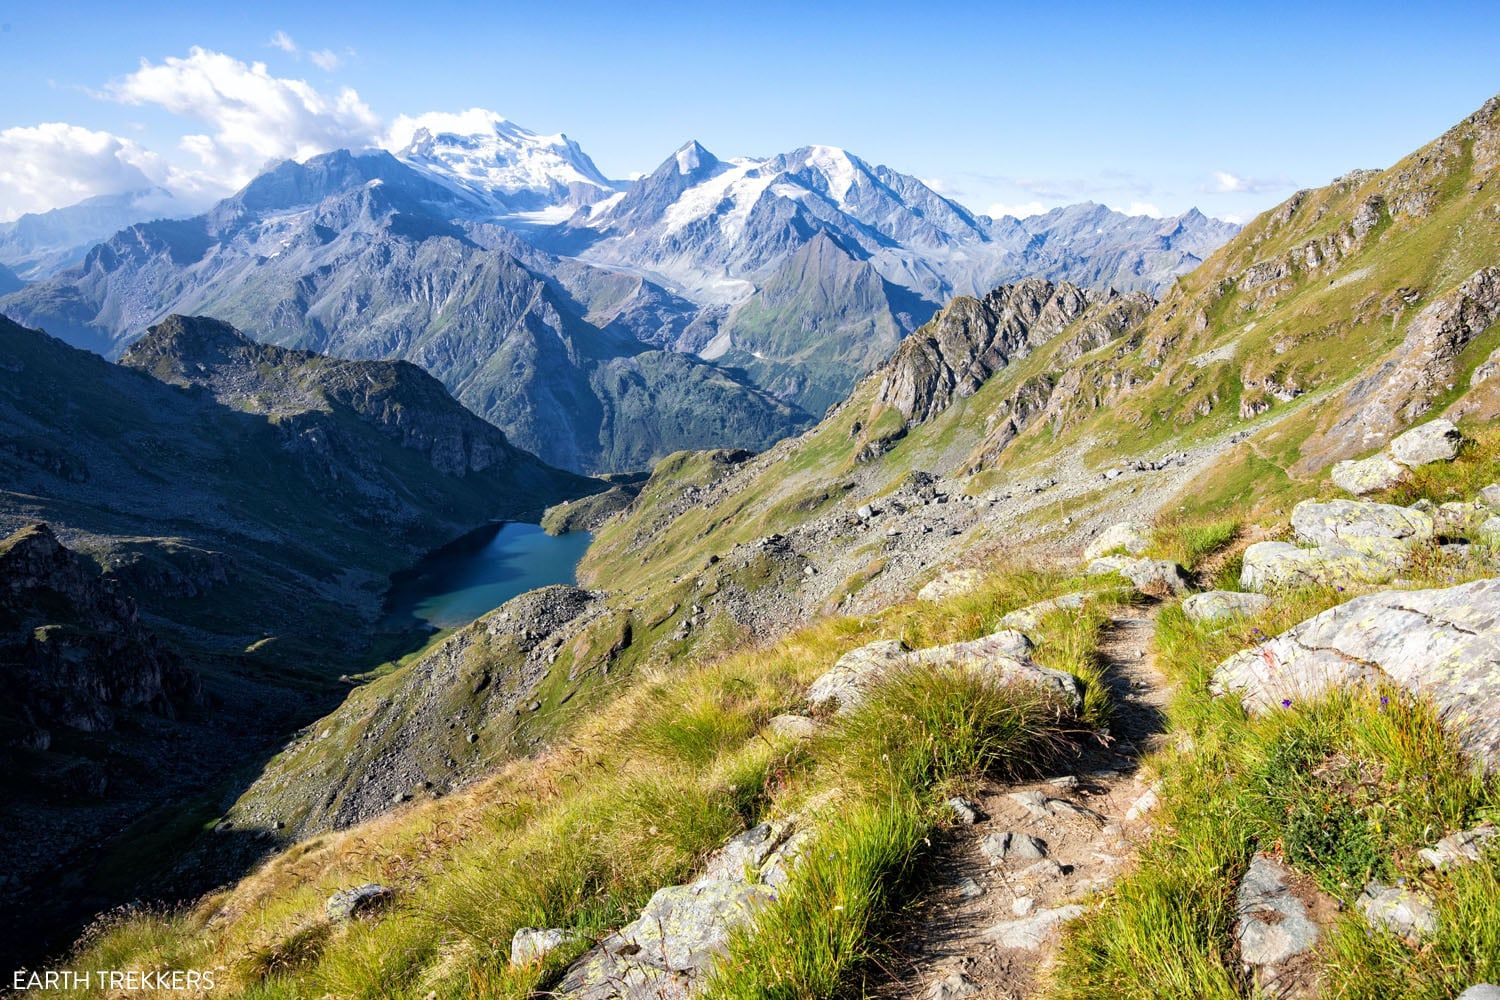
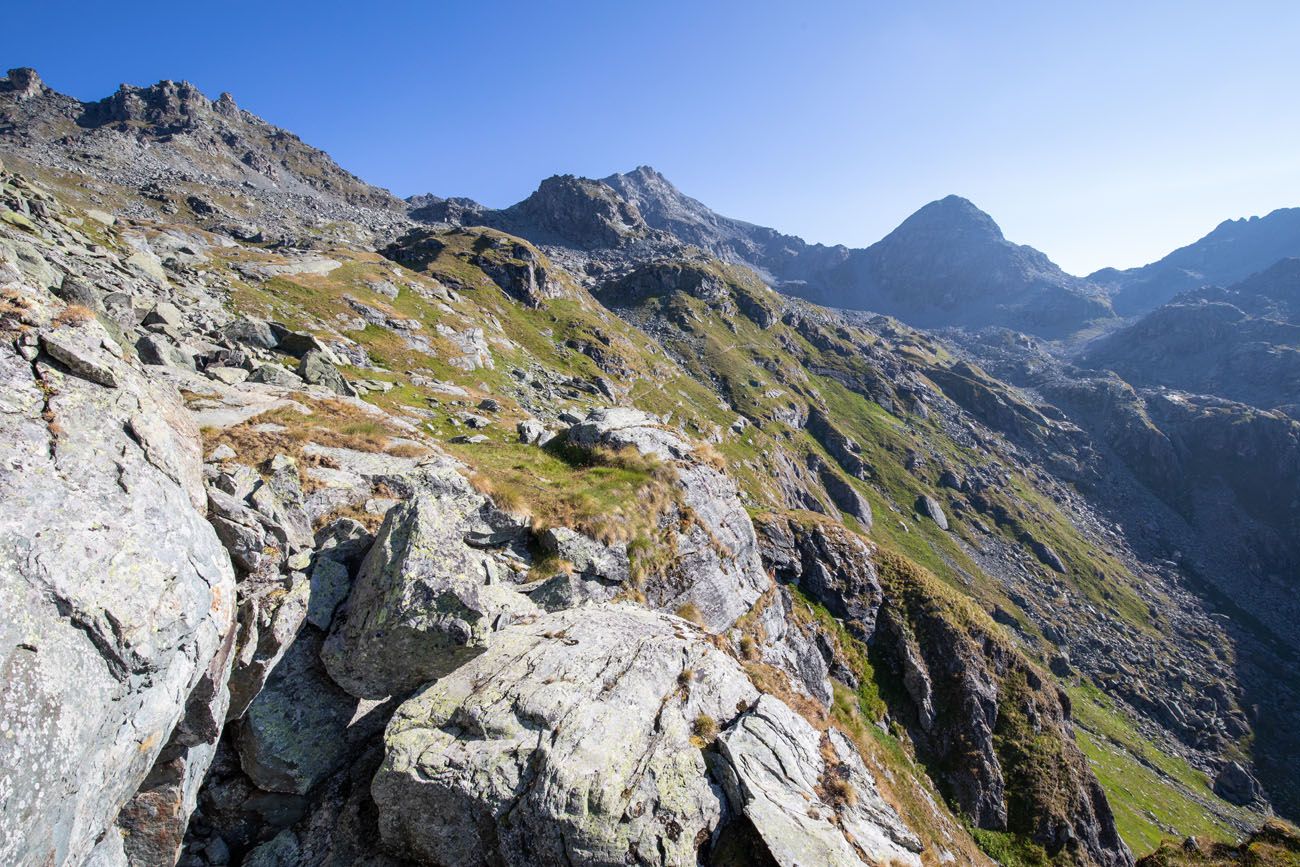
The views from this section are remarkable. The views continue to open up, revealing more of the valley and surrounding mountain peaks, which are even more spectacular on a sunny day. These will be your views for the next few miles.

Sentier des Chamois
The Sentier des Chamois brings you to Col Termin. At this point, you are standing at 2,648 meters (8,700 feet). This is the first of three cols on stage 6 of the Haute Route.
Col Termin
Col Termin to the trail for Cabane de Louvie
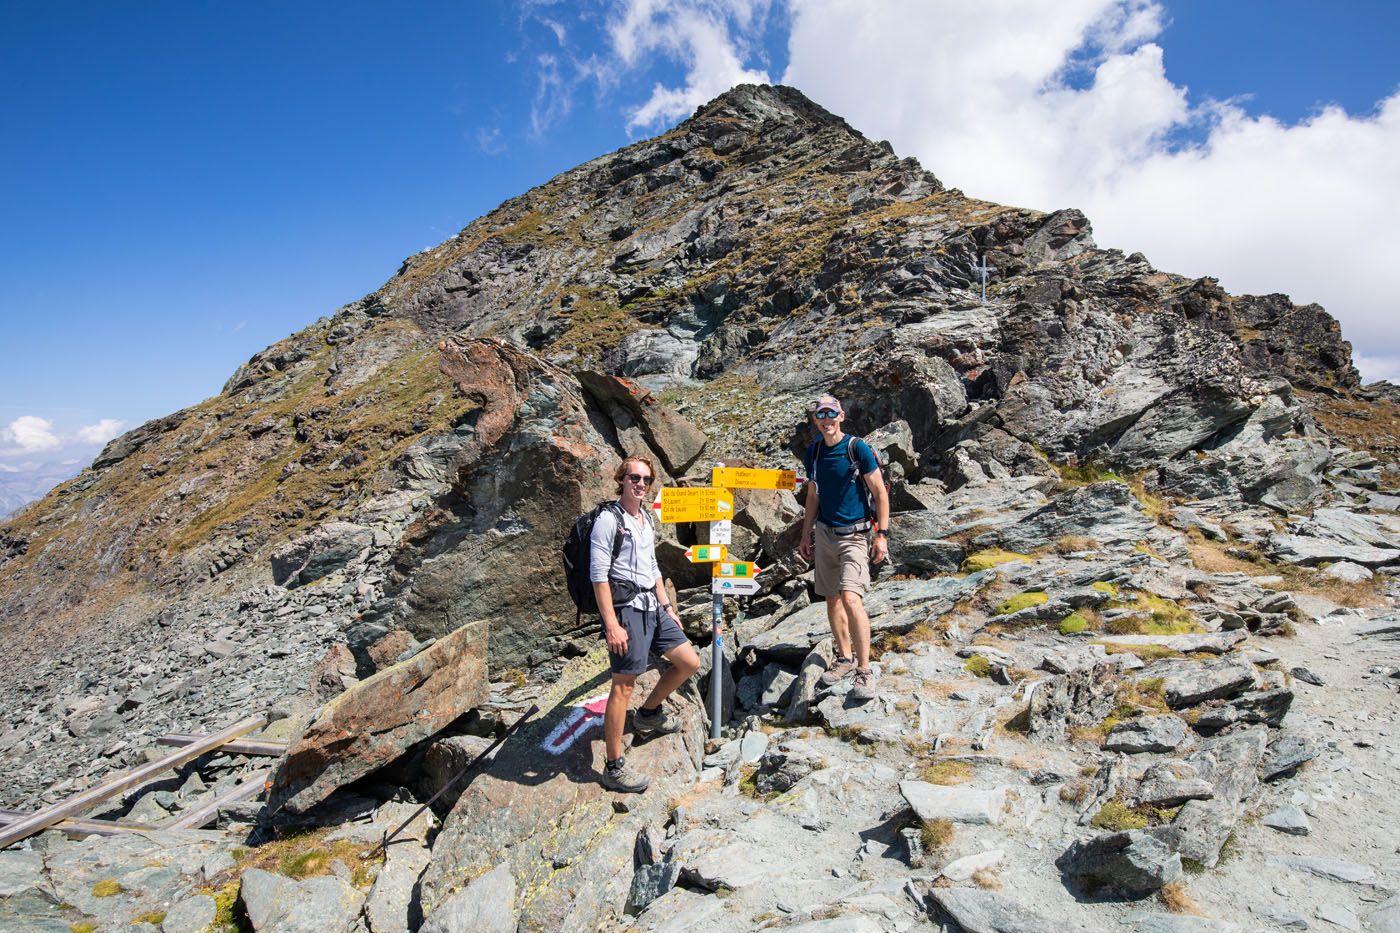
From Col Termin, follow signs for Col de Louvie and Prafleuri.
Trail between Col Termin and the detour to Cabane de Louvie.
View of Lac de Louvie from the trail.
About 20 minutes past Col Termin, you will reach a trail junction. At this point, the trail from Cabane de Louvie joins the main Haute Route trail.
STARTING FROM CABANE DE LOUVIE: If you spent the night at Cabane de Louvie, you will have a 2.6 km (1.6 miles) hike with 420 meters (1,375 feet) of total ascent to get to the trail junction mentioned above. It’s a tough, uphill hike between the lake and the main trail. But we think it’s worth the distance and extra climb for the awesome setting Cabane de Louvie has on the lake.
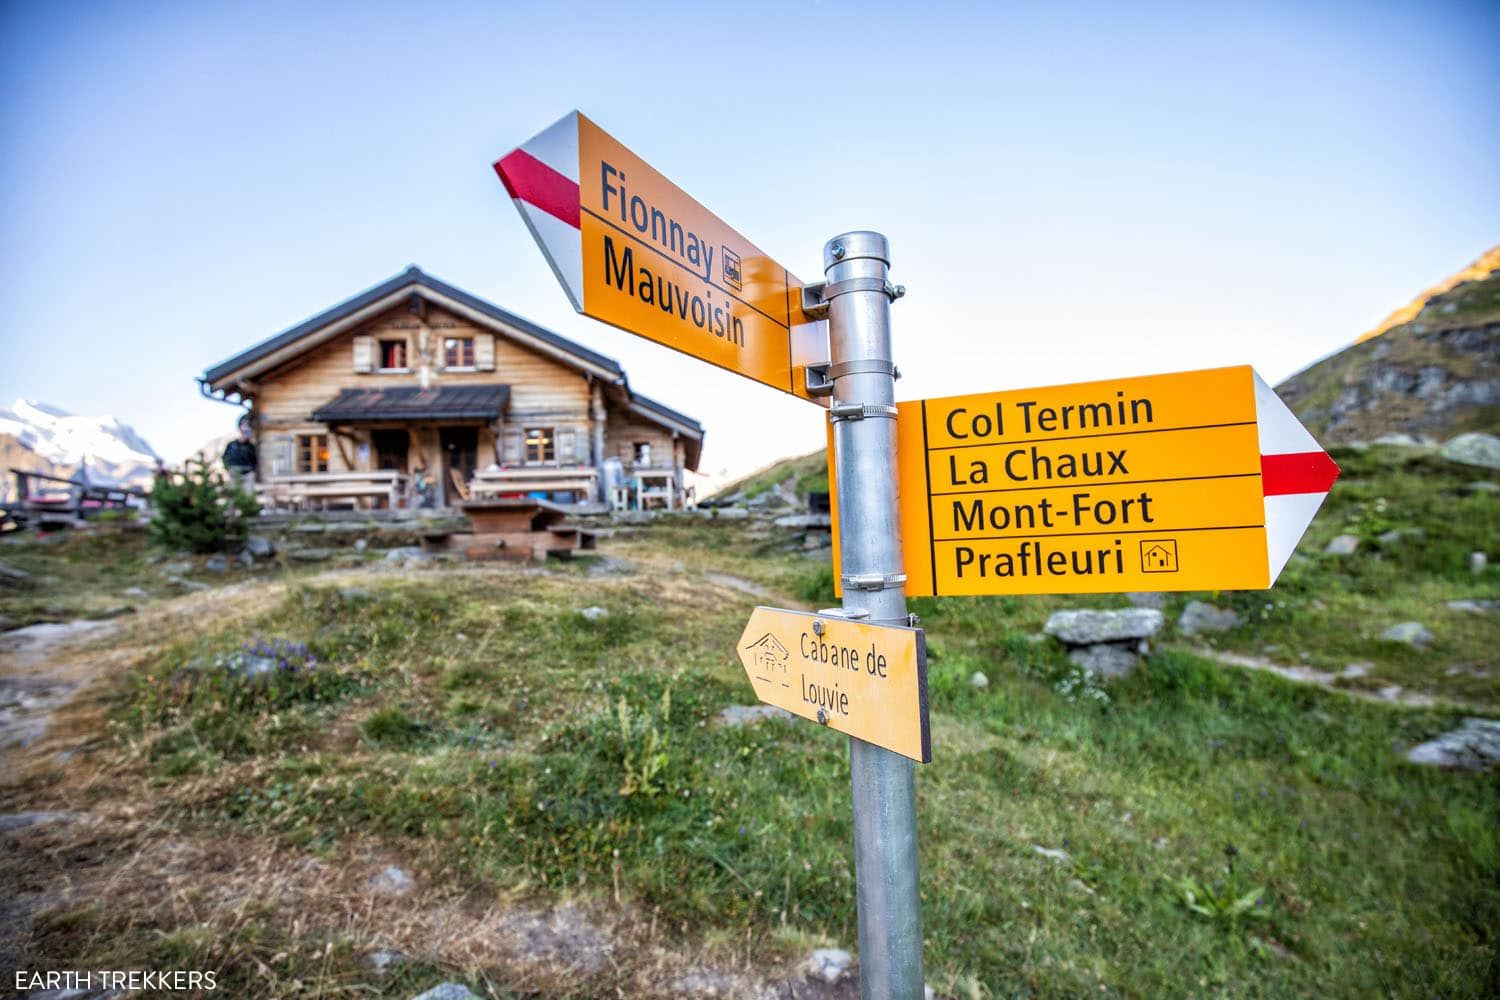
Cabane de Louvie
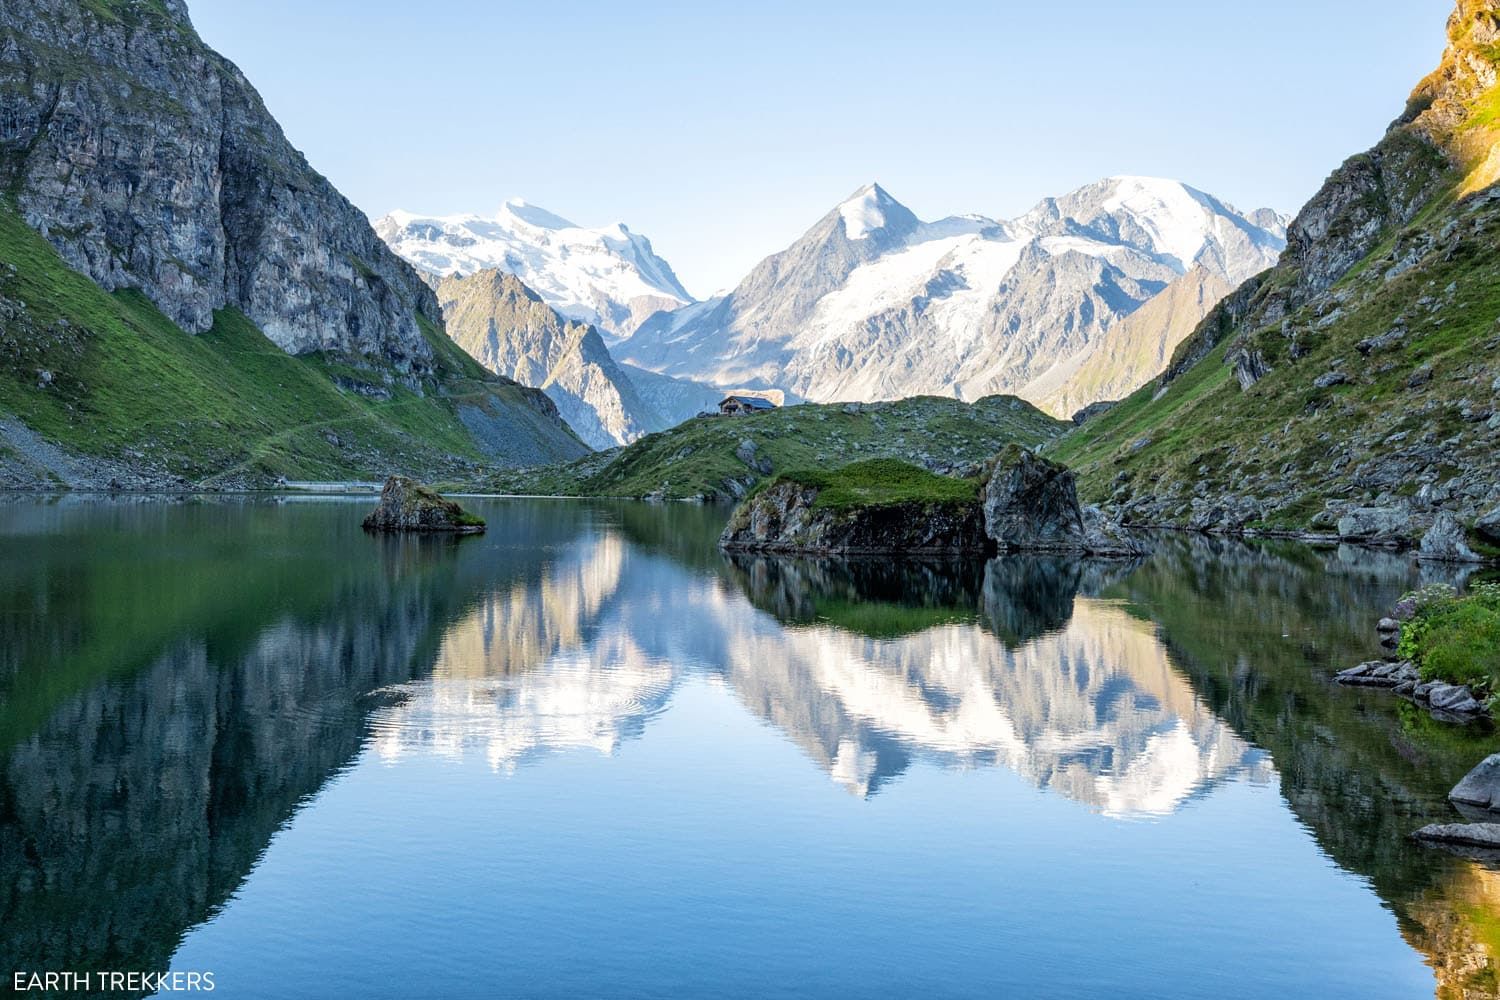
Cabane Louvie and Lac de Louvie in the morning.
Cabane de Louvie Trail to Col de Louvie
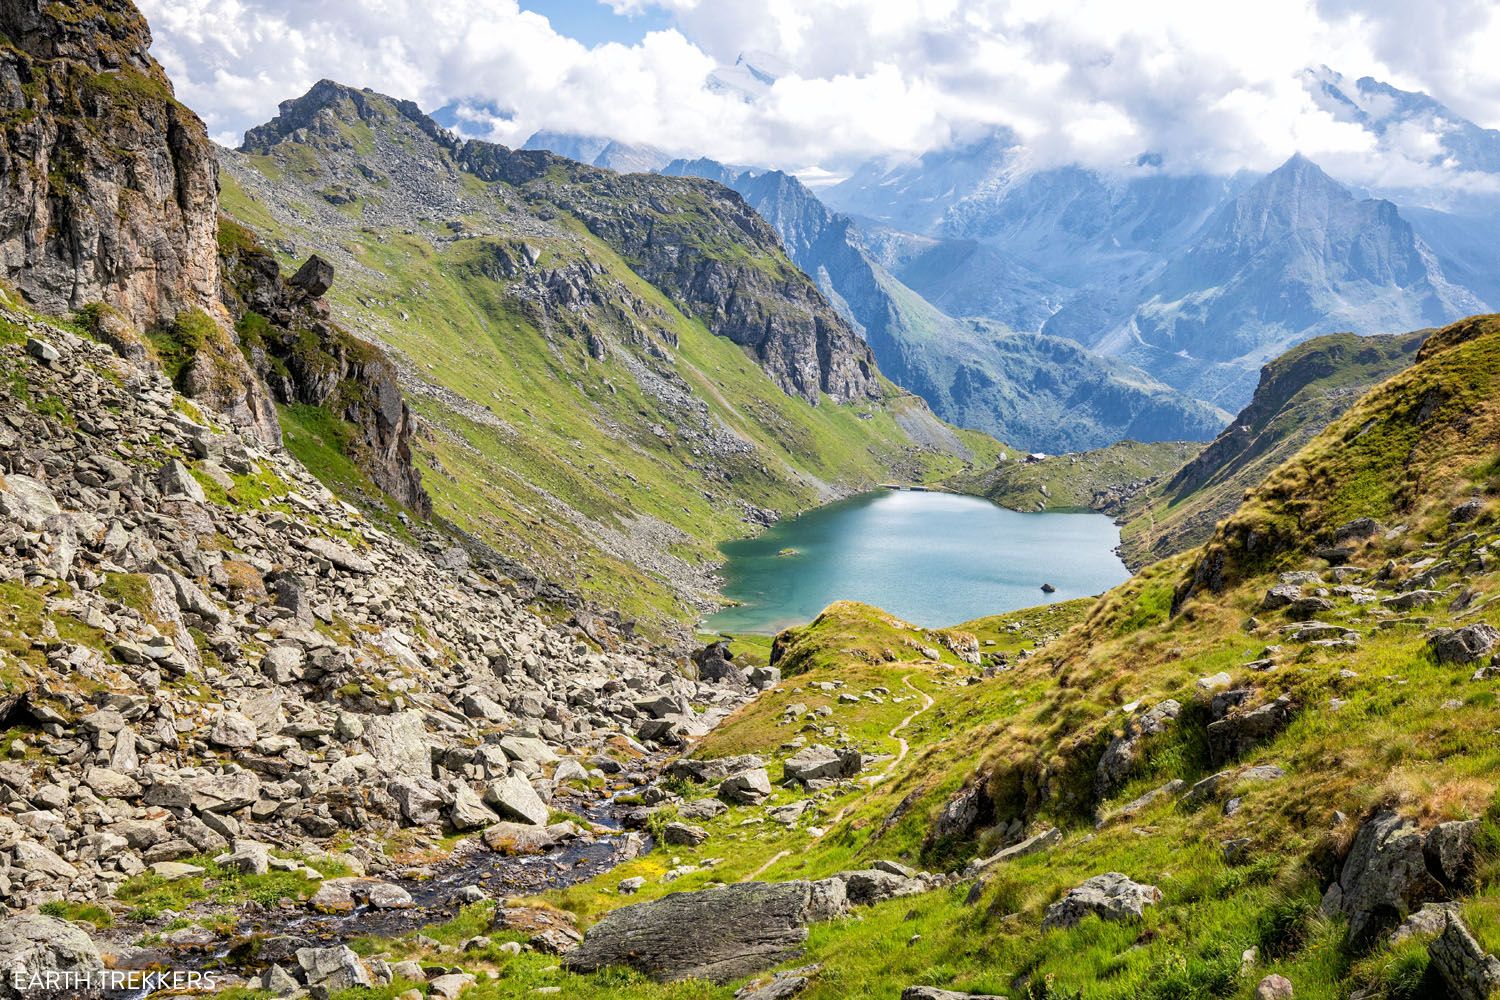
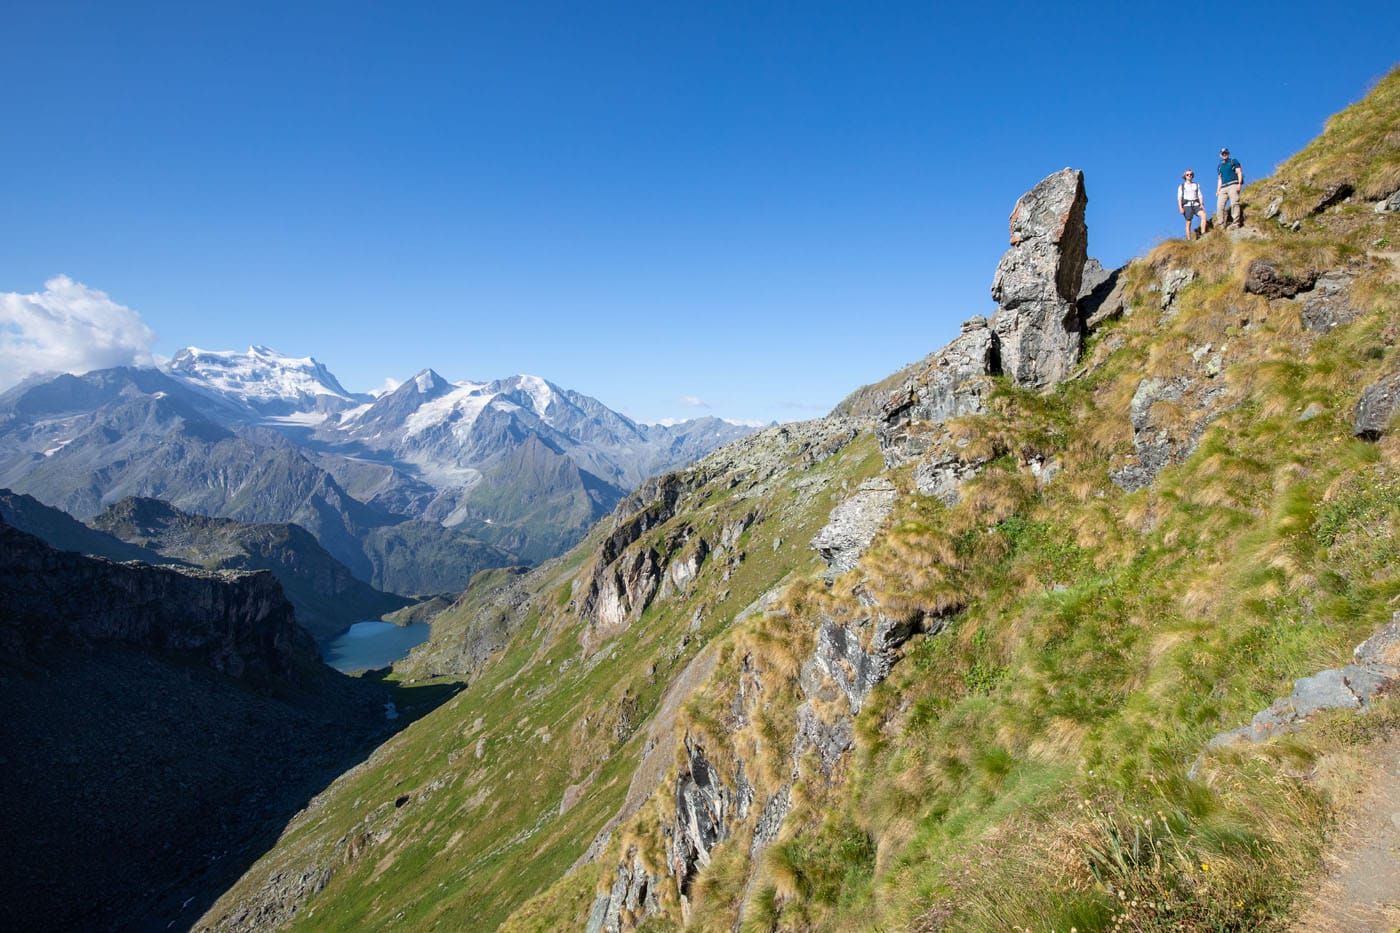
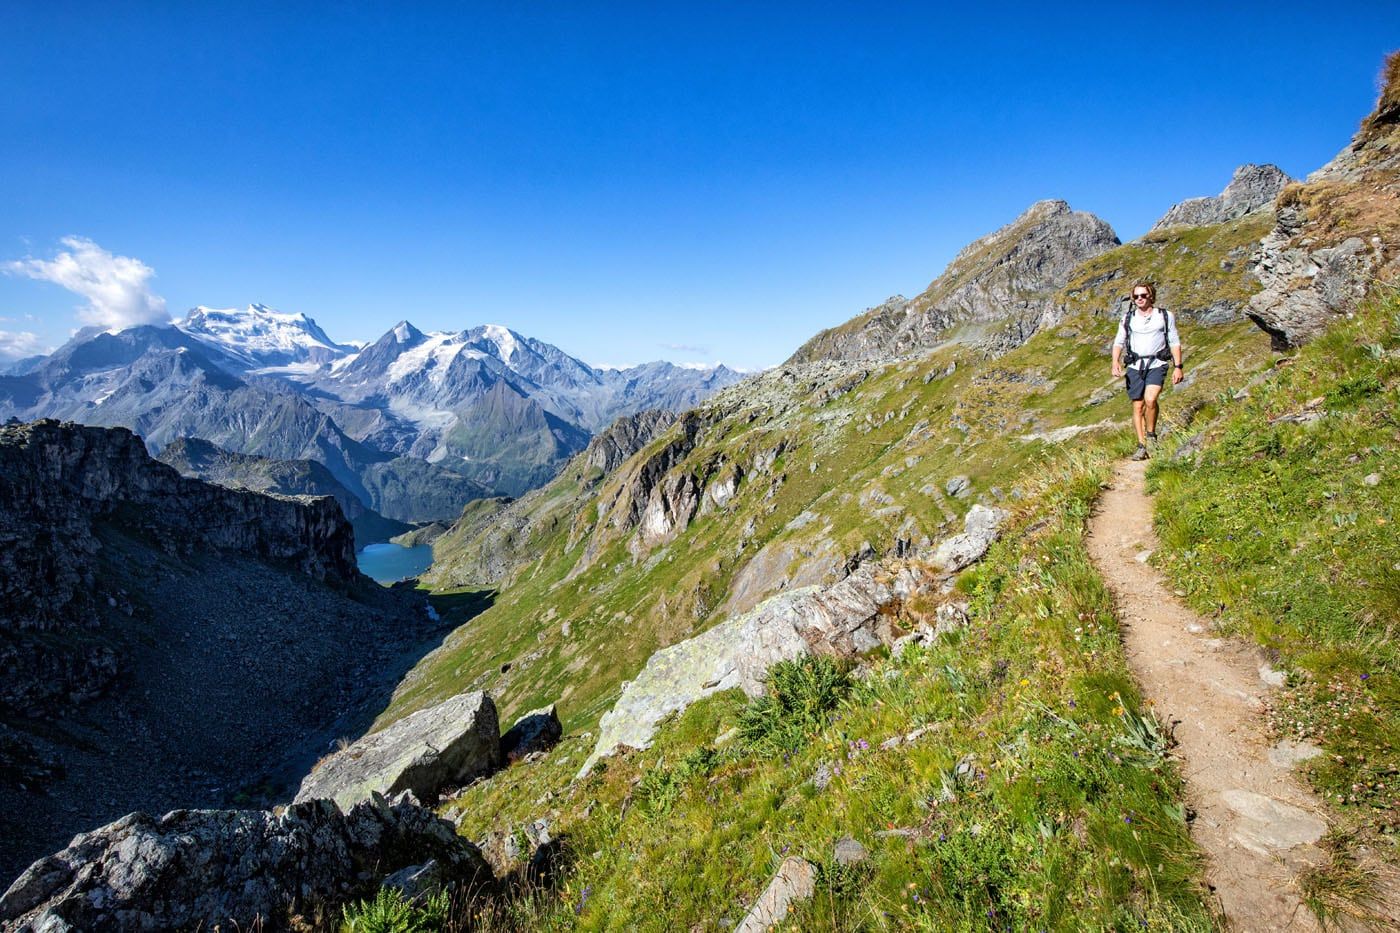
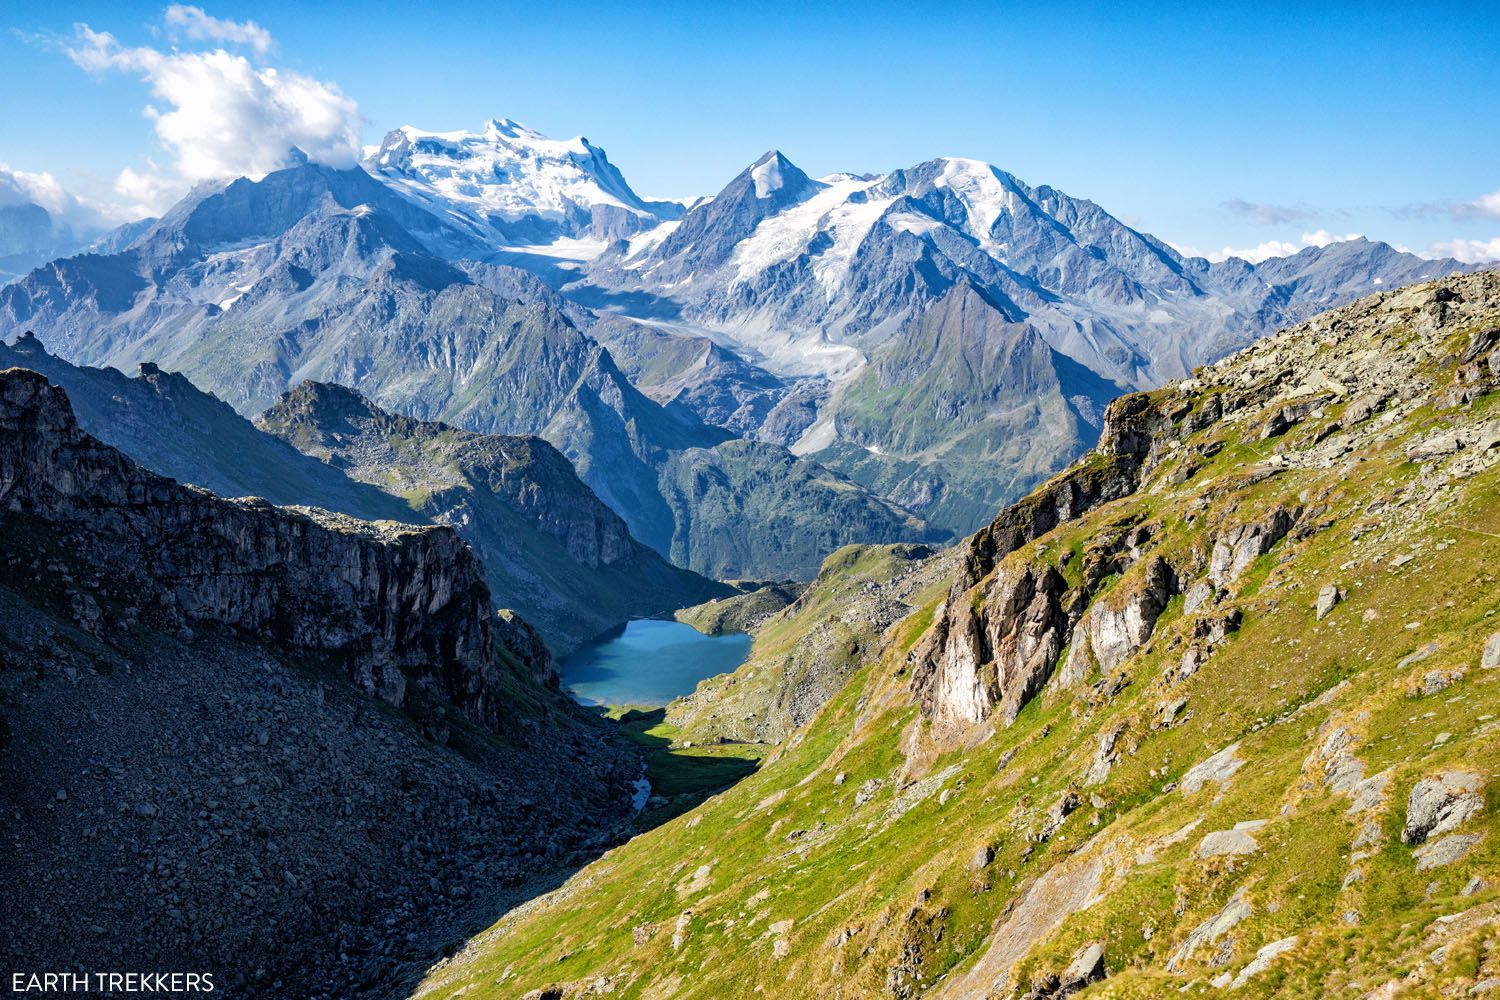
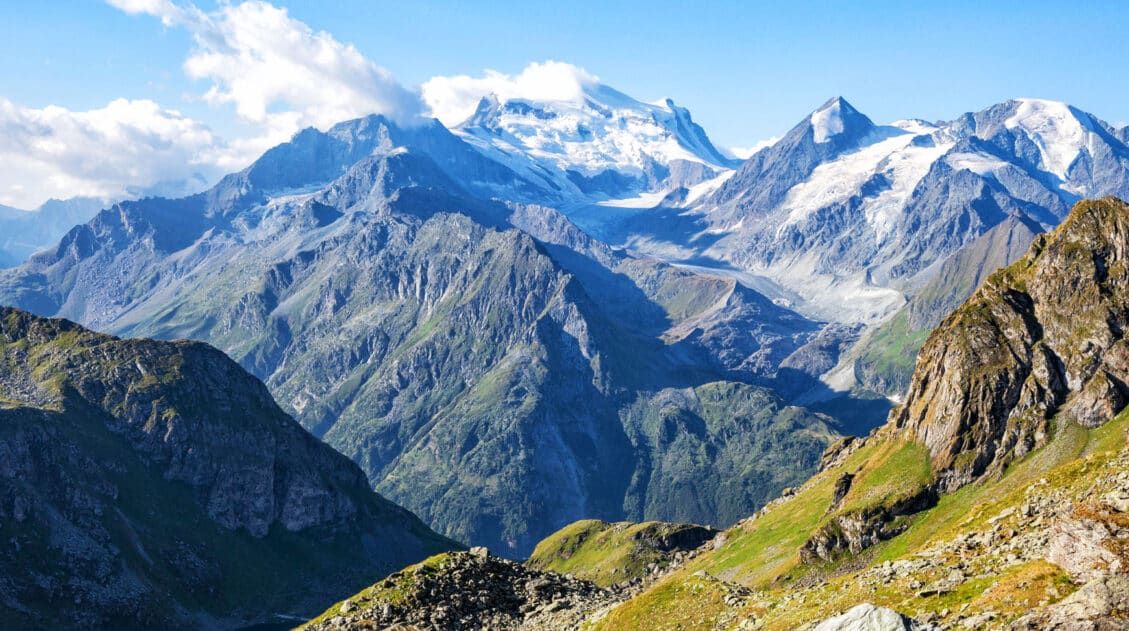
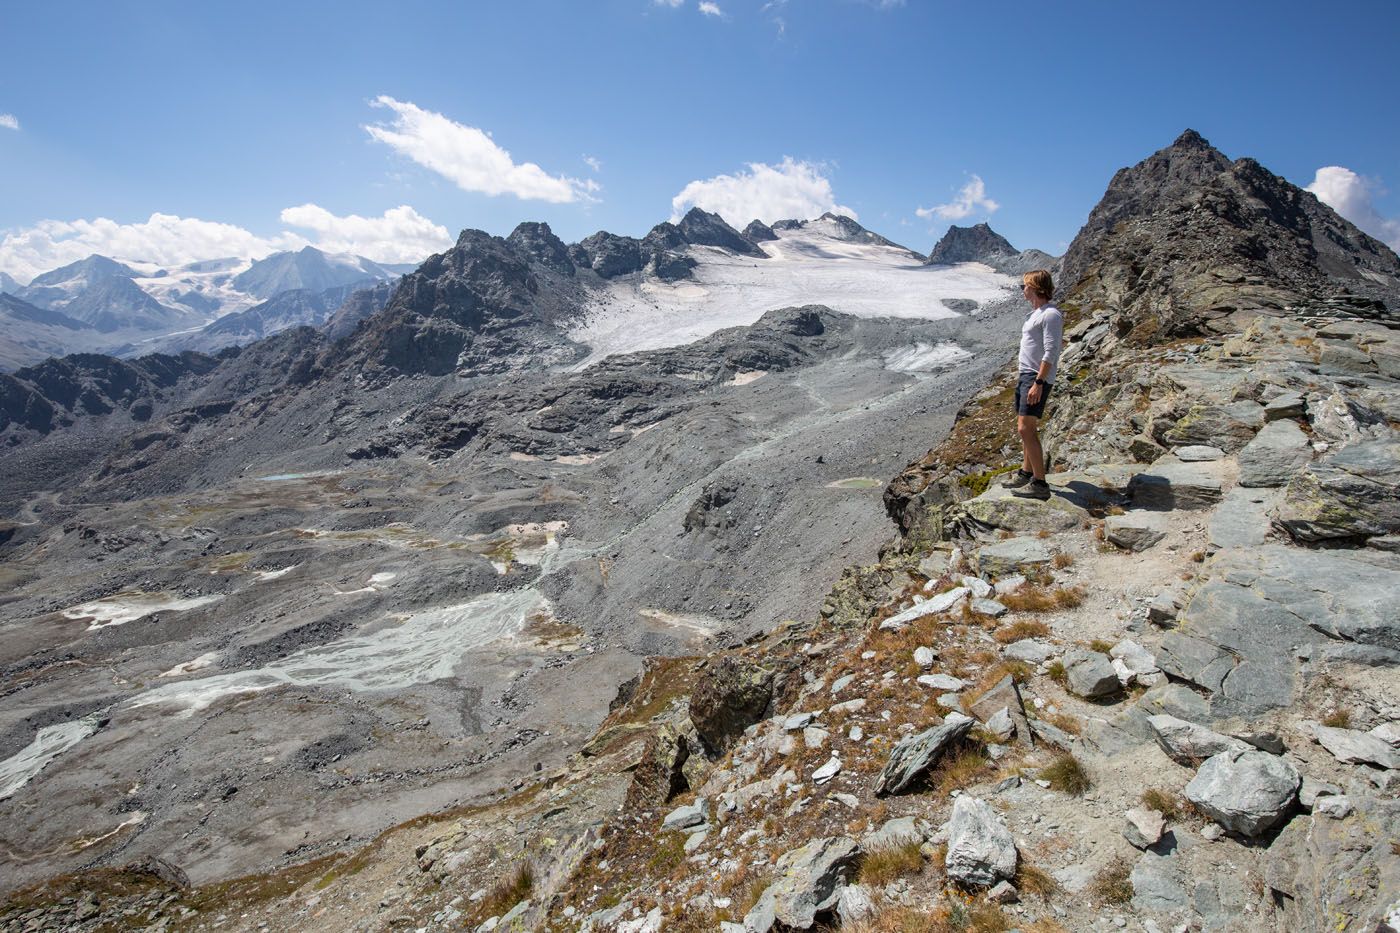
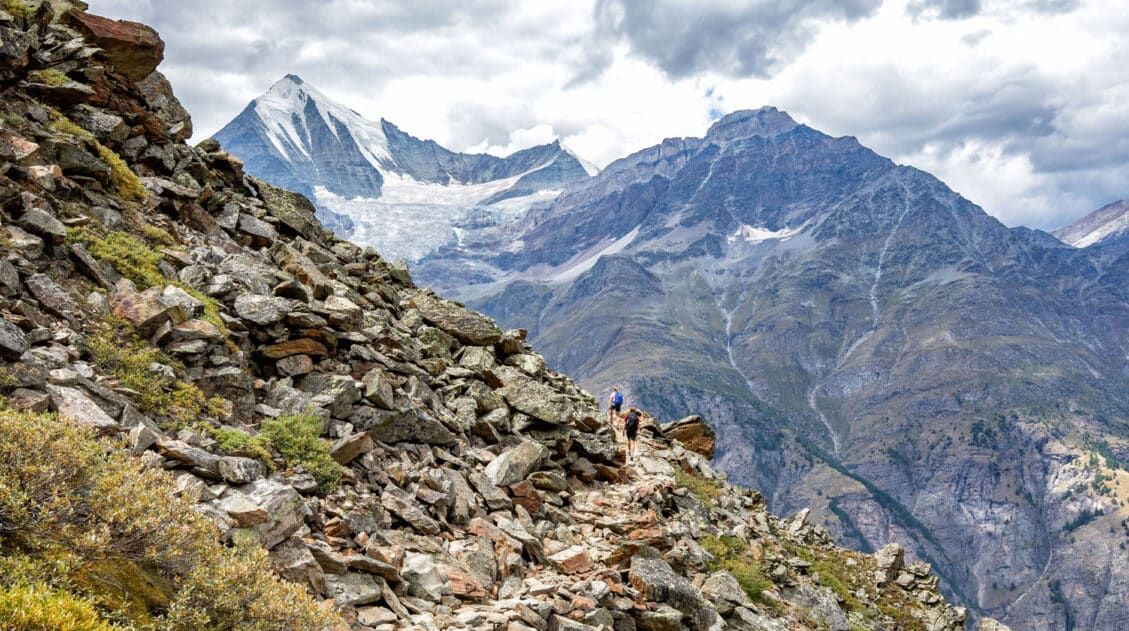
From the trail junction, continue to follow signs to Cabane de Prafleuri. The views from the first part of this section are incredible. Down below is Lac de Louvie and Cabane de Louvie. Off in the distance is the glacier capped Grand Combin.
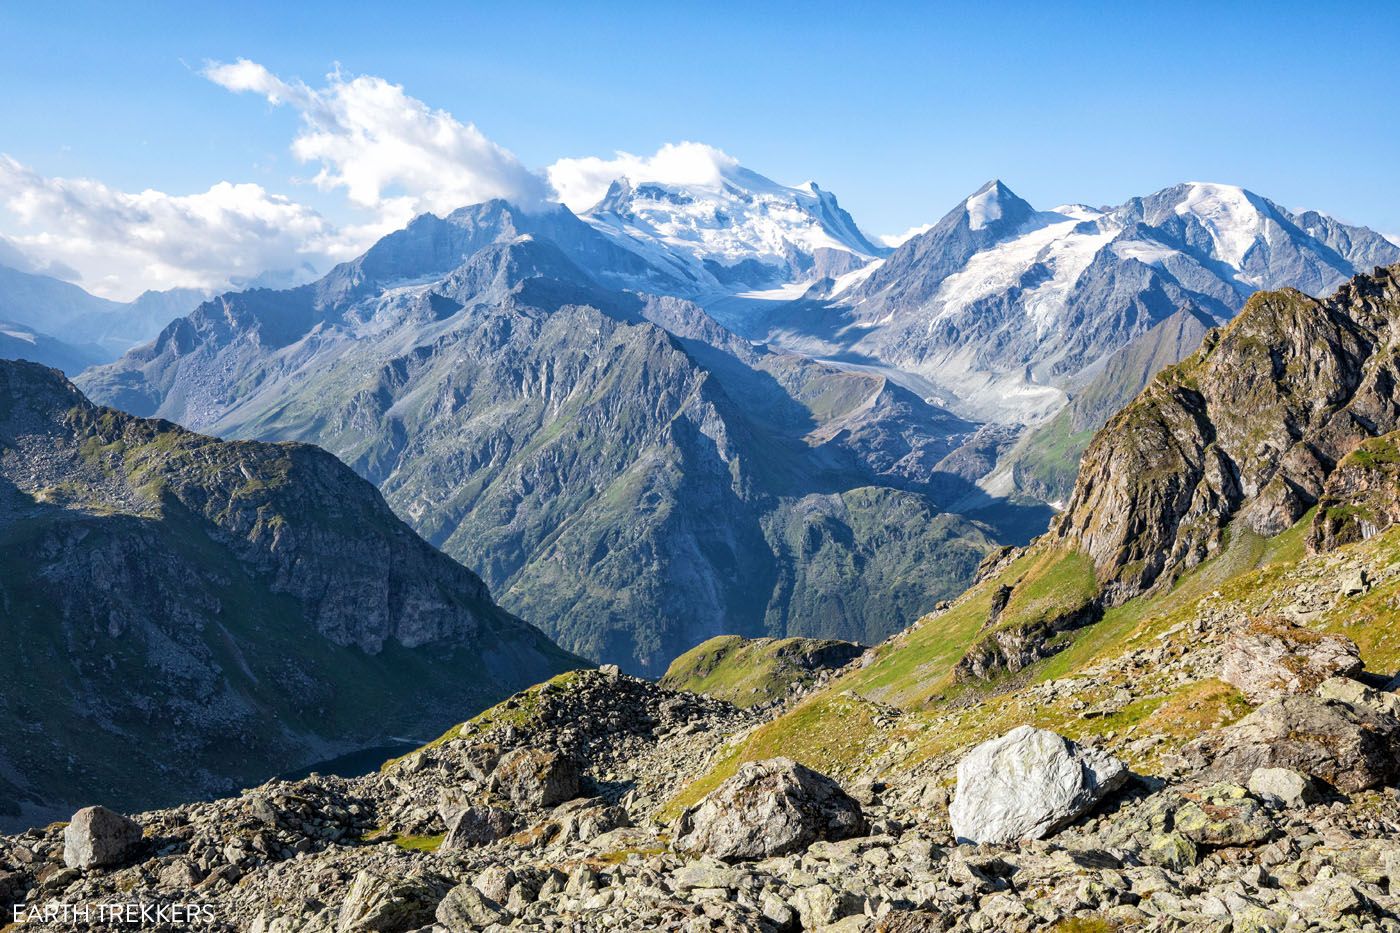
Grand Combin
Grand Combin and Lac de Louvie
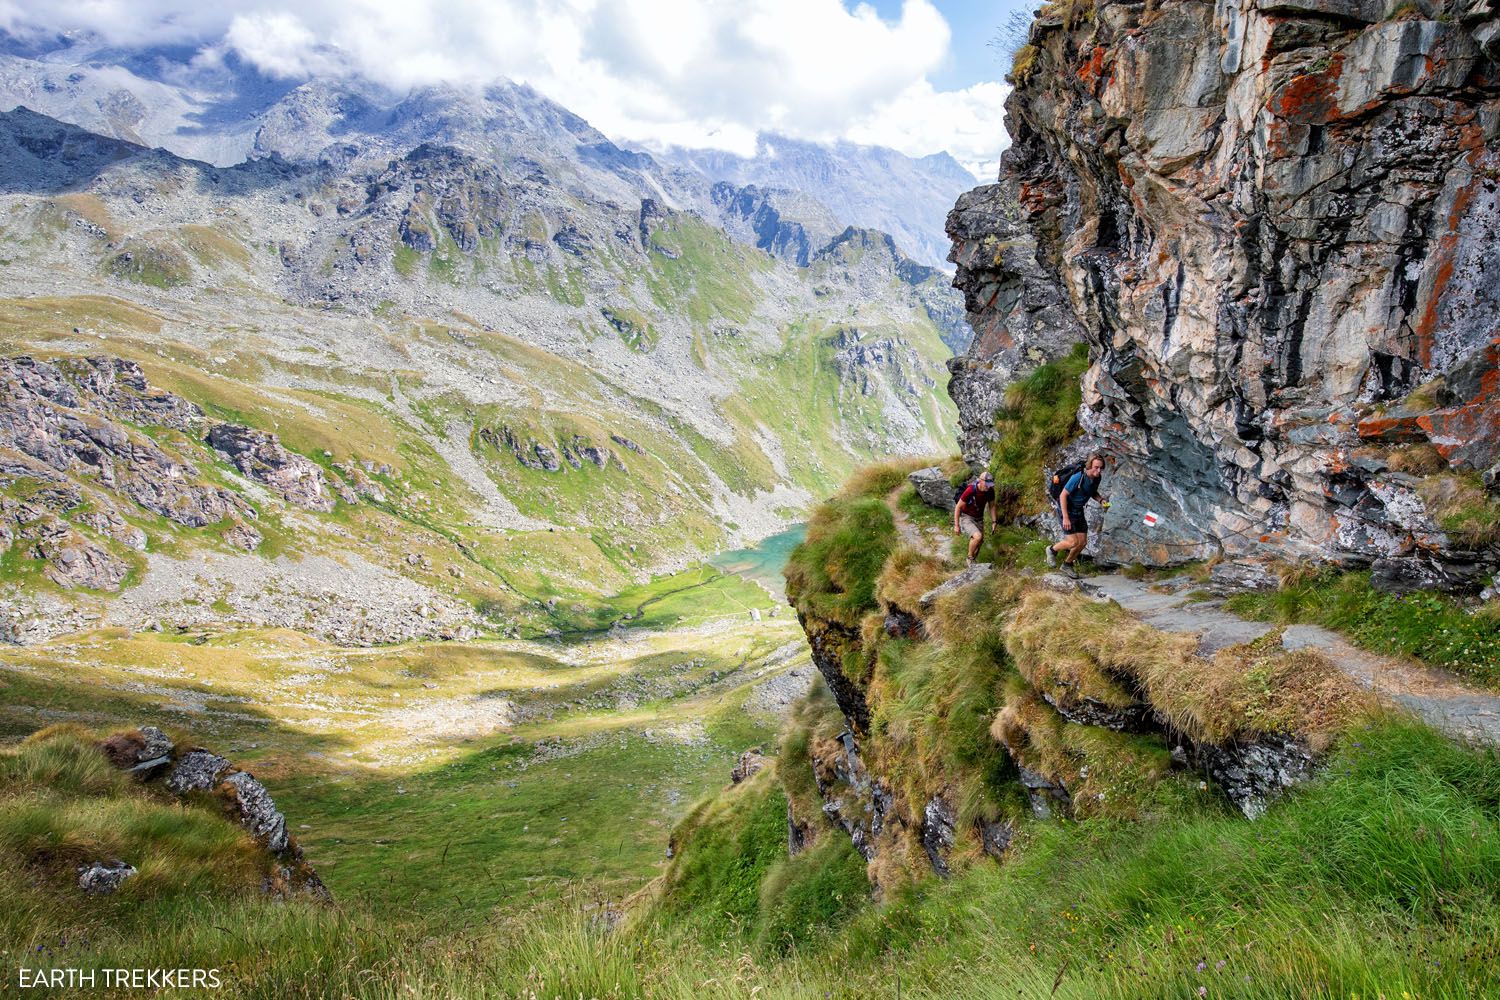
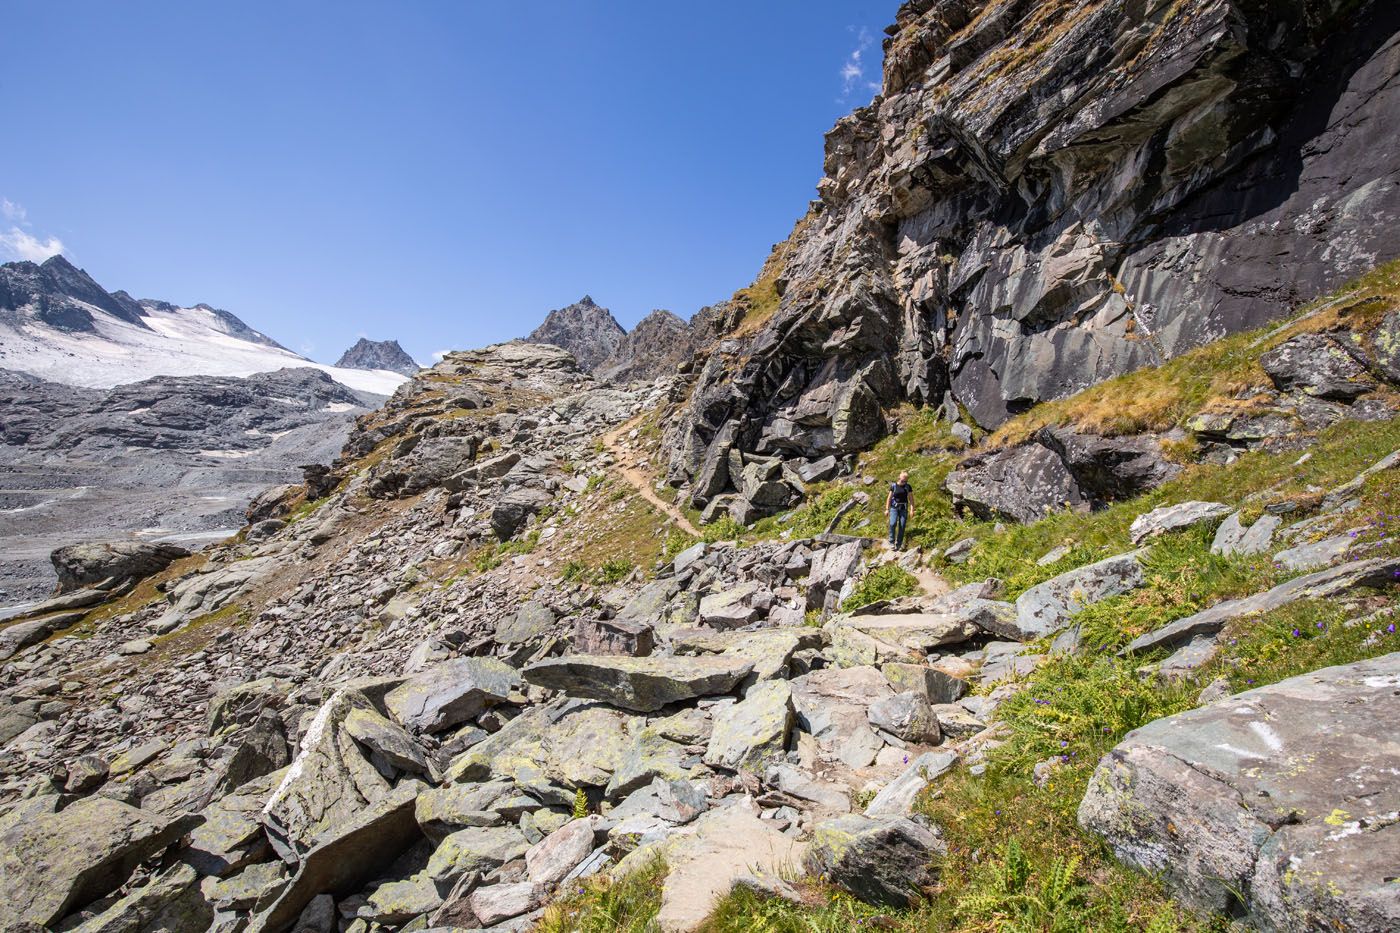
During this section of trail, you are gradually ascending, but with a few downhills scattered in, this part of the hike feels rather easy. Some sections of the trail scale a few cliff edges and there are chains in place should you need them.
Once you reach the boulder field, the trail starts its ascent to Col de Louvie. At times you will pick your way through boulder fields (have care here) and at other times you will hike up a very steep, dusty trail.
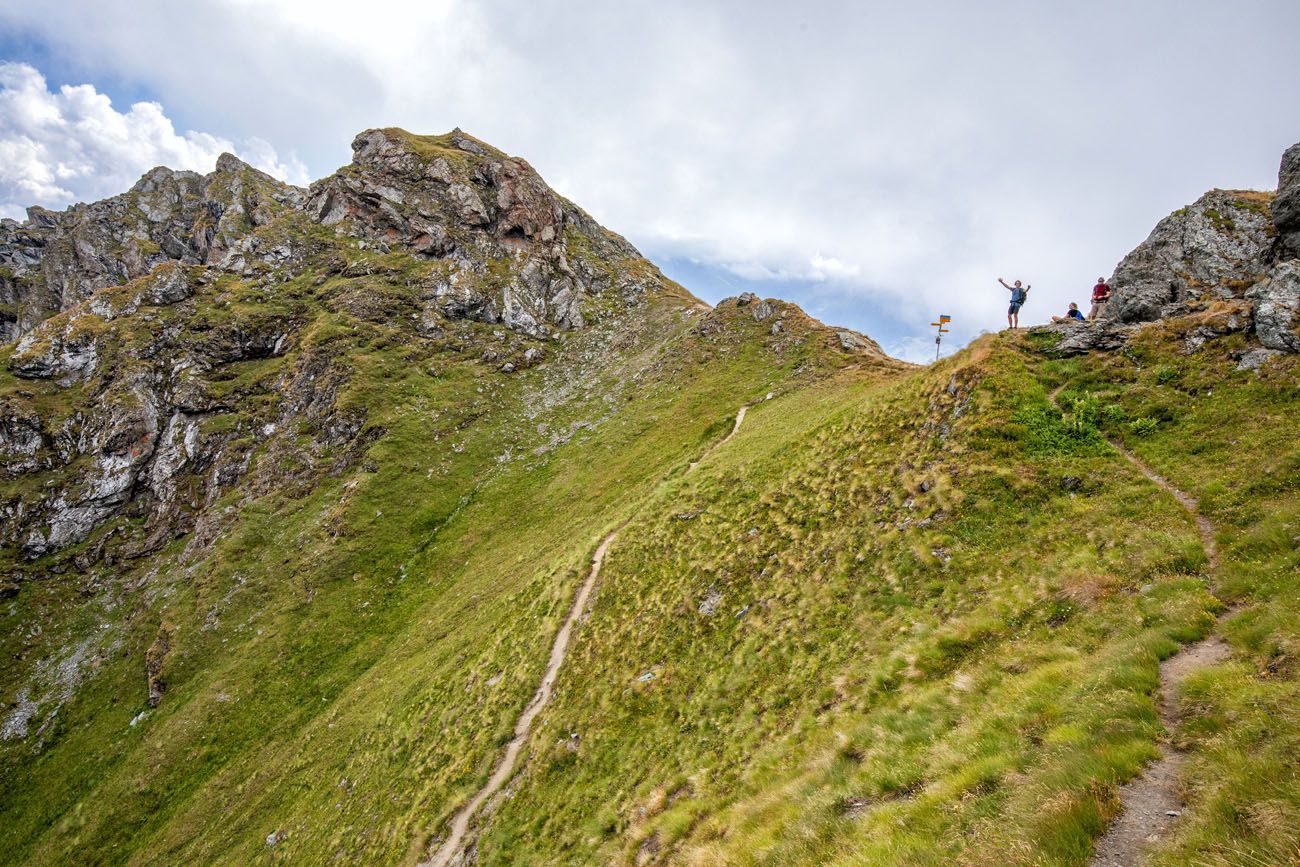
Once at the top, you are standing at Col de Louvie (2,921 meters, 9,600 feet).
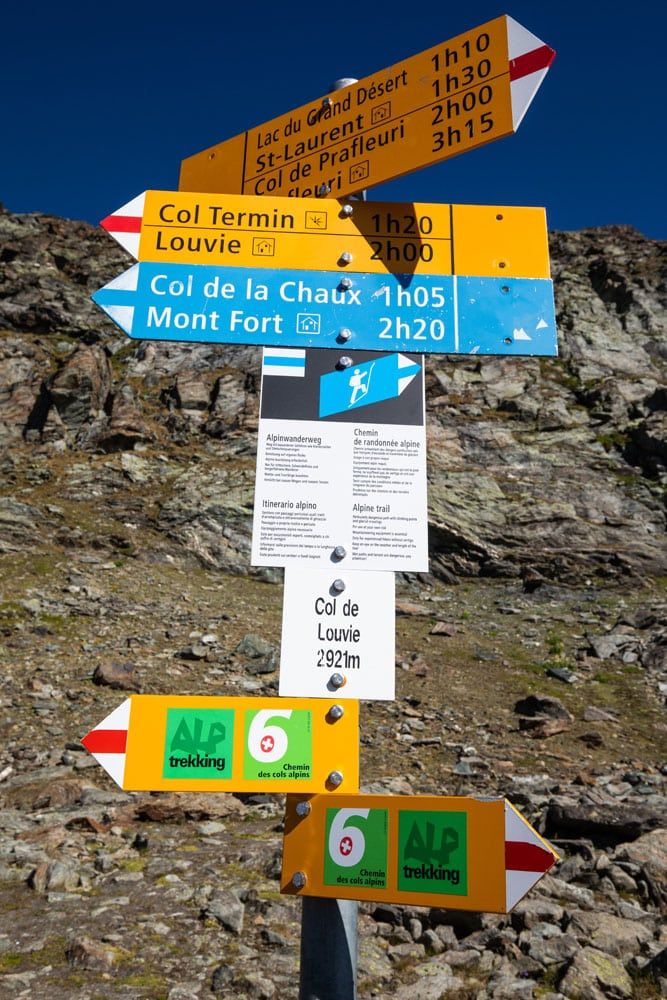
Col de Louvie
Col de Louvie Photo
Col de Louvie to Col de Prafleuri
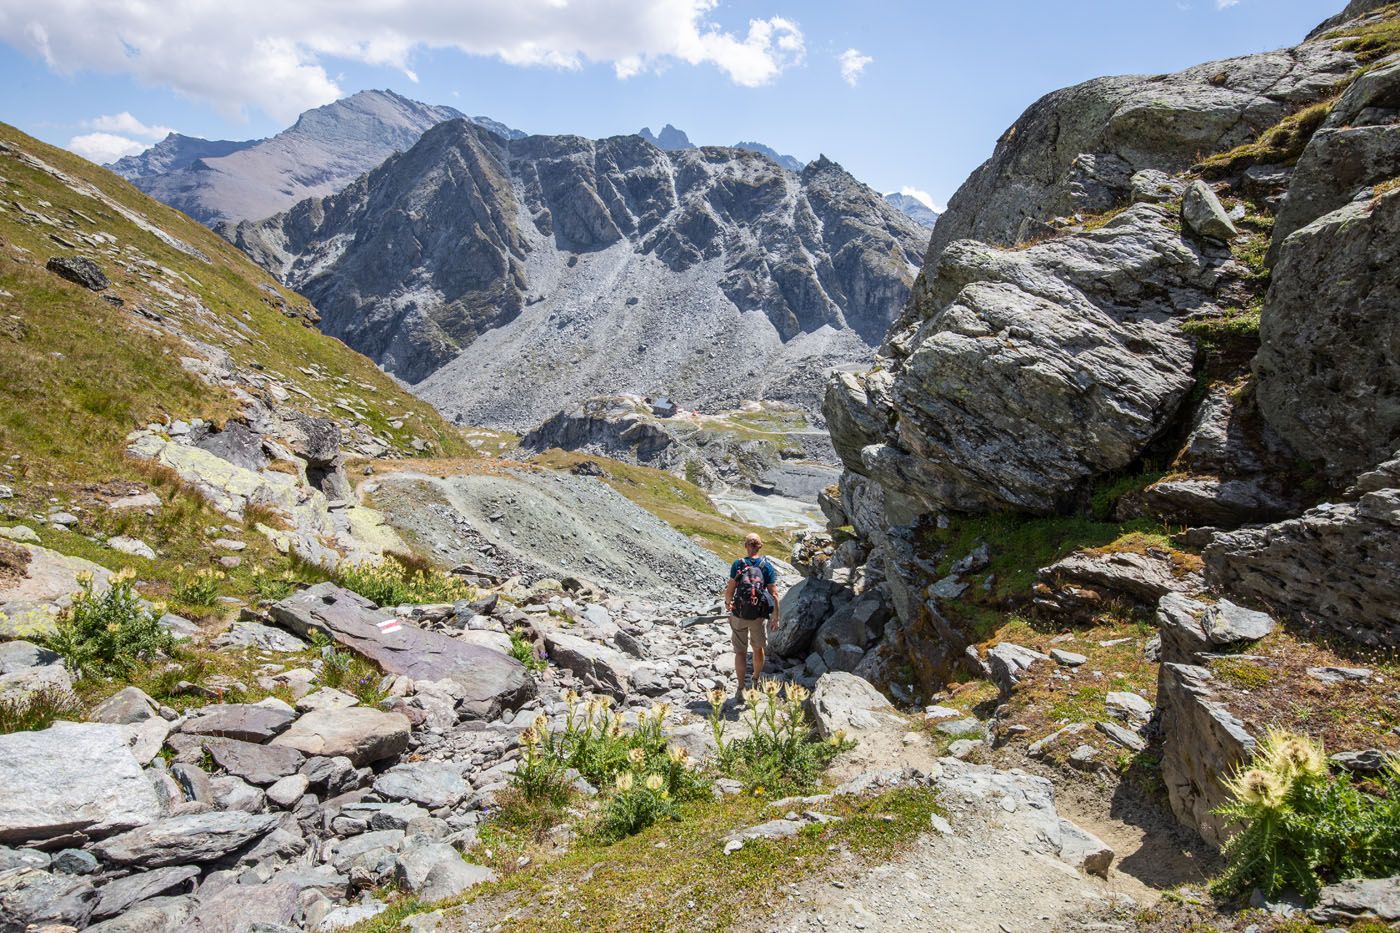
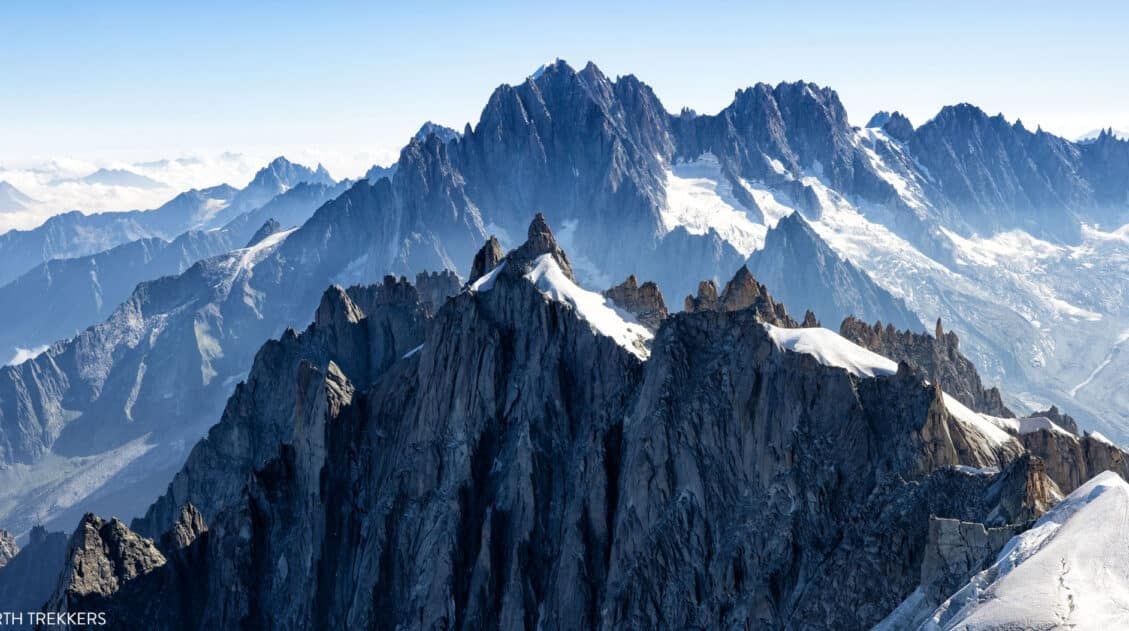
Once you start down the other side of Col de Louvie, you leave behind views of Grand Combin and the lush, green landscape. The terrain dramatically changes into mountains covered in slate gray rocks and boulders. A few receding glaciers cling to several of the highest peaks in the area.
Take your time hiking down from Col de Louvie. With loose rocks and scree, it’s slow-going on this descent.
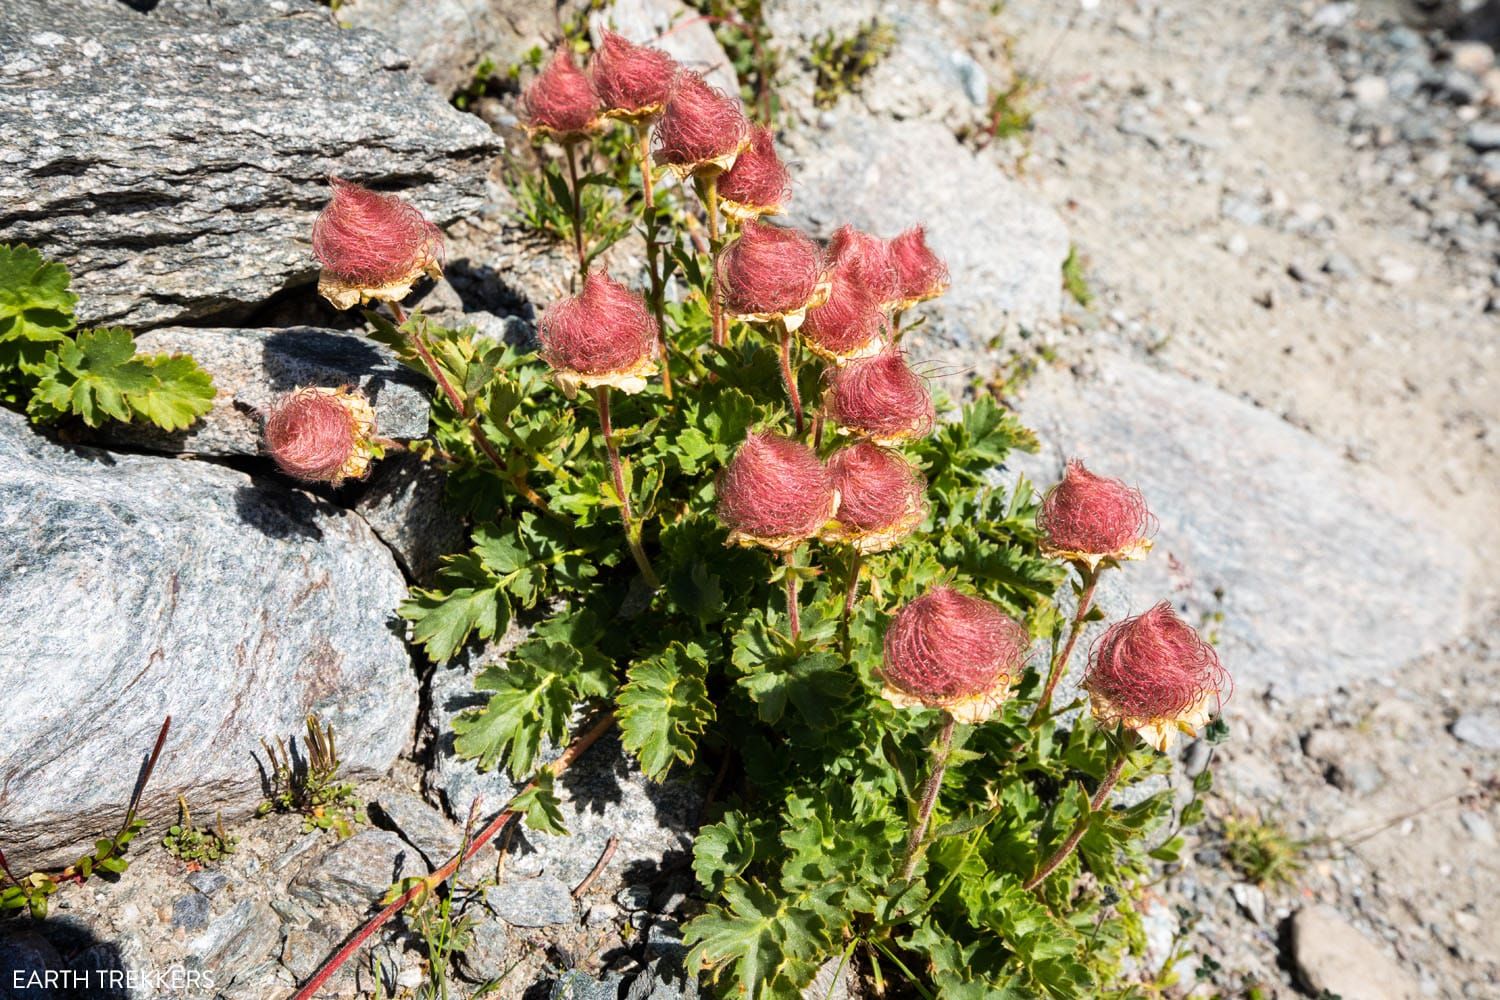
Alpine flowers
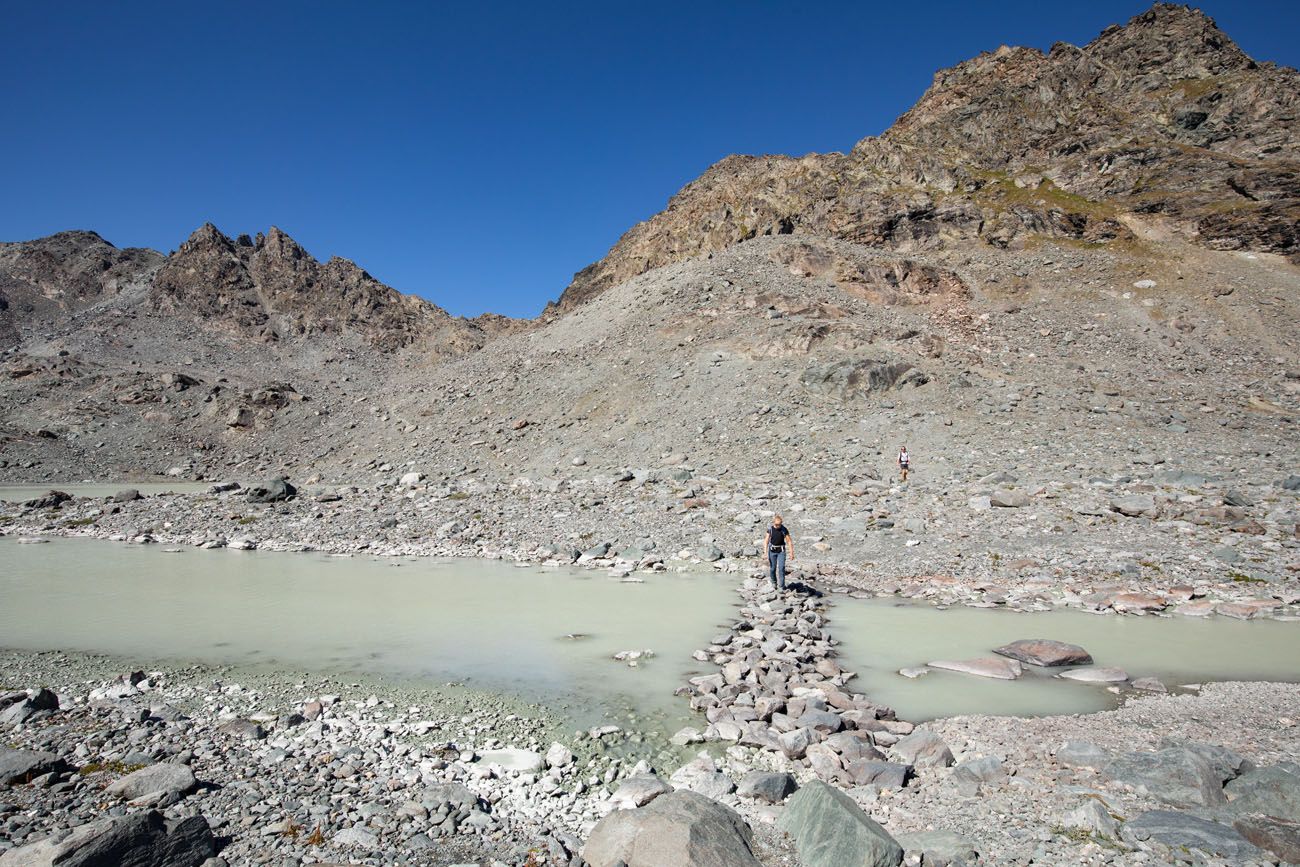
Once you reach the lake, you can go either way. We tried to go right first, but the river was too wide to cross without risking wet feet.
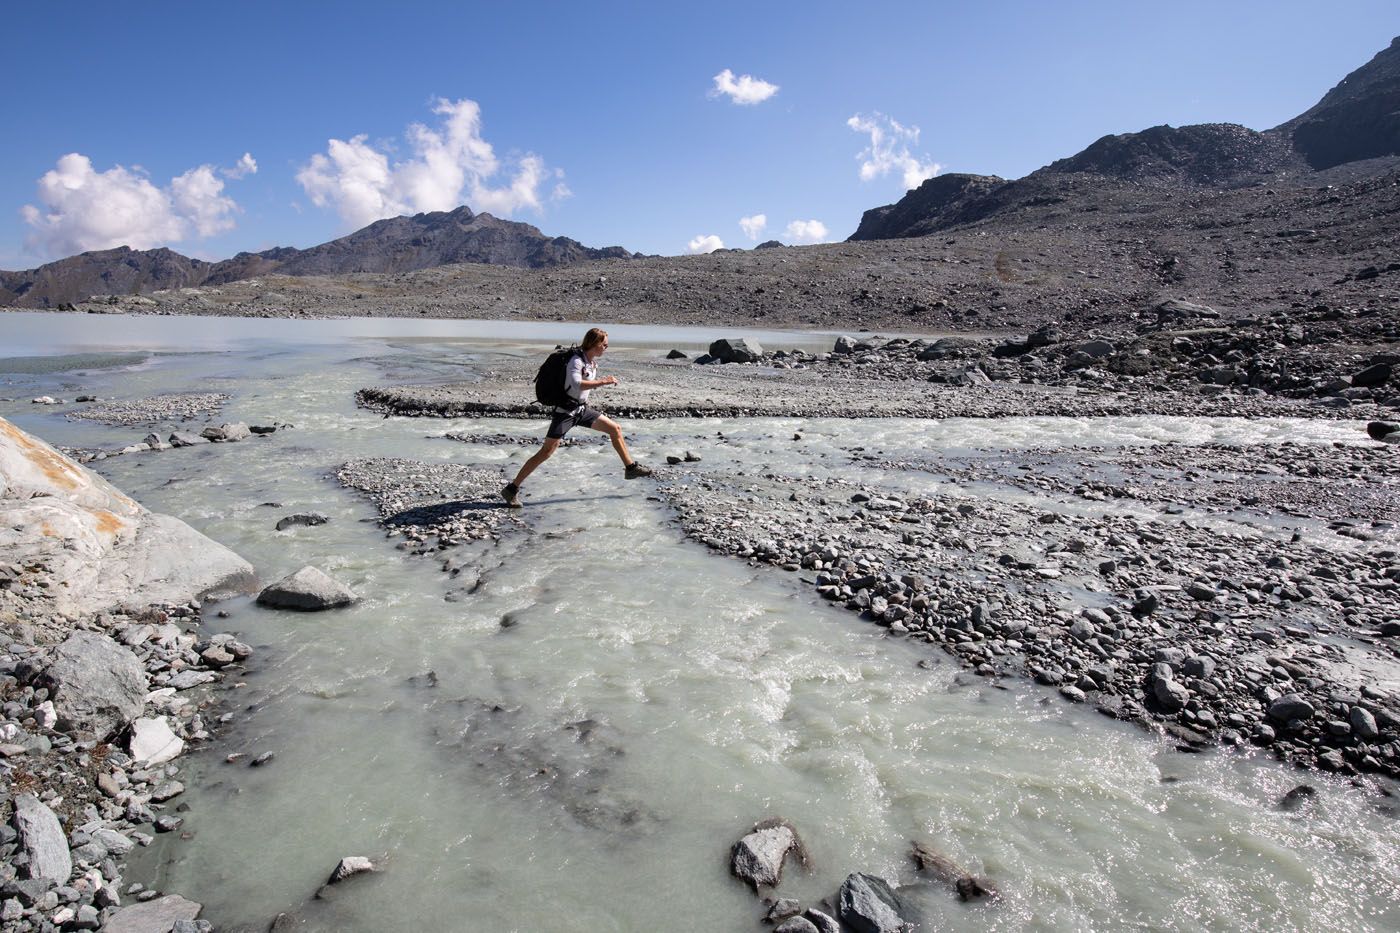
Tyler crossing the river. This part wasn’t too bad but what you can’t see in this photo is a wider, deeper section of the river that needed to be crossed next.
If you go left (clockwise around the lake) you will cross a creek with a manmade stone bridge.
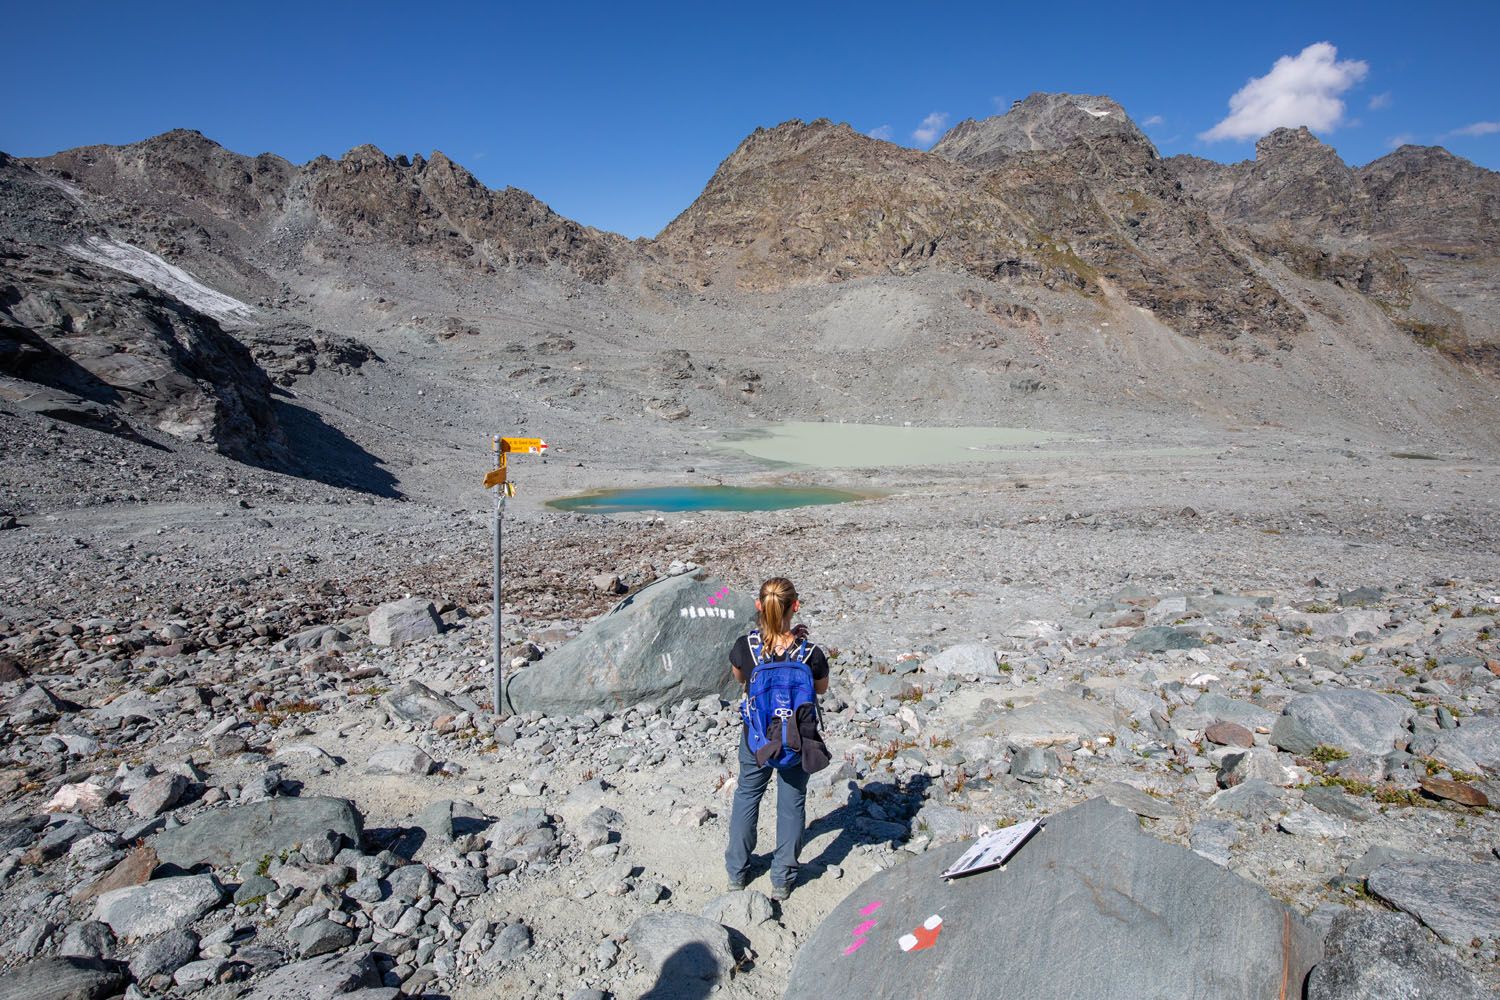
Now you are heading towards Col de Prafleuri. Route finding is challenging in this area. Keep a lookout for the rocks painted with red & white blazes and hike from one to the other. It also helps to have a digital map on your phone to double check your location (we used digital maps from Gaia GPS).
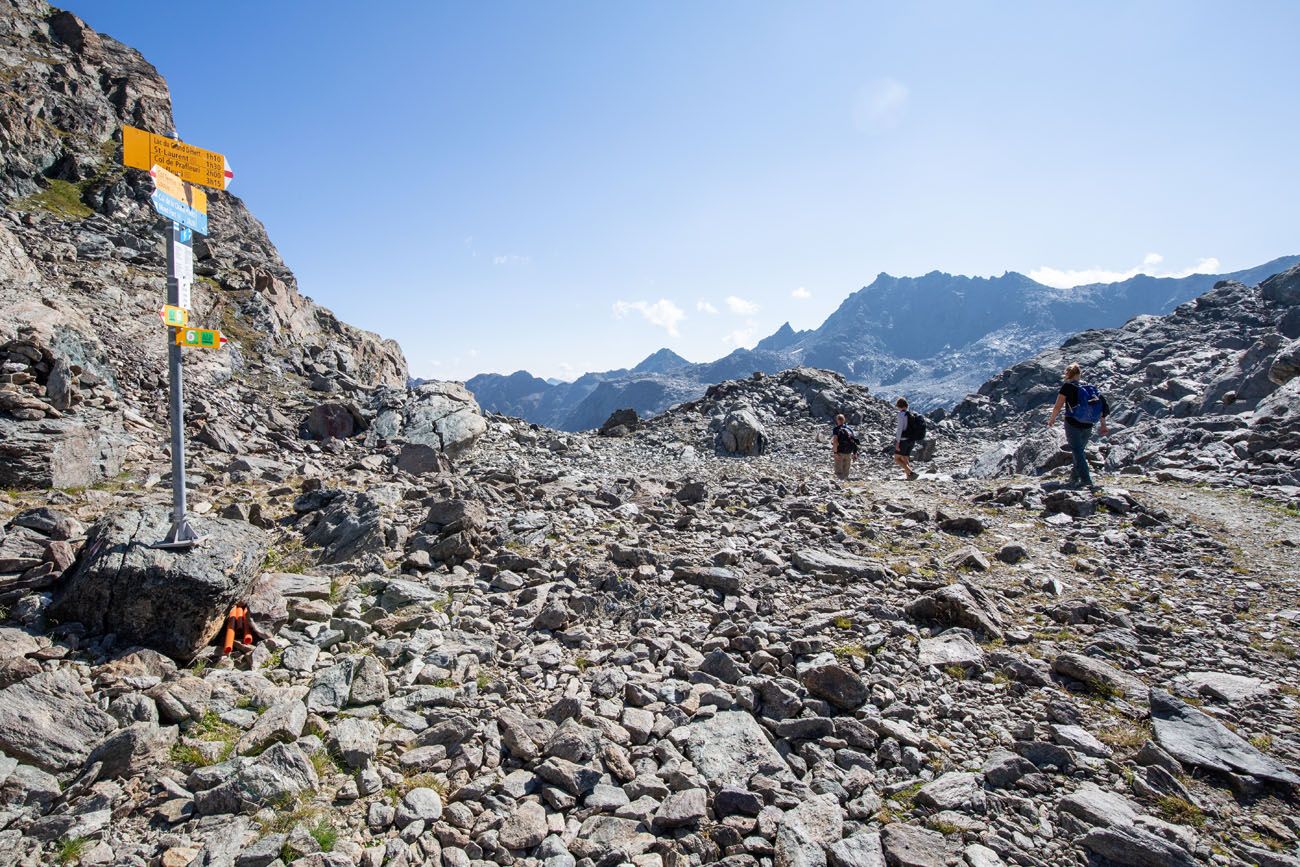
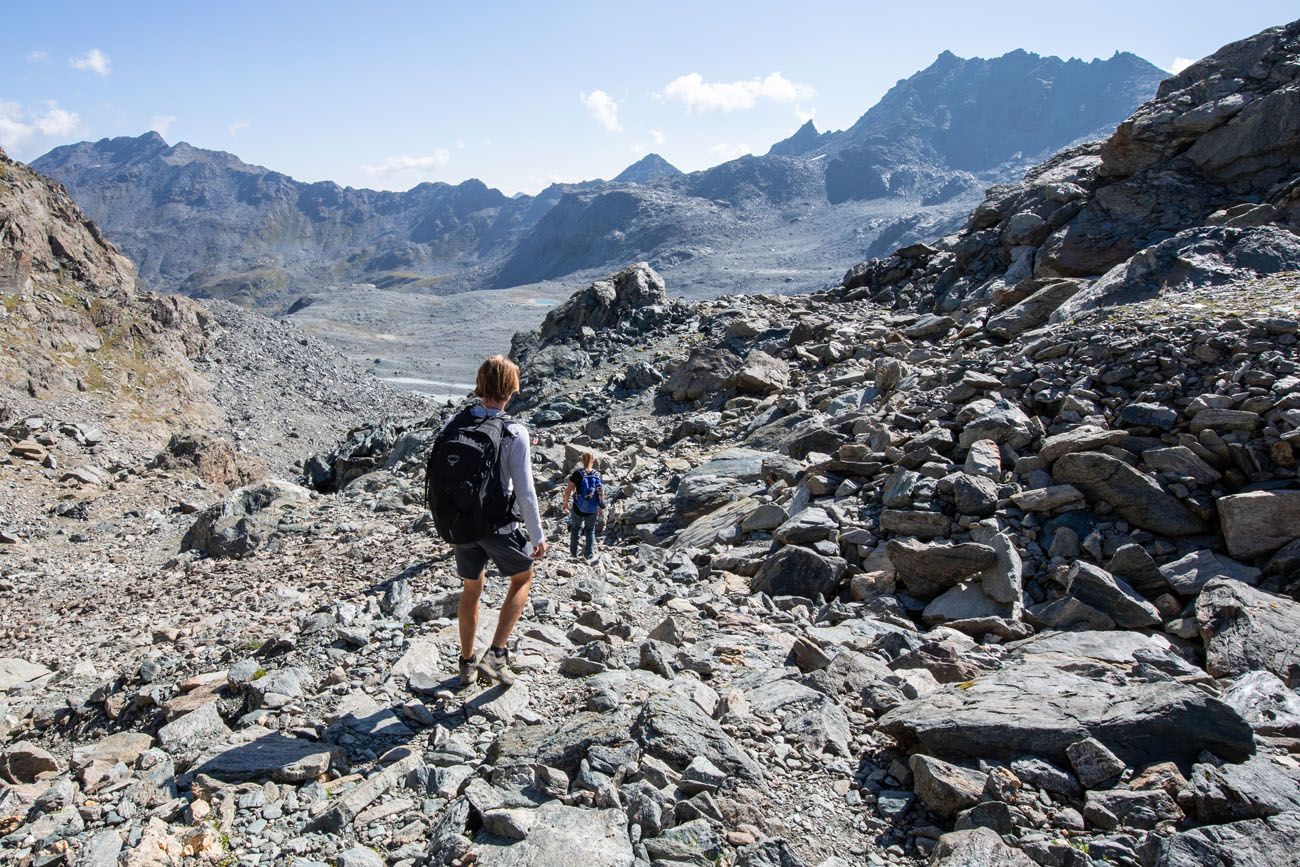
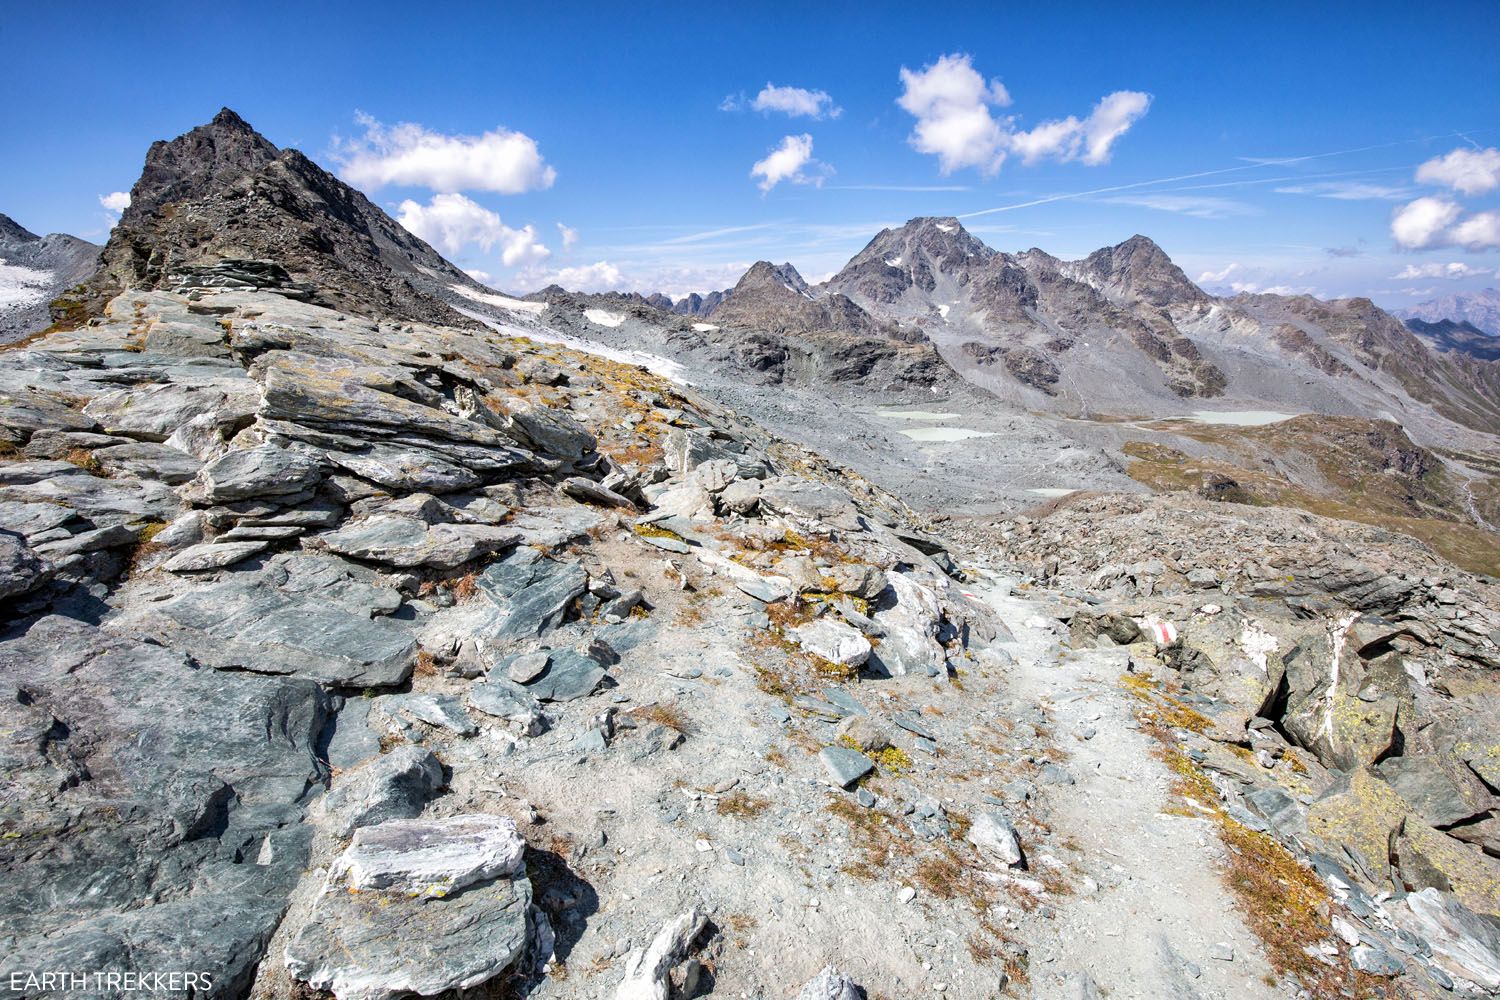
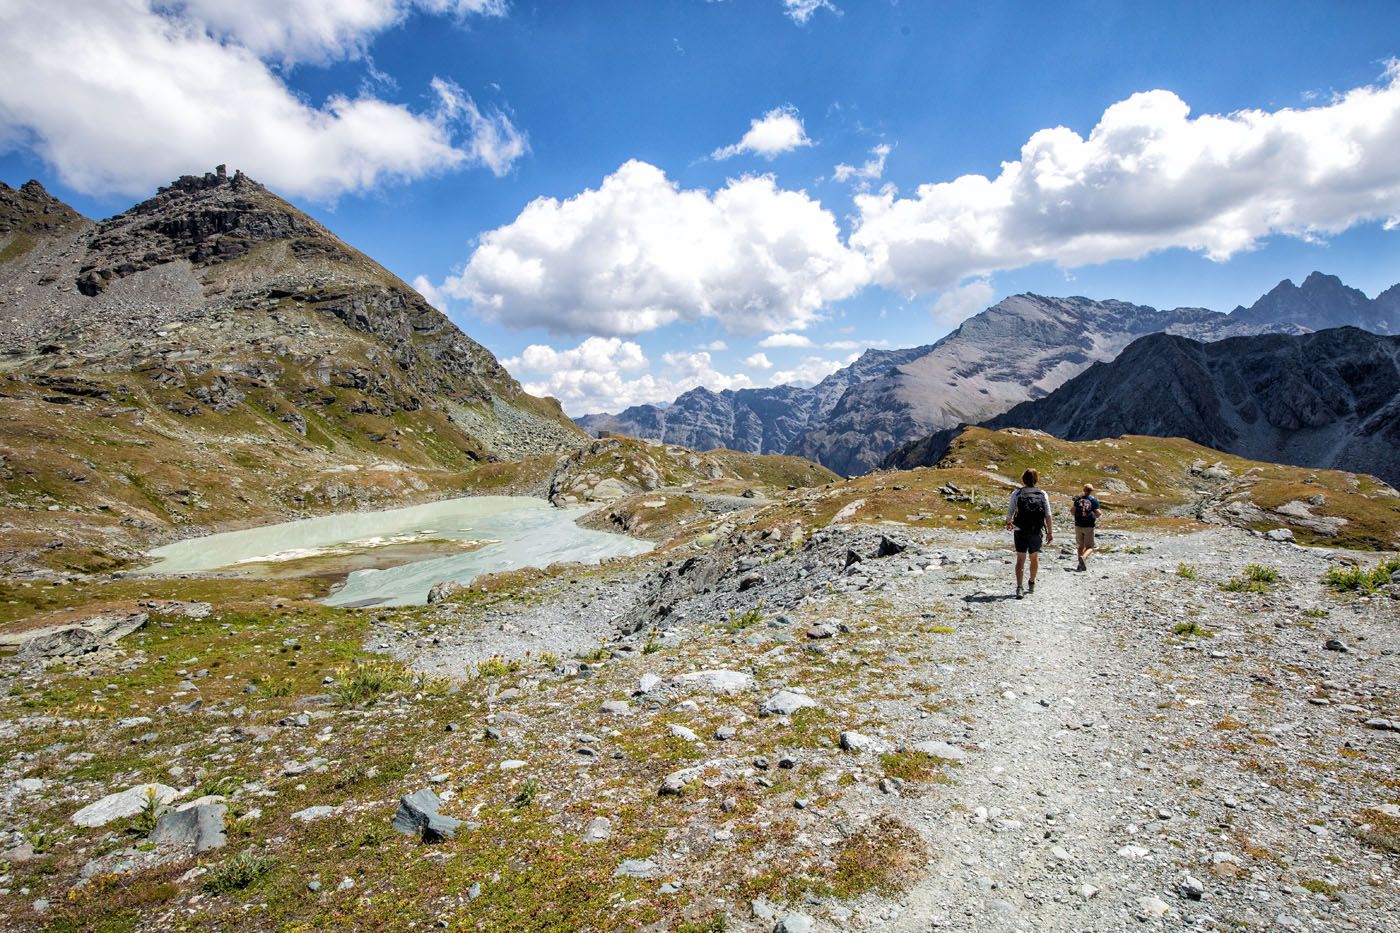
From the lake, it’s an easy climb up onto a rocky hill. You will then hike down past several glacial lakes before starting the final big ascent of the day.
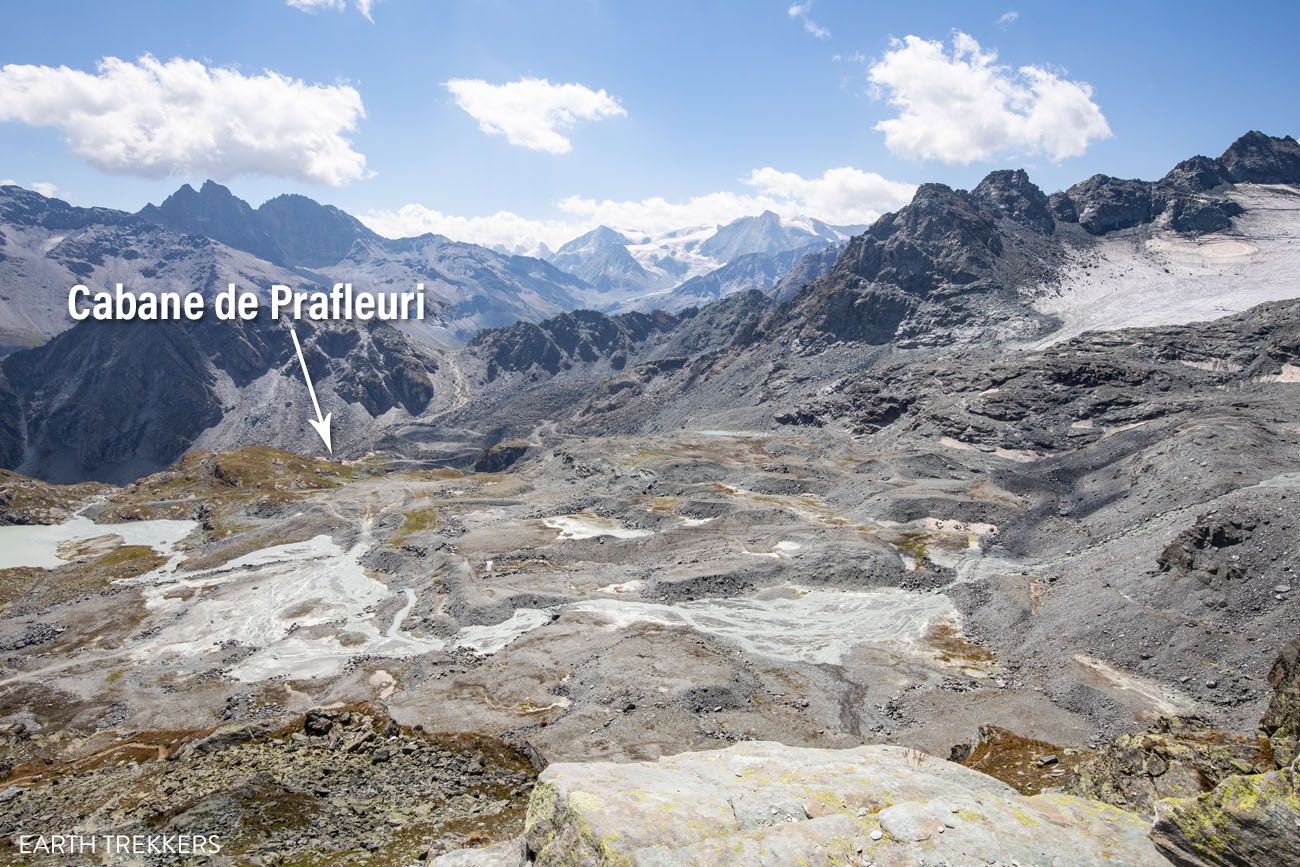
Looking out over the Grand Desert and back to Col de Louvie.
Trail across the Grand Desert to Col de Prafleuri.
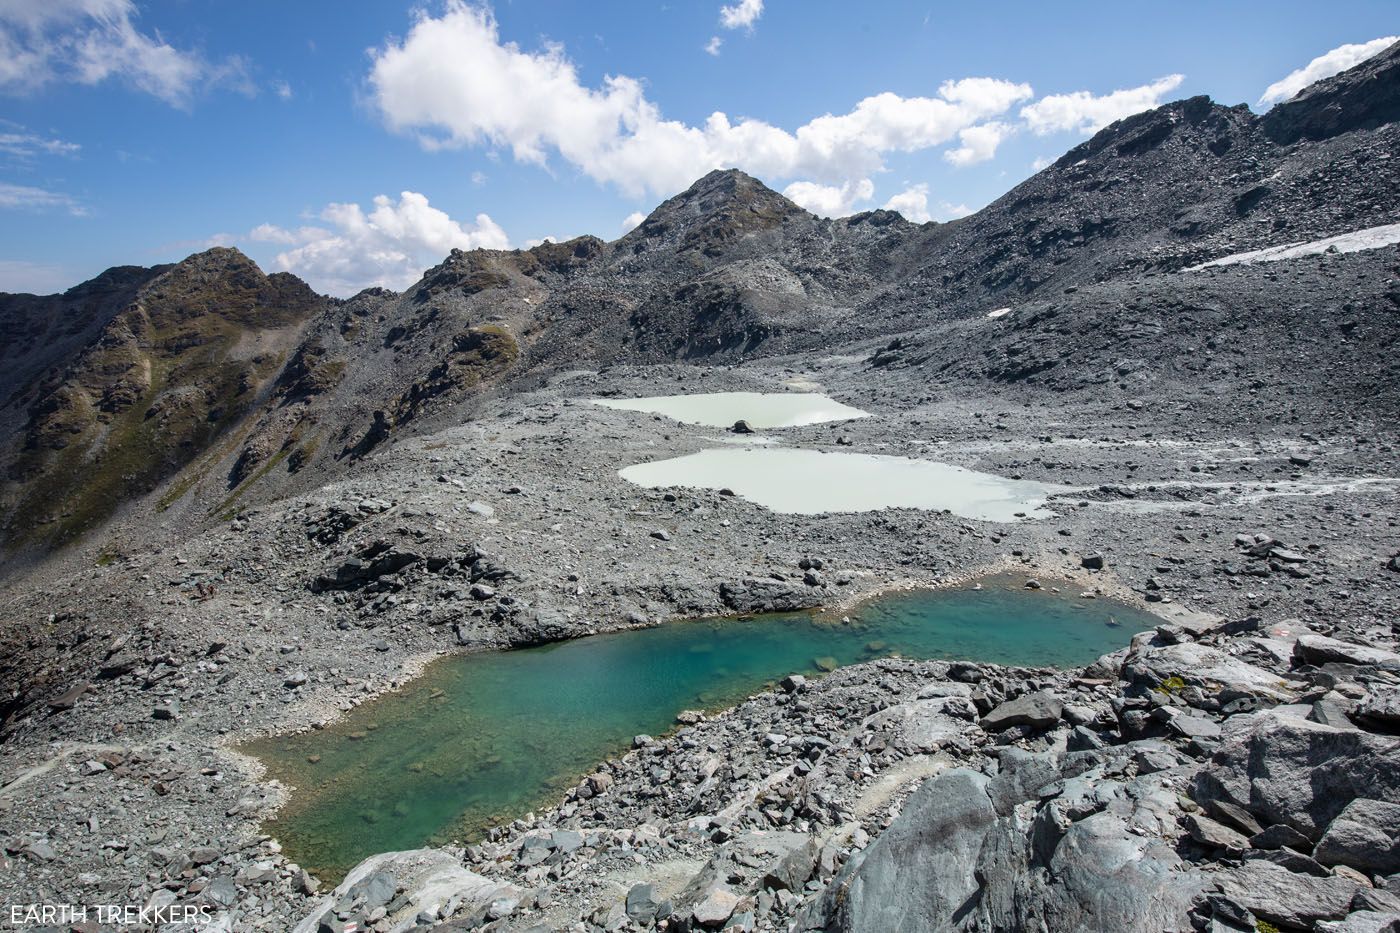
The trail takes you past the lakes in this photo. The hill/mountain on the opposite side of the lakes is the final climb of the day (Col de Prafleuri).
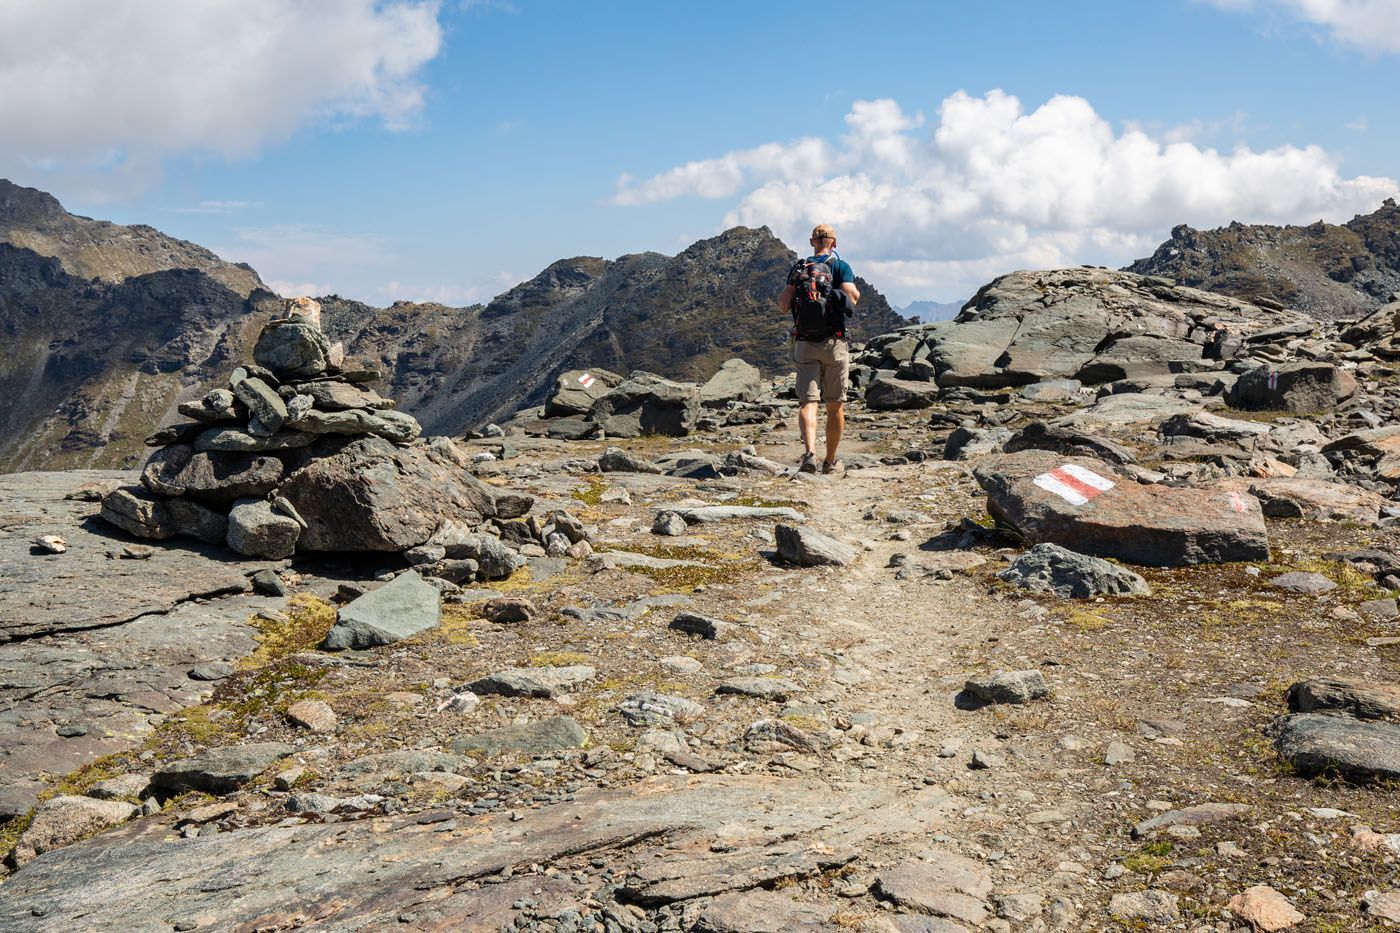
Similar to Col de Louvie, it’s a strenuous hike up and around boulders, and on a dusty, steep trail, to reach the top of Col de Prafleuri.
Trail to Col de Prafleuri.
Once at the top, the view is magnificent and one of the best of the day. You are standing at (2,987 meters, 9,800 feet), the highest point of Stage 6 and of the entire Haute Route.
If you look closely, off in the distance in the valley below, is Cabane de Prafleuri. That is today’s finish line.
Col de Prafleuri
Col de Prafleuri
View from Col de Prafleuri
Col de Prafleuri to Cabane de Prafleuri
From Col de Prafleuri, it’s a steep descent to the cabin. On the way, you will pass by several rivers and streams fed by the melting glaciers.
To get to the cabin, it’s one last short but steep climb.
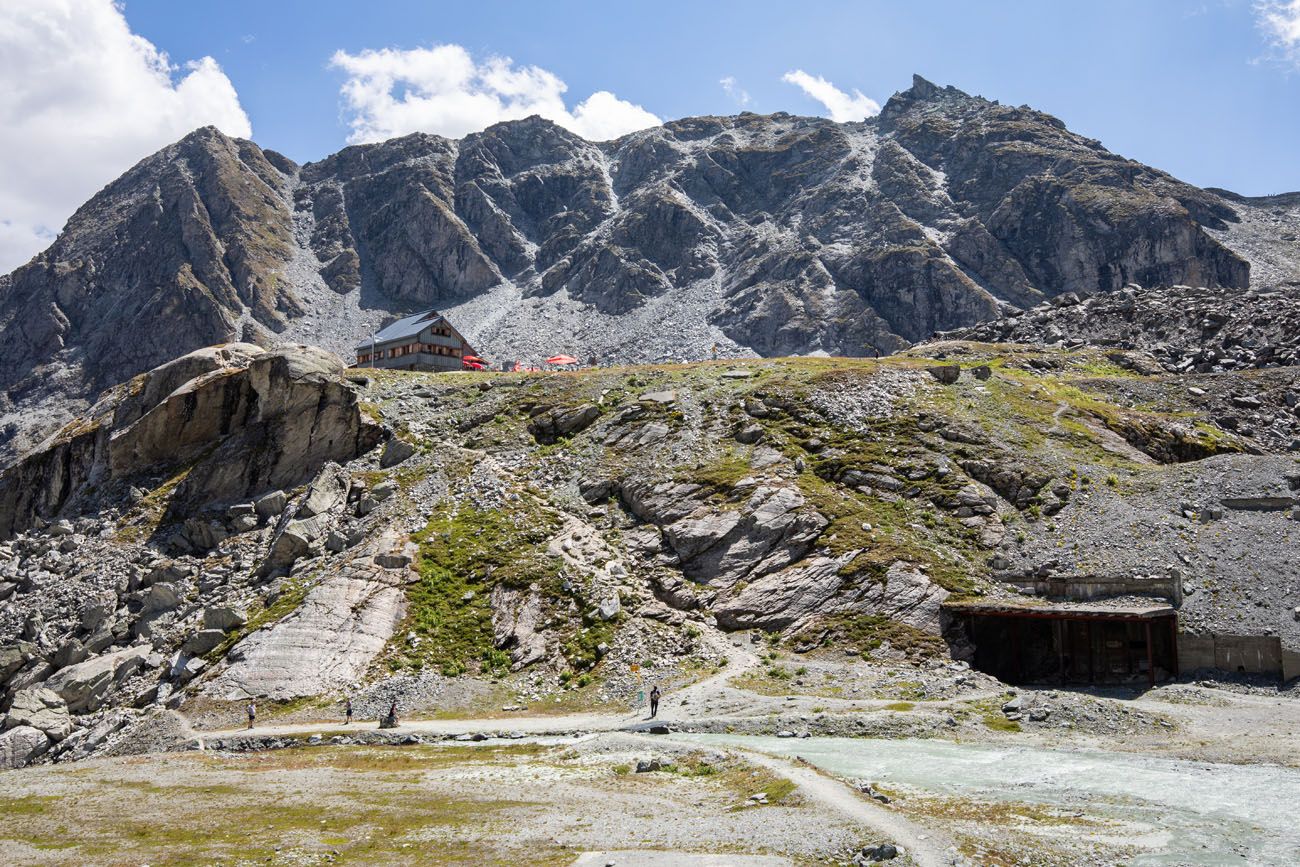
We had a late lunch here of rösti with ham, cheese, and a fried egg on top. It’s just what we needed after another day of hiking.
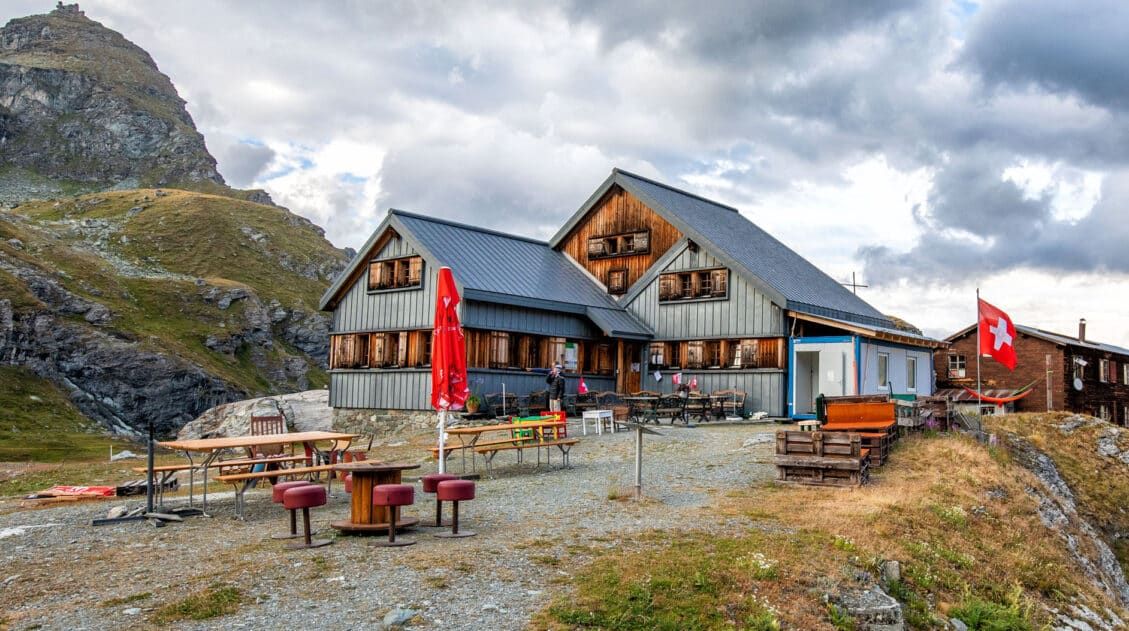
Where We Stayed
We stayed at Cabane de Prafleuri, the only option today if you are following the classic Walker’s Haute Route. Some people continue onto Arolla, combining two stages in one, but that is a very BIG day and we don’t recommend it, particularly because you could also be recovering from a massive Stage 5, as we were.
Cabane de Prafleuri offers dorm rooms that can accommodate from four to ten or more people. Shoes need to be removed upon entering the building. When we were here (July 2022), backpacks were not allowed in the dorm rooms (dortoirs). You’ll be assigned a locker and a bin. Unload what you need from your backpack and transport it to your room in the bin.
There are no showers at Cabane Prafleuri, but you can clean off in one of the nearby lakes. There are two toilets and four sinks that are shared among the guests.
Pillows and a comforter are provided. During our stay here, we were not allowed to use our sleeping bag liners. A disposable liner was provided instead.
We had an outlet in our room so we could charge our phones. There is no Wi-Fi or cellular service at the cabin.
We enjoyed our stay here. The building and the rooms are clean, the food is good, and the setting is fantastic. We spent the rest of the day, playing cards inside the cabin, staying warm and dry as an afternoon thunderstorm rolled through the area.

Cabane de Prafleuri
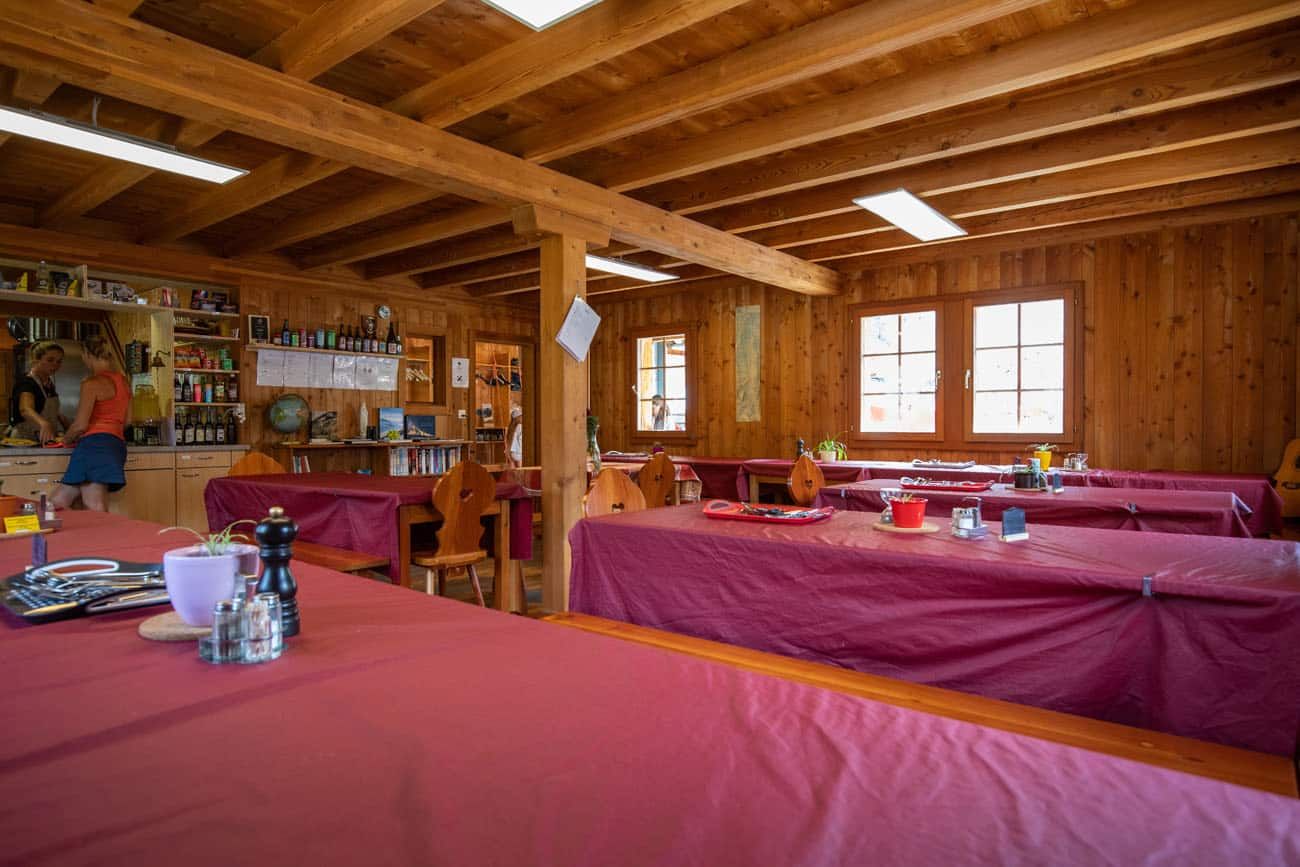
Inside Cabane de Prafleuri
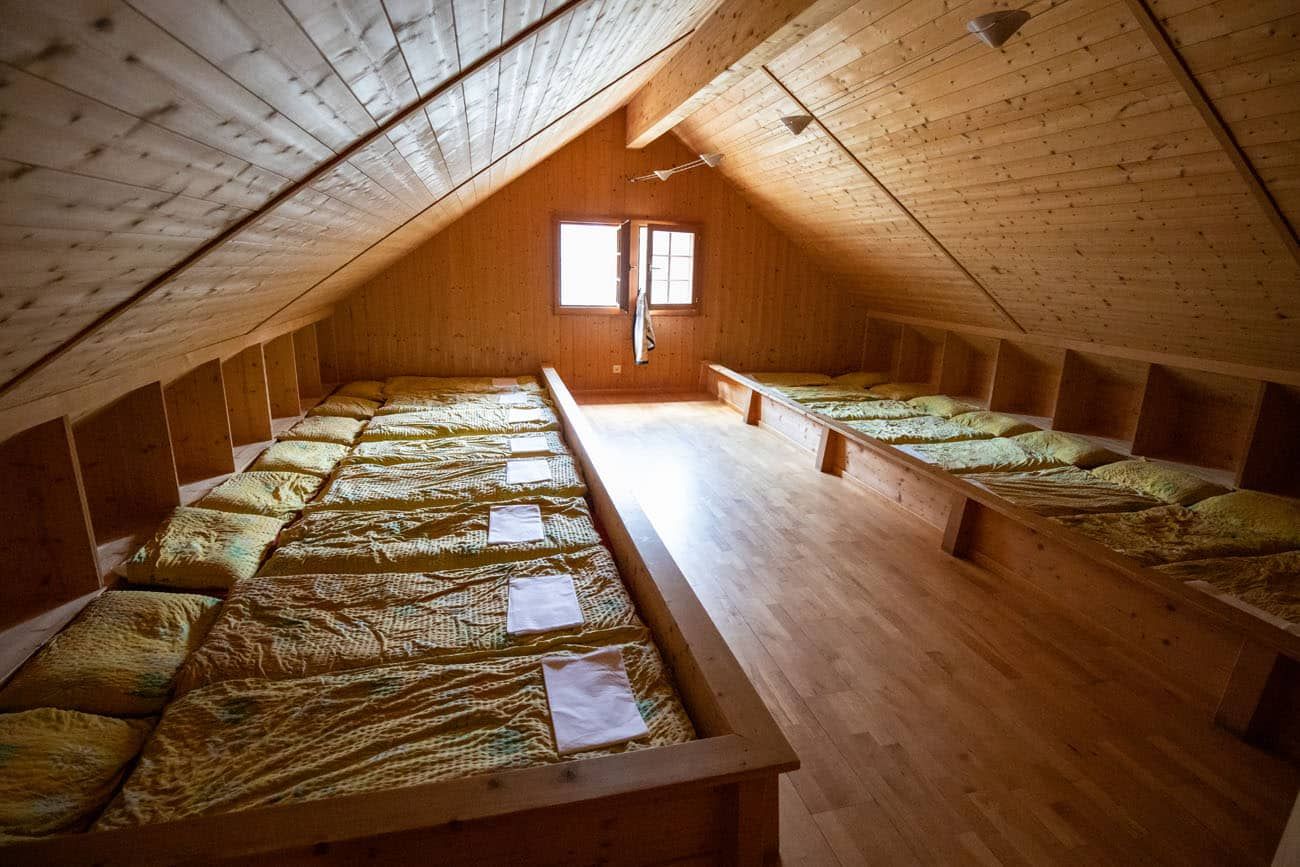
One of several dorm rooms
For a detailed list of accommodations for each stage, along with information on making your reservations, see our guide on How To Book Your Haute Route Accommodations.
Clarifications for the Walkers Haute Route Book
We were able to follow the Walker’s Haute Book by Kev Reynolds (the sixth edition from 2019; there is now an updated version) without ever needing to backtrack. But there was one time during this stage we felt a little more clarification would have helped so we are providing that clarification here based on our experience. These notes were taken related to following the main route described under Stage 6.
Descending Col de Louvie:
It was easy to lose the trail markers as we descended Col de Louvie and we had perfectly clear visibility. So it would be even more challenging staying on the marked trail when there is low visibility. Just keep in mind that you need to work your way down to the glacial pond at the bottom of the hill. As you descend look for the large red & white waymarker painted on a boulder on the hillside on the other side of the glacial pond. That is the large red-white waymarker referenced in the book and ultimately where you are going.
Once you reach the glacial pond the trail splits into two directions. The waymarked path to the right takes you closer to the glacial stream feeding the pond and you have to cross that glacial stream. The path to the left isn’t waymarked or well defined but it is a way to get to the other side of the pond without having to cross the flow of the glacial stream. Once on the other side of the glacial pond work your way up the hill looking for that large red-white waymarker. There will also be a signpost here pointing the way towards Prafleuri.
More Information about the Haute Route
In our Walker’s Haute Route Planning Guide, we have links to all of our articles about the Walker’s Haute Route, including information about each stage, how to plan your trek, what to expect, and more.
For an overview of all 14 stages of the Walker’s Haute Route, with overall hiking stats, map, elevation profile, and lists of the most difficult stages, easiest stages, and our personal favorites, check out our Guide to the Walker’s Haute Route Stages.
Stages of the Haute Route: Below are our guides to each stage of the Haute Route.
- Haute Route Stage 1: Chamonix to Argentière
- Haute Route Stage 2: Argentière to Col de Balme to Trient
- Haute Route Stage 3: Trient to Fenetre d’Arpette to Champex-Lac
- Haute Route Stage 4: Champex-Lac to Le Chable
- Haute Route Stage 5: Le Chable to Cabane du Mont Fort
- Haute Route Stage 7: Cabane de Prafleuri to Arolla
- Haute Route Stage 8: Arolla to Les Haudères
- Haute Route Stage 9: Les Haudères to Lac de Moiry
- Haute Route Stage 10: Lac de Moiry to Zinal
- Haute Route Stage 11: Zinal to Gruben
- Haute Route Stage 12: Gruben to St. Niklaus
- Haute Route Stage 13: St. Niklaus to the Europahütte
- Haute Route Stage 14: Europahütte to Zermatt
If you have any questions about how to hike the Haute Route Stage 6, or if you want to share your experience, let us know in the comment section below.
You Might Also Like
How To Plan Your Walker’s Haute Route Experience
Pinterest Facebook Flipboard The Walker’s Haute Route is a 14-stage trek from Chamonix, France to Zermatt, Switzerland. It is a tough yet rewarding experience through the French and Swiss Alps that crosses 10 mountain passes and offers incredible scenery along the way. It is a beast of a trek! It took us 13 days, averaging […]
How To Book Your Walker’s Haute Route Accommodations
Along the Walker’s Haute Route, there are a variety of accommodation types, from mountain huts to 5-star hotels, from dormitories to apartments, and from shared bathrooms to private bathrooms. You will have the opportunity to experience a combination of all of these since you will be staying in a new place at the end of […]
Walker’s Haute Route Stages: An Overview of All 14 Stages
The Walker’s Haute Route is a multi-day trek from Chamonix, France to Zermatt, Switzerland. On this walk, hikers will cross 10 mountain passes, walk through small towns and through rugged, remote landscapes, and get to experience a less touristy side of the Swiss Alps. There are several routes that take hikers from Chamonix to Zermatt. […]
24 Best Things to Do in Chamonix, France in the Summer
Discover the best things to do in Chamonix, France in the summer. This guide covers the top cable cars, hiking trails, glaciers, and adventures in Chamonix, based on our firsthand experience hiking and exploring the area. Chamonix is one of the most spectacular mountain destinations in Europe, and in the summer, it’s an outdoor playground […]
Aiguille du Midi + Panoramic Mont-Blanc: The Ultimate Guide
At 3,842 meters (12,605 feet), Aiguille du Midi is one of the highest places you can reach by cable car in the world and the closest most people will ever get to the summit of Mont Blanc without a rope and crampons. We’ve ridden cable cars across Europe from the Dolomites to Zermatt, and this […]
Grand Balcon Nord Hike: Best Direction, Hiking Stats & Tips
The Grand Balcon Nord is one of the best hikes in Chamonix. This trail runs above the valley, offering sweeping views of Mont Blanc at one end and Mer de Glace, France’s largest glacier, at the other. Tim, Tyler, Kara, and I hiked it in July as part of a five-day visit to Chamonix before […]
20 Amazing Things to Do in Zermatt, Switzerland
Zermatt is an idyllic mountain village tucked away in the Swiss Alps. The mighty Matterhorn dominates the skyline, creating one of the most unique alpine landscapes in Europe. Explore the hiking trails, journey up higher into the mountains by cable car and train, stroll the scenic streets of Zermatt, and go skiing all year long. […]
How to Climb the Breithorn: Photos, Trail Stats & What to Expect
Climbing to the summit of Breithorn is one of Zermatt’s most adventurous experiences. Standing at a height of 4,164 meters (13,660 feet), Breithorn is one of the highest peaks in the area and it is one of the easiest 4,000+ meter peaks to summit in the Alps. Thousands of hikers come to Zermatt to summit […]
How to Visit Gornergrat and Hike to Riffelsee & Riffelberg
For one of the best views of Matterhorn, it’s hard to beat Gornergrat. A scenic, cogwheel train takes you from Zermatt to this alpine paradise. Once at the top station, you can simply enjoy the sweeping views of the Matterhorn and the Swiss Alps from the restaurant and terraces. Or, you can add on the […]

12 Epic Day Hikes in Zermatt (+ Trail Stats, Photos & Map)
One of the best ways to explore Zermatt is on foot. Hiking trails climb high into the mountains above Zermatt, past Swiss hamlets, through scenic valleys and rocky gorges, and to some of the best viewpoints of the Matterhorn. The network of cable cars and trains takes you up into the mountains, so for the […]
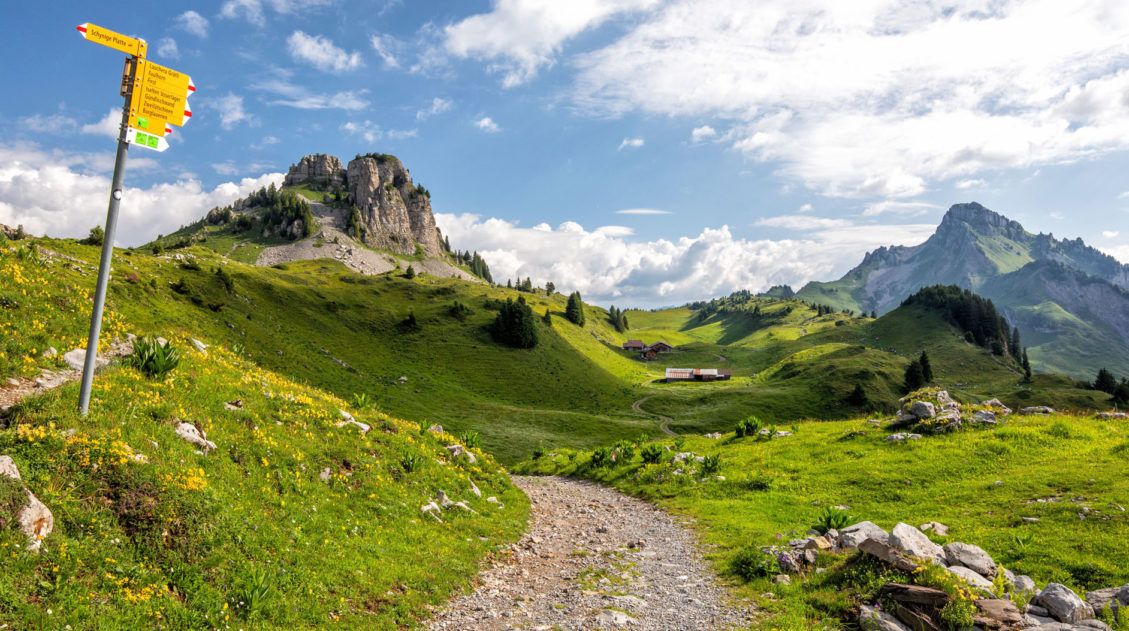
Schynige Platte to Faulhorn to First Hike: Step-By-Step Trail Guide
The hike from Schynige Platte to Faulhorn to First is a big day hike in the Jungfrau region of Switzerland, but what a spectacular day. A scenic ride on a cogwheel train, alpine lakes, rustic mountain huts, snow-covered trails, cows and their musical bells, and some of the best views of Swiss Alps…these are just […]
Ultimate Hiking Guide: Europe, Asia, Africa, Americas & Oceania
Are you looking for the perfect hike? With hikes on six continents ranging from a few miles to multi-day adventures, explore some of the best hikes from around the world.
20 Best Day Hikes in the World (+ Map & Photos)
Where can you go to find that perfect day hike? The hike that leaves you breathless as you climb the summit of the mountain. The hike with the awe-inspiring views. The hike that is so enjoyable because the terrain and its views are always changing. The hike that has you saying “Wow!” over and over […]
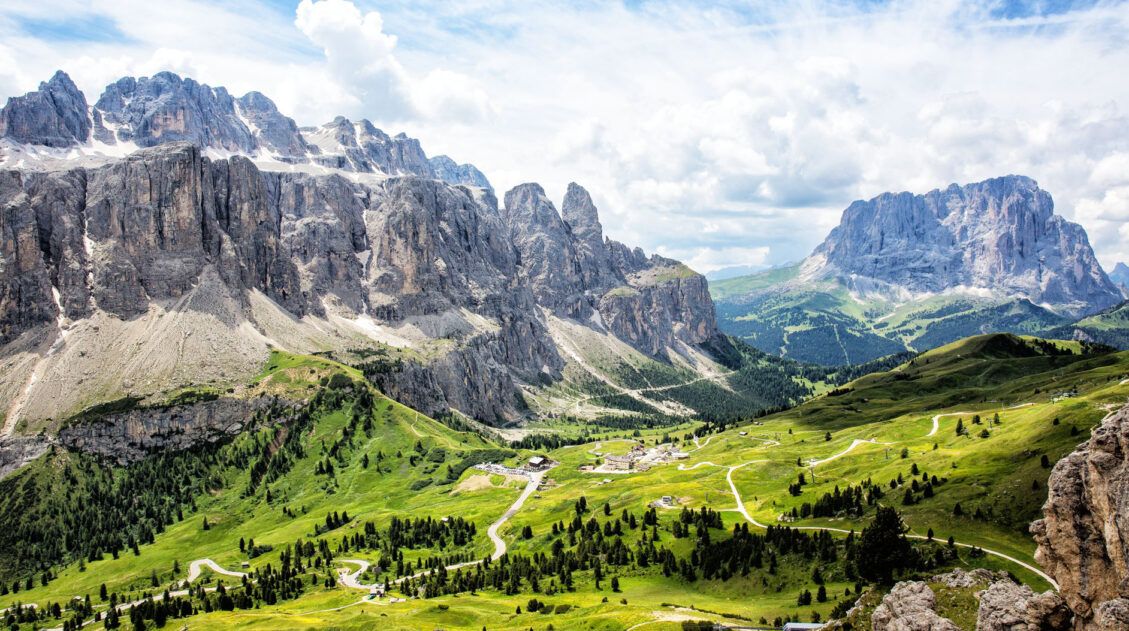
Best Hikes in Europe: 25 Incredible Hikes for Every Level
From the dramatic cliffs of Norway to the jagged peaks of the Dolomites and the volcanic landscapes of Iceland, Europe is packed with some of the most unforgettable hikes in the world. In this guide, we share our favorite hikes in Europe, trails that stand out for their scenery, uniqueness, and overall experience from start […]

Comments 2